Malwarebytes For Mac is the best free malware and adware removal tool we’ve tried on macOS. The recently released Premium version even offers antivirus and adware protection too. Here we take a closer look at what it can do.
With malware becoming an increasing problem on Macs, there has been an increasing demand for a Mac version of Malwarebytes especially from PC users that have switched to Mac.
Malwarebytes has been a trusted and popular malware removal tool on PC and Windows for many years and although it wasn’t until July 2015 that it finally arrived on Mac.
The Mac version of Malwarebytes is actually built on top of a popular Mac adware remover called AdwareMedic which was bought by Malwarebytes in 2015.
Due to the enormous success of AdwareMedic by Mac security expert Thomas Reed, Malwarebytes astutely spotted the chance to buy AdwareMedic and finally get a foothold in the Mac market.
Not only that, but they brought Reed on board as their Director of Mac Offerings and so Malwarebytes for Mac is still basically the same as AdwareMedic.
Reed is one of the World’s foremost experts on Mac security and speaks regularly on the latest security threats he’s discovered on Mac.
Quick Navigation
A Note On Malware vs Viruses on Mac
It’s important to understand from the start that the free version of Malwarebytes for Mac is not an antivirus tool.
There is a distinct technical difference between viruses and malware.
Viruses generally cripple or infect your entire system while malware generally plagues you with ads, slows down browsing or at worst, steals your private data or even hijacks your Mac.
Malwarebytes is designed to remove malware (including adware which is a type of malware) only which is a far bigger problem on Mac than viruses.
Viruses on Mac are still very rare and require totally different solutions such AVG which we looked at in our AVG for Mac Review.
The free version of Malwarebytes doesn’t provide real time protection such as antivirus suites like AVG. That is to say, it won’t protect you from infection in real time but it will effectively remove any malware that has already installed itself on your Mac.
It’s what you might call, a “shoot to kill” malware remover rather than a “fire and forget” solution that continually works in the background on your Mac.
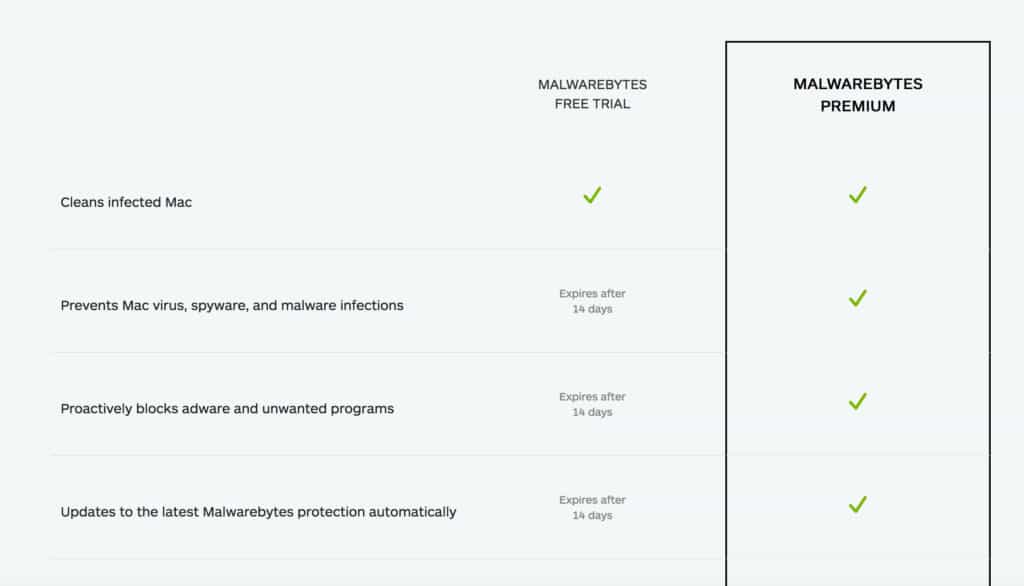
However, there’s a new Premium version of Mawlarebytes for Mac that does now include anti-virus protection although this starts at $39.99 for one year and $59.99 for 2 years.
How To Install And Use Malwarebytes for Mac
Let’s then take a closer look then at how to download, install and use Malwarebytes for Mac.
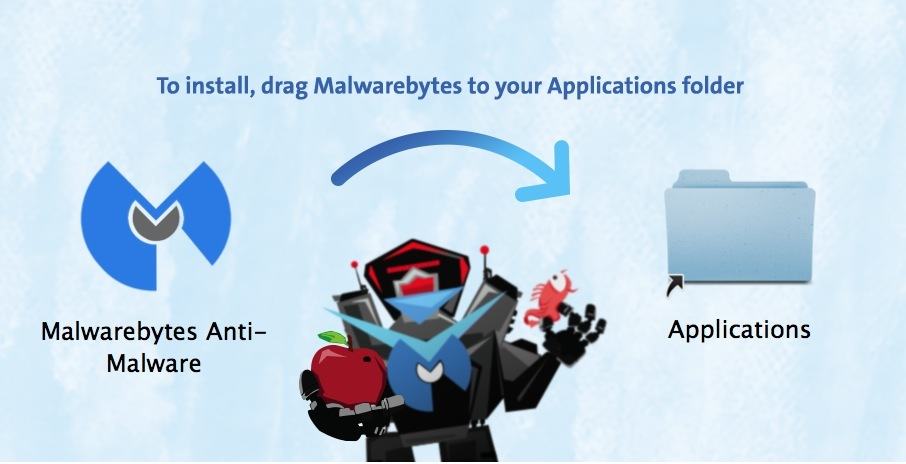
After you download Malwarebytes for Mac you must drag it into your Applications folder. Note that it only works on OS X 10.10 Yosemite or higher including El Capitan, Sierra, High Sierra and Mojave.
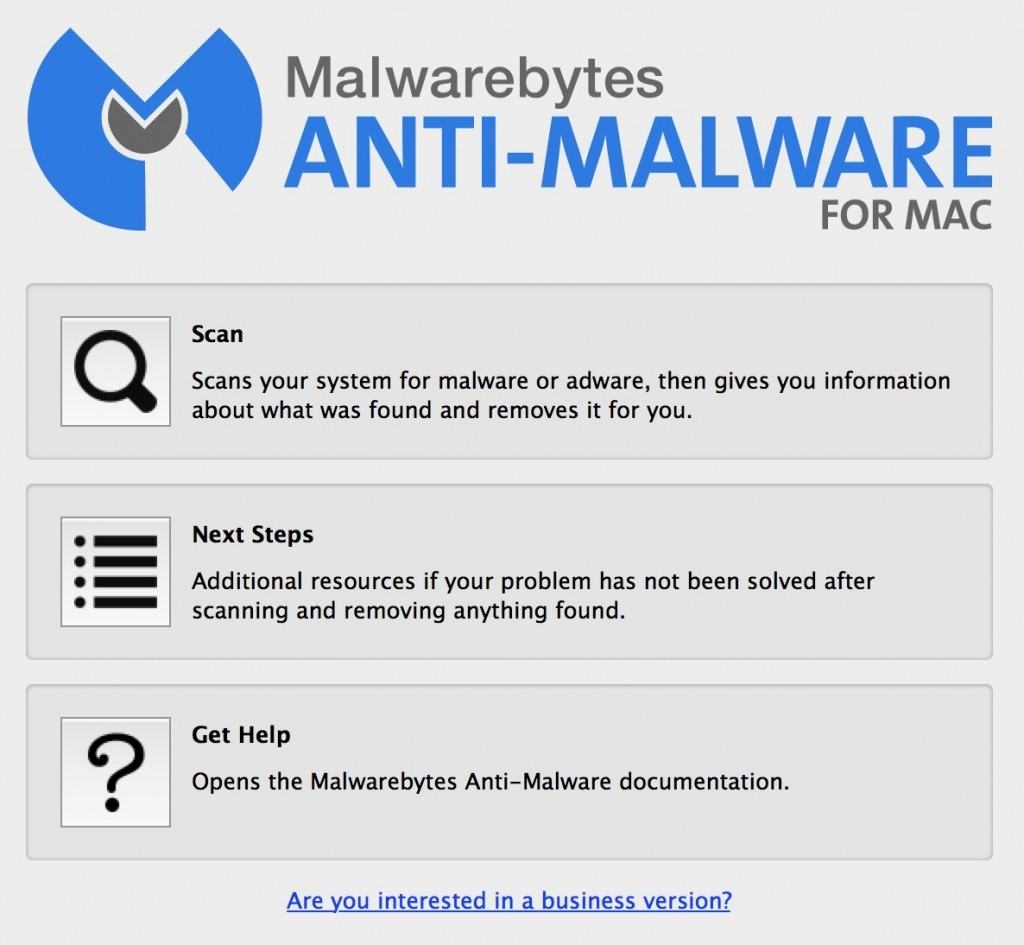
You then have to agree to a lengthy End User License Agreement and the main Malwarebytes user interface will open.
If you’ve ever used AdwareMedic, then you’ll notice that MalwareBytes for Mac looks almost exactly the same which isn’t surprising because as we highlighted in the introduction, it’s basically the same product.
The only difference is the Malwarebytes branding at the top and there’s also a new link at the bottom for a Malwarebytes business version.
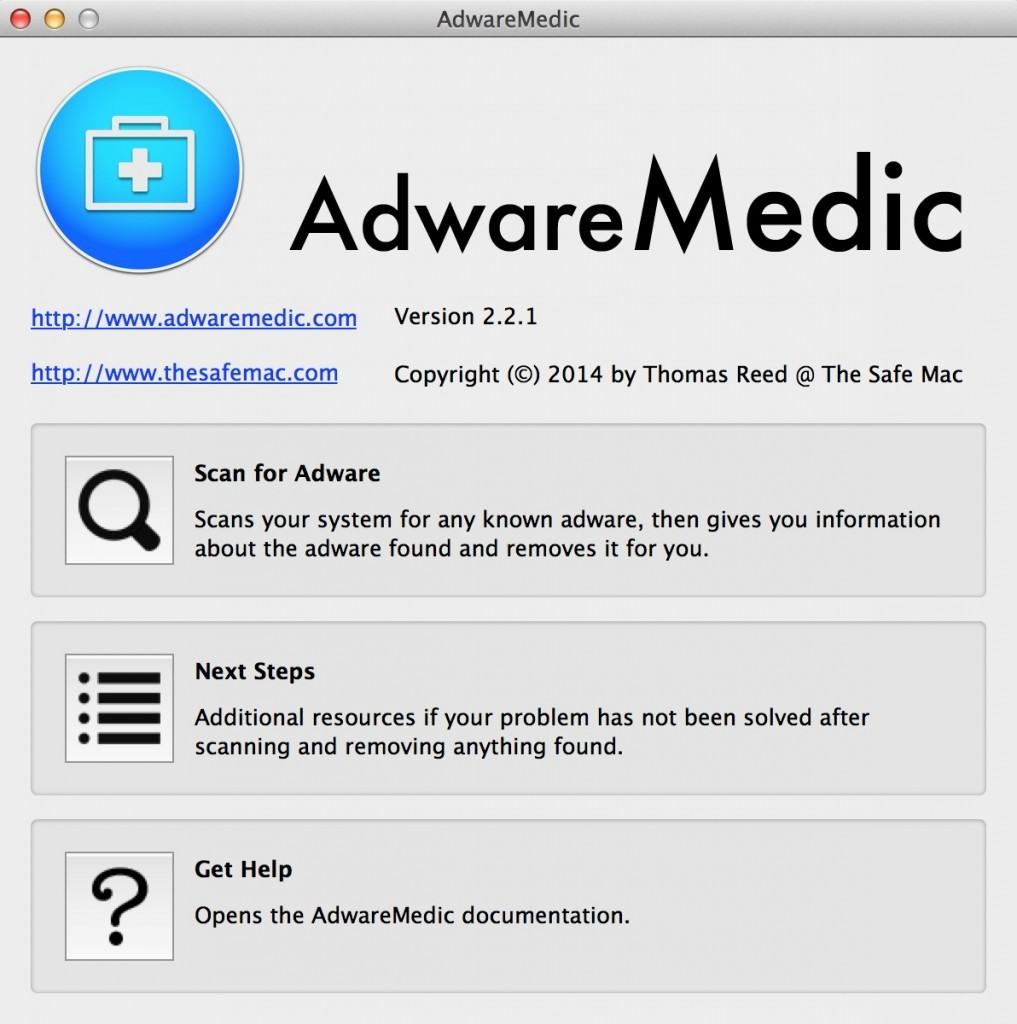
And this is how the old AdwareMedic looked – spot the difference:
To state the obvious, to scan your Mac you simply select the first option “Scan”.
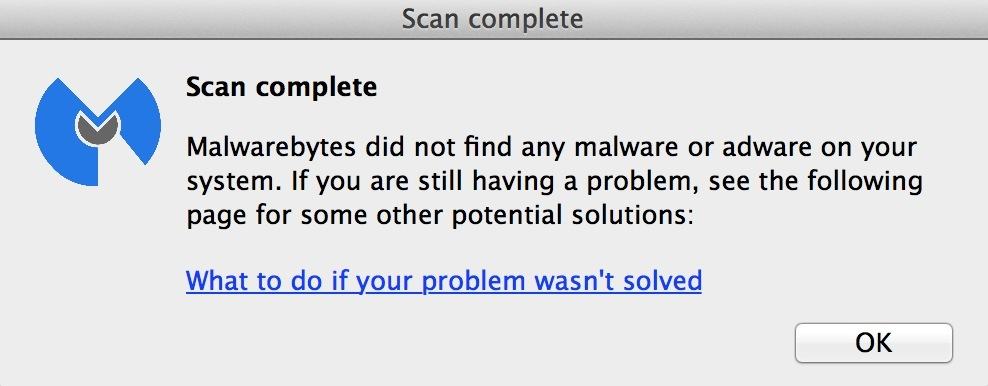
As with AdwareMedic, Malwarebytes takes no more than a 5 or 6 seconds to scan your system. If you’re clean as a whistle and no adware or malware is found, you should receive the following message:
If however after scanning you, you’re infected with something, you’ll receive a message something like this:
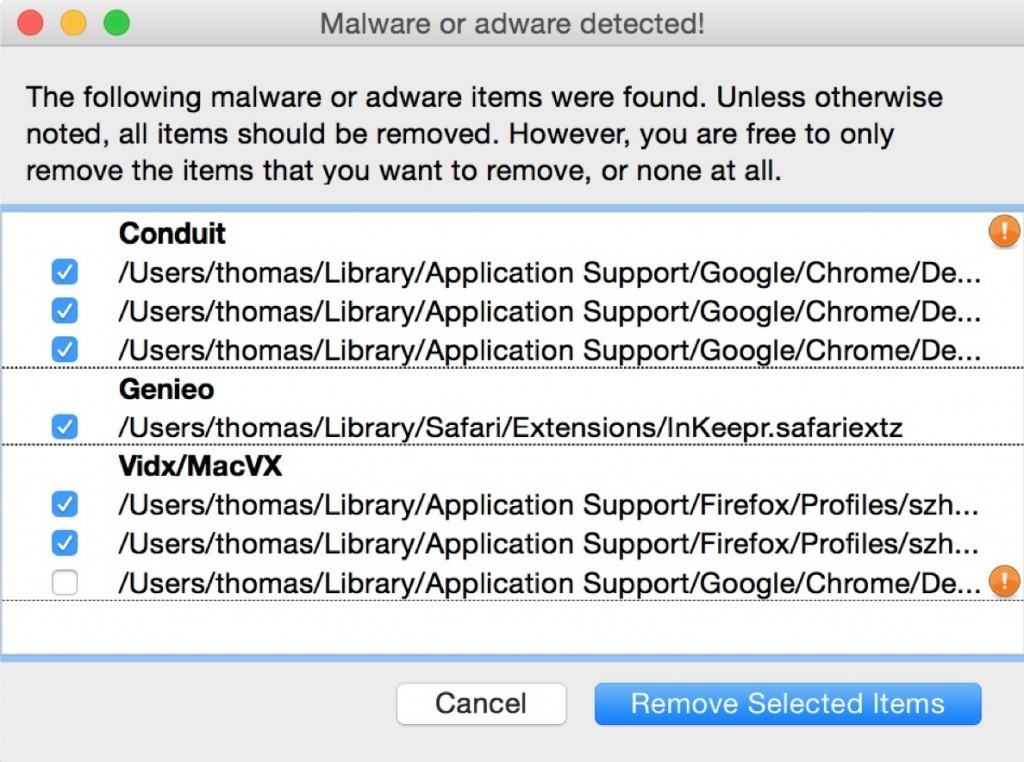
AdwareMedic gives you a useful overview of the name of the Adware your Mac is infected with, in this case Conduit, Genieo and Vidx/MacVX.
These types of malware are usually installed on your Mac after downloading from dodgy sites such as download portals or malicious ads that trick you into clicking “download” accidentally.
You can choose which files you want to remove using the checkboxes on the left but of course, in almost all cases its best to select them all and click “Remove Selected Items”.
Those files that definitely need removing because they are the most malicious, are selected automatically by default by Malwarebytes but those that are unchecked, you an choose whether to remove them yourself.
The reason for these optional files is that often they are browser preference files that have been modified by malware and if removed, will require you to reset your browser preferences again.
However, we strongly recommend deleting removing all files and then re configuring any necessary browser preferences afterwards to make sure that your machine is squeaky clean after scanning.
Note that none of the files are actually deleted – they are moved to a folder called “Malwarebytes Removals” in your Trash which you can choose to empty or delete at any time.
Those files labelled with an “!” exclamation mark allow you to see more details about exactly what the malware is if you hover the mouse cursor over it and it is purely for informational purposes.
When you click “Remove Selected Items”, you will be prompted for your Mac admin password but this is entirely normal because the malware is usually rooted so deeply in the your Macs system, that it requires root access to weed them out.
If you have several user accounts on your Mac, you will have to enter each account and run a scan for each one to ensure that malware has been removed from each account.
In most cases, you’ll find that your problem has magically disappeared as millions of users online can testify to with the old AdwareMedic tool upon which Malwarebytes is based.

What Happens If Malwarebytes For Mac Hasn’t Helped?
If you’re sure your Mac is still infected with something or experience problems with browsing or adware on your Mac after using Malwarebytes, click on “What to do if your problem wasn’t solved” and you’ll be taken to an extensive Malwarebytes For Mac Support Site.
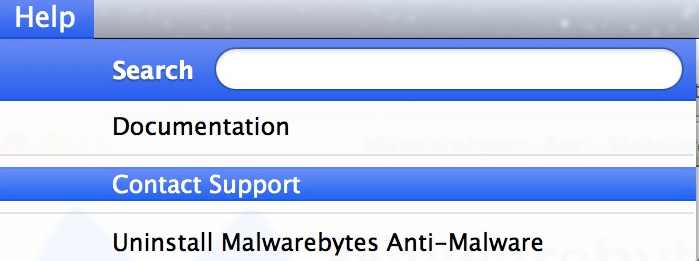
You can also access the help section by click on the “Next Steps” button in the main interface. If you can’t find the answer there, you can also select the Help menu at the top of your Mac’s screen and select Contact Support.
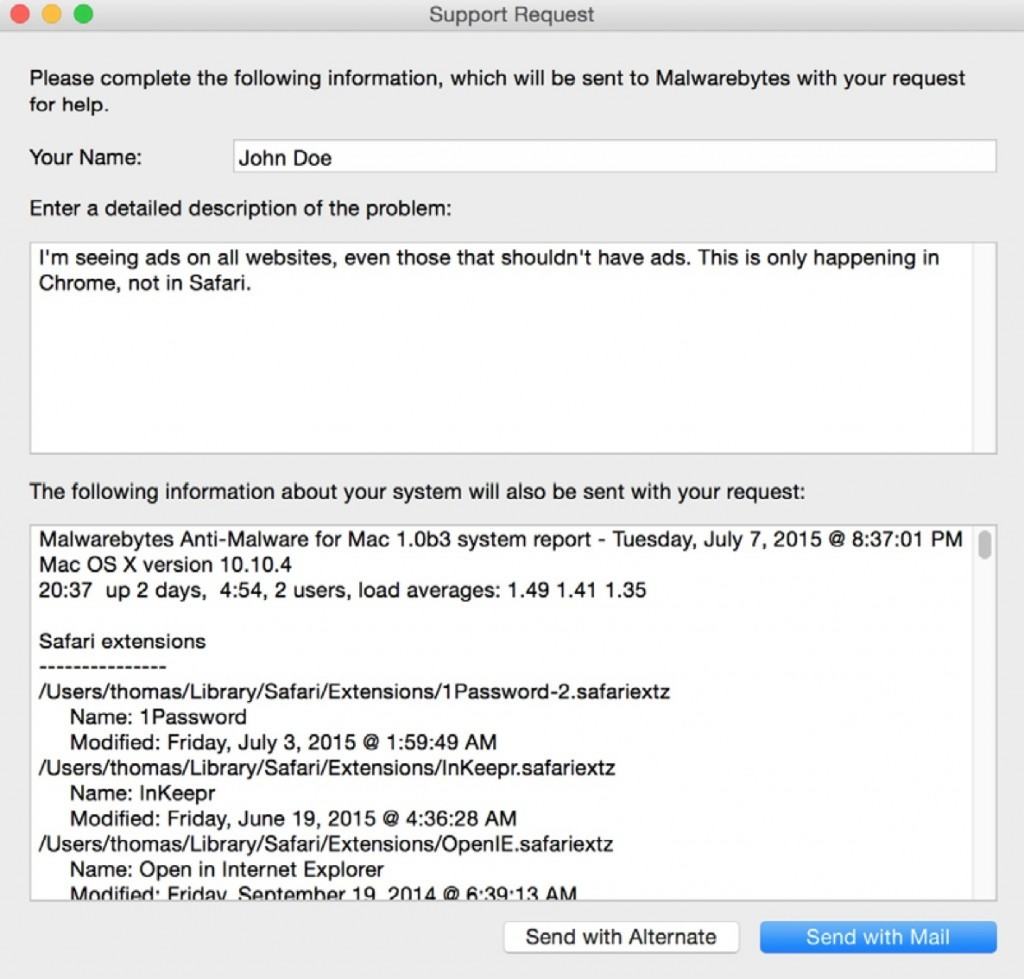
This allows you to fill in a form which will be sent to Malwarebytes (and presumably Thomas Reed) who will attempt to deal with your problem individually.
You can choose to send it automatically with Apple Mail by clicking “Send Mail” or if you don’t use Mail, click Send with Alternate and it will copy the text to your clipboard, which you can then by pasting into your preferred mail client such as Gmail, Yahoo! Mail etc which you must send to support@malwarebytes.com
You’ll also notice that in the same Help Menu, you can select the option to automatically uninstall Malwarebytes Anti-Malware.
We recommend using this option rather than dragging the application to your Trash because it ensures that all components of the application are fully removed.
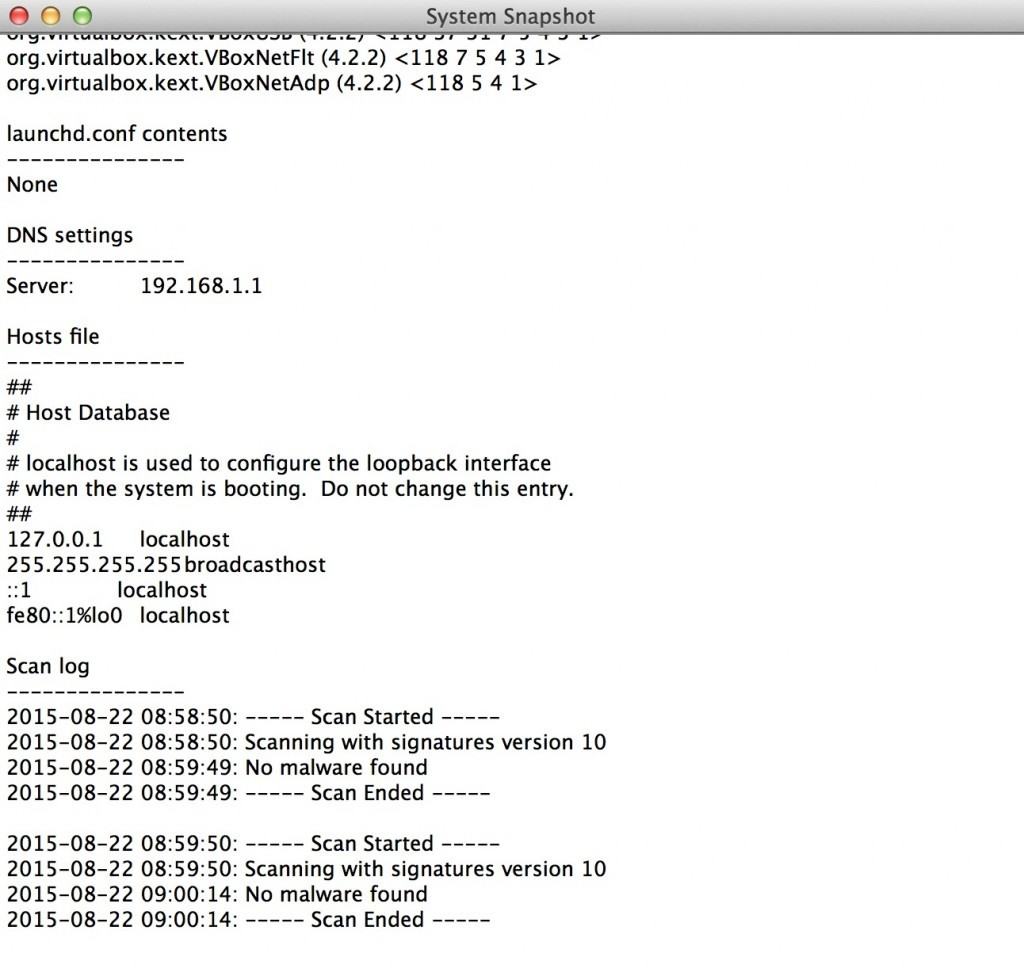
Finally, if Malwarebytes are unable to help you in anyway, you can take a useful snapshot of your system which you can then paste into other support forums online or show to an expert who may be able to diagnose the problem from it.
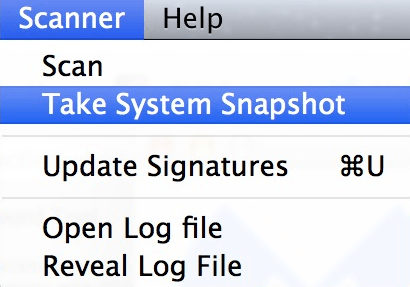
Simply go to the Scanner Menu in the Menu Bar and select System Snapshot.
You can then copy the System Snapshot and paste it into forums or show it to someone who may be able to help:
Apart from this, there is an option to Update Signatures from the Scanner Menu which makes sure that Malwarebytes is definitely updated with the latest malware threat definitions.
However, the application will automatically update itself each time you open it so there’s no real need to use this unless you manually deactivate automatic updates.
Malwarebytes For Mac Pricing
Malwarebytes for Mac now offers Malwarebytes for Mac Premium which includes continual virus, spyware and adware protection. It also automatically updates to the latest version of Malwarebytes to keep you protected. The free version will work forever however but only for manual scanning for malware.
Malwarebytes for Business On Mac
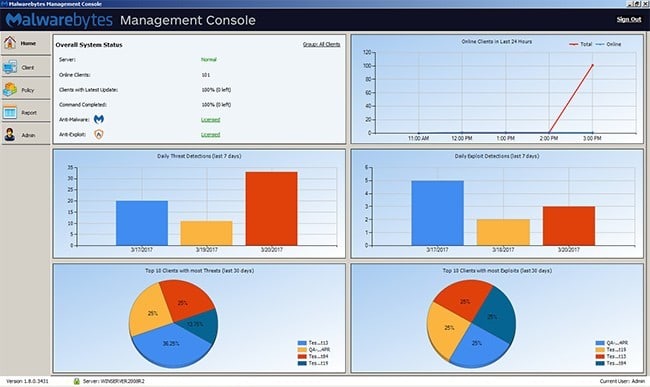
More recently, Malwarebytes has released an Enterprise version of Malwarebytes for Mac.
This provides more advance malware protection for Macs on corporate networks and is used by companies as large as Samsung, Dole and Sun Products.
The Enterprise edition provides real time protection via the Endpoint Security feature which blocks malware before it has a chance to install including ransomware, provides protection from zero-day exploits and blocks all malicious exploits.
System Admins can easily control and manage Endpoint Security from the main dashboard although unfortunately, this is only available on Windows at the moment.
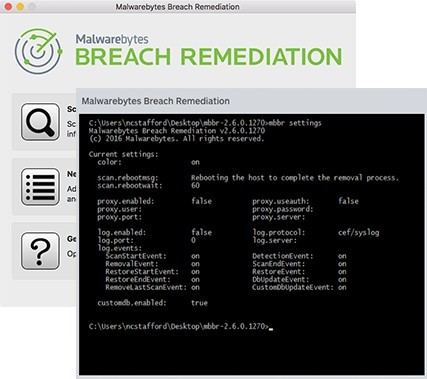
However, the Malwarebytes Enterprise Breach Remediation tool is available for both Mac and PC.
The Breach Remediation tool does not provide real time protection as it’s designed to integrate with your existing security infrastructure such as SIEM.
The tool allows remote operation either via shell, AppleScript or it’s own separate GUI.
You can watch how Breach Remediation protects entire Mac networks from malware below:
