Although CDs and DVDs are a dying media in 2024 you can still easily burn a CD or DVD on Mac using iTunes.
Whether you want to burn a CD to play in an old car stereo, burn an MP3 CD, burn photos to a CD on Mac or just burn some files onto DVD, it’s extremely simple to do using iTunes.
Although you can use DVD/CD burning software, iTunes is free and very easy to use although if you’re planning on doing it regularly, we do recommend using proper CD or DVD burning software because it gives you far more features and control.
You Also Might Like:
- The Best Burning Software For Mac
- How To Burn An ISO On Mac
- The Best Thunderbolt and SSD External Hard Drives For Mac
How to Burn a CD or DVD on Mac
Before you start, you’ll need to make sure you have the following:
- A CD or DVD recorder. If your Mac was built before 2011, it will already have an internal Apple SuperDrive (or if it’s really old, an Apple Combo drive) which can burn CDs and DVDs. However, since the beginning of 2011, Apple phased them out and Macs no longer include an internal CD or DVD player. You’ll therefore need to purchase an external SuperDrive or CD/DVD recorder that you can connect to your Mac’s USB ports. You can buy external Apple SuperDrives for around $70 but you can also use just about any external CD/DVD burner. For example, the VersionTech USB DVD CD Burner SuperDrive does exactly the same job as the Apple SuperDrive but costs just $29.99.
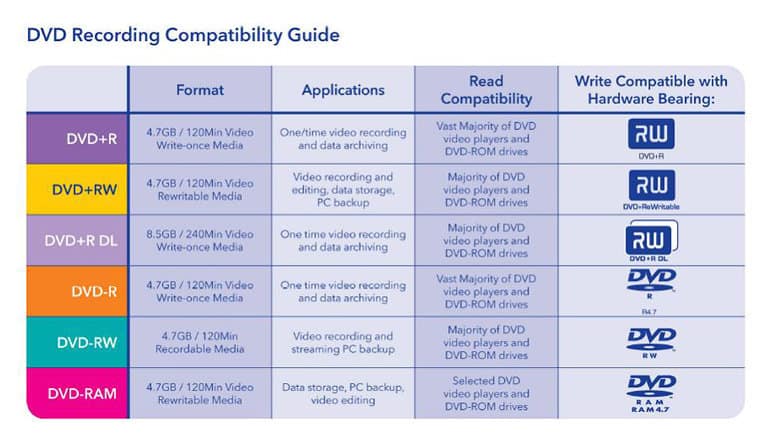
- A blank CD or DVD. There are two types of blank CDs and DVDs – CD-R or CD-RW and DVD-R or DVD-RW. The RW simply means the discs are re-writable i.e. you can can burn them and reuse them as many times as you like. R means that they are record only i.e. can only perform one burn on them and after which you cannot burn them or reuse them again. Note that most modern CD and DVD players can play both R and RW discs but older ones may not be able to play RW so you should check with your CD/DVD player manufacturer or model first. If you’re unsure and want to make a music CD that plays in any CD player, play it safe by going for a CD-R disc. Note that all blank CDs can record a maximum of 80 minutes of music or 700MB of data (about 150 MP3 files) and a standard DVD records up to 4.7GB of data. There are however other types of blank DVD formats with higher capacity and features and the DVD comparison table below gives a good overview of the current market.
If you’ve got both a CD/DVD burner and some blank discs, then you’re ready to go!
For most people, the main reason they want to burn a CD is to burn a music CD on Mac that plays in any CD player so that’s the example we’ll use. However, the process is exactly the same if you want to burn an MP3 CD or a data DVD. The only difference is step 6 where you must select the appropriate type of CD or DVD you want to create. Note that you can only burn data to DVDs using iTunes – you cannot burn iTunes movies to play on DVD as they are protected by Apple’s DRM (Digital Rights Management) although there are utilities that can help you remove this.
How to Burn a Music CD on Mac
- Open iTunes from your Application folder, Dock or by searching for it in Spotlight.
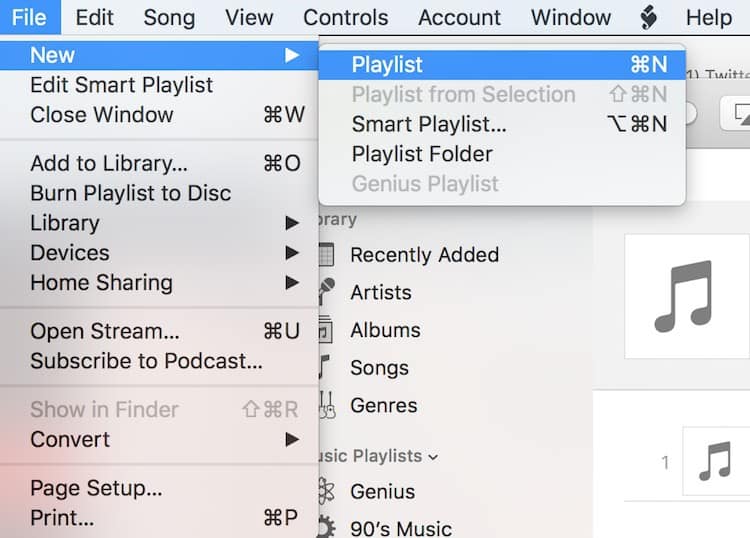
- Create a playlist in iTunes. To create a playlist go to File > New > Playlist.
- Click on Edit Playlist.
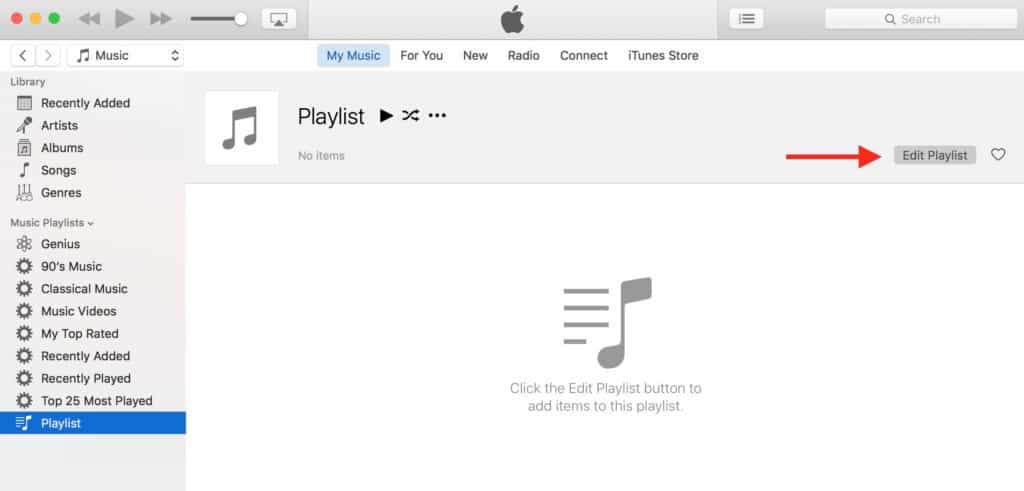
- Then just simply drag and drop the songs you want to burn to a CD. iTunes allows you to change the order of songs in the playlist by dragging and dropping them up and down. If you have a Touch Bar Mac, you can also select the songs and press the “Add To Playlist” button to add them. You can delete tracks by selecting them and pressing delete (this will not delete them from your iTunes collection, only from the playlist). The amount of songs you can add depends on whether you want to burn a music audio CD which can play in any CD player or an MP3 CD which can only play in MP3 players or computer CD drives. Be aware that a CD can only hold about 80 minutes of music so that’s going to be around 10-15 songs. If you exceed this limit, iTunes will try to record the music on two or more discs to fit them all on so make sure you don’t exceed this time limit. To view how much playing time your playlist is, go to View > Show Status Bar and you’ll see it appear at the bottom of iTunes. If you want to burn an MP3 CD, you can fit up to 700MB of songs on there which is around 150 MP3 files. Note that songs you have purchased from the iTunes store, you can burn as many times as you like as long as they are iTunes Plus songs. If they are not iTunes Plus tracks, you can only burn each track up to seven times.
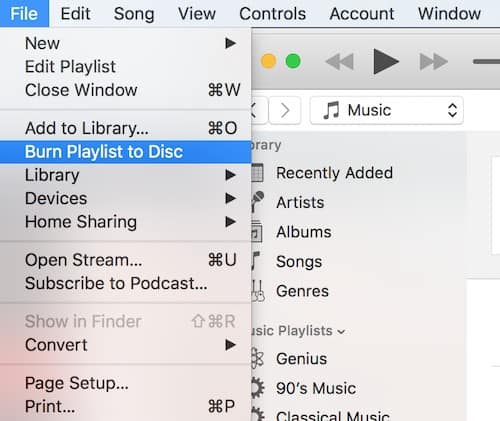
- When you’re happy with your playlist, go to File > Burn Playlist To Disc.
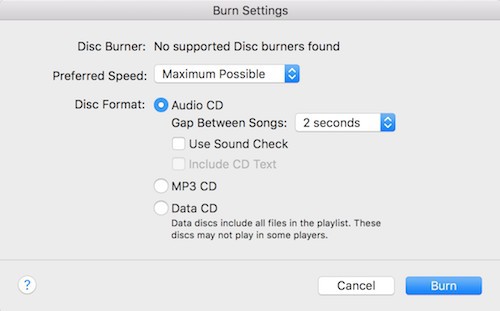
- In the dialog that appears, leave the preferred speed on “Maximum Possible” and next to Disc Format, choose whether you want to burn an audio CD (that will play in any CD player), MP3 CD or Data CD. Note that if you select Audio CD, you can also choose how long a gap you want between songs and ensure that the sound levels are equal for each track (so that you don’t get some tracks playing loud and some too quiet) by selecting “Use Sound Check”. If the CD player or car stereo that you’ll be playing the CD in also displays text information such as the artist and song on a digital display, also select “Include CD Text”.
- When you’re ready, click Burn at the bottom and iTunes will start to create your CD.
- You will see the status of the burning process at the top of the iTunes interface. Burning the CD on your Mac may take several minutes and you can cancel the process at any time by clicking the “X” but if you’re using a CD-R disc, you won’t be able to use it again (as oppose to CD-RW discs which you can use to burn as many times as you like).
- When the CD is complete, it will appear in your iTunes menu on the left hand side. Click the eject button to remove it from the CD burner.
- That’s it you’re done! If you want to make your CDs look really professional, some printers can even print a cover onto your CD. Check out our guide to all in one printers for Mac for more.
Note that although burning files to a CD or DVD is a perfectly legitimate way to backup your data, you’re much better off nowadays using an external hard drive on your Mac.
iTunes also won’t be any use if you need to burn an ISO on Mac – you’ll need one of these Nero for Mac alternatives for all other CD and DVD burning tasks.
If you have any problems burning a CD or DVD on your Mac after following this tutorial, let us know in the comments below and we’ll try to help.