

Apple has made it incredibly easy for you to multitask without using multiple devices, all thanks to its easily accessible split-screen feature on Macs.
The ability to split screen on a Mac was first introduced way back in macOS El Capitan. All versions of macOS since allow you to divide a screen very easily including Sonoma and Ventura.
Here we show you how to split screen on your Mac or MacBook including Apple Silicon Macs and how to split the screen on an external monitor too.
You May Also Like:
Table of Contents
- Split Screen on Google Chrome
- Keyboard Shortcut
- How To Make A Split Screen Keyboard Shortcut
- Using the Mouse to Split Screen
- How to Split Screen on Safari
- How to Split Screen on a Mac with a Monitor
- How to Do a 4-Way Split Screen on
- How to Do a 3-Way Split Screen
- How to Adjust Window Size
- How to Exit Split Screen
- How To Fix Split View If It’s Not Working
Split Screen on Google Chrome
Using the Google Chrome browser as an example, here is how you can split your screen in Chrome in just a few steps:
- Open Chrome on two different windows, making sure none of them are set to full-screen view.
- Drag the cursor to the green icon on the top-left of the window and hover on it, until the drop-down menu appears.
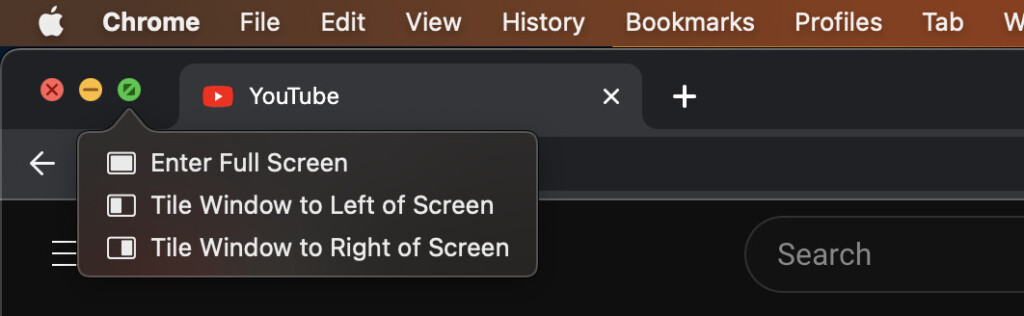
- Click on Tile Window to Left of Screen.
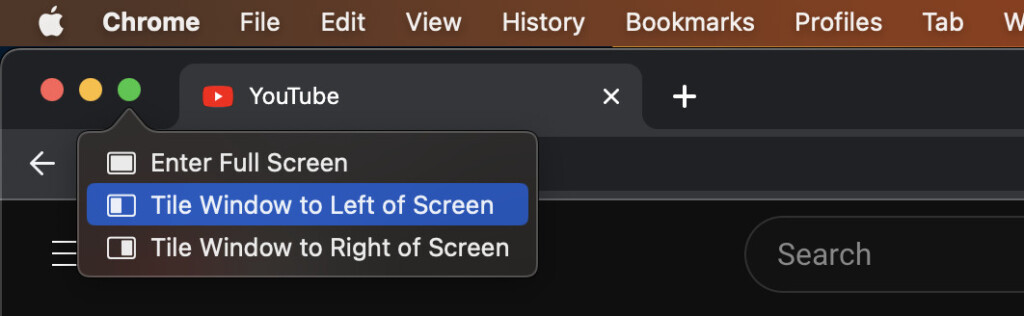
- For the second window, drag the cursor to the green button and click on Tile Window to Right of Screen.
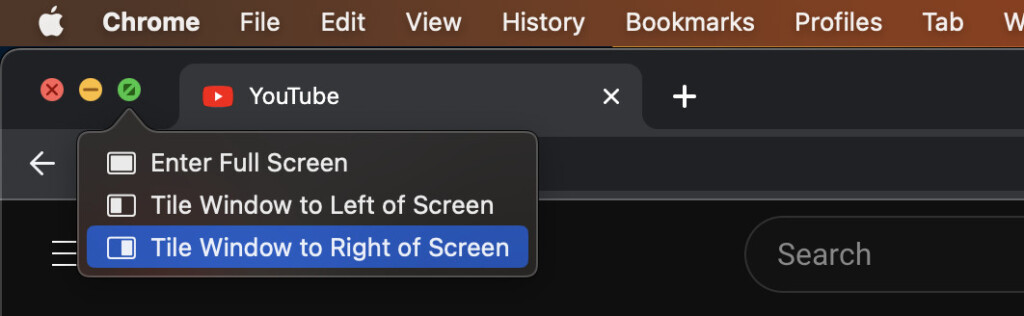
- Press Command + Tab to switch from one window to the next.
Keyboard Shortcut
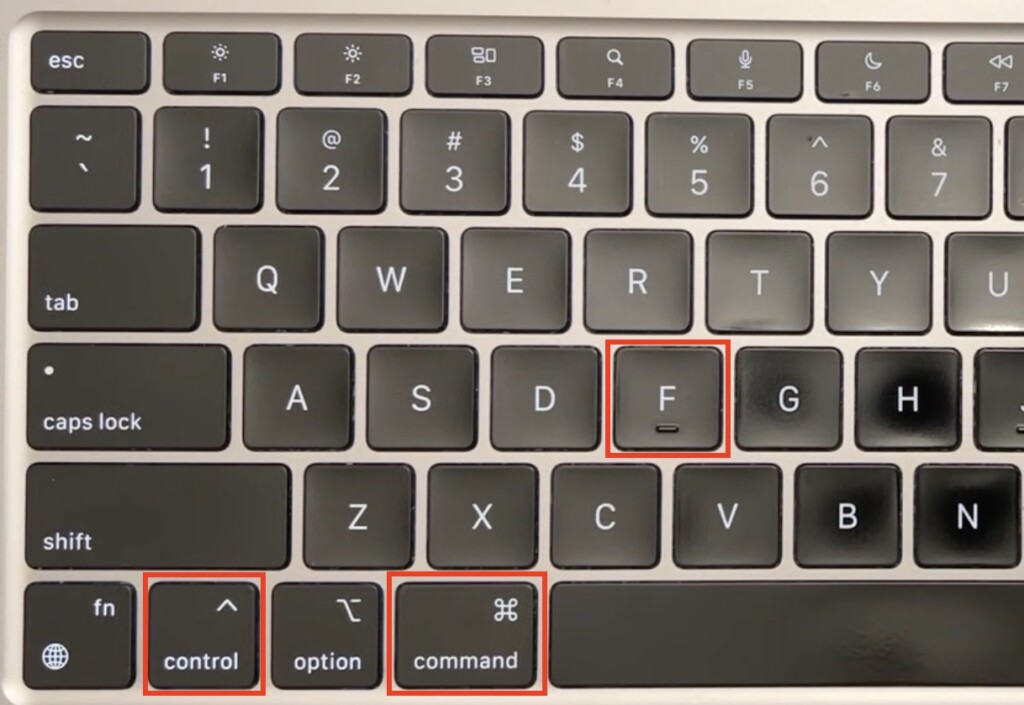
No matter which applications you want to cascade or tile together for split screen view on a Mac, you can do so easily with this split view shortcut.
- Open up the apps you need to view in split screen.
- Press Command + Control + F to access full-screen mode.
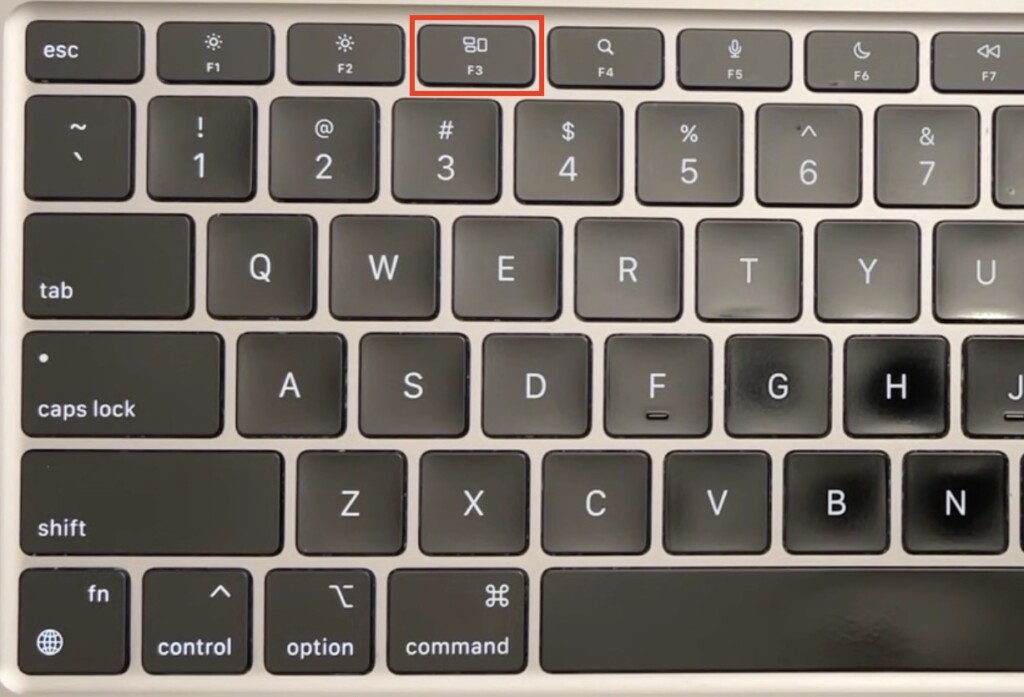
- Press the F3 button to open Mission Control.
- Click and drag on the app you want to open in the split screen.
- Click on the tiled apps, and you will enable split screen view.
How To Make A Split Screen Keyboard Shortcut
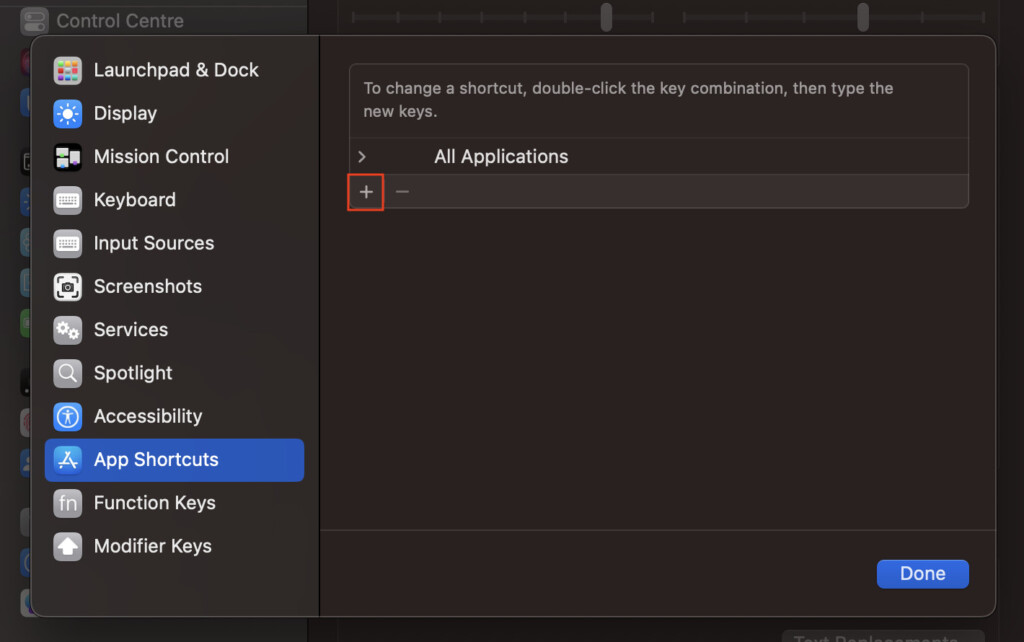
If you want to configure your own keys split screen on your Mac, follow these instructions:
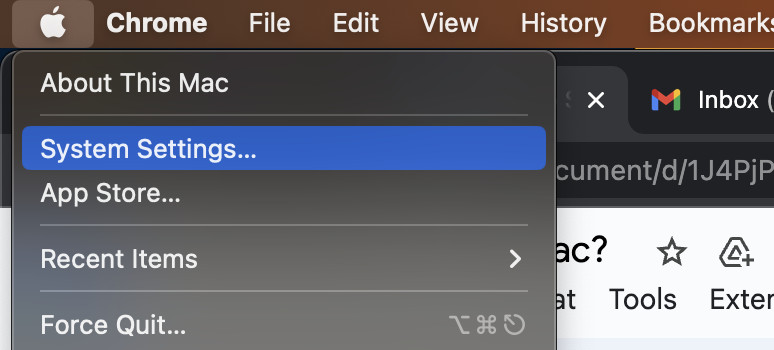
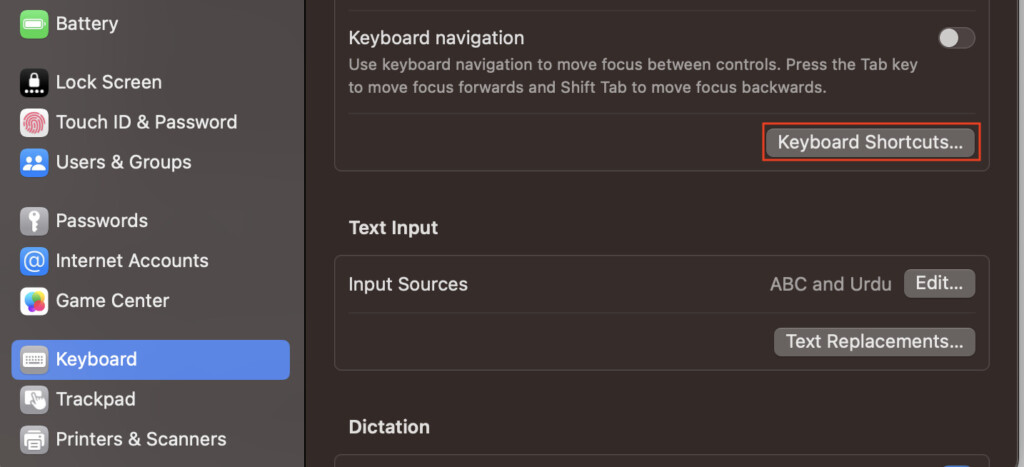
- Access System Settings > Keyboard > Keyboard Shortcuts > App Shortcuts.
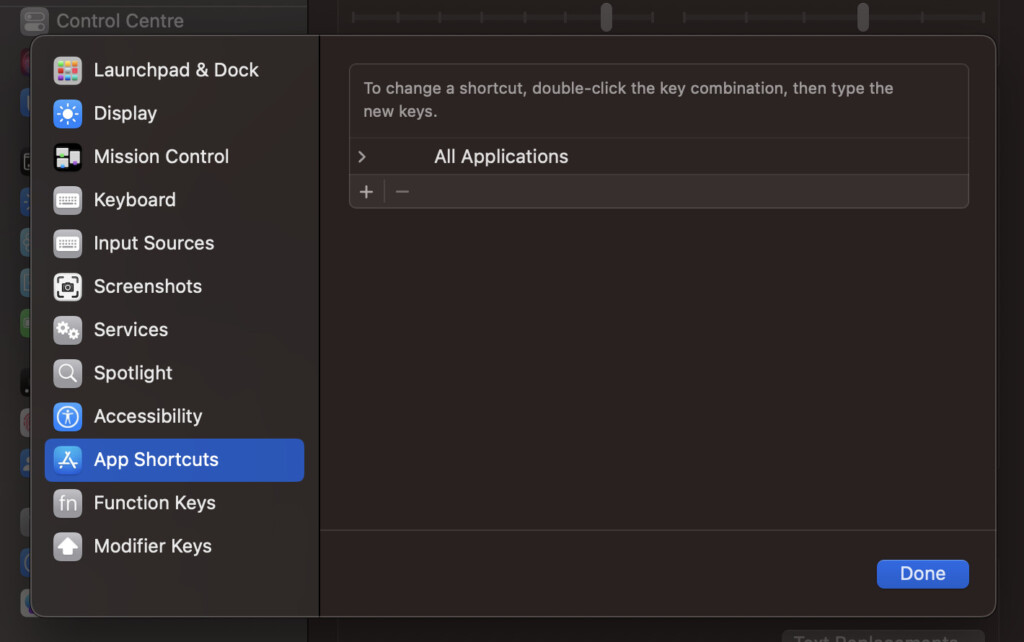
- Click on the ‘+’ button, and name your command “Tile Window to Left of Screen.” (It is very important that you name your command exactly as shown without omitting any word, otherwise it will not work).
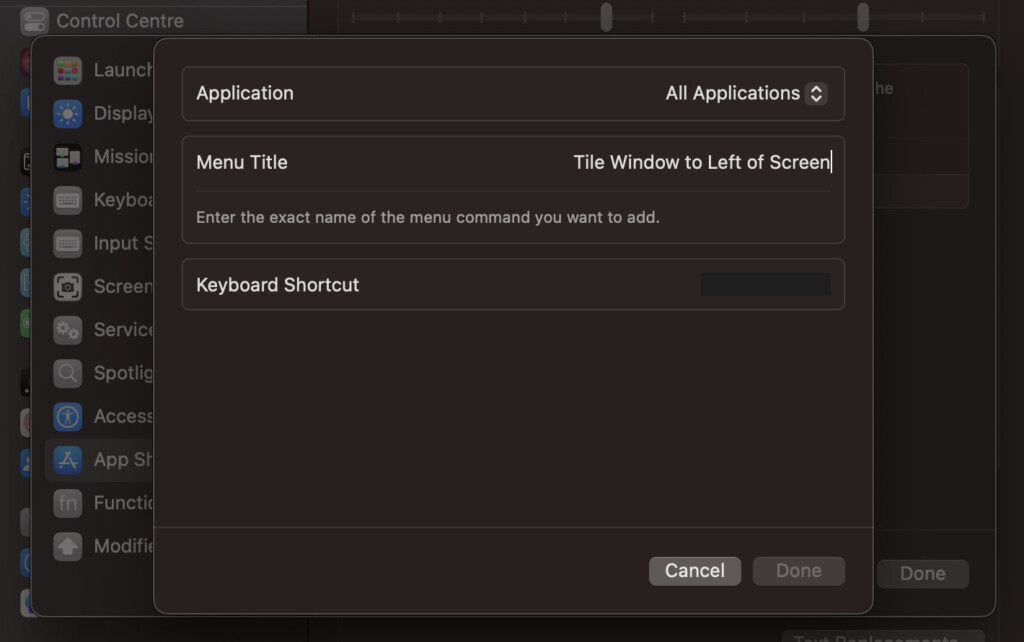
- Enter a sequence of buttons you wish to save as the shortcut, and click on Done. In this example, we have used Shift + Command + L as our custom shortcut.
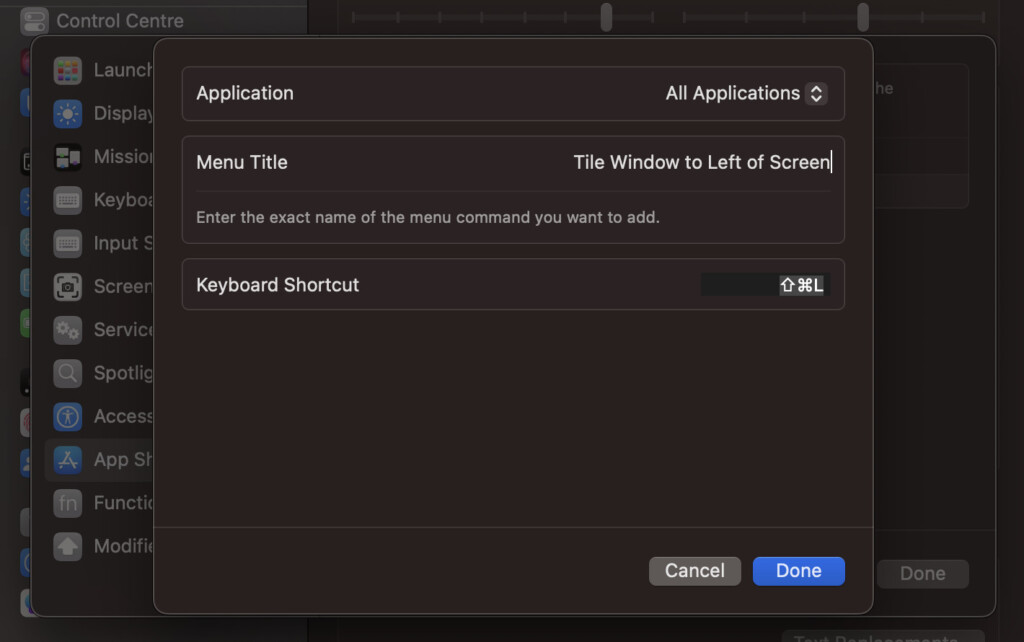
- Once your shortcut is saved, you can press it to cascade your app window to the left, and select another app for the right side of your screen.
Using the Mouse to Split Screen
In macOS versions older than Catalina (you can identify your MacOS version here), if you want to tile two windows left and right, or top and bottom, you can use the mouse to split screen.
For Side-by-Side Windows:
- Open the first window and click and hold it to the left of the screen until a dark transparent rectangle appears. Release the mouse once it appears.
- Open the second app or browser, and drag its window to the right. Release the mouse once you see the rectangle.
For Top and Bottom Windows:
- Open the first window and click and hold it to the top center of the screen until the rectangle appears. Release the mouse once you see it.
- Open the second window, and drag it towards the bottom center, releasing it once you see the rectangle.
How to Split Screen on Safari
In older versions of Safari, here’s how you can split screen on your Mac while using Safari:
- Open the first page on Safari.
- Click on the “…” icon at the top of the browser to access the multitasking toolbar.
- Click on Split View. The window will be tiled to the left, and you can open a second page on Safari and tile it to the right.
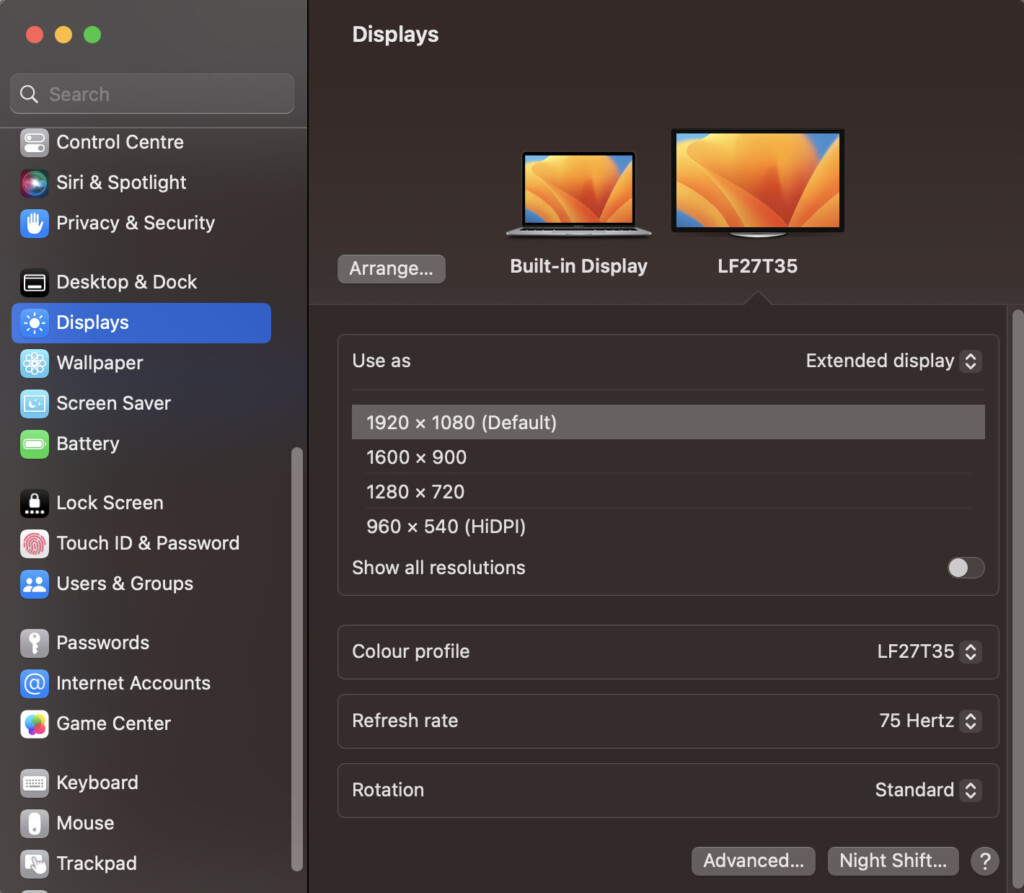
How to Split Screen on a Mac with a Monitor
If you have an external monitor or additional display connected to your Mac or MacBook, here is how you can split screen:
- Click on the Apple menu, followed by System Settings.
- Click on Displays from the sidebar.
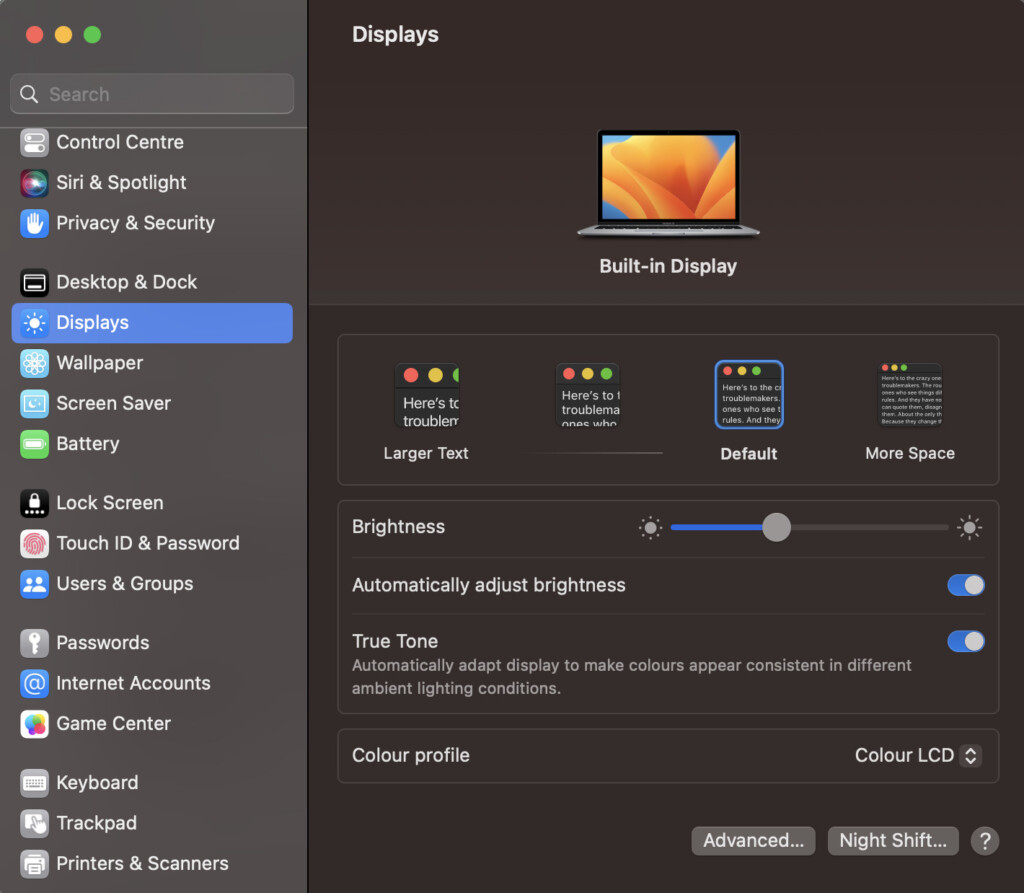
- Click on the name of your monitor or additional display.
- Click on the Use As menu, followed by Extended Display.
- Open the apps or browser pages you want to access in split screen.
- Move your cursor and hover upon the green icon at the top-left of the window, and click on Tile Window to Left of Screen in the drop-down menu that appears.
- Open the second window, hover upon the green icon, and click on Tile Window to Right of Screen.
- You can also use the keyboard shortcut we discussed above to split screen, or drag one window to the left to move it to the external display.
How to Do a 4-Way Split Screen on
If your Mac or MacBook runs macOS older than Catalina, you can make use of the Split View to split your screen into four different sections for easier multitasking.
Let’s see how you can do a 4-way split screen on your Mac.
- Open an app or browser, but make sure it isn’t in full-screen mode.
- Move the window to the top-left of the screen and release it when a transparent rectangle appears.
- Open a second window, and move it to the bottom-left corner, releasing it in the same manner.
- Do the same with the remaining two windows; drag them to the top and bottom-right, releasing them once you see the rectangle.
- Now, you can view all four windows on your Mac screen and work comfortably.
How to Do a 3-Way Split Screen
If you want to view three different windows side-by-side on your Mac, follow these steps:
- Open an app or browser, but make sure it isn’t in full-screen mode.
- Drag it to the bottom center of your screen, and release when you see a transparent rectangle.
- Open up another app or browser, and drag it to the left or right of your screen. Do the same with the third window, moving it in the other direction.
- Your Mac will display the three windows side-by-side.
How to Adjust Window Size
You may need one window to appear larger than the other. Here’s how you can do so:
- Click and hold the vertical line between the windows.
- If you want to make the window on the left larger, drag the line to the right as much as you need.
- If you want to make the window on the right larger, drag the line to the left as much as you need.
How to Exit Split Screen
Exiting split screen is as easy as entering Split View on your Mac:
- Navigate to the top-left of the tiled window.
- Click on the green button, and this will remove the particular app or browser from the split screen view.
- If you want to replace it with another window, open a new app or browser, and use the above-mentioned method to tile it to the left or right.
- If you want to close all windows, repeat Step 1 with the other windows in split-screen mode.
How To Fix Split View If It’s Not Working
If you find that you can’t enter Split View on a Mac then try the following:
- In macOS Ventura or later go to the Apple logo in the top left and select System Settings and click Desktop & Dock in the sidebar. Scroll down and ensure that “Displays have separate Spaces” is checked.
- In versions of macOS Monterey or earlier, go to the Apple logo in the top left and select System Preferences and click Mission Control and make sure that “Displays have separate Spaces” is selected.