

If you need to check how much storage space is left on your Mac, it’s not as easy as it used to be on macOS.
Fear not though as here we show you how to check the storage space on your Mac and recover lost disk space including on the latest Apple Silicon Macs.
If you’re suffering from a slow Mac, your Mac keeps freezing or you’re constantly seeing warnings that “Your startup disk is almost full”, the tools here will solve the problem in just a few clicks.
You should always have at least 10-20% of free hard drive space on your Mac in order for macOS to run smoothly otherwise you will notice performance problems, app instability, crashes and see warnings like “to make more space available on your startup disk, delete some files”.
The problem is that the latest versions of macOS don’t make it very easy to see exactly which files are causing the problem.
Since macOS High Sierra, Apple changed the way that Macs manage data on Macs so that it’s harder to see which files are hogging hard drive space especially on the latest version of macOS Sonoma.
That’s why we recommend using a disk space analyzer on your Mac as the information provided by macOS isn’t very useful anymore especially when it comes to System files or those labelled mysteriously as “Other”.
We also recommend reading our guide to the best external hard drive for Mac so that you can move large files that you don’t want to delete but don’t need regularly.
Contents
- 1. DaisyDisk
- 2. GrandPerspective
- 3. Space Gremlin
- Important Note On Using Disk Analyzers
- Checking Storage On Your Mac Using macOS
- Checking Storage on macOS El Capitan Or Lower
- How To Check Disk Space On Lion, Mountain Lion & Mavericks
- How To Check Storage Space On Mac OS X 10.6 Snow Leopard
- How To Delete Language Packs From Mac
- Conclusion
1. DaisyDisk
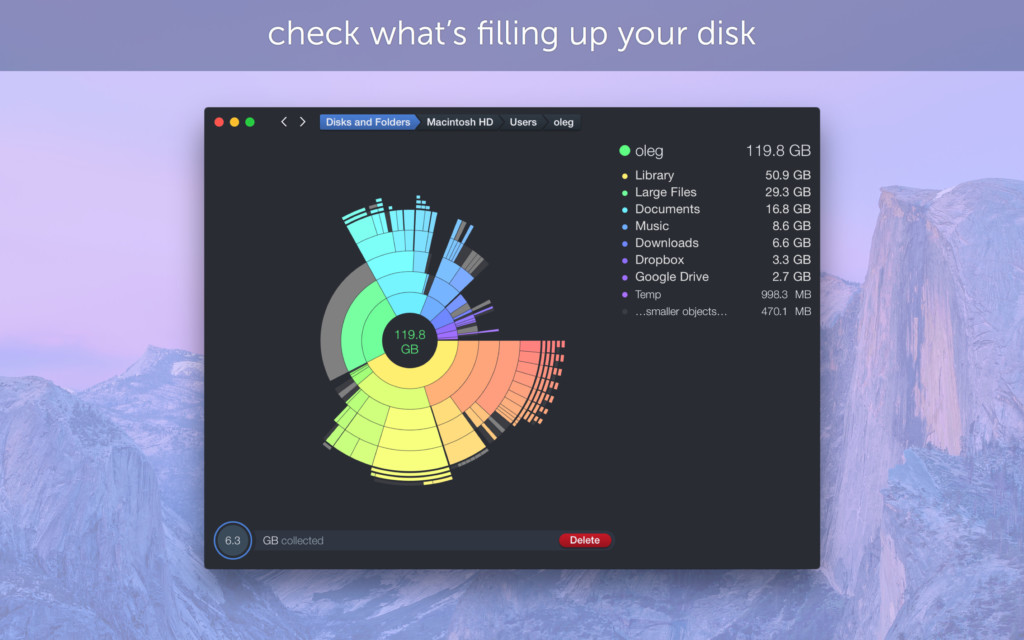
DaisyDisk is an invaluable free disk storage management tool for Macs which clearly shows which files are occupying space on your Mac’s hard drive.
Best of all, unlike macOS it allows you to drill down and find exactly where they are on your Mac.
It’s one of the few tools that can detect disk hogging snapshots on macOS Sonoma, Ventura and Monterey and allow you to select which ones to keep and which to delete.
DaisyDisk quickly scans your hard drive and then clearly displays a pie-chart view of how much space specific files are using on your Mac.
What we really like about DaisyDisk is that you can click on the pie segments and drill down to see specific files within folders and locate them instantly in Finder.
The other good thing for those unsure what’s safe to delete or not is that DaisyDisk prevents you from deleting essential system files.
If you’re really struggling to find a large file on your Mac, guaranteed that DaisyDisk will help you find it.
You can use DaisyDisk for free although if you upgrade for $9, you can remove the upgrade nag screen, get access to all functions including app deletion and free updates among other things.
If you do decide to buy DaisyDisk, we recommend buying direct from the developer rather than the DaisyDisk Mac App Store version as the developer edition has a few more features that aren’t in the App Store version for technical reasons.
Pricing: Free trial / $9.99/license
2. GrandPerspective
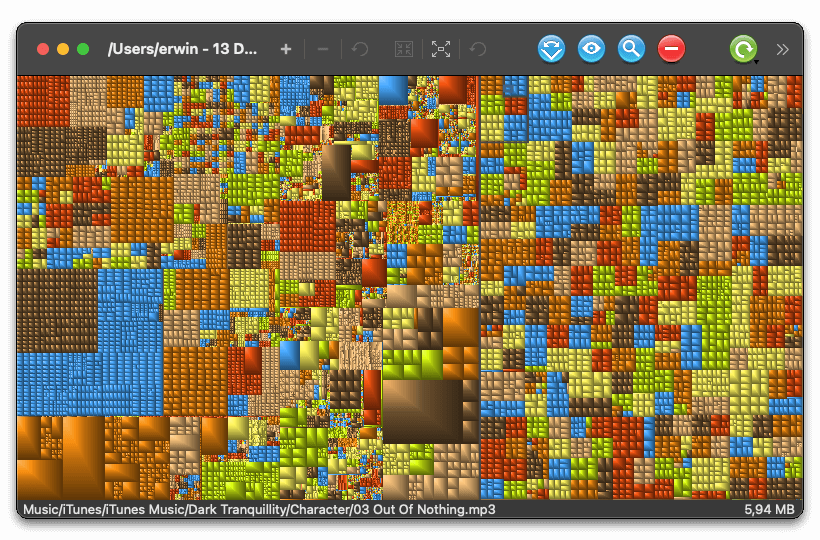
GrandPerspective is another storage management utility for Mac which clearly shows what’s on your Mac hard drive.
GrandPerspective uses a tree map for visualization which isn’t quite as easy to read at first as DaisyDisk, but is easy to decipher when you’re used to the app.
Files are displayed as a rectangle proportional to the file’s size and you simply click on rectangles to see which files they represent.
GrandPerspective is not quite as polished as DaisyDisk and but it is free to download and use, or you can pay $2.99 and buy it from the Mac App Store to support the developer.
Pricing: Free / $2.99 from App Store
3. Space Gremlin
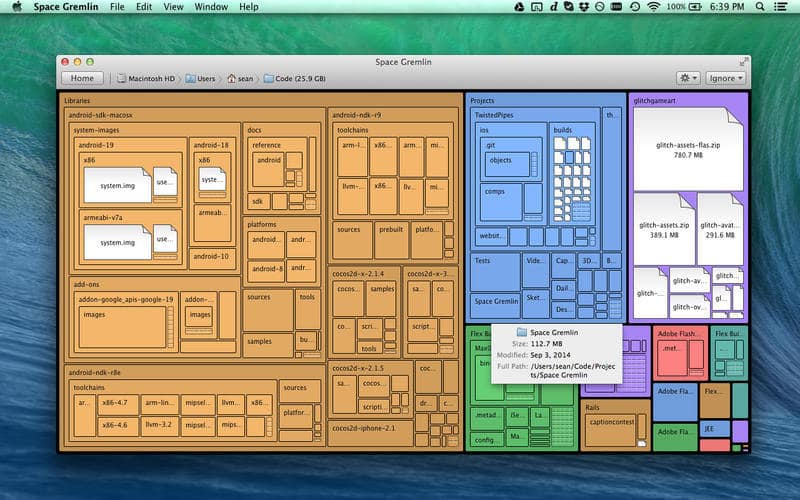
Space Gremlin is another useful way to manage storage on your Mac with a similar treemap display to GrandPerspective.
Space Gremlin scans both internal and external hard drives and when you move the cursor over the rectangles, it shows exactly where the files are located on your Mac.
You can choose to either compress or move large files to the Trash and Space Gremlin updates in real-time with every change you make.
Note that when you move files to the Trash, Space Gremlin doesn’t actually delete them completely as a safety mechanism. You have to empty your Trash yourself so that macOS can warn you if you are about to delete essential system files.
You can also see exactly what’s in restricted space in Space Gremlin by scanning in admin mode but you’ll need to open Space Gremlin using macOS Terminal to do this.
Like Daisy Disk, there is an App Store and non App Store version of Space Gremlin for technical reasons due to Apple’s implementation of sand boxing.
Pricing: Free Demo / $4.99
These are easily the best disk storage management apps we’ve used to find and delete large files on a Mac.
There are others such as OmniDiskSweeper and Disk Inventory X but they aren’t as well maintained, updated or as comprehensive for clearing storage on a Mac.
Important Note On Using Disk Analyzers
Most storage management applications on Mac give you the option of also scanning as an administrator. This allows them to discover files that macOS normally protects from deletion or interference from other apps.
These are usually important system files such as system caches and root files, Time Machine backup snapshots and file system metadata that naturally grows the longer you use your hard drive.
You will need to enter your Mac admin password in order to scan as an administrator but you should be very careful before deleting “restricted” or “hidden” files that are critical for macOS to work.
Checking Storage On Your Mac Using macOS
You can also check disk space on your Mac using macOS but as outlined in the introduction, it doesn’t often show you exactly where the large files are located.
The information provided differs depending on which version of macOS you’re using.
If you’re using macOS High Sierra later, we strongly recommend using a disk scanning utility.
Here’s how to check how much storage space you have left on your Mac using macOS.
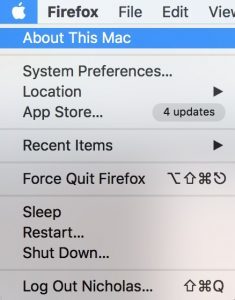
- Click on the Apple logo in the top left of your screen and select About This Mac:
- Click on the Storage tab at the top of the panel. On macOS 10.12 Sierra, it will look like the panel below. You must hover the cursor over the categories to see exactly how much space each one takes on your hard drive:
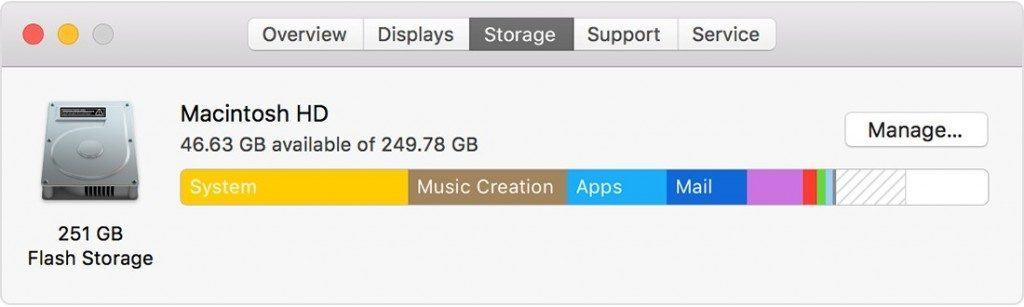
The smart thing in macOS Sierra is that if you click on the Manage… button, it gives you a range of features that help you automatically free-up storage space on your Mac.
Optimized Storage can make your Mac store files you don’t use very often in iCloud this increasing the amount of space available on your hard drive.
However, it’s only really useful to those that store a lot of iTunes and Apple Mail content on their Mac.
To access Optimized Storage, click on the Manage… button next to the storage breakdown. You’ll then see a number of recommendations for managing storage space on your Mac.
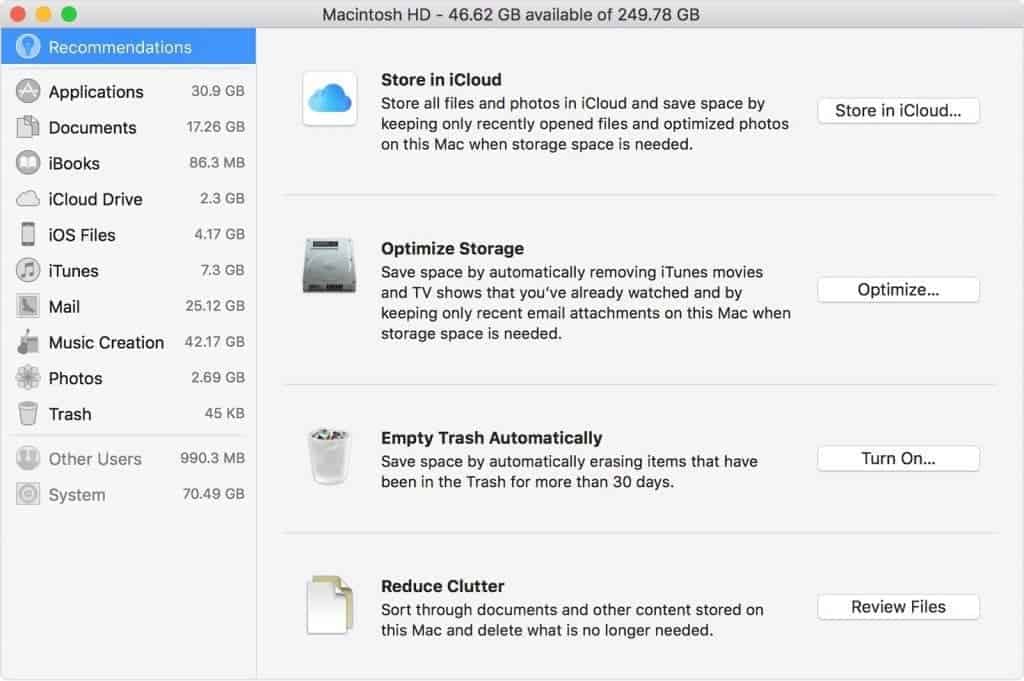
Here’s an overview of what each one does:
- Store in iCloud
To really maximize space available on your Mac, you can activate them all one-by-one although to use Store in iCloud, you’ll need to purchase iCloud storage which starts at around $0.99 per month for 50GB.
- Optimize Storage
Optimized Storage does not require an iCloud account and if you download media from iTunes and use Apple Mail, it can save you some serious storage space. Optimize Storage saves hard drive space on your Mac by:
- Automatically removing shows and movies you’ve downloaded on iTunes – you can download them again at any time.
- Downloading only recent attachments received in Apple Mail – you can also re-download older attachments at any time.
- Configuring Apple Mail to block downloading of future attachments automatically unless you specifically click on them.
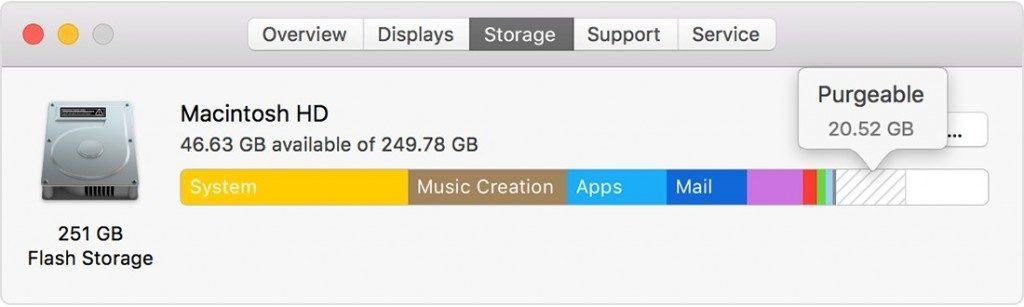
When you activate Optimize Storage, if you go back to the file storage screen, you will now see the amount of space that is can be purged from your Mac hard drive:
- Empty Trash
Empty Trash simply configures your Trash to empty automatically after 30 days. Remember that dragging files to Trash doesn’t delete them straightaway – you have to Empty Trash to clear them completely from your hard drive.
- Reduce Clutter
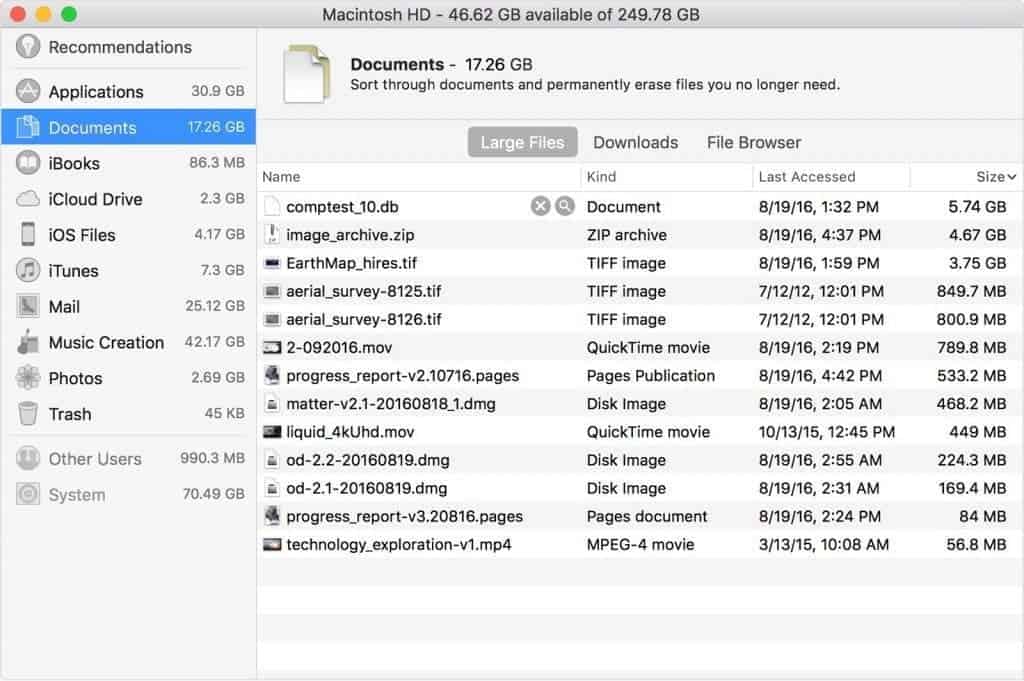
Reduce Clutter is another useful hard drive space-saving feature as it helps you to identify large files that you may no longer need on your Mac and clean your Mac hard drive.
This is something that has been long overdue in Mac OS X although there are some excellent storage management apps for Mac that help you locate and delete large files easily (see reviews below).
When you click on Review Files next to the Review Clutter option, you can go through files via type to see which ones you need and which ones you can remove. Click on the “X” next to the file to delete them or the Spyglass icon to see them on your Mac.
Checking Storage on macOS El Capitan Or Lower
If you’re using OS X 10.11 El Capitan, the Storage panel looks slightly different as there’s no need to hover the cursor over the storage bar as the exact amounts are displayed below the storage status bar:
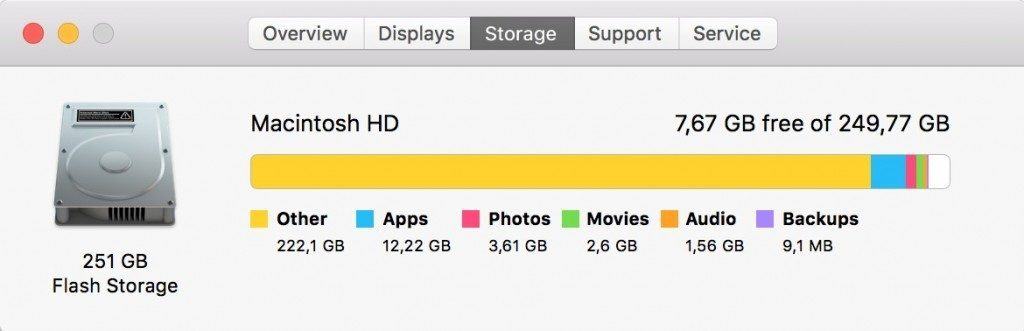
The breakdown of most hard drive space provided by OS X is mainly self-explanatory – the colored bars show exactly how much space Audio, Movies, Photos, Apps and Backups are taking up on your Mac.
The white space at the end is the amount of free space left on your hard drive and if you have iCloud Drive switched-on, it will also show how much space you’ve got on there too.
However in El Capitan, you might find the yellow bar labelled as “Other” occupies a huge amount of space on your hard drive. “Other” refers to system files and folders that are essential to allow OS X to work.
This includes such things as cache files, document backups, personal configuration data, plugins and other system files. In OS X 10.12 Sierra, the “Other” category is labelled more clearly as “System” to make it less confusing for users.
You should be extremely careful before trying to find and delete files from the Other or System categories as you may end up damaging OS X.
We always recommend using a disk management utility to get to find out exactly what these files are on your Mac as these tools will not only help you pinpoint them, but warn you if you are about to delete something essential.
How To Check Disk Space On Lion, Mountain Lion & Mavericks
To check storage space on Mac OS X 10.7 Lion, 10.8 Mountain Lion and 10.9 Mavericks, the procedure is almost exactly the same as above with one small change:
- Click on the Apple logo in the top left of the screen and click About This Mac.
- Click on More Info at the bottom of the panel that appears.
- Along the top of the panel, select Storage to see a breakdown of hard drive space on your Mac.
How To Check Storage Space On Mac OS X 10.6 Snow Leopard
If you’re still using OS X 10.6 Snow Leopard or earlier (which we do not recommend nowadays for security reasons among many others), the process is slightly different.
You have to open a Finder window, click on Macintosh HD and then either Ctrl-click and select Get Info or go to the File menu at the top of the screen and select Get Info.
The panel that appears will show you how much space is being used on your Mac although it won’t show you what type of files are taking-up hard drive space.
Note that there are other ways to check how much hard drive space you have left on your Mac such as by using OS X Disk Utility but using the Apple Menu is definitely the easiest and gives the most detailed information.
How To Delete Language Packs From Mac
One thing that takes valuable Gigabytes of space on your Mac are language packs.
Most people only use their Mac in one language but macOS includes language packs for hundreds of different languages. If you don’t need these, deleting them can free-up at least 1.5GB of space.
The best tool for removing language resources from OS X is Monolingual which allows you to select which language packs you want to remove.
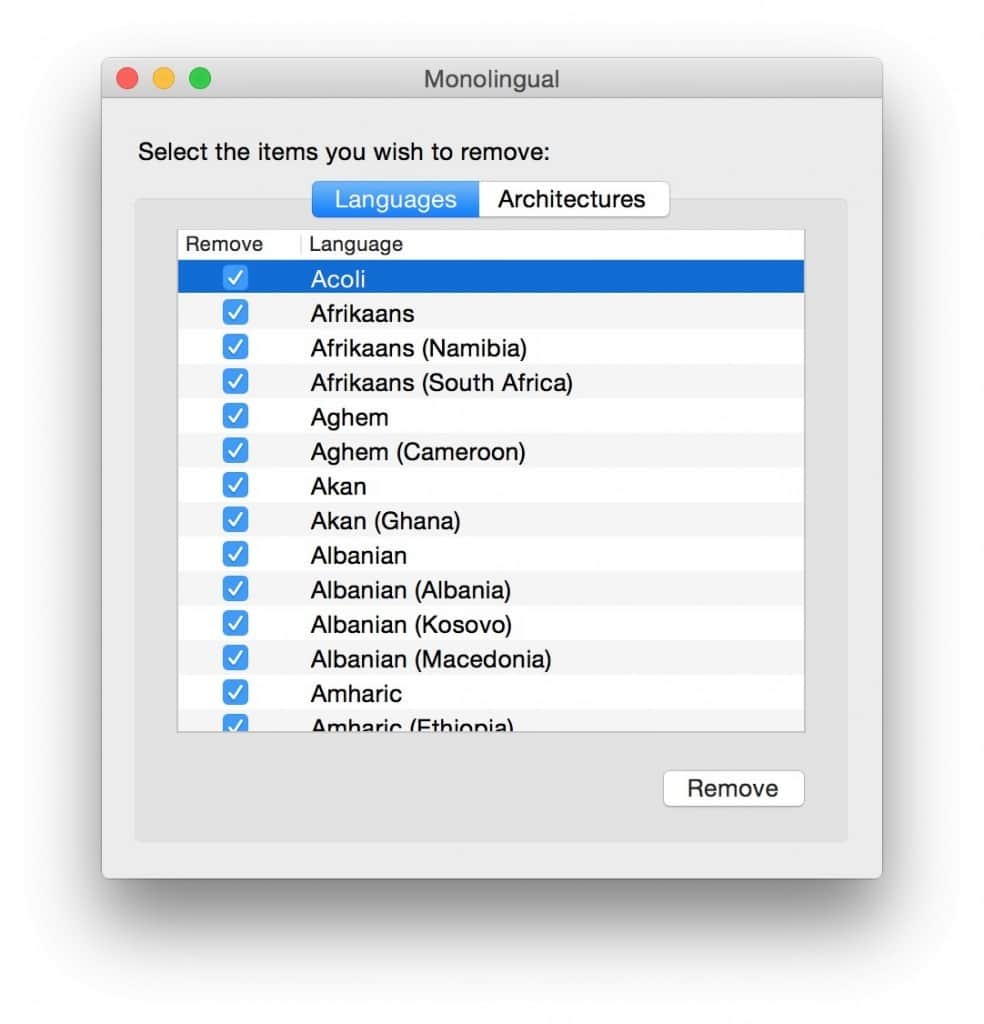
It will also detect language packs from other apps such as Adobe or Microsoft Office products and delete them too.
Conclusion
The latest versions of macOS have made it harder than ever to manage disk storage space on Mac and using a disk management tool is almost essential nowadays.
However, it’s still easy to see an overall picture of how much storage space is remaining on your Mac using macOS although you will need a disk storage management app to get deep down and dirty and locate those really hard to find files that are hogging space.
One final tip is to always buy a Mac with the biggest internal hard drive available.
If you’ve already purchased a Mac however and find that your hard drive simply isn’t big enough, you can easily amplify your storage capacity for less than a few hundred dollars with an external hard drive.
If you have any other problems, issues or questions on how to clear space on a Mac or you have trouble finding large files, let us know in the comments below.