Using a VPN is the best way to ensure your privacy online or watch content that’s blocked in your region.
The best VPNs for Mac users nowadays allow you to easily share your VPN with other Macs or devices.
This is great if you want to make sure that all Macs in your home or office are surfing anonymously and securely or if you want to stream content that’s blocked in your region on another device.
It’s also a perfect solution for sharing a VPN connection with devices such as AppleTV, Roku and Smart TVs or gaming consoles such as PlayStation and XBox that normally can’t use a VPN.
The other great thing is the market for VPNs is insanely competitive with massive discounts on most VPN subscriptions.
You May Also Like:
Before we start, it’s important to be aware that depending on your VPN provider, sharing a VPN on macOS is a two-step process.
- First you need to configure a L2TP/IPSec connection profile (this is to create a secure VPN tunnel on your Mac).
- Then you need to configure your VPN service so that you can share it.
However, it’s important to be aware that some VPN providers like NordVPN no longer support L2TP/IPSec as it’s not as secure as it used to be.
Many VPN providers have already dropped L2TP/IPSec and switched to the more secure OpenVPN and IKEv2/IPsec protocols.
The problem with this however is that there’s no way to share a VPN on Mac via WiFi (you can share your WiFi but not the actual VPN connection) using these protocols so it’s important you check that your VPN provider supports L2TP/IPSec.
If your VPN provider does support L2TP/IPSec, this process shouldn’t take more than a few minutes so here’s how to easily share a VPN connection on Mac using WiFi.
1. Setup An L2TP/IPSec Connection On Your Mac
First you need to setup a secure tunnel that your Mac can use. This is known as an L2TP/IPSec connection.
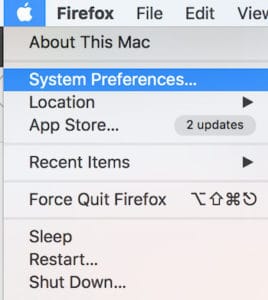
- Click on the Apple logo in the top left of your Mac and select System Preferences.
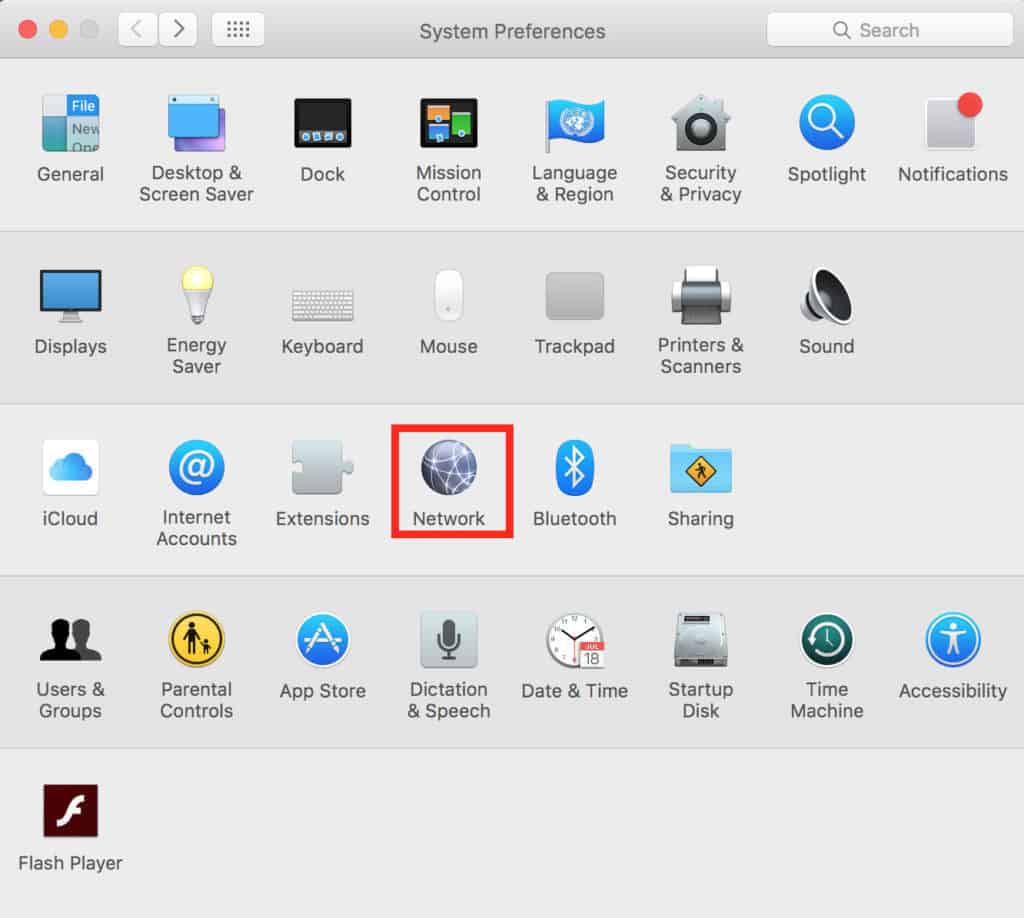
- Click on Network.
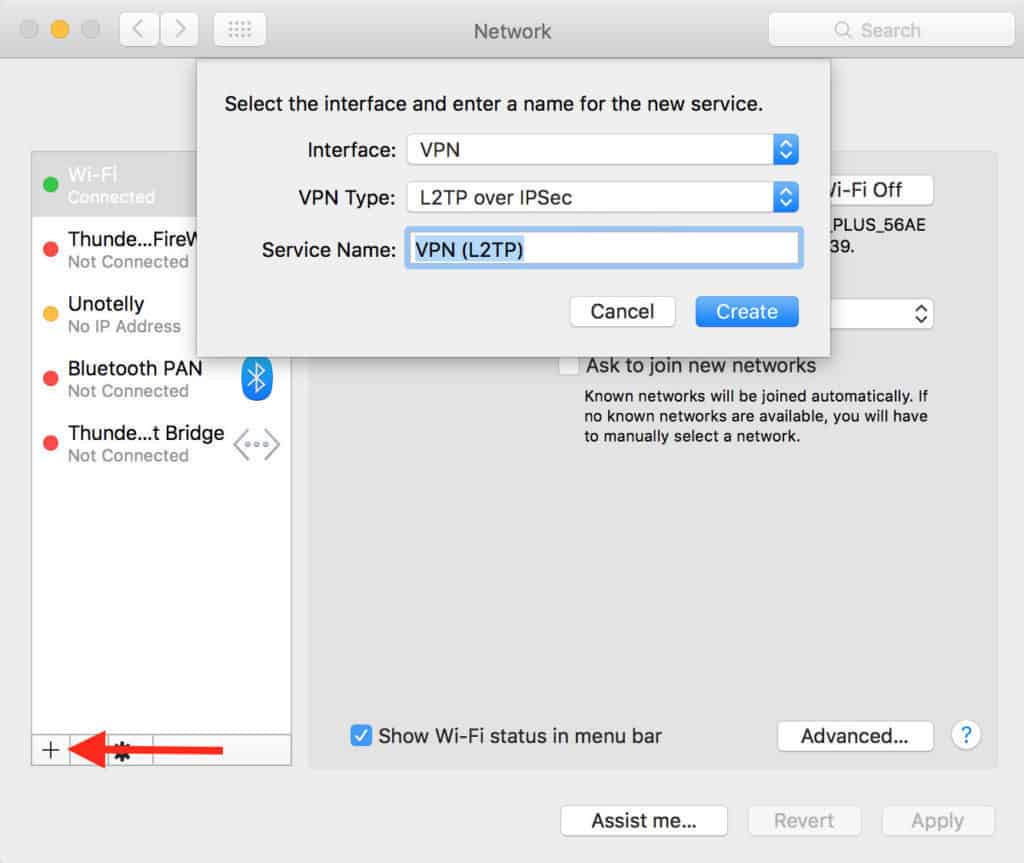
- Then click on the “+” symbol near the bottom left corner and select “VPN” under Interface and “L2TP over IPSec” under VPN Type. Enter the name of your VPN provider (examples include CyberGhost VPN or ExpressVPN) under Service Name and click Create.
- You then need to enter a Server Address for your VPN Network (such as one of these if you’re using ExpressVPN) and under Account Name, enter your VPN account username. Tick the box “Show VPN status in menu bar”.
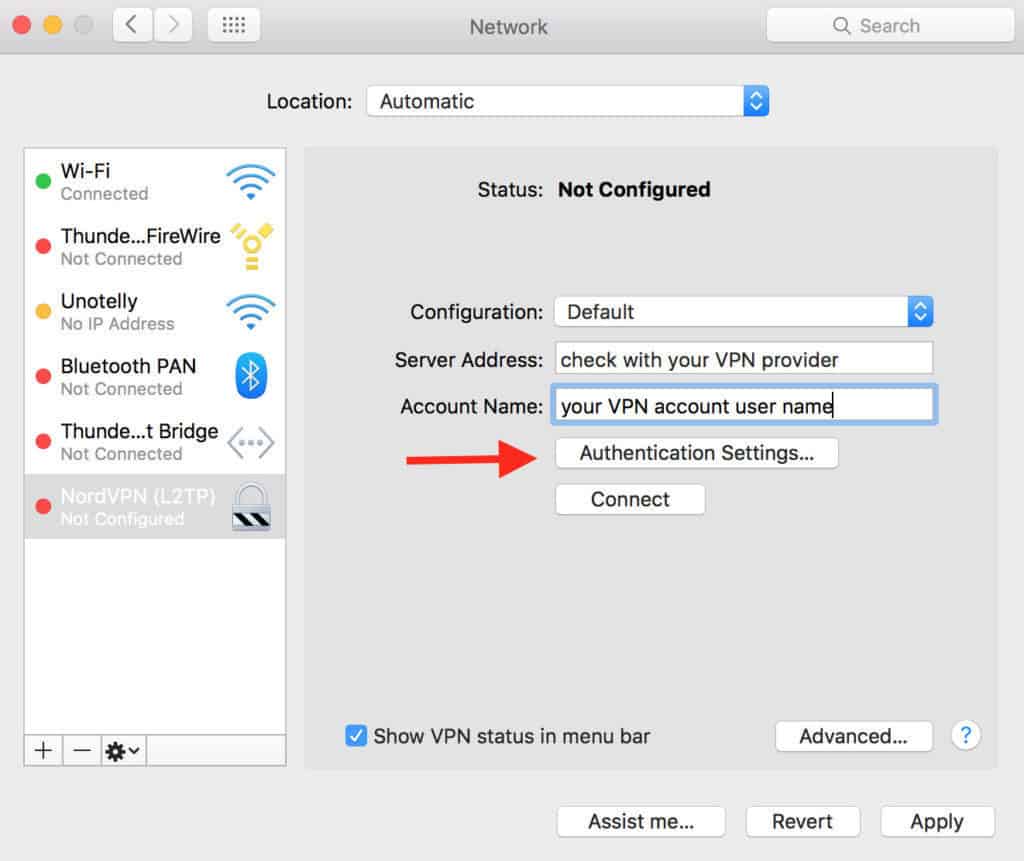
- Enter your VPN Password and under Shared Secret you can use anything you want – just make sure you make a note of it.
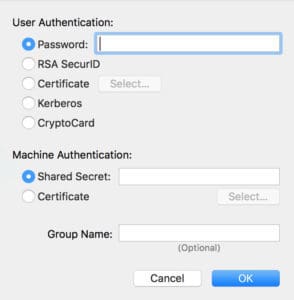
- Click OK and then select Advanced.
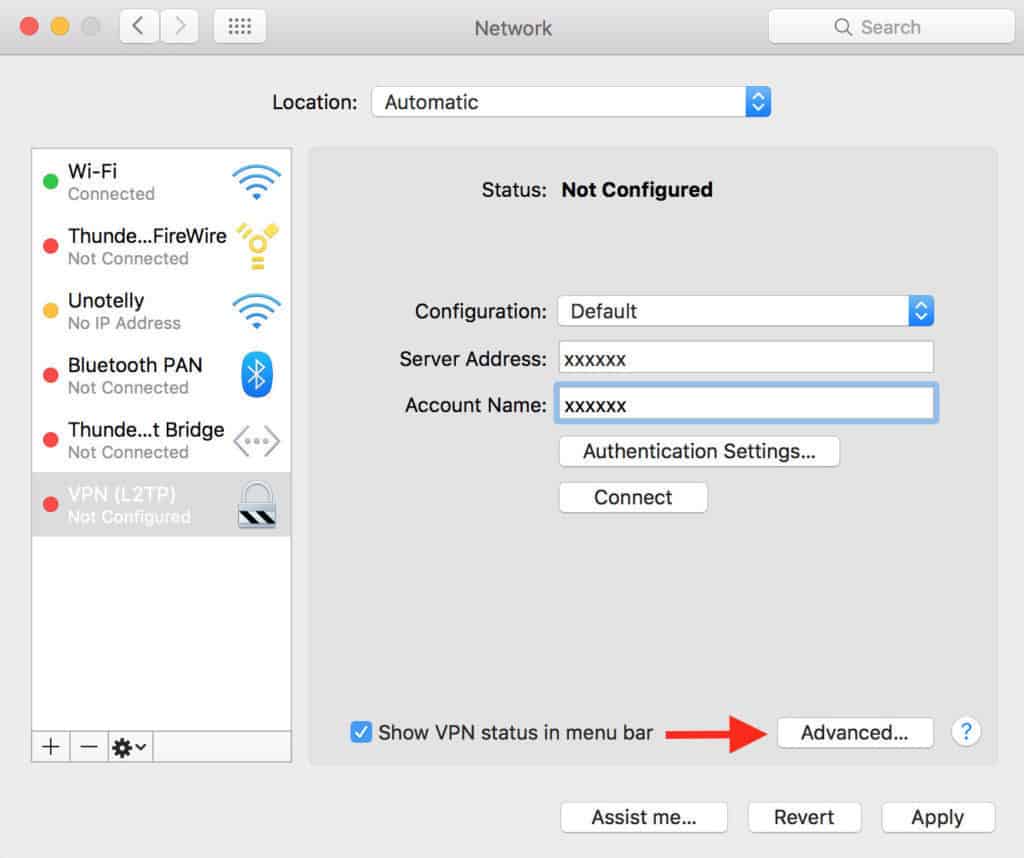
- Tick the box Send all traffic over VPN connection.
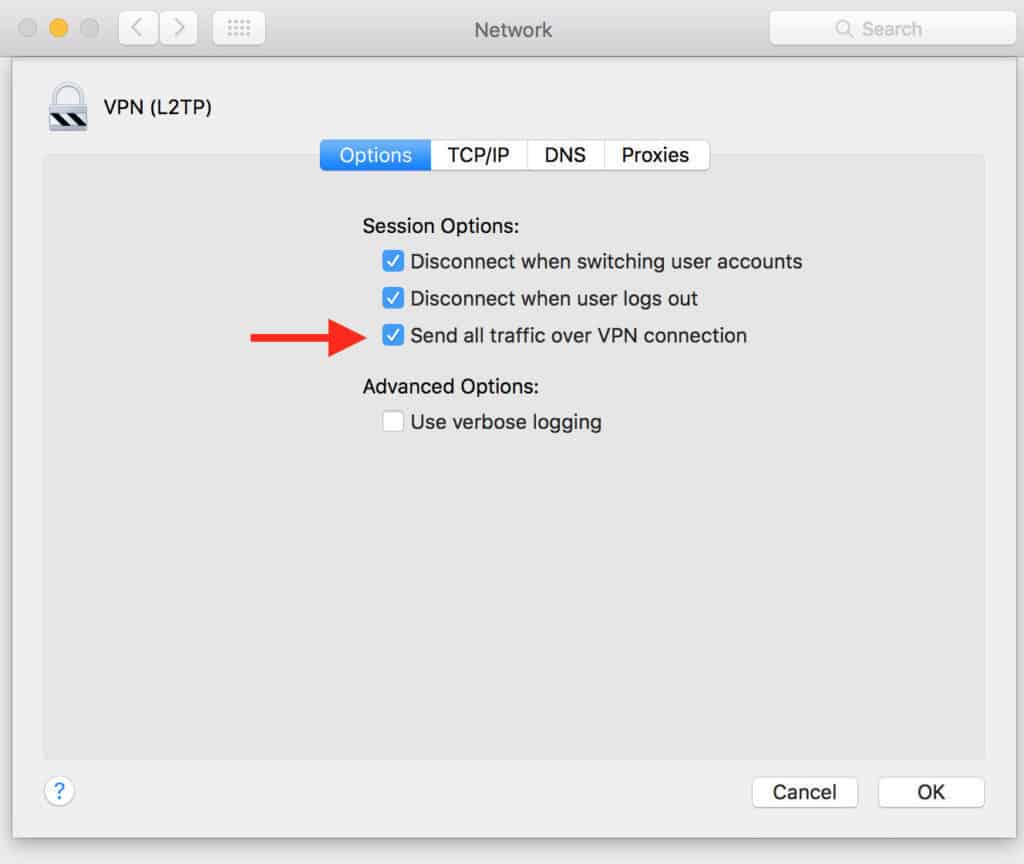
- Click OK and then make sure that the checkbox Show VPN status in menu bar is checked.
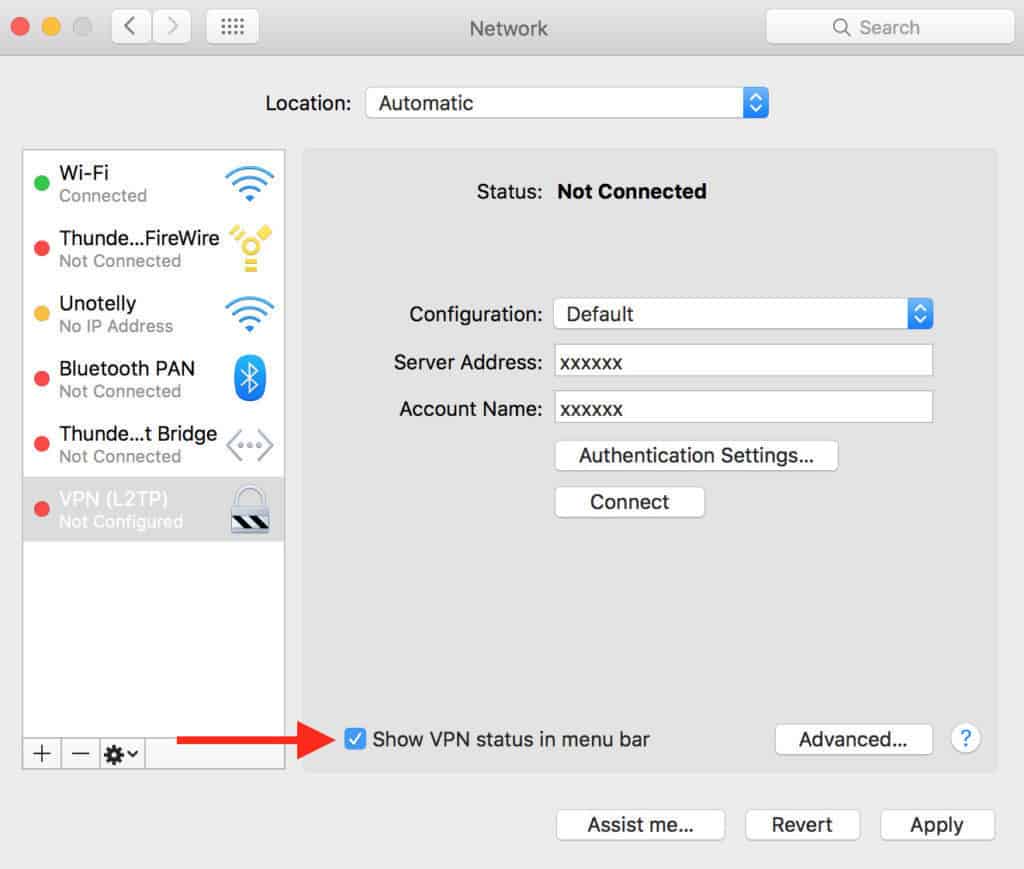
You’ll see that the VPN status icon appears at the top of your screen in your Menu Bar next to the time.
Finally click Apply at the bottom of the screen and you’ve now completed setting up a secure L2TP/IPSec connection that your VPN service can use.
Now you just need to connect your VPN to this secure tunnel. Just follow the instructions below to complete the setup.
2. Setup Your VPN Service For Sharing From Your Mac
- Firstly, make sure your VPN connection is switched on. If you haven’t got one, check out some of these VPN apps that are compatible with Macs.
- Click on the Apple logo in the top left of your Mac and select System Preferences.

- Click on Sharing.
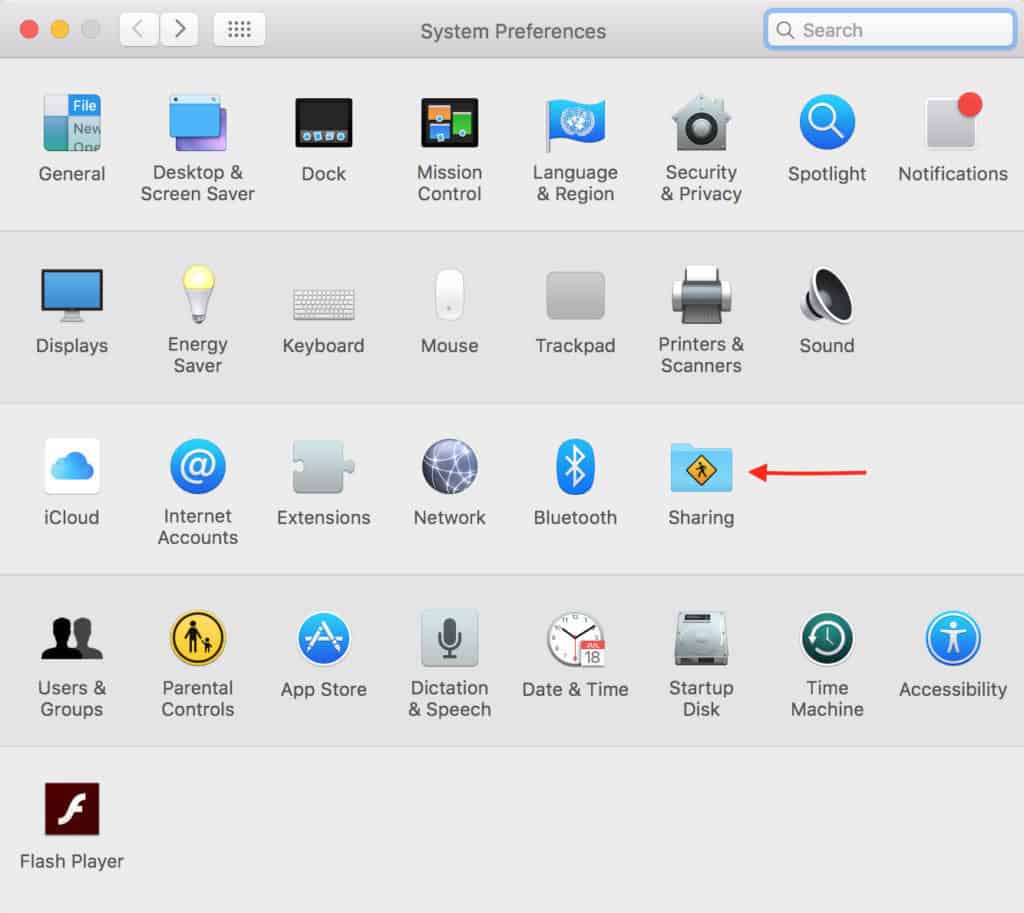
- Click on Internet Sharing in the options on the left but don’t actually tick the checkbox yet. In the configuration options on the right, under Share your connection from select VPN (L2TP). In the box To computers using select Wi-Fi.
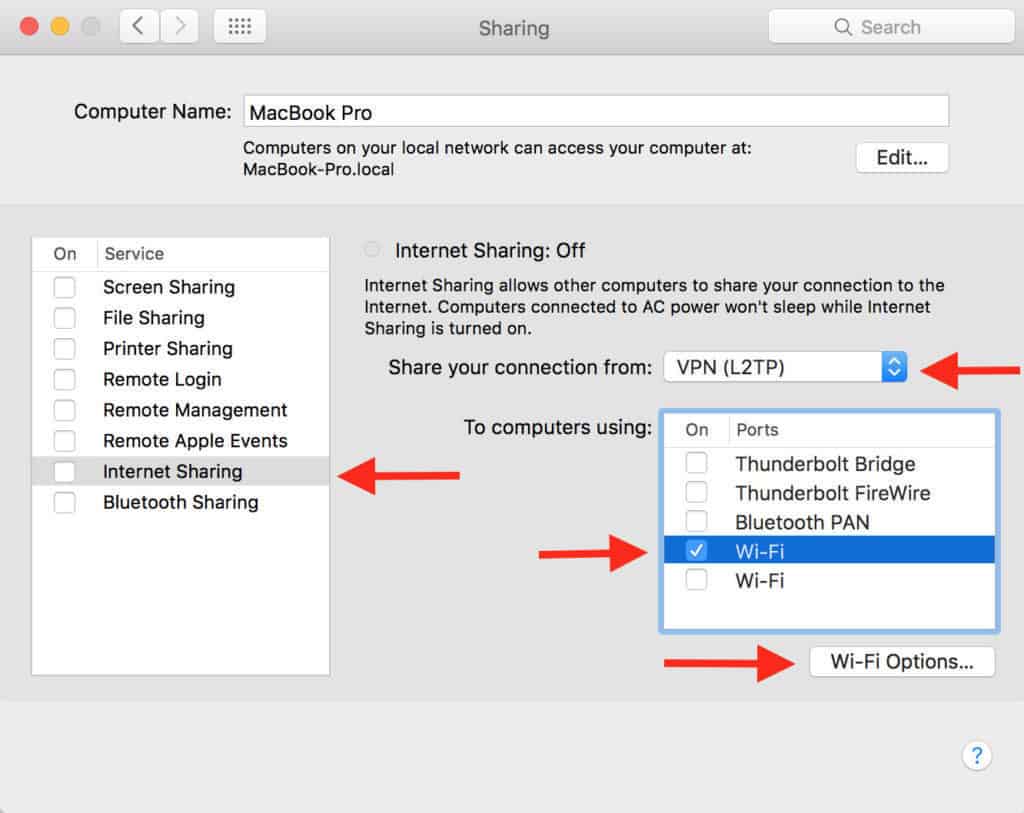
- When you click Wi-Fi Options you must then define a password that other users on the same WiFi network will need to use your VPN connection. Choose the Network Name of connection you want to share, leave the Channel on 11, change Security to WPA2 Personal and then create a Password that other users will need to connect to the VPN network.
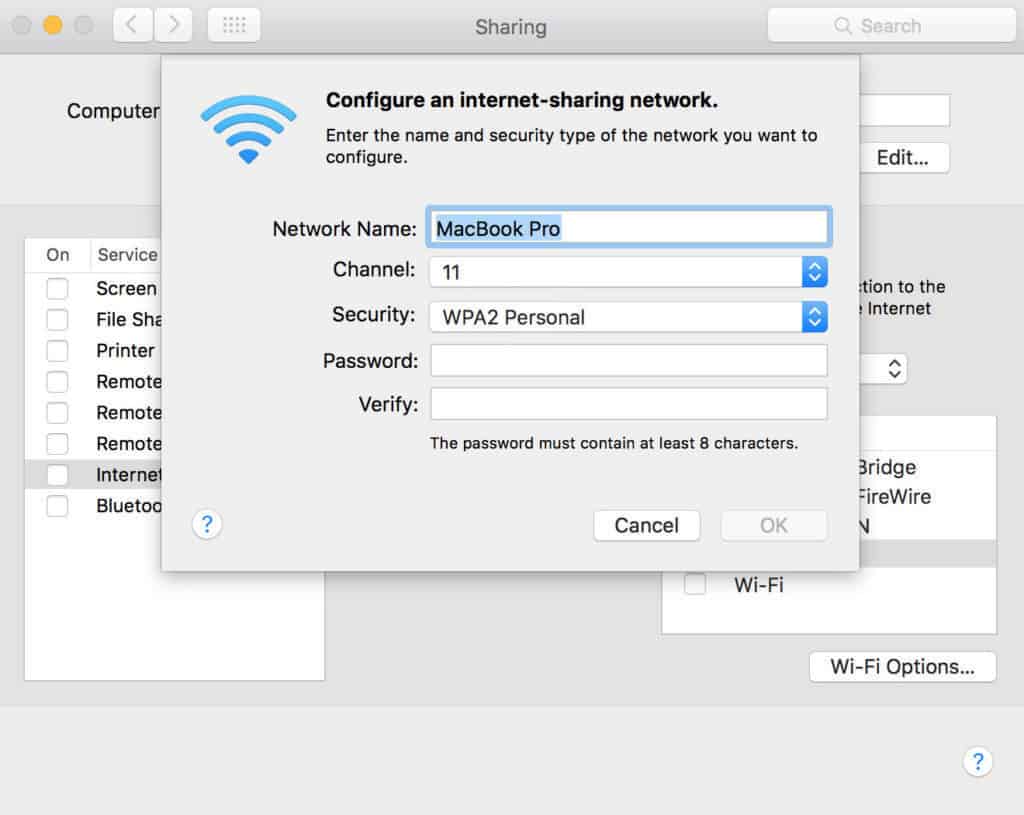
- Click OK and then check the box next to Internet Sharing to turn it on.
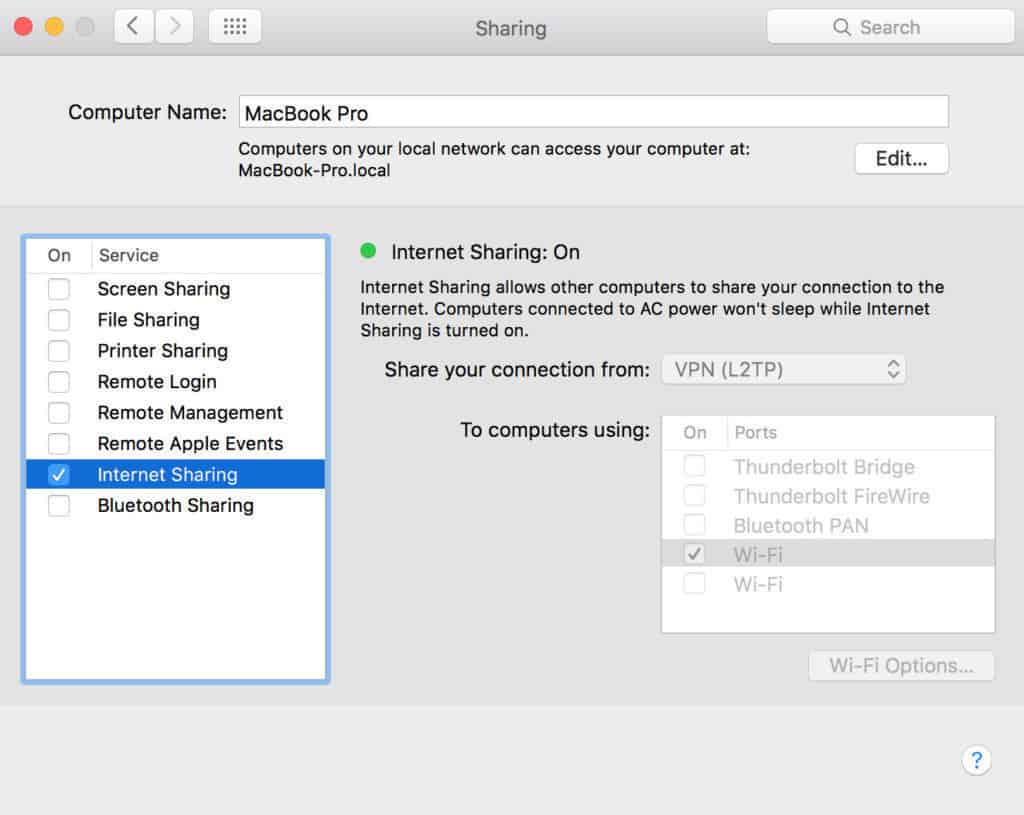
And that’s it, you’ve now setup a VPN network than any WiFi enabled device can use such as iPhone, iPad, Android device, PlayStation, XBox etc. All they need to do is connect to the Wi-Fi network you’ve enabled it for and enter the password that you setup earlier.
If at any time you want to deactivate the VPN, simply uncheck the Internet Sharing box. You can also disconnect the L2TP tunnel at any time by selecting it under System Preferences > Network and click Disconnect.
If you have any questions or problems setting up a VPN to be shareable on your Mac, let us know in the comments below.
If you found this tutorial useful, you might also find our guide to the best VPNs for Mac useful too.


