If you want to forget an old or unused WiFi network on your Mac, here we show you how to forget a WIFI network.
Forgetting old and unused WiFi networks prevents your Mac from automatically joining a network you don’t want to use.
Forgetting a wireless network also enables you to connect to it with a different password if it has changed.
Here we’ll show you all the ways to forget a WiFi network on a Mac including on Apple Silicon Macs and the latest version of macOS Sonoma.
You May Also Like:
Contents
How To Forget a WiFi Network on Ventura or Later
If you are using macOS Ventura or later including macOS Sonoma, follow these steps to forget any network:
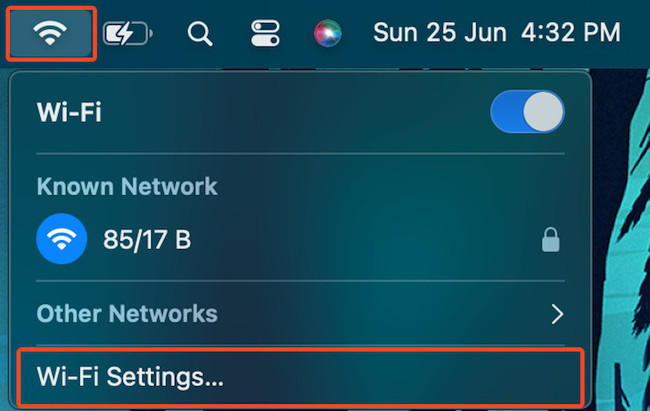
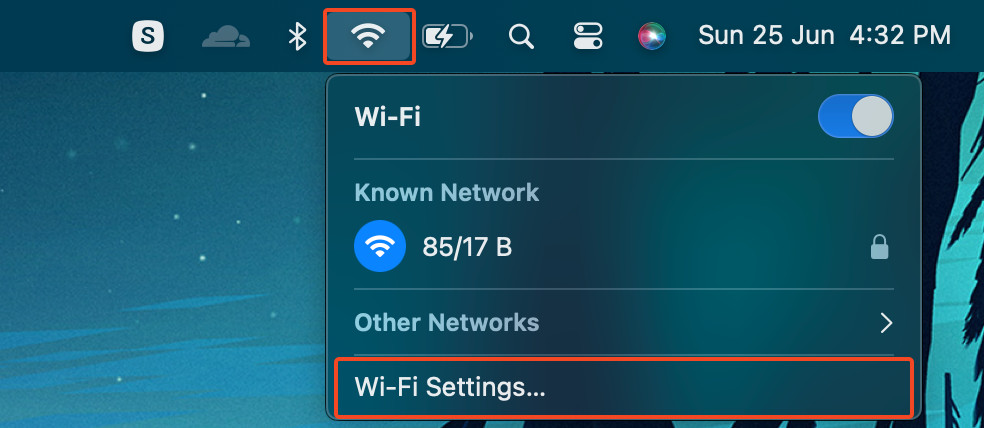
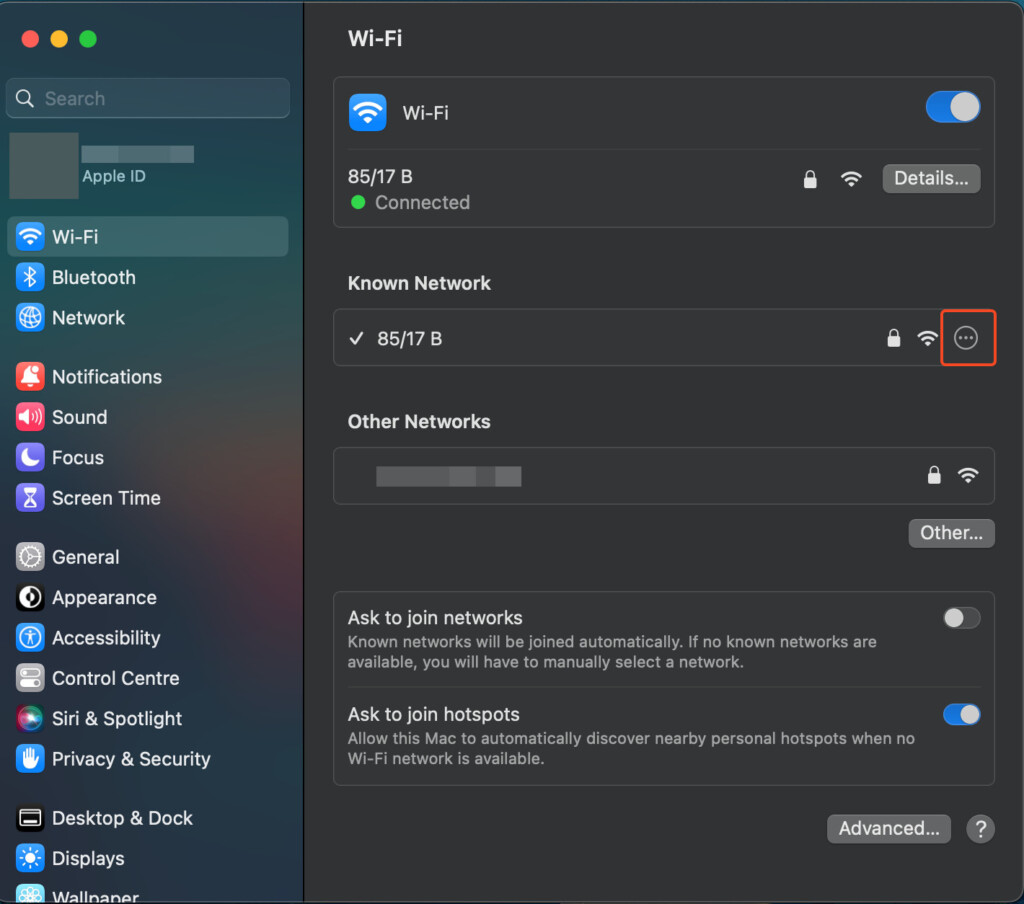
- Click on the WiFi icon in the menu bar and tap Wi-Fi Settings.
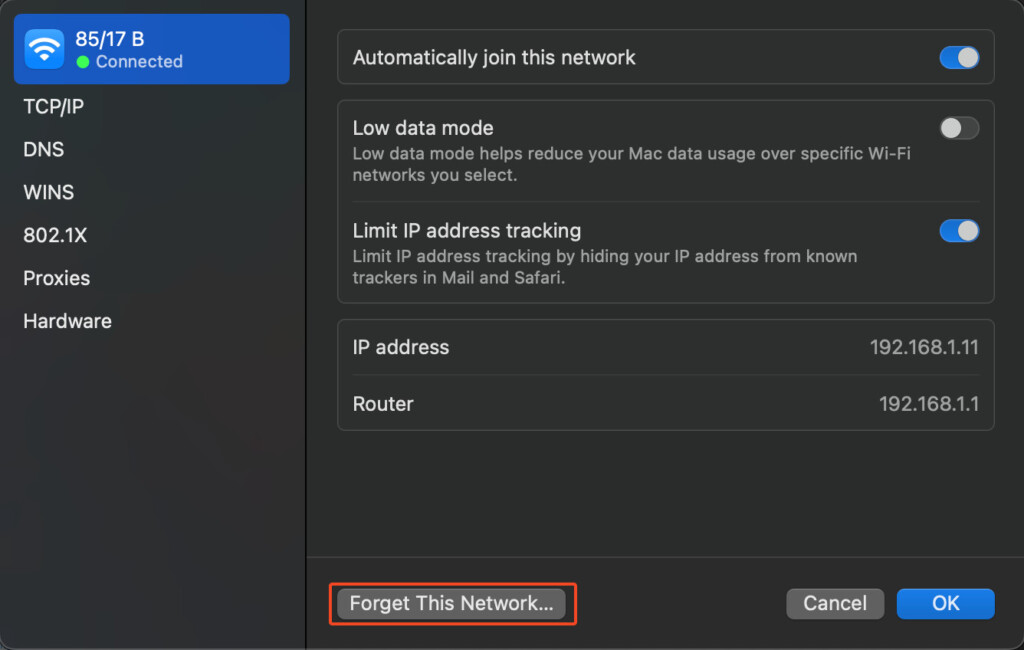
- To forget a network you are currently connected to, just hit Details on the right-hand side of the name of that network.
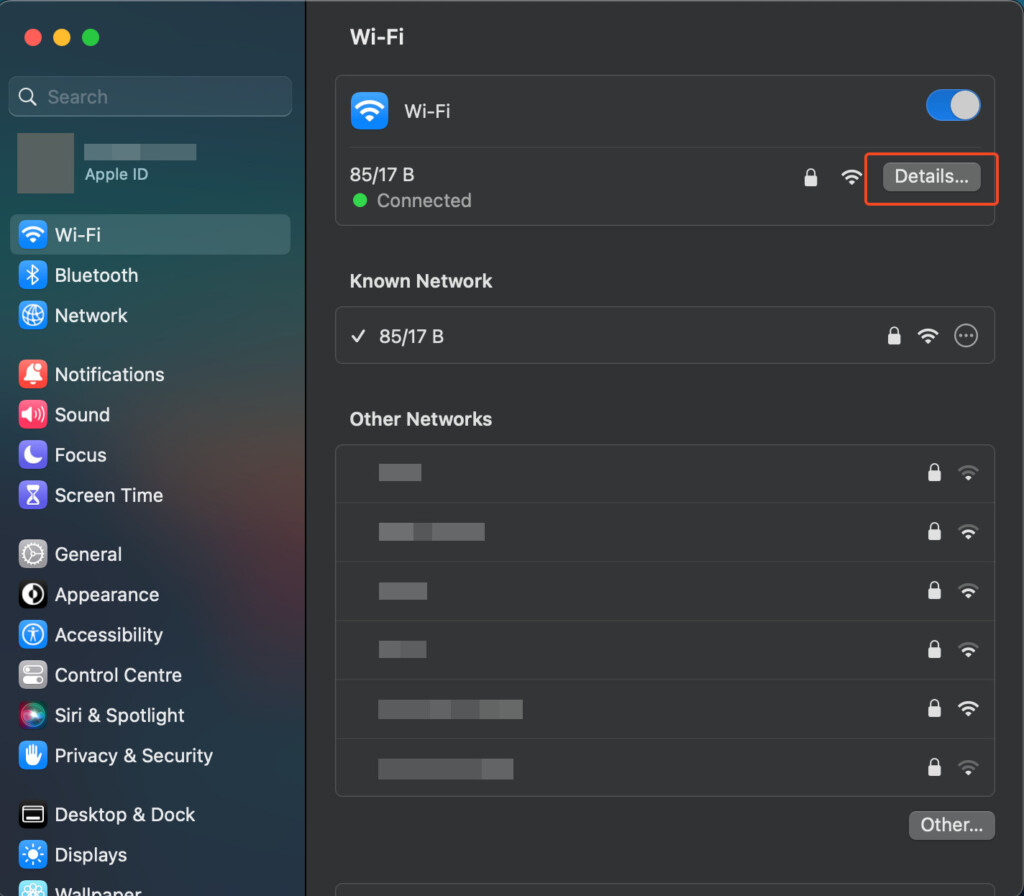
- Click on Forget This Network
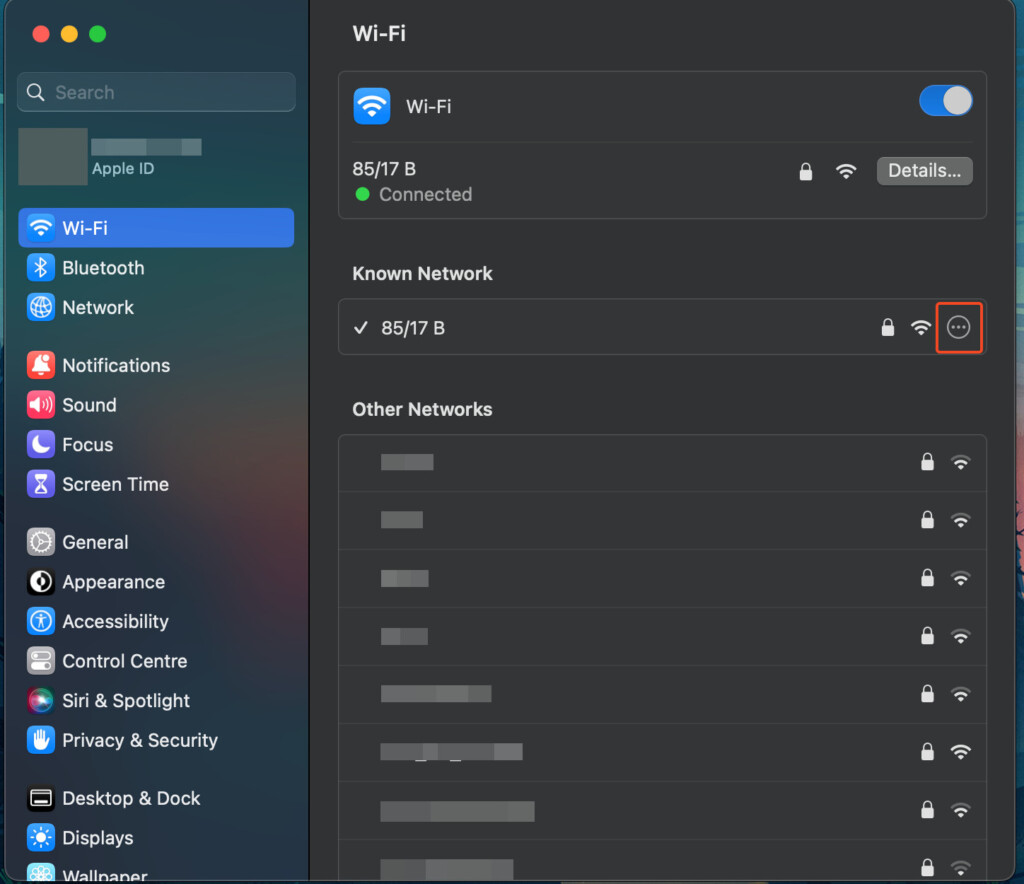
Alternatively, if you want to forget a network under Known Networks, do the following:
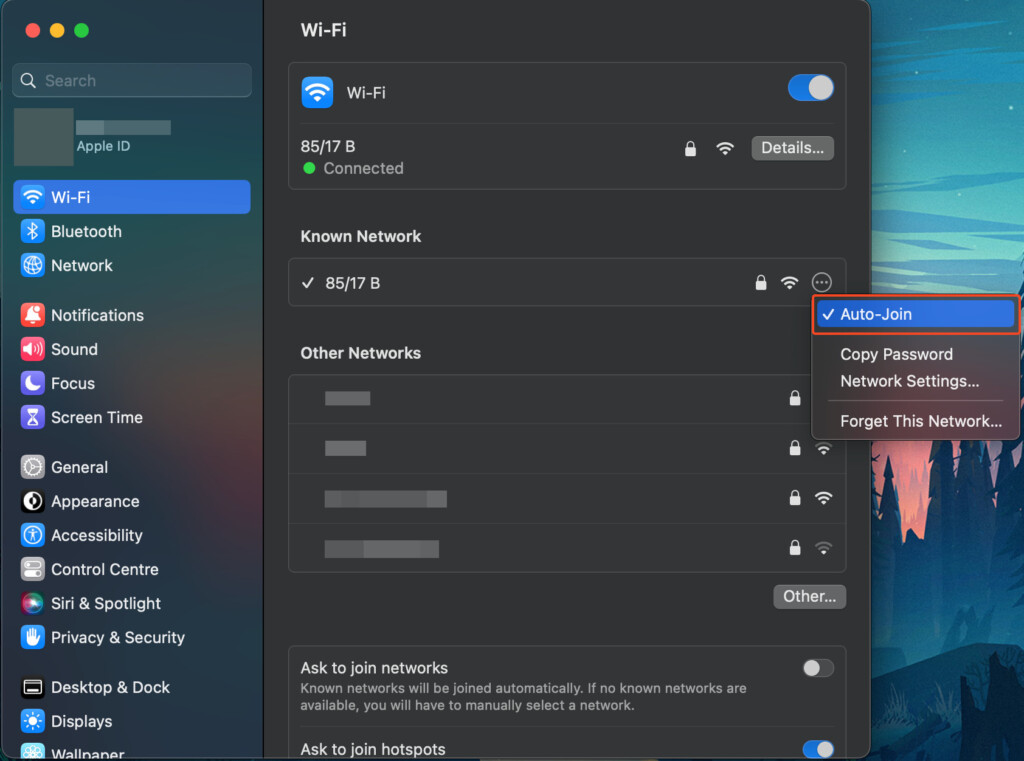
- In the Wi-Fi Settings screen, go to the Known Networks section and click the options button (three horizontal dots) to the right side of the network’s name.
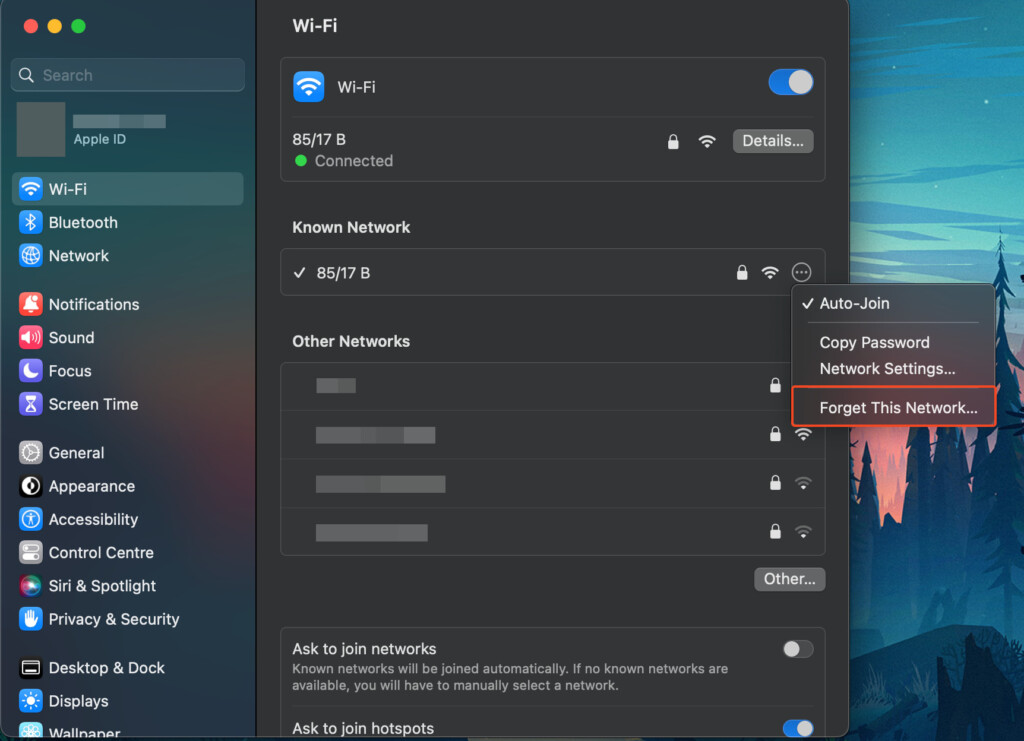
- Select Forget This Network to remove it from the list of known networks.
How To Forget a WiFi Network on Monterey or earlier
If you want to get rid of Wi-Fi networks on older version of macOS including macOS Monterey, Big Sur, Catalina or earlier, just follow these simple steps:
- Tap on the Apple icon on the top left side of your screen.
- Head into System Preferences/System Settings.
- From the options available, click on the Network option.
- Click on the lock icon in the bottom left of the open tab and enter your Mac’s password.
- Head into the Advanced options.
- Under the Wi-Fi section, select the network you want to forget on your MacBook.
- Hit the minus(-) button under the list of networks.
- Choose the Remove option in the dialogue that opens to forget the chosen network.
- Lastly, hit OK to close the list of networks and then tap Apply to confirm the removal.
Forgetting a WiFi Network Using Terminal
If you do not have access to the WiFi settings you can forget a WiFi network using Terminal by doing the following:
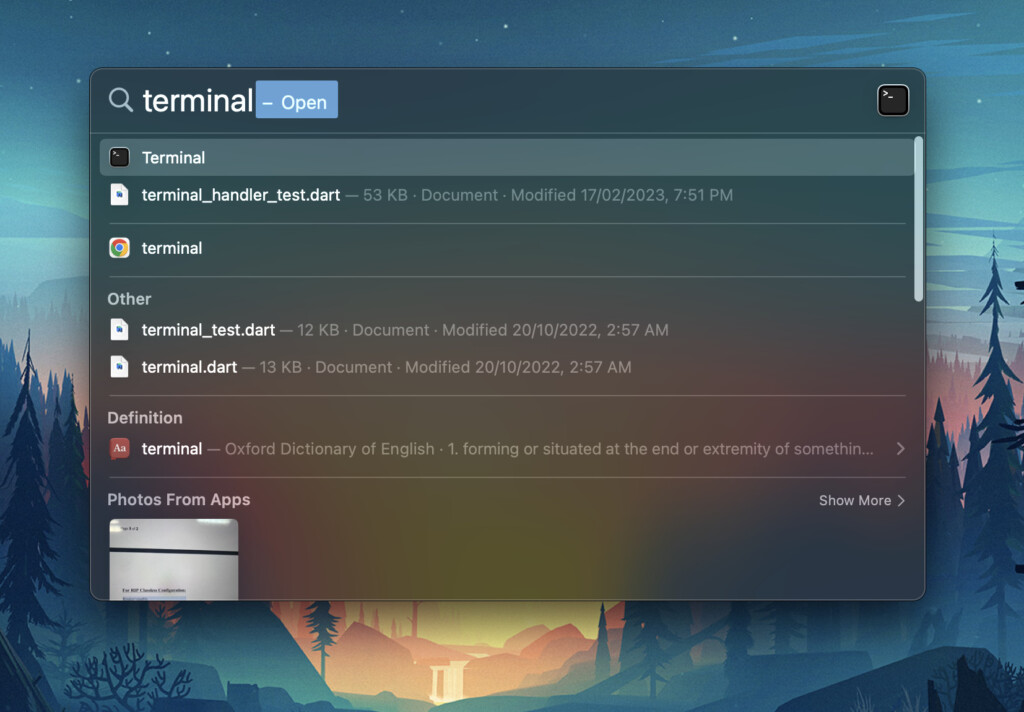
- Hit Command and Space-Bar and type in ‘Terminal’ in the dialogue that appears to access the Terminal.
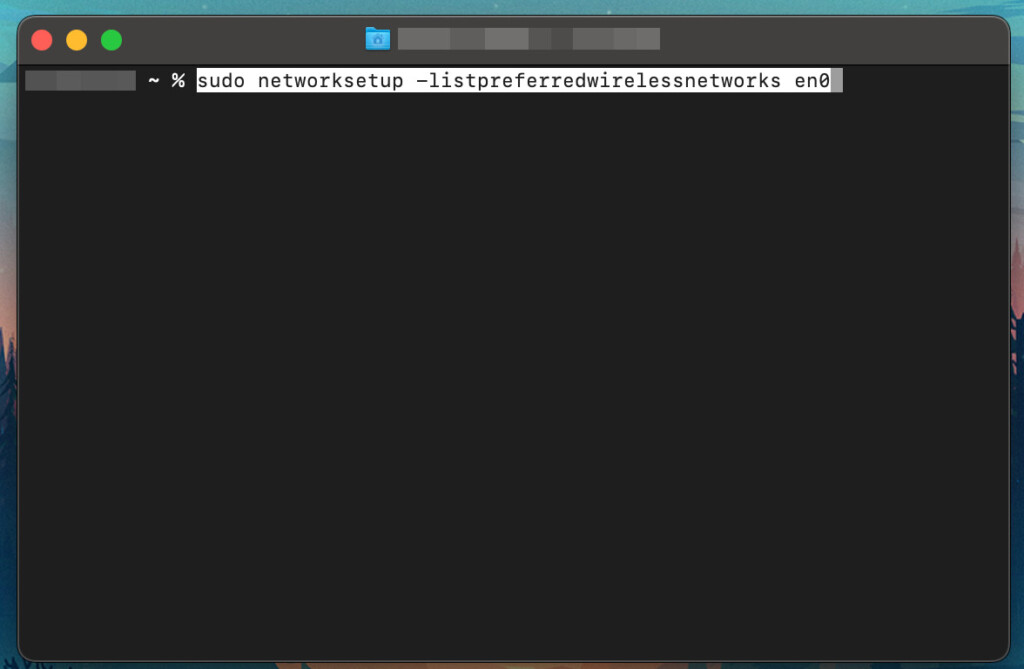
- Type in the command sudo networksetup -listpreferredwirelessnetworks en1 if you are on a Mac with wireless and ethernet connection ports.
- Alternatively, type in sudo networksetup -listpreferredwirelessnetworks en0 if you are on a newer Mac with only wireless connection capabilities and no ethernet port.
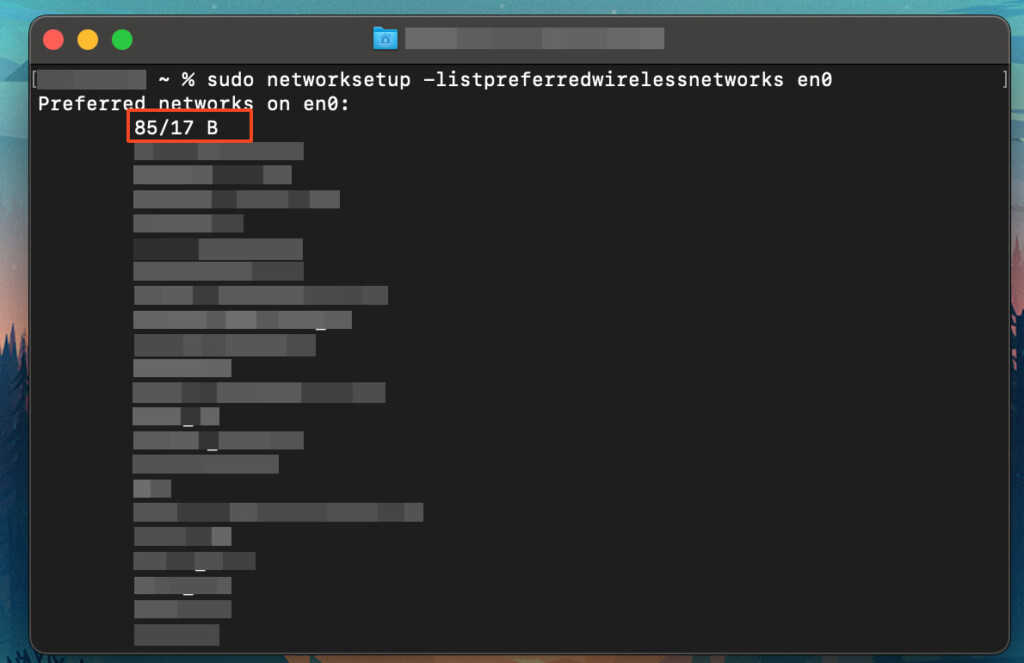
This command will allow you to see a list of all the preferred networks available.
- Once you have chosen the network you want to remove from your device, copy its name.
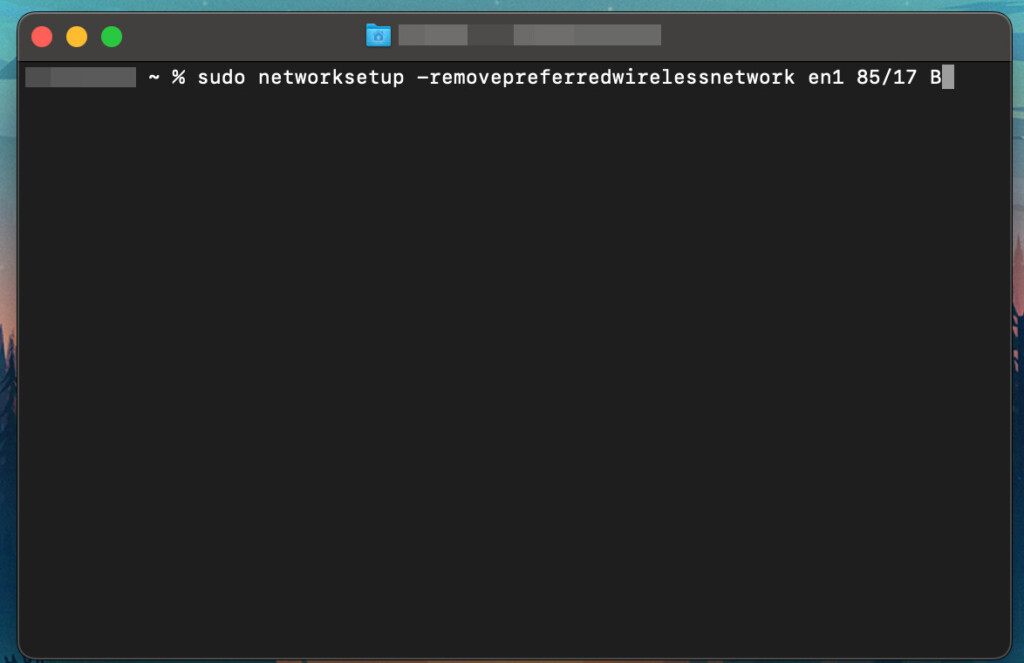
- Now, type in the following command sudo networksetup -removepreferredwirelessnetwork en1 [WiFi to be removed] and replace the [WiFi to be removed] part with the WiFi network name you copied in Step 3.
Forgetting a WiFi Network on a Mac in Recovery Mode
If you want to completely remove your WiFi network information after you have done a factory reset of a Mac, here is how to do so:
- If your Mac is still displaying WiFi networks in recovery mode, turn off your MacBook.
- Immediately press the Option, Command, P, and R keys for about 20 seconds.
- Let go of the keys once you hear the startup sound.
- This will reset and PRAM/NVRAM of your MacBook and remove any data left on your device.
Turning Off Auto-Join of WiFi Networks
If you want to stop your Mac automatically joining WiFi networks that are within range, you need to deactivate auto-join of WiFi networks.
To turn off the auto-join feature for WiFi networks, head into the Wi-Fi Settings by following the previously mentioned steps depending on your version of macOS.
Once you’re in the Wi-Fi Settings menu, follow these steps:
- Tap on the options button (three horizontal dots) on the right side of your chosen WiFi network.
- Now simply toggle Auto-Join and remove the tick icon to stop your device from automatically joining that network.