
NinjaTrader remains one of the most popular futures and forex trading platforms, but there’s still one major drawback for Mac users – it isn’t available as a native macOS application.
Unlike more modern (and in our opinion much better) platforms such as TradingView, which now offer an excellent Mac desktop app and browser experience, NinjaTrader is still built exclusively for Windows because it relies on Microsoft’s .NET Framework and other Windows-specific technologies.
The good news is that it’s still perfectly possible to use NinjaTrader on a Mac in 2026, including the latest Apple Silicon Macs (M1, M2, M3, M4 and M5).
Depending on how you trade, there are now three different ways to use NinjaTrader on macOS:
- Run the full Windows desktop version in a virtual machine (best for most users)
- Use NinjaTrader Web in your browser (best for manual trading)
- Run NinjaTrader on a Windows VPS (best for automated trading)
Here’s how each option works.
Option 1: Install Windows With Parallels (Recommended)
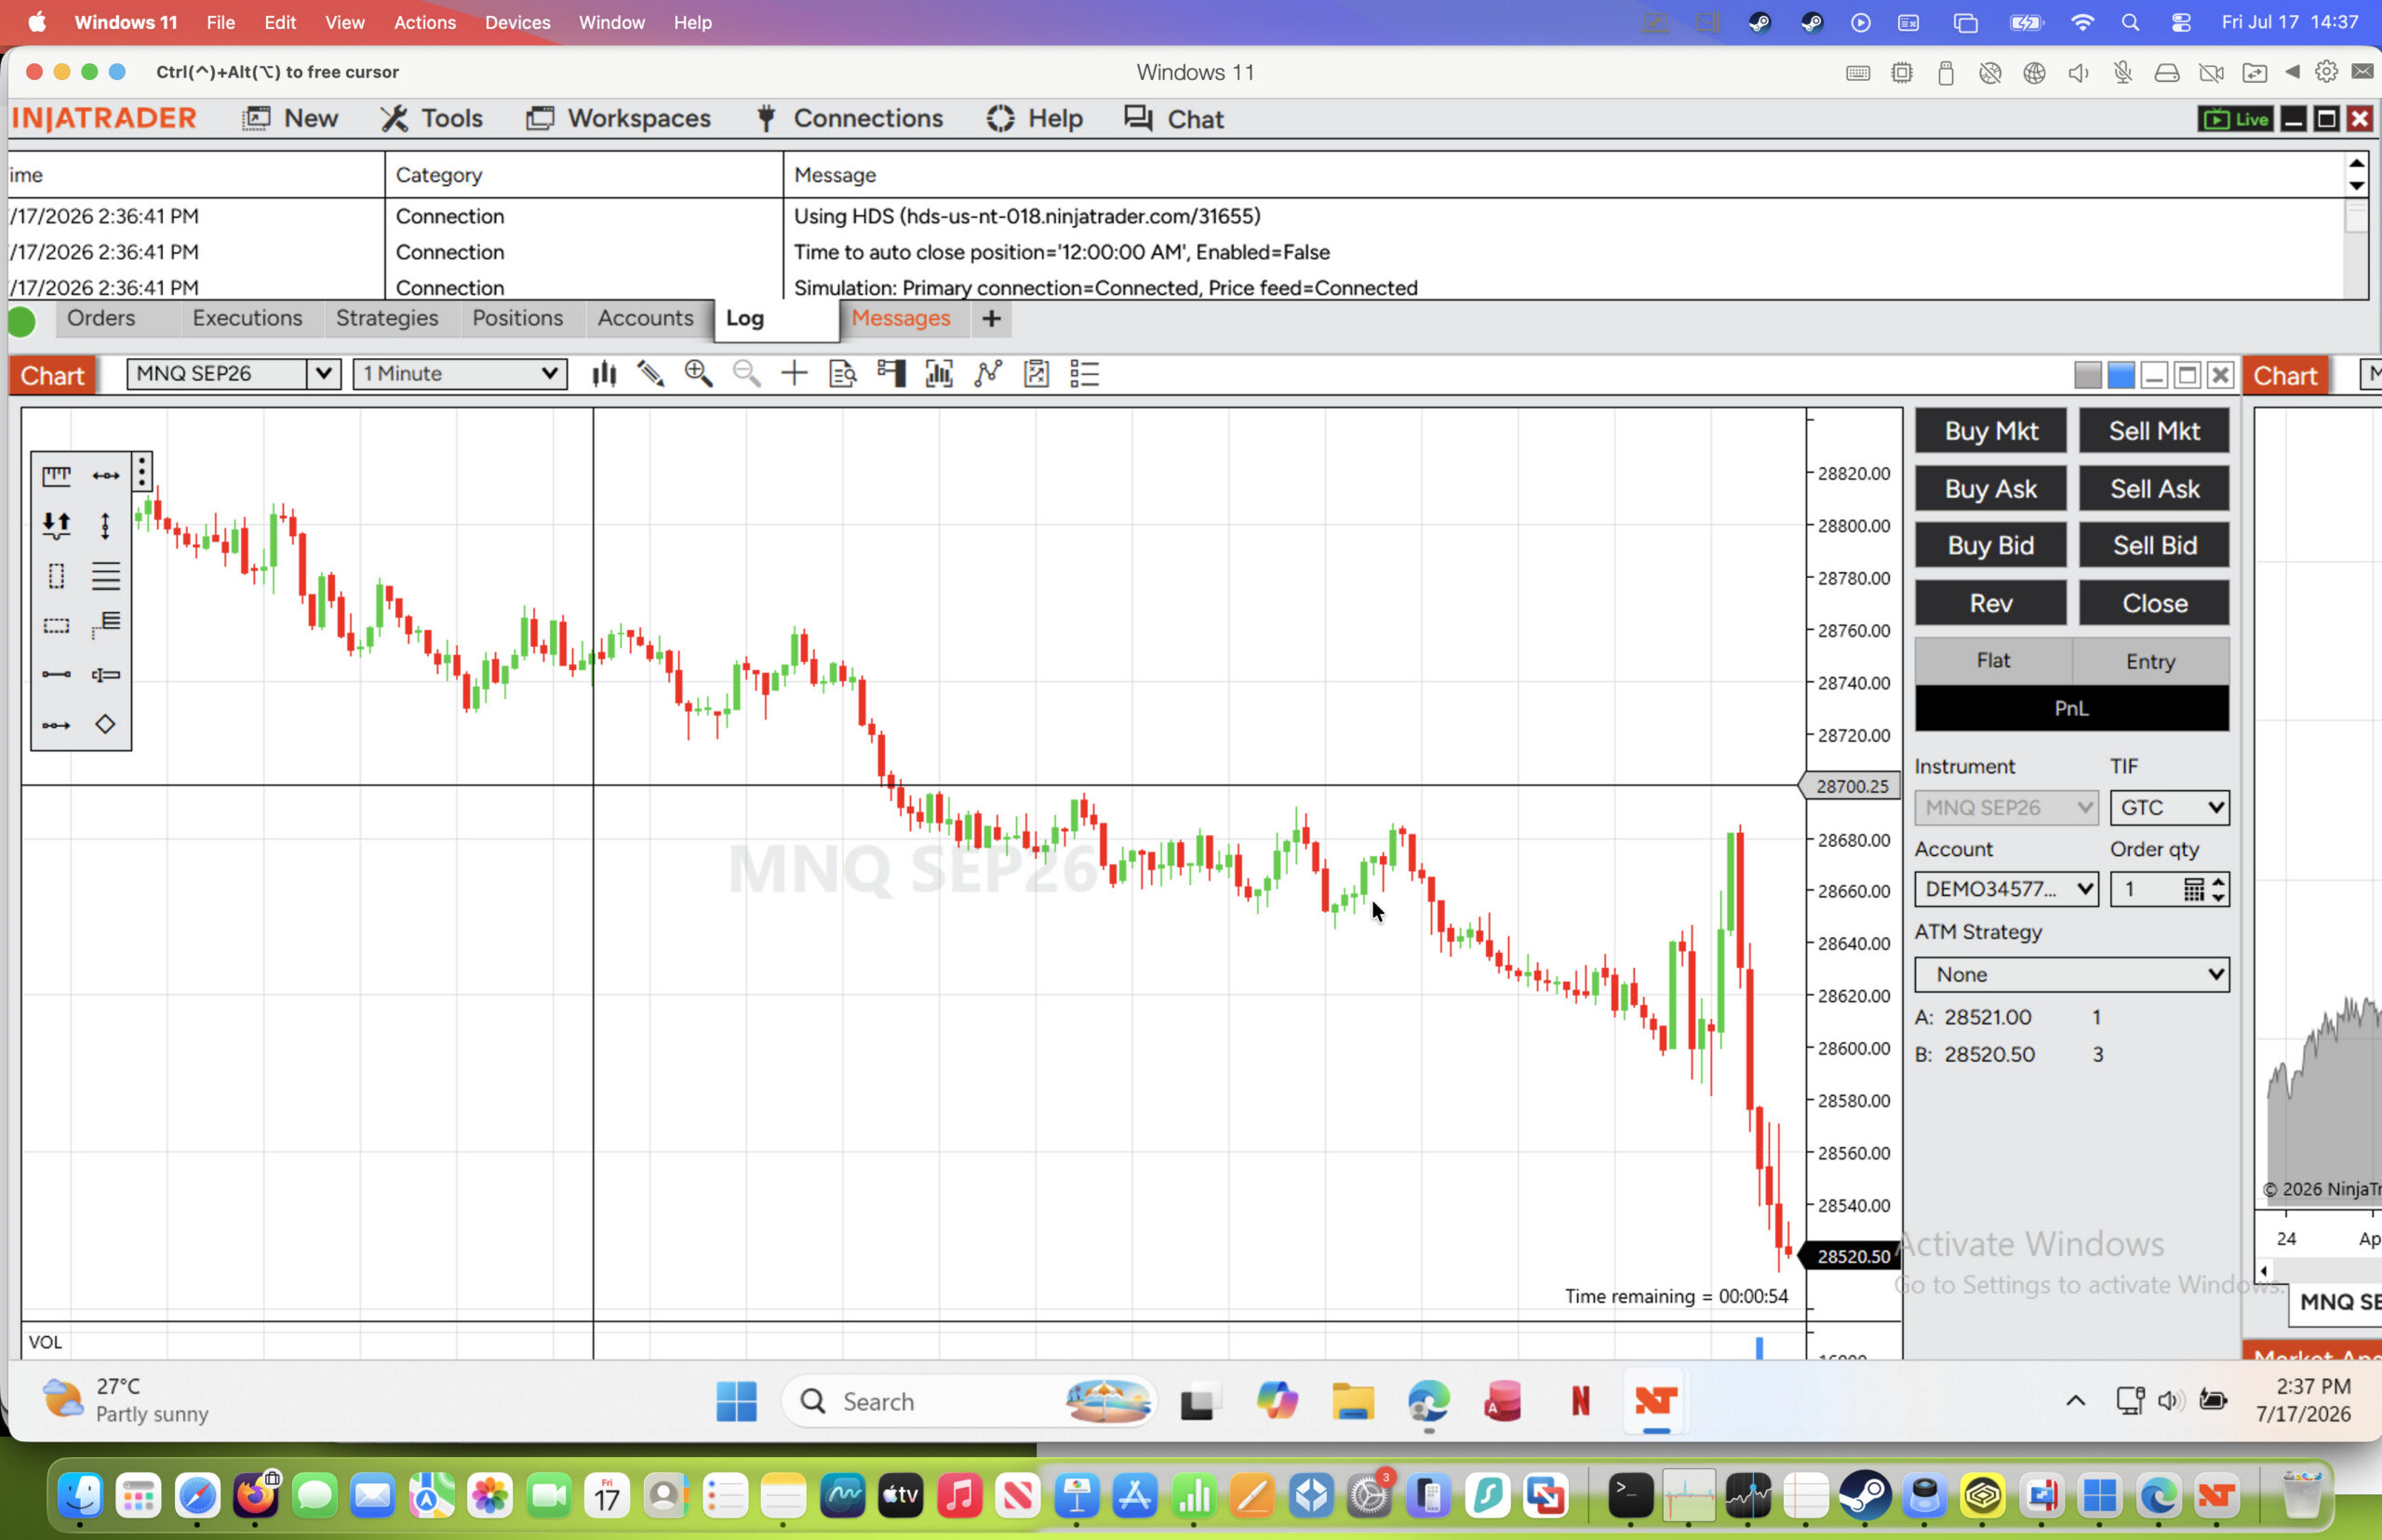
For most traders, the easiest way to run the full NinjaTrader desktop platform is by installing Windows 11 inside macOS using a virtual machine.
This lets you run Windows and macOS side-by-side without restarting your Mac.
In our testing, Parallels Desktop continues to provide the smoothest experience for NinjaTrader, especially on Apple Silicon Macs.
Parallels can automatically download and install Windows 11 on your Mac in around 15 minutes, after which NinjaTrader installs exactly as it would on a Windows PC.
Once installed you can:
- Trade live
- Paper trade
- Use NinjaScript
- Install third-party indicators
- Run custom strategies
- Connect supported brokers
Because Windows runs in its own virtual machine, you can still switch back to macOS instantly whenever you need.
You can read our full review of Parallels for more.
How to install NinjaTrader using Parallels
- Install Parallels Desktop – you can try a free trial first.
- Let Parallels automatically download Windows 11.
- Start Windows.
- Create or log into your NinjaTrader account.
- Download the Windows installer.
- Install NinjaTrader normally.
Within a few minutes you’ll have the full desktop version running on your Mac as you can see in our installation tutorial below.
Performance tip
If you notice chart lag or slow loading, disable Mac folder sharing inside Parallels:
Configure > Options > Sharing > Disable “Share Mac”.
This prevents Windows constantly syncing macOS folders in the background and can noticeably improve performance.
Option 2: Use NinjaTrader Web
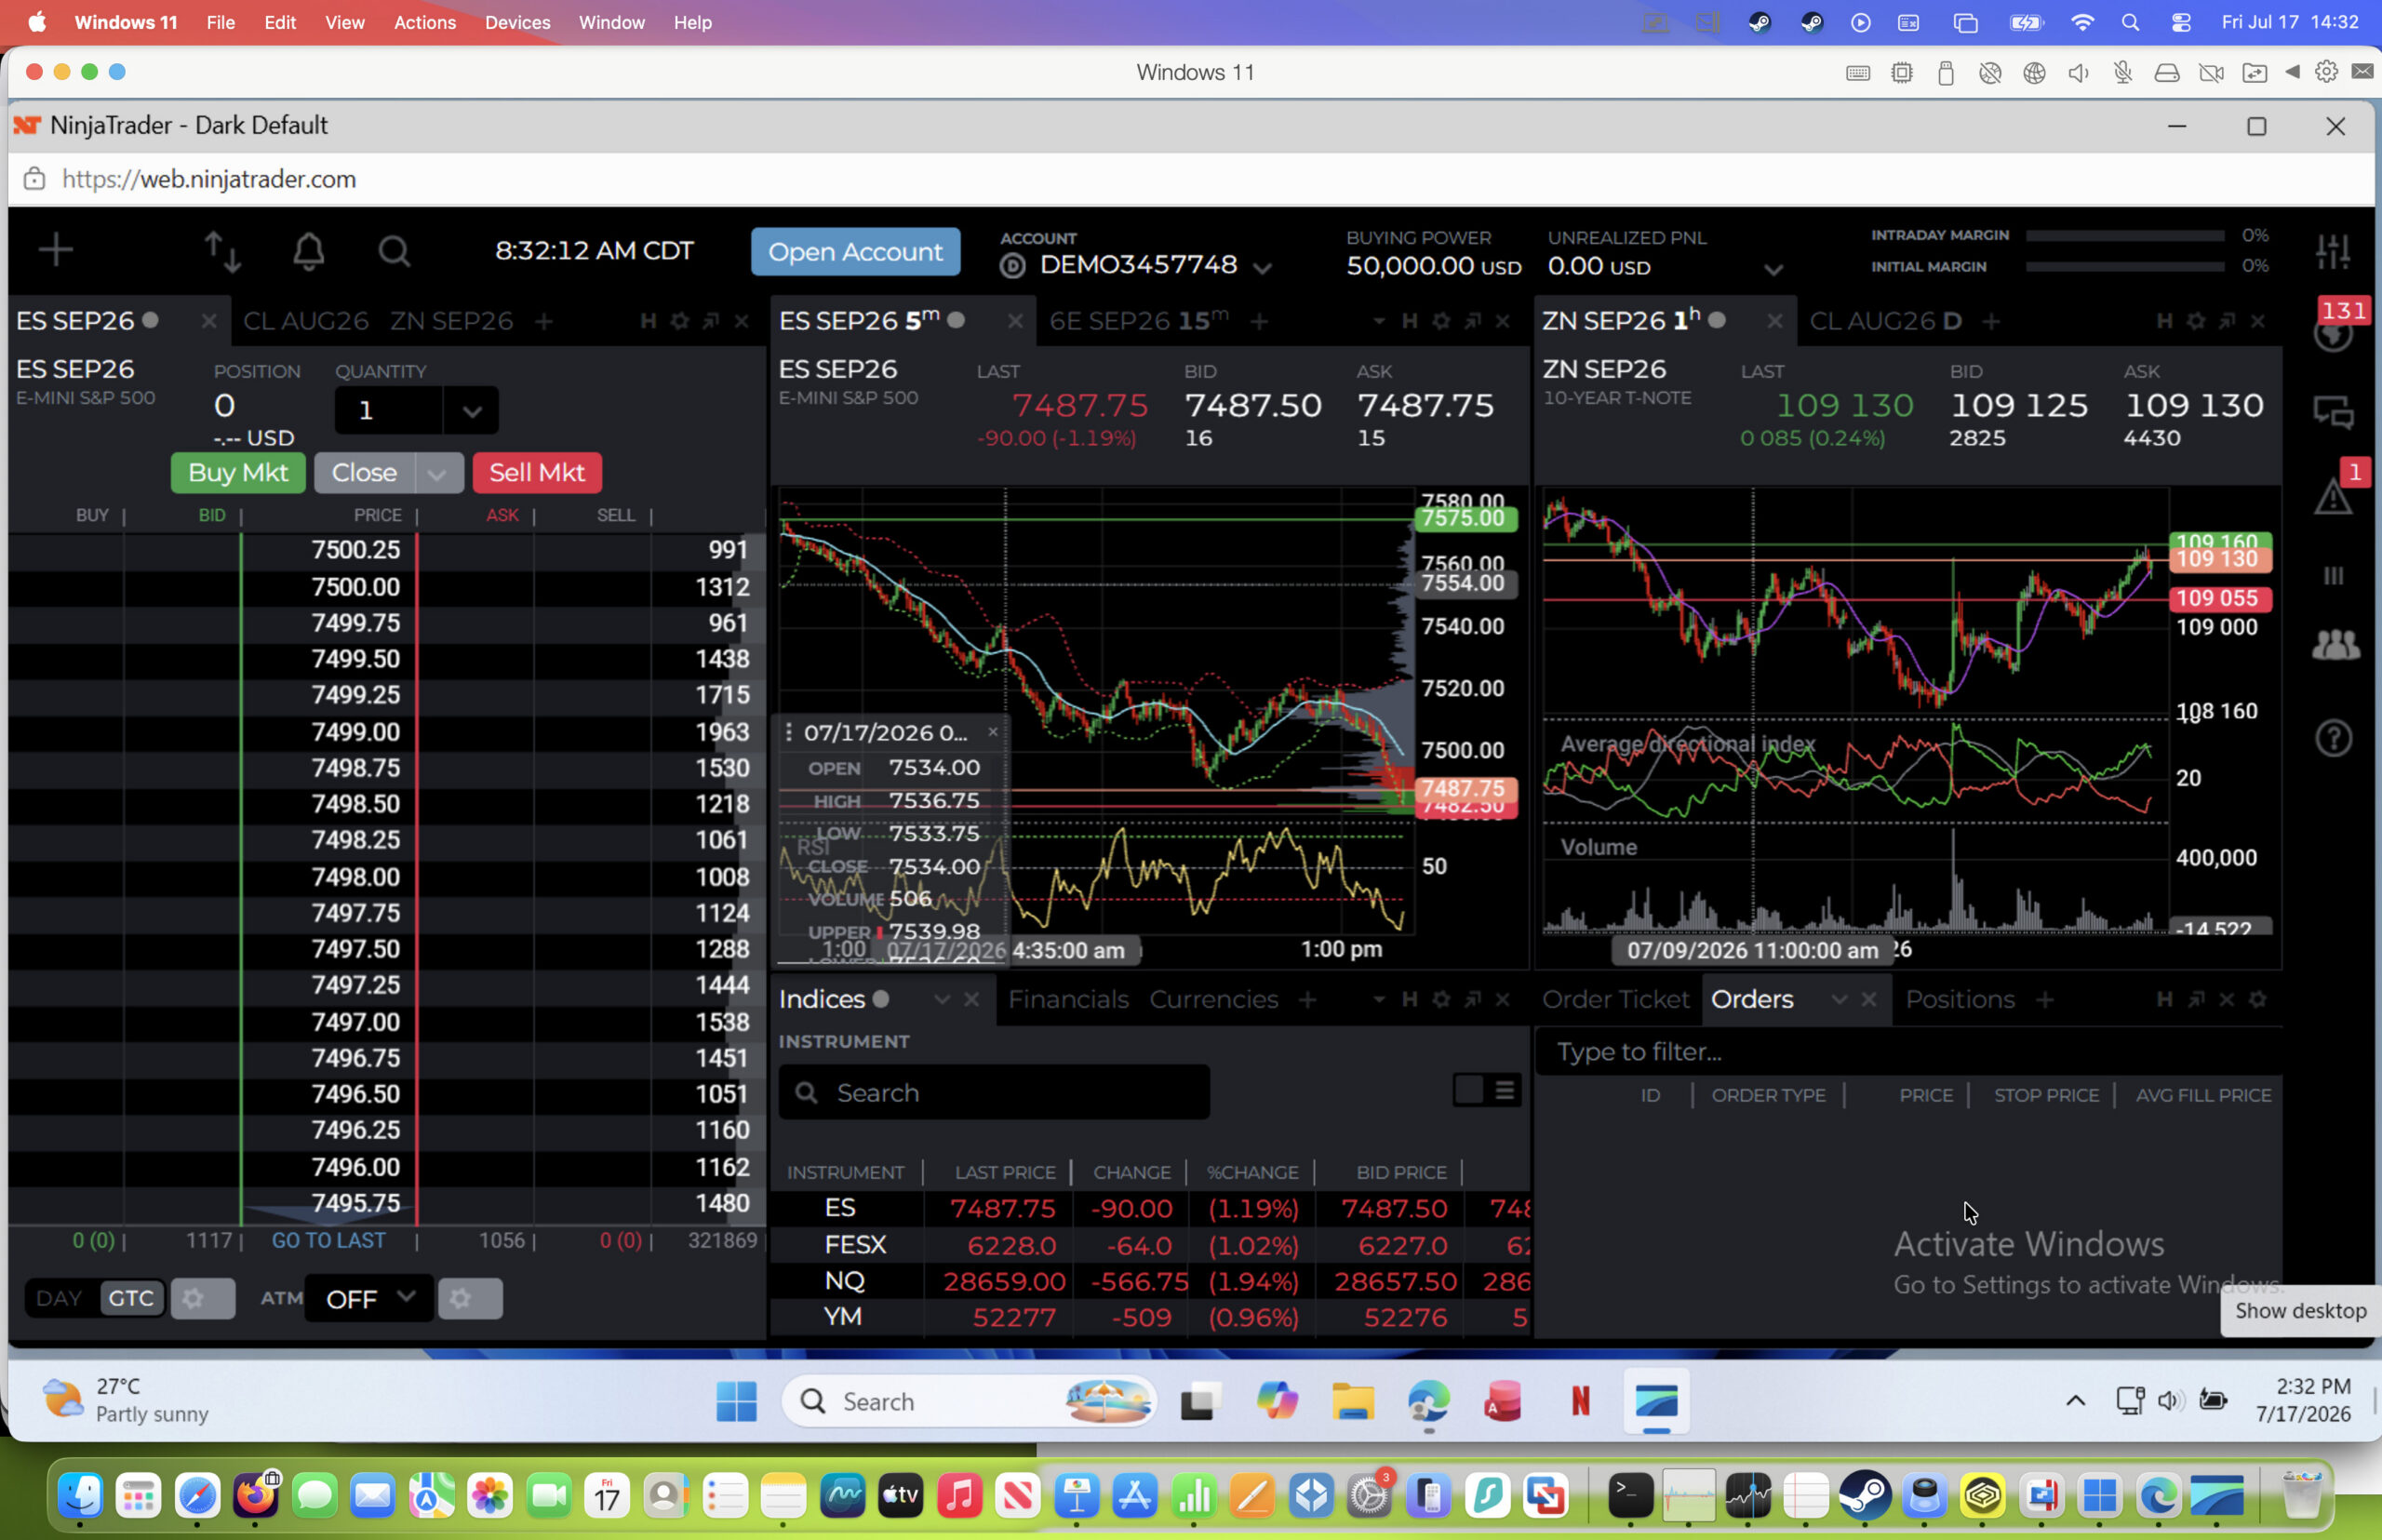
If you only need to monitor markets, analyse charts and place manual trades, you may not need Windows at all.
NinjaTrader now offers a browser-based version that runs directly in Safari, Chrome or Edge on macOS.
This is by far the simplest option because there’s nothing to install.
The web platform includes many of the core trading features available in the desktop version, making it ideal for discretionary traders.
However, it doesn’t support everything available in the Windows application.
You won’t be able to use features such as:
- NinjaScript development
- Advanced strategy automation
- Some third-party add-ons
- Full desktop customisation
If those features are important to you, you’ll still need the Windows desktop version.
Option 3: Run NinjaTrader on a Windows VPS
If you run automated strategies or trade around the clock, a Windows VPS can often be a better solution than leaving your Mac switched on continuously.
A VPS is simply a Windows computer running in a secure data centre.
You connect to it remotely from your Mac using Microsoft’s free Windows app.
Advantages include:
- 24/7 uptime
- Lower latency
- No interruptions if your Mac sleeps
- Better reliability for automated strategies
- Reduced strain on your Mac
Once connected, you simply install NinjaTrader on the VPS exactly as you would on a normal Windows PC.
Can You Run NinjaTrader Using CrossOver?
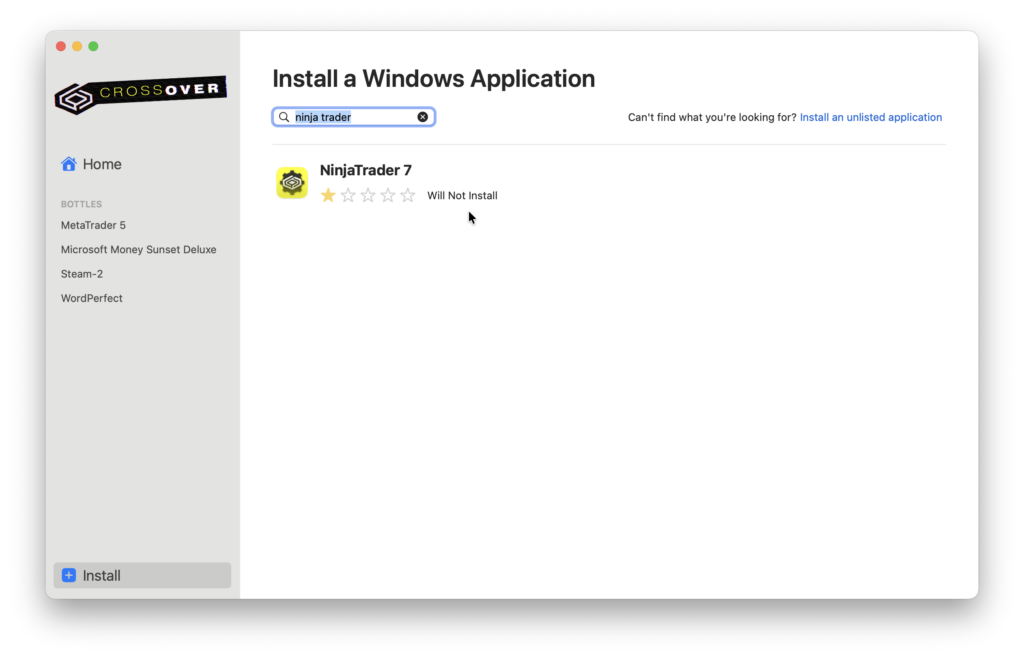
Unfortunately, no. Although CrossOver works brilliantly for many Windows applications, it isn’t suitable for NinjaTrader.
NinjaTrader depends heavily on Windows-specific .NET components and system libraries that CrossOver cannot fully replicate.
In our testing, the application either fails to install correctly or doesn’t run reliably enough for live trading.
As you can see above, the most recent version of Ninja Trader available on Crossover is NinjaTrader 7 and the Crossover dashboard confirms that it does not install.
For that reason, we recommend using Parallels or a Windows VPS instead.
Can You Run NinjaTrader on Apple Silicon Macs?
Yes. NinjaTrader runs well on Apple Silicon Macs including M1 to M5 models.
When using Parallels, Windows 11 for ARM translates the Intel version of NinjaTrader automatically, so no additional configuration is required.
Performance is generally excellent on modern Apple Silicon Macs, particularly models with 16GB of RAM or more.
FAQ
Is there a native NinjaTrader app for Mac?
No. NinjaTrader is only available as a Windows desktop application, although the company now also offers a browser-based web platform.
Does NinjaTrader work on the latest versions of macOS?
Yes. NinjaTrader works on the latest versions of macOS when run inside Windows using Parallels Desktop or accessed through the web platform.
Can I use NinjaTrader without installing Windows?
Yes, if you’re happy using NinjaTrader Web. However, you’ll need Windows for NinjaScript, automated strategies, many third-party indicators and the full desktop feature set.
Is Parallels better than VMware Fusion?
Both will run NinjaTrader, but Parallels is considerably easier to set up, offers better graphics acceleration and generally provides a smoother experience on Apple Silicon Macs. VMware Fusion remains a good free alternative for personal use if you don’t mind a more manual setup.
Can I run NinjaTrader with CrossOver?
No. NinjaTrader’s Windows dependencies mean CrossOver isn’t currently a reliable way to run the platform.