If you want to record the screen on a Mac with the sound from the video, here we show you how to screen record on a Mac with internal audio.
Although it’s easy to record a screen on a Mac and capture external audio from your Mac’s microphone, it’s actually not so easy to record the internal audio when recording the screen on a Mac.
You May Also Like:
To capture the sound from a video, game or application on your Mac while screen recording you need to use QuickTime plus the Blackhole plugin.
The screen recording tool and QuickTime in macOS can only capture external audio via the microphone.
However, you can make QuickTime also record your Mac’s internal audio with the Blackhole plugin which is by far the quickest and easiest way to record the internal sound on a Mac during a screen recording for free.
Follow these instructions to record the screen on a Mac with the sound.
- Make sure that QuickTime Player is closed on your Mac. First you need to download and install the Blackhole audio plugin. Scroll down the page to “Download” where it indicates that the Blackhole plugin works on both Intel and Apple Silicon Macs so it’s the same download for both.
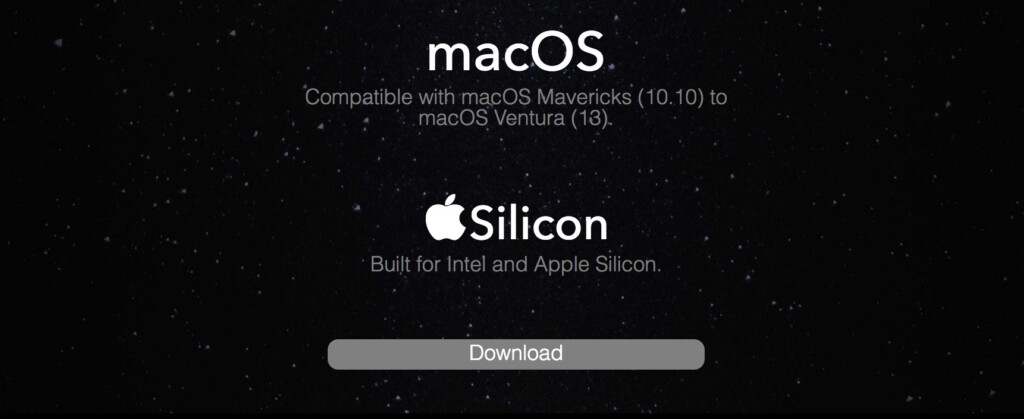
- You’ll need to enter your name and email address to receive the download link. Note that although there is also a Github page for the Blackhole plugin it will just take you straight to the Blackhole audio plugin website anyway when you try to download it.
- When you receive the email you will get the option to download three versions: 2 channel, 16 channel and the 64 channel version. Download the 16 channel version of Blackhole on your Mac. Double click on the downloaded file to run the installer. When the Blackhole plugin installer has finished, you can drag the installer to the Trash if you want.
- On your Mac, go to the Spotlight search tool in the top right of your Mac and search for “Audio Midi Setup”. You’ll see a list of audio plugins and devices that are installed on your Mac. You’ll see the Blackhole plugin now listed there on the left.
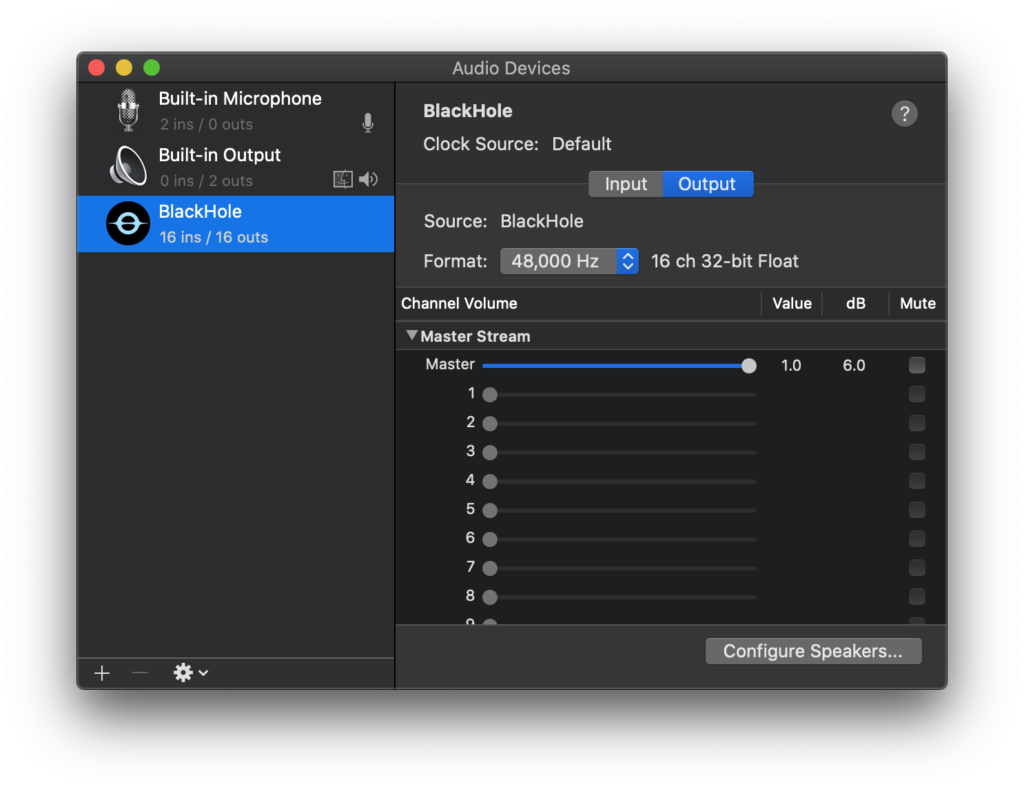
- In the bottom left of the Audio Devices list, click on the “+” symbol and in the pop-up menu that appears, select “Create Aggregate Device” and save it as “QuickTime Input”. When it’s created click on it and select check the box next to “Blackhole 16 ch”. This will allow QuickTime to use Blackhole to record your internal audio. If you also want to record your own voice via your Mac’s external microphone check the box next to “Built-in Microphone”.
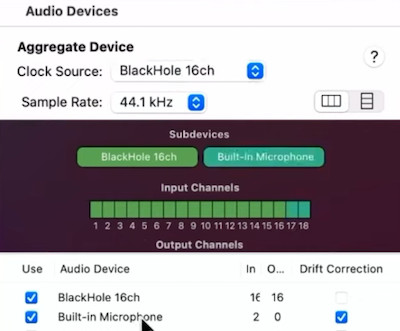
- Go back to the bottom left corner of the Audio Devices list and click on the “+” symbol again and select “Create Multi-Output Device” and save it as “Screen recording audio”. Make sure that you check the boxes “Built-in output” first and then “Blackhole 13ch” second.
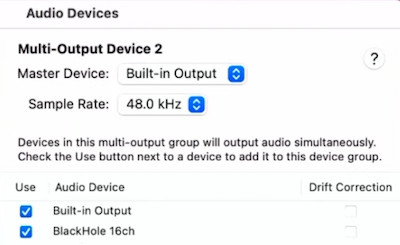
You’ve now configured the Blackhole plugin and can close the Audio Midi Setup windows
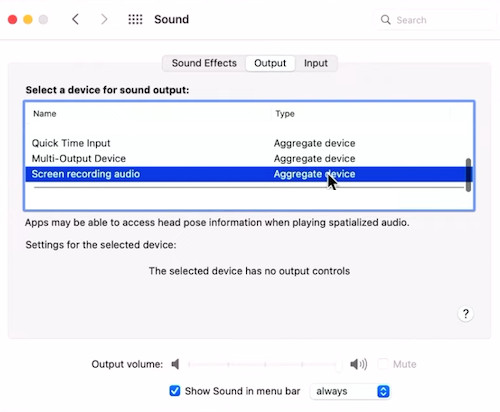
- Then go the Apple logo in the top left of your screen and select System Preferences > Sound. In the Output tab, click on Screen recording audio. You can then close the Sound preferences, as this setting will be saved automatically.
- Finally, open QuickTime Player on your Mac. If you can’t find it go to the Spotlight search magnifying glass in the top right of your Mac’s screen and search for “QuickTime”.

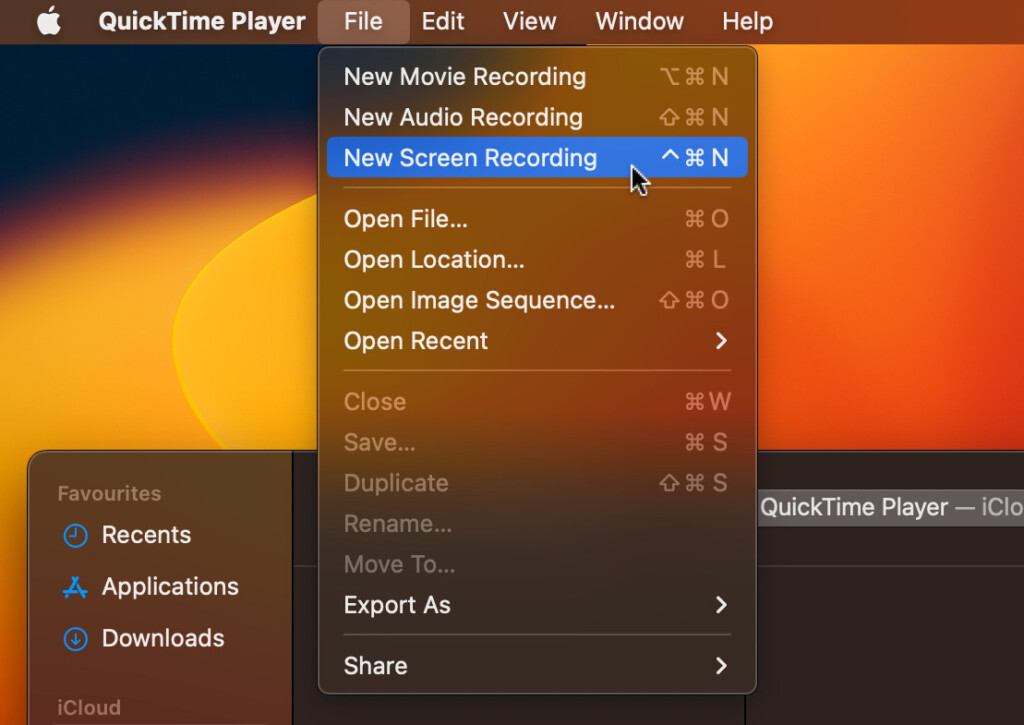
- When QuickTime is open, go to the File menu at the top of the screen and select New Screen Recording.
- In the screen recording tool that appears select Options and then make sure there is a tick next to QuickTime Input.
- Click Record and QuickTime will now record your Mac’s internal audio while screen recording.
If at anytime you want to stop QuickTime recording the internal audio on your Mac, you simply go back to the Sound settings and in the Output deselect the Screen recording audio that you selected earlier and change it back to Internal Speakers.
If you find that QuickTime will not record the Mac’s internal audio in stereo while screen recording, try downloading the 2 channel Blackhole plugin and repeat this tutorial but selecting “Blackhole 2ch” in the Audio Output instead of the 16 channel option.
If you experience sound distortion during the recording, go back to the Audio Devices settings and check the Drift Connection box.


