

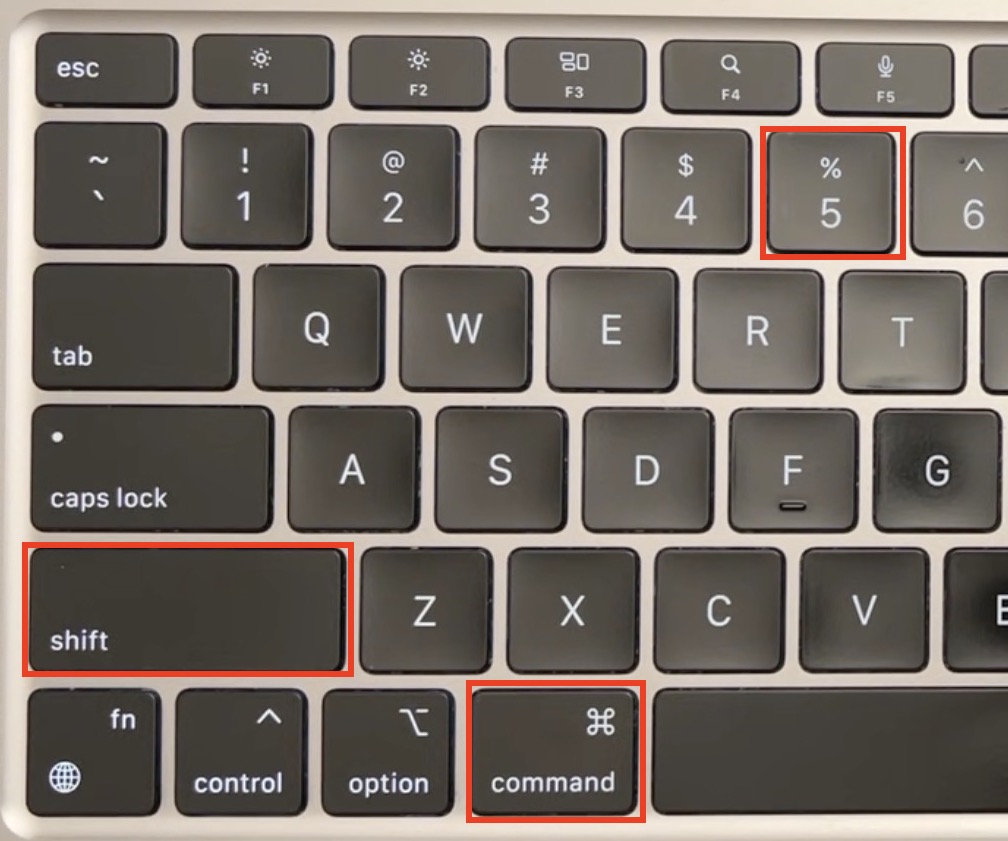
To screen record on a Mac, press Shift + Command + 5, choose Record Entire Screen or Record Selected Portion, then click Record.
When you’re finished, click the Stop button in the menu bar or press Command + Control + Esc.
macOS includes a free built-in screen recorder that’s integrated into the screenshot tool and works on all modern Macs including MacBook Air, MacBook Pro, iMac, Mac mini and Mac Studio.
Once recorded, macOS lets you:
- Preview recordings instantly
- Trim and crop videos
- Share them directly
- Export them to video editing software if needed
You May Also Like:
Contents
- How To Record The Screen On A Mac
- The Easiest Way: Use the Screenshot Toolbar
- Screen Recording Using QuickTime (Older Macs)
- Trimming & Editing A Screen Recording
- Recording A Screen With Your Mac’s Internal Audio
- DRM & Streaming Limitations
- If Screen Recording Won’t Work
- Screen Recording Software For Mac
- FAQ
How To Record The Screen On A Mac
Here then are all the ways to record the screen on both Intel and Apple Silicon Macs depending on what you want to capture.
Here’s an overview of all the methods available before we look at each in more detail.
| Method | Best For | Pricing |
|---|---|---|
| macOS Screenshot Tool (⌘ + ⇧ + 5) | Quick screen recordings, tutorials, and basic demos with no setup | Free (built into macOS) |
| QuickTime Player | Older Macs using High Sierra or earlier, simple recordings, and basic editing | Free (built into macOS) |
| QuickTime + BlackHole | Recording internal system audio alongside screen capture | Free |
| Screen Recording Software | Professional tutorials, training videos, and advanced editing | Paid (apps such as Capto and ScreenFlow offer a one-time license, others like SnagIt are subscription only) |
The Easiest Way: Use the Screenshot Toolbar
The Screenshot toolbar is now the main way to screen record on a Mac. It was introduced in macOS Mojave and is also what opens when you start a recording from QuickTime Player.
The easiest way to access it using one of the many useful keyboard shortcuts in macOS.
How To Record The Entire Screen
- Press Command + Shift + 5 (⌘ + ⇧ + 5).
- Choose one of:
- Record Entire Screen (the black square with the black dot in the corner)
- Record Selected Portion (the dotted square with the black dot in the corner)
- (Optional) Click Options to adjust settings
- Click Record

To stop recording:
- Click the Stop button in the menu bar, or
- Press Command + Control + Esc
By default, screen recording are saved to your Mac Desktop. However, you can click on Options in the screenshot tool to change where screen recording are saved on a Mac and also set a timer, etc.
If you want to record your voice or external sound with the screen recording select “Built-in Microphone”. If you don’t want any audio with your screen recording just leave it on “None”.
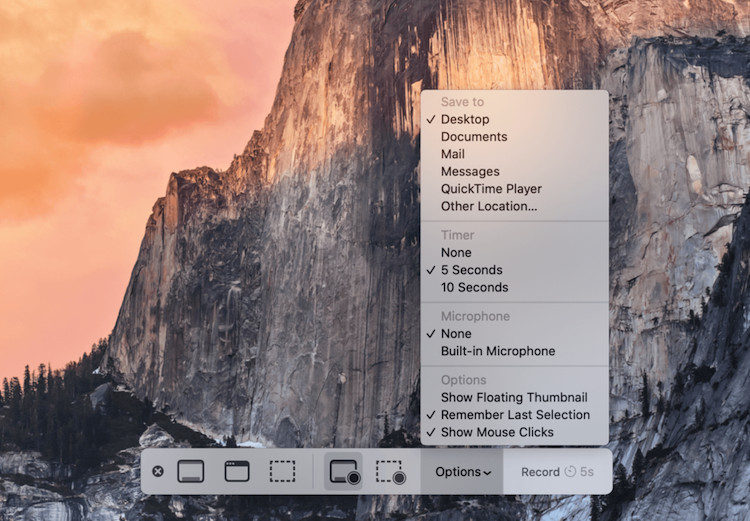
If you select the Show Floating Thumbnail in the Options menu, you will see a thumbnail of your screen recording in the bottom-right of your screen when it is complete. You can click on the thumbnail to view, share, or edit it.
How To Record a Specific Part of the Screen
If you want to screen record a selected portion of your screen on a Mac you simply select the dotted square with the black circle in the corner.

- When you select this, your screen will go dim and a small box will appear on it, which you can resize and adjust around the section you wish to capture.
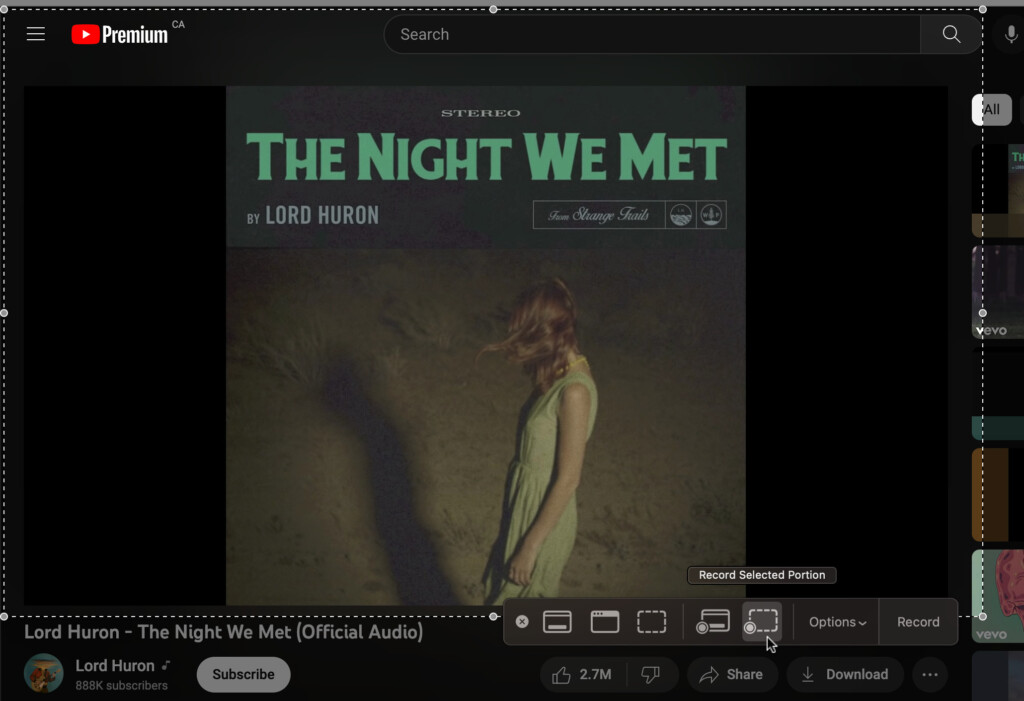
- As with a full screen recording, you can click on Options to adjust any settings, such as selecting the save location, setting a timer, etc.
- Once you have selected the area of the screen you wish to record, click on Record.
- When you have completed the recording, press Command + Control + Esc to stop, or click on the white recording button at the top of your screen.
- If you have clicked on Show Floating Thumbnail in the Options menu, you will see a thumbnail of your screen recording on the bottom-right of your screen. You can click to view, share, or edit it.
Screen Recording on a Mac with Sound
If you also want to record your voice or a video’s audio during screen recording here’s how you can do it:
- Press Command + Shift + 5 to access the Screenshot menu.
- Choose between Record Entire Screen and Record Selected Portion, depending on your screen recording preferences.
- Click on Options, and select the audio source beneath Microphone.

- Click on Record, and your Mac will start screen recording accompanied by audio.
- To stop recording, press Command + Control + Esc, or click the white record button on the top of the screen.
Note that this does not record the Mac’s internal audio. To record your Mac’s internal audio you need to use QuickTime along with the Blackhole plugin.
Screen Recording Using QuickTime (Older Macs)

QuickTime Player can still be used, but on modern macOS it simply opens the same Screenshot toolbar.
In modern versions of macOS, QuickTime is no longer a separate recording system.
When QuickTime is useful:
- On older Macs running macOS High Sierra or earlier
- For quick playback and trimming after recording
How to use it:
- Open QuickTime Player
- Click File > New Screen Recording. You can also press Control + Command + N to access this feature.
This will launch the same screen recording interface as Command + Shift + 5.
- If you also want to capture audio with video, click on the arrow next to the Record icon and click on the audio source under Microphone.
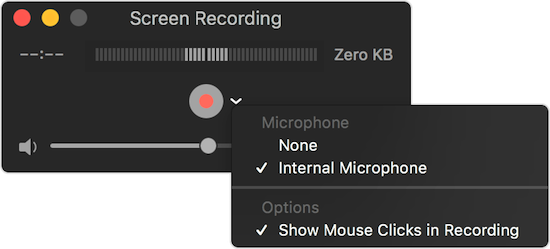
- You can also choose whether you want to show or hide mouse clicks during recording.
- Click on the Record icon to start screen recording.
- If you want to record the entire screen, click anywhere on it. Otherwise, click and drag the cursor to create a specific area to be captured.
- You can stop the recording by pressing Command + Control + Esc, or by clicking the round record button in the menu at the top of the screen.
- Once you stop the recording, it will open in QuickTime, where you can playback, edit, or share it.
- Click on File, followed by Save, to store the recording. You can also press the Command + S buttons.
Note that QuickTime can only save video files in MOV format and will save them with the time stamp in the format “Screen Recording (date) at (time).mov”.
You can however go to File > Export and save the clip in a range of different resolutions and also in M4V format for iPhones.
Trimming & Editing A Screen Recording
You can also trim recordings and perform basic edits (such as limited cropping) with QuickTime on your Mac.
- Open the screen recording in QuickTime and go to Edit > Trim.
- Double click on the clip and drag the yellow handles at either end of the clip to trim it to the desired length
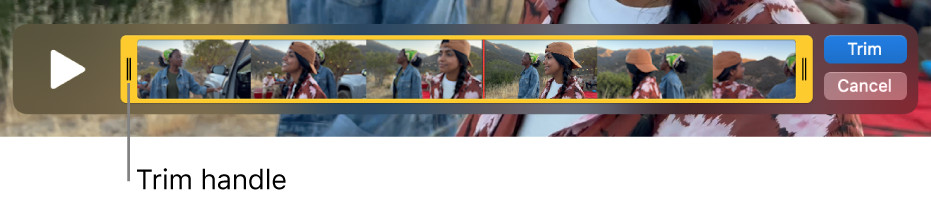
- You can see individual frames and cut more precisely by clicking and dragging the trackpad or mouse along the clip.
Recording A Screen With Your Mac’s Internal Audio
If you want to record the internal audio on a Mac desktop with the screen recording then you can do so with an extra QuickTime plugin called Blackhole.
Blackhole is a plugin which will allow you to record the audio on your Mac’s screen with QuickTime.
Note that you don’t need Blackhole to record external audio – the macOS screenshot tool can do this already as long as you have “Built-in microphone” selected in the screenshot tool.
You can find full instructions how to record the screen with internal audio on a Mac here.
Alternatively, you can use screen recording software almost all of which allow you to configure recording of your Mac’s internal audio.
DRM & Streaming Limitations
Note that some services (such as Netflix, Amazon Prime Video, Apple TV+, and Disney+) block screen recording due to copyright and DRM restrictions. If content is protected, screen recording will either fail or result in a black screen.
If Screen Recording Won’t Work
If the content you are trying to record isn’t protected by DRM but screen recording still won’t work, it’s often due to permissions in macOS.
How to enable screen recording:
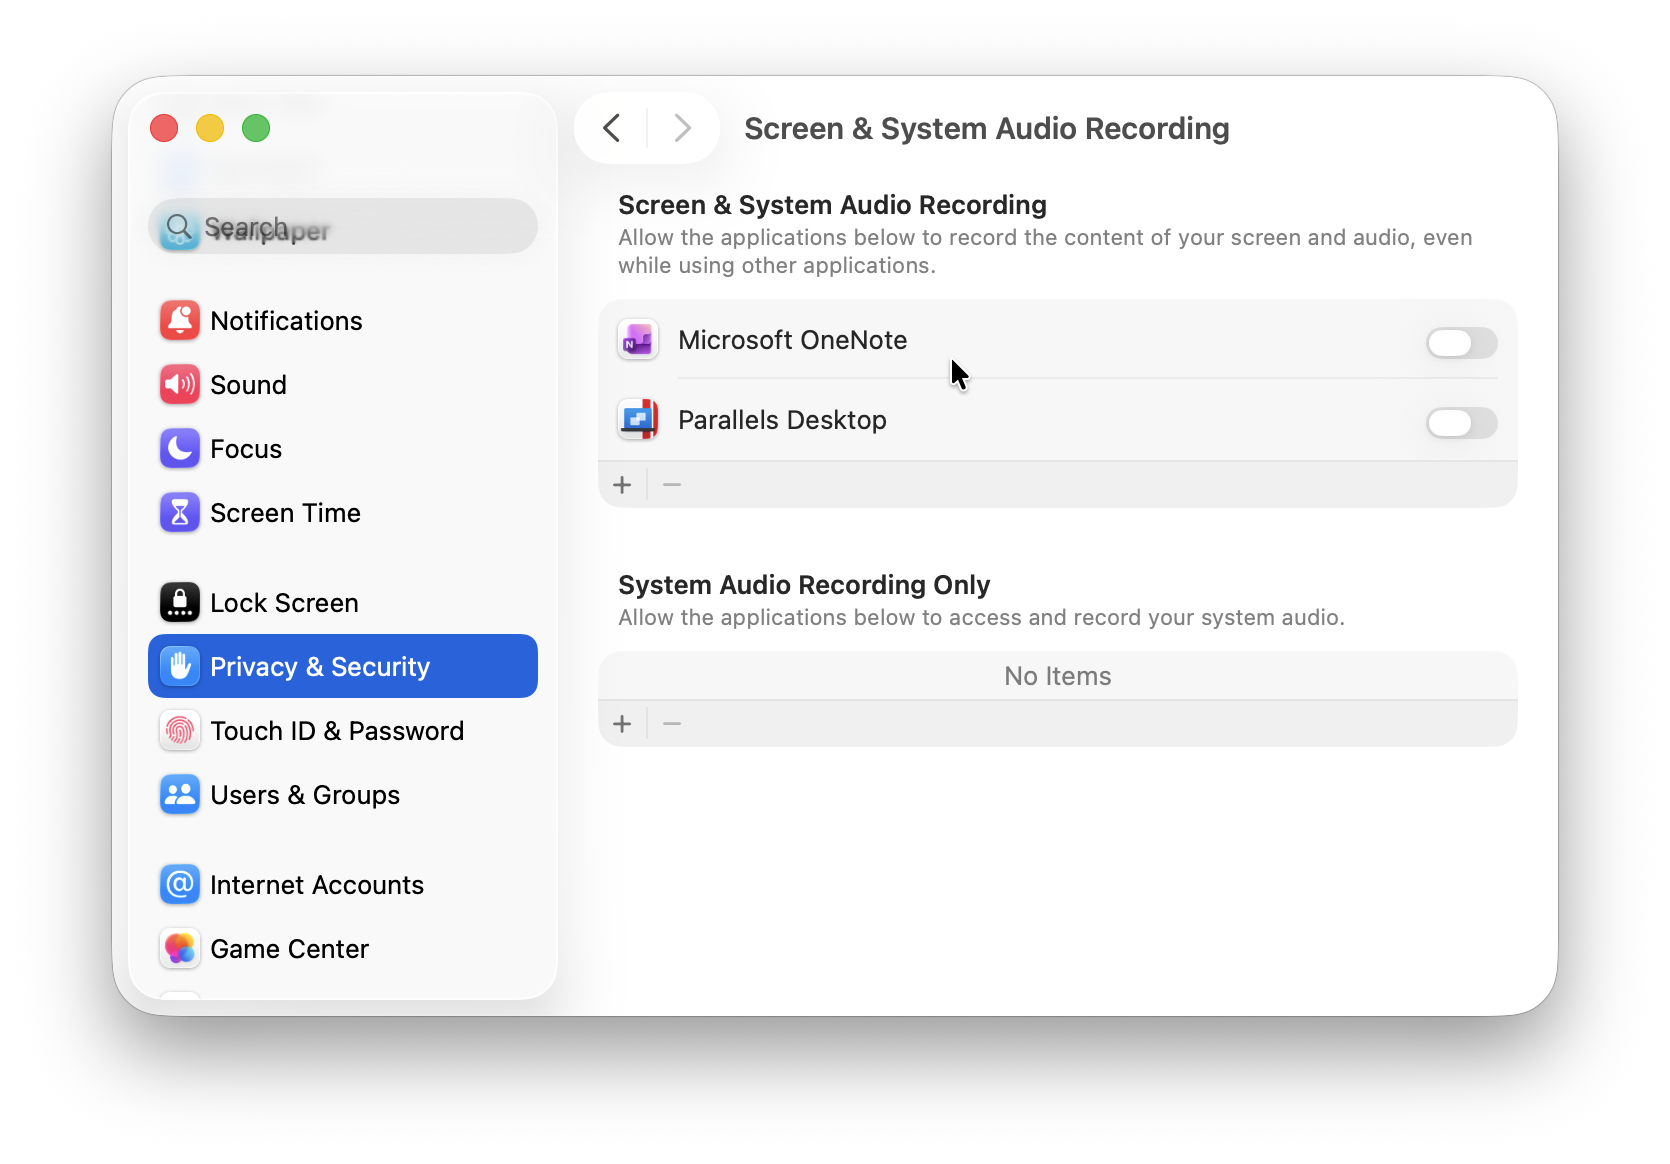
- Go to System Settings
- Select Privacy & Security
- Click Screen & System Audio Recording
- Enable access for the app you’re using
Without this, recordings may fail or appear blank.
Screen Recording Software For Mac
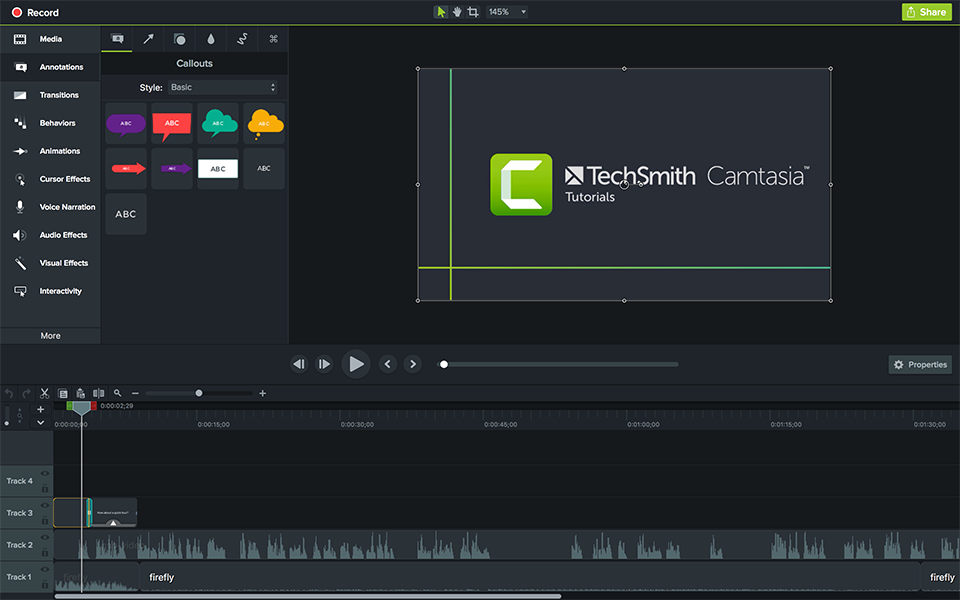
If you need a something a bit more powerful or need to record the internal audio on your Mac without using plugins, then you should consider using a Screen Recording Software.
There are many screen recording apps for macOS which offer features like recording internal audio, more powerful editing tools, annotations and more.
Some of the best include Camtasia, Screenflow, SnagIt and Capto all of which offer free trials and either one-time purchase or subscription options.
FAQ
How do I screen record on a Mac?
You can screen record on a Mac by pressing Command + Shift + 5, which opens the macOS Screenshot toolbar. From there, choose whether to record the entire screen or a selected portion, adjust options if needed, and click Record.
Is screen recording on a Mac free?
Yes. macOS includes free built-in screen recording tools via the Screenshot toolbar and QuickTime Player. You only need third-party software if you want advanced editing features or to record your Mac’s internal audio.
Can I screen record with sound on a Mac?
Yes, but with limitations. macOS allows you to record external audio, such as your voice, using the built-in microphone or an external mic. However, system/internal audio is not supported natively and requires additional software such as BlackHole or a dedicated screen recording app.
How do I record internal audio on a Mac?
To record internal system audio on a Mac, you need:
- QuickTime Player
- A virtual audio driver such as BlackHole
Once installed, you can select BlackHole as the audio input source in QuickTime or a third-party screen recorder.
Alternatively, you can use dedicated third-party screen recording software instead.
Does screen recording work on both Intel and Apple Silicon Macs?
Yes. Screen recording works on both Intel and Apple Silicon (M-series) Macs, including MacBook Air, MacBook Pro, iMac, Mac mini, and Mac Studio, as long as they are running macOS Mojave or later.
Where are screen recordings saved on a Mac?
By default, screen recordings are saved to the Desktop. You can change the screenshot saved location by opening the Screenshot toolbar (Command + Shift + 5) and selecting a different folder under Options.
How do I stop a screen recording on a Mac?
You can stop a screen recording by:
- Clicking the stop recording button in the macOS menu bar, or
- Pressing Command + Control + Esc
Can I edit a screen recording on a Mac?
Yes. macOS allows basic editing such as trimming using QuickTime Player or the floating thumbnail preview after recording. For more advanced editing, annotations, or effects, third-party screen recording software is recommended.
Why does screen recording show a black screen on streaming services?
Streaming platforms like Netflix, Amazon Prime Video, Apple TV+, and Disney+ block screen recording using DRM protection. When recording protected content, the video may appear black or fail to record entirely.
Which is better: the macOS Screenshot tool or QuickTime Player?
- The Screenshot tool is best for quick, modern screen recordings with minimal setup.
- QuickTime Player is useful for older versions of macOS or when you need slightly more control over recording options.
For internal audio recording or advanced features, neither is ideal without additional software.