
To take a screenshot on a Mac, press ⌘ + Shift + 3 for full screen or ⌘ + Shift + 4 to capture part of the screen. If you’ve just switched from Windows to Mac, here are the fastest and easiest ways to screenshot on a Mac in 2026.
Contents
- How To Take A Screenshot on a Mac Keyboard
- Mac Screenshot Shortcuts Cheat Sheet
- How to Take a Screenshot on a Mac with a PC Keyboard
- 10 Ways To Screenshot on a Mac
- 1. Take a Screenshot of the Entire Screen
- 2. Screenshot a Selected Area
- 3. Screenshot a Specific Window
- 4. Use the Mac Screenshot Toolbar (Best All-in-One Tool)
- 5. Take a Timed Screenshot
- 6. Copy Screenshots to Clipboard (Instead of Saving)
- 7. Take Screenshots Using Preview (No Shortcuts Needed)
- 8. Record Your Screen on a Mac
- 9. Use Terminal (Advanced Users)
- 10. Use Third-Party Screenshot Apps
- Where Are Screenshots Saved on Mac?
- How To Change Screenshot Shortcuts
- How To Copy & Paste Screenshots On A Mac
- Taking A Screenshot Of The Touch Bar On MacBooks
- Mac Screenshot Not Working? (Fixes)
- FAQ
How To Take A Screenshot on a Mac Keyboard
If you just need the fastest way to screenshot on a Mac, use keyboard shortcuts:
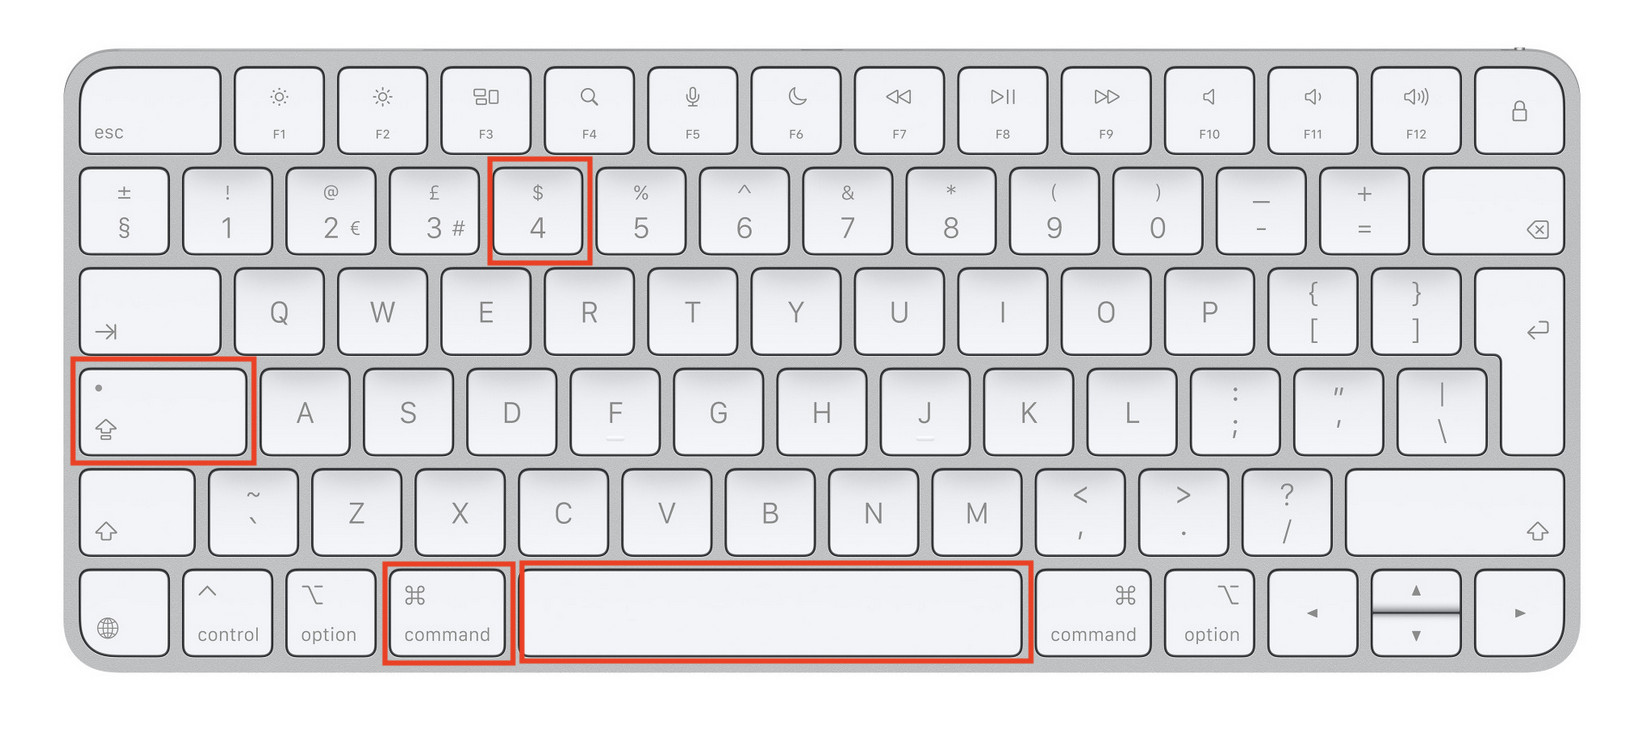
- Full screen: Press
Command (⌘) + Shift + 3 - Selected area: Press
Command (⌘) + Shift + 4, then drag to select - Specific window: Press
Command (⌘) + Shift + 4, then tapSpaceand click the window
By default, screenshots are saved to your desktop with a timestamped filename such as “Screenshot 2026-06-19 at 15.02.07”.
You can also easily change where screenshots are saved on your Mac to prevent your desktop getting cluttered.
In this extensive guide, we’ll show you all the ways to take a screenshot on a Mac, including built-in tools, advanced options, using a PC keyboard and how to fix common problems.
Mac Screenshot Shortcuts Cheat Sheet
| Action | Shortcut |
|---|---|
| Capture entire screen | ⌘ + Shift + 3 |
| Capture selected area | ⌘ + Shift + 4 |
| Capture window | ⌘ + Shift + 4, then Space |
| Open screenshot toolbar | ⌘ + Shift + 5 |
| Copy full screen to clipboard | ⌘ + Control + Shift + 3 |
* For taking a screenshot on a Mac with a PC keyboard, simply replace the ⌘ key with the Windows key.
For more handy shortcuts on macOS, check out our ultimate guide to Mac keyboard shortcuts.
How to Take a Screenshot on a Mac with a PC Keyboard
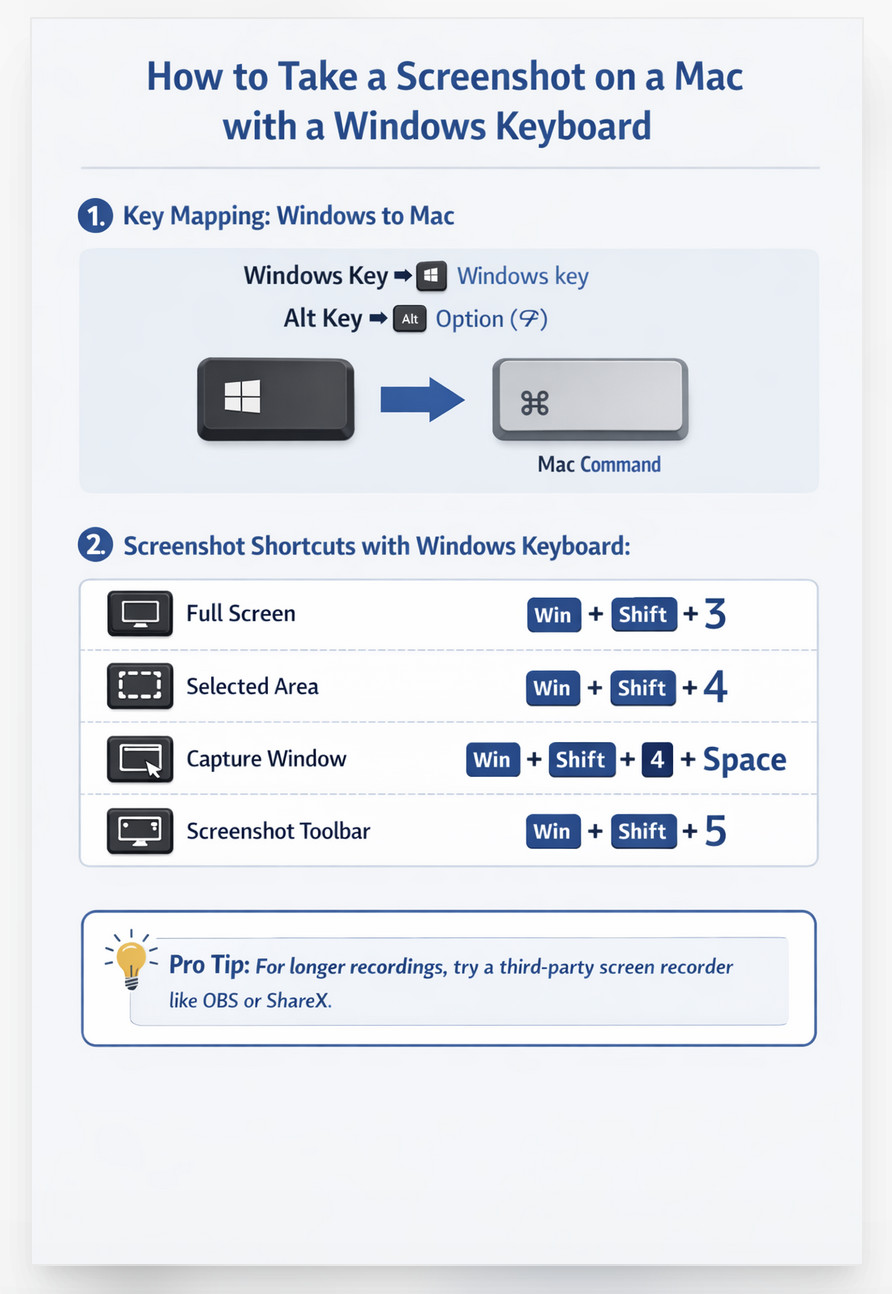
If you’re using a Windows keyboard on a Mac (common with Mac mini setups or external keyboards), the shortcuts are almost identical – but the key names are different.
1. Windows to Mac Key Mapping
Here’s how the main keys translate:
- Command (⌘) → Windows key
- Option (⌥) → Alt key
Once you know this, you can use all standard Mac screenshot shortcuts.
2. Mac Screenshot Shortcuts Using a Windows Keyboard
Use the following combinations:
- Full screen:
Windows + Shift + 3 - Selected area:
Windows + Shift + 4 - Window screenshot:
Windows + Shift + 4, then press Spacebar and click the window - Screenshot toolbar:
Windows + Shift + 5
These work exactly the same as on a Mac keyboard.
3. Where Screenshots Are Saved
By default, screenshots are saved to your Desktop with a timestamped filename.
You can change this by pressing:
Windows + Shift + 5 → Options → Save To
4. Screen Recording with a Windows Keyboard
To record your screen:
- Press
Windows + Shift + 5 - Choose Record Entire Screen or Record Selected Portion
- Click Record
Note: macOS records audio from your microphone only, not internal system sound.
5. Tip: Check Your Modifier Key Settings
On some keyboards, the Windows key and Alt key may be swapped.
To fix this:
- Go to System Settings → Keyboard → Modifier Keys
- Adjust the mapping if needed
6. When to Use Third-Party Tools
If you need more advanced features like:
- Scrolling screenshots
- Better annotations
- Higher-quality screen recordings
Then tools like Snagit or CleanShot X offer more flexibility than the built-in macOS options.
10 Ways To Screenshot on a Mac
Here then is a closer look at all the ways to screenshot on a Mac including the equivalent of the “Windows Key + PrtScn” on macOS.
1. Take a Screenshot of the Entire Screen
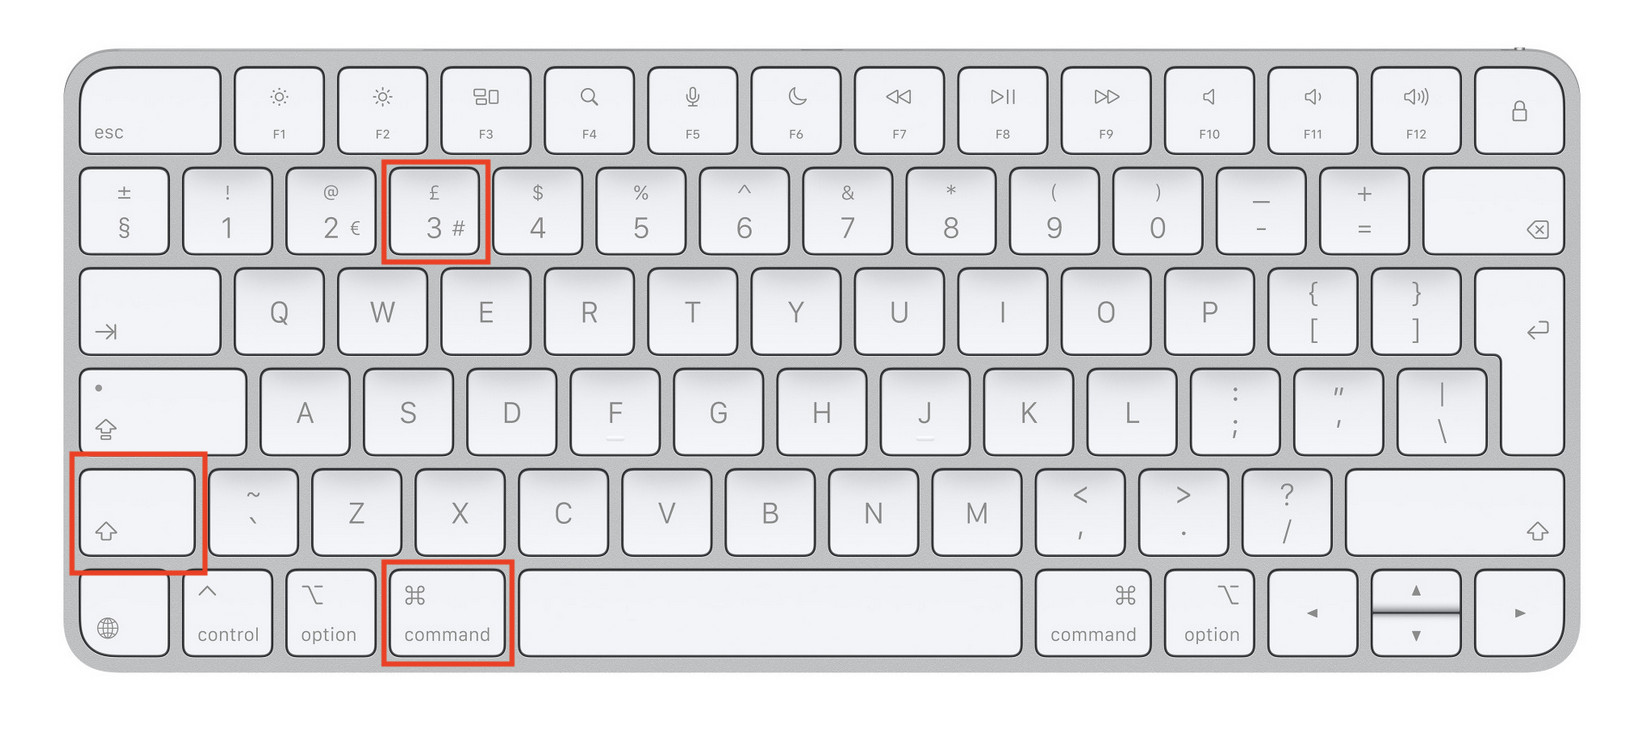
This is the fastest way to capture everything on your display.
How to do it:
- Press
⌘ + Shift + 3 - Your Mac will instantly save the screenshot
By default, screenshots are saved to your desktop with a timestamped filename.
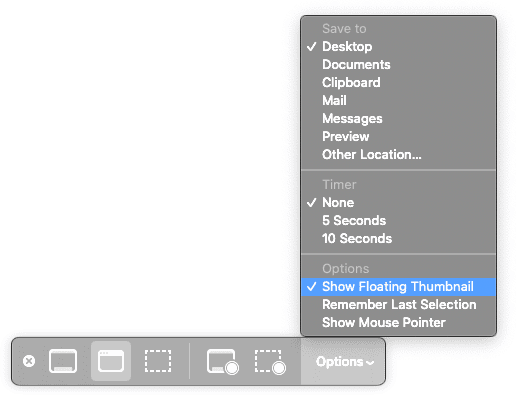
You will also see a tiny preview on the bottom-right corner of the screen if you have the Show Floating Thumbnail option activated. You can only activate this in macOS Mojave or later. To activate Show Floating Thumbnail in macOS, press Command + Shift + 5 to bring up the screenshot tool and click on Options to make sure there is a tick next to Show Floating Thumbnail.
The filename saved on your Mac’s desktop will include the words “Screenshot” followed by the timestamp and file type such as .
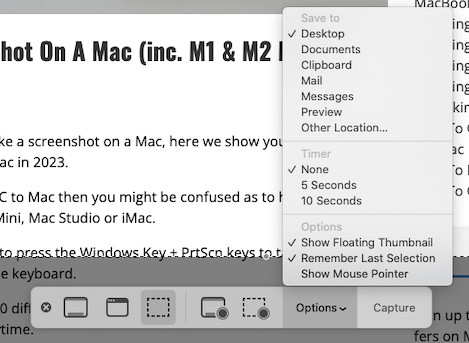
If you don’t want all of your screenshots saved on the desktop, you can change where macOS saves screenshots by choosing “Other Location…” from the Options menu.
This Options menu also includes the possibility to save screenshots to your Mac clipboard which you can also do by using the keyboard shortcut ⌘ + Control + Shift + 3 (for the whole screen).
Once your screenshot is saved, you can open it in macOS Preview where you can crop it, highlight a certain area, or add text to it.
You can also annotate the screenshot in Preview or use a drawing app for this instead.
To exit the screenshot tool at any time, simply press the Escape key.
⚠️ macOS Tahoe Note: Some users that have recently updated to macOS Tahoe may be experiencing a bug where screenshots are not being saved. You can fix this following the instructions here.
2. Screenshot a Selected Area
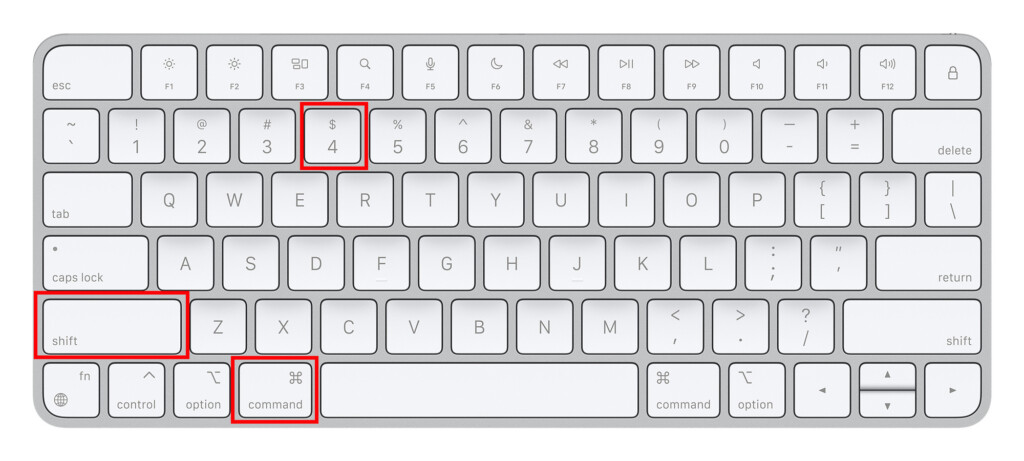
Perfect for capturing part of a webpage, image, or document.
Steps:
- Press
⌘ + Shift + 4 - Drag to select the area
- Release to capture
Pro Tips:
- Hold Shift to adjust width/height precisely
- Press Spacebar while dragging to reposition the selection
3. Screenshot a Specific Window
To capture a clean image of a single window:
Steps:
- Press
⌘ + Shift + 4 - Tap Spacebar
- Click the window
This automatically adds a subtle shadow around the window.
4. Use the Mac Screenshot Toolbar (Best All-in-One Tool)

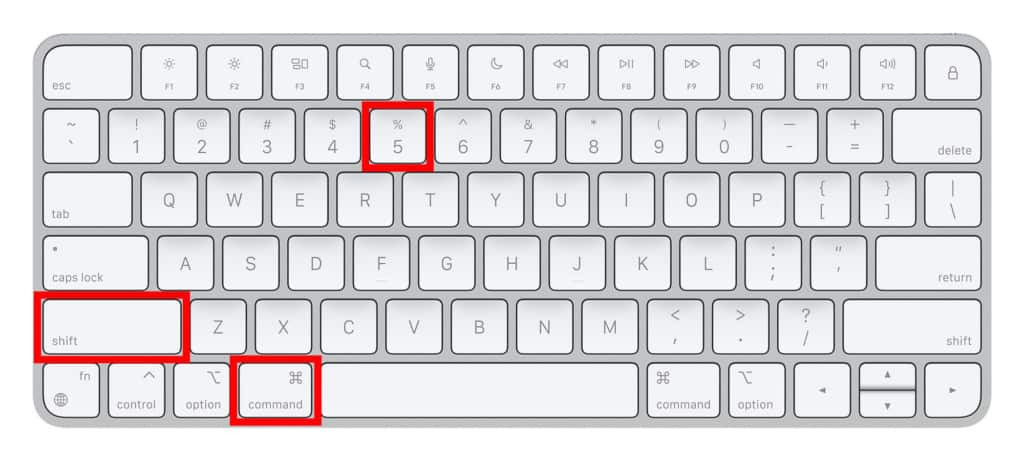
Available on macOS Mojave and later, this is the most powerful built-in option.
Open it with:⌘ + Shift + 5
You can:
- Capture full screen, window, or selection


- Set a timer (5 or 10 seconds)
This is the closest equivalent to the Windows Snipping Tool.
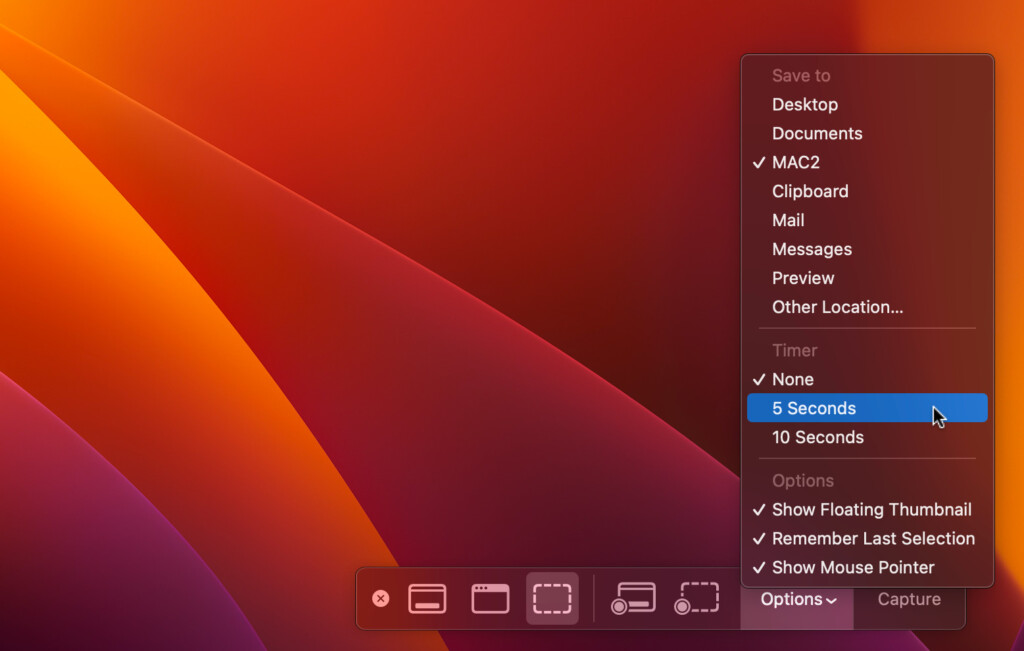
5. Take a Timed Screenshot
Useful for capturing menus or hover states.
Steps:
- Press
⌘ + Shift + 5 - Click Options
- Choose 5 or 10 seconds
- Click Capture
6. Copy Screenshots to Clipboard (Instead of Saving)
If you don’t want files cluttering your desktop:
- Full screen to clipboard:
⌘ + Control + Shift + 3 - Selection to clipboard:
⌘ + Control + Shift + 4
You can then paste directly into apps using ⌘ + V.
7. Take Screenshots Using Preview (No Shortcuts Needed)
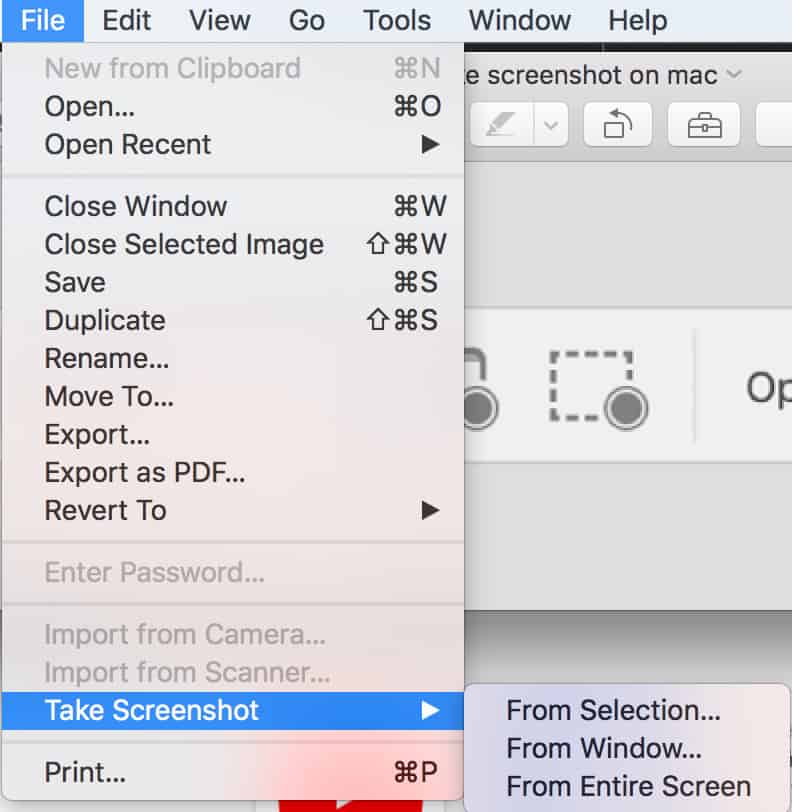
The built-in Preview app also lets you capture screenshots.
Steps:
- Open Preview
- Click File > Take Screenshot
- Choose:
- From Selection
- From Window
- From Entire Screen
This method opens the screenshot instantly for editing.
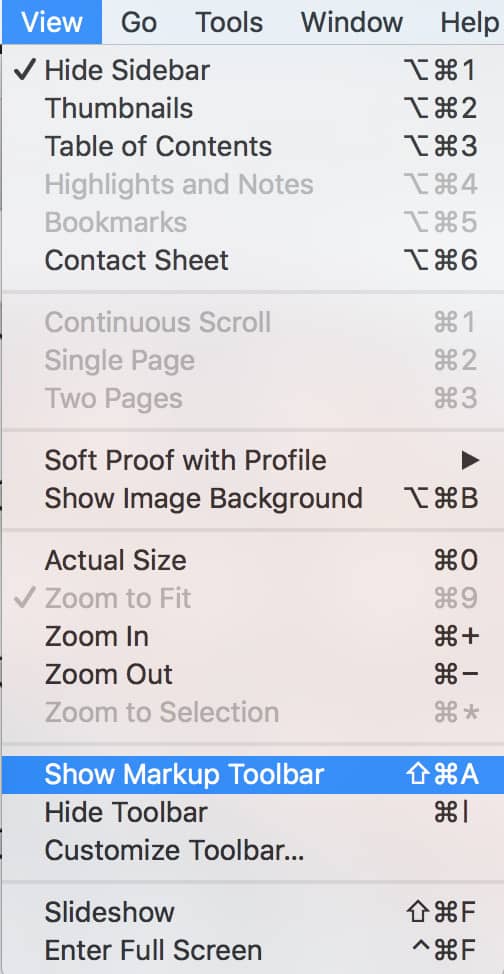
When you’ve captured the image, you can then edit it by clicking on the Show Markup Toolbar in the Markup toolbar. If you can’t see the Markup Toolbar then you can make it appear by going to View > Show Markup Toolbar.
8. Record Your Screen on a Mac
You can also record the screen on a Mac using the same screenshot toolbar.
Steps:
- Press
⌘ + Shift + 5 - Select:
- Record entire screen
- Record selected portion
- Click Record
Note: macOS records microphone audio by default – not internal system sound. If you need to record the internal audio on your Mac during a screen recording, you’ll have to use a plugin.
9. Use Terminal (Advanced Users)

You can take screenshots via Terminal. Open terminal on your Mac and type the following commands:
- Full screen:
screencapture ~/Desktop/screenshot.png
- With delay:
screencapture -T 10 ~/Desktop/screenshot.png
10. Use Third-Party Screenshot Apps
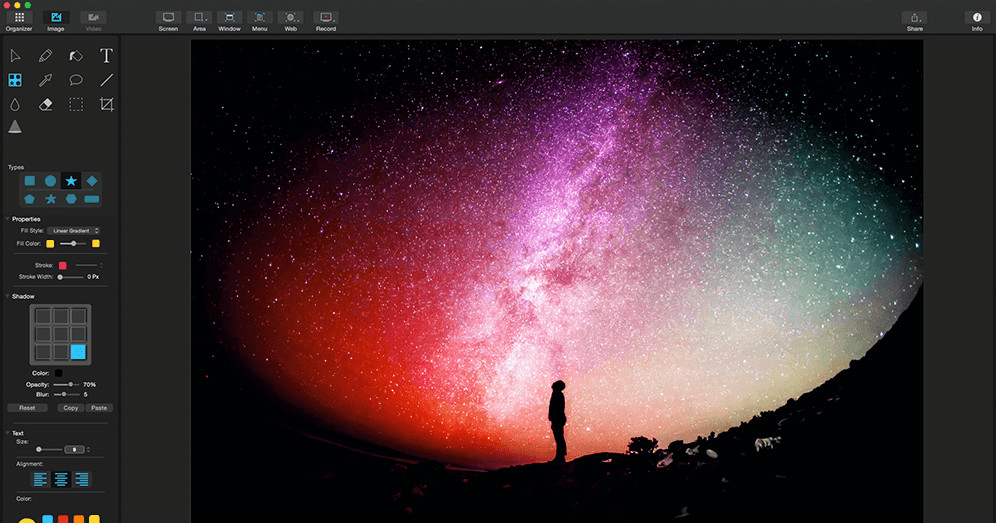
If you need more advanced features (scrolling capture, annotations, workflows), third-party tools offer more flexibility.
Popular options include:
These are ideal for content creators and professionals.
Where Are Screenshots Saved on Mac?
By default, screenshots are saved to your Desktop.
To change where screenshots are saved on a Mac:
- Press
⌘ + Shift + 5 - Click Options
- Choose a new location
You can also save directly to:
- Clipboard
- Documents
- Messages
- Preview
- Custom folders
How To Change Screenshot Shortcuts

You can customize shortcuts in:
System Settings > Keyboard > Keyboard Shortcuts > Screenshots
For more on screenshot keyboard shortcuts, check out our ultimate guide to Mac keyboard shortcuts.
How To Copy & Paste Screenshots On A Mac
You can copy and paste screenshots in a Mac into a document, email or other app in the same way as any other document or file
In most cases, the simplest way is to
- Select the screenshot on your Mac and press Command + C to copy and Command + V to paste.
- Holding Control while pressing the screenshot shortcut also copies it to the clipboard directly,
- You can also right-click on the screenshot and select copy and paste from the pop-up menus that appear.
For more on copy and pasting screenshots, check out our guide on how to copy and paste on a Mac.
Taking A Screenshot Of The Touch Bar On MacBooks
If you still have one of the older Touch Bar MacBooks (which were discontinued in 2021), you can easily take a screenshot of whatever appears on the Touch Bar.
Simply press Command + Shift + 6, and your MacBook will save a screenshot of the Touch Bar for you to use.
You can also customize a specific key on the Touch Bar to take screenshots by going to the Apple logo in the top left of your screen and System Preferences > Keyboard > Customize Control Strip.
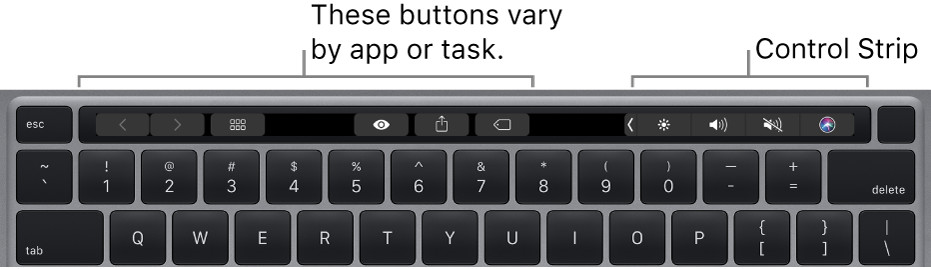
You can then select a button on your Touch Bar Control Strip that you want to use to take screenshots on your Mac.
Mac Screenshot Not Working? (Fixes)
If screenshots aren’t working:
1. Restart your Mac
2. Check keyboard shortcuts are enabled
3. Ensure storage space is available
4. Try using ⌘ + Shift + 5 instead
5. Check screenshot save location
FAQ
How do I take a screenshot on a Mac without a keyboard?
Use the Screenshot toolbar (⌘ + Shift + 5) or Preview’s screenshot tool.
What is the Mac equivalent of Print Screen?
- Full screen:
⌘ + Shift + 3 - Selection:
⌘ + Shift + 4
How do I paste a screenshot on a Mac?
Use:
⌘ + Control + Shift + 3(copy full screen)- Then press
⌘ + Vto paste
Why are my screenshots not saving?
Check:
- Save location
- Disk space
- macOS permissions
How do I take a screenshot on a Mac with a Windows keyboard?
Using a Windows keyboard on a Mac doesn’t limit you – you just need to remember:
Windows key = Command (⌘)
Once you do, all Mac screenshot shortcuts work exactly the same.