
If you’ve setup a new Mac or just switched to macOS from Windows and are going crazy trying to work out how to take a screenshot in macOS Tahoe, Sequoia or the forthcoming Golden Gate, here we show you the quickest ways to take one on a Mac.
Although there’s no “Prt Scn (Print Screen)” key on Macs like there is on Windows PCs, macOS is packed with lots of useful keyboard shortcuts including for screenshots.
Here then are the quickest and easiest ways to take a screenshot in the latest versions of macOS.
For a more comprehensive roundup, check out our ultimate guide to taking screenshots on a Mac.
1. Use macOS Screenshot
The free screenshot tool in macOS not only allows you to take screenshots, but also make screen recordings. Here’s how to take a screenshot on a Mac using the screenshot tool.
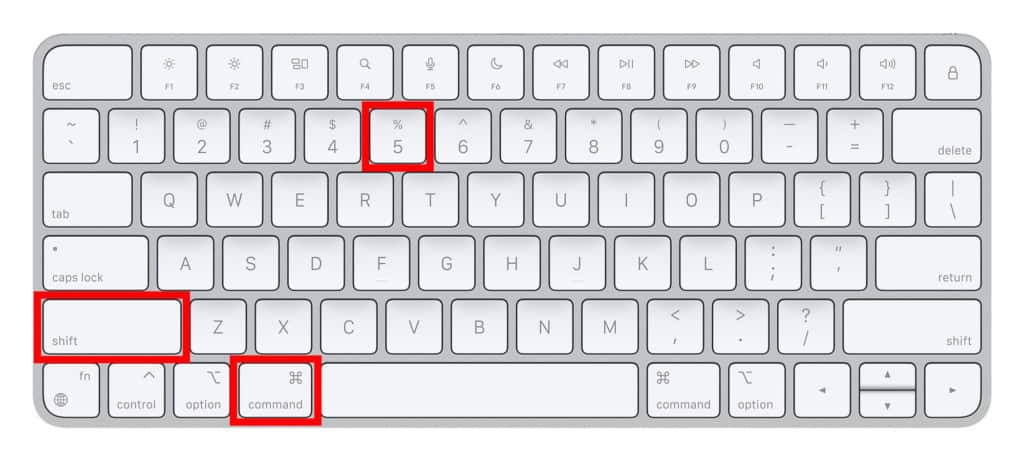
1. Press the ⌘Command + Shift + 5 keys at the same time to bring up the screenshot menu on your Mac and you will see the following screenshot tool menu.

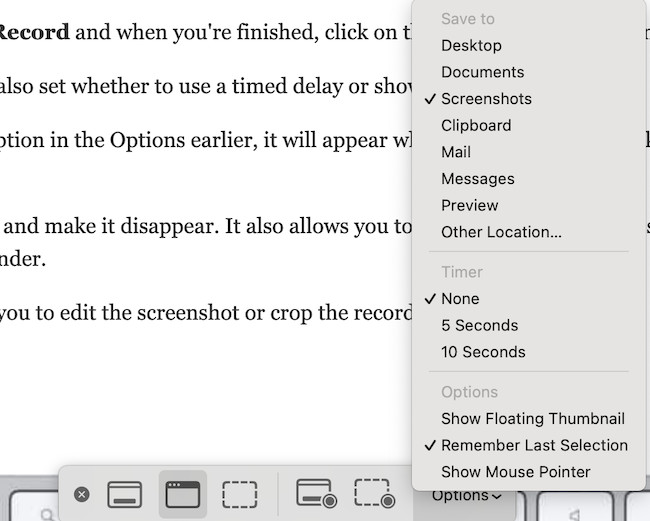
From left to right, the menu gives you 5 capture options:
- Entire Screen
- Selected Windows
- Selected Portion
- Record Entire Screen
- Record Selected Section
If you’ve got a Touch Bar Mac, you can also use the Touch Bar to select which option to use.
- If you just want to take a screenshot of a specific window, then move the mouse cursor over it and click on the Window highlighted to take the screenshot.
- If you want to take a cropped screenshot of a selected area of the screen, use the crosshairs to select the area you want to save and click on Capture to save it.
- The last two options are for screen recording and you can find full instructions how to screen record on a Mac here.
By default, screenshots are saved to your Mac desktop but you can change this to any location you like including copying screenshots to your clipboard.
The Options Menu in the screenshot tool allows you to specify some of the settings of the screenshot or screen recording including an option to change where screenshots are saved on a Mac.
- If you select the Show Floating Thumbnail option in the Options, a small preview of the screenshot or screen recording will appear in the bottom right corner of your Mac desktop. If you click on the thumbnail, it will allow you to edit the screenshot instantly in Preview. You can also drag a thumbnail of the screenshot or screen recording into a document, email, note or in Finder. If you don’t do anything, the thumbnail will disappear after a few seconds and be saved on your Mac desktop or wherever you have configured screenshots to be saved.
⚠️ Some users may experience a bug in macOS Tahoe where the screenshots are not saved despite selecting a “Save to” location. This is a glitch with the “Show Floating Thumbnail” option in Tahoe that only happens if you try and drag or interact with the thumbnail when it appears. We recommend disabling the “Show Floating Thumbnail Issue” if you are having issues with this. Alternatively, do not move your cursor anywhere over the floating thumbnail when it appears and it should save correctly to your defined save location after a few seconds.
2. Use Keyboard Shortcuts
macOS also has keyboard shortcuts that allow you to capture a part of your screen instantly. You can use the following keyboard shortcuts to instantly capture a screen or Window on your Mac:
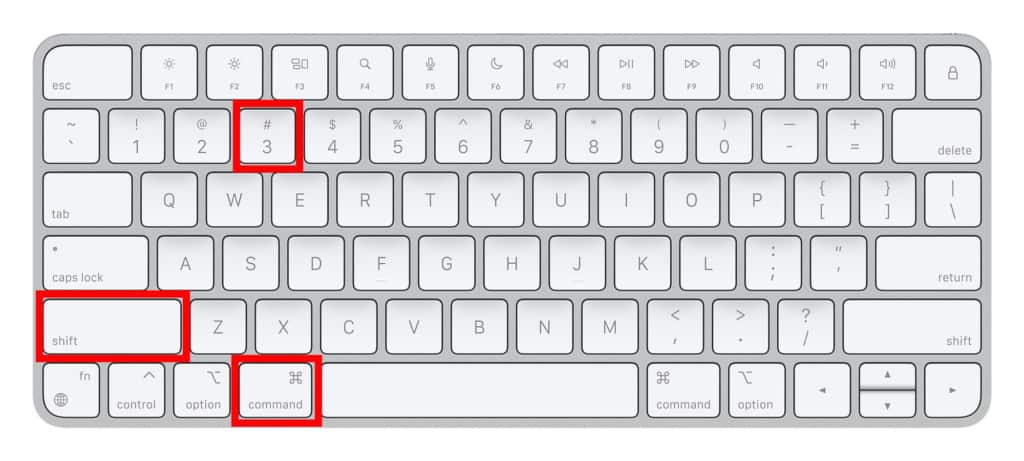
- Shift-Command-3: Captures the entire screen
- Shift-Command-4: Captures a section of the screen using crosshair pointer which you can drag and resize with the Touchpad or mouse. You can also use this to take a shot of a drop down menu for example.
- Shift-Command-4 + Spacebar: Captures a window, menu bar or dock. Just use the Trackpad to select which one you want to save.
- Shift-Command-6: Captures the Touch Bar on Touch Bar Macs.
- If you want you can also configure your own keyboard screenshot shortcuts by going to the Apple Menu and selecting System Preferences > Keyboard > Shortcuts.
3. Preview
Preview allows you to view PDF documents and images on your Mac for free but it also takes screenshots. If you want to take a screenshot on a Mac without a keyboard you can with macOS Preview.
Preview lets you grab any part of the screen that you want to snip. The advantage of using Preview to take screenshots on a Mac is that it immediately opens them in Preview for editing.
You can then edit, annotate or resize images and documents in Preview instantly.
To take a screenshot in a few ways using Preview.
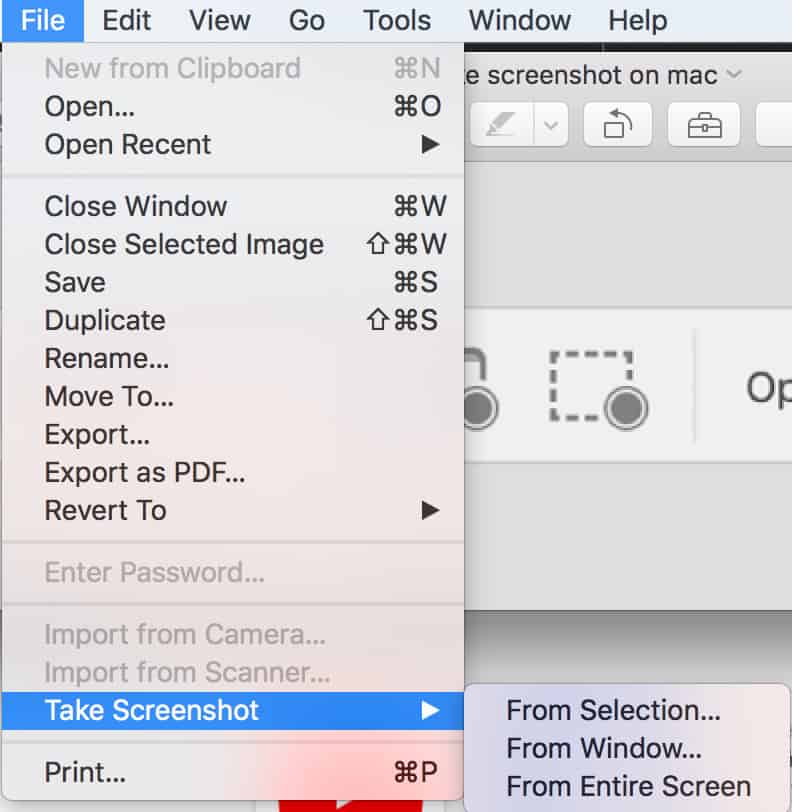
- Go to File > Take Screenshot > From Selection to select a part of the screen you want to capture.
- Go to File > Take Screenshot > From Window to take a screenshot of a specific window.
- Go to File > Take Screenshot > From Entire Screen to take a screenshot of the entire screen.
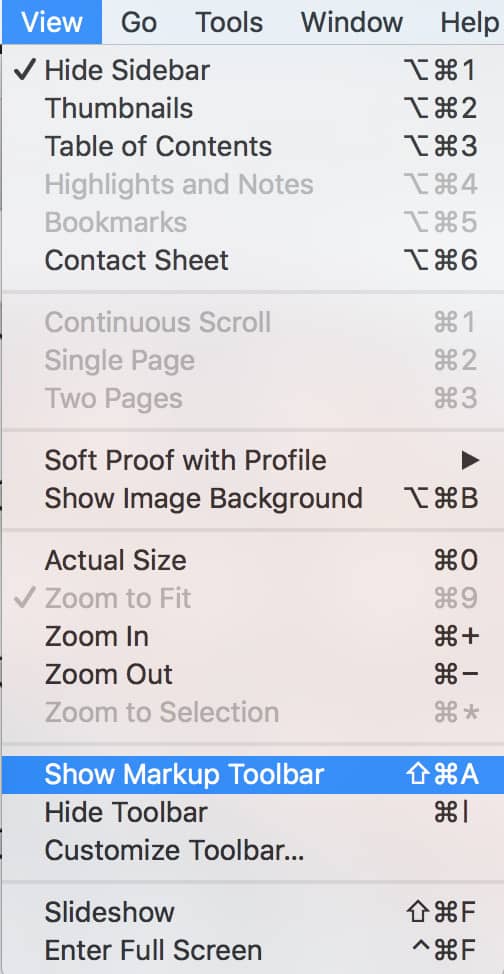
When you’ve captured the image, you can then edit it by clicking on the Show Markup Toolbar in the Markup toolbar. If you can’t see the Markup Toolbar then you can make it appear by going to View > Show Markup Toolbar.
When you’re done click on File > Save to save it anywhere on your Mac.
These are all free ways to take a screenshot on a Mac which are part of macOS.
You’ll also find that there are specialist screen capture tools out there that offer more features and control especially when it comes to screen recordings but they’re not free.
Where Are Screenshots Saved On A Mac?
By default, screenshots and screen captures made using the macOS Screenshot tool or with keyboard shortcuts are saved on your Mac desktop unless you change where screenshots are saved using Options in the macOS screenshot tool.
Whichever method you use, screenshots are saved as PNG files and screen recordings as MOV files.
The filenames are labelled with “Screenshot” or “Screen Recording” with the date and time they were taken.
If you use Preview to take screenshots on a Mac, you can choose where to save them by going to File > Save.
Can I Take A Screenshot of Anything on a Mac?
Most applications and screen activity can be saved as a screenshot on your Mac. However, there are some applications that will not allow you to take a screenshot or screen record due to copyright protection or Digital Rights Management (DRM) controls.
For example you can’t take a screenshot of Netflix or record Netflix on your Mac for these reasons.
For a more comprehensive look at all the different ways you can take a screen shot on a Mac, check our ultimate guide to screenshots on a Mac.
How Do I Take Scrolling Screenshots on a Mac?
The macOS screenshot tool does not support taking scrolling screenshots of an entire page or portion of it.
However, there are free third party tools that allow you to easily take scrolling screenshots on a Mac as you can see in our video below.