
A Virtual Private Network (VPN) protects your privacy, security and gets around geo-restrictions online by rerouting and encrypting your internet connection.
However, for those unfamiliar with computing, setting-up a VPN may seem a confusing and intimidating prospect.
At the moment Mac users have 2 options to setup a VPN:
- Subscribing to a VPN service and using its Mac VPN app
- Setting-up a VPN manually with you Mac’s in-built VPN to connect to an office or home network
The first option is best for those that are interested in using a VPN for greater privacy and security online or to watch streaming services like Netflix and BBC iPlayer in another country.
You can check out our guide to the best VPNs For Mac to see which are the best VPN services on the market for doing this.
The second option is best for those that want to be able to use a corporate network from home or access a Mac remotely.
In this tutorial, we look at both options so you can decide which is the best VPN setup on a Mac for you.
These ways of setting up a VPN on a Mac work on the latest versions of macOS including Sonoma and the latest Apple Silicon Macs.
Do Macs Have a Built In VPN?
macOS does have an in-built feature in the Network Settings that allows you to create and connect to a VPN network
To setup a VPN in macOS Network Preferences (such as to an office network) you’ll need the VPN server address, account name and authentication password from your system administrator.
This kind of VPN connection only allows you to connect securely to another network such as a corporate intranet or office network.
It’s not suitable for protecting your privacy online or getting around geo-restrictions to watch BBC iPlayer or Netflix in another region for example.
The alternative way of connecting to a VPN on a Mac is by subscribing to a VPN service. This is much easier and simply requires you to install the providers VPN app on your Mac.
Using a VPN service also allows you to choose a server to connect to in any country and both re-routes and encrypts your internet traffic via that country so you can get round geo-restrictions and surf anonymously online.
You May Also Like:
Here then we look at these different ways of setting-up a VPN on a Mac so you can choose which is best for you.
1. How To Manually Setup A VPN Using Your Mac’s Network Settings
If you need to connect to a remote network such as an office network, you have to setup a VPN manually on your Mac.
Here’s how to setup a VPN manually on a Mac.
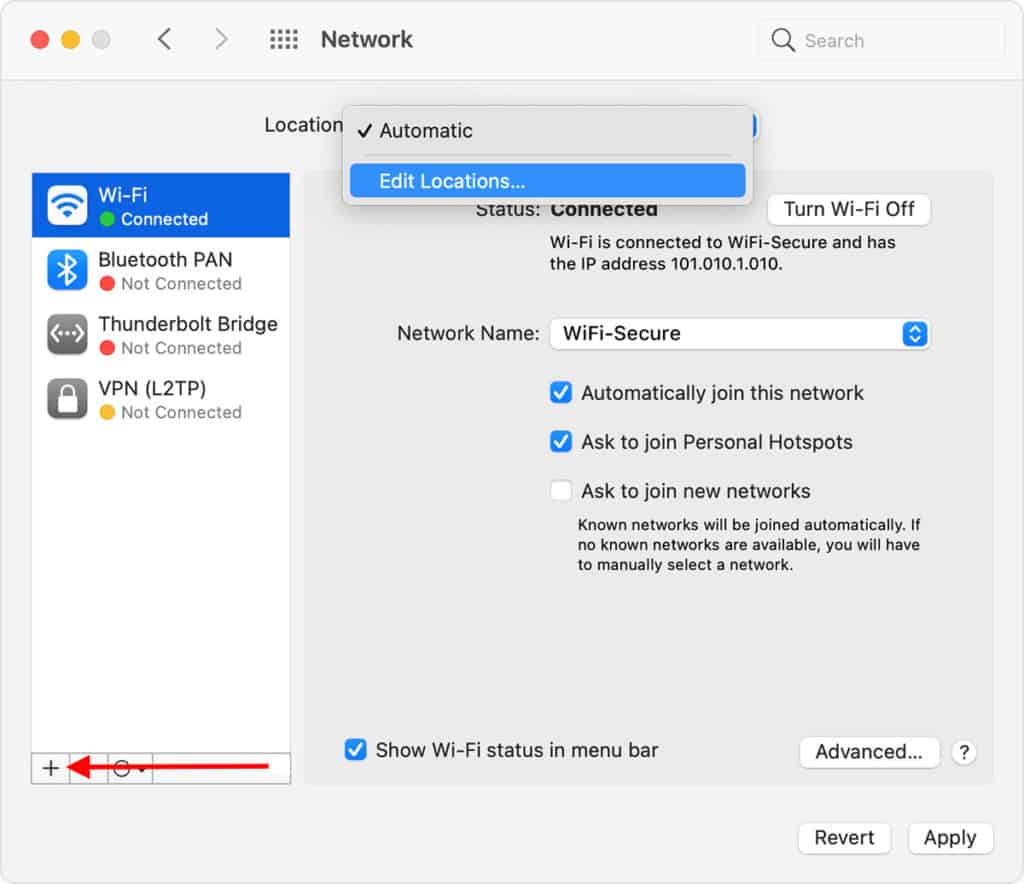
- Go to the Apple Menu > System Preferences and select Network
- Click the “+” button on the left and choose VPN.
- Select the VPN Type you want to setup. This will need depend on the type of connection you want to setup and this information will be provided by your system administrator. The connection will be one of these types:
– L2TP over IPSec is an extension of the Point-to-Point Tunneling Protocol used by internet service providers to enable a VPN over the internet.
– PP2P (Point-to-Point Tunneling) which is an obsolete security protocol which we don’t recommend unless it’s your only option.
– Cisco IPSec (Internet Protocol Security) is a set of security protocols specific to Cisco VPNs.
– IKEv2 is a protocol that sets up a security association in IPSec.
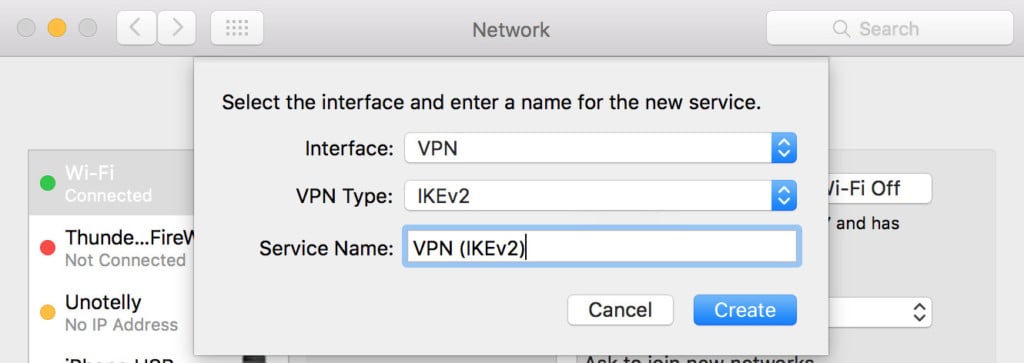
- Once you’ve chosen the correct protocol for your VPN give it a name (such as “Company Network”) and click Create.
- You must then enter the Server Address, Remote ID and Local ID. This will be provided to you by your corporate system administrator or technical department.
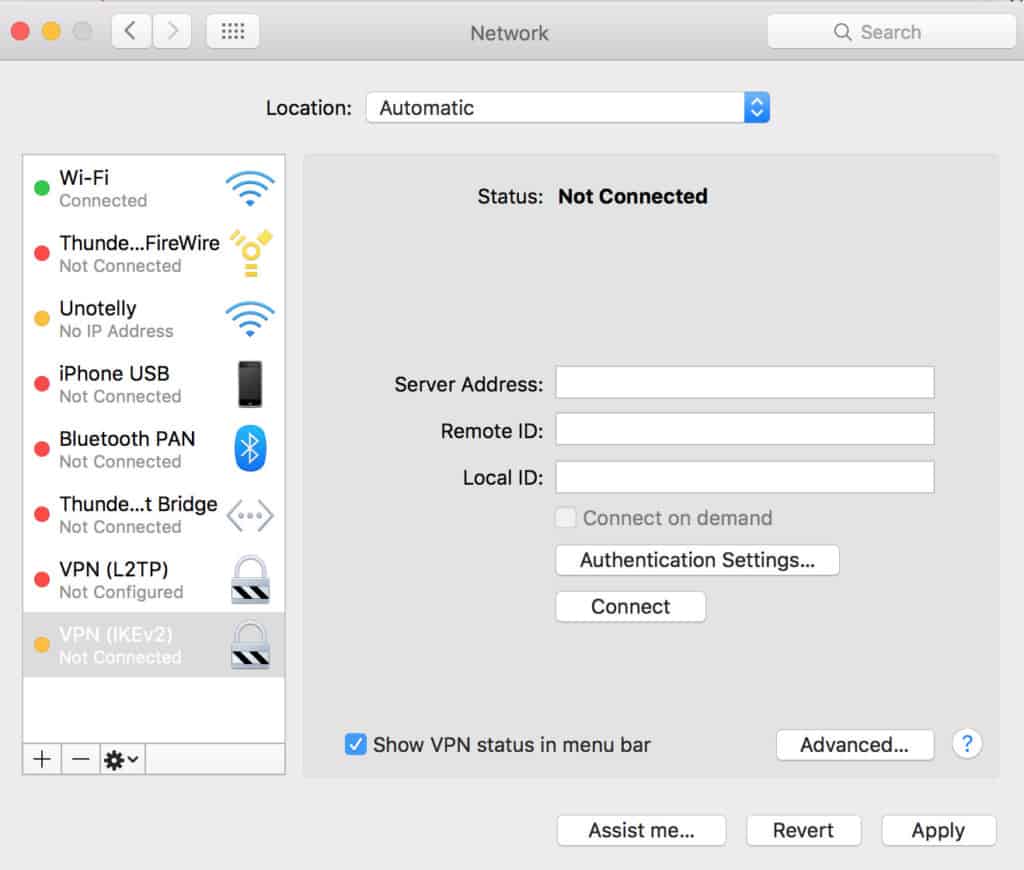
- Click on Authentication Settings and enter the server address and password that are given to you by your corporate network administrator or technical department.
- Click on the Advanced settings if there is additional information to enter such as session options, TCP/IP settings, DNS servers and proxies.
- Click Apply then OK.
- Check the box Show VPN Status In Menu Bar to see the VPN status icon in your Mac’s Menu Bar which allows you to easily connect and disconnect from the VPN.
Once you’ve setup the VPN network on your Mac, you will be able to log into your office network at home for example, and use it just as if you were in the office.
If you ever want to delete the VPN you setup on your Mac, go back to the Network Settings and use the “-” symbol to remove the VPN network.
2. How To Setup A VPN On Mac Using A VPN Service
Using a VPN service is the easiest way to use a VPN on a Mac as it automatically does all the configuration for you. All you have to do is download the app, install it on your Mac and click connect.
There are many advantages to using a paid VPN service, the most popular ones being:
- Your internet usage and IP address remain anonymous or at the least, very difficult to trace.
- Your internet activities are encrypted so that no one, including your ISP or even VPN provider can intercept and read anything you submit over the net (including which apps you’re using at any one time).
- You can access websites or unlock streaming services such as Netflix and BBC iPlayer that may be geo-blocked in your region.
Here’s how to setup a VPN on a Mac using a VPN service.
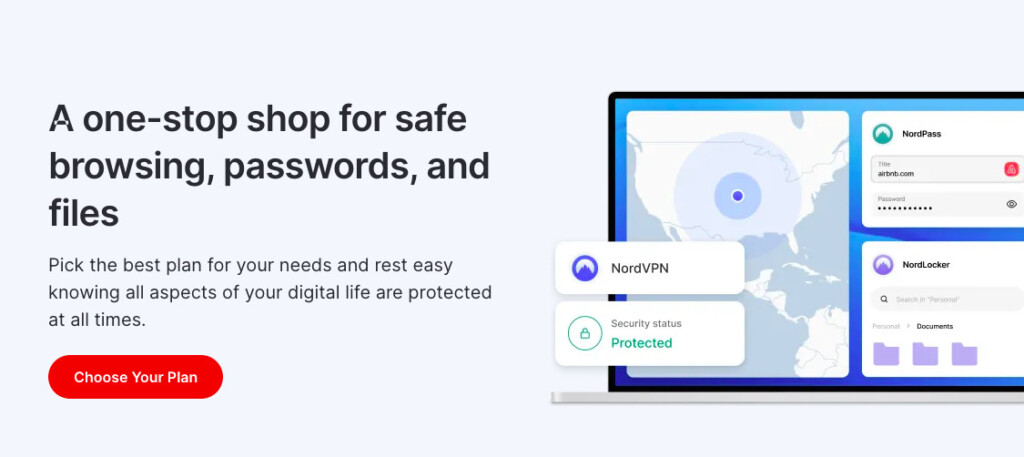
- Choose a VPN service to subscribe to. If you need some help, check out our guide to the best VPNs for Mac all of which are the best Mac compatible VPN services on the market. We strongly recommend NordVPN For Mac as the best Mac compatible VPN service on the market at the moment.
Whichever you choose, all of them allow you to try them for free first so you can test them before paying. There are also a number of free VPNs for Mac but be aware they are not as fast, secure or cover as many countries as paid VPN services.
- Download the VPN app and install it on your Mac. During the installation process, you may be asked by macOS to allow it to change the configuration settings of your Network settings which is perfectly normal and saves a lot of technical work for you.
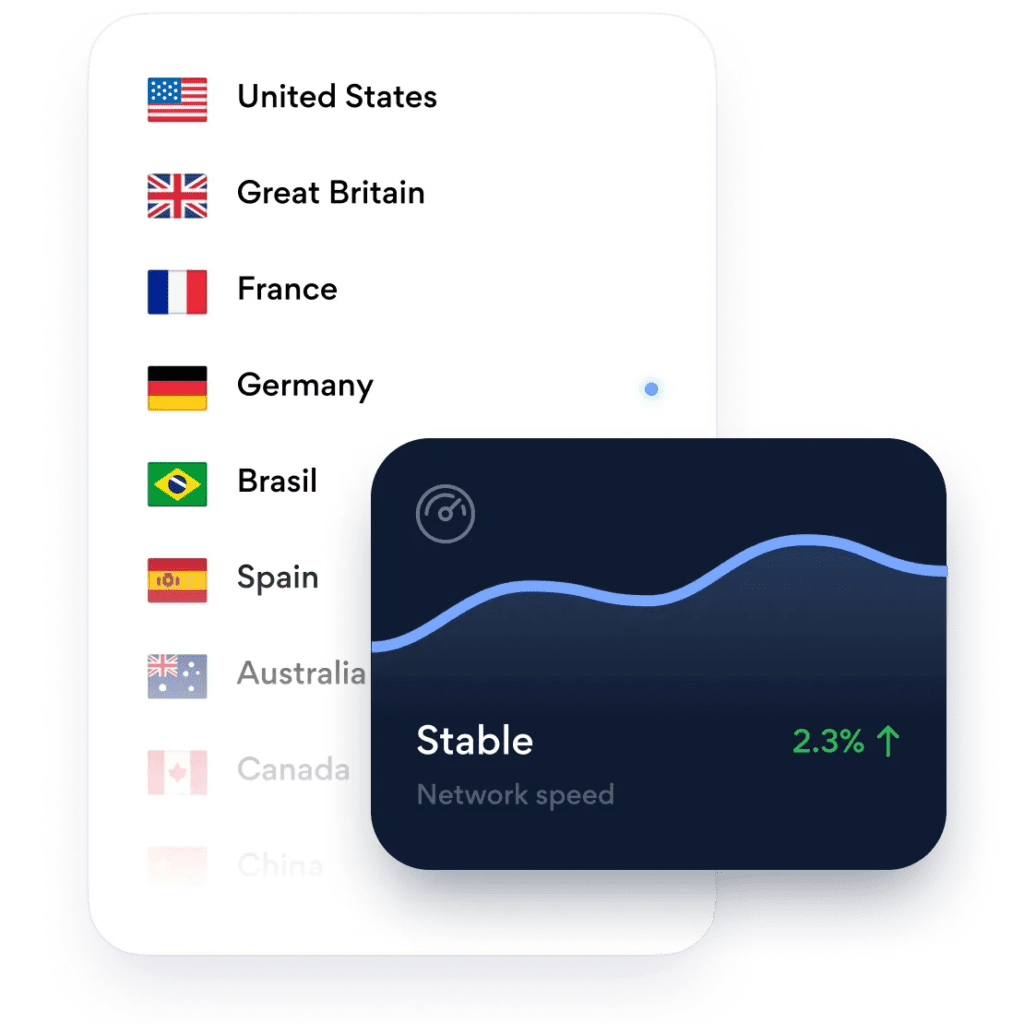
- Launch the VPN on your Mac. You can then choose a country to connect to. Whichever country you connect to, your VPN connection will be secure and your privacy protected. However, if you wanted to watch UK Netflix outside of the USA then you’d need to connect to a US server.
Once the VPN is connected, you can see the status of the VPN connection in your Menu Bar and toggle it on and off easily from there.
When you disconnect the VPN, you’ll go back to using the IP address provided by Internet Service Provider (ISP).