

Recording your Mac’s screen is easy, but capturing internal audio (the sound from videos, games, or applications) is a bit trickier.
Frustratingly, the macOS screen recording tool and QuickTime only capture external audio via your microphone.
By default, the screen recording tool only captures external audio via your Mac’s microphone.
To record your Mac’s internal audio during screen recording, you need to use QuickTime Player along with the free BlackHole plugin.
Here I’ll show you exactly how to do it so that you can record all the sound that’s going on internally on your Mac.
You May Also Like:
Contents
What You’ll Need
- A Mac (Intel or Apple Silicon)
- QuickTime Player (built into macOS)
- BlackHole audio plugin (free)
- macOS Ventura or later (including the latest version of macOS Tahoe)
If you’ve got all these, follow these instructions to make the macOS screen recording tool record your internal audio.
Step 1: Install the BlackHole Plugin
- Make sure QuickTime Player is closed.
- Download the BlackHole audio plugin from the official site. The download works on both Intel and Apple Silicon Macs. Note that although there is also a Github page for the Blackhole plugin it will just take you straight to the Blackhole audio plugin website anyway when you try to download it.
- Enter your name and email to get the download link.
- You will see three versions: 2-channel, 16-channel, and 64-channel. Download the 16-channel version, which is suitable for most screen recording tasks.
- Open the downloaded file and follow the installer instructions. After installation, you can move the installer to the Trash.
Step 2: Configure Audio Devices
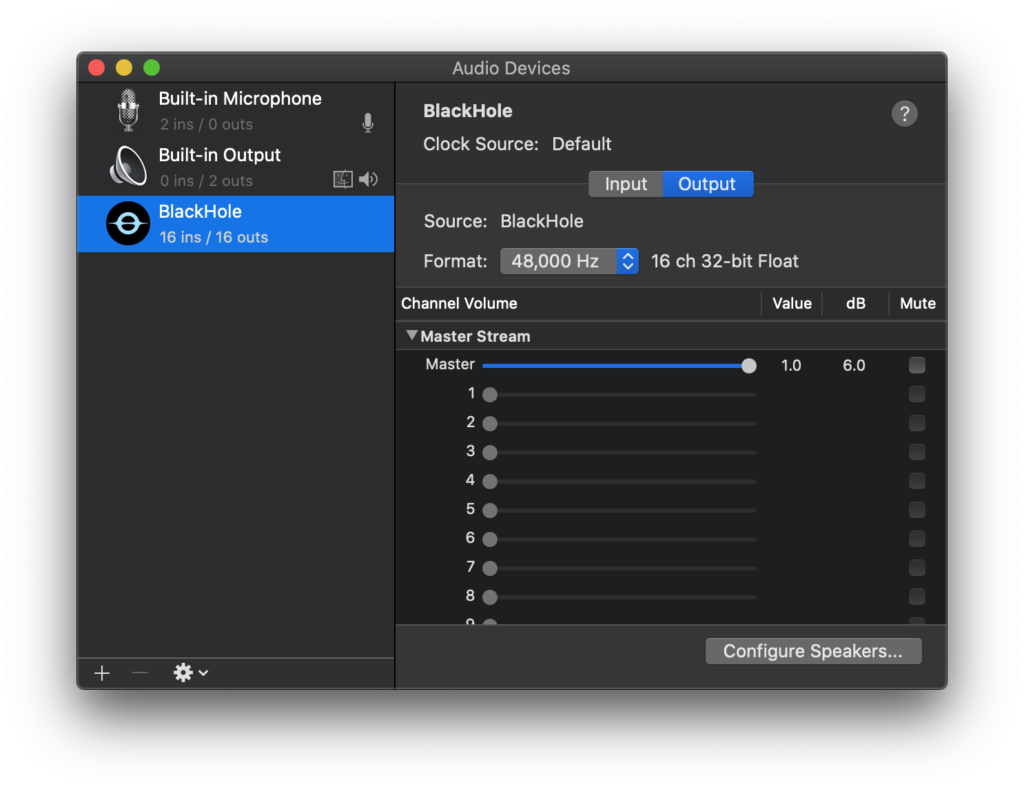
Open Audio MIDI Setup
- Use Spotlight Search (Cmd + Space) and type Audio MIDI Setup, then press Enter.
- On the left, you will see a list of audio devices, including BlackHole 16ch.
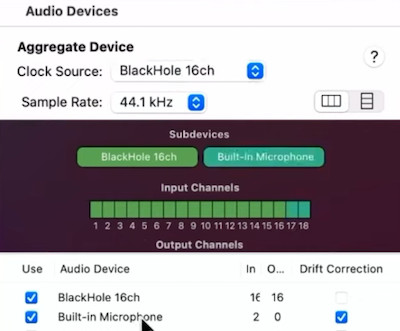
Create an Aggregate Device
- Click the + button at the bottom left and select Create Aggregate Device.
- Rename it QuickTime Input.
- In the right panel, check BlackHole 16ch.
- If you want to record your voice via the Mac’s microphone simultaneously, also check Built-in Microphone.
Create a Multi-Output Device
- Click the + button again and select Create Multi-Output Device.
- Rename it Screen Recording Audio.
- Check Built-in Output first, then BlackHole 16ch second.
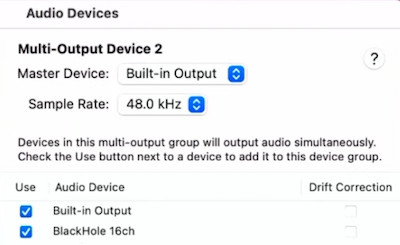
This setup allows your Mac to play audio through your speakers/headphones while also routing it into QuickTime for recording.
You’ve now configured the Blackhole plugin and can close the Audio Midi Setup windows.
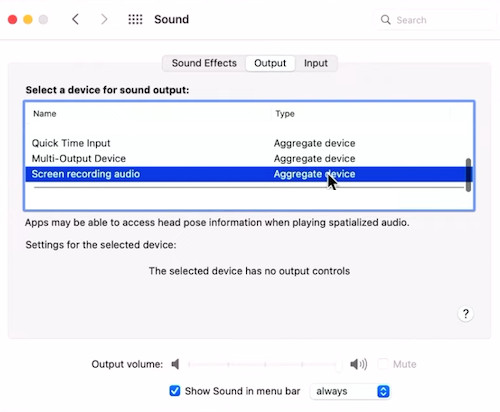
Step 3: Set System Audio Output
- Click the Apple menu > System Settings (or System Preferences in older macOS versions) > Sound.
- Go to the Output tab.
- Select Screen Recording Audio.
- Close System Settings; the setting will remain active.
Step 4: Record Your Screen with QuickTime
- Open QuickTime Player.
- Go to File > New Screen Recording.
- In the screen recording window, click Options and select QuickTime Input as the audio source.
- Click Record and start your screen recording. QuickTime will capture both your screen and your Mac’s internal audio.

Step 5: Finishing Up
- To stop recording internal audio, go back to System Settings → Sound → Output and switch back to Internal Speakers.
- If QuickTime does not record in stereo correctly, try the 2-channel version of BlackHole and select BlackHole 2ch in your audio setup instead of 16-channel.
- If you notice audio distortion, open Audio MIDI Setup and check the Drift Correction box for BlackHole.