
If you just want to share the screen on your Mac, you don’t have to use remote desktop software in order to do it.
As we’ll show you, sharing your Mac’s screen has never been easier in 2026 with lots of free tools available both built into macOS and third party apps.
So whether you’re helping a friend, doing remote work, or presenting to a team, there are plenty of options available.
In this guide, you’ll learn:
- Native macOS methods (local network, over the internet)
- Remote tools and services
- Pros, cons, and tips to get the best experience
- When built-in tools aren’t enough (for iOS, cross-platform, etc.)
First of all, here’s a summary of all the methods we will cover before diving into them in more detail.
| Tool | Best Use Case | Pricing |
|---|---|---|
| macOS Screen Sharing (built-in) | Mac ↔ Mac, local network | Free (built into macOS) |
| FaceTime (SharePlay) | Quick screen sharing with other Apple devices | Free (built into macOS/iOS) |
| QuickTime Player (wired iOS screen recording) | Share or record iPhone/iPad screens | Free (built into macOS/iOS) |
| Reflector / AirServer / LetsView | Wireless iOS/Mac screen mirroring | Reflector: Paid; AirServer: Paid; LetsView: Free |
| Chrome Remote Desktop | Cross-platform remote access | Free |
| Microsoft Remote Desktop (Mac → Windows) | Hybrid workflows / Mac to Windows access | Free |
| AnyDesk / TeamViewer | Support or presentation across platforms | Free for personal use; Paid for commercial |
| Zoom / Google Meet / Slack | Collaboration + screen sharing in calls | Free tier available; Paid plans for advanced features |
Table of Contents
- 1. Preparation: What to Do Before You Share
- 2. Native Screen Sharing (Mac ↔ Mac)
- 3. Connecting from Another Mac (Same Local Network)
- 4. Share a Mac Screen from Anywhere (Over the Internet)
- Fine-Tuning Your Screen Sharing Session
- Sharing iPhone / iPad Screens
- Recording While Screen Sharing
- Troubleshooting Mac Screen Sharing Issues
- FAQ
Before jumping into screen sharing, it’s always a good idea to do a bit of “housekeeping” to make your Mac look respectable! If you’ve got files and folders all over your desktop, it doesn’t look great, especially in meetings.
Here’s a few tips how to do it:
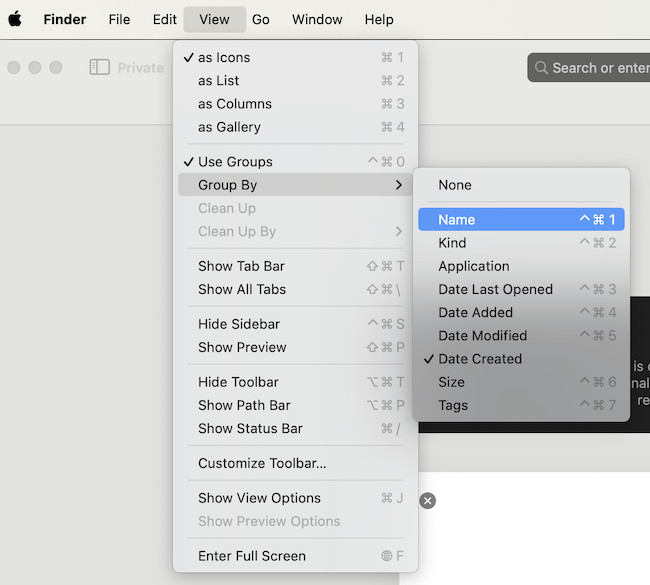
- Tidy your desktop: Remove sensitive files, arrange icons, hide clutter. You can do this easily by going to Finder > View and use one of the “Group By” options or you can use Stacks (Finder > View > Use Stacks) to group items automatically.
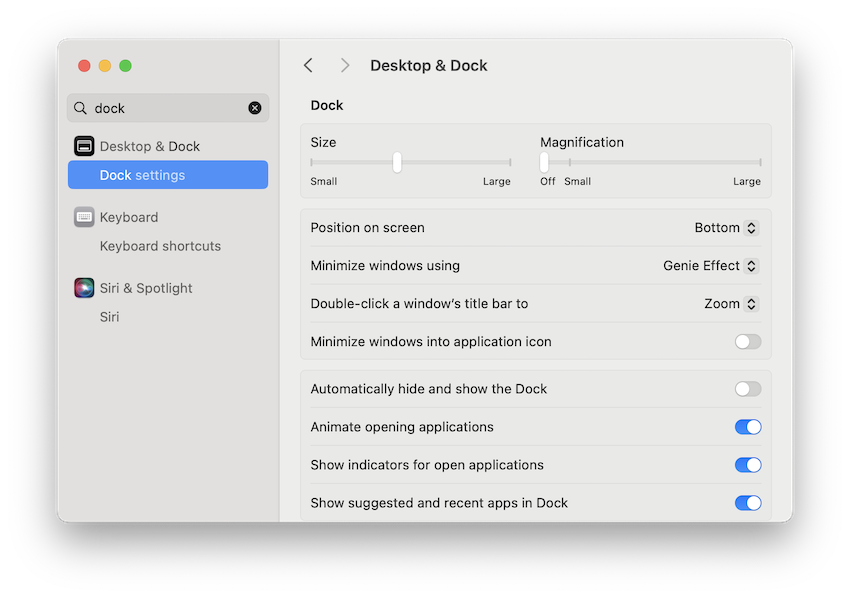
- Clean your menu bar: Go to System Settings > Control Center to hide unnecessary menu bar icons (or System Preferences > Dock & Menu Bar on older versions of macOS) to hide unnecessary Dock icons.
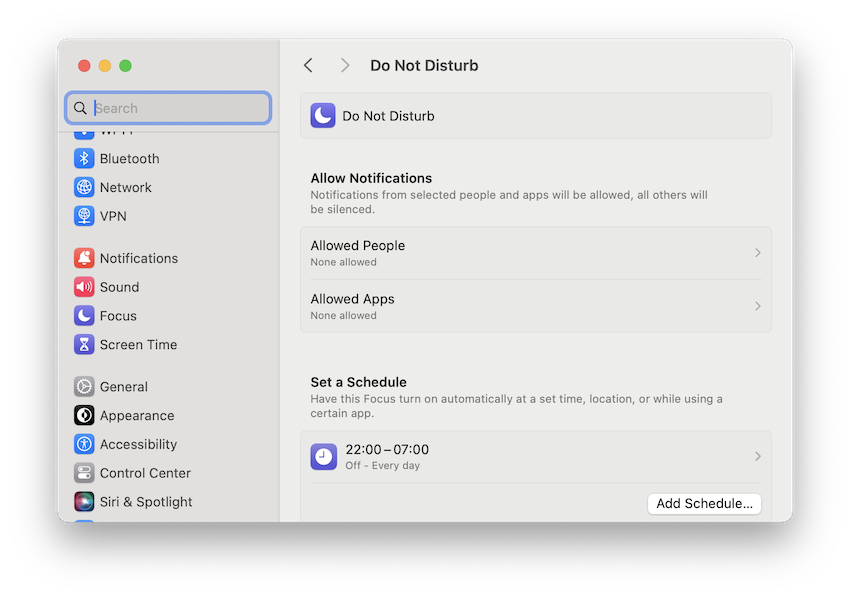
- Disable notifications temporarily: Use Focus mode or “Do Not Disturb” so alerts don’t pop up while you’re sharing.
- Check system requirements & macOS version: Newer macOS versions (Ventura, Sequoia, Tahoe etc.) add enhancements for screen sharing like better background sharing, presenter previews, etc.
2. Native Screen Sharing (Mac ↔ Mac)
macOS includes a built-in Screen Sharing feature (based on VNC) that works well on local networks and in many remote setups if you just want to share Mac to Mac.
Before you start, you need to make sure that Screen Sharing is enabled on the target Mac i.e. the Mac that you want to appear on your own desktop.
Note: Home users should have no problem with the following instructions but those working on a company network with a Firewall may not be able to because sharing may be blocked by system administrators.
If you do experience problems with this tutorial on a corporate network, please contact your network administrator.
To activate screen sharing in macOS follow these instructions.
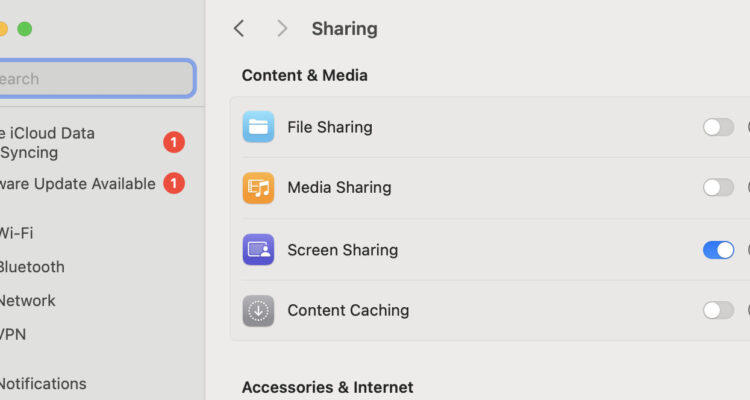
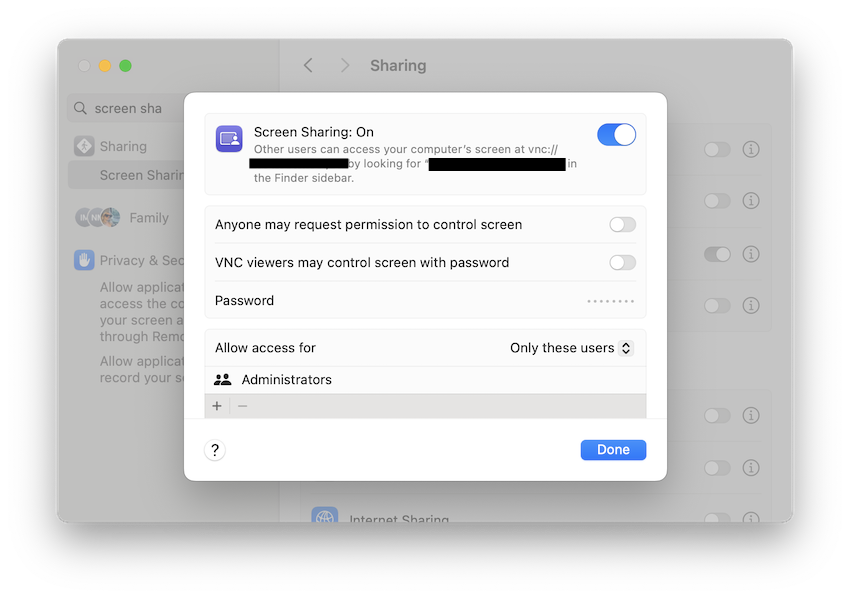
- On Apple Silicon Macs running the latest versions of macOS, click on the Apple logo in the top right, go to System Settings and search for “Screen Sharing“:

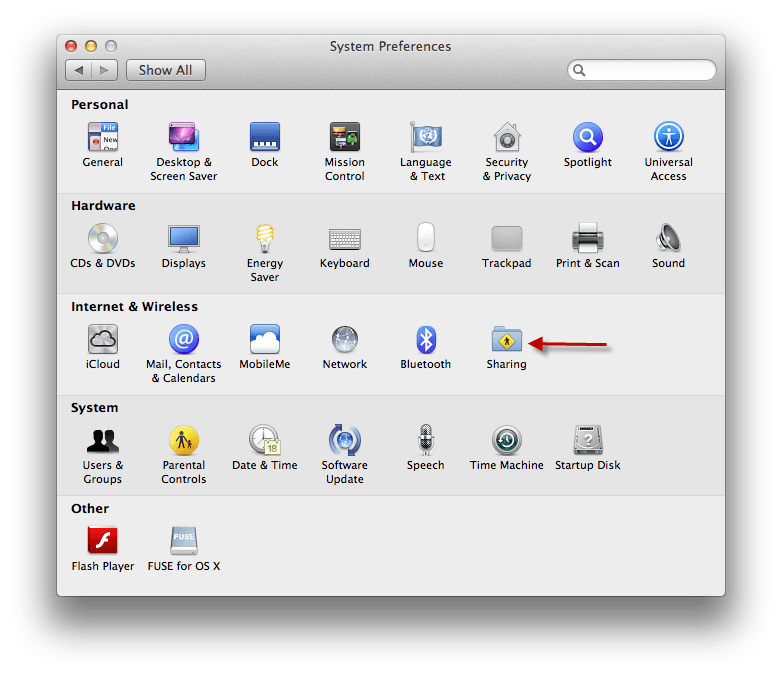
- On Intel Macs running versions of macOS Monterey or earlier, go to System Preferences and click on “Sharing” under Internet & Wireless Preferences:
- Then activate screen sharing on mac by clicking the Screen Sharing box.
- On Intel Macs running older versions of macOS Monterey or earlier, it will look more like this:
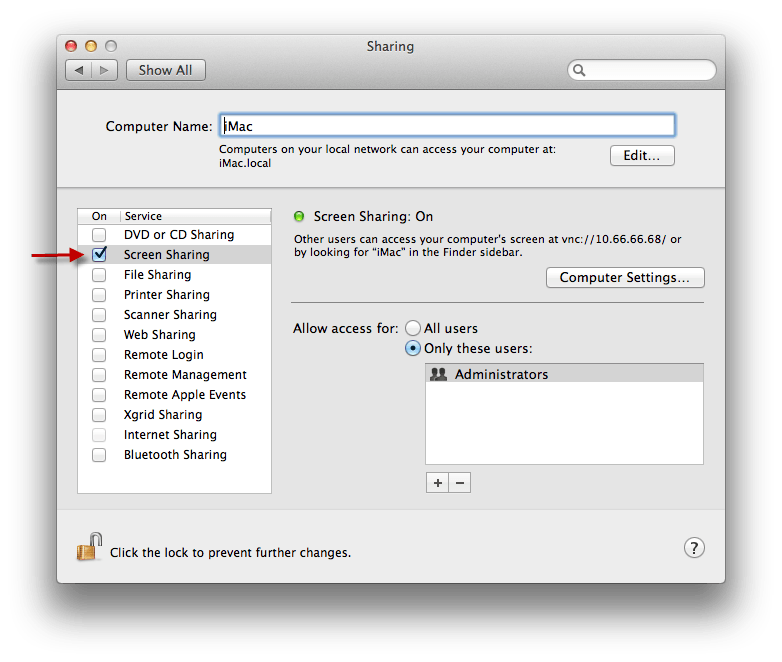
You’ll see a network address like vnc://192.168.x.x (make a note of it).
There are also options to:
- Allow anyone to request permission to control screen (they must still be approved).
- VNC viewers may control screen with a password (lets others connect using a set password).
- Restrict access to specific users if desired.
Now you are ready to access the screen of the Mac remotely.
3. Connecting from Another Mac (Same Local Network)
If both Macs are on the same Wi-Fi or Ethernet network, you can now start screen sharing in a few different ways.
a) Finder Sidebar
- On your own Mac, open Finder.
- Under Network or Shared, select the target Mac.
- Click Share Screen.
- Choose either:
- Ask Permission (sends a prompt to the other Mac), or
- Registered User (enter a username/password if you have one).
b) Connect to Server (VNC)
- In Finder, choose Go ▸ Connect to Server… (⌘K).
- Enter the VNC address you noted earlier, e.g.
vnc://192.168.x.x. - Click Connect.
c) Browser Shortcut
Some browsers allow you to type the VNC address directly in the URL bar (e.g. vnc://192.168.x.x) to launch the Screen Sharing app automatically.
Use Screen Sharing Controls
Once connected, the Screen Sharing app opens. You can:
- Resize or go full screen (arrow icon in the top right).
- Adjust quality and scaling from the View menu.
- Drag and drop files if both Macs are running macOS Mountain Lion (10.8) or later.
Tips & Limitations
- Performance depends on network speed – wired connections give the smoothest experience.
- Built-in Screen Sharing only shares Mac screens, not iPhone or iPad. To mirror iOS devices, use apps like Reflector or AirServer.
- Always limit access to trusted users and set strong passwords.
Apple’s Screen Sharing works best on the same local network. To connect over the internet you’d need to configure routers and port forwarding, which can be complex.
Instead, I strongly recommend using a free remote-desktop service such as:
- Chrome Remote Desktop – Quick setup, works in any browser.
- Microsoft Windows App – Ideal if you also need Windows access.
- AnyDesk or TeamViewer – Simple cross-platform apps
- Zoom / Google Meet / Slack – allows you to collaborate and screen share at the same time
How to share via FaceTime (requires macOS 12.1 and iOS 15.1 or higher)
Alternatively, you can also use FaceTime which allows you to instantly screens with other Apple device users anywhere in the world.
FaceTime uses SharePlay to share screens. To screen share with Facetime, do the following:
- Start a FaceTime call.
- Click the Share Content icon and choose Share Entire Screen or Share This Window.
Note: Facetime only supports view-only screen sharing; you cannot remotely control the other Mac or iOS device.
Fine-Tuning Your Screen Sharing Session
For the best results, you can tweak a few settings and follow some security and performance tips:
1. Display & Quality Settings
- In the Screen Sharing app, go to Settings (menu bar) to adjust quality and scaling.
- Use Full Quality / Adaptive Performance options on newer Macs for smoother images.
- Match resolution and color profiles if you’re using graphic design or media software.
2. File Sharing During Screen Share
- Drag and drop files directly between Macs in the Screen Sharing window.
- Use copy/paste to share text, images, or documents quickly.
3. Annotation Tools
- Use apps like Presentify to highlight or annotate your screen, ideal for tutorials, demos, or guided walkthroughs.
4. Hide Sensitive Data
- Close or hide windows with private content before sharing.
- Use macOS “Hide Others” or minimize clutter to keep the focus on relevant content.
5. Privacy & Permissions
- Ensure Screen Recording and Accessibility permissions are enabled for apps that control or capture your screen by going to System Settings > Privacy.
6. Security Best Practices
- Disable Screen Sharing when not in use.
- Avoid “Anyone may request permission” on laptops.
- Use per-user access whenever possible.
- Set strong passwords for VNC access.
7. Performance Tips
- Wired/Ethernet connections provide the smoothest experience.
- Close unnecessary apps to reduce CPU load and improve responsiveness.
Sharing iPhone / iPad Screens
macOS doesn’t natively share iOS screens via its Screen Sharing. For this we recommend using:
- QuickTime (wired) remains valid for recording or sharing iOS screens.
- Wireless mirroring apps like Reflector, AirServer, and LetsView are now widely used.
- macOS still does not allow native remote control of iOS devices – it supports viewing only.
Recording While Screen Sharing
You can use built-in tools for screen recording on a Mac:
- Press Shift + Command + 5 > select screen recording.
- Or use QuickTime > New Screen Recording.
Third-party tools (Capto, ScreenFlow) offer more control and options.
Troubleshooting Mac Screen Sharing Issues
If you run into any problems sharing your screen, try one of the following:
- Check firewall/NAT issues: macOS Firewall or router NAT may block VNC traffic.
- Keep Macs awake: Prevent sleep mode while sharing.
- Use wired/Ethernet connection for best performance.
- Close unneeded apps to reduce CPU load.
- Test access before critical sessions, especially on remote or multi-network settings.
FAQ
Do I need extra software to share my Mac screen?
No. macOS has a built-in Screen Sharing feature that works on local networks and can be accessed via VNC. For remote access over the internet or cross-platform sharing, third-party tools like Chrome Remote Desktop, TeamViewer, or AnyDesk are recommended.
Can I share my screen with Windows or Linux users?
Yes, but you’ll need a cross-platform tool such as Chrome Remote Desktop, TeamViewer, or AnyDesk. Apple’s native Screen Sharing is Mac-to-Mac only.
Can I control someone else’s Mac remotely?
Yes. With macOS Screen Sharing, you can request control, or use tools like TeamViewer or AnyDesk for full remote control. FaceTime and conference apps are view-only.
Can I share my iPhone or iPad screen from a Mac?
Yes. You can use QuickTime Player with a cable or wireless mirroring apps like Reflector, AirServer, or LetsView. Note: remote control of iOS devices is not possible – screen sharing is view-only.
How do I improve screen sharing performance?
- Use a wired/Ethernet connection instead of Wi-Fi when possible.
- Close unnecessary apps to reduce CPU load.
- Use Full Quality / Adaptive Performance options in the Screen Sharing app on newer Macs.
Is screen sharing secure?
Yes, if you follow a few of the following tips:
- Only allow access to trusted users.
- Use per-user accounts or strong passwords for VNC.
- Disable Screen Sharing when not in use.
- Ensure Screen Recording and Accessibility permissions are granted only to trusted apps.
Can I share my screen over the internet using Apple’s Screen Sharing?
Technically yes, but it requires complex router and port forwarding setup. For simplicity and reliability, use Chrome Remote Desktop, TeamViewer, AnyDesk, or a video conferencing app instead.
Do I need the latest version of macOS to share my screen?
No. macOS Screen Sharing has existed for many versions. Ventura, Sonoma, Sequoia and Tahoe offer additional enhancements like presenter previews and improved background sharing.
Can I record a screen sharing session?
Yes. Use Shift + Command + 5 for screen recording, QuickTime > New Screen Recording, or third-party apps like Capto or ScreenFlow for advanced features.