
If you’ve ever wanted to create custom labels or stickers on your Mac, then there’s a range of free and paid apps that make it easy.
Whether you need them for printing address labels, organizing files, labeling products, or crafting DIY stickers for personal use, Macs have a range of tools and apps that make it easy to bring your designs to life.
Here we’ll show you a range of tools and apps to create anything from simple labels to Avery labels and fancy stickers that you can print on any all-in-one printer.
Contents
- 1. Printing Address Labels From Contacts
- 2. Using Pages for Basic Label Creation
- 3. Using Canva for Sticker & Label Design
- 4. Using Labelmaker For Labels
- 5. Advanced Sticker and Label Design with Adobe Illustrator
- Other Software for Label Design on Mac
- Printing Your Labels and Stickers on a Mac
- Using Cricut for Custom Stickers
- How To Make Avery Labels on a Mac
1. Printing Address Labels From Contacts
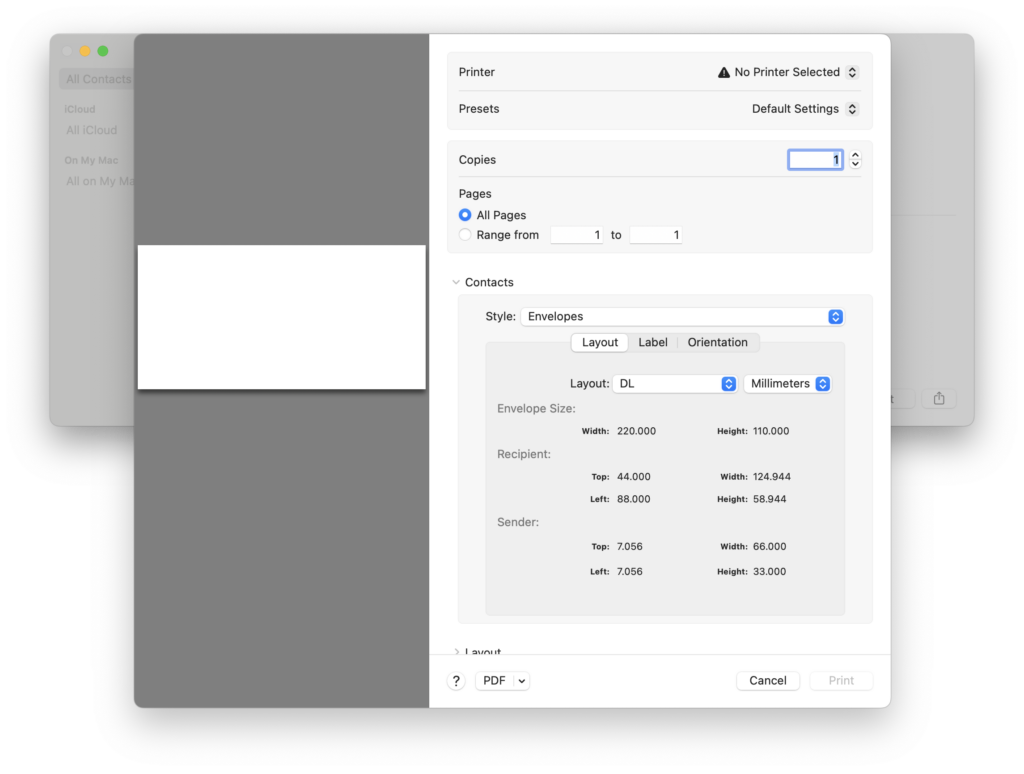
If you just want to print address labels for Contacts stored in macOS, it’s very straightforward.
Here’s How To Print Address Labels from Contacts:
- Launch the Contacts app on your Mac.
- Choose the contacts you wish to create labels for by selecting individual contacts or an entire list. Note: Only contacts with address information will be included in the labels.
- Navigate to the menu bar and select File > Print.
- In the print dialog box, click the Style pop-up menu and select Mailing Labels.
- If the Style menu isn’t visible, click Show Details at the bottom-left corner of the dialog box.
- Click on the Layout tab to choose your label type, such as Avery Standard or A4.
- To define a custom label, select Define Custom and input your label’s dimensions.
- Click on the Label tab to include additional elements such as sorting by zip code, company name or region, add a logo and modify the font or color.
- After customizing, click Print to produce your labels.
2. Using Pages for Basic Label Creation
Apple’s built-in Pages app is more flexible than most people think – and it’s free!
Though it’s mainly known as a word processor, it can also be used for desktop publishing but few Mac users know it can also be used for designing labels.
It can also be used to make Avery labels on a Mac.
Here’s how to create labels with it:
How To Make Labels With Pages:
- Open Pages and select “Blank” from the templates.
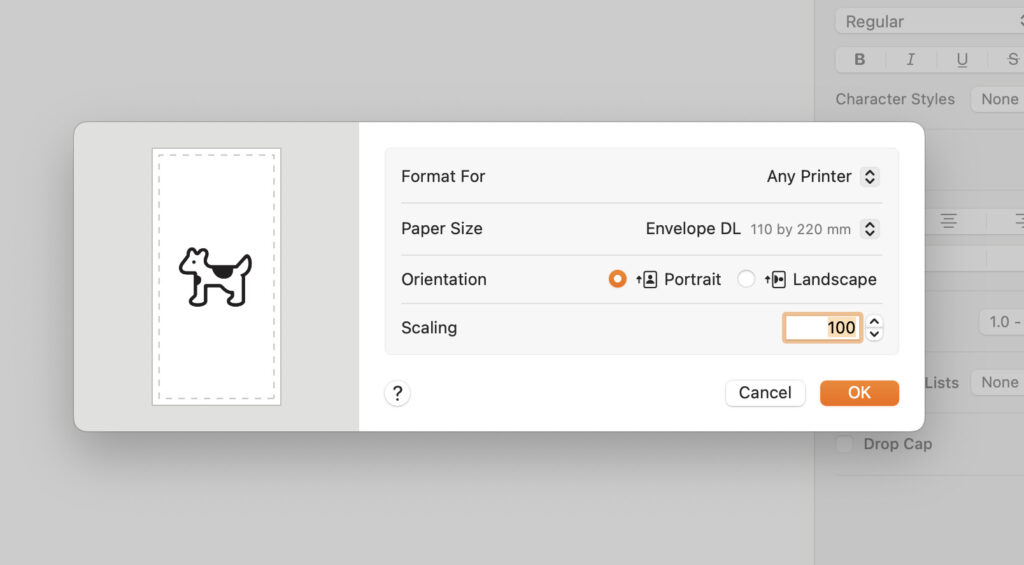
- Go to File > Page Setup and choose the label size you’re working with. If you’re using specific label sheets (like Avery), you can find pre-set templates online or set custom dimensions based on the label size.
- Use Text Boxes to add text to your label and customize the font, size, and color.
- Add images or logos by simply dragging and dropping them onto the canvas. Pages supports most image formats, making it easy to insert icons or even photos.
- Once you’re happy with the design, go to File > Print or export your design as a PDF for later use.
🏷️ Tip: For better alignment, use the Arrange tab to adjust text boxes and images. Pages automatically snaps elements into place, making your designs look polished and professional.
3. Using Canva for Sticker & Label Design
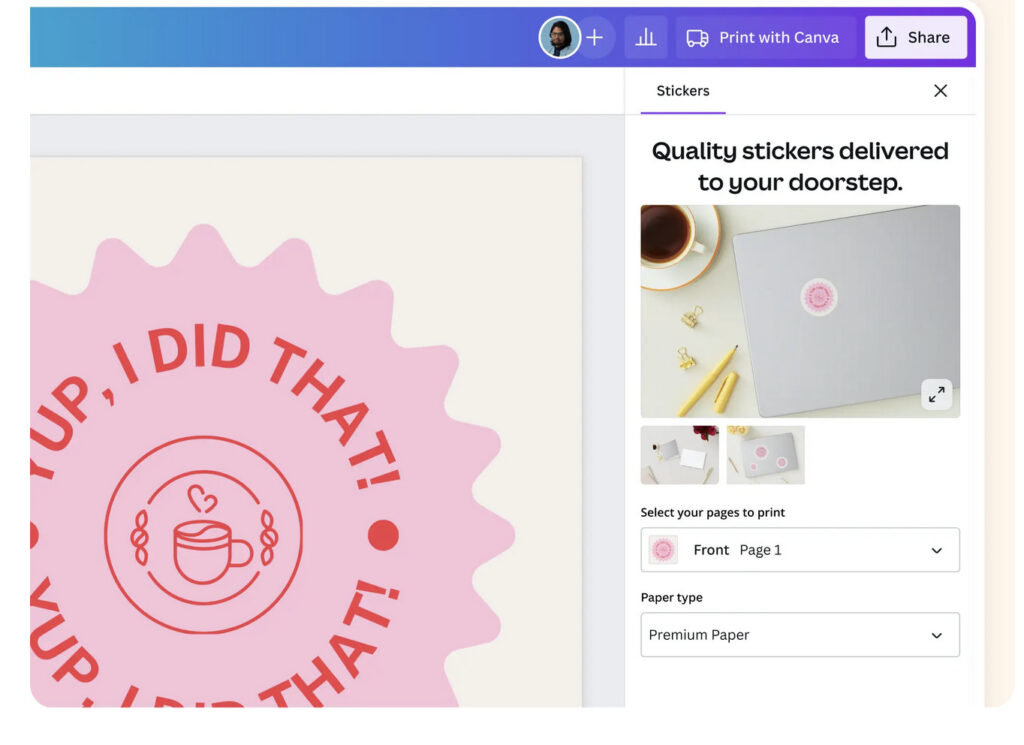
For more creative control, Canva is an excellent web-based graphic design tool that works on any Mac.
The free version of Canva offers a surprisingly large library of templates specifically for stickers and labels, and is easy enough to use for anyone without any design experience.
How To Make Labels & Stickers With Canva:
- Go to Canva.com and create a free account if you don’t have one already.
- Search for “Sticker” or “Label” templates of which there are hundreds of customizable options.
- Once you pick a template, you can edit text, change colors, and add images or your logo. Canva’s drag-and-drop interface is simple to use.
- Once finished, download your design in a high-resolution format such as PNG or PDF.
🏷️ Tip: Use Canva Pro for access to an even wider range of design elements and the ability to export your sticker designs with transparent backgrounds. This is important for cutting machines or when printing on clear sticker paper.
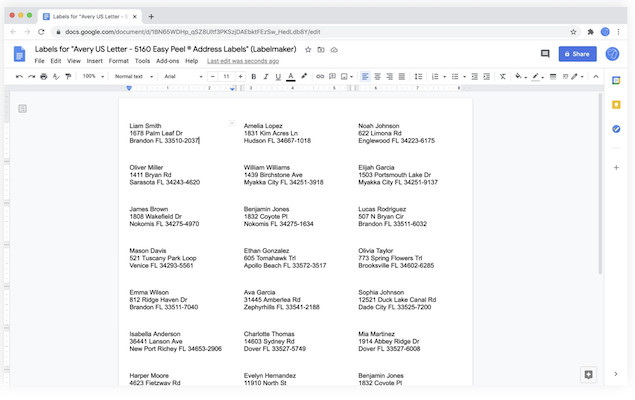
4. Using Labelmaker For Labels
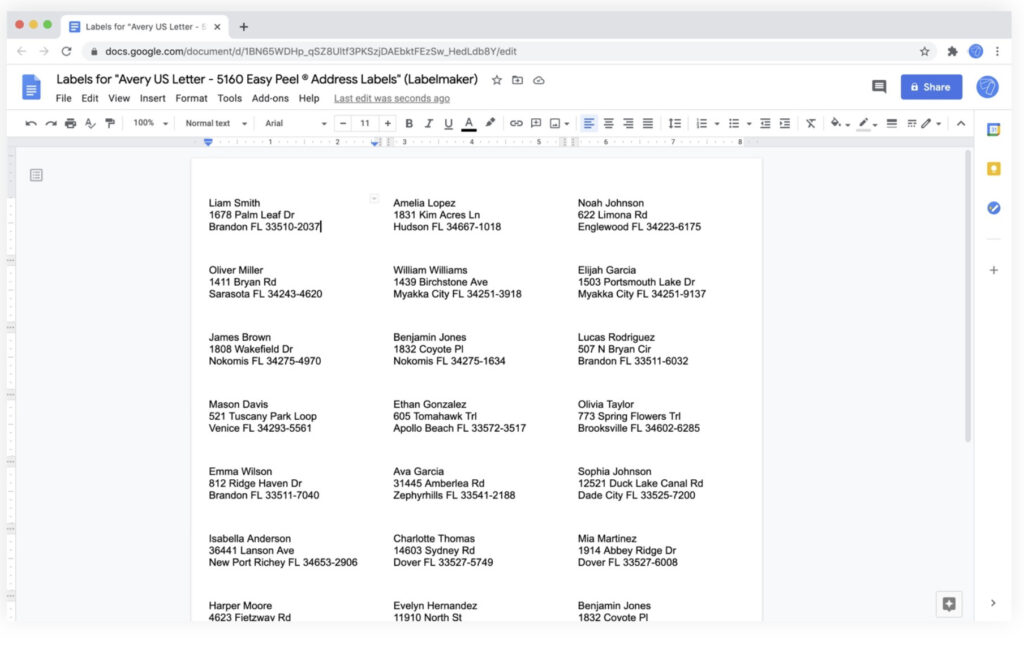
Labelmaker is an add-on for Google Docs that allows you to easily create labels.
How To Make Labels With Labelmaker on a Mac:
- Go to Google Docs.
- Open a new or existing document.
- Click on the Extensions menu at the top.
- Select Add-ons > Get add-ons.
- In the Google Workspace Marketplace, search for Labelmaker.
- Click on the Labelmaker add-on and then click Install.
- Follow the prompts to grant the necessary permissions.
- In the Labelmaker sidebar, click on Select a template.
- Browse or search for your specific label template (e.g., Avery® 5160).
- Design your label in the first cell of the document.
- If you have a mailing list in Google Sheets, click on Select a spreadsheet to link it.
- Use merge fields (e.g.,
<<First Name>>) to personalize each label. - Once your design is ready, click on Create labels to generate the full sheet.Labelmaker
- You can use the File > Print options in Google Docs to print the labels.
🏷️ Tip: If your labels are misaligned after printing, use Labelmaker’s guide on How to Fix Misaligned Labels Templates for troubleshooting tips.
5. Advanced Sticker and Label Design with Adobe Illustrator
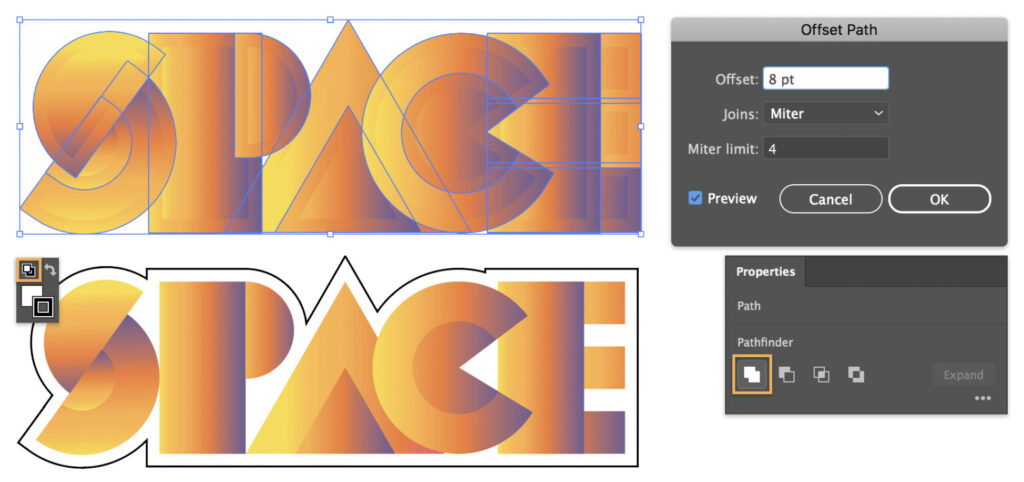
If you want to take your sticker and label design to the next level, Adobe Illustrator is easily the best tool for professional-grade designs.
We don’t recommend this option unless you know what you’re doing with graphic design software but it does produce the most professional results.
Illustrator offers precision control over every aspect of your design and is especially handy if you’re creating labels for commercial purposes or planning to print them in bulk.
How To Create Labels and Stickers With Illustrator:
- Open Adobe Illustrator and create a new document with your preferred dimensions.
- Use Illustrator’s vector tools to create a scalable design. This ensures your labels or stickers print clearly at any size.
- Customize your design with text, shapes, and imported images. You can also use Illustrator’s large library of fonts for something a bit different.
- Save your file as a high-resolution PDF or in Adobe Illustrator (AI) format for professional printing.
🏷️ Tip: If you’re working with die-cut stickers (stickers with custom shapes), use the Pen Tool to create custom paths and outlines, which your printer can use to cut around the edges.
Other Software for Label Design on Mac
There are also other Mac-friendly apps that can help create labels in macOS:
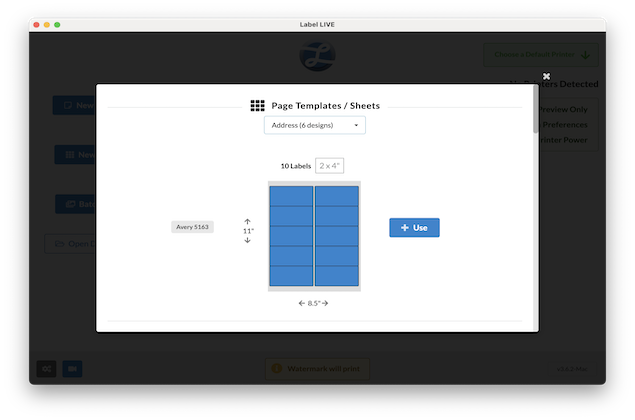
- Label LIVE: This is a straightforward app specifically for making barcode labels, address labels, and similar. It works with a wide range of label printers and offers templates that are aimed at businesses.
- Affinity Designer: A budget-friendly alternative to Adobe Illustrator, Affinity Designer offers many of the same features for vector-based design. It’s a great option for those who want a one-time purchase graphic design software.
- Swift Publisher: This excellent app is a popular alternative to Microsoft Publisher for Mac and is ideal for creating things like product labels, address labels, and more.
Printing Your Labels and Stickers on a Mac
Whichever app you use, once you’ve completed your design, printing is the next step.
Whether you’re using an all-in-one printer or sending your design to a professional print service, here are some tips for printing your designs.
- Home Printing Tips: For best results, use high-quality sticker paper or label sheets designed for inkjet or laser printers. Avery and Neato are popular brands that offer Mac-compatible label templates.
- Printer Settings: Before printing, adjust your printer settings to the highest resolution available (usually 300-600 DPI). Make sure the paper type is set to Sticker Paper or Labels for optimal ink absorption.
If you haven’t got a printer or yours is not suitable for label printing, check out our full article on the best all-in-one printers for Mac.
Using Cricut for Custom Stickers
If you’re serious about making custom stickers, a Cricut machine paired with a Mac can help you create professional-looking stickers that are perfectly cut to size.
Cricut’s Design Space app works on macOS, and is a great choice for DIY sticker makers.
How To Make Labels & Stickers With Cricut:
- Create or import your sticker designs into the Cricut Design Space software.
- Use the Print then Cut feature to print your stickers on your home printer and then cut them using the Cricut machine. This feature ensures precise cuts around intricate designs.
- Apply your stickers to any surface for a custom, professional finish.
🏷️ Tip: For long-lasting stickers, use waterproof sticker paper, and apply a laminate sheet over the stickers before cutting them to make them more durable.
How To Make Avery Labels on a Mac
Avery labels are pre-cut adhesive labels made by Avery, a well-known brand that produces printable labels and office supplies.
Normally they come in sheets (usually standard 8.5″ x 11″) and are designed to be used with home or office printers.
There are a few ways to create Avery labels on a Mac but here are the easiest methods:
Using Avery Design & Print Online (Easiest)
- Go to Avery Design & Print Online.
- Click “Start Designing”.
- Enter your Avery product number (found on the label packaging).
- Choose a template design or start from scratch.
- Customize with text, images, barcodes, etc.
- Click “Preview & Print”.
- Select Download PDF for Printing or print directly.
Using Apple Pages
- Open Pages and choose New Document.
- Click “Stationery” or search for “Labels” in the template gallery.
- If you don’t see your Avery template, download one from Avery’s site and open it in Pages.
- Fill in your label text/images.
- Load the Avery sheet into your printer and click File > Print.
Using Microsoft Word for Mac
If you have Microsoft Word on your Mac, Avery provides Word-compatible templates:
- Download your template from Avery Templates.
- Open it in Word.
- Edit and print like a regular document.
If you have any issues, check Avery’s tips on using Word for Mac.