Remote Desktop software has become far more common these days with more and more people working from home and teams spread out all over the world.
Setting up a VPN to connect to an office network or another Mac ensures secure, reliable remote access from any location.
This guide will walk you through the process of setting up a VPN for remote management of a Mac, ensuring that your data and connections remain protected.
Table of Contents
Choosing the Right VPN Service
The first step is selecting a VPN that meets your specific needs. Here’s what to look for:
- Compatibility: Ensure the VPN service supports the latest macOS versions. Check if it offers a dedicated macOS client and that it works natively with Apple Silicon Macs.
- Security: Opt for a VPN with strong security features, including AES-256 encryption, a no-logs policy, and secure protocols.
- Server Network: A VPN with a large server network allows for better connectivity and performance, especially if you manage Macs across different regions or countries even.
There are many VPN services that you can use and two of the best that offer Mac apps are NordVPN and Surfshark.
We have done a full review of the Best VPNs For Mac that looks at these options in-depth.
Installing the VPN Client on Your Mac
Once you’ve chosen a VPN, download and install the client on your Mac. The installation process is pretty much the same whichever you choose and generally follows these steps:
- Download: Visit the VPN provider’s website and download the macOS version of their client software. Almost all VPN services offer a free trial nowadays although you may have to provide credit card details to access it.
- Installation: Open the downloaded file and follow the on-screen instructions to install the VPN. You may need to grant the installer permissions under System Preferences > Security & Privacy.
- Launch: After installation, launch the VPN client and log in using your credentials.
Configuring the VPN for Remote Management
With the VPN installed, you need to configure it to ensure secure remote management:
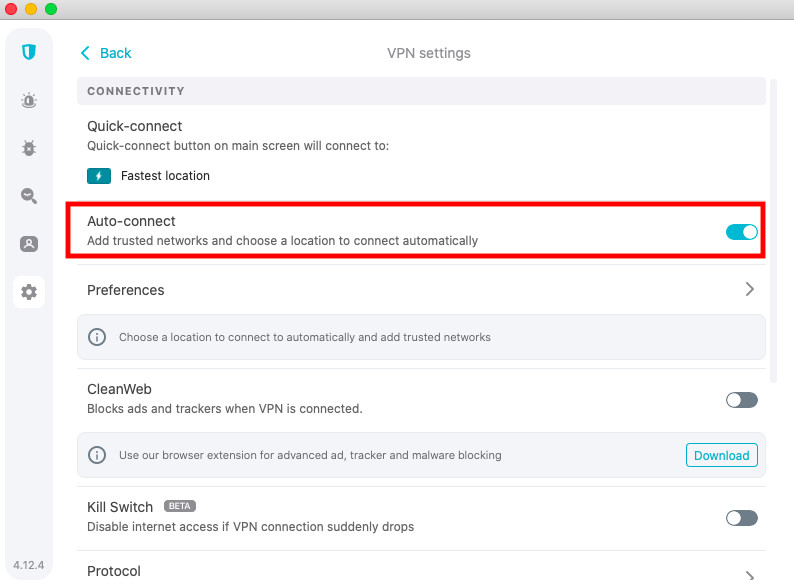
- Auto-Connect on Startup: Set the VPN to connect automatically whenever your Mac starts. This ensures that your remote sessions are always encrypted.
- In the VPN client (in this example Surfshark), go to Preferences or Settings and enable the Auto-Connect feature.
- Custom DNS: Configure custom DNS servers within your VPN client to prevent DNS leaks and enhance security.
- Typically, this can be done in the advanced settings of your VPN client.
Enabling and Configuring Remote Management on macOS
There are various ways to remotely manage a Mac, although probably the simplest and most effective is to use the Remote Management feature in macOS.
Alternatively, you can use remote desktop apps which offer far more features and power than you get in macOS.
Here’s how to enable remote management in macOS.
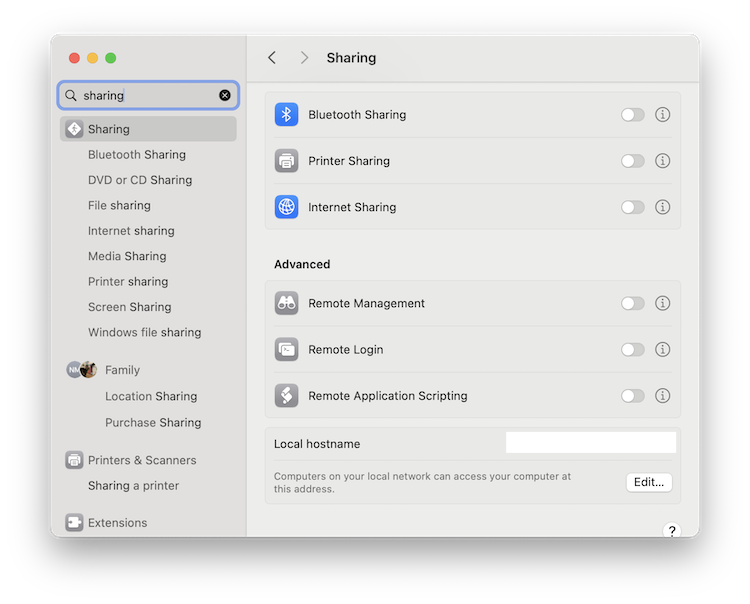
- Go to the Apple logo in the top left of your Mac screen and select System Settings.
- Search for “Sharing” in box on the left.
- Activate Remote Management in the Advanced column.
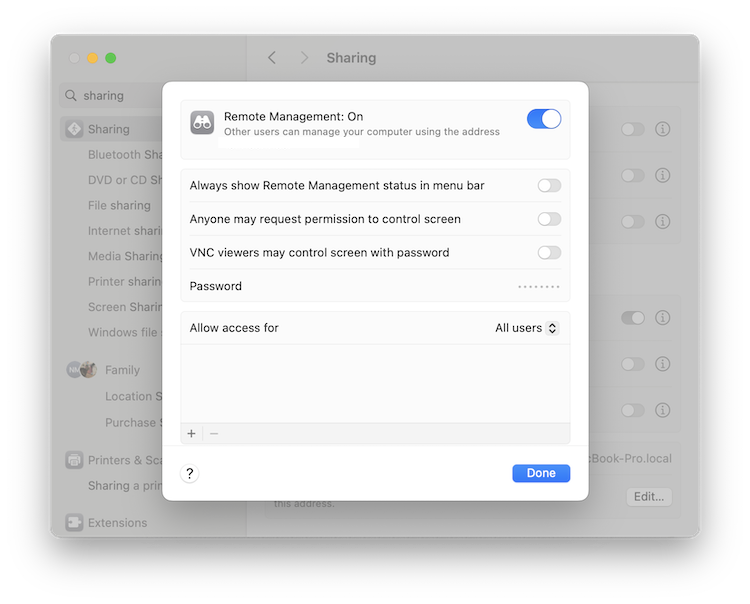
- You then have the option to configure a password for apps connecting to your Mac. Plus there are added settings such as where to display the status, permissions and VNC access.
On older versions of macOS, the process is:
- Open System Preferences by clicking on the Apple logo on the top left of your Mac.
- Click on Sharing and select Remote Management.
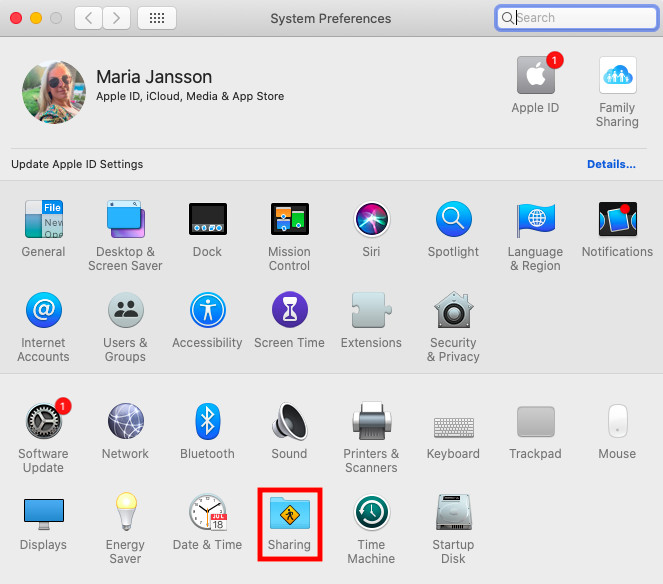
- Click on Computer Settings and set up a password. Additionally, you can specify which users or groups have remote access to your Mac.
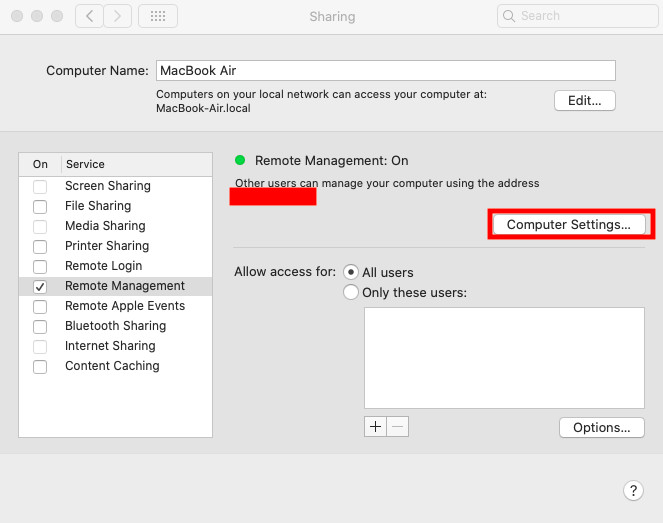
- You can also configure advanced options, such as screen sharing quality and additional access permissions.
Securing Your Remote Connection
Making sure your Mac is secure is very important when enabling remote access. Here are additional measures you can take:
- Two-Factor Authentication (2FA): Enable 2FA on both your VPN account and your macOS account. This adds an extra layer of security.
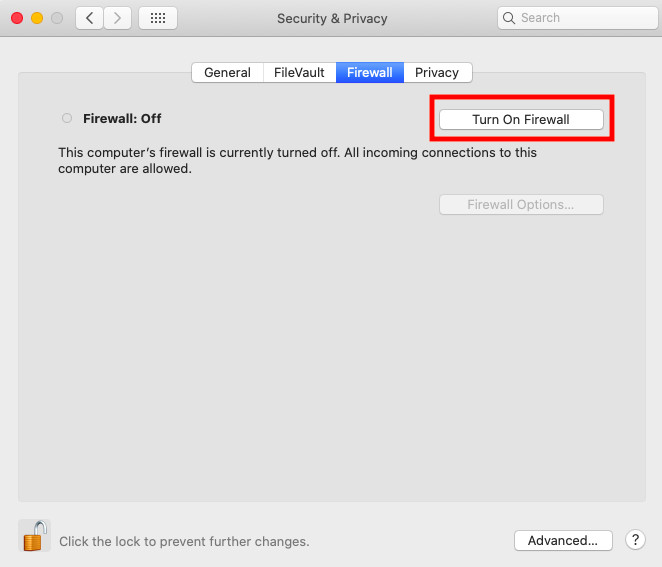
- Activate macOS Firewall: macOS has an in-built Firewall that can protect you Mac from unauthorized connection attempts. Go to System Settings and search for “Firewall”
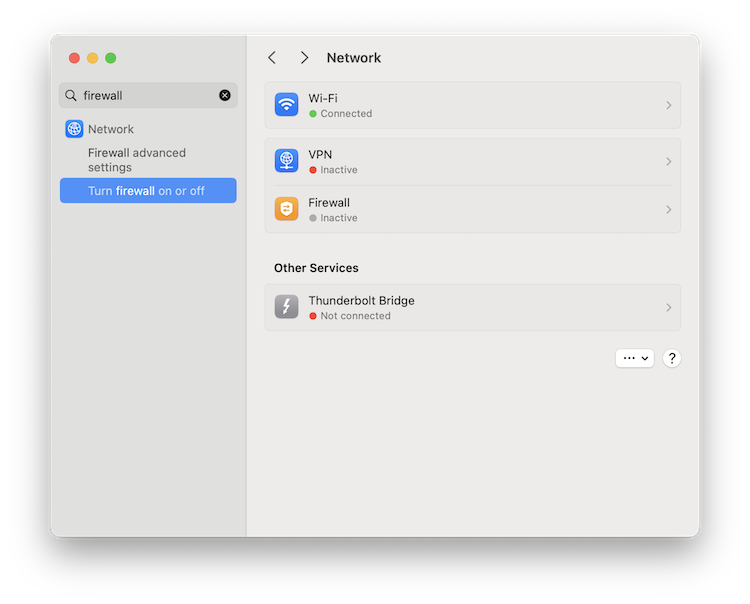
- You can then activate the Firewall in macOS and configure how it operates on your Mac.
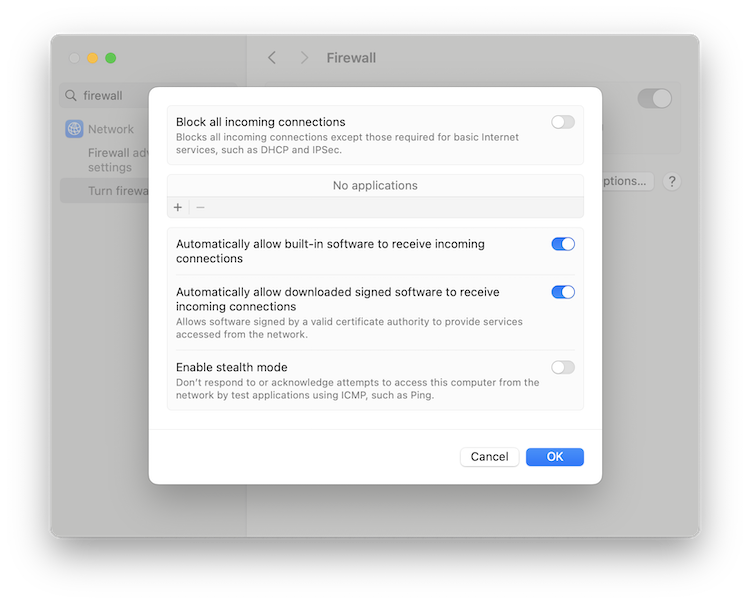
On older versions of macOS, you need to go to System Preferences > Security & Privacy > Firewall to activate it.
- Keep macOS and your VPN updated: It’s also especially important to make sure that you keep both macOS updated and your VPN software updated to protect against vulnerabilities.
Testing and Troubleshooting the Setup
Before relying on the setup, it’s important to test that everything is working:
- Test Remote Access First: Use another device to connect to your Mac remotely. Ensure that the connection is stable and that you can access all the necessary functions.
- Check VPN Stability: Monitor the VPN connection over time. If the connection drops frequently, consider switching to a different server or contacting support.
- Performance Tuning: If the VPN is slow or unreliable, experiment with connecting to different servers.
FAQ
Why should I use a VPN for remote Mac management?
A VPN ensures that your remote connection to a Mac is encrypted and secure.
How can I test if my VPN setup is working properly?
Try accessing your Mac from another device via the VPN. Ensure the connection is stable and that all remote management tools function correctly.
Will a VPN slow down my remote management tasks?
A VPN can slightly affect the speed of apps using it but using a high-quality service with fast servers should mean you don’t really notice it.
Can I manage multiple Macs remotely using a single VPN?
Yes, many VPNs allow for multiple simultaneous connections, enabling you to manage several Macs securely at once. However, some may charge per device or per Mac managed.


