

If you want to install Windows 11 on your Mac, here we show you a quick and easy way to do so including on the latest Apple Silicon Macs.
There are various ways to use Windows on Macs although the easiest method for most people is with a virtual machine.
There are pros and cons to installing Windows on a Mac but virtual machines offer the best compromise between having the best of both worlds – macOS and Windows at the same time.
Virtual machines allow you to run Windows and macOS side-by-side so that you can switch between them whenever you want.
In this tutorial, we’ve used the Parallels virtual machine which is by far the easiest and fastest tool for running Windows on any Mac as you can read in our full Parallels review.
You can see just how quick and easy it is to install Windows 11 on a Mac using Parallels below.
However, although you can try Parallels for free it does require a paid subscription.
If you’re on a budget, you might want to consider using VMware Fusion instead which is free (full VMware Fusion review here).
VMware Fusion isn’t as slick or as well integrated with macOS as Parallels but it does also download and install Windows 11 automatically on Apple Silicon Macs.
For a comparison of the two solutions, check out our look at VMware Fusion vs Parallels.
Intel Mac owners can also use Boot Camp to install Windows 11 for free although this is increasingly unsupported, unstable and no longer available on Apple Silicon Macs anyway.
Boot Camp should now be considered a legacy option suitable only for advanced users.
Contents
Can You Install Windows 11 on Apple Silicon Macs?
Yes you can install Windows 11 on M-series Macs (which is exactly what we did in this tutorial) but there is a slight difference to installing it on Intel Macs.
It’s not yet possible to run the standard x86 version of Windows 11 on M-series Macs like you can on Intel Macs.
However, you can run Windows ARM which is very similar to the standard version of Windows.
Windows ARM works with many x86 and x64 apps via translation although it sometimes results in poorer performance and in some cases won’t work at all.
We’d advise checking whether the Windows software you want to run is compatible with Windows ARM before proceeding.
Installation Checklist & Instructions
Firstly, you’ll need at least 64GB or more free storage space on your Mac startup disk to install Windows 11.
This is however the bare minimum you’ll need and we strongly recommend at least 128GB of free storage space as automatic Windows updates will quickly eat up your hard drive.
The Windows 11 ARM download alone is around 6-7GB so if you’re running low on disk space, you may need to recover some hard drive to download it.
If you can’t or don’t want to delete anything from your Mac’s hard drive, you should get an external hard drive to transfer files onto, ideally an SSD drive or a Thunderbolt SSD drive.
With this in mind, follow these instructions to install Windows 11 on any Mac.
- Download the free trial of Parallels to try it first.
- Double click on the Parallels download and when prompted by macOS click “Open” and then click “Accept” on the End User License Agreement.
- Parallels will now download the installer and then prompt you for your Mac admin username and password to continue the setup.
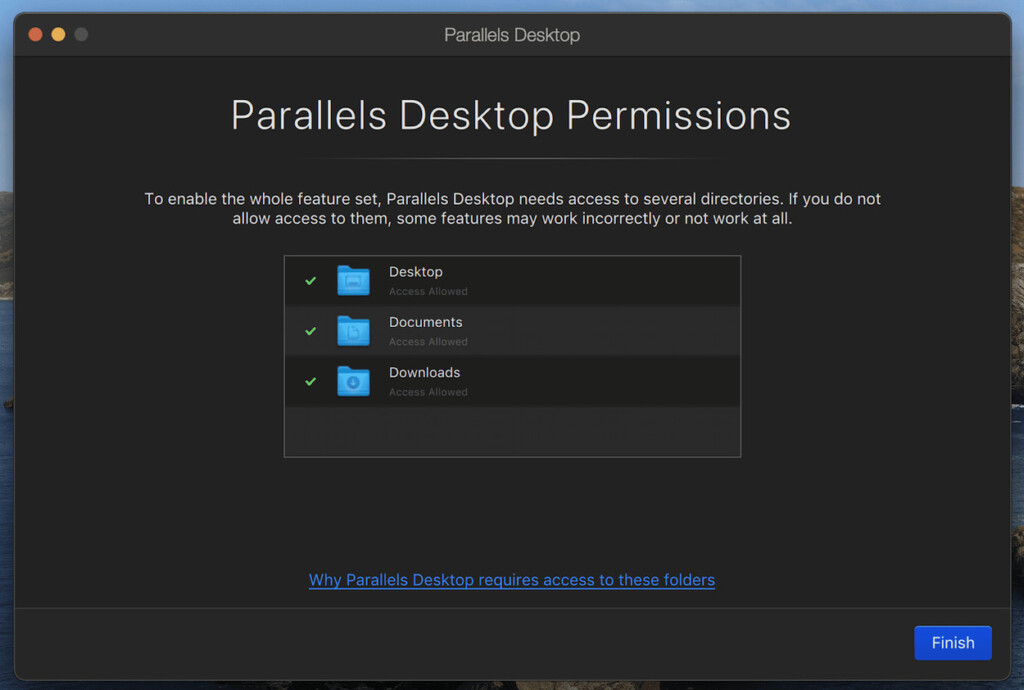
- Parallels will ask permissions to access your Mac Desktop, Downloads and Documents folders. Click on “Finish”.
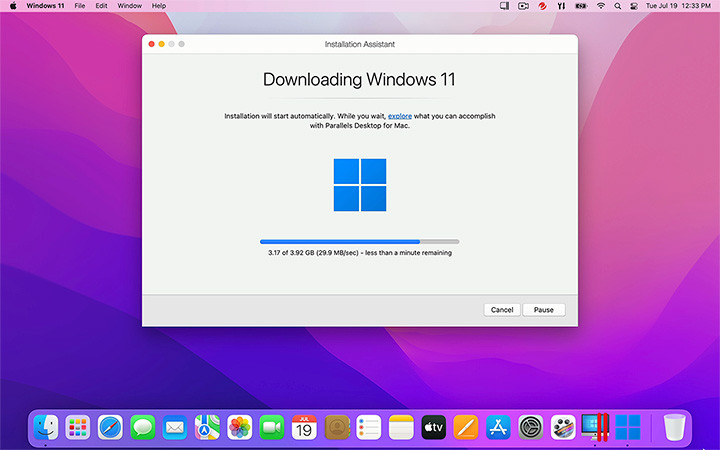
- Parallels will then automatically download and Install Windows 11 from Microsoft when you click Install Windows. If you’re using an Apple Silicon M-series Mac it will download and install Windows 11 ARM.
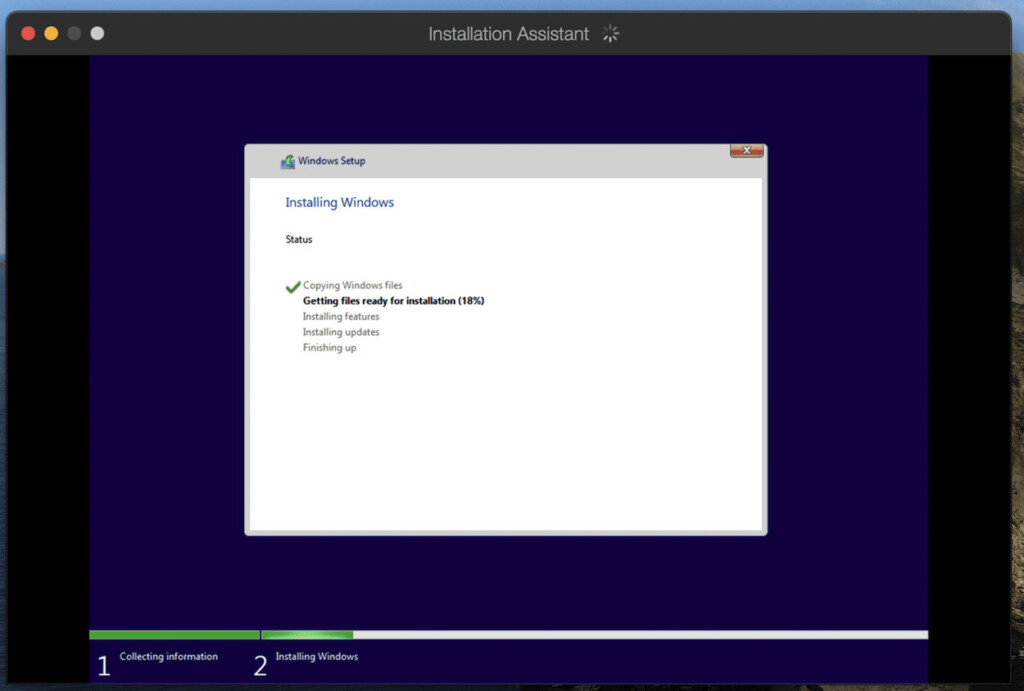
- Microsoft allows you to use Windows 11 for free unless you want to customize the appearance of it, in which case you will need to activate it with a license key. Once is has validated the install, Parallels will then start the Windows 11 installer on your Mac just as if it were installing Windows on a PC.
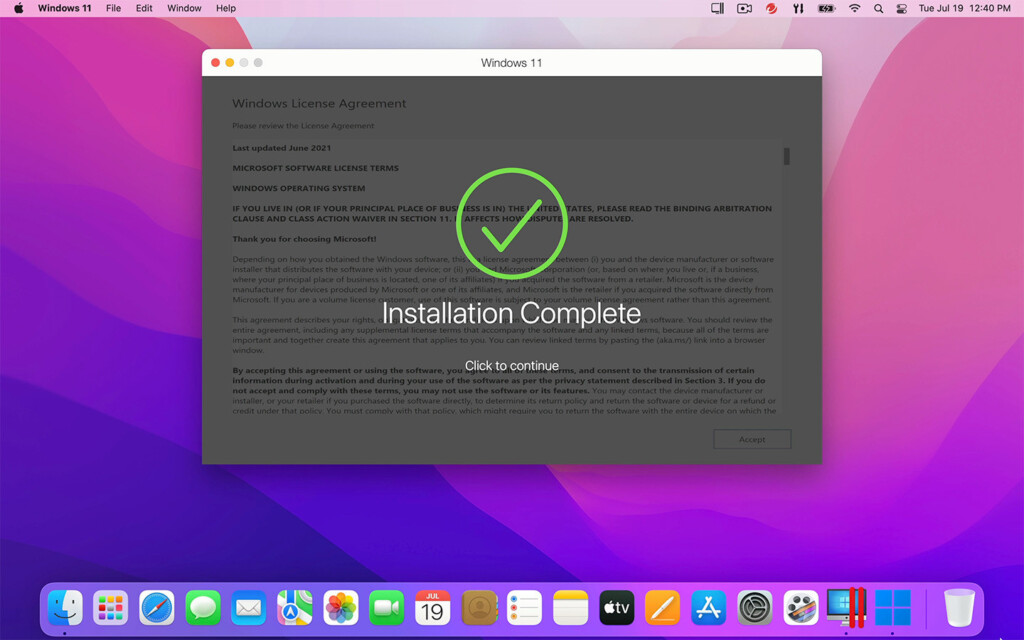
- When this is completed, you’ll get an “Installation Complete” message.
- To finalize the setup, Parallels will prompt you for your Parallels username or password. You can setup an account if you don’t already have one or sign in with your Apple, Google or Facebook account too.
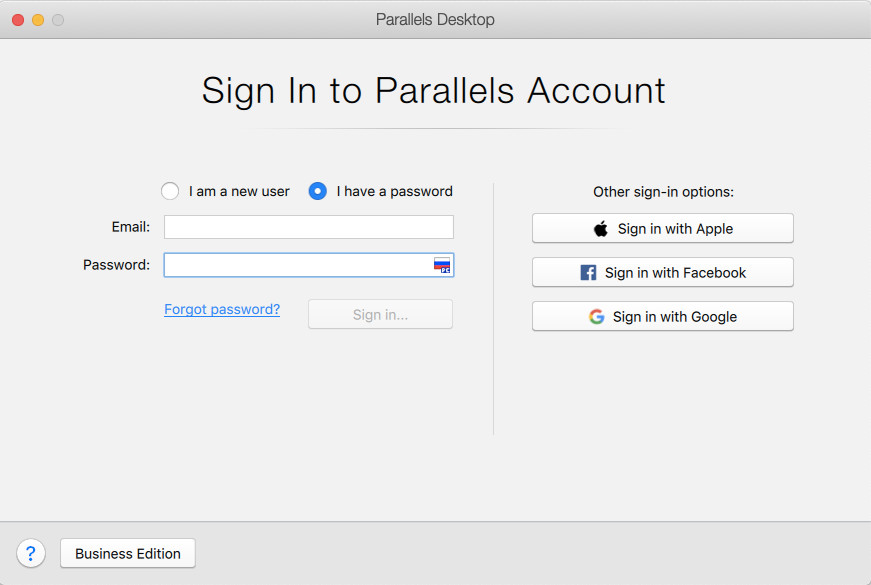
- After you’ve signed-in, Parallels will give you access to a 14 day free trial but if you’ve purchased a Parallels license already, you can enter the license key next.
- Parallels will then display the Windows 11 End User License Agreement which you must click on “Accept” before continuing. You’ll then have full access to Windows 11 on your Intel Mac or Windows 11 ARM on an Apple Silicon Mac.
- Since you’re using a fresh install of Windows, the first thing you’ll need to do is install the latest updates for Windows 11 from Microsoft. To do this, go to the Windows Start Menu > Settings > System > Windows Update.
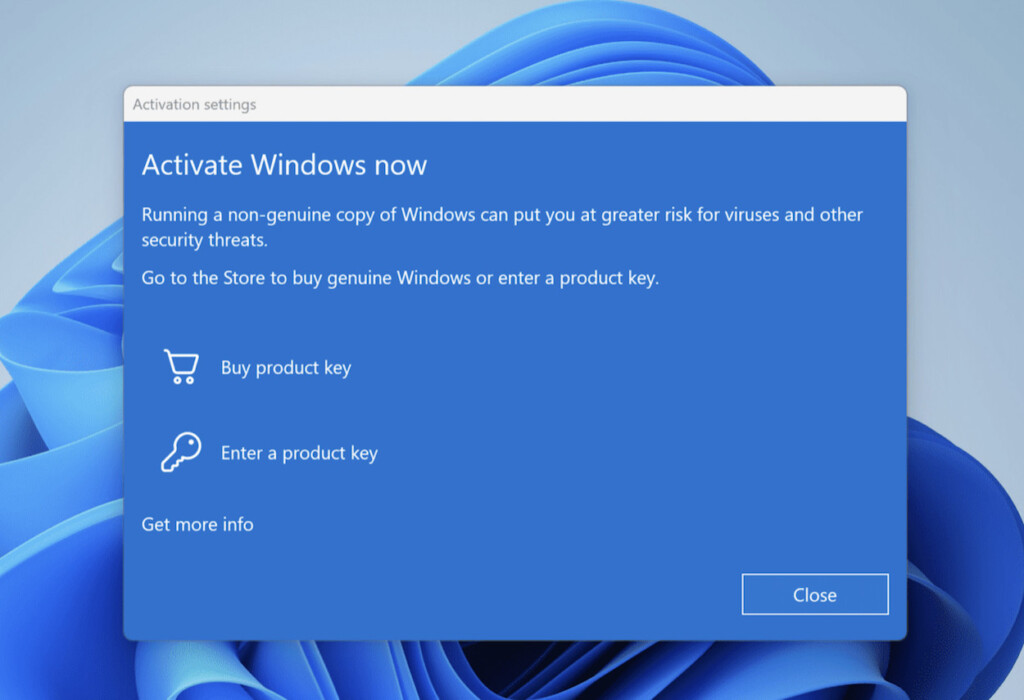
- Windows 11 may prompt you to activate it at this point but you can simply click “Close”. Windows 11 is free to use and you only need to activate it with a key if you want advanced customization options such as changing the wallpaper or desktop theme.
- Click on “Check for updates” button in the top right corner of the Windows Update screen and then install the updates. This can take some time depending on the speed of your internet connection.

- When you have installed all the updates, Windows 11 will then restart to apply them.
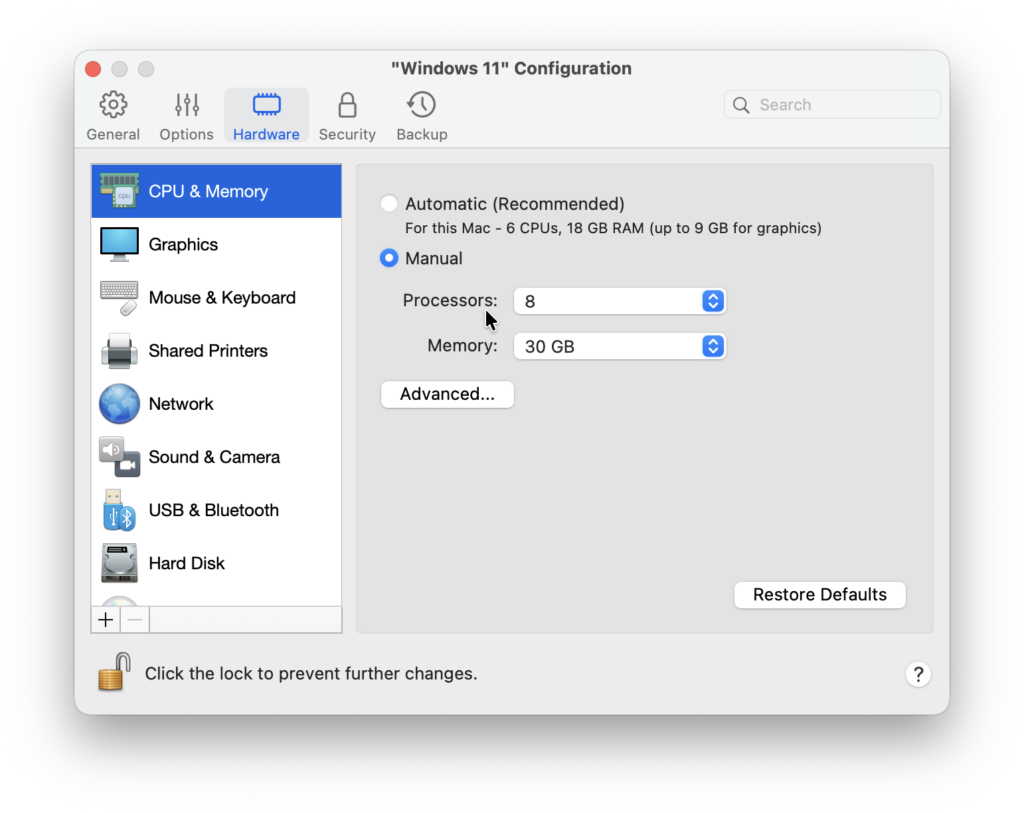
- Once Windows has restarted, you can then configure Parallels to optimize how it uses resources on your Mac. To do this, go to your Windows 11 desktop and select “Actions” from the Menu bar across the top and then select “Configure” at the bottom of the Menu.
- You’ll then see the Windows 11 Configuration Window in Parallels. The most important setting to change is the CPU & Memory allocation under the “Hardware” tab. You can leave the settings on “Automatic” if you want Parallels to manage it for you but we recommend increasing the Memory on Apple Silicon Macs. So for example, if you have an Apple Silicon MacBook Pro with 16GB of unified memory, you can allocate at least half of this to Parallels (i.e. 8GB). This makes it easier for your Mac to run Windows in Parallels smoothly at the same time as macOS. On Macs with only 8GB of unified memory, allocating more than 4GB to Windows may negatively impact the performance of macOS.
- There are many other options you can configure in Parallels. If you click on the “Options” tab across the top for example and select “Sharing”, you can configure how macOS and Windows 11 share files and folders.

- The other thing you might like to configure is how you want macOS and Windows to interact. If you want all of your Windows and Mac apps blended in the Dock for example, then use Parallels in “Coherence” mode.
- To activate Coherence mode go to “View” at the top of your screen in Parallels and select “Enter Coherence”. Then select the blue icon in the top-left of the Window to activate Coherence mode.
- You can exit Coherence mode by going to the “View” Menu again and selecting “Exit Coherence”.
If you choose to use Parallels in the default Windowed Mode instead of Coherence Mode, you can easily switch between macOS and Windows by pressing CMD+TAB on your Mac at any time and there’s no lag when resuming the virtual machine.
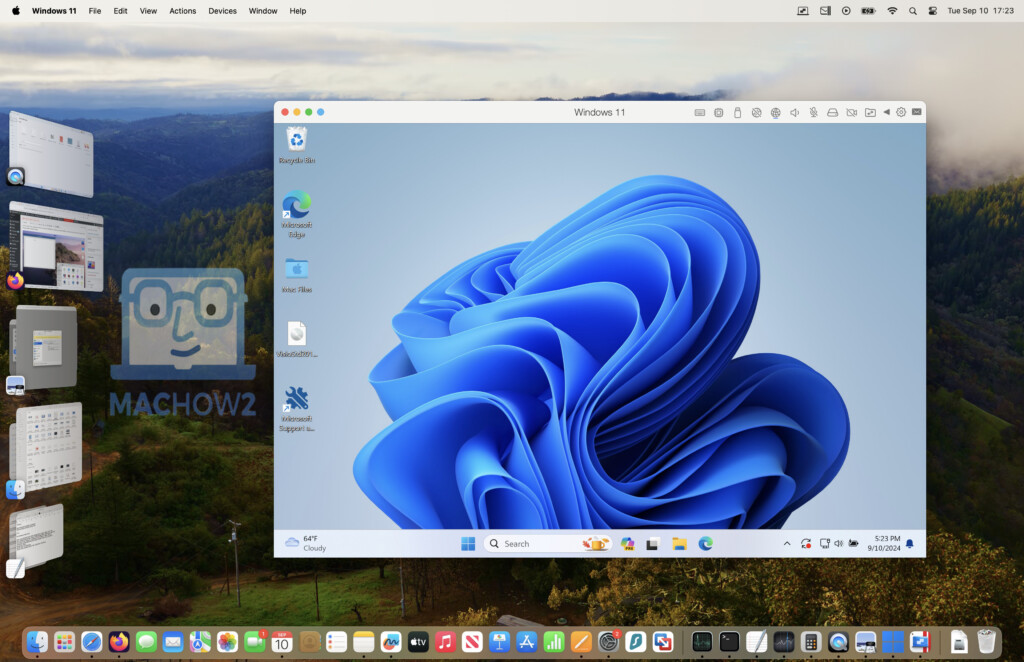
Once you’re happy with the setup, that’s it. You’ve completed the installation of Windows 11 on your Mac.
From here, you can install Windows apps or gaming platforms in on your Mac such as Steam, Microsoft Office 365 or any other Windows only games and software that won’t work on a Mac.
Note however that not all Windows games work in Windows ARM or virtual machines.
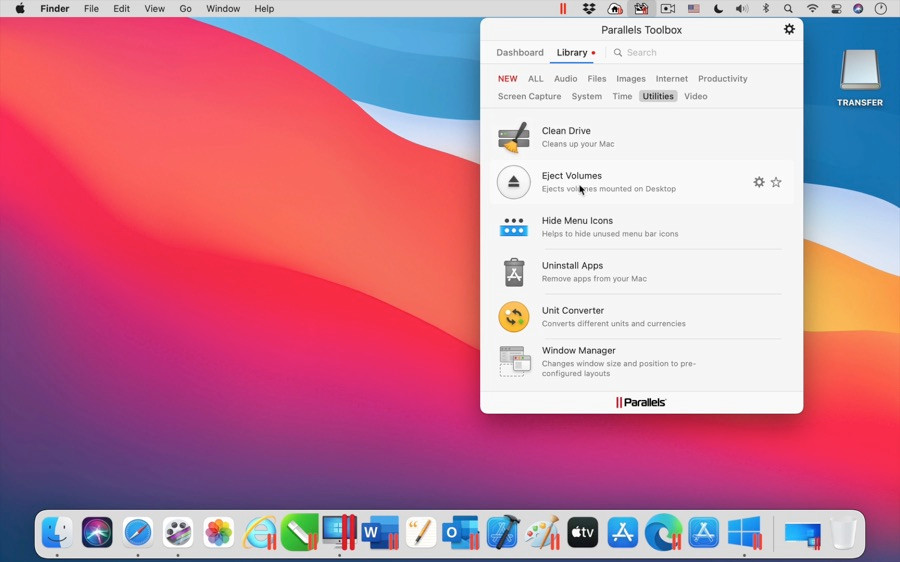
- Although it’s optional, you can also install Parallels Toolbox to get extra features such as tools to clean disk space, uninstall apps, manage windows screenshot tool and other things to make using Windows easier on a Mac. To install Parallels Toolbox simply go to the menu at the top of the screen and select Parallels > Install Parallels Toolbox For Mac and then click Install Now.
How To Use Windows 11 In Parallels
Parallels can run macOS and Windows 11 in different modes depending on how to use them.
The best mode to run it in is Coherence Mode which means the two operating systems work seamlessly together.
You can however switch to three other views: Window View Mode, Full Screen View Mode and Picture-in-Picture View Mode.
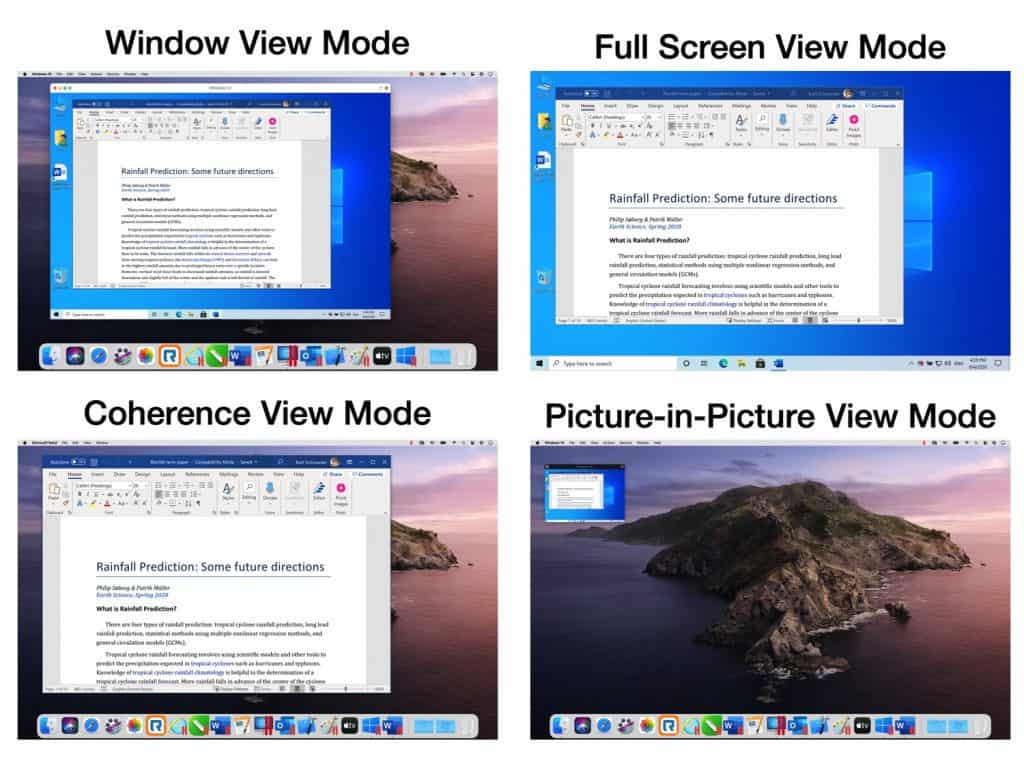
Coherence Mode merges macOS and Windows into one but if you want to use them separately, use Windowed Mode.
You can also optimize Windows 11 depending on how you plan to use it.
If you go to the menu at the top of the screen and select Actions > Configure you can choose to optimize Windows for specific tasks such as Productivity, Software Development, Software Testing, Design and Gaming.
Note that some customization modes are only available if you upgrade to Parallels Pro.

By default most settings in the Hardware tab are set to Automatic but you can manage external hardware connected to your Mac such as Printers and external hard drives in Windows.
If you have any problems following these instructions, you can check out our full tutorial video here.
FAQ
Can you install Windows 11 on a Mac in 2026?
Yes. You can install Windows 11 on both Intel and Apple Silicon Macs, but the method depends on the type of Mac you have.
- Apple Silicon (M-series) Macs must use a virtual machine such as Parallels or VMware Fusion.
- Intel Macs can use either a virtual machine or Boot Camp (although Boot Camp is now considered a legacy option).
Can Apple Silicon Macs run Windows 11 natively?
No. Apple Silicon Macs cannot run Windows natively. Windows 11 runs inside a virtual machine, which allows Windows and macOS to run at the same time.
What version of Windows runs on Apple Silicon Macs?
Apple Silicon Macs run Windows 11 ARM, not the standard x86 version.
Windows ARM is very similar to the standard version of Windows 11 and includes built-in translation to run most x86 and x64 Windows applications, although:
- Some older apps may not work
- Performance can vary
- Certain drivers and games are incompatible
Is Windows 11 ARM free to use?
Yes. Microsoft allows Windows 11 (including Windows ARM) to be used without activation.
However, without a license key:
- Personalisation options are restricted
- You may see occasional activation reminders
A license is only required if you want full customization and enterprise features.
What’s the best way to run Windows 11 on a Mac?
For most users in 2026, Parallels Desktop is the best option:
- Fastest performance
- Best macOS integration
- Automatic Windows 11 ARM download on Apple Silicon Macs
VMware Fusion Pro is a good free alternative but is less polished and slightly slower.
How much storage space do I need?
Technically, Windows 11 can install with 64GB, but this is not practical long-term.
For reliable use:
- 128GB or more is strongly recommended
- Windows updates and apps quickly consume space
If your Mac has limited internal storage, consider freeing space or using a Mac with higher storage capacity.
How much memory (RAM) should I allocate to Windows?
Parallels manages memory automatically, but you can adjust it manually.
General guidance:
- 8GB Macs: Allocate no more than 4GB to Windows
- 16GB Macs: 6–8GB works well
- 32GB+ Macs: 8–16GB depending on workload
Allocating too much memory can slow macOS, especially on Apple Silicon Macs with unified memory.
Can I play Windows games on a Mac using Parallels?
Some Windows games work, but compatibility is limited:
- Many games run via Windows ARM translation
- Anti-cheat systems often block virtual machines
- Performance varies depending on the game and Mac hardware
Parallels is best suited for productivity and business software, not AAA gaming.
Is VMware Fusion completely free?
Yes. VMware Fusion Pro is free for both personal and commercial use.
However:
- It has fewer features than Parallels
- Performance and graphics support are not as strong
- Windows integration is less seamless
Can Intel Macs still use Boot Camp for Windows 11?
Technically yes, but it is not recommended in 2026.
- Windows 11 is unsupported on Boot Camp
- Updates may fail or be blocked
- Apple no longer maintains Boot Camp drivers
Boot Camp should be treated as a legacy solution for advanced users only.
Can I run macOS and Windows at the same time?
Yes. Virtual machines allow macOS and Windows to run side-by-side. You can:
- Switch instantly between them
- Run Windows apps alongside Mac apps
- Use Coherence Mode to blend both environments
This is not possible with Boot Camp.
Does Parallels require a subscription?
Yes. Parallels Desktop requires an annual subscription, although a free trial is available. Pricing varies by edition and region.
Is Windows performance good on Apple Silicon Macs?
Yes. On modern M-series Macs, Windows 11 ARM performance is:
- Very good for office apps
- Excellent for development tools
- Suitable for many professional workflows
Performance is often better than older Intel Macs running Windows natively.
Is this setup future-proof?
Using Windows in a virtual machine on Apple Silicon Macs is currently the most future-proof way to run Windows on a Mac.
- Apple is fully committed to Apple Silicon
- Microsoft actively supports Windows ARM
- Virtual machines avoid hardware compatibility issues
Boot Camp does not offer this long-term reliability.