
Boot Camp is a free utility in macOS which allows you to install Windows on Intel Macs and here we show you how to install Windows 11 on a Mac with it for free.
There are many pros and cons to running Windows on a Mac but one of the big strengths of Boot Camp is that it runs Windows natively on Intel Macs.
However, it’s very important to be aware that using Boot Camp is definitely not the best way to run Windows on a Mac in 2026.
In fact, if you have an Apple Silicon Mac, Boot Camp isn’t even available for M-series Macs.
Apple hasn’t even updated Boot Camp meaningfully since macOS Monterey and Microsoft is increasingly blocking unsupported hardware from feature updates.
There are various methods to run Windows on a Mac but by far the best way to install Windows 11 on Macs nowadays is by using a virtual machine.
Virtual Machines vs Boot Camp
Virtual machines are a far more convenient option as they allow you to run macOS and Windows simultaneously whereas Boot Camp can only run Windows or macOS at one time.
In our extensive research and testing, we found that Parallels is the best virtual machine for running Windows within macOS.
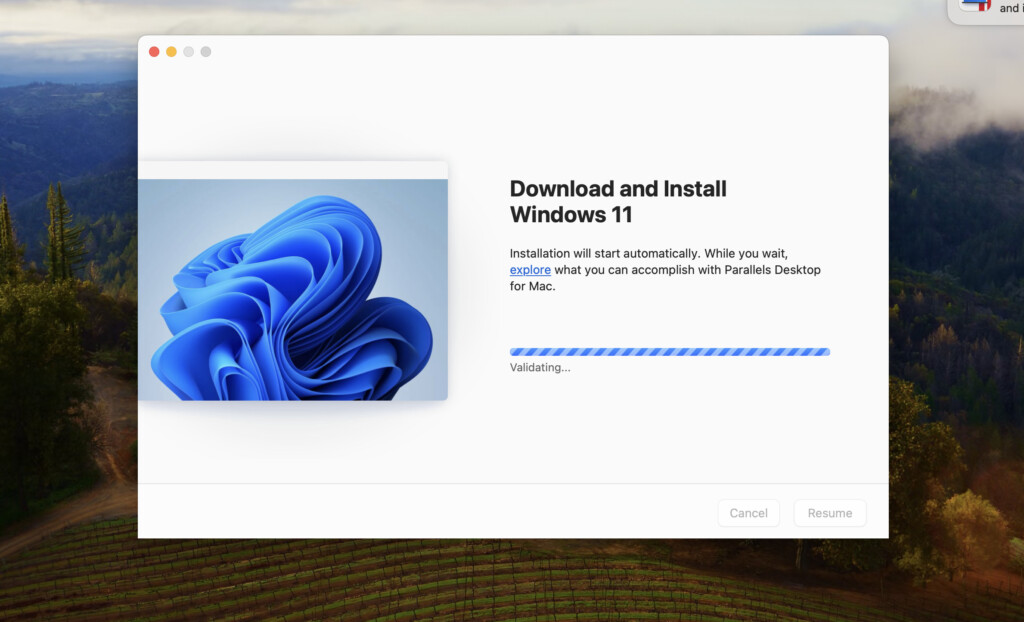
Parallels is a commercial product that requires a subscription (although a free trial is available) but it’s definitely the easiest, most stable and best integrated tool we’ve used to run Windows on a Mac as you can read in our full Parallels review.
If you don’t want to pay for Parallels, you can also use VMware Fusion Pro for FREE (even for commercial use) which also now automatically downloads and installs Windows 11 on Apple Silicon Macs (check out our full VMware Fusion review for an in-depth look).
Fusion Pro doesn’t have as many features as Parallels and doesn’t offer quite the seamless experience switching between macOS and Windows but it’s certainly the best of the free virtual machines available.
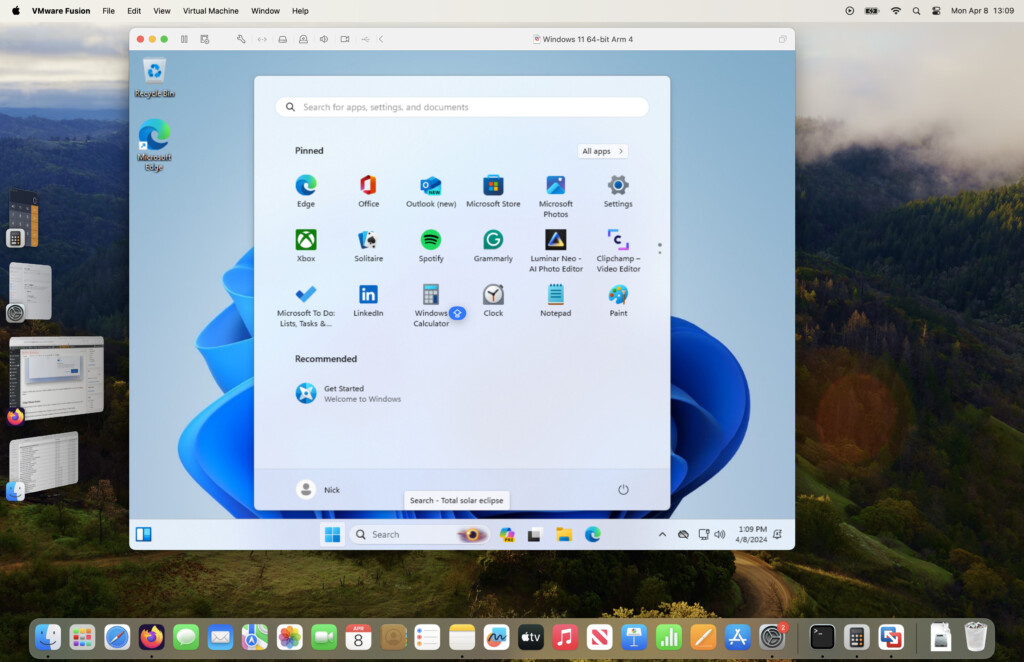
VMware Fusion is a free virtual machine which also installs Windows 11 on both Intel and Apple Silicon Macs.
For more check out our look at Parallels vs VMware Fusion and check out our guide to the best virtual machines for Mac.
Can You Use Boot Camp on Apple Silicon Macs?
You cannot install Windows 11 on Apple Silicon Macs using Boot Camp and that includes all Macs with the M-series chips.
Boot Camp remains available on Intel Macs running macOS Ventura and earlier, but it is no longer actively developed or supported for Windows 11. If you’re not running one of these versions of macOS or earlier, you will need to downgrade your version of macOS in order to use Boot Camp.
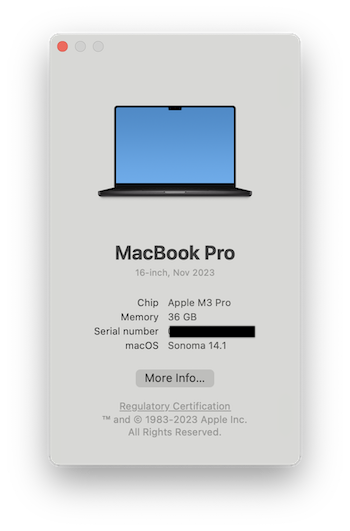
If you’re not sure whether you have an Intel chip or Apple Silicon Mac with an M-series chip, simply go to the Apple logo in the top left of your screen and select About this Mac and you will see both the Chip and version of macOS you are using.
There is however a better way to install Windows 11 on Apple Silicon Macs.
So assuming you have an Intel Mac, follow these instructions to use Boot Camp to install Windows 11.
What You’ll Need
- At least 64GB or more free storage space on your Mac startup disk. This is the bare minimum you’ll need but we strongly recommend at least 128GB of free storage space as automatic Windows updates and any Windows software you install will quickly eat-up this space. You may therefore need to recover some hard drive space on your Mac. If you simply can’t clear enough space, an alternative option is to install Windows on an external drive without Boot Camp instead.
- A USB stick with at least 8GB of storage space on to put the Windows 11 ISO file on.
- We recommend backing-up your Mac with Time Machine in case anything goes wrong during the Windows installation process.
Instructions To Install Windows 11
If you’ve got all this, you’re ready to go.
- Download the Windows 11 ISO from Microsoft which is the third option down the page. When you click the blue Download button it will then prompt you to select the Product Language which should be English.
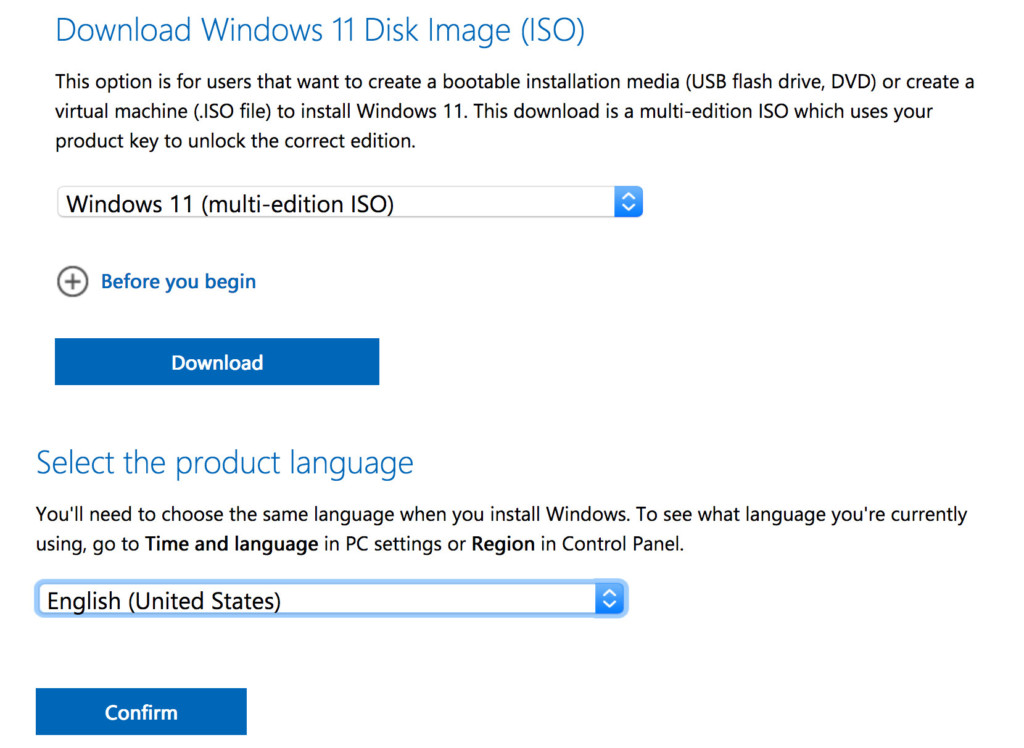
- Be warned that there are some websites that have published workarounds to install Windows 11 that bypass a TPM (Trust Platform Module) requirement by using a modified ISO image of Windows. However, we do not recommended using these modified ISO images as they’re not officially supported and are likely to be broken by updates to Windows 11 or macOS in the future. It will also be very difficult to apply updates to unofficial installations of Windows 11 on a Mac so we strongly advise against it. We strongly recommend using the official Windows 11 ISO from Microsoft and modifying the registry manually as instructed later in this tutorial.
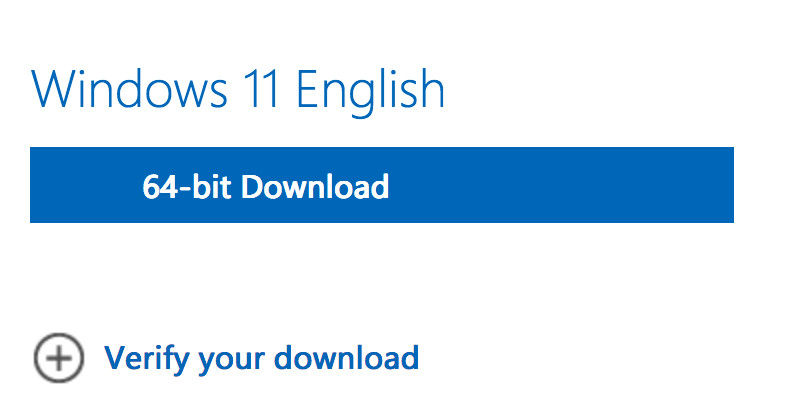
- Click the blue Confirm button to confirm the language and the Download link will appear at the bottom of the page. Click on 64-bit Download to start downloading the Windows 11 ISO.
If you have any problems downloading a Windows 11 ISO from Microsoft, you can also use the Crystal Fetch app on the Mac App Store which automatically downloads one for you.
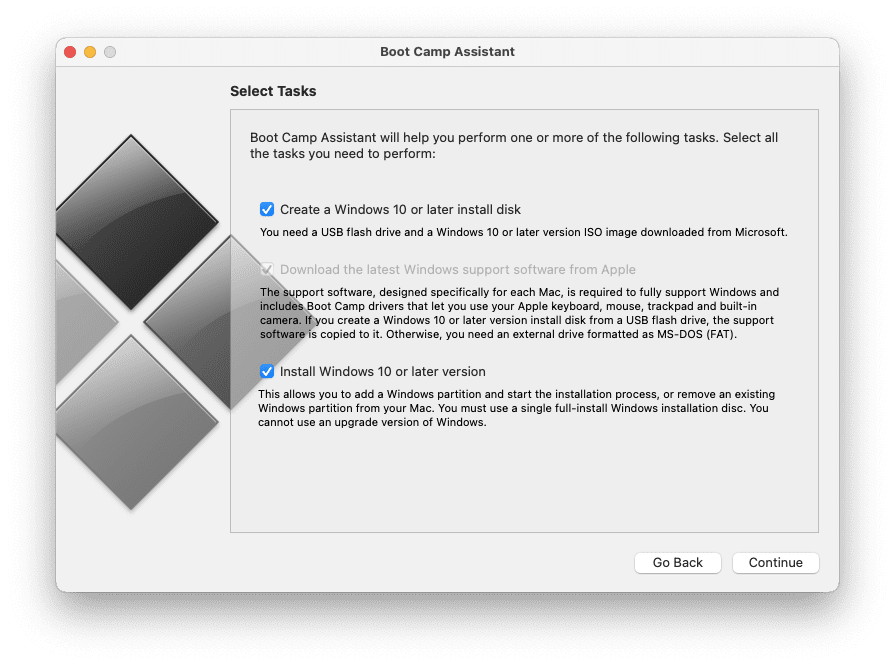
- Insert a USB stick into your Mac and open the Boot Camp assistant which you can find by searching in Spotlight on your Mac for “Boot Camp” or by going to Applications > Utilities > Boot Camp Assistant.

- Click Continue and then select both “Create a Windows 10 or later install disc” (this option includes Windows 11) and “Install Windows 10 or later version.”
- Click Continue on your Mac and browse to the Windows 11 ISO file that you downloaded earlier to create the installer on the USB drive. Boot Camp will do this automatically for you when you click Continue.
- You must then decide how much space you want Windows to occupy on your Mac hard drive by dragging the bars representation macOS and Windows. It’s important you estimate this correctly as you cannot resize the partition later. The minimum partition for Windows 11 is 64GB but the more Windows applications or games you intend to install, the more hard drive space you should dedicate to Windows.
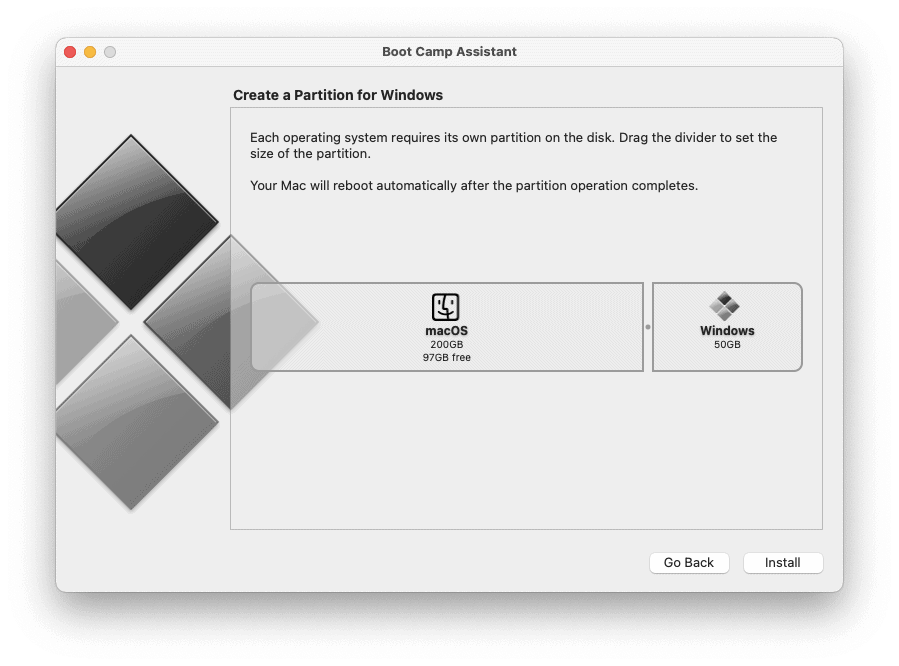
- Click “Install” and Boot Camp will restart your Mac and then take you through the Windows 11 installer just as if your were installing it for the first time on a PC. If you are using battery power, Boot Camp will advise you to connect your Mac to the main electricity as the installation will not complete successfully if the battery dies half way through.
- The Windows installer will then begin.
If during this process you receive the error message: “Can’t install the software because it is not currently available from the software server” then you need to download the Windows support manually in Boot Camp.
To do this, restart your Mac and Boot Camp and go to Action > Download Windows Support Software.
- During the installation process you need to take an extra step to “trick” Windows into thinking your Mac is compatible with it. The reason is because Windows 11 requires a physical TPM 2.0 module which Macs do not have. If you try and install the Microsoft Windows 11 ISO without taking the following step, you will receive a “This computer is incompatible with Windows 11” or a “The PC must support TPM 2.0” error during the installation because it will check for the TPM 2.0 chip on your Mac. However, you can bypass the TPM restriction by holding down “Shift+F10” when the Windows 11 setup screen appears. Depending on the Mac keyboard you have, this is Shift + Fn + F10 (on the most recent Apple keyboards) or Shift + Control + Option + F10 on some MacBooks if Fn alone doesn’t send F-keys.
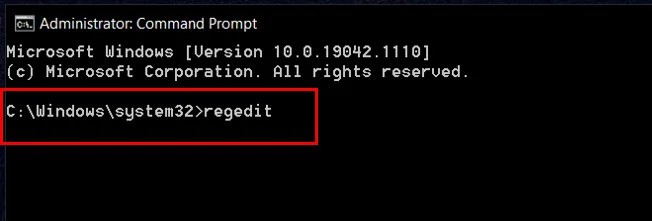
- In the Command Prompt Window type: “regedit” to open the Registry Editor in Windows 11.
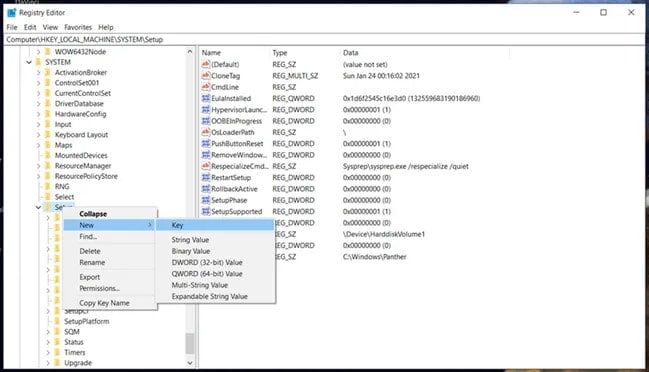
In the Registry Editor browse to HKEY_LOCAL_MACHINE\SYSTEM\Setup. Right click on the Setup folder and select New > Key.
Set a new name called LabConfig for the key and right click on it. Select New > DWORD (32-bit) and give it the name BypassTPMCheck.
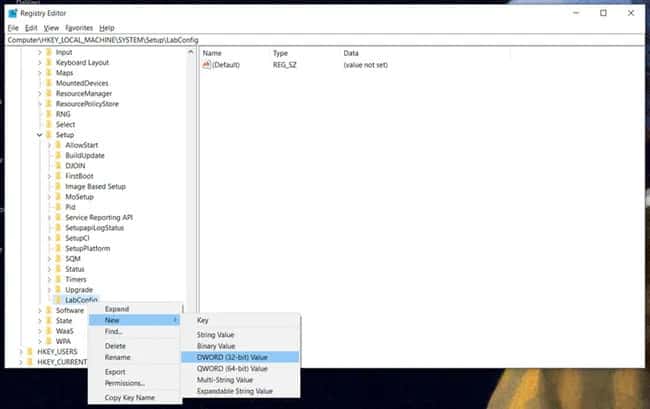
- You must then repeat the above process to bypass the RAM check and Secure Boot check respectively by naming the keys ByPassRAMCheck and BypassSecureBootCheck.
- The final step is to double click on these three values you have created and set them to “1”.
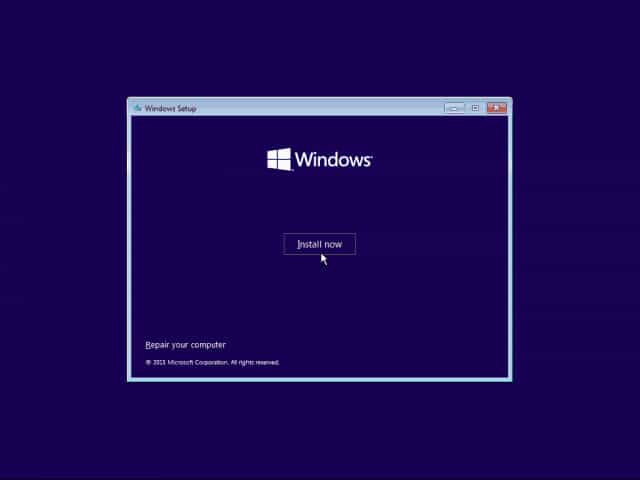
You can then quit the Registry Editor and Command Prompt to return to the Windows 11 installer and click “Install Now” to install Windows 11 bypassing the TPM check.
If this doesn’t bypass the TPM 2.0 check, and you’re installing an early version of Windows 11, you can also try going back to the Command Prompt in Windows and use the command:
setup.exe /product server
This may be not work however on more recent versions of Windows 11 including the latest Windows Insider ISO, Release Preview and Developer version that no longer work with the registry edit workaround. For more help on this, you can read through this thread. Microsoft has tightened TPM enforcement in recent updates and even if Windows 11 installs successfully with this bypass, feature updates may silently fail or permanently block the system.
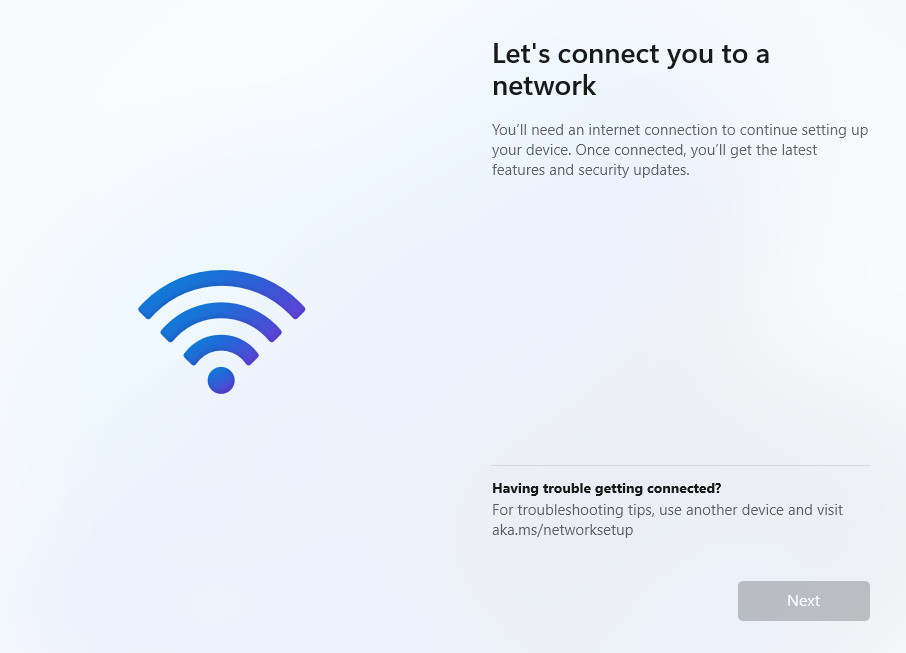
- If you are prompted with the message, “Let’s connect you to a network” then you can skip this step. To skip the network connection when installing Windows 11 with Boot Camp press the “Shift + F10” keyboard shortcut. In Command Prompt, type “OOBE\BYPASSNRO” and hit Enter. Your system will then reboot and you’ll see the option to Skip this step. Note again that this currently works, but may be removed in future builds.
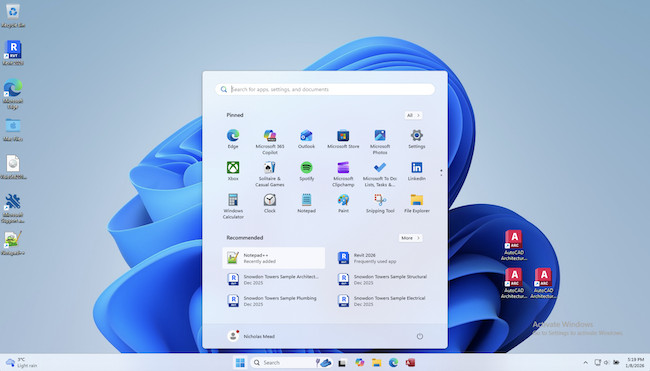
Once Windows 11 is installed, you can use Windows just as if you were on a PC. However, expect potential update blocks or driver issues since this is not the standard way to install Windows 11.

If you want to switch back to macOS at any time, simply shut down your Mac and then restart by holding down the Option (⌥) key.
You will then be given the choice to boot in either macOS or Windows.
Always keep a macOS backup; a failed Windows update may require you to remove or recreate the Boot Camp partition.
Does This Work on Touch Bar Macs?
Yes – having a Touch Bar doesn’t prevent you installing Windows 11 with Boot Camp. Touch Bar MacBooks simply hide the F-keys behind the Fn key.
During setup, when Windows requires the Shift + F10 shortcut, press Shift + Fn + F10 (or Shift + Control + Option + F10 on some models) to open the Command Prompt.
The real limitation is Apple Silicon: Boot Camp only works on Intel-based Macs, regardless of whether they have a Touch Bar.
Intel Mac owners can attempt a direct Windows 11 installation with the TPM/Secure Boot workarounds described above.
It also used to be possible to install Windows 10 with Boot Camp first and then upgrade to Windows 11 but many Intel Macs can now no longer update from Windows 10 to 11 or are blocked during feature update checks.
FAQ
Can you install Windows 11 on a Mac using Boot Camp in 2026?
Yes, but only on Intel-based Macs, and it is not officially supported by Microsoft or Apple. While Windows 11 can still be installed using TPM and Secure Boot workarounds, updates may fail or be blocked in the future. Boot Camp should now be considered a legacy solution.
Does Boot Camp work on Apple Silicon (M1-M5) Macs?
No. Boot Camp is not available at all on Apple Silicon Macs. Apple removed Boot Camp support entirely for Macs with M-series chips. To run Windows on these Macs, you must use a virtual machine such as Parallels Desktop or VMware Fusion.
What is the best way to run Windows on a Mac in 2026?
For most users, the best way to run Windows on a Mac in 2026 is with a virtual machine, not Boot Camp.
- Parallels Desktop offers the best performance, compatibility, and ease of use
- VMware Fusion Pro is free and works well, especially for lighter workloads
Virtual machines allow you to run macOS and Windows at the same time and avoid rebooting.
Is Boot Camp better than virtual machines for gaming or performance?
On older Intel Macs, Boot Camp can still offer better raw GPU performance for some games because Windows runs natively. However:
- Many modern Windows games no longer support older Intel GPUs well
- Windows 11 updates may stop working
- Apple no longer updates Boot Camp drivers
For most users, the convenience and stability of virtual machines outweigh any performance gains.
Can Windows 11 updates break a Boot Camp installation?
Yes. This is increasingly common in 2026.
Because Intel Macs lack TPM 2.0 and Secure Boot, Windows 11 installs via Boot Camp are unsupported and may:
- Fail feature updates
- Stop receiving updates entirely
- Require reinstalling Windows
Always keep a full macOS backup before using Boot Camp such as by using Time Machine in macOS.
Is bypassing the TPM and Secure Boot checks safe?
The registry workaround described in this guide does work on some Windows 11 versions, but:
- It is not supported by Microsoft
- Future Windows updates may disable it
- Security features are reduced
This method is recommended only for advanced users who understand the risks.
Can I install Windows 10 with Boot Camp and upgrade to Windows 11 later?
Sometimes, but this method is increasingly unreliable.
- Many Intel Macs are now blocked during the upgrade process
- Windows 10 reached end of support in October 2025
- Even successful upgrades may later fail feature updates
This is no longer a dependable long-term solution.
Do I need a USB stick to install Windows 11 with Boot Camp?
On most Intel Macs, yes.
You will need:
- An 8GB or larger USB drive
- A Windows 11 ISO downloaded from Microsoft
Some newer Intel Macs can install directly from the ISO without a USB drive, but Boot Camp may still request one.
Can I install Windows 11 on an external drive using Boot Camp?
No. Boot Camp only installs Windows on the internal startup disk.
However, you can install Windows on an external drive using:
- Virtual machines
- Third-party tools (advanced and unsupported)
Does Boot Camp still exist in the latest versions of macOS?
Boot Camp Assistant is still present on Intel Macs running macOS Ventura or earlier, but:
- It has not been updated in years
- Apple provides no support for Windows 11
- Newer Intel Macs may not be able to downgrade macOS to older versions
How do I switch between macOS and Windows with Boot Camp?
Shut down your Mac, then restart it while holding the Option (⌥) key. You’ll be able to choose between macOS and Windows at startup.
Should new Mac buyers use Boot Camp at all?
No. If you are buying a Mac in 2026, it will be Apple Silicon, and Boot Camp is not an option.
Even for existing Intel Mac owners, Boot Camp is best viewed as a temporary or experimental solution, not a future-proof one.