BenQ has really upped the stakes recently when it comes to producing Mac compatible monitors.
Little more than a year ago it released the PD3225U Design Monitor which has proved some serious competition as an alternative to Apple’s Studio Display.
However, at $1,099.00, it’s not exactly a budget option although it’s still cheaper than Apple’s display.
But in summer 2024, BenQ launched its new MA series of monitors with the 27 inch model less than half the price of the Design Monitor and yet just as tailor made for Macs.
At just $499.99 (£499.99) for the 27-inch MA270U and $649.99 (£649.99) for the 32-inch MA320U these are easily the best value Mac compatible monitors we’ve tried.
BenQ invited us to watch an exclusive preview of the MA series over the summer and we were immediately impressed by how “plug and play” it was with Macs for a monitor at these prices.
Now they’ve sent us a new 27 inch MA270U to test it out for real.
Note that the MA270U is 4K only and if you want something that’s 5K like the Apple Studio Display then the more recent BenQ 5K PD2730S is probably more suitable.
Table of Contents
- What’s So “Mac Friendly” About The MA Series?
- What’s In The Box?
- MA270U Design
- Setup
- Connecting The Display
- Performance
- Glare Reduction
- Mac Keyboard & Siri Integration
- Adjustable Stand
- Speakers
- Who’s It Aimed At?
- PD3225U vs MA Series
- Is 4K Enough?
- Using Multiple MA Series Monitors
- BenQ MA270U vs MA320U Specifications
What’s So “Mac Friendly” About The MA Series?
The problem with most external monitors is that they struggle to recreate the exact brilliant colors of the liquid retina MacBook displays.
The MA series use BenQ’s own color tuning technology to automatically match exactly the colors you see on your MacBook Air or MacBook Pro.
The display has an “M-book” mode specifically designed for compatibility with MacBooks which eliminates color inconsistencies using BenQ’s Color Lab technology.
So out of the box, they work extremely well with Macs with virtually no configuration.
As well as this, the brightness and volume can be controlled from the Mac keyboard which very few monitors support.
We’ll take a look at both of these things in more detail later on in this review.
What’s In The Box?
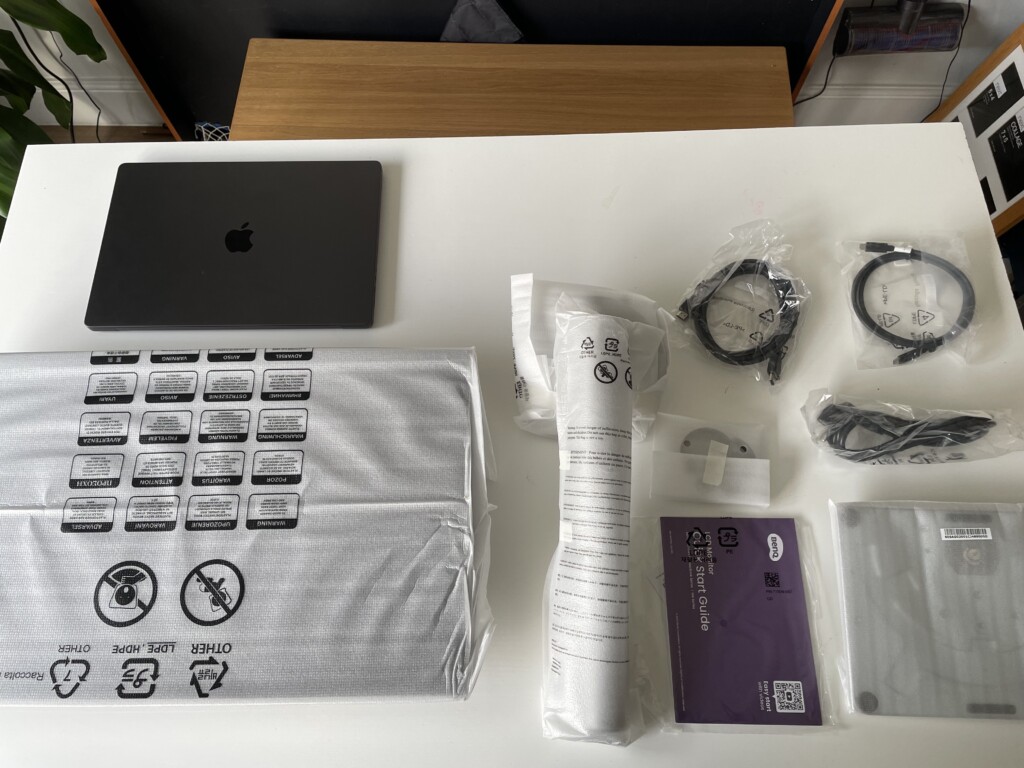
The box includes the Monitor, the stand (in two parts), power cable, HDMI cable, USB-C cable, cable ties organizer and Quick Start Guide.
MA270U Design
The first thing you notice when you take the MA270U out of the box is, it’s very minimalist “Apple” style design.
It has a thin bezel around the outside to help maximize screen estate with a tasteful gray and black finish.
The bottom bezel is a bit thicker however (around 1cm) as it features the BenQ logo on it.
The back of the monitor has an aluminum effect finish which bulges out slightly although it’s more than slimline enough to fit any desk comfortably.
Putting it all together is very simple, as it just requires clipping the neck of the stand to the back and then screwing on the base with the key-screw – no tools are required.
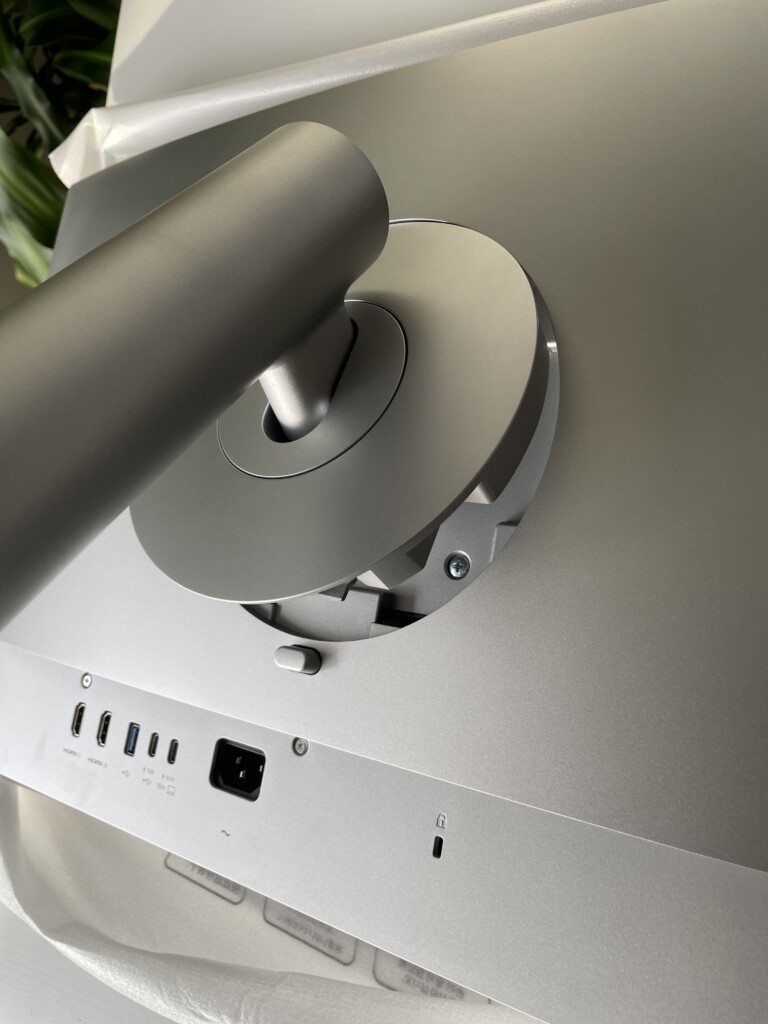
The neck of the stand is steel and feels really solid and the base has a soft padded area that gives the Mac some cushioning if you want to place it directly underneath.
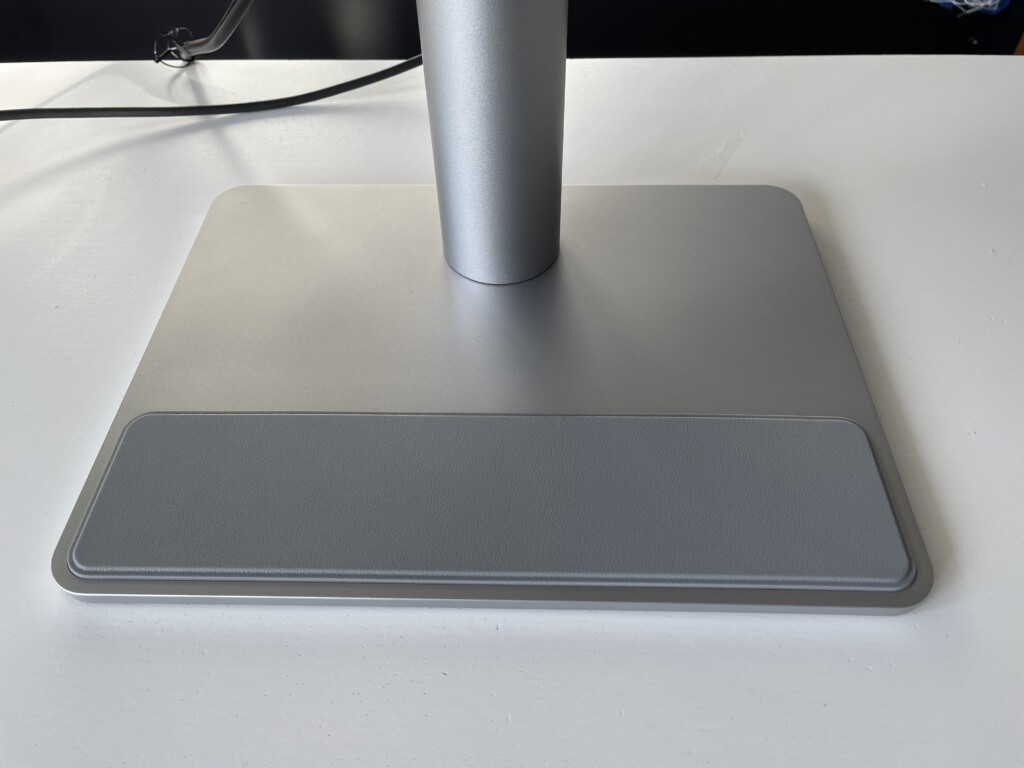
Generally, we found the stand extremely stable and wobble free, much like BenQ’s Design Monitor.
You can also unclip the stand and use a VESA mount if you prefer (maximum size 100 x 100mm) but the stand is more than stable enough on its own.
Setup
The power supply is inside the MA series of displays so there’s no big power brick to worry about.
On the back, connectivity includes two USB-C ports, two HDMI 2.0 ports and a USB-A port.
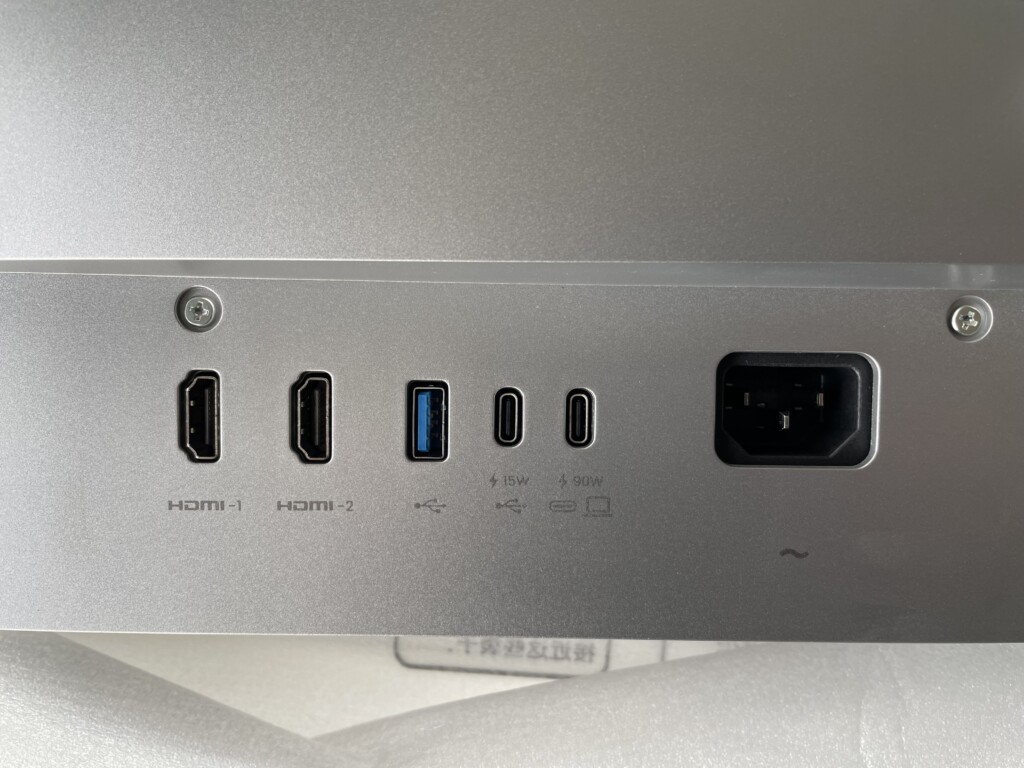
One of the USB-C ports connects to your MacBook and can be used to provide up to 90W of charging power to it.
This charges your MacBook even when the monitor is off if you activate “Always-on power charging” (although you don’t have to enable this).
The other USB-C ports can provide up to 15W of charging power to charge things like gaming controllers.
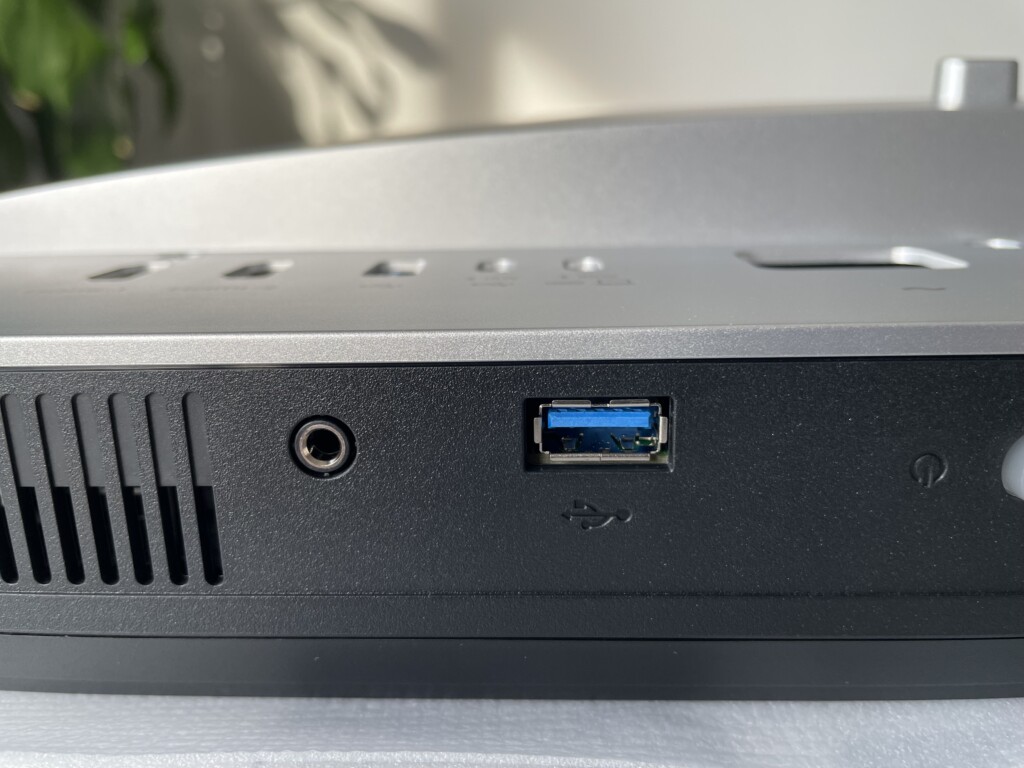
There’s also two USB-A ports which can be used to connect things like a Bluetooth receiver for mouse or gaming controller.
One of these is on the bottom of the display along with a headphone jack and the power button.
The only issue for some users is the lack of a genuine Thunderbolt port like the PD3225U Design Monitor.
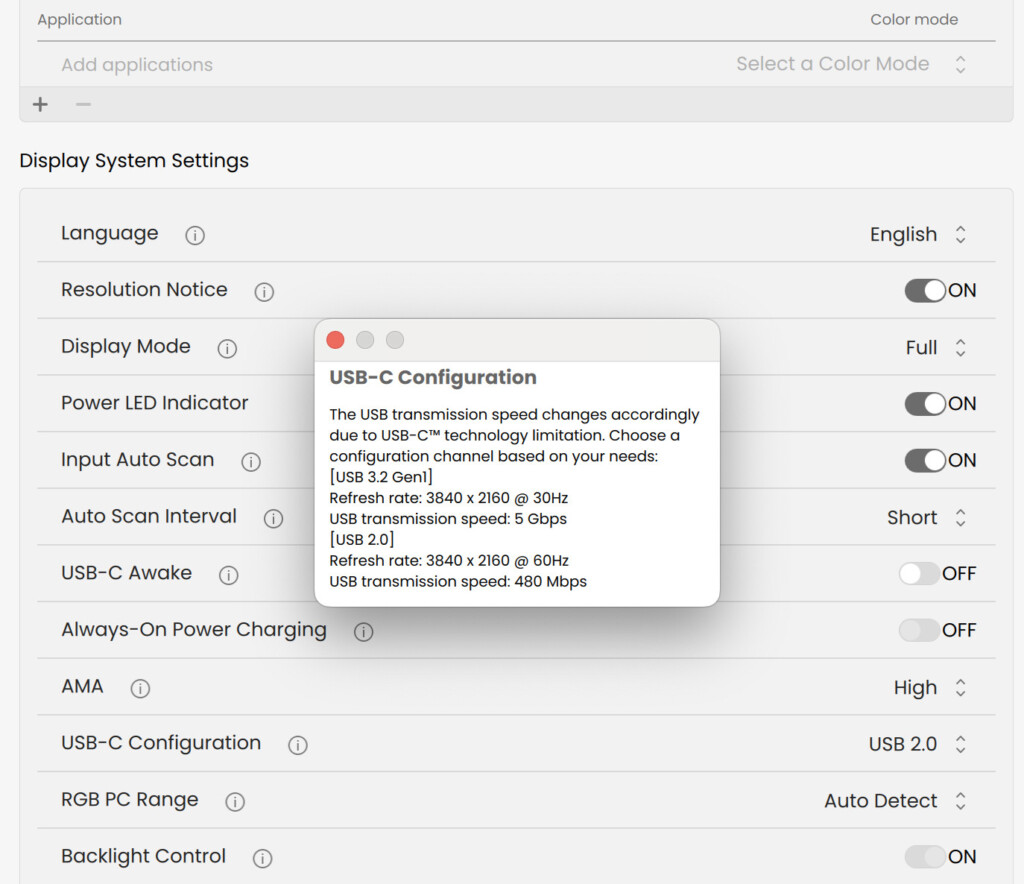
The USB-C on the MA Series can only deliver maximum USB-C 3.2 Gen 1 speeds of up to 5 Gbps and 60Hz.
When it was first released, there was an issue with the MA270U USB-C port only supporting 30Hz at 4K with Apple Silicon Macs but this was fixed in a firmware update so make sure it is updated.
Thunderbolt connections like those found on BenQ’s Design Monitor support speeds of up to 40 Gbps.
The HDMI ports are also the slightly older 2.0 standard and considering the latest Macs support HDMI 2.1, it would have been nice to have seen support for this.
Connecting The Display
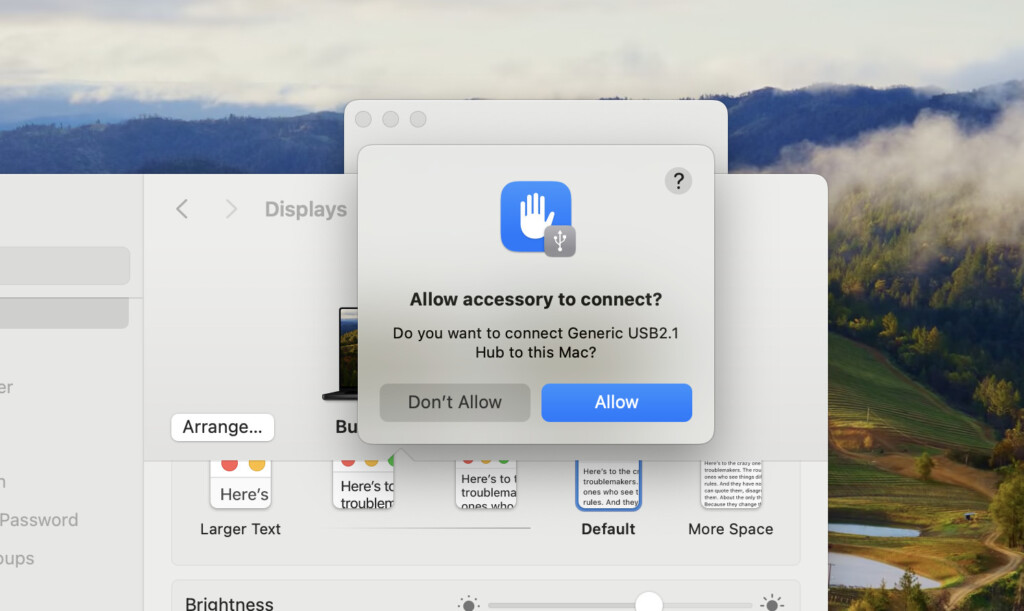
When you connect the monitor for the first time via the USB-C cable, your Mac should recognize it.
Don’t worry if it says “Generic USB2.1 Hub” as your Mac doesn’t know exactly what it is yet.
It’s important to “Accept” the connection otherwise your Mac will block the display from working!
Your Mac desktop should appear immediately on the BenQ MA series monitor.
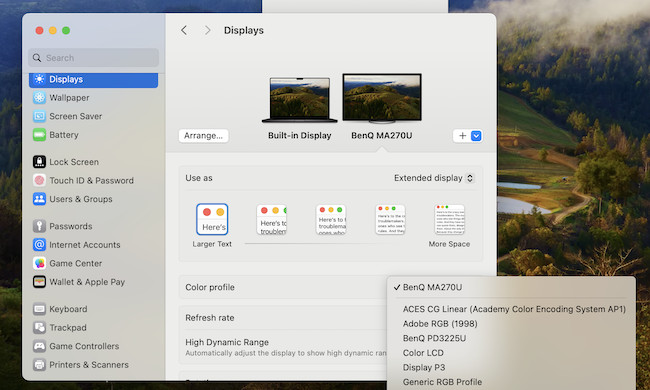
If you go the Apple logo in the top left of your screen and select System Settings and go to Displays you will see the monitor has been recognized and connected.
Graphic Designers can also choose a specific Color Profile to use here too.
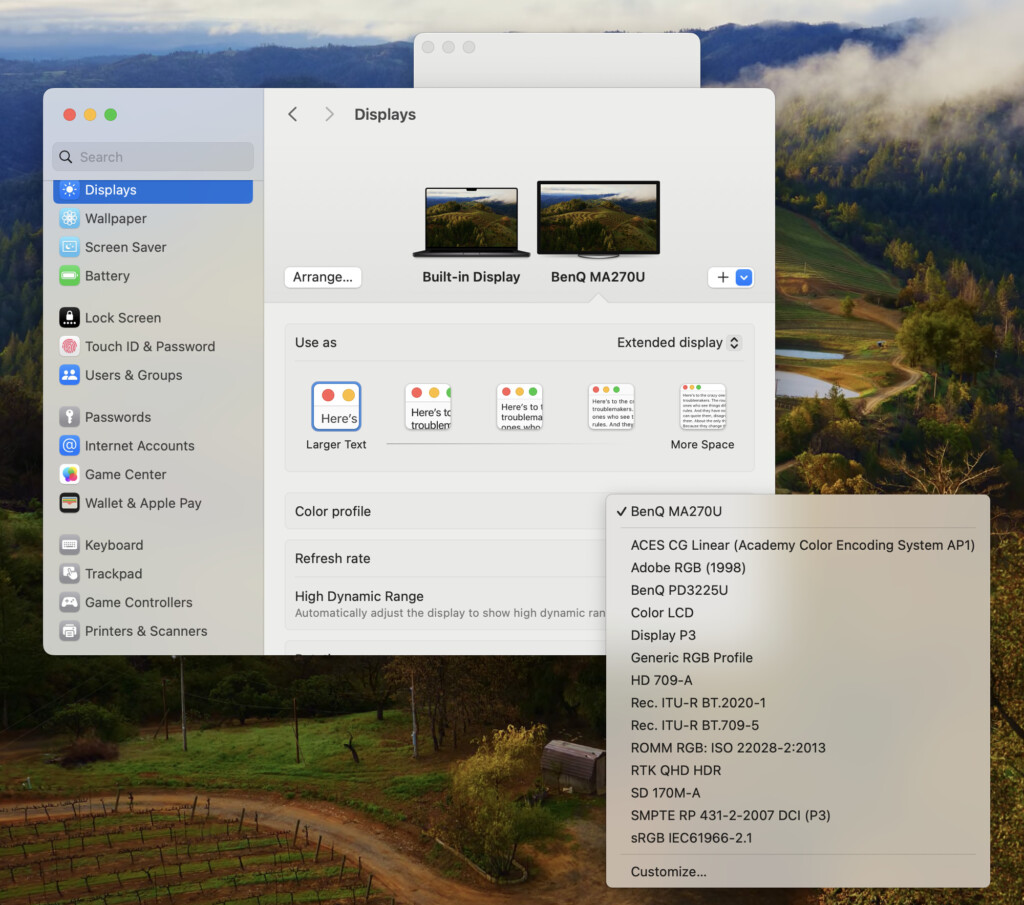
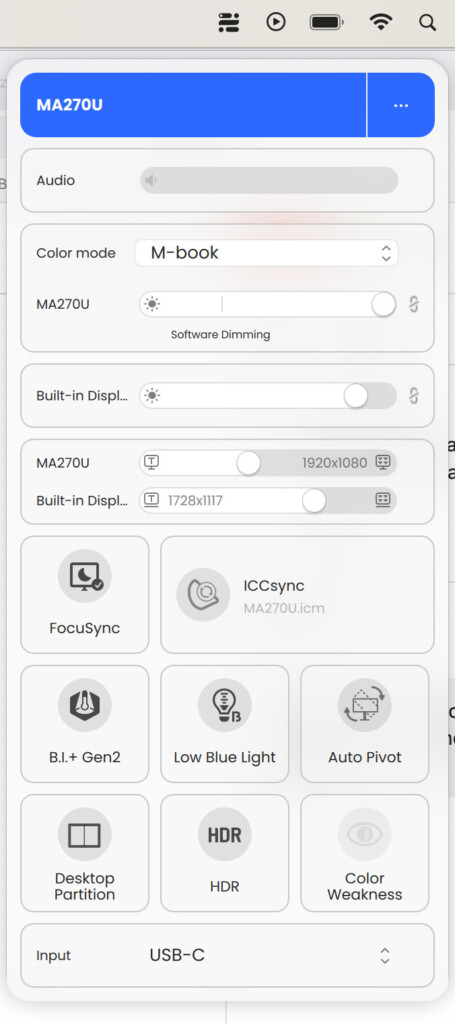
However, we recommend using the BenQ Display Pilot 2 software to configure exactly how the display interacts with your Mac.
This is the same software that comes with the Design Monitor.
If you don’t have it, you can download it here but if you do already have it, you’ll need to update it to work with the MA series.
With Display Pilot, you can select the color profile “M-book mode” which will match your MacBook’s retina display as closely as possible. You should find that its already activated by default though.
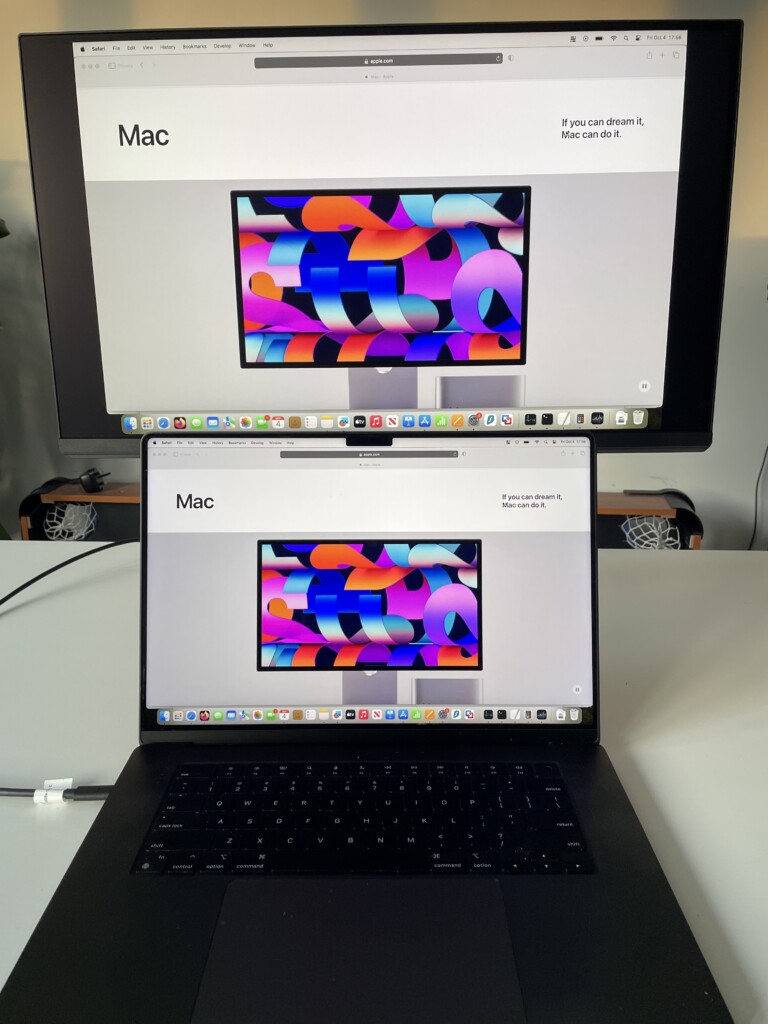
The color matching was incredibly accurate with our M3 MacBook Pro’s Liquid Retina XDR display.
While most monitors suffer from backlight bleed and struggle to match the exact colors of your MacBook’s display, the MA series seem to have no problem at all.
It’s almost impossible to tell the difference between the colors on the BenQ and the MacBook’s internal display.
In fact, it’s hard to see any difference at all between the quality in the far more expensive BenQ Design Monitor and the much cheaper MA series.
Source: MacHow2
Display Pilot also provides a more customizable experience than using an On Screen Display (OSD) to configure the monitor.
Once installed, it sits in the Menu Bar of macOS at the top.
If you open it, click on the three dots in the top right corner and select the Advanced tab across the top, you’ll also get access to many of the Display System Settings.
You can control things here such as Always-On Power Charging to make sure the monitor continues charging your MacBook even when it is off.
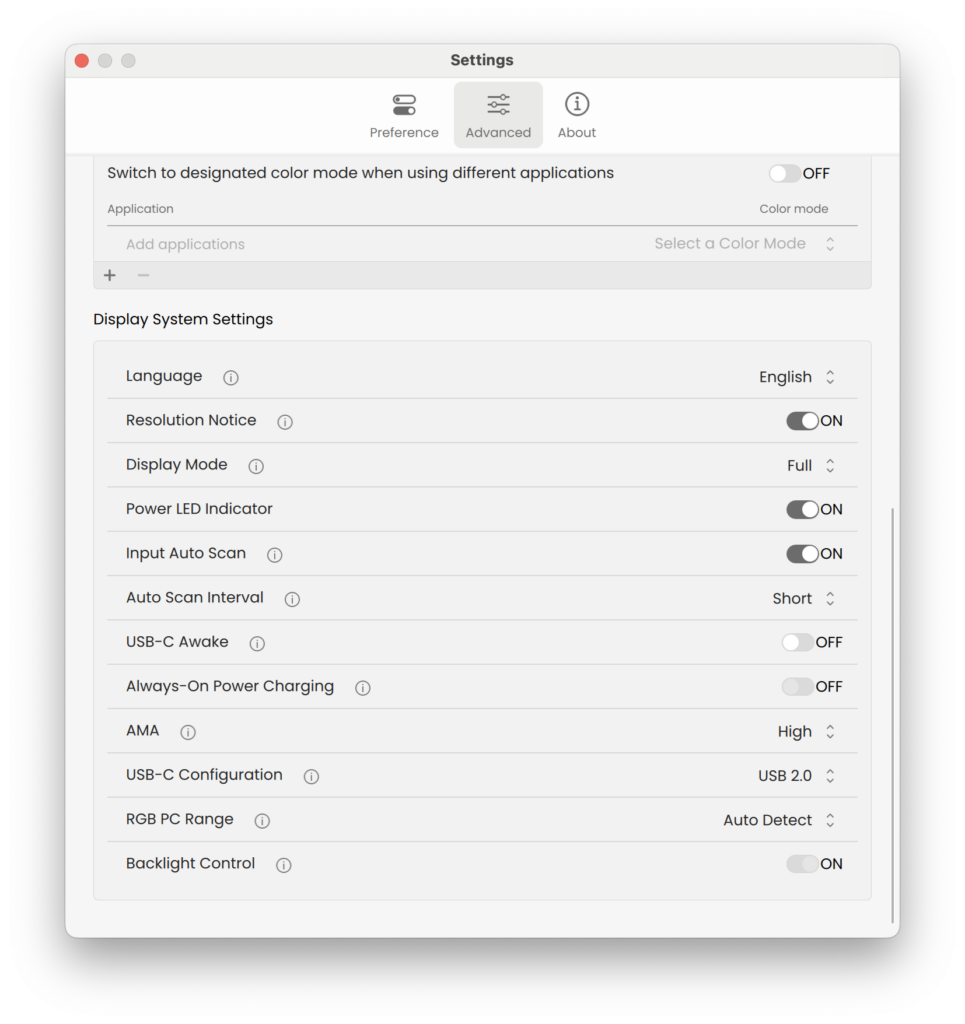
We did find the Display Pilot 2 software a bit overwhelming as it provides almost too many options that more mere mortals won’t know what to do with.
However, it’s so much better than your average external monitor On Screen Display (OSD).
Especially for Graphic Designers that need ultra precise control over how the monitor displays colors and interacts with a Mac, Display Pilot goes far and above everything outside of the Apple Studio Display.
Performance
The 27 inch monitor supports up to 400 nits of brightness which doesn’t quite compare to the 600 nits of the Apple Studio display but is still good enough for all but the most brightly lit workspaces.
The 32 inch MA320U model however goes up to 550 nits of brightness.
Both the 27 inch and 32 inch displays support SDR and HDR.
The display has a maximum refresh rate of 60Hz which is pretty standard and fine for everything other than fast paced gaming.
The monitor has a 5 millisecond response time which is fine for basic games although fast paced action or FPS games may struggle.
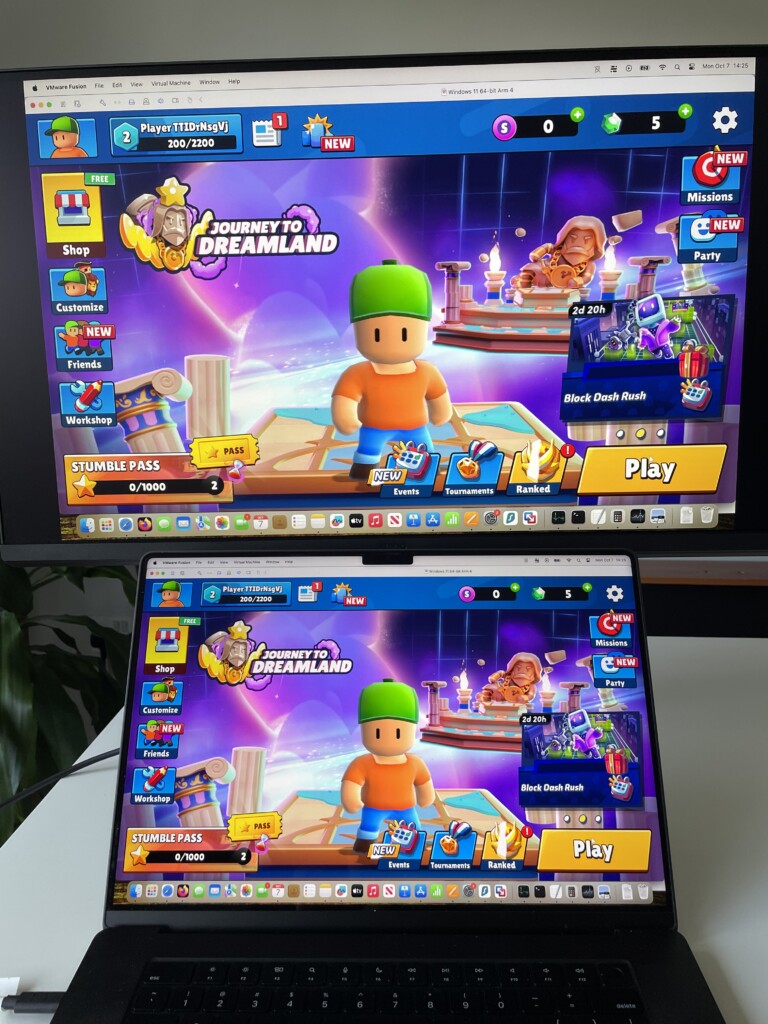
One other thing we liked is that the MA series monitor wakes from sleep very quickly when your Mac does.
With many external displays, it can take ages for them to recognize your Mac after sleeping and in some cases, they won’t even wake from sleep at all.
BenQ have also included a workspaces option which allows you to manage different tiled workspaces on your Mac.
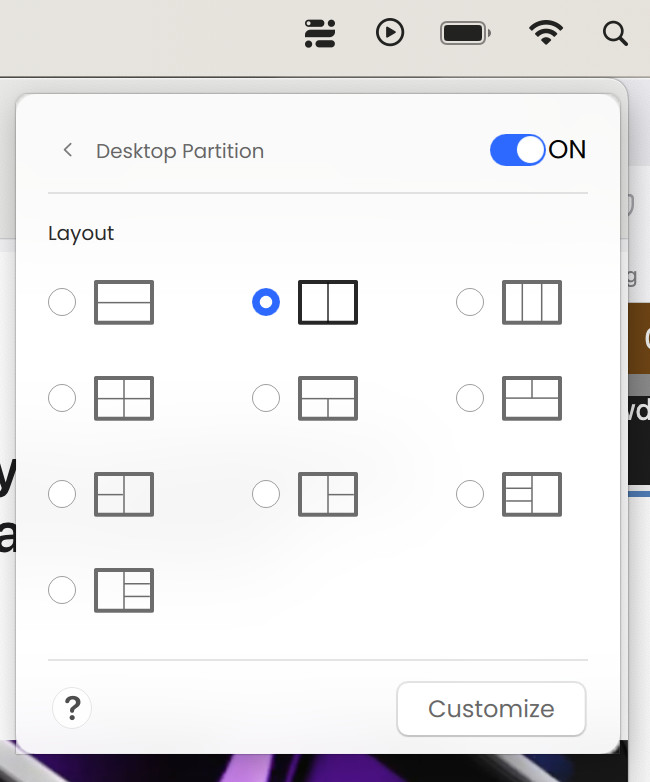
However, this is slightly bad timing as macOS Sequoia recently introduced tiled workspaces which offer pretty much the same thing but with better integration with macOS.
macOS allows you to use an external monitor either mirroring your Mac’s display or by extending it for extra space.
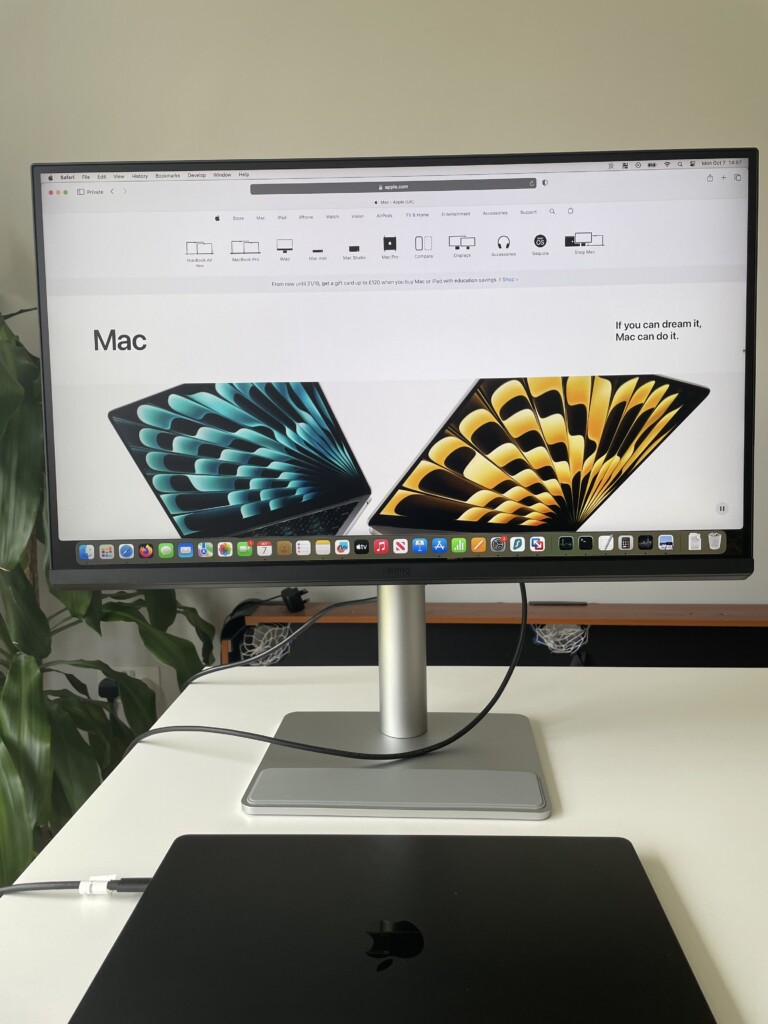
For those that like to use Windows on a Mac, one possibility is to have macOS on your MacBook and Windows on the external monitor as below.
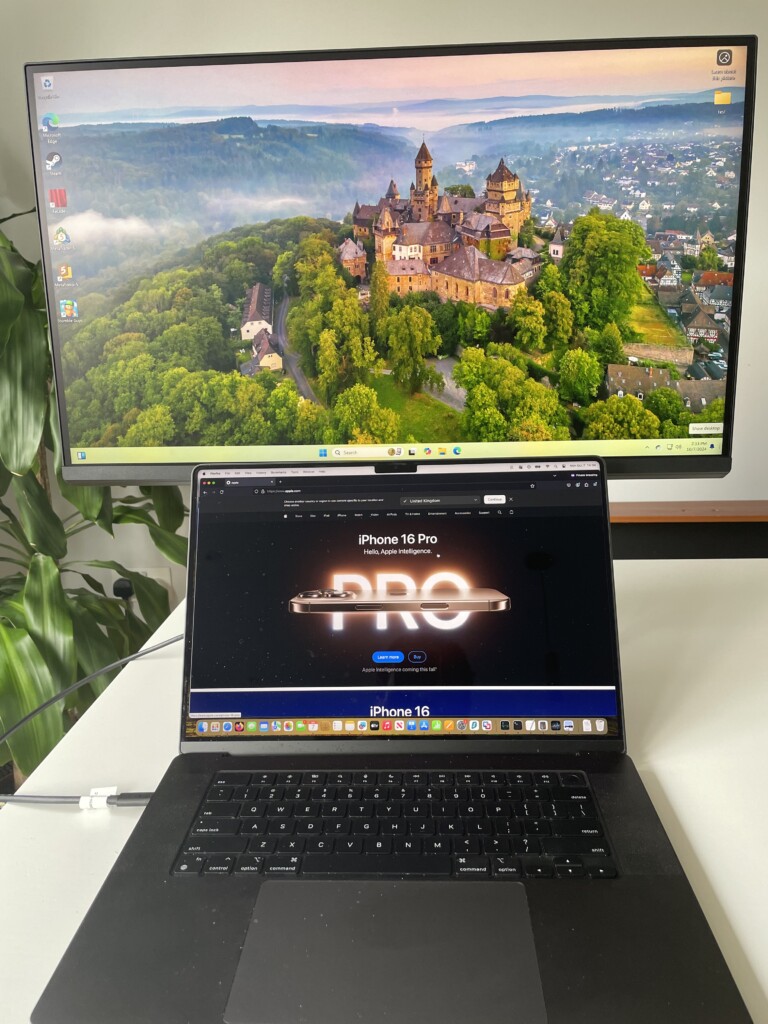
You can of course, also use the display with the MacBook lid down too, known as “clamshell mode”.
Glare Reduction
The MA monitors have a Nano Matte Panel to help reduce glare in brightly lit working environments.
They also use BenQ Eye-Technology to reduce reflections that can harm your eyes when working for long periods.
The monitors are TUV Reflection Free Certified which means that the Low Blue Light mode has been officially certified by the TÜV Rheinland safety authority.
Considering the Apple Studio charges several hundred dollars extra for a Matt finish, this is also a nice touch by BenQ.
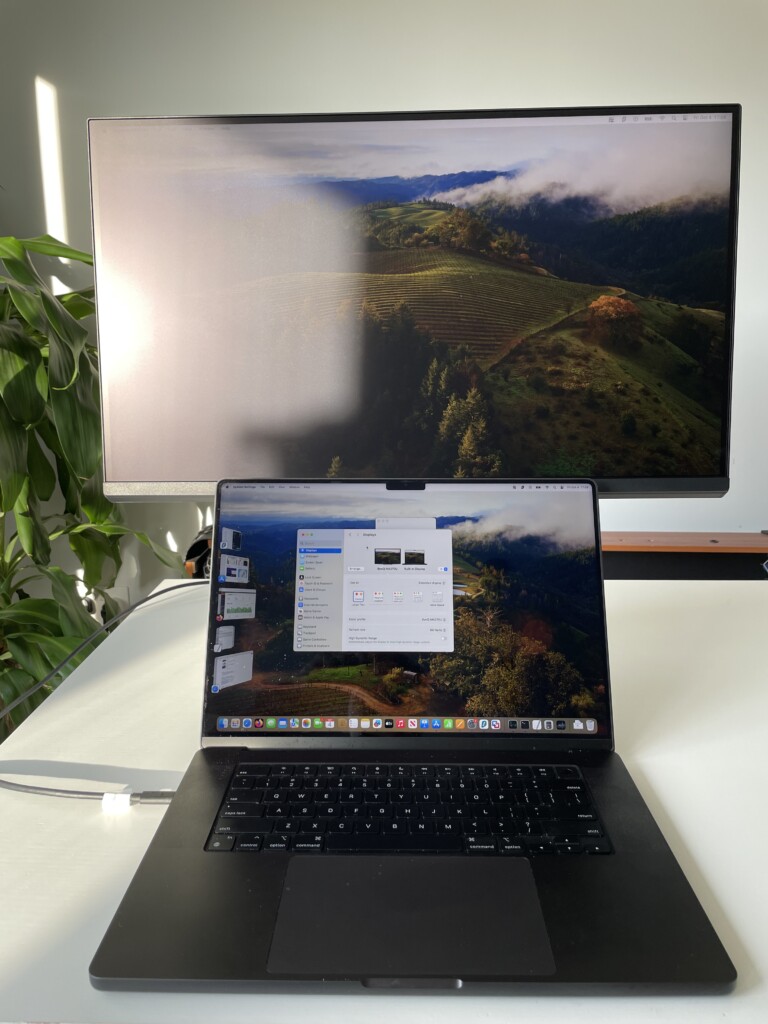
However, while we found it generally works well at reducing reflections, we really tested it by putting it in direct sunlight and there was quite a lot of glare.
To be honest, no external monitors handle direct sunlight well but it’s worth being aware of if you have no choice over where you sit.
Mac Keyboard & Siri Integration
One of the things that stands-out with BenQ’s monitors aimed at the Mac market is the way they integrate with macOS.
This is one of the great things about the Apple Studio Display is that you can control brightness and volume from the Mac itself without having to mess around with the monitor’s often clunky On Screen Display (OSD).
Integrated Mac Keyboard controls in non Apple displays are nothing new (it’s possible with the LG 27 inch UltraFine for example) but very few monitors support it.
The MA series is one of those that does with brightness and volume adjustable from your Mac keyboard.
While this doesn’t always sync perfectly with the Mac, it’s a pretty close match and better than having to use an OSD to control them.
In the MA series BenQ has also added Siri integration to activate Focus mode to bring the display closer to Focus Modes in macOS.
We never actually tested this out at we don’t have Focus Modes setup and it’s questionable how many users would actually use this.
However, it’s another nice touch from BenQ making the effort to integrates its products with macOS more than most.
Adjustable Stand
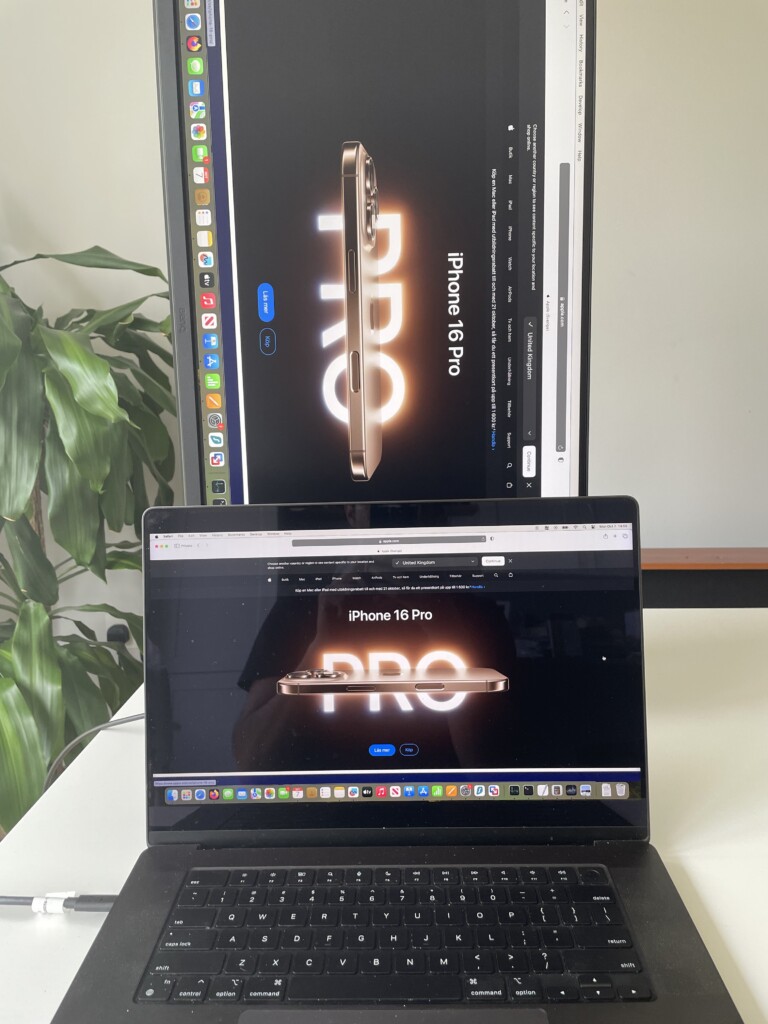
Like BenQ’s Design Monitor, the MA series have a flexible stand that allows you to tilt and pivot it however you want.
You can adjust the height up to 115mm, tilt between 5-20 degrees and swivel 15 degrees left and right.
You can also pivot it horizontally 90 degrees.
When you consider the Apple Studio Display costs extra for a VESA mount, this is another plus in the BenQ’s favor.
Speakers
There are two 3 watt speakers built-in to the display but outside of the Apple Studio display, we’re yet to find an external display with decent sound quality.
As expected, the sound isn’t great on the MA series. In fact, we’d recommend turning the sound off on the display and just using the sound on your MacBook which is much better.
Or even better, use some external speakers.
Who’s It Aimed At?
The MA series are primary aimed at those that need a high quality, no fuss external Mac display for work or school.
However, we think even creative professionals that can’t afford the more expensive PD3225U will be tempted by them such is the quality of the color reproduction.
At almost a third of the price of the Apple Studio Display, the 27 inch MA270U will definitely appeal even to graphic designers on a budget.
For a more in-depth look at how to compares to Apple’s monitor, check out our detailed look at the BenQ MA270U vs Apple Studio Display.
PD3225U vs MA Series
The new MA series of displays will inevitably get compared to BenQ’s flagship Mac friendly PD3225U Design Monitor.
Despite almost being twice the price however, there isn’t much to choose between them.
Undeniably, for graphic designers and creative professionals, the PD3225U is a better product.
It features out-of-the-box color calibration and indeed every model produced comes with its own calibration certificate.
The PD3225U is also a pure Thunderbolt monitor and although this is less important with display connections as it is with external hard drives, it’s still faster than the USB-C connections on the MA series.
The Design Monitor also has a hotkey puck for switching between inputs and profiles which the MA series lacks.
Is 4K Enough?
The MA series only support a maximum of 4K and many Mac users may wonder whether going with a 5K display is a better option.
In terms of image quality, we think 4K is enough.
Although 5K displays have a sharper image, the difference is only really noticeable when you look very closely at the monitor.
When you’re sat back normally from it, it’s almost impossible to tell the difference.
If this is the most important issue for you, then considering that you won’t get a 5K display anywhere near $500, the 4K resolution in the MA series is just fine unless you’re a professional graphic designer.
However, scaling is another issue.
The retina displays on MacBook have an incredibly high Pixel Per Inch (PPI) density of around 220 PPI.
At resolutions above 4K MacBooks use HiDPI or “Retina Mode” when connecting to external displays which scales more precisely than on a 4K monitor.
There are no 4K monitors that support 220 PPI so when your Mac tries to scale its own incredibly high PPI with an external 4K display that supports a lower PPI, the results aren’t perfect.
However, it really depends how keen your eye is though. For those that are sticklers for precision and accuracy, this will be annoying.
For most general users that don’t want top pay over $1,000 for a 5K display with a similar PPI, it’s not a deal breaker.
Using Multiple MA Series Monitors
The number of external monitors your Mac supports depends on which chipset it has.
There is a one external monitor limitation on base level Apple Silicon chip Macs but those with the Max, Pro and Ultra chips can support multiple monitors.
If you have a Mac that only supports one external display, you can use a Docking Station although these also require third party software and have technical limitations.
BenQ MA270U vs MA320U Specifications
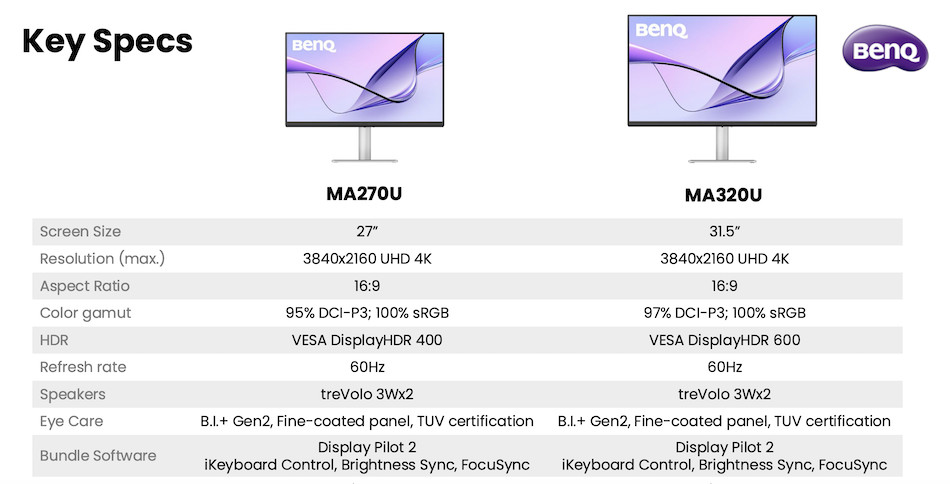
You can see how the two MA series monitors compare side-by-side below.
The main difference is the bigger 32 inch model has a slighter better color gamut range and costs $140 more than the smaller 27 inch.
Also not displayed in this comparison is the 27 inch supports 400 nits of brightness compared to 550 in the 32 inch model.
In every other aspect, the displays are exactly the same.
