
If you want to add one or more external monitors to your MacBook Pro here we show you all the different ways you can connect an external display to a MacBook Pro including to M1, M2 and M3 chip Macs.
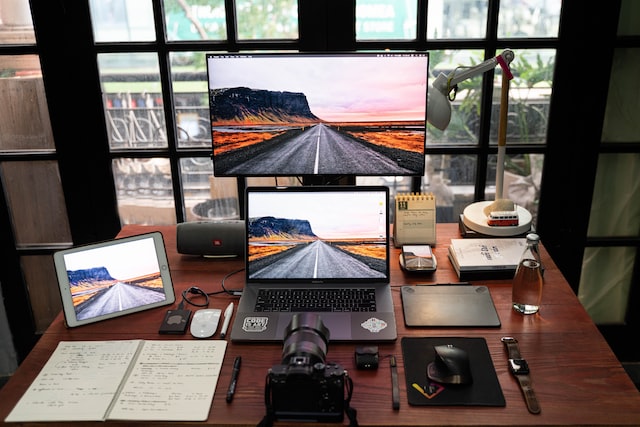
The Liquid Retina XDR Display in the latest MacBook Pro provides amazing quality but even the biggest 16 inch MacBook Pro doesn’t give you much screen estate.
However, the options for connecting an external display to a MacBook Pro depend on which MacBook Pro you have.
There are also limitations to be aware of with the base level 2020 M1 and M2 chip MacBook Pros which only support one external monitor without using workarounds (although this doesn’t affect the 14/16 inch M1/M2 MacBook Pros with M1/M2 Max or M1/M2 Pro chips)
You May Also Like:
- How To Connect Multiple Monitors To M1, M2 and M3 Macs
- What To Look For In The Best Monitors For Macs
Contents
- How To Connect A Monitor To A MacBook Pro
- 1. Find Out Which MacBook Pro Ports You Have
- 2. Connect & Configure The Monitor
- If The Monitor Is Not Working With The MacBook Pro
- Which Is The Best Monitor For A MacBook Pro?
- Can I Close The Lid On My MacBook Pro?
- Does The MacBook Pro Support HDMI 2.1?
- Can I Use A TV As Monitor For A MacBook Pro?
- Can I Use An iPad As An External Display For A MacBook Pro?
How To Connect A Monitor To A MacBook Pro
Any MacBook Pro can connect to at least one external monitor but some can connect to more than others.
It will depend on whether you have an Apple Silicon M1/M2/M3 chip from 2020 onwards or the older Intel chip in the MacBook Pros from 2017, 2015, 2012 and 2011 for example.
1. Find Out Which MacBook Pro Ports You Have
It’s important to make sure that the monitor your purchase has the right ports to connect to your MacBook Pro so you need to check exactly which ports and cables connect to it.
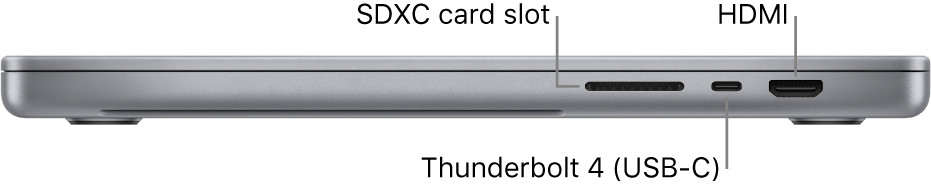
If you know what you’re looking for, you can do this via a physical inspection looking at the side of your MacBook Pro.
If you’re not sure which ports you have on your MacBook Pro however, there’s an easy way to find out and reveal exactly how many monitors it can support.
To check which ports are on your Mac and how many external displays it supports:
- Click on the Apple logo in the top left of your screen and select About This Mac.
- Double-click on the serial number then copy and paste it into the Apple Tech Specs search page to find out exactly which MacBook Pro and ports you have.
- Scroll down to the Charging and Expansion section where you’ll see the exact ports your MacBook Pro has plus its maximum external display capabilities.
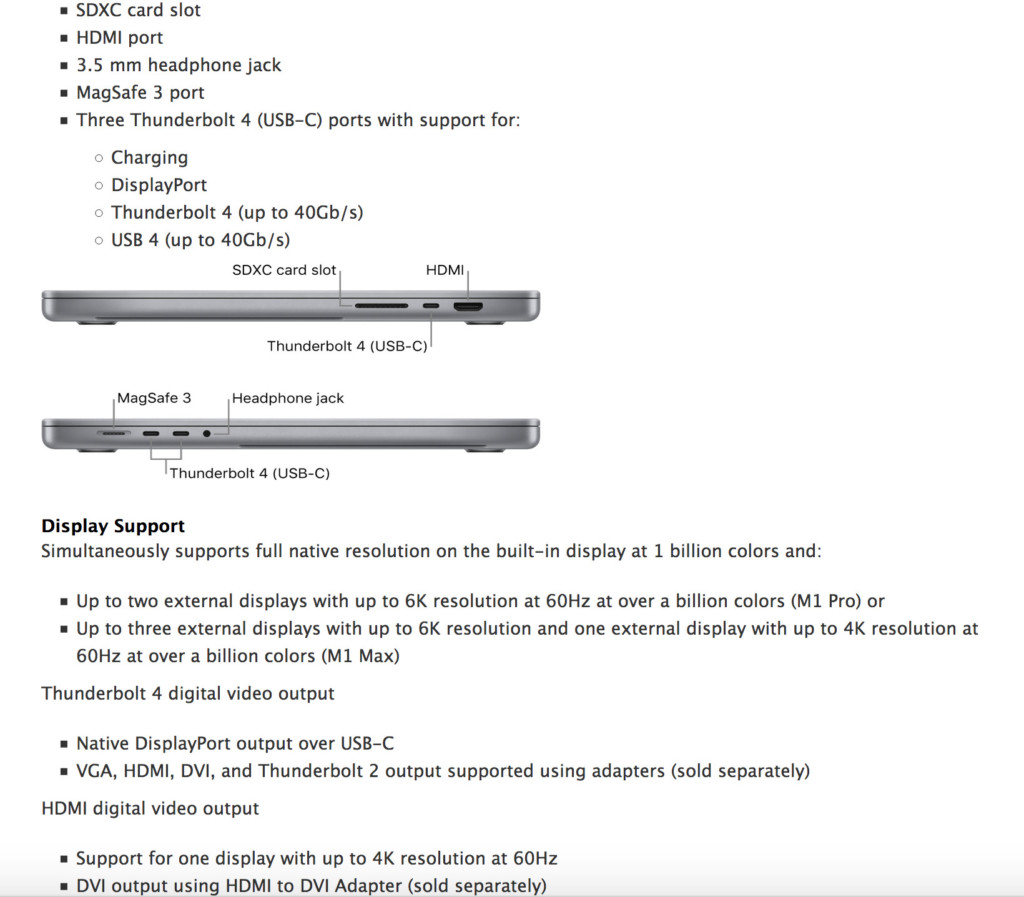
In this example for the 16 inch MacBook Pro M1, we can see there are two main ports to connect external displays: Thunderbolt 4 and HDMI.
Note that HDMI can also be used to connect TV’s and Smart TV’s to your Mac if you want to.
It also shows that you can connect via USB-C which uses the same cables as Thunderbolt but isn’t quite as fast.
For an understanding of the difference between Thunderbolt and USB-C ports check out our guide to USB-C vs Thunderbolt.
Bear in mind if you need lots of space between your MacBook Pro and external display then most of the connections cables are quite short and you may need to buy a longer one.
The specs also show that you can connect monitors to this Mac via VGA, DVI and Thunderbolt 2 but these will all require adapters.
Generally, we don’t recommend using an adapter to connect to an external monitor as the cleaner the connection natively via Thunderbolt 4 or HDMI, the more reliable and trouble-free using an external display with your MacBook Pro will be.
However, if the monitor doesn’t have a USB-C or Thunderbolt port but has any of the following ports you can use an adapter to connect it to a MacBook Pro:
- A Thunderbolt 2 display requires a Thunderbolt 3 to Thunderbolt adapter
- A VGA display or projector requires a USB-C VGA Multiport adapter
- A DisplayPort or Mini DisplayPort display requires a USB-C to DisplayPort or Mini DisplayPort adapter
- A DVI display or projector requires a USB-C to DVI adapter
2. Connect & Configure The Monitor
Once you’ve chosen a monitor for your MacBook Pro, you then need to connect it to one of the ports you’ve identified.
- Plug in the power to your monitor and connect it to your MacBook Pro. Once you’ve successfully connected the display and your MacBook Pro has recognized it, you then need to set it up correctly.
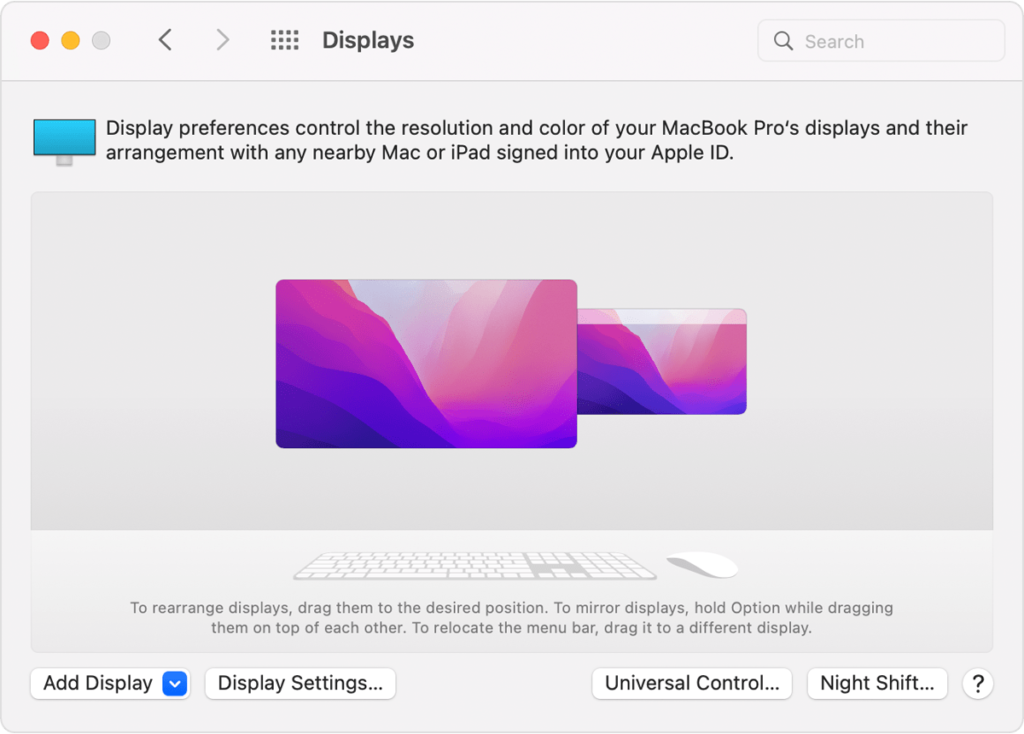
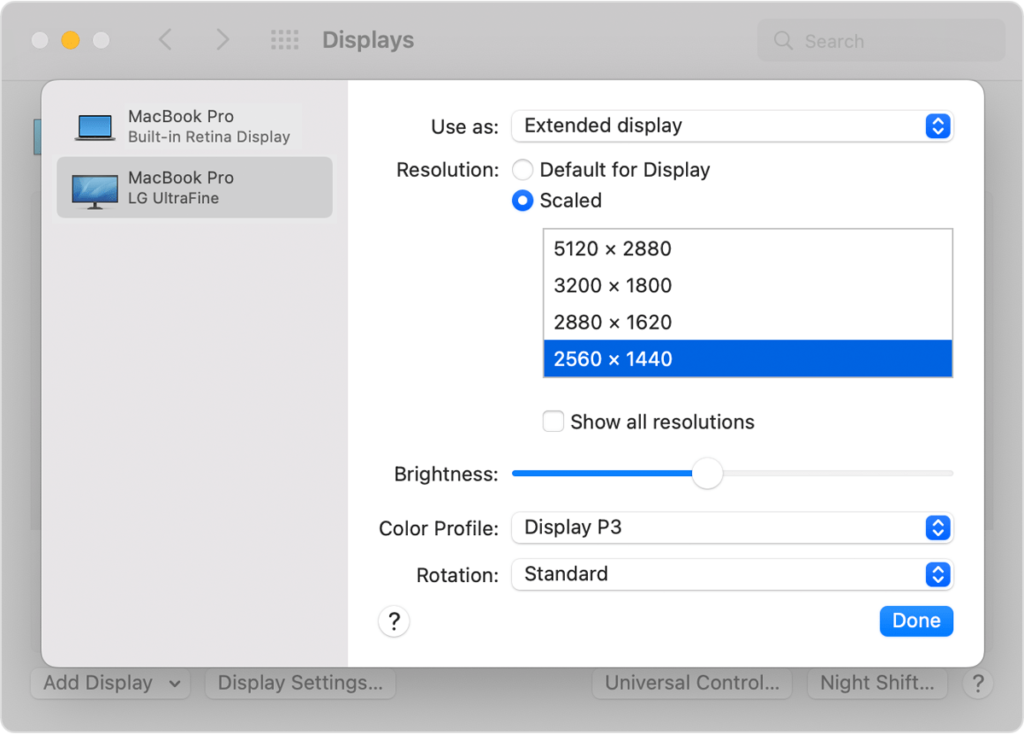
- Go to System Preferences > Displays and you’ll see the external display that you’ve connected.
You’ll now see options to set how the displays are arranged such as left to right or right to left, screen mirroring, contrast, resolution and more.
The principle or main display is indicated by the one that has a white bar above it.
Screen mirroring simply mirrors your MacBook Pro screen in the external display so they both show the same thing. If you want to to use the external display as an extension of your screen, then you need to turn off Screen Mirroring.
You can also change the resolution of your external display.
We recommend changing this to “Default for Display” for the optimum settings.
“Scaled” will match the resolution of your MacBook Pro but if you’re finding that a scaled resolution is making everything look extremely small or blurry on your MacBook Pro’s external display, try some of these solutions.
If The Monitor Is Not Working With The MacBook Pro
If your Mac fails to recognize the external display or you can only see a black screen, try the following:
- Try connecting the display to your MacBook Pro while it is turned off then switch the MacBook on
- Double-check that all cables are securely connected
- Check you have updated to the latest version of macOS which is currently Ventura
- Go to System Preferences > Displays and press the Alt or Option key to reveal the “Detect Display” option. Your MacBook Pro will then try to recognize the display connected to it.
If you’re still having problems getting your external display to work with a Mac, try some of these solutions.
Which Is The Best Monitor For A MacBook Pro?
Pretty much any display will work with a MacBook Pro but the best external monitors for the MacBook Pro will have at least a USB-C or Thunderbolt connection.
A Thunderbolt or USB-C port will also charge your MacBook Pro’s battery while it is connected.
An M1 MacBook Pro is powerful enough to handle a 6K monitor at 60Hz such as Apple’s top of the range 32 inch Pro XDR Display.
The M1 MacBook Pro can also handle Ultrawide monitors including 34-inch, 38-inch and the biggest 49-inch displays.
The more recent Apple Studio Display is easily one of the best displays for the MacBook Pro and because its an Apple monitor, it just works as it should do without any scaling issues with a MacBook Pro.
However, there are cheaper options and our advice is to check our guide to the best MacBook Pro monitors for more.
Can I Close The Lid On My MacBook Pro?
If you’re using an external keyboard and mouse then you can safely close the lid on your MacBook Pro and use the external monitor. This is known as “clamshell” mode.
However, you’ll need to go to System Preferences > Battery > Energy Saver > Power Adapter and move the slider to Never to enable this mode.
Does The MacBook Pro Support HDMI 2.1?
The latest M2 MacBook Pros support HDMI 2.1. One of the big upgrades in the new 14/16 inch M2 MacBook Pro and M2 Pro/M2 Max MacBook Pros was the addition of the HDMI 2.1 port.
Previously the 2021 M1 MacBook Pro only supported HDMI 2.0 and the 2020 M1 MacBook Pro didn’t have an HDMI port at all.
HDMI 2.0 supports up to 240 Hz when using 1080p resolution, 144 Hz at up to 1440p resolution, and 60 Hz at up to 4K resolution.
HDMI 2.1 supports 120 Hz at up to 4K resolution and 60 Hz at up to 8K resolution. If you use a lower resolution than 4K, HDMI 2.1 can even handle up to 240 Hz.
Can I Use A TV As Monitor For A MacBook Pro?
You can use a Smart HDTV as a display for a MacBook Pro either by using the HDMI connection in the 2021 14 inch and 16 inch MacBook Pro (not the 2020 model) or wirelessly via AirPlay.
AirPlay is the easiest way and as long as your MacBook Pro and Smart TV or Apple TV are connected to the same WiFi network, you can use the TV as an external monitor for a MacBook Pro.
Your MacBook Pro monitor will be mirrored in 1080p HD resolution.
Simply go to the Airplay symbol in the Menu Bar at the top of your Mac and select the TV or Apple TV you want to connect it to.
Can I Use An iPad As An External Display For A MacBook Pro?
You can use an iPad wirelessly as a small external display for a MacBook Pro by using Sidecar via AirPlay on your Mac.
This can also be useful if you use the iPad as a graphics tablet and need to see more details in your drawings or sketches.
Simply go to the AirPlay symbol at the top of your MacBook screen and from the drop down menu, select the iPad you want to connect your MacBook Pro to.