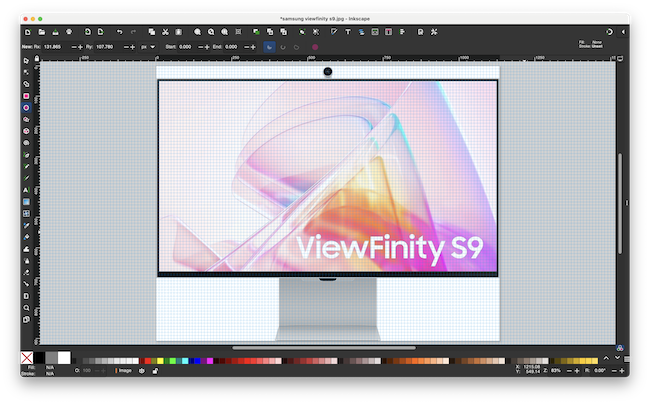
Decent graphic design software isn’t usually free but Inkscape is one of those rare outliers that we ranked as one of the best graphic design software for Macs.
Is it really too good to be true though? Is Inkscape really a serious free alternative to Adobe Illustrator, CorelDRAW and other big industry graphic design apps?
Can it really be used as a professional graphic design application?
Here I take a closer look at this powerful yet free graphic design tool on a Mac to see what it can do.
Contents
Inkscape Overview
Released in 2003, Inkscape is a free, open source vector graphic editing software that offers what many graphic design packages charge a hefty subscription for.
Vector illustration is a digital art that uses mathematical formulas to create shapes, lines and colors. This is different from raster images which are made of pixels.
The big advantage of vector based graphic design software is that images can be scaled up or down with no loss of quality.
Obviously, all this goes on under the hood so that all you have to do is get creative on the canvas.
The software is maintained and developed by the open source community so there’s no big company behind it, just a dedicated team of programmers that develop and maintain the software.
Inkscape is used by a wide range of users and can be used for anything from simply drawing on a Mac to logo design and other advanced graphic design work.
While most industry professionals use either Adobe or Corel products, many freelancers use Inkscape because it’s free and doesn’t require any big up front purchases or subscriptions.
Using Inkscape
To download Inkscape, you need to choose either the Intel version or Apple Silicon version on the download page. Just drag it into your Applications folder and you’re good to go.
When you open Inkscape, you can choose a canvas style such as Default, Checker Board, Solid White etc.
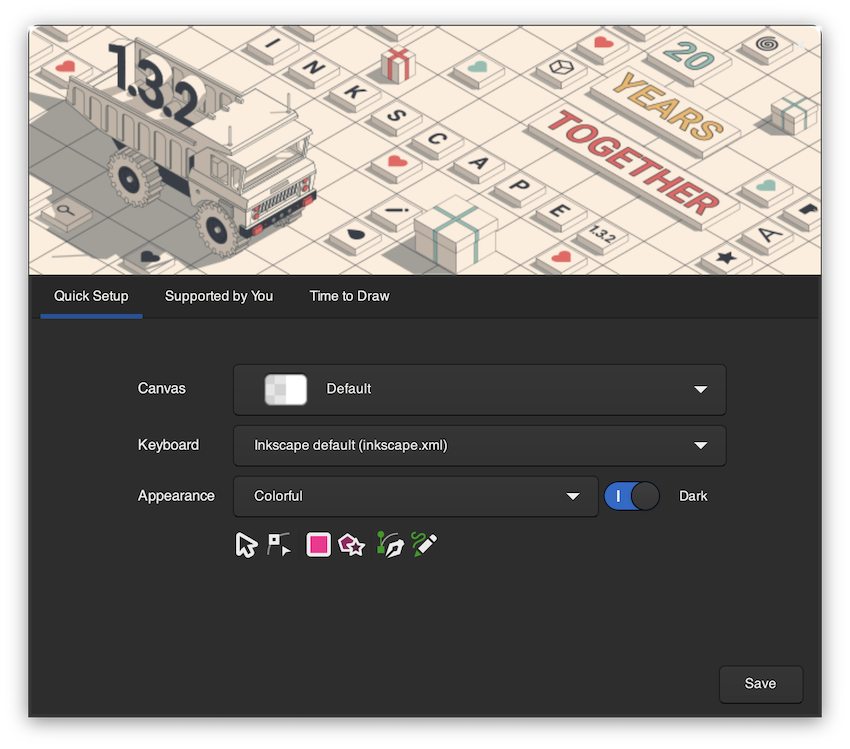
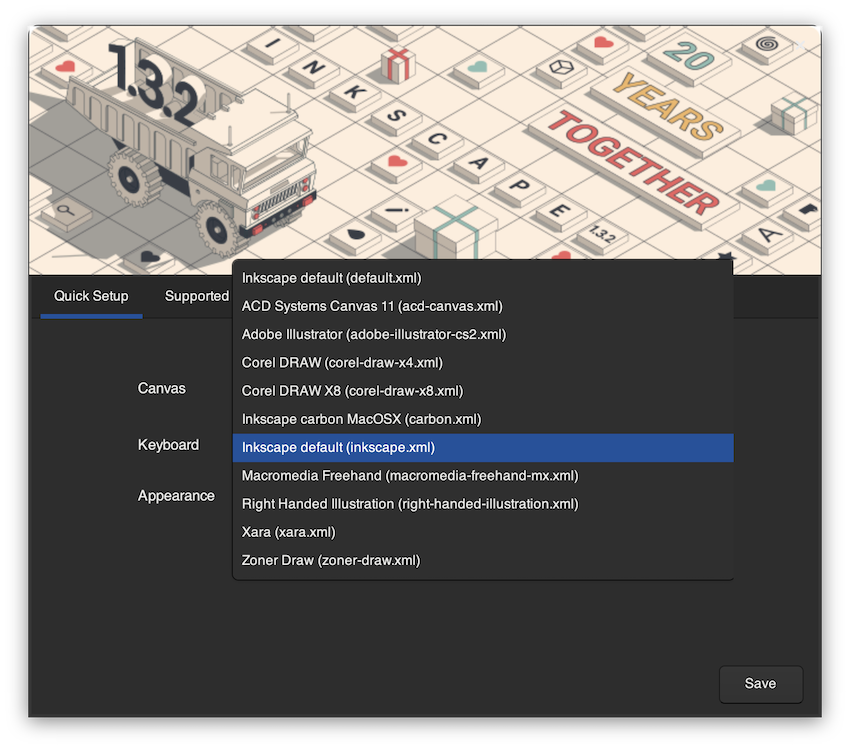
If you’re used to using another graphic design application such as CorelDRAW or Adobe Illustrator, you can also choose the same keyboard settings that you’re used to which is a nice touch.
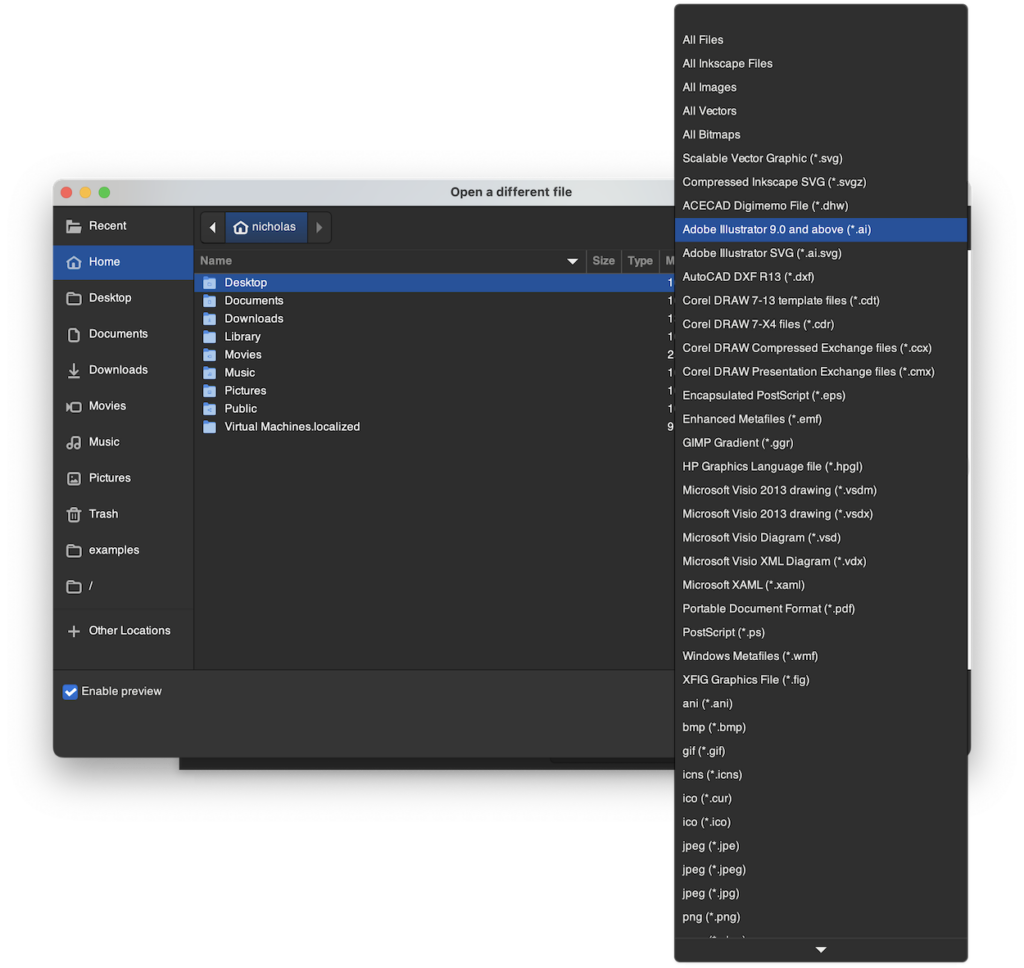
Under “Time to Draw” you can also open an existing file or import a file. Inkscape supports a surprisingly wide variety of formats including Adobe Illustrator, CorelDRAW and even Microsoft Visio and AutoCAD.
By default, Inkscape uses the SVG format which is a cross platform format that can also be used by Adobe, Corel and other products.
Inkscape offers all the other major file format support you’d expect in a serious graphic design software including EPS, PostScript, JPG, PNG, BMP and TIP images.
If you don’t want to import an existing image, just click on “New Document” to start a blank canvas.
Inkscape has a pretty standard graphic design interface that’s filled with a multitude of filters, extensions, object tools and layers. If you’re not a graphic designer though you will find it overwhelming.
Under the Filters Menu alone you will find a huge choice ranging from Bevel and Color Filters to Protrusions (including Chewing Gum) and Ridges.
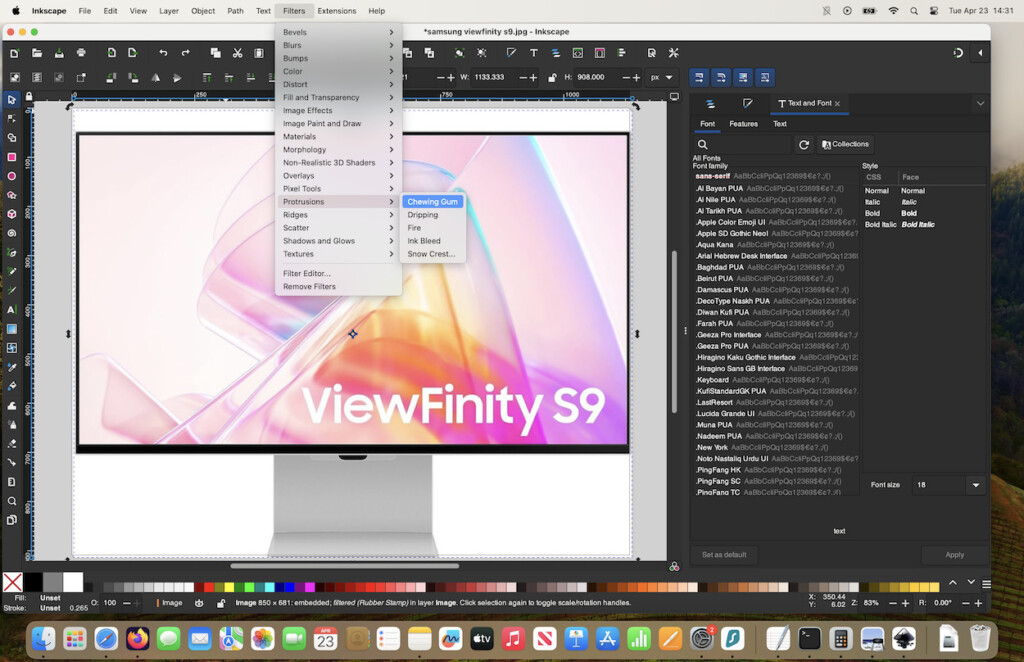
Although there is a basic guide on how to use Inkscape, it’s oriented more on using a keyboard and mouse rather than a MacBook Pro Trackpad, but you can work out how to mesh the two.
The Menu layouts also aren’t quite labelled the same or in the same order as you get in Adobe or Corel products but once you’ve got used to where things are, it’s fine.
I found the IronEcho Design Beginners Tutorial much more useful for getting to grips with the app although it is Windows based.
Inkscape provides a very useful overview of where you can find everything on the main interface. Although the Mac version differs slightly, it’s pretty much the same as the Windows version layout below.
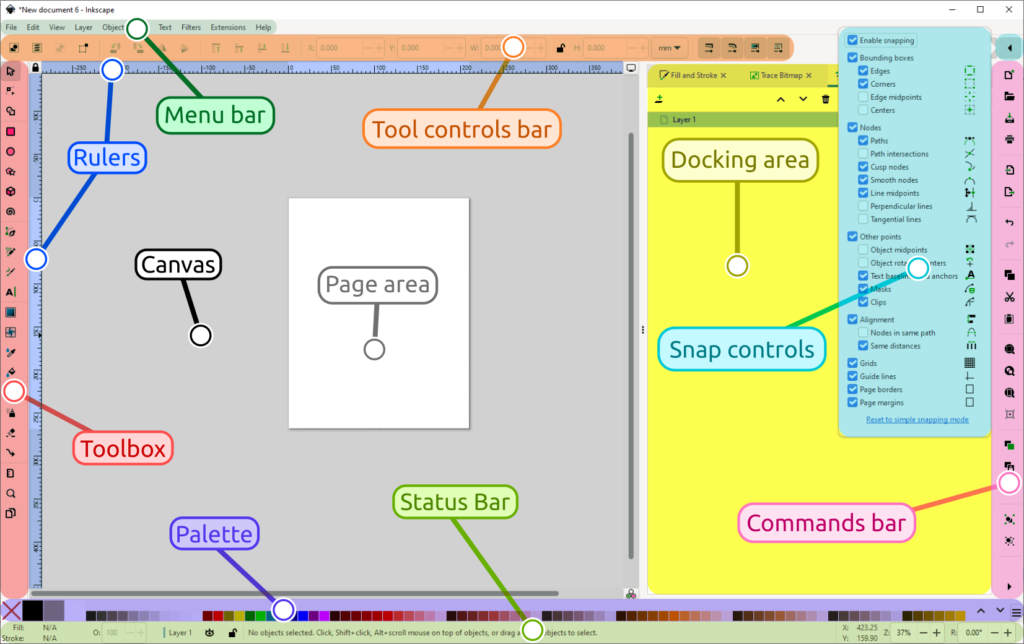
I used Inkscape using a Trackpad but you could also use it with a mouse, or even a drawing tablet such as the Wacom Intuos Pro. For example, you could scan an image, import it into Inkscape and then trace over it with a tablet pen or stylus.
To move an object around, simply swipe with two fingers and to zoom in and out you use the pinch movement.
To right-click, you simply press down with two fingers.
You can also use three fingers to do the equivalent of a left-click and select multiple objects on your canvas although you have to activate this in System Preferences on your Mac.
Inkscape Tools
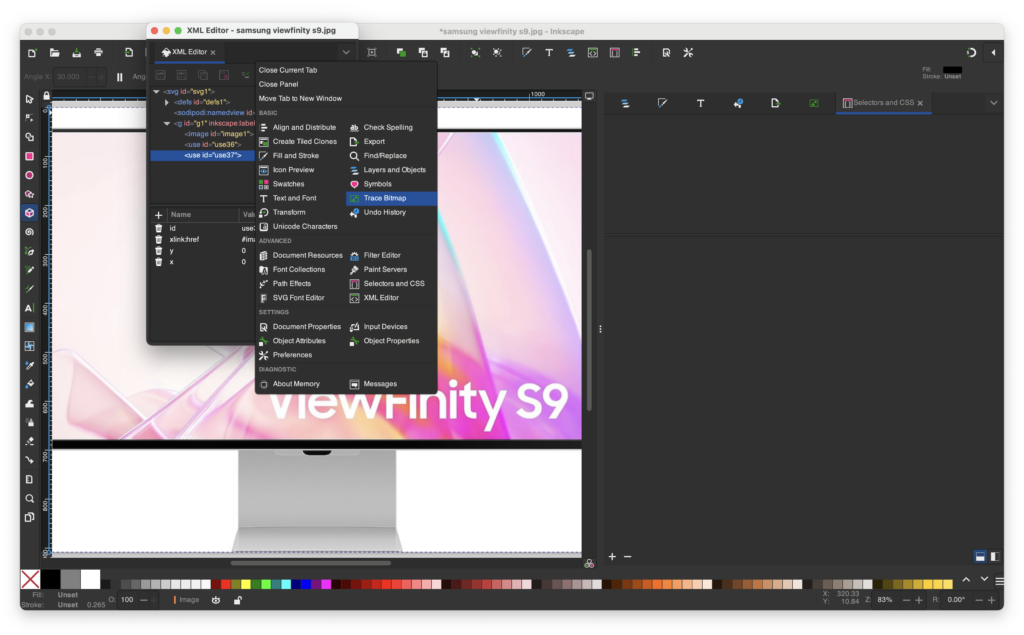
Inkscape is absolutely packed with tools including for shapes, text, markers, clones, transparency effects and more.
You can also adjust gradients, add patterns perform node editing, add layers, do bitmap tracing and much more. In fact, you can do pretty much anything you can do in any of the big graphic design apps such as Illustrator and CorelDRAW.
If you want to add metadata to images such as a Creative Commons license, Inkscape can do that too.
Inkscape Extensions
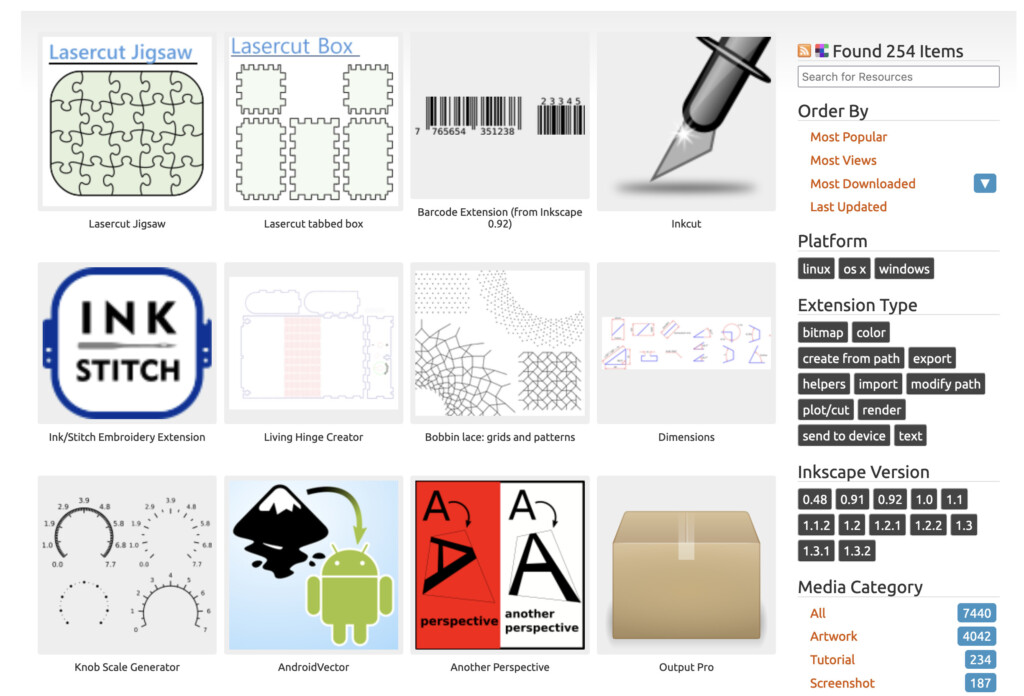
One of the things we liked most about Inkscape is that you can extend its functionality with extensions. Although it comes with lots of preinstalled Extensions, you can extend its functionality with user generated ones.
This means that unlike a lot of big graphic design apps, you don’t need to have lots of bloated features added unless you add the plugin.
Some of the most downloaded plugins in Inkscape include Lasersaw Jigsaw, Barcode Extension and a fountain pen Inkcut tool.
There’s even an extension which can convert text and images into Braille which is pretty cool.
All of the Extensions in Inkscape are free to use and safe to install although since they are developed by other users, you download them at your own risk.
Inkscape Filters
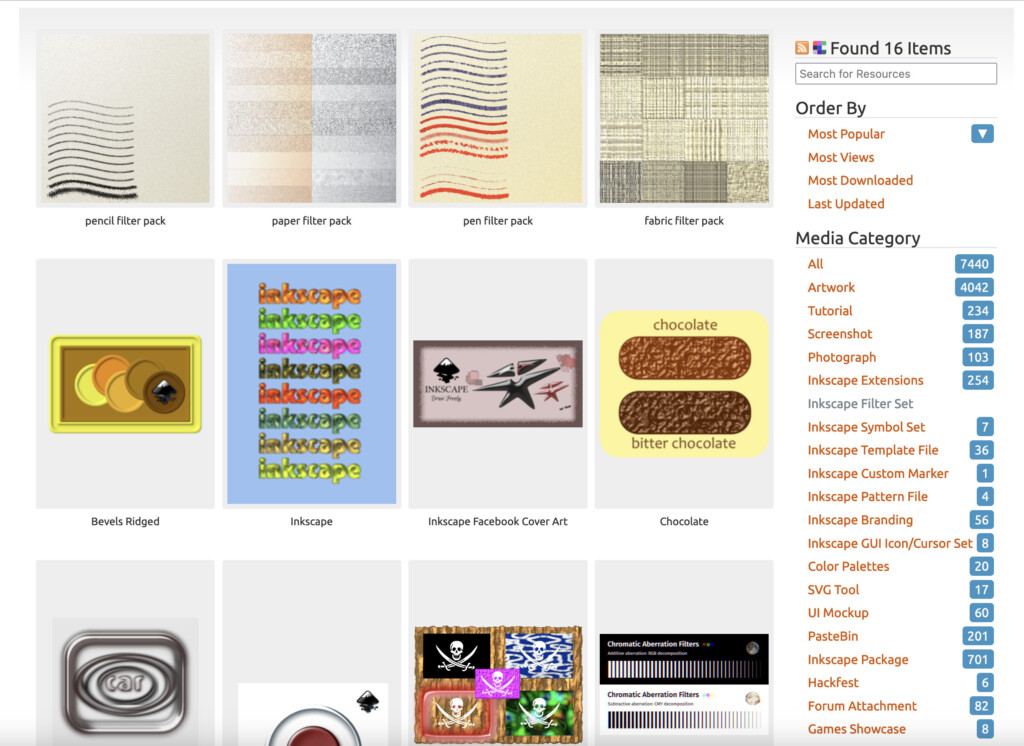
Inkscape also comes with a huge range of Filters but also offers an additional range of filters that you can download and install for free.
Some of the most popular include the Paper Filter, Fabric Filter and Pen Filter Pack.
There are also extra color Palette Filters, Branding Filters and Symbol Sets to choose from.
Inkscape Export Formats
When you’ve finished your work, Inkscape supports exporting to PNG, PDF, TIFF, JPEG and the web optimized format WebP.
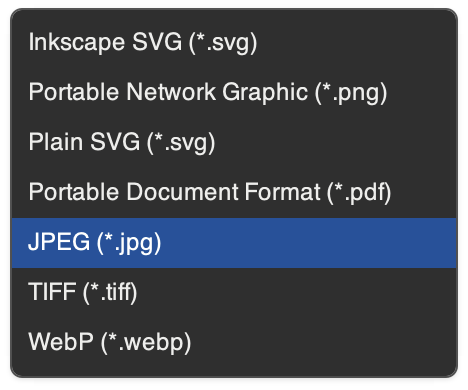
Although early versions of Inkscape supported exporting to Adobe Illustrator 8.0, this is no longer possible but if you export to SVG, the file can be opened in Illustrator.
Inkscape For Mac vs Windows
Inkscape is also available on Windows and there are a few differences in the Mac version compared to it. The layout of some of the tools and menus is slightly different on a Mac although the functionality is pretty much the same.
The best explanation I’ve found about this is Nick Saporito’s from Logos with Nick who clearly explains how the Mac version of Inkscape differs from Windows.
In fact, if you’re looking for a professional course in how to use Inkscape, then I strongly recommend Nick Saporito’s course.
Saporito is a professional US based graphic designer that runs the Logos by Nick website and knows Inkscape inside and out including using it on a Mac
Is Inkscape Safe To Use on a Mac?
Inkscape is perfectly safe to use on a Mac. Because it’s not available in the Mac App Store, you will be prompted whether to allow it to install on your Mac but it’s safe to do so.
Not all developers are able to publish their apps in the Mac App Store but this doesn’t mean they are malicious or dangerous for your Mac.
Inkscape is also fully compatible with the latest M-series Macs and runs natively on Apple Silicon.
Inkscape Downsides
Inkscape supports RGB only. It doesn’t support CMYK or Pantone for commercial printing. You can always convert your Inkscape file into CMYK or Pantone using an Adobe product but it may not translate very well.
There’s also no .EPS file support in Inkscape on either Mac or Windows.
Inkscape can also be glitchy at times on a Mac. Much more so than it seems on Linux or Windows.
One of the reasons for this is that it was originally designed on Linux and then ported across to Mac which has resulted in some performance issues.
One of the main problems you’ll find on both Intel Macs and Apple Silicon Macs is that Inkscape can be extremely laggy.
For example, when I tried to resize Inkscape on my M3 MacBook Pro, the lag was terrible as you can see below.
It doesn’t seem to matter how much RAM or memory you’ve got (we tested it with 32GB of RAM available) this seems like an ongoing issue that never gets resolved.
Although some users report that Inkscape for Mac occasionally becomes unstable and crashes I didn’t experience this. Fortunately, the program uses an auto-save feature to prevent losing your work but I also recommend saving frequently.
Inkscape vs Illustrator
From a tools and features perspective, there’s very little you can’t do in Inkscape that you can do in Adobe Illustrator.
The huge advantage of Inkscape is of course that it’s completely free to use. Illustrator costs $22.99/£21.98 per month or is included as part of a Creative Cloud subscription.
Inkscape can also be used on a relatively low spec Mac or PC whereas Illustrator requires a pretty powerful Mac nowadays to run.
Some things on Inkscape feel easier too such as creating Gradients and Canvas management. There’s also of course a huge number of filters and extensions in addition to those that come with it by default.
However, there are naturally some drawbacks when comparing it to an industry standard package like Illustrator.
Illustrator is used by pretty much everyone in the graphic design industry so in terms of format compatibility and interchanging files, it’s so much easier sticking to the same application.
Illustrator is also free of the laggy glitches and bugs that I found with Inkscape and if there are problems, Adobe’s support is usually very good whereas with Inkscape, you’re going to be relying on forums for help.
If you want to import and export Illustrator files between other Adobe products, then there’s also no competition as Illustrator benefits from Creative Cloud integration.
You also get nifty little tools like AI art generation like you can see below being tested in Adobe Express.
Because it doesn’t support CMYK or Pantone, Inkscape also isn’t suitable for commercial printing so if you’re printing professionally, you’re definitely better-off going with Illustrator.
Inkscape Alternatives
If you just want a user friendly way to do basic editing, remove backgrounds and create designs quickly, then you’ll find Adobe Express much easier to use than Inkscape.
A limited version of Adobe Express is also free to use plus you benefit from integration with Adobe’s Creative Cloud, stock images and AI tools.
If you want another free open source alternative, then Krita is another free graphics design tool that works on Mac although we haven’t fully tested it yet.
If you want something more polished but available as a one-time purchase, then Affinity Designer (now owned by Canva) is a much better option.
For a professional alternative, then by far your best option is Adobe Illustrator and although its only available on subscription, you can try a free trial of it.
For a more comprehensive look at alternatives to Inkscape, check out our look at the best graphic design software for Mac.
For more ways to draw in macOS, check out our guide on how to draw on a Mac.


