

Although SolidWorks remains one of the most powerful CAD tools for engineering and manufacturing, there is still no native macOS version in 2026.
However, the good news is that you can run SolidWorks on a Mac – including the latest Apple Silicon Macs (M-series chips) – using a virtual machine.
In this guide, we’ll show you the best way to install SolidWorks on a Mac, how well it performs, and whether it’s the right solution for your needs.
Contents
- Important: SolidWorks on Mac Reality Check
- Best Setup for Running SolidWorks on a Mac in 2026
- Your Options to Run SolidWorks on a Mac
- 1. Virtual Machine (Best Option)
- 2. Boot Camp (Intel Macs Only – Legacy)
- How To Install SolidWorks on a Mac: Video & Step-by-Step Instructions
- How To Make RealView Work In SolidWorks on a Mac
- When Will SolidWorks Be Available For Mac?
- Is There a SolidWorks Viewer For Mac?
- Alternatives To SolidWorks on Mac
- FAQ
- Conclusion
Important: SolidWorks on Mac Reality Check
Before installing anything, it’s important to understand:
- SolidWorks is not officially supported on macOS
- It is also not officially supported on Windows ARM (which is the only version of Windows virtual machines can run on Macs).
- On Apple Silicon Macs, it runs via emulation inside Windows
This means:
- Performance is good for light to moderate projects
- Large assemblies and simulations may struggle
- Some features (e.g. RealView, certain add-ins) may not work properly
Best Setup for Running SolidWorks on a Mac in 2026
For the best experience, we recommend the following minimum hardware and software:
- Mac: M3 Pro, M3 Max or newer (M4 ideal)
- RAM: 18GB minimum (32GB recommended)
- Storage: 512GB SSD or higher
- Virtual Machine: Parallels Desktop (Pro edition)
- OS: Windows 11 ARM
Lower-spec Macs (e.g. base M1/M2) can run it, but expect lag with complex models.
Your Options to Run SolidWorks on a Mac
1. Virtual Machine (Best Option)
Using a virtual machine is the only practical method for most Mac users in 2026.
Recommended: Parallels Desktop
- Runs Windows and macOS side-by-side
- Fully compatible with Apple Silicon
- Best graphics performance currently available on Mac
Pros:
- No reboot required
- Easy setup
- Optimized for Apple Silicon
Cons:
- Not native performance
- Requires paid license for best performance
Alternative: VMware Fusion
- Now supports Apple Silicon
- Free for personal use
However:
- Weaker 3D graphics performance than Parallels
- Less optimized for CAD workloads
2. Boot Camp (Intel Macs Only – Legacy)
Boot Camp only works on older Intel Macs and is no longer relevant for most users in 2026.
How To Install SolidWorks on a Mac: Video & Step-by-Step Instructions
With this in mind, here is our recommended way to use SolidWorks on a Mac using Parallels.
You can watch how to install Windows on a Mac using Parallels in our video below or follow the step-by-step instructions below it.
- Download Parallels for Mac and run the installer. You can use the free trial to try it first. For running SolidWorks on a Mac, we recommend getting Parallels Pro because it gives you much more control over how many resources you your Mac allocates to Parallels which is very important in an application as resource hungry as SolidWorks.
- Double click on the Parallels download and when prompted by macOS click “Open” and then click “Accept” on the End User License Agreement.
- Parallels will now download the installer and then prompt you for your Mac admin username and password to continue the setup.
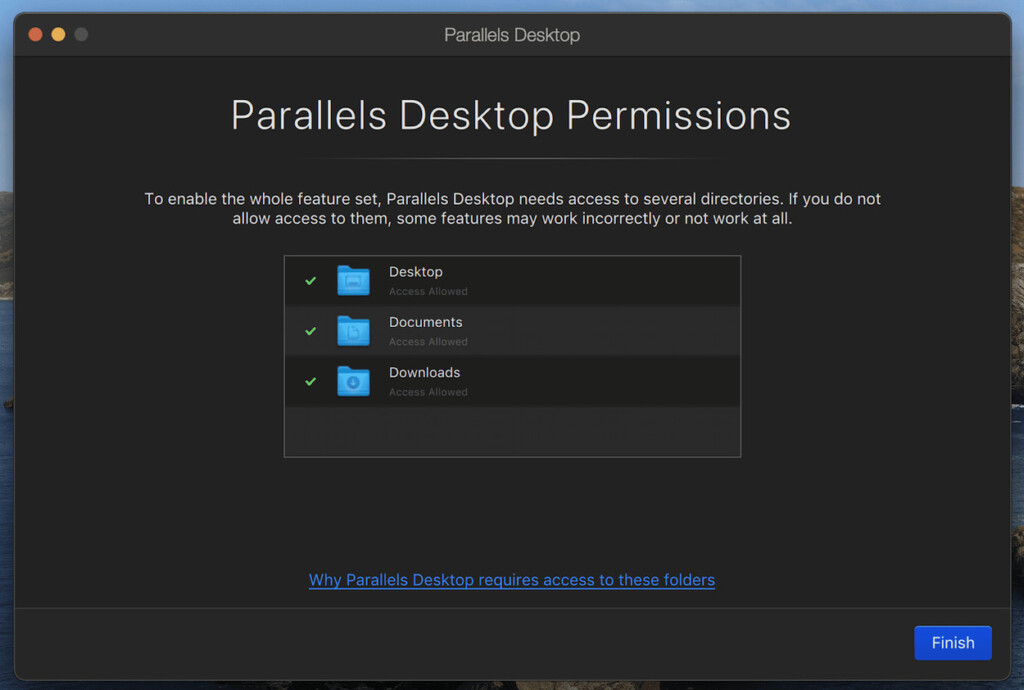
- Parallels will ask permissions to access your Mac Desktop, Downloads and Documents folders. Click on “Finish”.
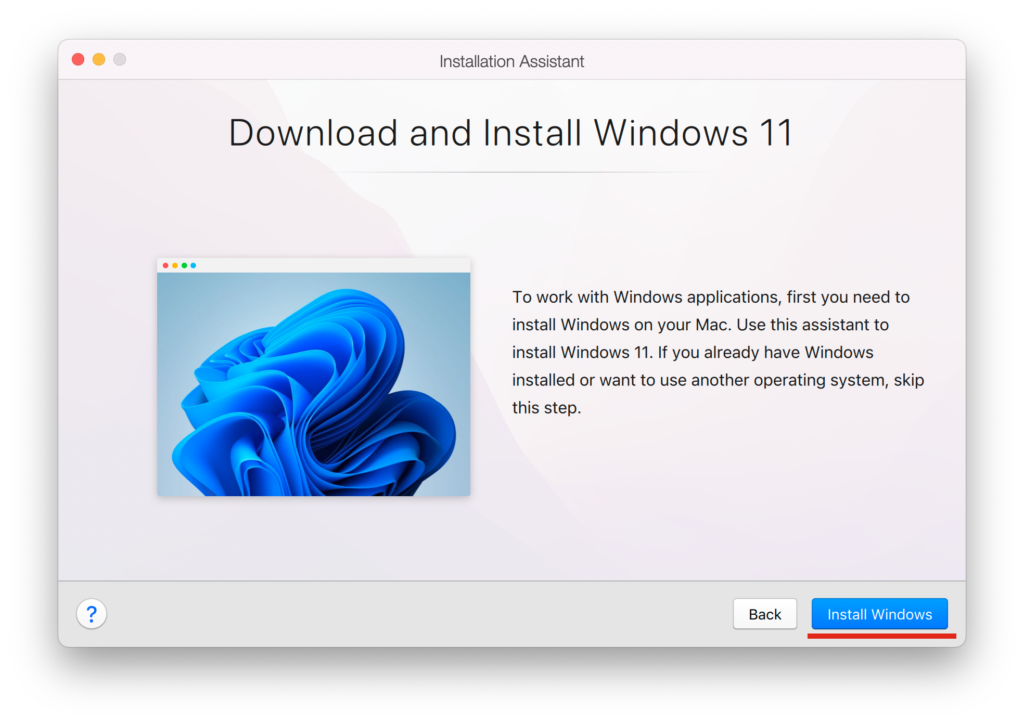
- Parallels will then automatically download and Install Windows 11 when you click Install Windows. If you’re using an Apple Silicon Mac it will download and install Windows 11 ARM.
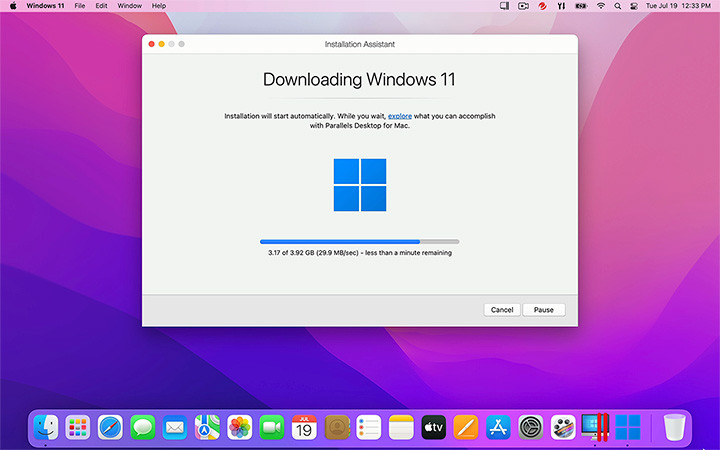
- Parallels will then start to download Windows 11 from Microsoft.
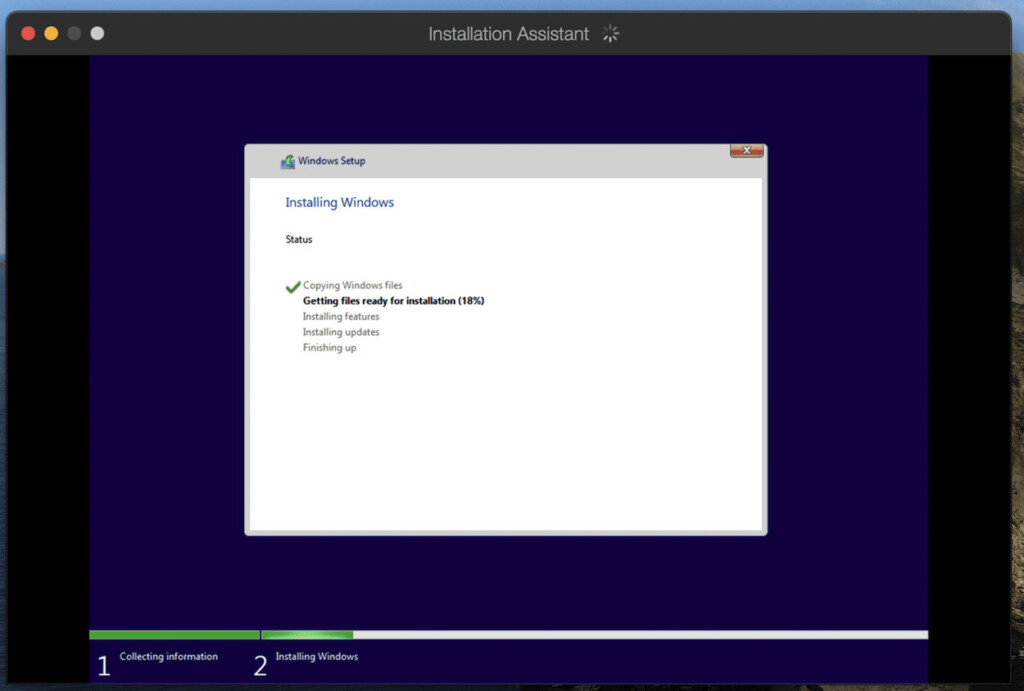
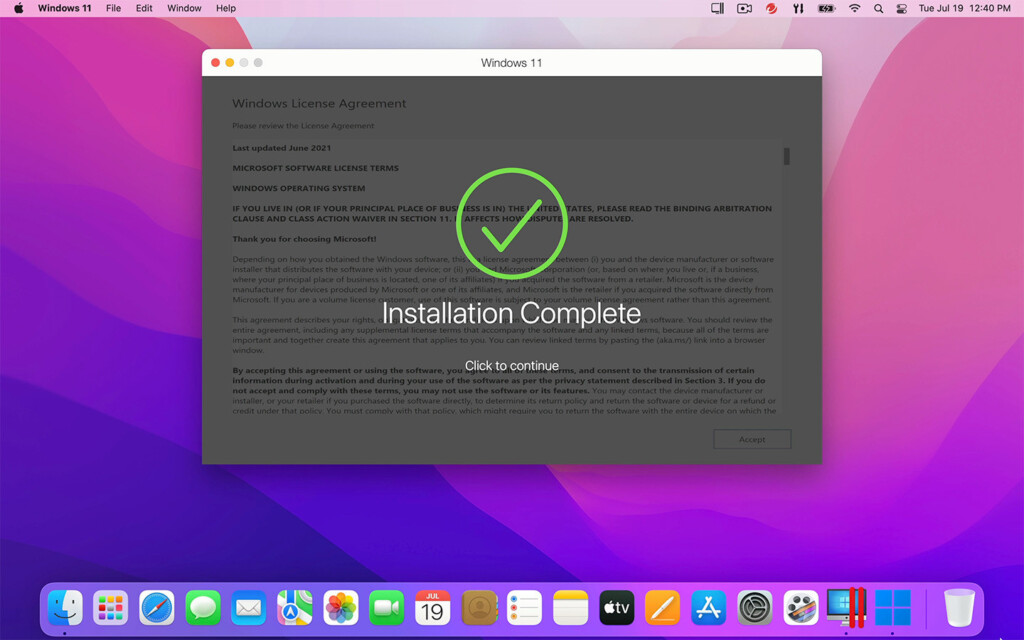
- Once is has validated the install, Parallels will then start the Windows 11 installer on your Mac just as if it were installing Windows on a PC.
- When this is completed, you’ll get an “Installation Complete” message.
- To finalize the setup, Parallels will prompt you for your Parallels username or password. You can setup an account if you don’t already have one or sign in with your Apple, Google or Facebook account too.
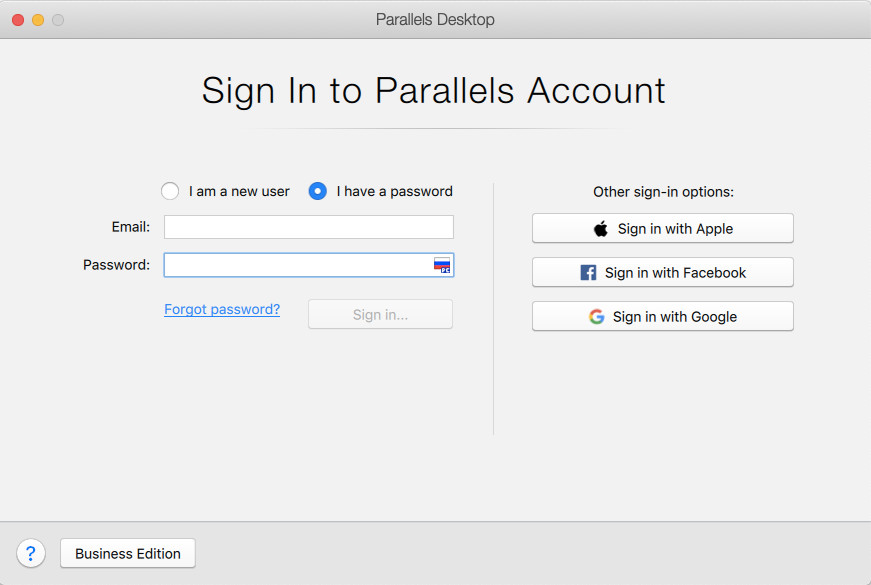
- After you’ve signed-in, Parallels will give you access to a 14 day free trial but if you’ve purchased a Parallels license already, you can enter the license key next.
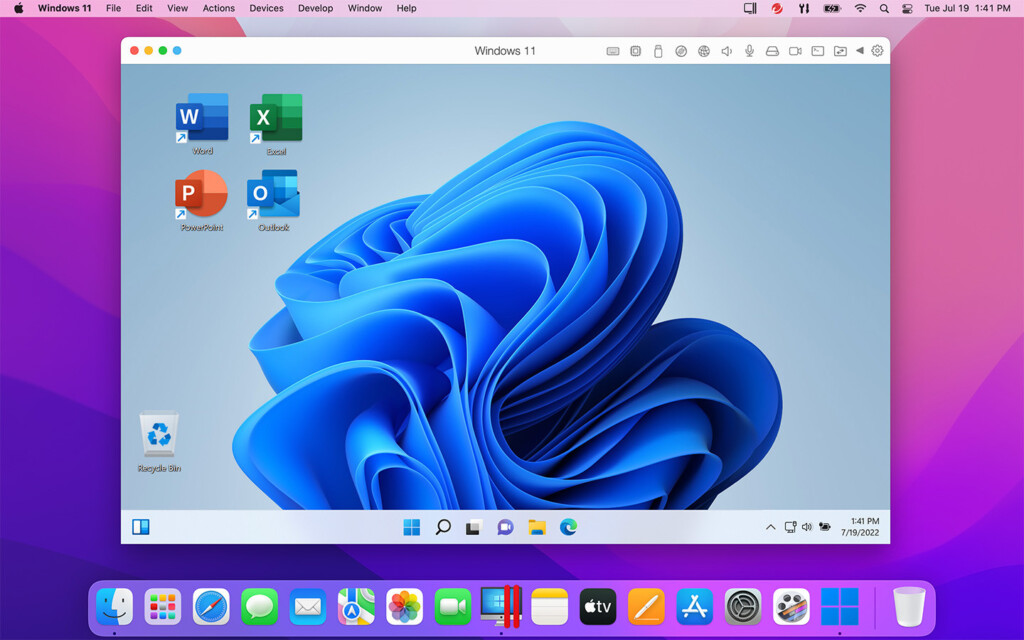
- Parallels will then display the Windows 11 End User License Agreement which you must click on “Accept” before continuing. You’ll then have full access to Windows 11 on your Intel Mac or Windows 11 ARM on an Apple Silicon Mac.
- Since you’re using a fresh install of Windows 11, the first thing you’ll need to do is install the latest updates for Windows 11 from Microsoft. To do this, go to the Windows Start Menu > Settings > System > Windows Update which is in the bottom left hand corner.
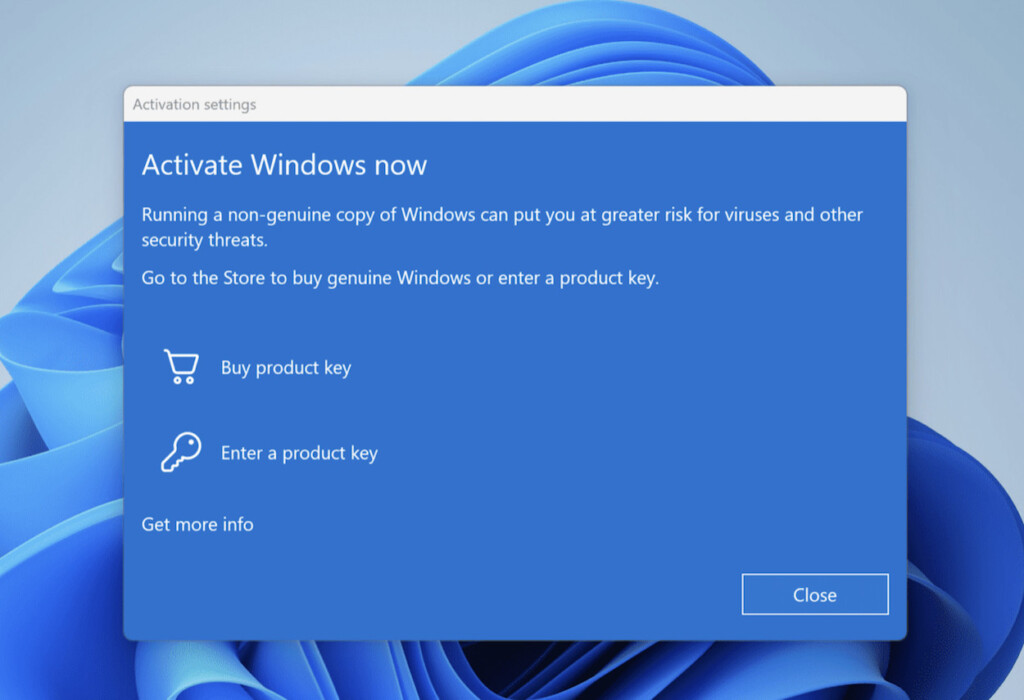
- Windows 11 may prompt you to activate it at this point but you can simply click “Close”. Windows 11 is free to use and you only need to activate it with a key if you want advanced customization options such as changing the wallpaper or desktop theme.
- Click on “Check for updates” button in the top right corner of the Windows Update screen and then install the updates. This can take some time depending on the speed of your internet connection.

- When you have installed all the updates, Windows 11 will then restart to apply them.
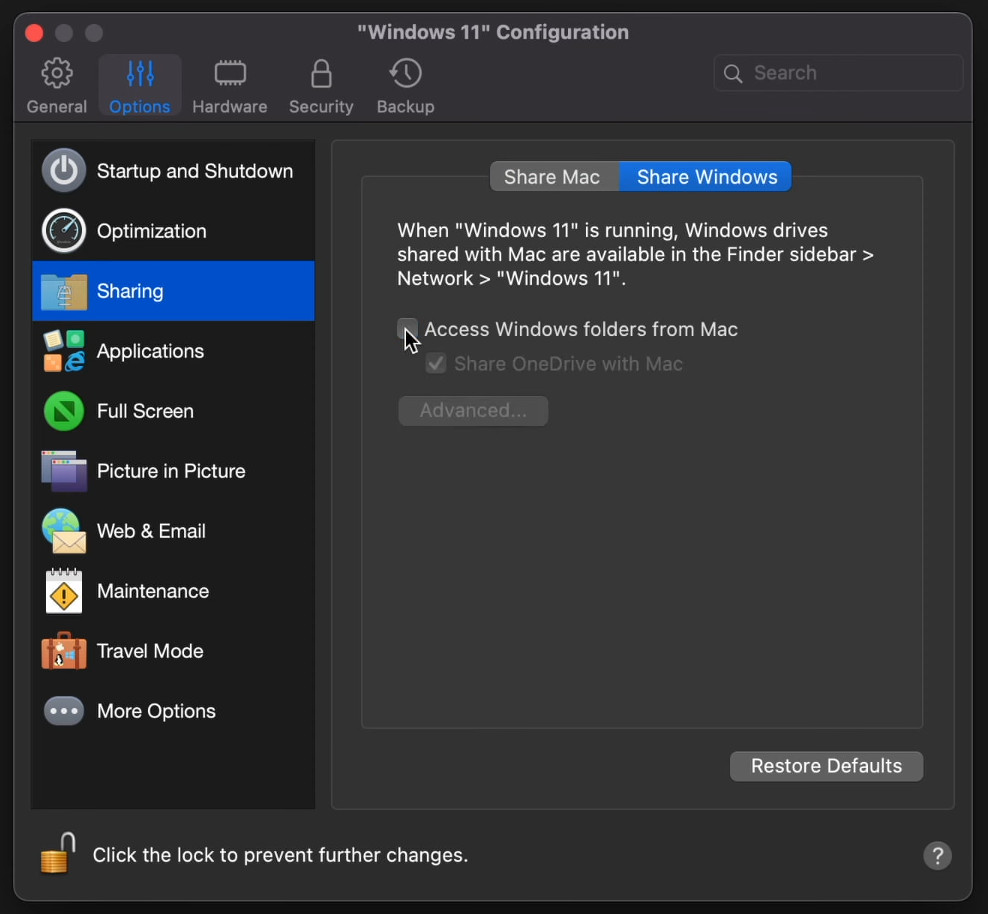
- Once Windows has restarted, you can then configure Parallels to optimize how it uses resources on your Mac. To do this, go to your Windows 11 desktop and select “Actions” from the Menu bar across the top and then select “Configure” at the bottom of the Menu. First you need to disable file sharing between Windows and macOS. SolidWorks does not support file sharing in Parallels you you need to select the General tab at the top of the Configuration window and select Sharing. In the “Share Mac” tab, uncheck all the options to share files between Mac and Windows.

- Do the same by unchecking “Access Windows folders from Mac” in the “Share Windows” tab.
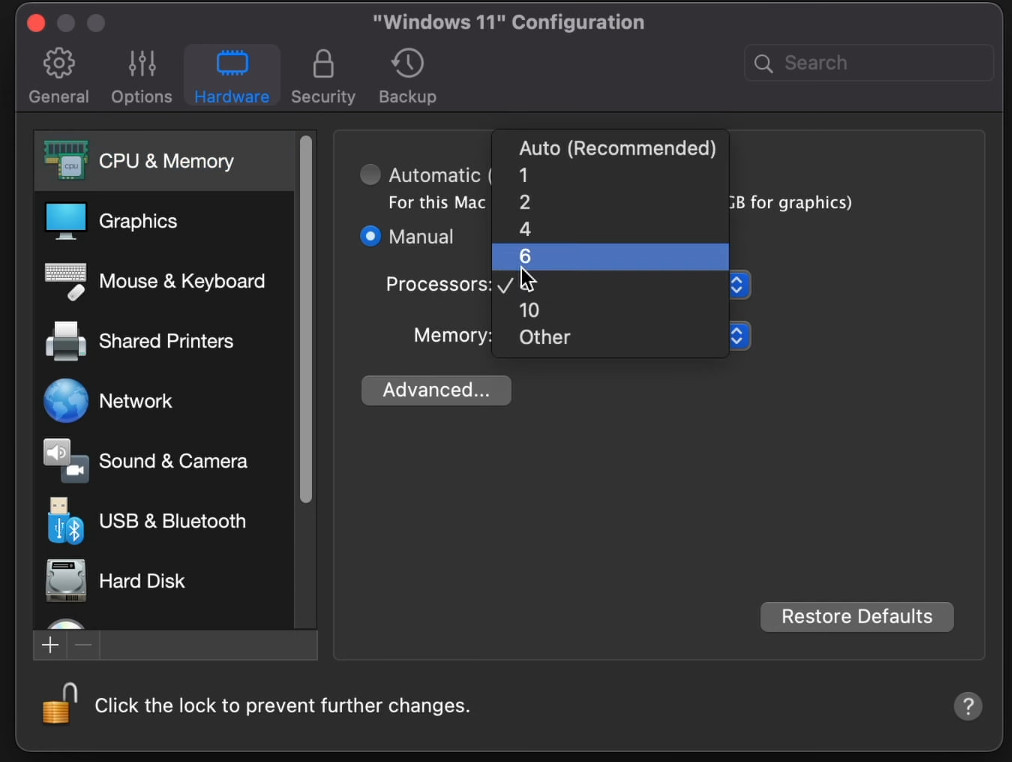
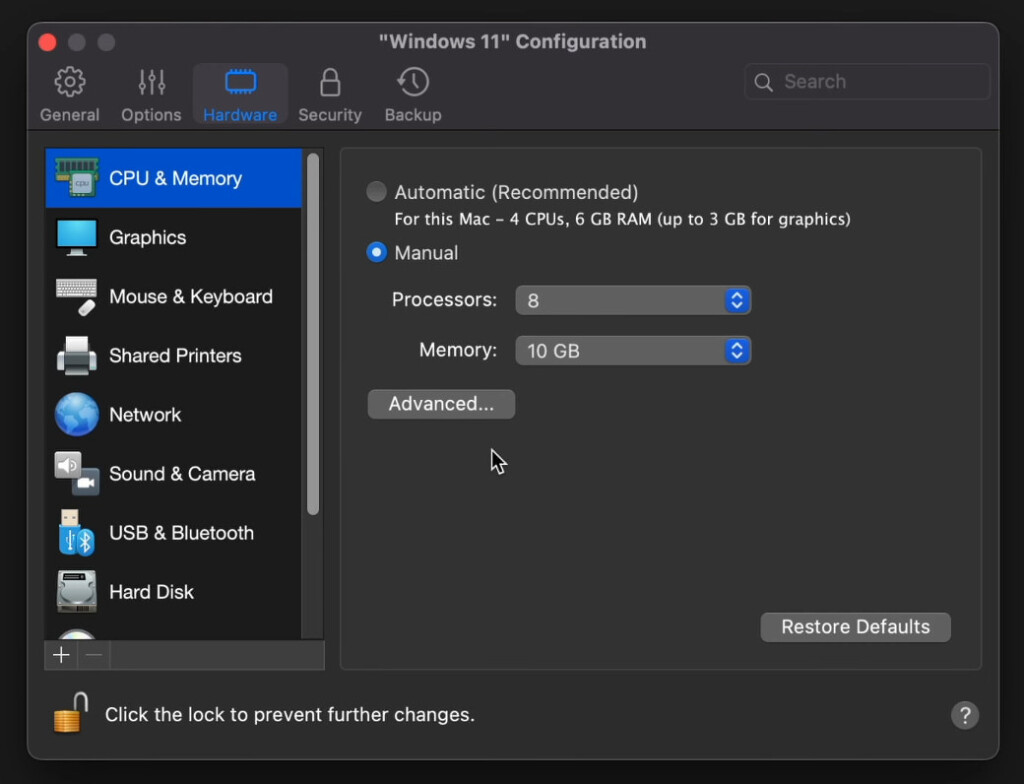
- Next go to the Hardware tab and change the CPU settings from “Automatic” to “Manual”. We recommend allocating at least 8 cores to Parallels to run SolidWorks smoothly but the number of cores available will depend on which model of Mac you have. We do not recommend allocating any less than 4 cores however for running Solidworks.
- Then change the Memory setting to at least 10GB if available. The very minimum we would recommend is 4GB.
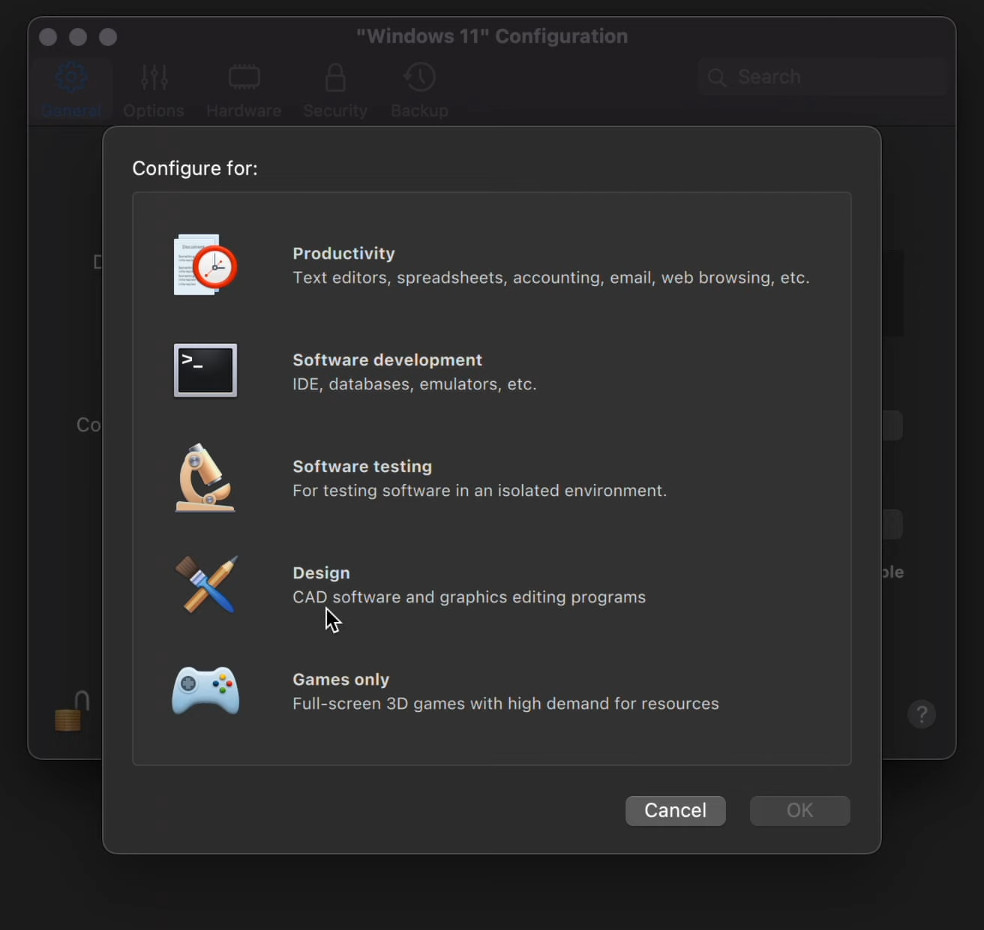
- Next go to the General tab and if you have the Pro version of Parallels, you can automatically optimize it even further for running CAD software like Parallels. To do this click on “Change…” next to “Configure For” and change the profile to “Design”.
- Restart Windows 11 for the changes you’ve made to the Parallels virtual machine to take effect. You’re now ready to install SolidWorks on your Mac.
- Open the Microsoft Edge browser in Windows and you can download SolidWorks for free if you choose the Community Download Edition. This is aimed at students, educators, military and sponsored organizations and is strictly not for commercial use. If you need to use SolidWorks commercially however, you need to purchase SolidWorks instead
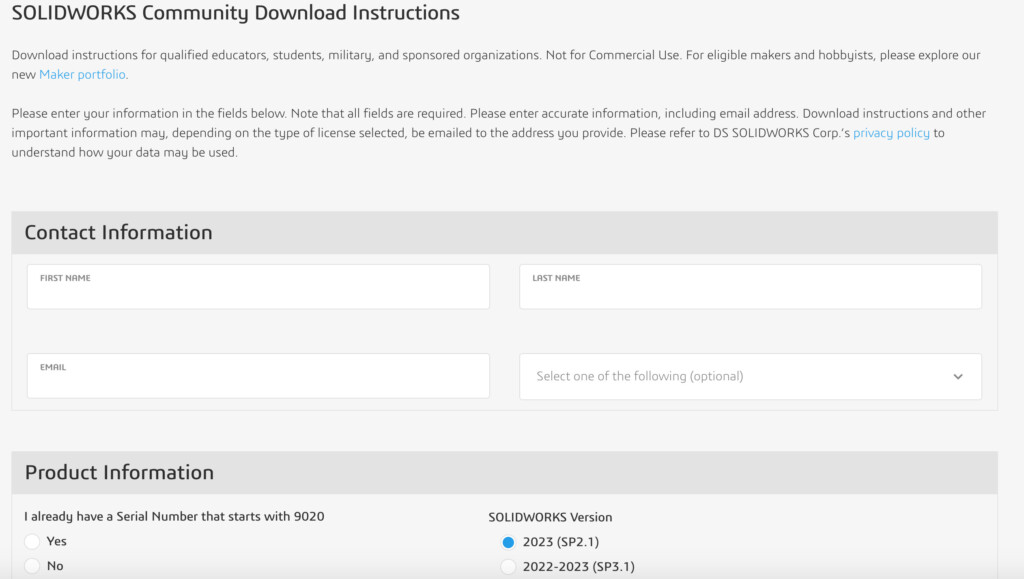
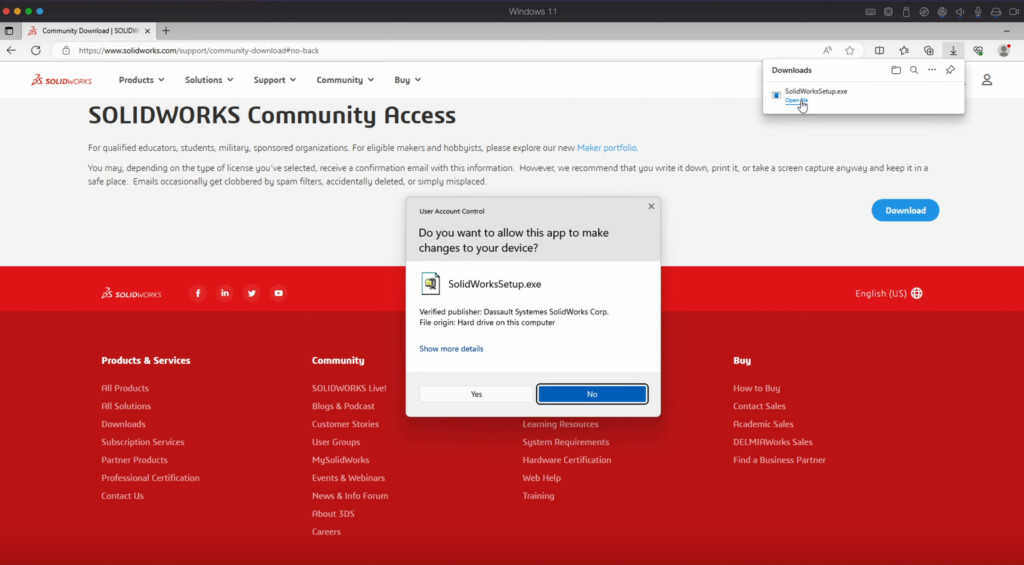
- When you fill in the form, you will receive a download link for SolidWorks. Download SolidWorks and then open the EXE file in Windows. Click “Yes” when prompted to unzip the SolidWorksSetup.exe file.
- Once unzippped, run the SolidWorks installer and you’ll be prompted to add your SolidWorks serial number.
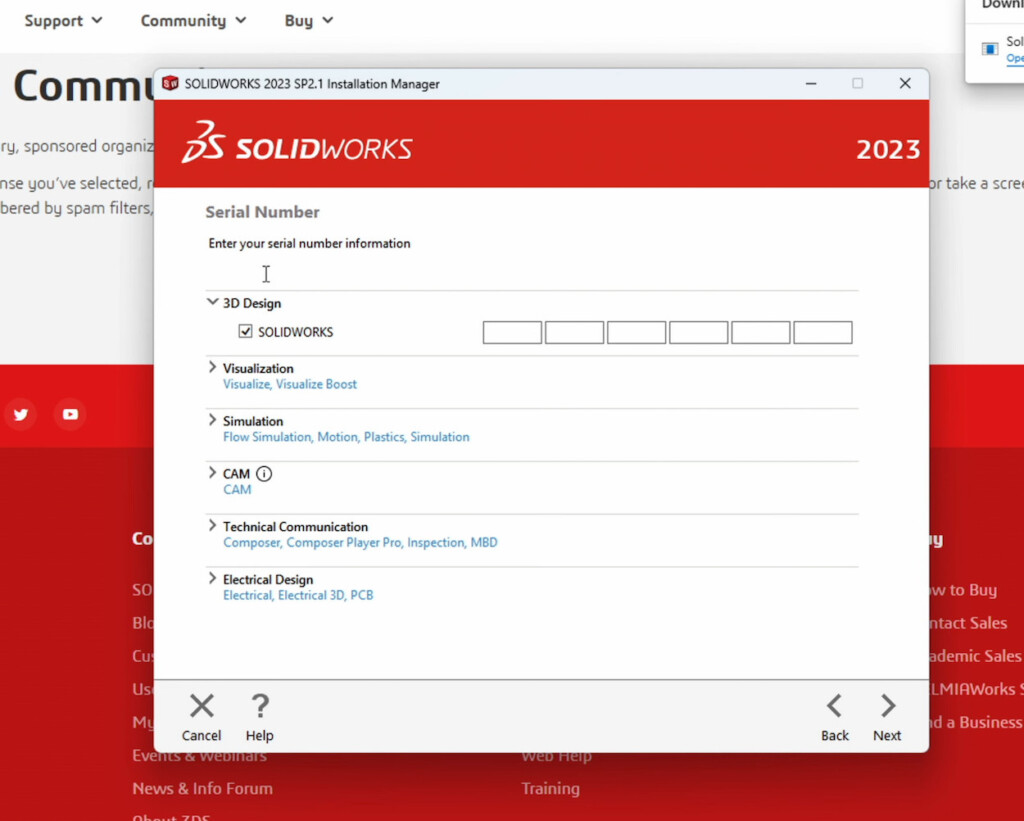
- Next you’ll be asked to select which SolidWorks products to install.
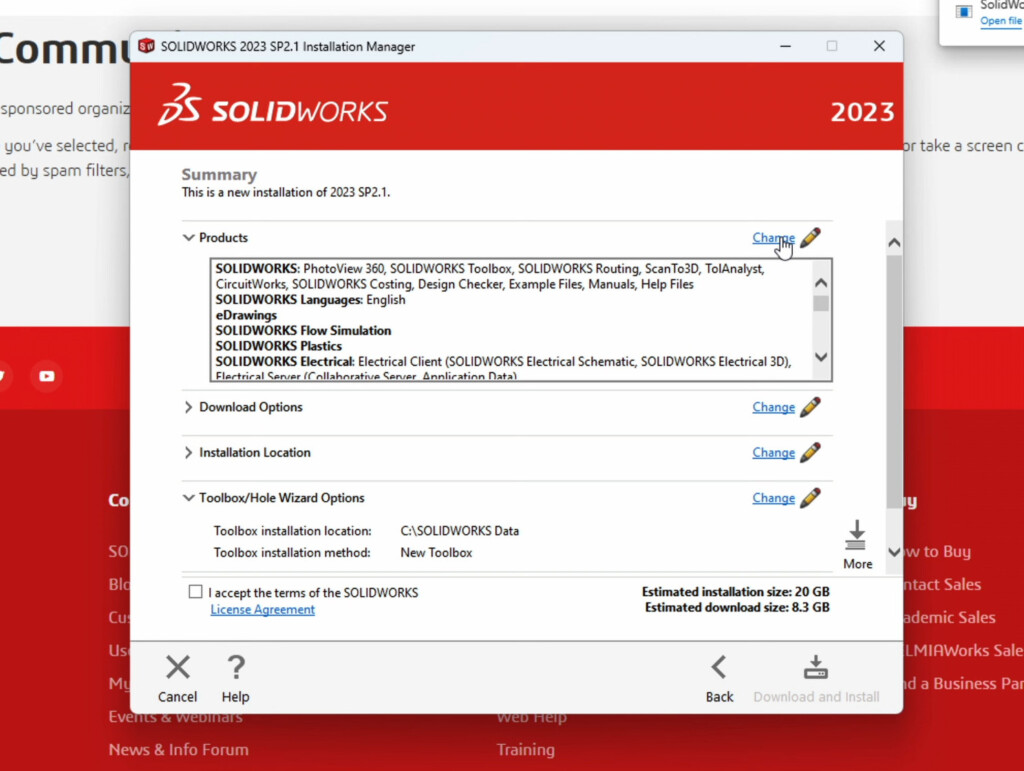
- SolidWorks running in Parallels does not work with all SolidWorks features so you’ll need to click on “Change” in the top right and uncheck the following options: “SolidWorks Electrical” and “SolidWorks CAM”.
- Once you’ve done this, return to the Summary of selections and check the box at the bottom “I accept the terms of the SolidWorks license agreement” and then click “Download and Install” in the bottom right-hand corner.
- SolidWorks will then install in Windows on your Mac and you’ll see an “Installation is Complete” message when you’re done.
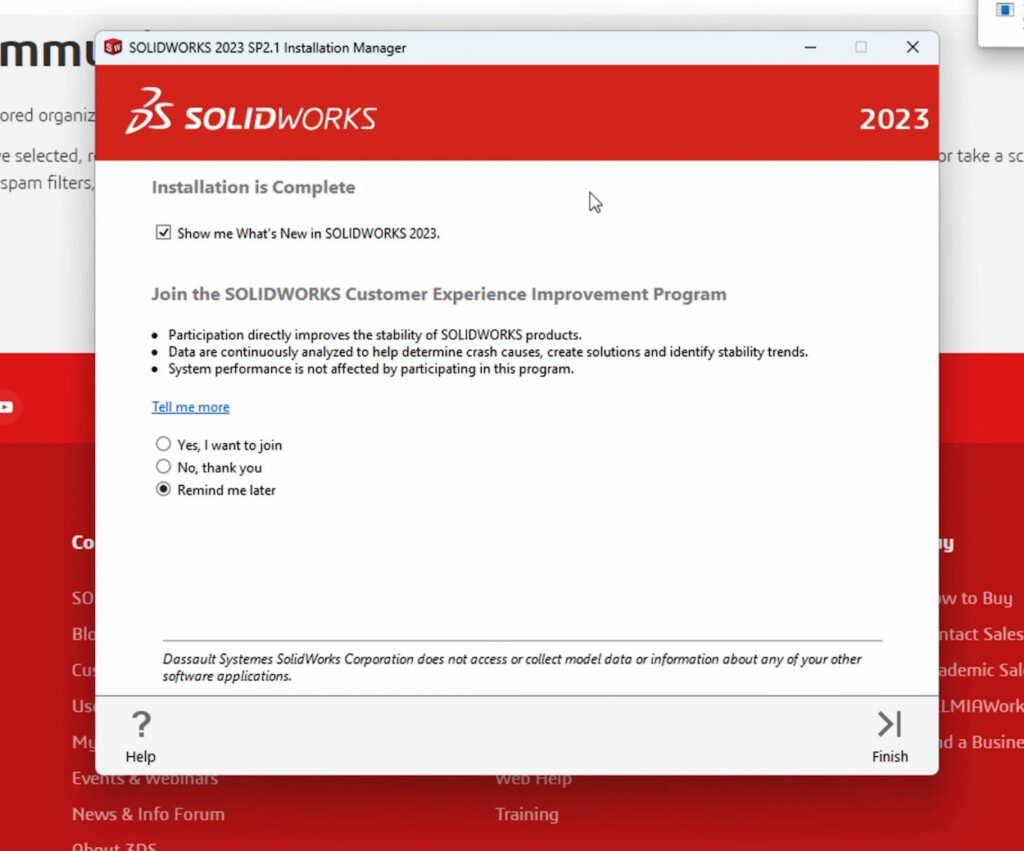
- Click on “Finish” in the bottom right-hand corner and SolidWorks will then prompt you to restart Windows on your Mac to complete the installation so click “Restart Now”.
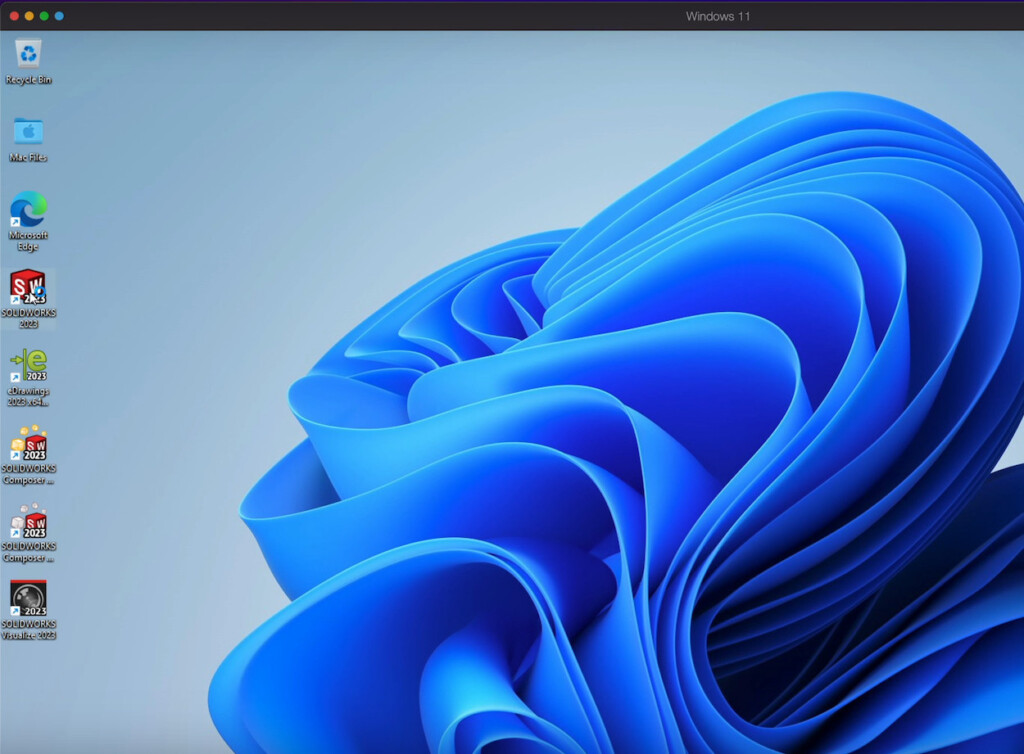
- When Windows restarts, you’ll see all of the SolidWorks applications that have been installed down the left hand side of your Windows desktop.
- Double-click on the SolidWorks desktop shortcut to launch SolidWorks in Windows on your Mac. SolidWorks will prompt you to activate the product with the serial number you entered earlier. Just click “Next” to do this and then click on “Accept” when presented with the license agreement. SolidWorks will then open in Windows.
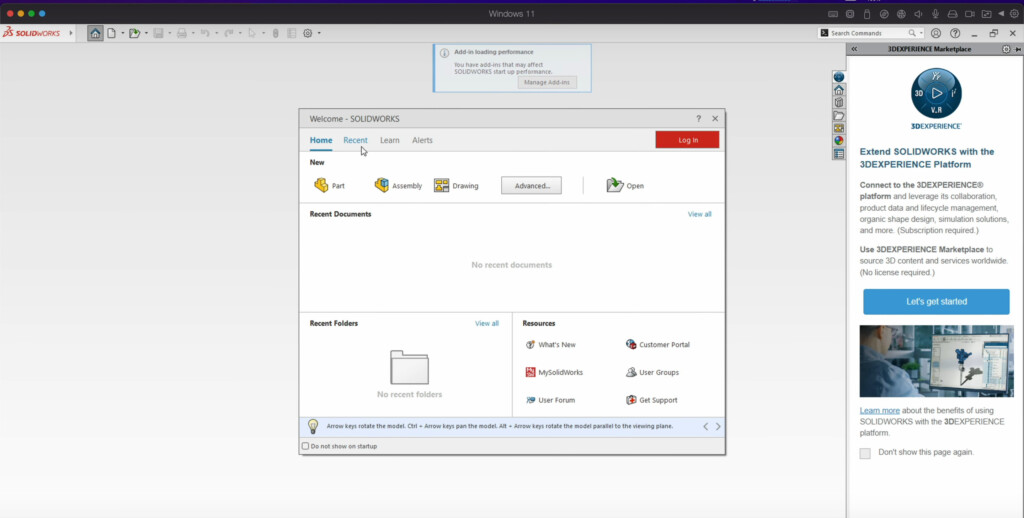
You should find that SolidWorks works very well on your Mac with no lag or stuttering when manipulating 3D objects and designs.
How To Make RealView Work In SolidWorks on a Mac
RealView doesn’t work by default when you install SolidWorks on a Mac but there is a workaround you can use to make it work.
To get RealView working in SolidWorks running on Windows on your Mac follow these instructions:
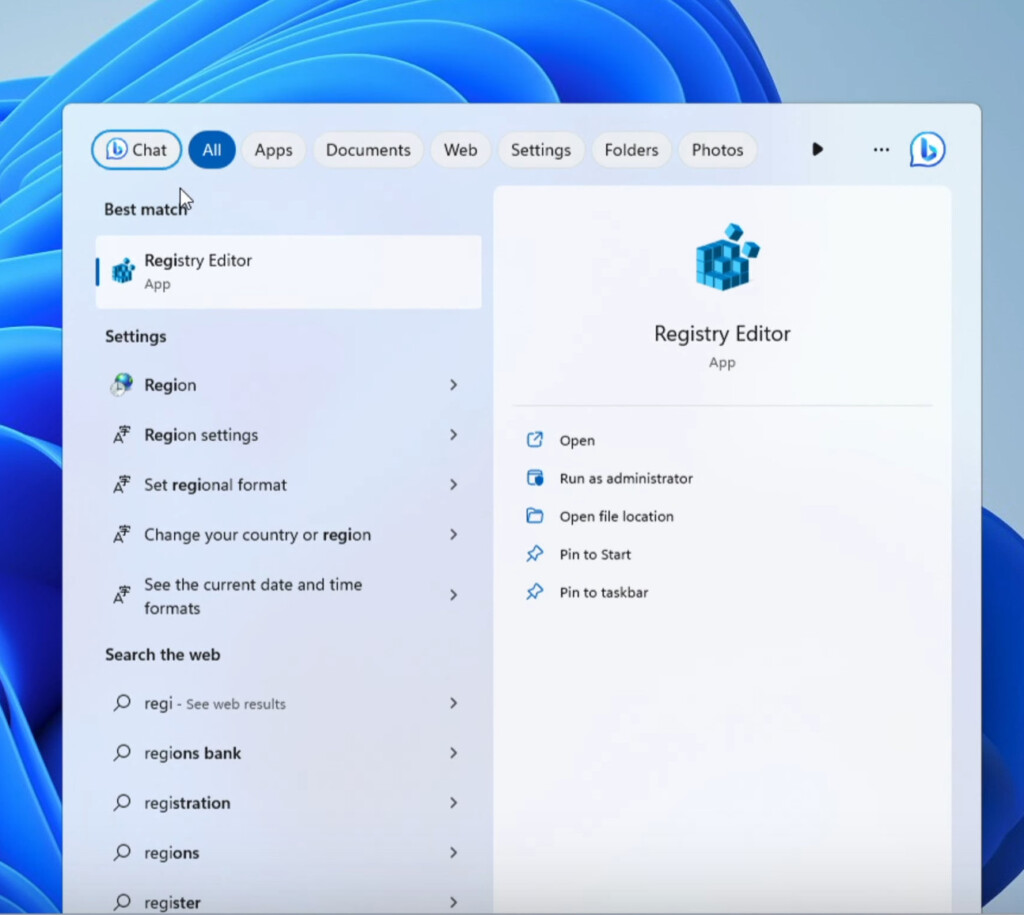
- Open the Windows Registry Editor in Windows 11 on your Mac.
- In the Registry Editor along the left hand folder nest, go to HKEY_CURRENT_USER/Software/SolidWorks/AllowList/Current and double click the Renderer entry on the right.
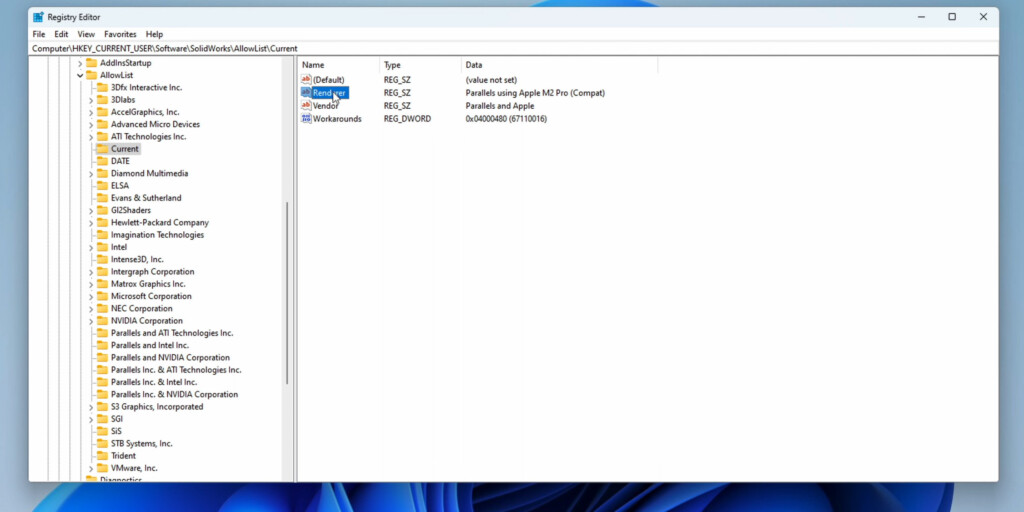
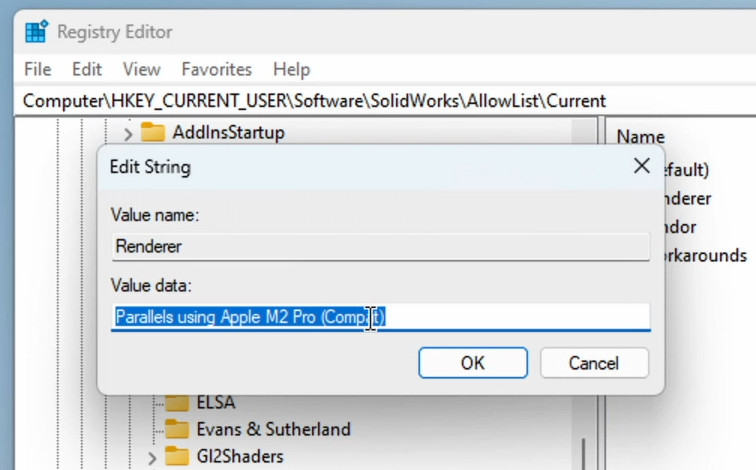
- Select and Copy the string that appears that will be something like “Parallels using Apple M2 Pro (Compat)”. It will differ according to whichever model of Mac you are using.
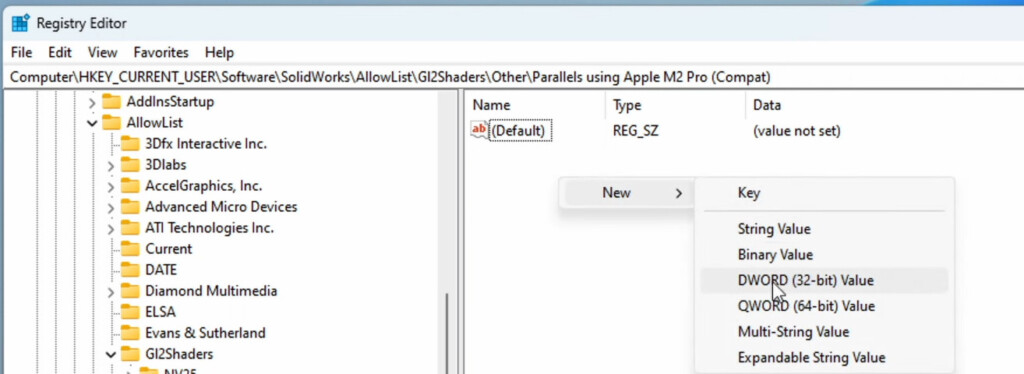
- Go back to the folders on the left and select HKEY_CURRENT_USER/Software/SolidWorks/AllowList/G12Shaders/Other and then right-click on it and select New > Key from the context menu that appears.

- In the new folder that appears rename it as the string you copied earlier i.e. “Parallels using Apple M2 Pro (Compat)”.
- Making sure that the folder you have renamed is highlighted, on the right you need to right-click on the Default file and select New > DWORD 32-bit value.
- In the new DWORD that is created rename it “Workarounds”. Right click on it and select “Modify”.
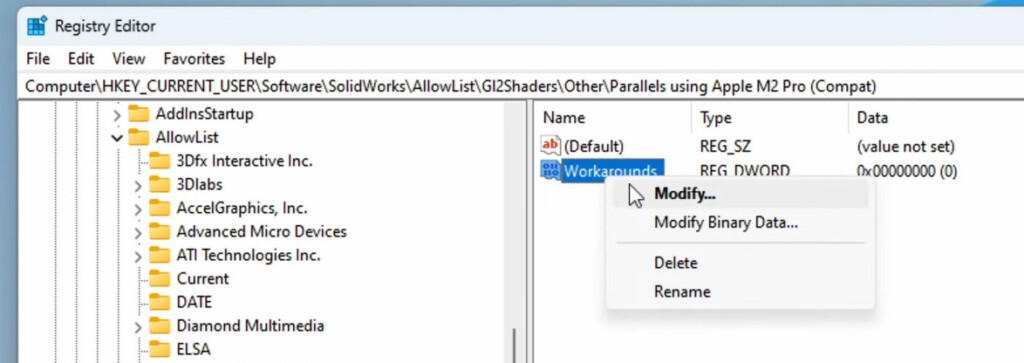
- In the Data Field that appears type “4000480” and leave “Hexadecimal” selected.

- Go back to HKEY_CURRENT_USER/Software/SolidWorks/AllowList/ and this time click on the Vendor value.
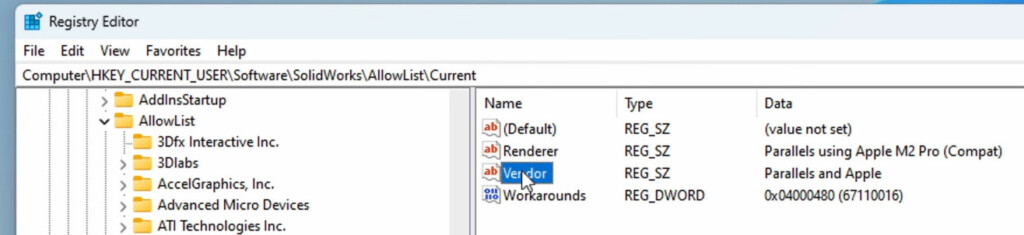
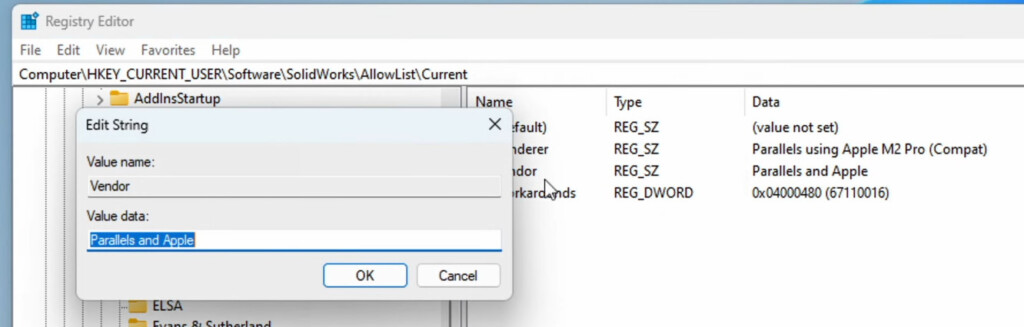
- Right click on Vendor and copy the text in the Value Data field which should be “Parallels and Apple”.
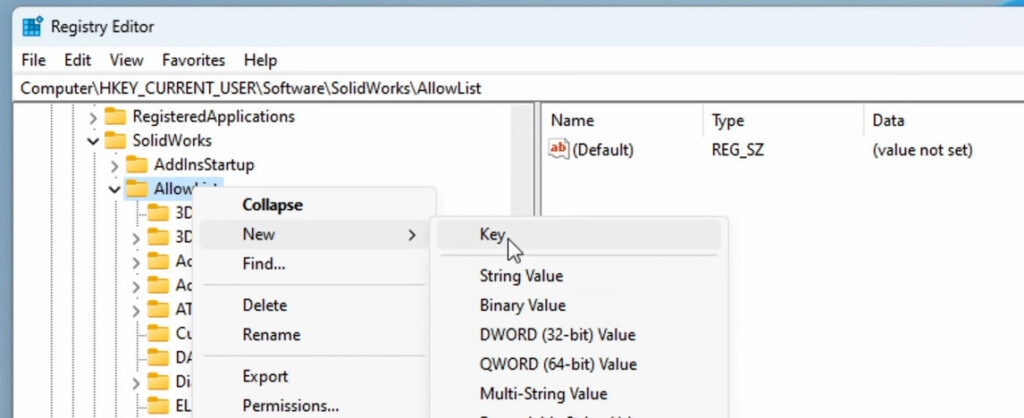
- Go back to HKEY_CURRENT_USER/Software/SolidWorks/AllowList/ and right click on AllowList to create a new key and paste the name of the folder as “Parallels and Apple”.
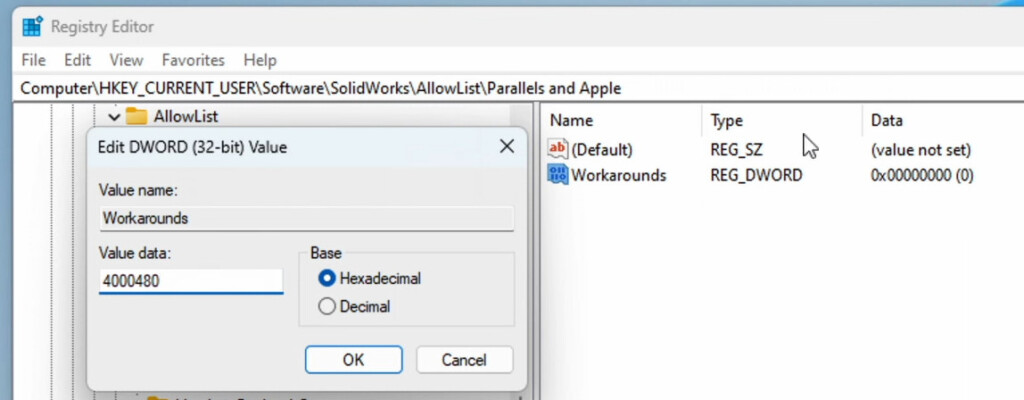
- Right click on the right of the screen and select New > Key > New > DWORD 32-bit value. In the new DWORD that is created rename it “Workarounds”. Right click on it and select “Modify”.
- In the Data Field that appears type “4000480” and leave “Hexadecimal” selected.
- You can now close the Registry Editor in Windows and restart SolidWorks. You should now see that RealView Graphics is now available in SolidWorks on your Mac.
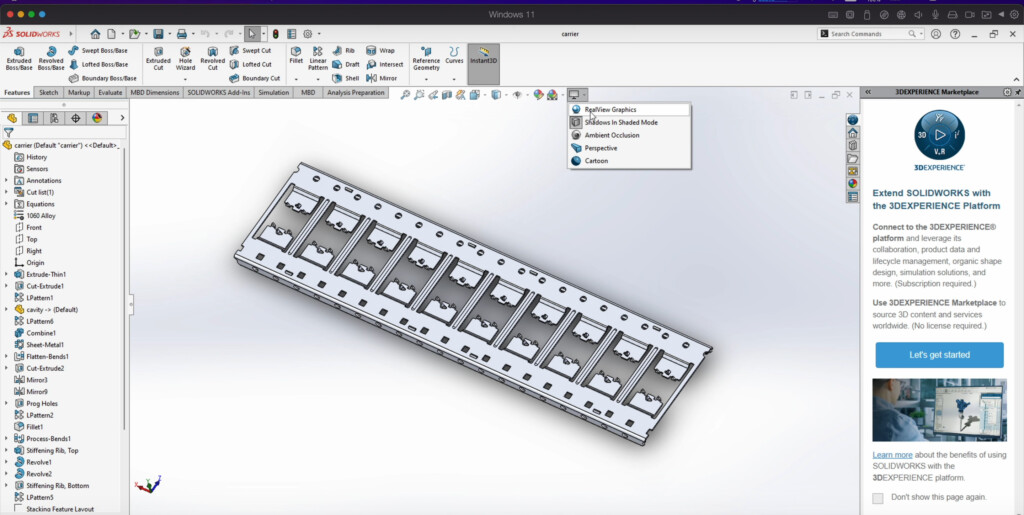
- When you select “RealView Graphics”, SolidWorks will use the GPU to render objects in 3D.
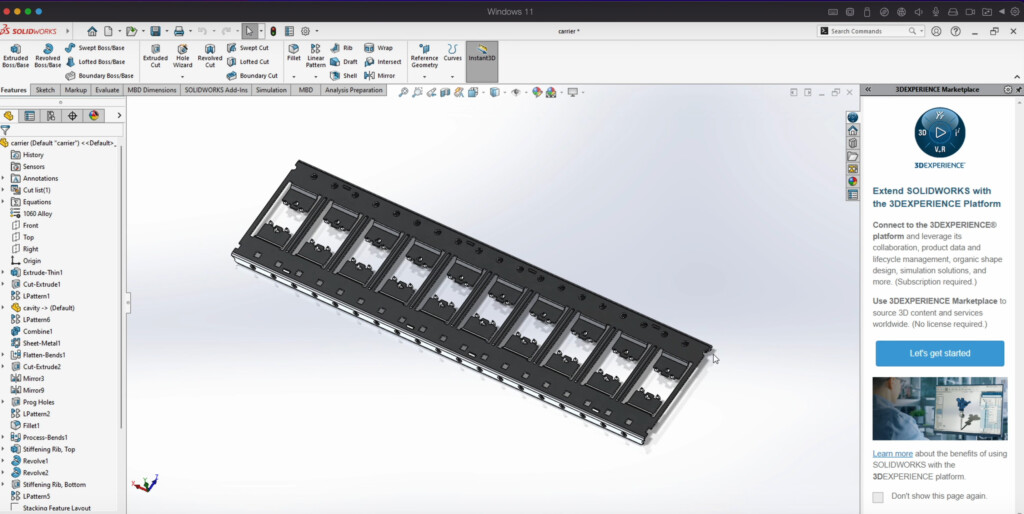
- Finally, you need to make these changes in the Windows Registry in order to make OpenGL and RealView work in macOS running SolidWorks on Parallels. You should be good to go after that.
Note that because this is a workaround to get RealView working on a Mac it’s not officially recognized by SolidWorks meaning that advanced options such as OpenGL and Enhanced Graphics Performance are not available in System Options > Performance.
When Will SolidWorks Be Available For Mac?
The makers of SolidWorks Dassault Systems has outlined its reasons for not making Solidworks for Mac and it basically comes down to a matter of resources and technical limitations.
The relatively small Mac user base and the complexities of CAD Software such as Solidworks means that the company simply can’t justify the investment required to produce a full Mac version of Solidworks.
Is There a SolidWorks Viewer For Mac?
If you just need a SolidWorks viewer for Mac so you can open diagrams, the company has made eDrawings for Mac which allows you to view (but not edit) files in various formats including DWG, DXF and STEP files on Mac (see it in action in our video below).
Alternatives To SolidWorks on Mac
Dassault Systems does offer SolidWorks Xdesign which works on Macs. SolidWorks Xdesign is a more streamlined, Cloud based version of SolidWorks and works on macOS in any browser.
There is the also interesting OnShape project headed by a former SolidWorks CEO and a group of ex-employees that’s aiming to create a online alternative to SolidWorks.
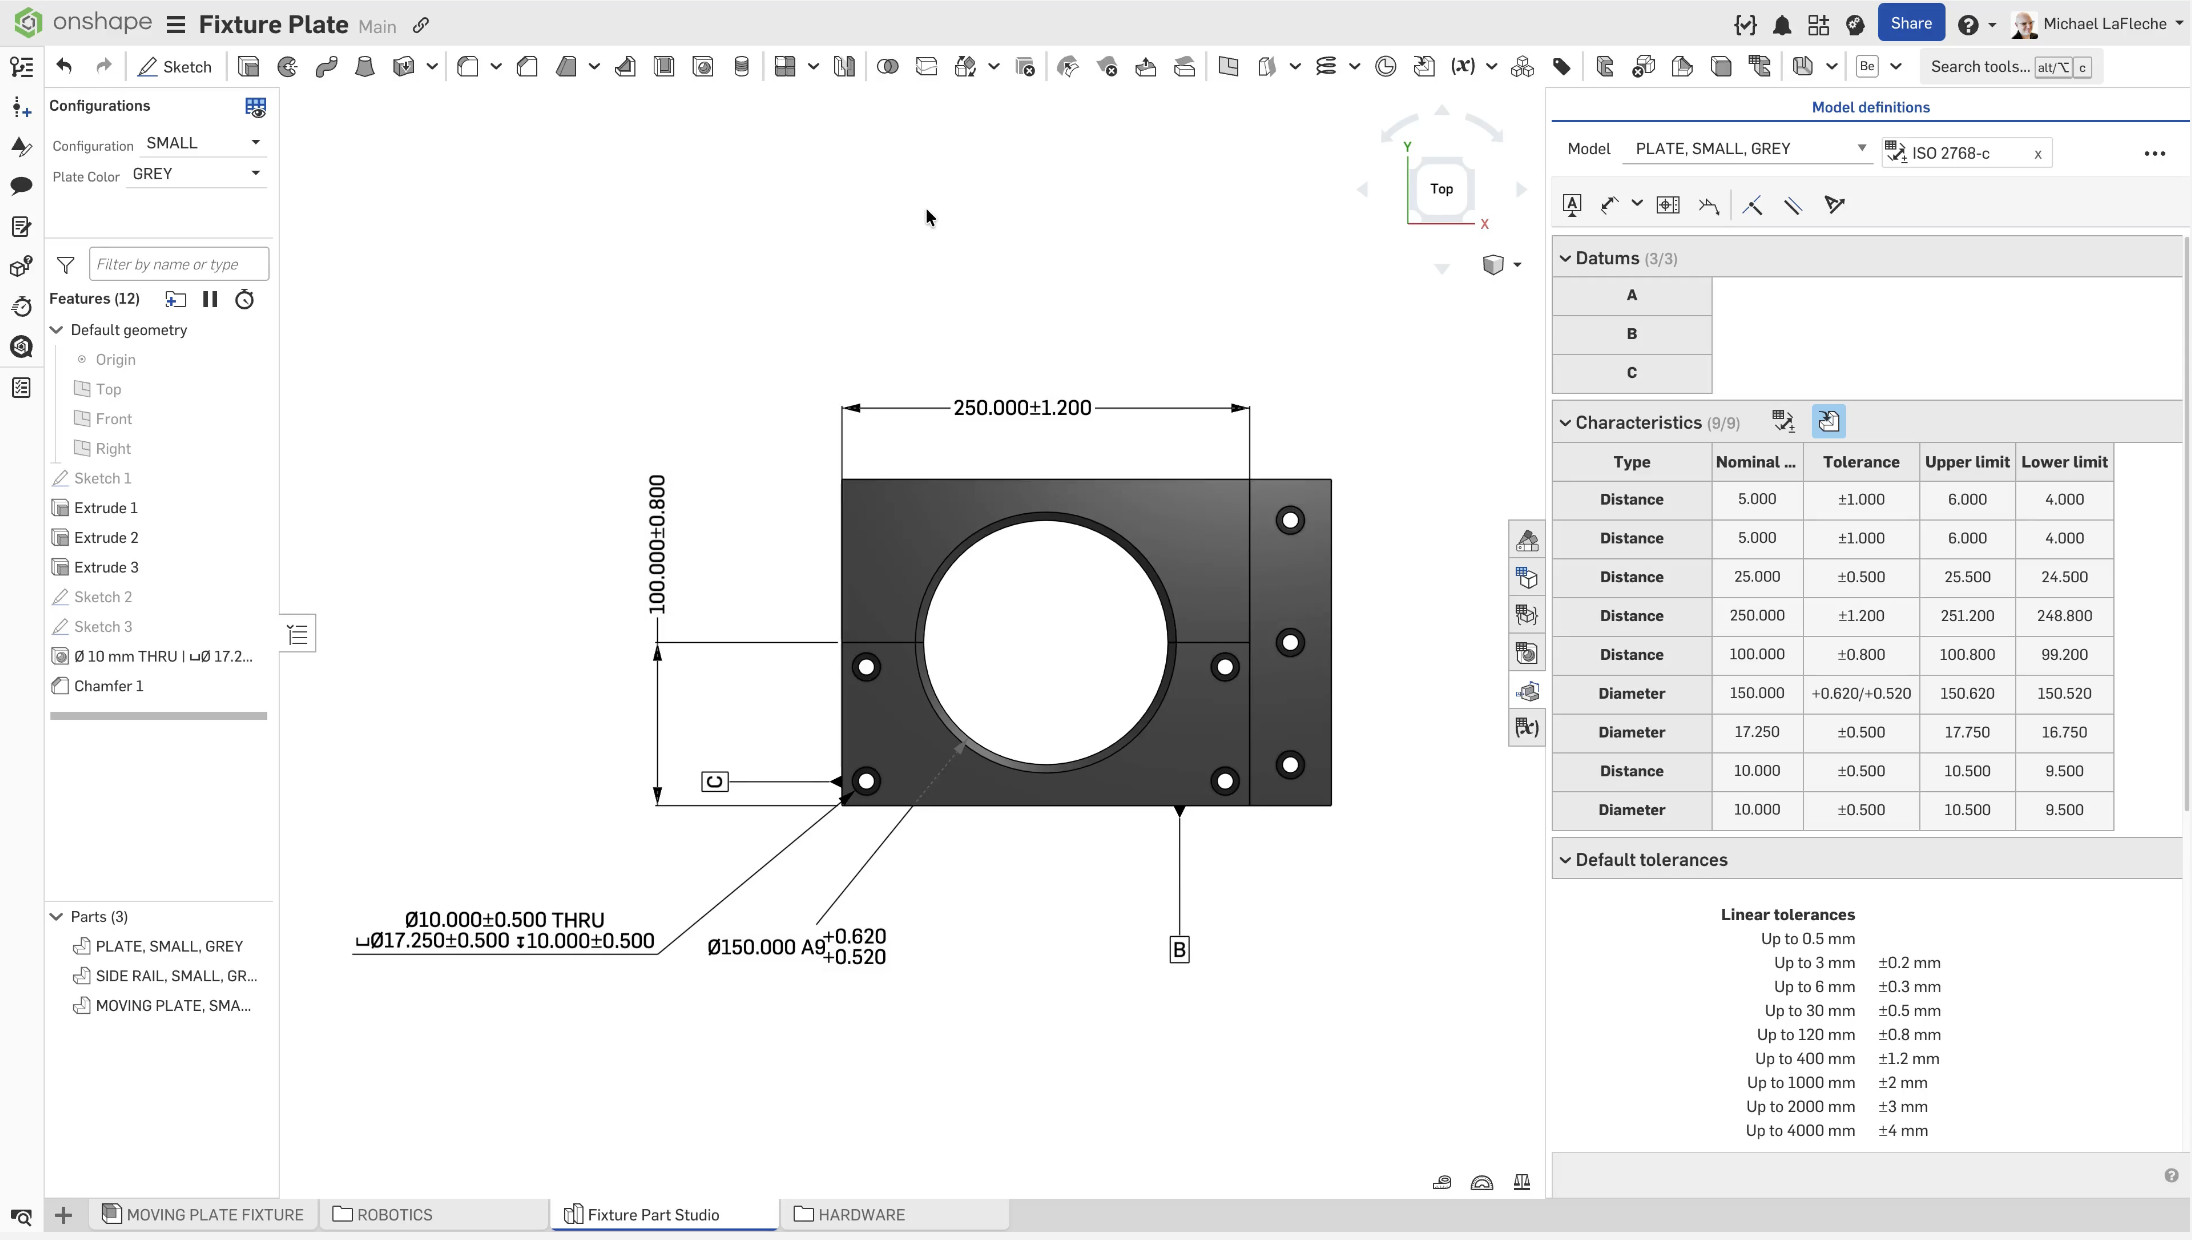
Some reviews have called OnShape “Google Docs for CAD” due to it’s ease of use for a CAD software and cloud based deployment that works on any platform.
For more options, check our guide to the best CAD software for mechanical engineers on Mac.
For other types of both 2D and 3D CAD software, check out our guide to the best CAD software for Mac.
FAQ
Can SolidWorks run on M-series Macs?
Yes it can run on Apple Silicon Macs – but only using a virtual machine like Parallels with Windows 11 ARM.
Is SolidWorks free on Mac?
No. You’ll need:
- A SolidWorks license (or community version)
- A virtual machine (Parallels paid for best results)
Is running SolidWorks on a Mac legal?
Yes – as long as you have a valid SolidWorks license.
Is Parallels good enough for professional use?
- Light/moderate CAD → Yes
- Heavy engineering work → No
Should You Run SolidWorks on a Mac?
Good choice if you:
- Are a student or hobbyist
- Need occasional access to SolidWorks
- Already own a powerful Apple Silicon Mac
Not ideal if you:
- Work with large assemblies
- Do simulations or rendering
- Need guaranteed stability
In those cases, a dedicated Windows workstation is still the better option.
Conclusion
Running SolidWorks on a Mac in 2026 is absolutely possible – and much easier than it used to be thanks to Parallels Desktop and improvements in Windows 11 ARM.
However, it’s still a workaround, not a perfect solution.
For the best experience:
- Use a high-spec Apple Silicon Mac
- Stick to moderate workloads
- Consider cloud alternatives if possible