
Split tunneling allows you to choose which apps or websites use a VPN on a Mac and here we show you how to setup VPN split tunneling on a Mac.
Split tunneling has become increasingly complicated on Macs due to changes made by Apple from macOS Big Sur onwards.
While many VPN apps supported it in macOS Catalina and earlier, there were almost none that supported it after the release of Big Sur.
This even includes NordVPN which was our pick as the best VPN for Macs – split tunneling is not possible in NordVPN due to changes by made Apple to macOS.
In fact, currently the only VPNs that support split tunneling on the latest versions of macOS Sequoia are Surfshark and Private Internet Access.
There is also Windscribe which is a free VPN for Macs but it only support split tunneling on an IP address or hostname basis.
Here we take a closer look at your options to use split tunneling on a Mac in 2025.
You May Also Like:
Contents
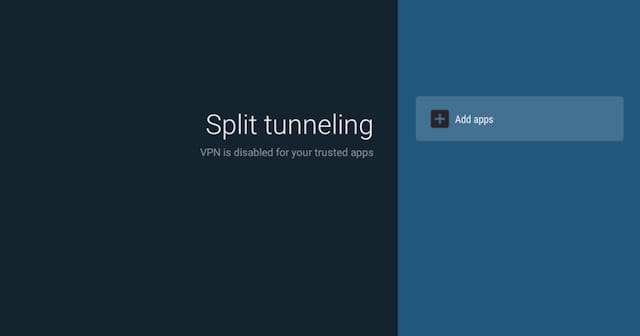
What Is Split Tunneling?
Split tunneling is useful because it gives you more control over when and how your VPN is used.
For example, VPNs often make it difficult to print wirelessly as your VPN makes your Mac “invisible” to the printer.
Split tunneling allows you to still print over a VPN by still enabling you to connect to your printer without your VPN getting in the way.
Split tunneling can also be used to allow certain games to use your VPN but not certain apps or websites such as banking websites.
It’s important to note that at the moment, the only VPNs that support split tunneling on the latest versions of macOS are Surfshark and Private Internet Access (PIA).
The reason for this is that since macOS Big Sur, Apple has made changes to the latest versions of macOS which make it harder for VPN services to do split tunneling on a Mac.
This is partly for security reasons too.
At the moment therefore, most VPNs that support split tunneling on a Mac, can only do it on Intel Macs using macOS Catalina or earlier (which of course most people no longer use).
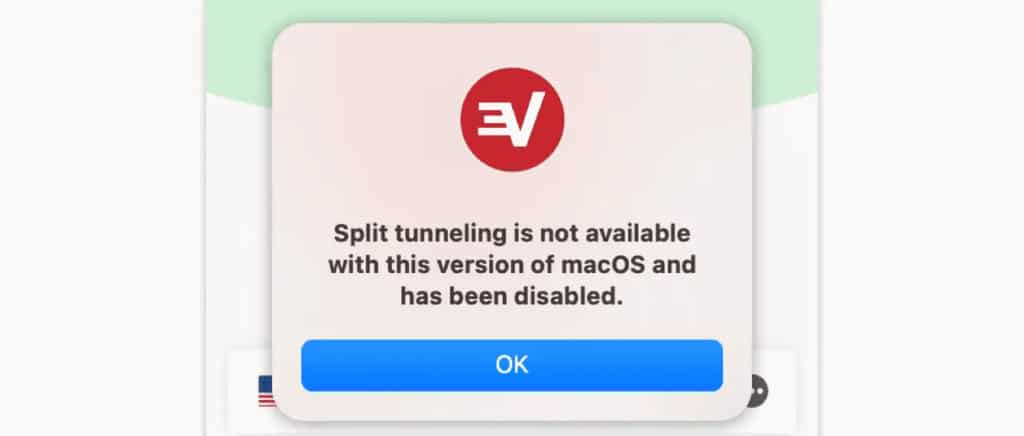
If you try to setup split tunneling on a recent version of macOS using most VPN services, you’ll get an error message similar to this one on Express VPN: “Split tunneling is not available with this version of macOS and has been disabled.”
VPNs That Support Split Tunneling On The Latest Versions of macOS
The only VPNs that support split tunneling on the latest versions of macOS including Apple Silicon Macs are Surfshark and Private Internet Access (PIA).
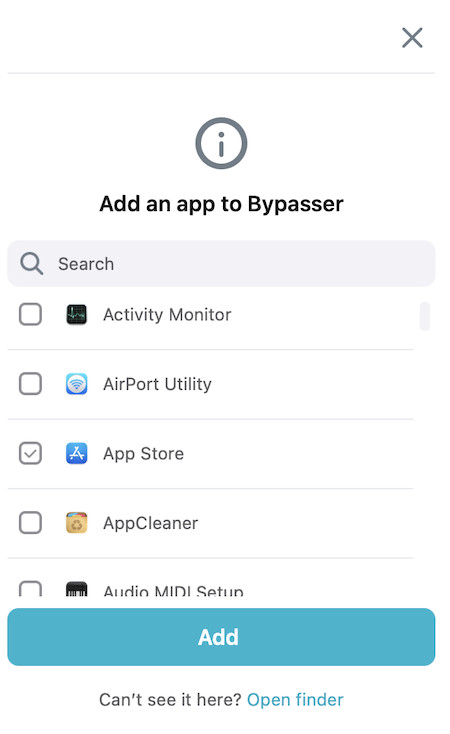
Surfshark introduced it’s macOS “Bypass” feature in April 2025 and allows you to easily select which apps and websites do not use the VPN.
To use it simply go to the Settings cog > VPN Settings > Bypasser.and select the apps and websites you want to exclude from using Surfshark.
PIA officially re-introduced the split tunneling feature to the latest version of macOS Sonoma in March 2024.
To use split tunneling in PIA on a Mac, simply go to Settings and select Split Tunneling.

You can then configure which apps you want to setup split tunneling on.
Note that it only works on an app basis – you can’t make it use the VPN just for visiting certain domains or specific websites.
How To Split Tunnel On Older Versions of macOS
Most VPN’s support split tunneling on older versions of macOS.
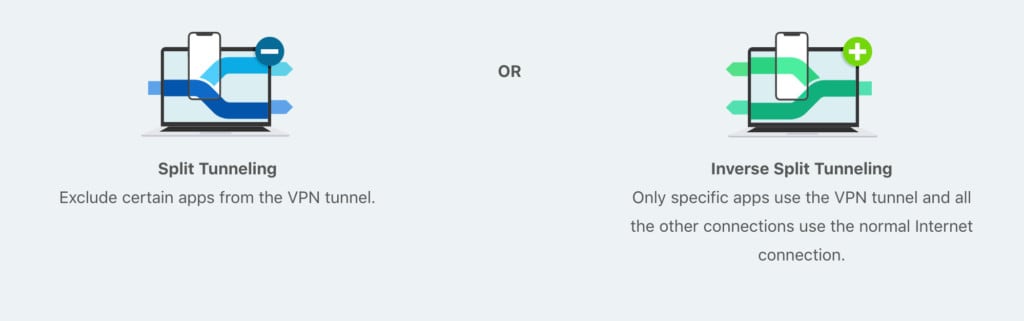
For example, Hide.me supports both standard split tunneling and inverse split tunneling on macOS Catalina and earlier.
Here we show you how to setup split tunneling on a Mac using the Express VPN app using macOS Catalina.
Express VPN supports split tunneling on Intel Macs running macOS Catalina or earlier but the instructions will be similar for other VPNs that support split tunneling on older versions of macOS.
- Go to Preferences > General and check the Connection Per App box at the bottom of the panel.
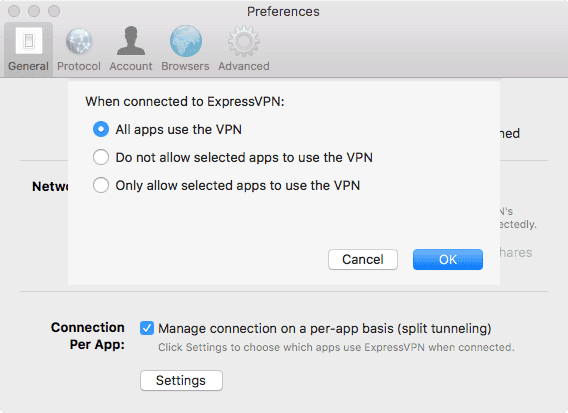
- Then select Do Not Allow Selected Apps To Use The VPN. You then simply select which apps you want to exclude from using the VPN.
- Click OK and close the Preferences and you’re done.
How To Setup Split Tunneling On a Mac Manually
If you use a corporate VPN for work, then you can try setting-up split tunneling manually on a Mac using the macOS Network settings.
Note that this only works on macOS Catalina or earlier due to changes in the architecture of macOS made by Apple in Big Sur onwards.
This requires using Terminal which is a free command based tool in macOS.
Here’s how to split tunnel on a Mac if you’ve setup a VPN manually on a Mac to connect to an office or corporate environment.
- Make sure you are disconnected from your VPN
- Go to System Preferences > Network
- On the left, click on your VPN connection and go to Advanced settings > Options
- Uncheck the box for Send all traffic over VPN connection
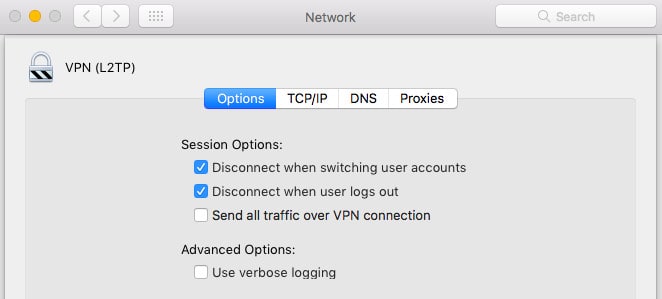
- Click Save and then connect to your VPN.
- Go back to Application > Utilities > Terminal
- In macOS Terminal, type ifconfig and press Enter. You need to write down the name of the interface that is being used by the VPN on your Mac that will appear by the cursor. If you are using L2TP like most VPNs do, this is usually ppp0.
- You then need to login as a root user on your Mac in Terminal by typing sudo su into the terminal command line. You will be asked to enter your Mac password.
- You then need to enter the following command in Terminal but replacing “ppp0” with the name of your VPN interface if it’s different and replacing the destination subnet you want to route the VPN through.
sudo route -nv add -net 10 -interface ppp0
sudo route change default 192.168.0.1
You’ve then setup split tunneling manually on your Mac.