We ranked macOS Dictation one of the best dictation software for Mac and best of all, it doesn’t cost a cent.
The Dictation tool in macOS is simple to activate and the accuracy has been improved significantly since it was first introduced in macOS.
If you’re going to be dictating regularly however, we strongly recommend checking our guide to dictation software for Macs before using Dictation in macOS.
The main reason for this is that commercial dictation software learns to recognize your voice more efficiently and therefore the accuracy improves significantly the more you use it.
Dictation software also offers more features than macOS Dictation which is still pretty basic and relies on Siri (and more recently Apple Intelligence) to translate your voice into text.
If you need meetings not only transcribed but organized into easily digestible notes, we also recommend checking out our guide to the best AI note taking apps for Macs too.
Here we show you how to turn-on and use voice dictation on both Apple Silicon and Intel Macs.
Table of Contents
Dictation vs Voice Control
Firstly, it’s important to be aware that macOS Dictation is different to macOS Voice Control.
Voice Control allows you to control your Mac and instruct it to perform tasks with your voice.
Dictation on the other hand transcribes your voice-to-text on the screen in any application that allows to type such as word processing software including Microsoft Office.
Note that when Voice Control is activated, Dictation will not work on a Mac because Voice Control will take precedence.
How To Activate Dictation on Apple Silicon Macs
The great thing about the latest Apple Silicon Macs with M-series chips is that all dictation is performed offline on your Mac for most major languages.
You can choose to send dictations back to Apple’s servers to improve the service but you don’t have to.
To turn on Dictation on Apple Silicon Macs do the following:
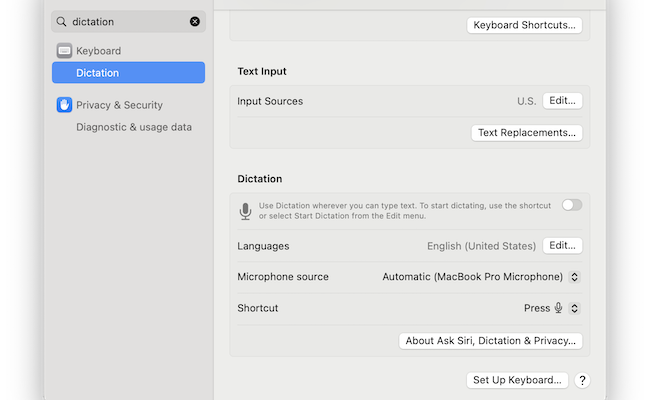
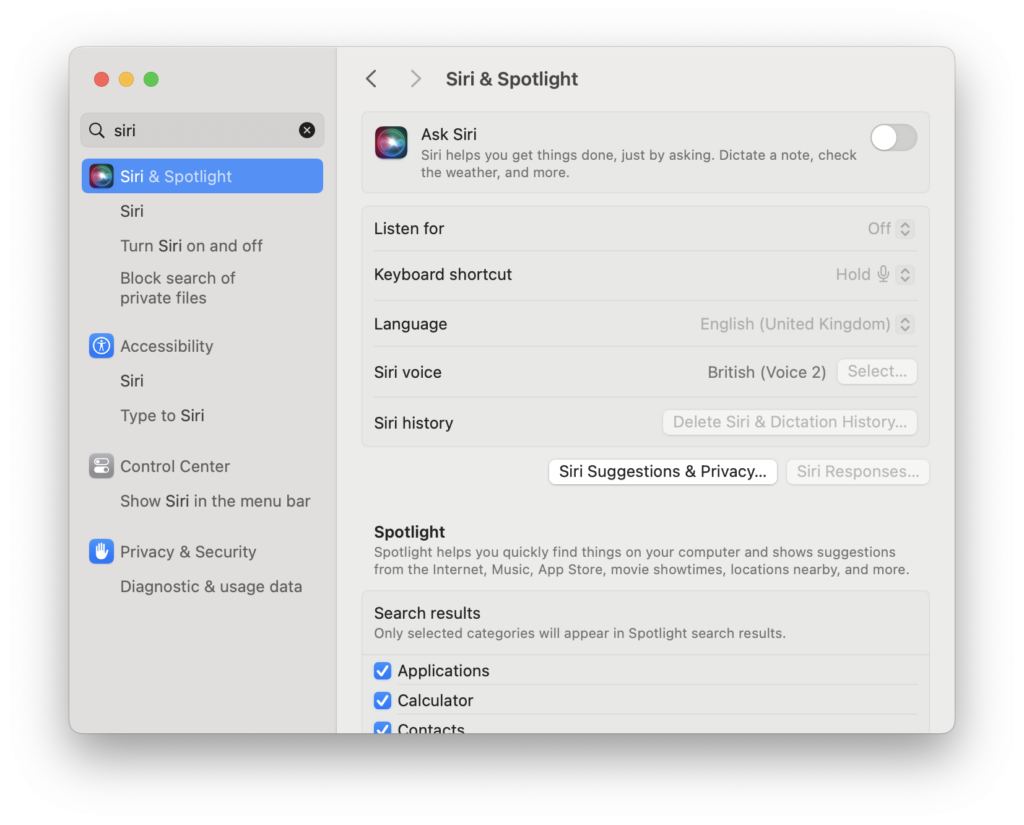
- Go to the Apple Logo at the top of your screen, select System Settings and search for “Dictation”.
- Scroll down the pane until you reach the Dictation section and then simply toggle the switch to the right where it says in small text “Use Dictation wherever you can type text.”
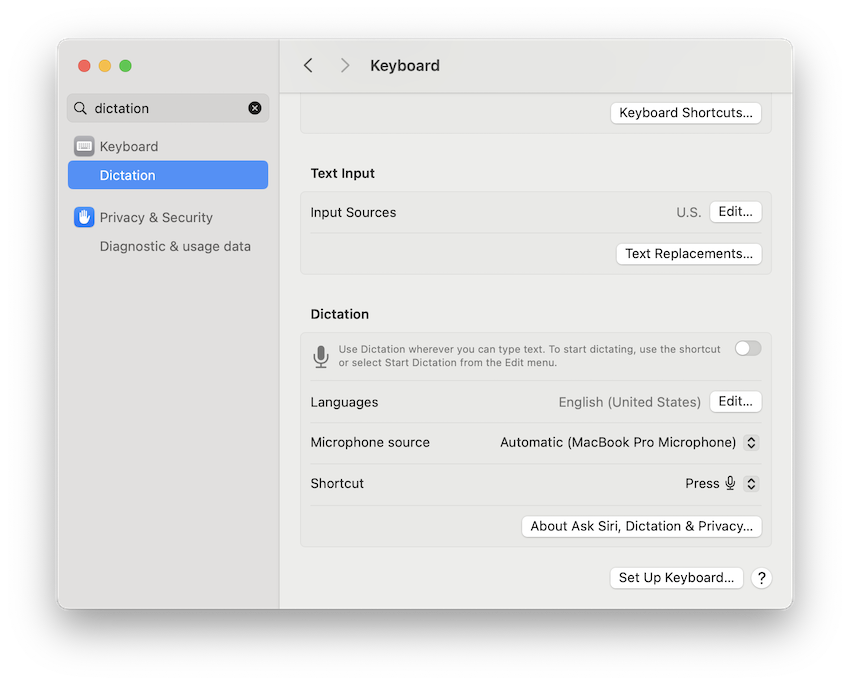
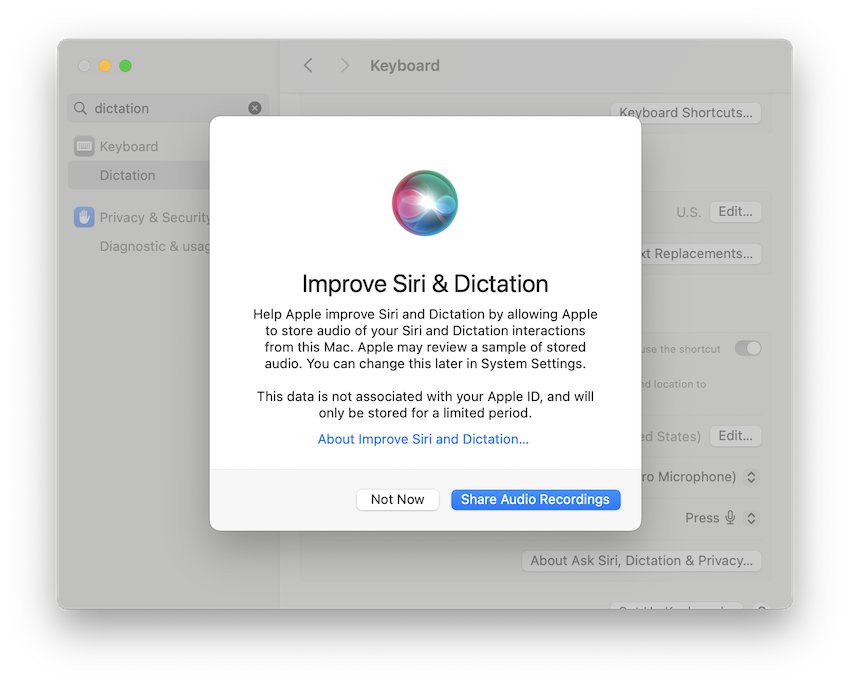
- You will see the same prompt from Apple asking for consent to improve Dictation by storing your recordings. As mentioned, you don’t have to accept this as all dictation on Apple Silicon Macs can be done offline but it will help improve the service.
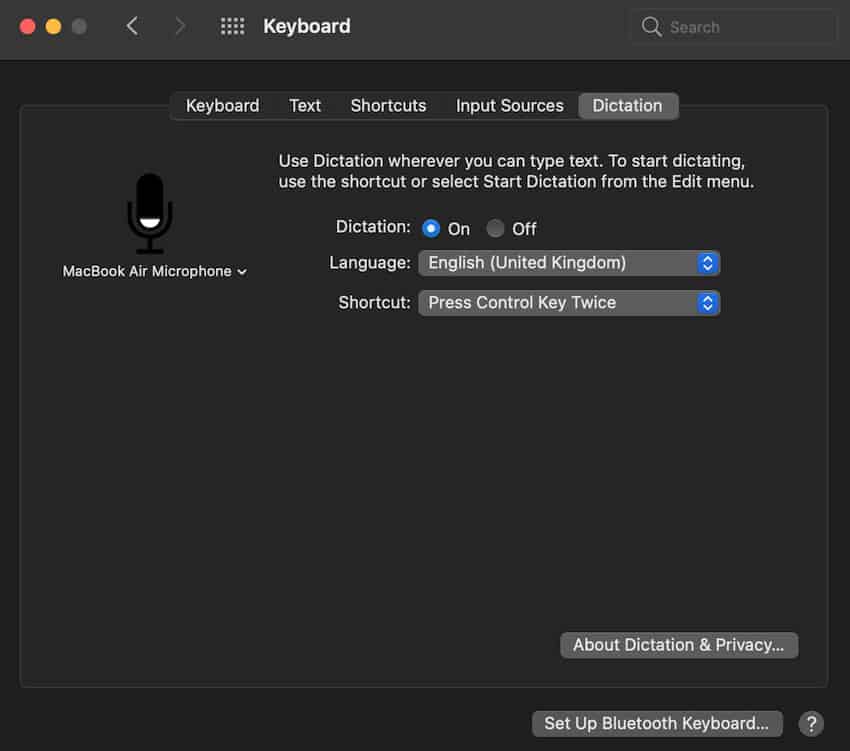
- On older versions of macOS, you can activate Dictation by going to System Preferences > Dictation and then clicking on the Dictation tab and checking the “On” button.
Apart from the ability to dictate offline, dictation on Apple Silicon Macs also allows you to dictate any length of text without it timing out.
If you don’t want your Mac listening to your conversations when you’ve finished dictation, you can switch off dictation manually although it will automatically deactivate if no voice is heard for more than 30 seconds.
Dictations are saved on your Mac’s hard drive but you can easily delete them at any time by going back to the Apple logo > System Settings and search for “Siri”.
How To Activate Dictation On Intel Macs
To turn-on dictation on an Intel Mac in running macOS Ventura and Sonoma, follow these instructions.
Note that on Intel Macs, running these versions of macOS, you can’t dictate offline.
All dictation is sent to Apple’s servers for processing.
However, those running macOS Mojave or earlier will see an “Enhanced Dictation” option too which does allow you to dictate offline in selected languages.
- Go to the Apple Logo in the top left of your screen and then select Preferences > Keyboard > Dictation.
- Click On and then Enable Dictation.
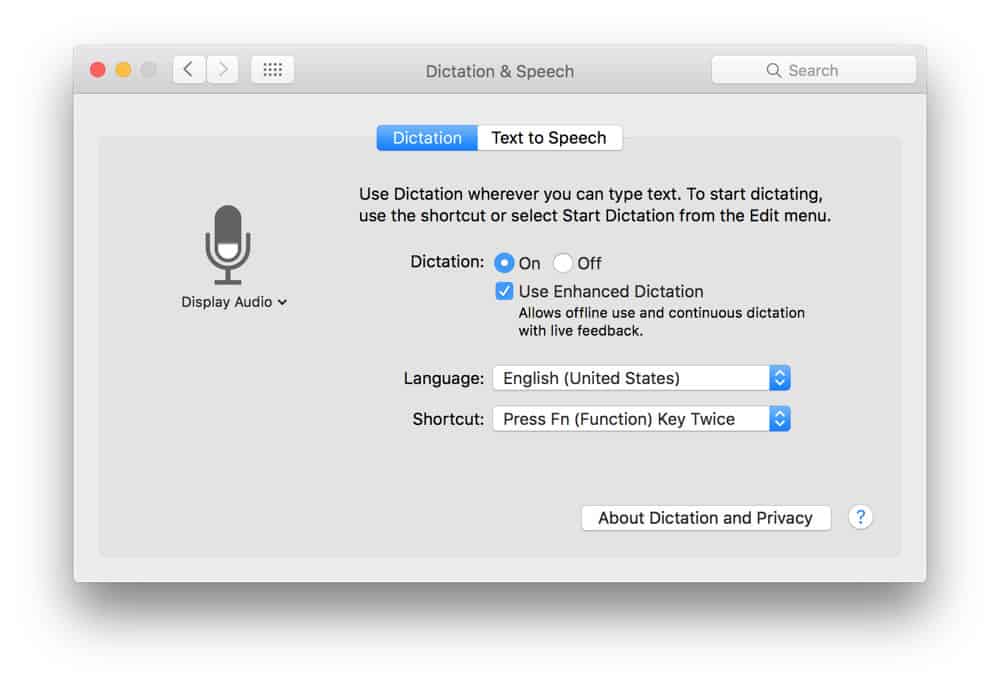
To improve the quality of Dictation voice recognition, you will be asked if you give your consent for Apple to save recordings.
You can choose whether you want to allow Apple and Siri to save your recordings so that it can improve how Siri recognizes your voice by clicking on About Dictation and Privacy.
If you want to allow this select Share Audio Recordings but if you’re not comfortable with Apple saving your dictations for improving the quality of Siri then click Not Now.
If you do want to delete your Siri dictation history by going to System Preferences > Siri and selecting Delete Siri and Dictation History.
Dictation Languages On Mac
- Dictation supports over 60 languages although only major languages are supported for on-device offline dictation. If you want to change the language for dictation on your Mac click on the Language pop-up menu to choose a language and dialect. On Apple Silicon Macs, the selection of languages may still not be as wide as on Intel Macs as everything is processed offline. You can also click on Remove a language by clicking Customize and deselecting languages that are not needed.
You can also dictate in multiple languages and switch languages by clicking the current language in the feedback window and then switching the language.
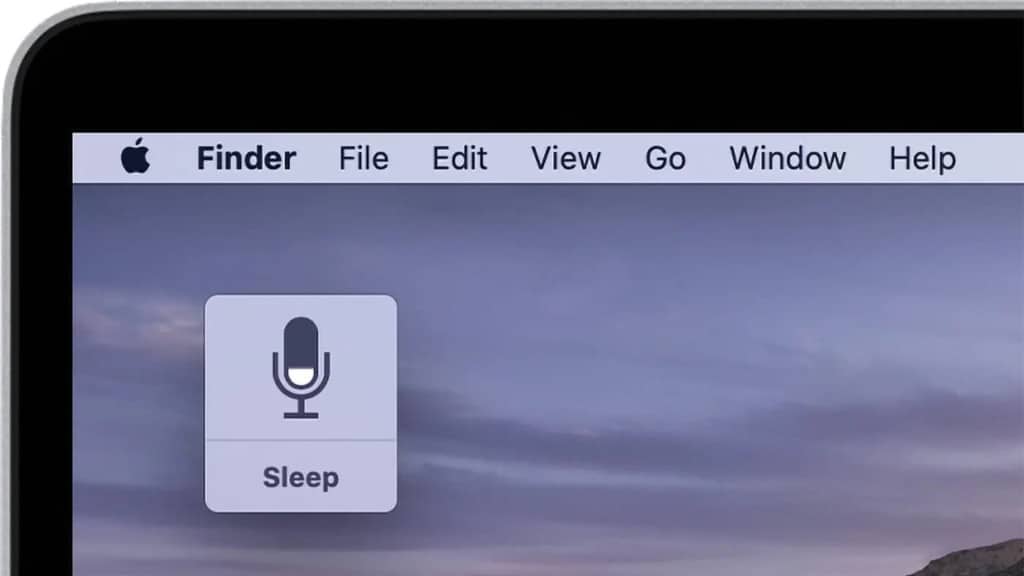
- If you have an external microphone, you can also use it with Dictation in macOS by clicking below the Microphone icon and choose the microphone that’s connected to your Mac. If it’s set to Automatic, your Mac will choose the microphone that’s most frequently used for audio recordings on your Mac which may or may not be an external microphone.
Source: Apple
macOS Dictation will automatically switch itself off if it doesn’t detect any voice for 30 seconds but you can also turn off dictation manually on your Mac by going to Preferences > Keyboard > Dictation and click Off.
How To Dictate On Mac
Once you’ve activated dictation, you can then dictate on your Mac in any app that supports it such as Apple Pages.
To start dictating on your Mac follow these instructions:
- Open a page in the app you want to dictate into such as Apple Pages.
- Go to Edit > Start Dictation.
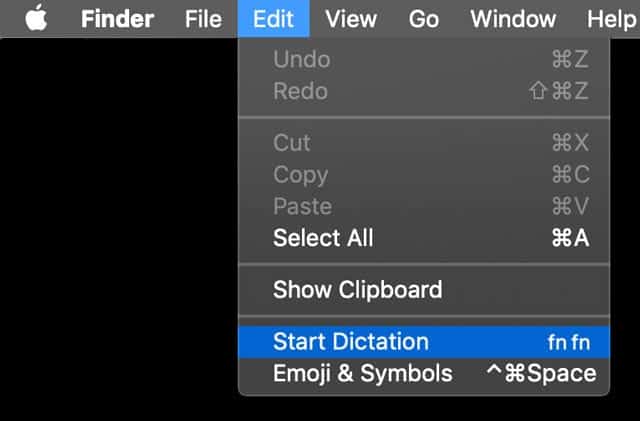
- You can then click on the Microphone symbol to start dictation and you will see the sound bar go up and down on the microphone as you start to speak.
As you dictate, words that Siri does not recognize or have not been interpreted correctly will be underlined in blue. You will have to correct and edit this manually.
One of the advantages of professional dictation software is that you’ll have to do less correcting of dictated text afterwards compared to macOS dictation.
Dictation Punctuation Commands On Mac
One of the things that takes some getting used to at first with dictation is that you have to speak all the punctuation and formatting commands.
Here are the most common dictation punctuation commands you’ll need to use:
- For punctuation just say the name of the punctuation you want to use such as “exclamation mark” or “full stop”.
- To start a new line say “new line”
- To start a new paragraph say “new paragraph”
There are of course many more and you can find a full list of commands for Dictating text on a Mac here.
For information about setting up keyboard dictation for multiple languages, see Turn on keyboard dictation.
When you’ve finished, press the dictation keyboard shortcut or the Return key, or click Done in the feedback window.
Ambiguous text is underlined in blue. If the text is wrong, click it and select an alternative. You can also type or dictate the correct text.
Dictating Offline On a Mac
If you want to dictate offline so that Apple can’t listen to anything your say the situation has become more complicated since the release of macOS Catalina – at least on Intel Macs.
If you’re using an Apple Silicon Mac then you’re good to go.
For most major languages, Apple Silicon Macs can dictate offline although for some languages, it may need to use Apple’s servers.
On Intel Macs, Dictation uses Apple’s Siri servers. You can only dictate offline now if you’re using macOS Mojave or earlier simply by selecting the “Enhanced Dictation” box in Dictation preferences.
However, macOS Catalina onwards removed the “Enhanced Dictation” option and so if you want to dictate offline in macOS Catalina onwards, you need an Apple Silicon Mac.
We recommend reading our guide to dictating offline on a Mac for more on this.


