If you need to convert a PDF file to a Word document on a Mac here we show you some easy ways to turn a PDF document into Word format on a Mac.
PDFs are great for reading and sharing but are a difficult format to work with especially if you need to convert a PDF to formats such as Word or Excel.
Most commonly, you need to convert a PDF to Word format if:
- You need to edit a lot of text in a PDF
- You need to submit or send a PDF document in Word format only
- You need to extract or modify chunks of text in a PDF
- You have OCR scanned a PDF and now need to edit it in Word
Unless you have PDF editing software on your Mac you can’t do many of these things with a PDF document alone.
Although you can view PDFs with Preview, it’s very limited when it comes to editing and it can’t convert them to MS Word DOC or DOCX format.
These methods of converting from PDF format to Microsoft Word also work on the latest Apple Silicon Macs as well as the latest version of macOS Sonoma.
With this in mind, here then we show you some easy ways to convert a PDF into a Word file in macOS.
You May Also Like:
Table of Contents
1. Using Adobe Acrobat
Adobe invented the PDF format so it’s no surprise it has the best PDF software for Mac when it comes to converting PDF to Microsoft Word format.
Adobe Acrobat is the best PDF software for Mac and allows you to do pretty much anything with a PDF.
Although there are other PDF converters for Mac, none of them work as well as Adobe Acrobat in terms of converting the formatting correctly.
To convert a PDF to Word format with Adobe Acrobat simply follow these instructions:
- Go to Adobe’s PDF to Word online conversion tool.
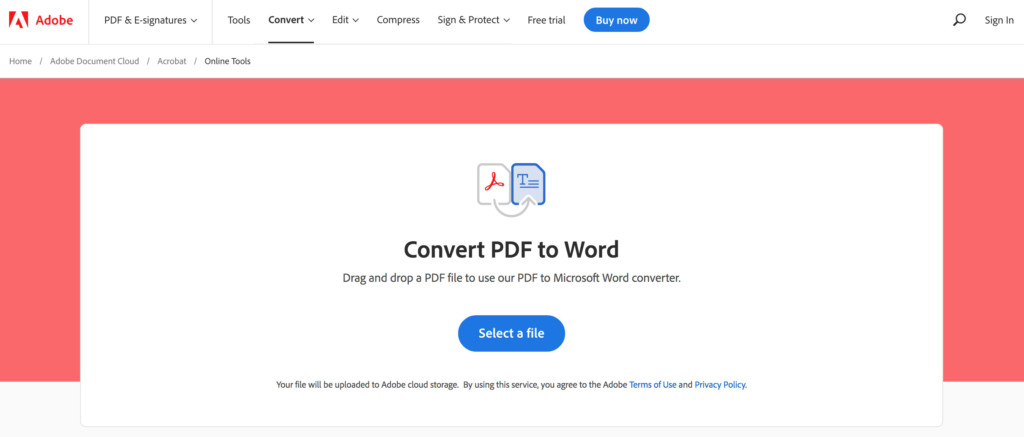
- Drag and drop the PDF file into the page or click Select a File and browse to the PDF file you want to convert
- Adobe Cloud will then convert the file to Word DOC or DOCX format and you can download the file on your Mac or save it in Adobe Cloud.
The best thing about Adobe Acrobat PDF to Word convertor is that it usually preserves the formatting of your documents perfectly.
Although there are other PDF conversion tools, invariably they don’t convert the documents to Word format very well and you spend a lot of time having to adjust the formatting and correct errors.
Adobe Acrobat ensures that the rich text, fonts, images and alignments all look the way they should do in Word as in the original PDF document.
The free trial of Adobe Acrobat Pro works on your Mac desktop and also allows you to convert files to and from Microsoft 365 (formerly Microsoft Office For Mac), edit PDFs, OCR scan documents, merge PDFs and sign PDFS.
The desktop version also allows you to organize and rotate PDFs, split PDFs, reduce the file size of PDFs, and convert other formats to PDF such as HTML, TXT, RTF, PNG, JPG and BMP.
If you don’t want to be locked into a subscription, you can also buy Adobe Acrobat as a one time purchase too.
You can try Adobe Acrobat for Mac free to test it for yourself.
You can also read more in our full Adobe Acrobat Pro for Mac review.
If you want to convert a PDF to Word without using Adobe however, then some of the following solutions may help you.
2. Using PDF Conversion Software
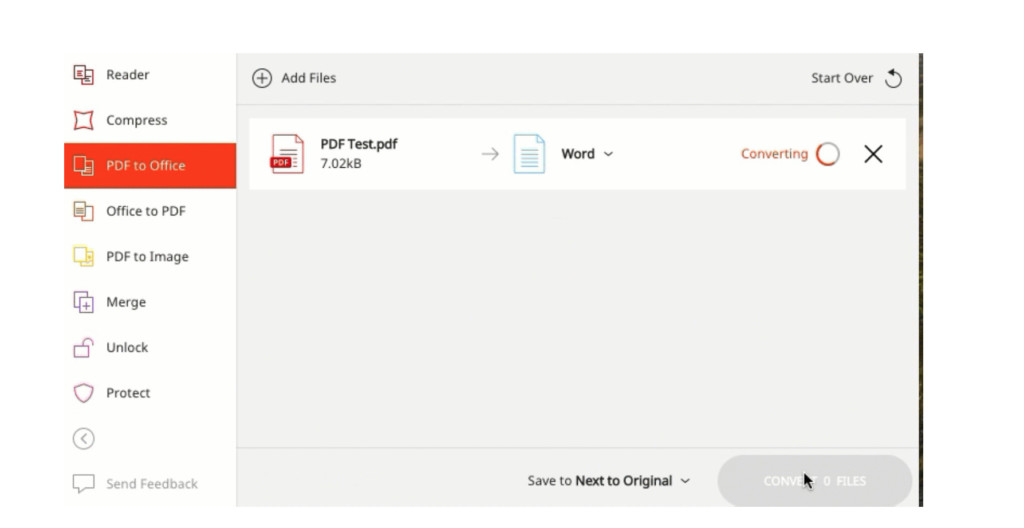
There are various desktop and cloud PDF conversion tools that allow you to convert PDFs to Word format and just about any other format you can think of.
Examples includes Zamzar and SmallPDF – but they’re not free.
These online conversion tools usually require you to either subscribe or pay in order to download the converted Word file.
There are also some desktop file converters like Able2Extract that will allow you to convert 3 pages of a PDF to Word for free.
For anything more than 3 pages, you’ll need to pay though.
Although Able2Extract Pro is cheaper than Adobe Acrobat Pro, it’s not as powerful and you’re still much better off going with Adobe’s product if you’re going to pay for one.
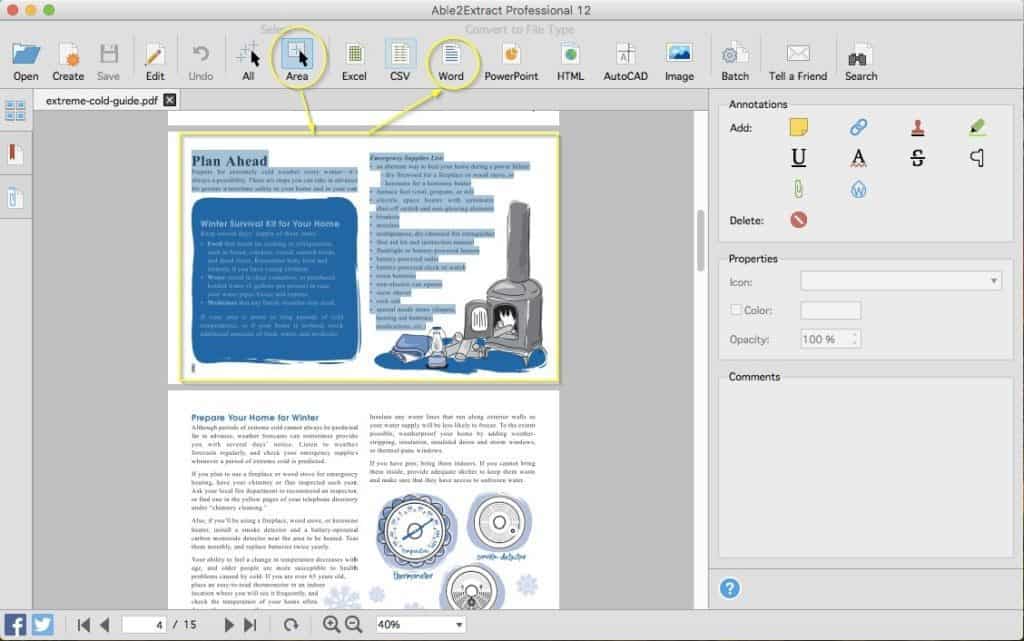
For instructions on how to convert a PDF to Word using Able2Extract, check out this guide on how to convert PDFs on Mac.
3. Using Preview
Depending on the PDF you want to convert to Word, you may be able to copy and paste a PDF document from macOS Preview into a Word document.
macOS Preview can open PDF files but it cannot directly convert them to Microsoft Word format.
Preview can only export PDFs to the image formats JPEG, PNG, TIFF, OpenEXR and JPEG-200.

However, you can copy the text in a PDF document in Preview and paste it into a Word document but if the formatting is complex, the results are terrible and the formatting will be destroyed.
Here’s how to copy and paste text from a PDF in macOS Preview into a Microsoft Word document.
- Right click or Ctrl-click on the PDF file and select Open With… and then Preview.
- Select all the text in the PDF and hit CMD-C to copy it all.
- Open a Microsoft Word document and paste it in by pressing CMD-V.
- You can then Save the document as a Word document in DOC or DOCX format.
4. Using Google Docs
Google Docs allows you to convert from PDF to Word format for free.
Please note that like using Preview, the formatting may not be preserved very well by using Google Docs and images may be removed from the final Word document that is converted.
To convert a PDF to Word using Google Docs follow these instructions.
- Go to Google Drive and upload the PDF document by clicking New > File Upload and browse to the PDF file on your Mac.
- Once the PDF is uploaded to Google Drive, Right-click or Ctrl-click on the PDF you want to convert and select Open with > Google Docs.
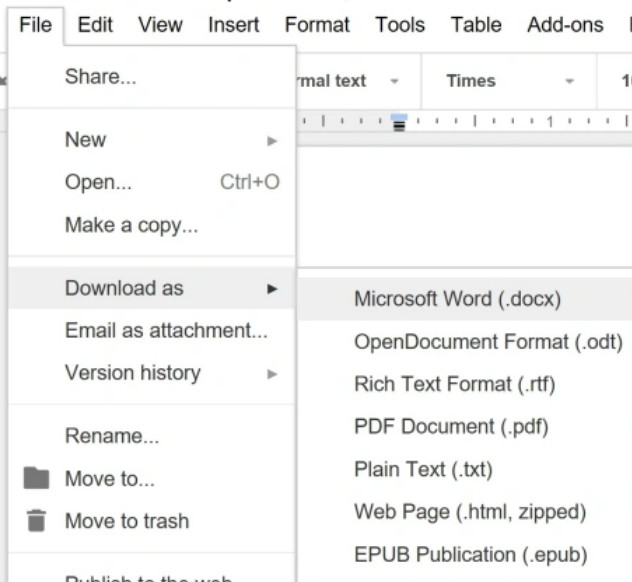
- The PDF document will then appear in Google Drive as an editable document. Go to File > Download As and then select Microsoft Word.
5. Using Automator
Finally, you can also use macOS Automator to convert PDF files to Word on a Mac.
Automator is a utility in macOS which as the name suggests, helps you automate common actions.
Automator can’t directly convert a PDF to Word but it can be instructed to extract text from a PDF in Rich Text Format (RTF) which you can then paste into Microsoft Word.
To convert a PDF to Word using Automator just follow these instructions.
- Search for Automator on your Mac using Spotlight
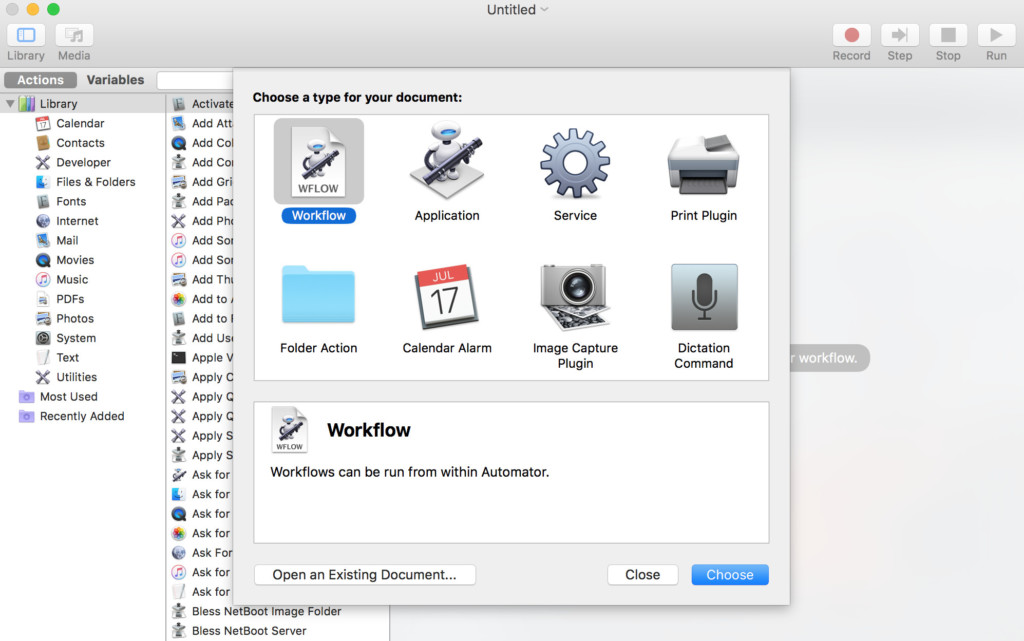
- Choose “Workflow” in Automator
- Drag and drop your PDF file into Automator.
- In the Actions list on the left go to Library > PDFs > Extract PDF Text.
- Drag the action to the right window under the PDF file. Make sure you select Rich Text which will preserve the formatting as best as possible.
- Finally, select where you want Automator to save the extracted text file and then click on the Run button at the top of Automator.
Automator will then extract the text out of the PDF file and save it in the location you selected.


