
macOS has a clever free tool called Rosetta 2 which “translates” Intel only apps and programs so that they work on Apple Silicon Macs with the M-series chips.
However, it is not installed by default on Apple Silicon Macs and you’ll only be prompted to install it the first time you open an Intel only application or program.
However in some cases, such as with anti-virus software or remote desktop software, you may not be prompted to install it even though the program you want to use requires it to run.
In these cases, you have to install it on an Apple Silicon Mac manually.
Here we show you how to do it on M-series Macs and also identify which apps are using Rosetta 2 on your Mac.
Contents
What is Rosetta?
Rosetta was first invented by Apple back in 2006 when Macs transitioned from PPC chips to Intel chips to enable PPC compatible software to work on Intel chips.
In 2020, Rosetta 2 was released as Macs transitioned yet again from Intel chips to the new Apple Silicon chips.
Rosetta 2 only works on Apple Silicon Macs – you can’t install it on Intel Macs as they don’t need it.
Once installed, it automatically works in the background of macOS to make Intel only apps work on M-series Macs.
For most apps, it works so seamlessly that you won’t notice much difference in the performance of an app using Rosetta compared to one that’s been built to work natively with the Apple Silicon architecture.
For example, even though there is no Apple Silicon native version of Sims 4, Rosetta 2 allows you to play Sims 4 on a Mac by translating the Intel version of EA Origin to work with M-series chips.
Rosetta is perfectly safe for your Mac and is made by Apple so you should have no security concerns.
However, for applications that require a lot of resources such as video editing software or graphic design apps, performance may be slower using Rosetta.
Method One: Automatically Install Rosetta
Normally, if an app requires Rosetta, it will automatically prompt you to install it if detects that it’s not present on your Mac.
To install it, simply click on the Install button when the prompt appears.

After Rosetta 2 has been installed, you won’t have to install it again.
Method Two: Installing Rosetta With Terminal
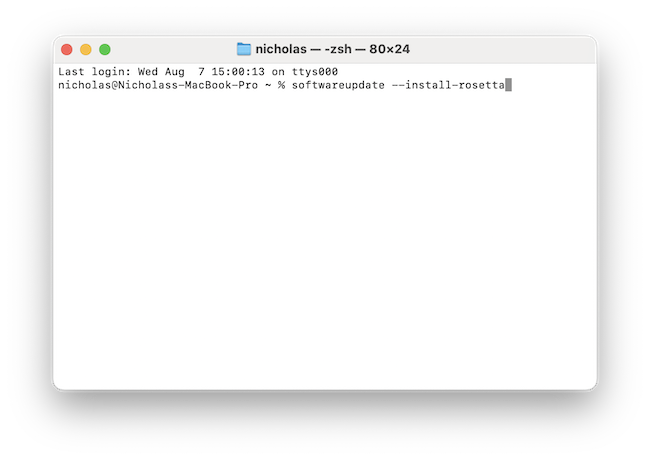
If for any reason you’re not prompted to install Rosetta you can use Terminal on your Mac to do it.
Here’s how to install Rosetta manually.
- Open Terminal on your Mac. If you can’t see it in your Dock, use the magnifying glass in the top right of your Mac to open Spotlight and search for “Terminal”.
- Type the following command into the command line: softwareupdate –install-rosetta
- Press Enter.
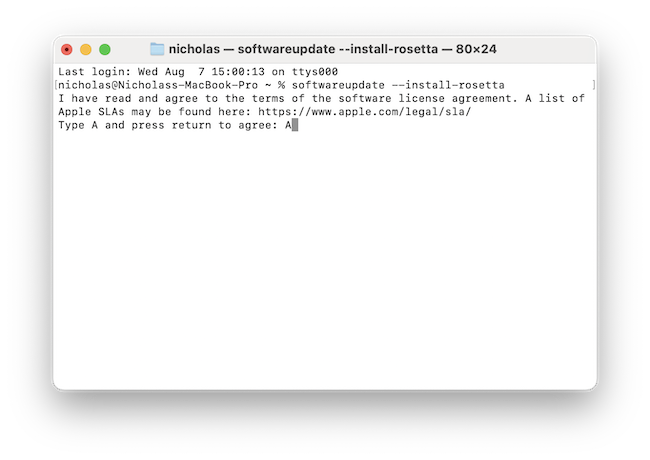
- Type “A” to agree to the license terms and press Enter again.
Rosetta 2 will now install automatically on your Mac.
Errors Messages

If you getting the error message “Installing Rosetta 2 on this system is not supported” then it’s probably because of one of two reasons.
It may be because you’re trying to install it on an Intel Mac (which do not need it) instead of an Apple Silicon Mac.
Rosetta 1 works on Intel Macs but Rosetta 2 only works on Apple Silicon.
If you are using an Apple Silicon Mac and are still getting this error message, then it’s probably because you’ve checked the box “Open using Rosetta” in Terminal.
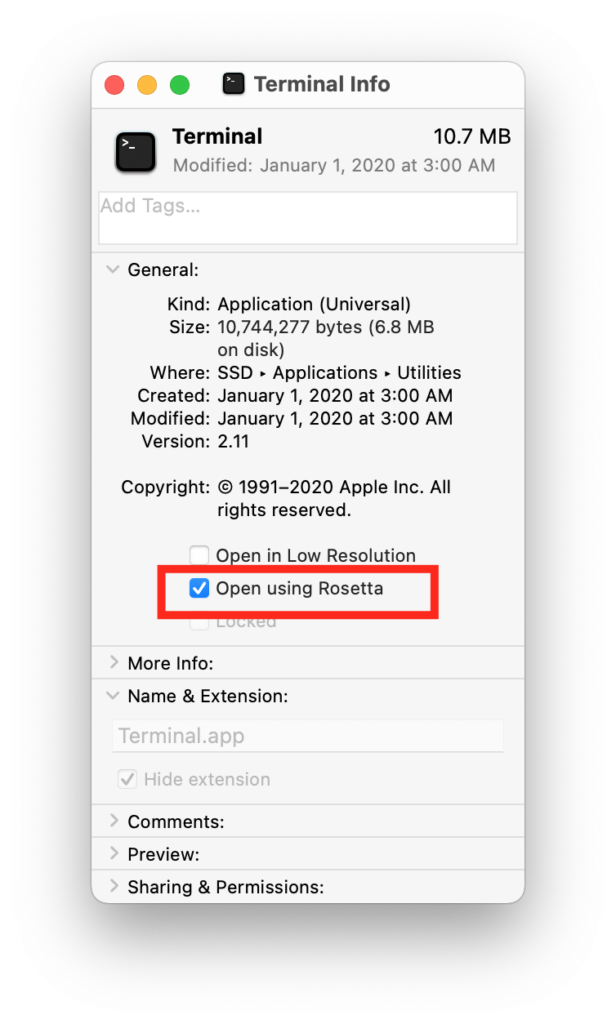
To uncheck this box, right-click on the Terminal app in your Dock or in your Applications folder and select “Get Info”.
Then uncheck the box “Open using Rosetta” and try installing Rosetta again in Terminal.
How To Check If Rosetta Is Installed On Mac?
You can check whether it’s already on your Mac by going to the Apple logo in the top left corner of your Mac and selecting About This Mac and then click on System Report and in the left hand margin select Software > Installations.
If you scroll down, you should see RosettaUpdateAuto which means that it is installed. If this doesn’t appear, then it hasn’t installed on your Mac correctly and you need to repeat one of the installation methods above.

Which Apps Require Rosetta?
You can check which apps require Rosetta on your Mac by using the Get Info tool in macOS.
- In Finder, go to Applications and Ctrl-Click on the Application you want to check.
- Select Get Info from the drop down menu
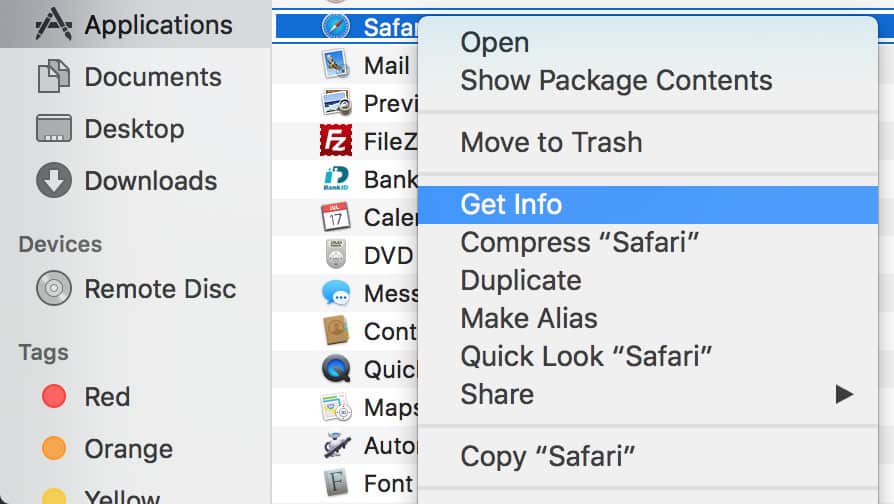
- You’ll see a list of specifications for the app and next to “Kind” it will either say Application (Universal) which means it works on both Intel and M-series Macs or Application (Intel) which means that it only works on Intel Macs and therefore requires Rosetta to work on an Apple Silicon architecture.

- If it says Application (Universal) you need to check the box “Open using Rosetta” if it’s not already checked to make it to work on M-series Macs.
You can read more on how to force an app use Rosetta here.
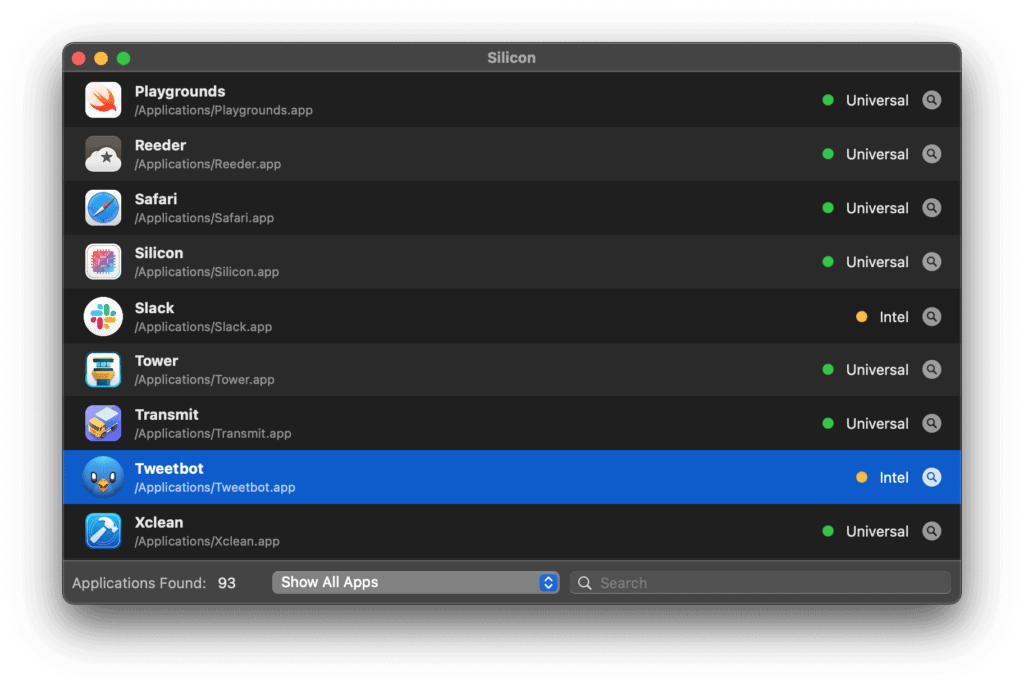
How To Tell If An App Is Using Rosetta
The only way to tell if an app is using Rosetta or running natively is either to use the “Get Info” option described above.
Alternatively, you can go to the Apple logo in the top left of your Mac and selecting About This Mac > System Report and then under the “Kind” column you can see whether the app is Intel (and therefore using Rosetta) or Universal (and therefore running natively).
There’s also a nifty app called DigiDNA/Silicon which sits in your Menu bar and tells you whether the app is running natively on Apple Silicon or using Rosetta.
Can Rosetta 2 Run Windows Apps?
Rosetta cannot run Windows applications. It’s only designed to translate Intel Mac apps to work on Apple Silicon Macs.
There are however other ways to Windows on a Mac.
How To Uninstall Rosetta
Most people will never need to uninstall Rosetta on a Mac after it has been installed.
However, if you’re using a Mac for testing, development or are a system administrator, you may need to remove it to see how certain apps and software performs without it.
Unfortunately, there’s no easy way to uninstall it because Rosetta installs deep within macOS and once installed, is SIP protected by macOS for security reasons.
However you can still uninstall Rosetta although it requires temporarily disabling the SIP security feature in macOS.
If you are using a Mac for testing purposes and need to install and uninstall tools such as Rosetta, it’s much better to use a Virtual Machine (VM) such as Parallels.