
Many Mac users are surprised to discover that there’s still no native version of Microsoft Project for macOS.
Microsoft discontinued the last Mac version of Project decades ago and today the desktop version remains Windows-only.
Although we’d strongly recommend using one of these excellent alternatives to Microsoft Project for Mac instead, there are now several ways to use Microsoft Project-related tools on a Mac including:
- Microsoft Planner
- Project for the web
- Project Online
- The desktop version of Microsoft Project via Windows virtualization
The best option depends on whether you need the full desktop version of Microsoft Project or simply Microsoft’s modern cloud-based project management tools.
For a full lowdown on the differences between them, check out our look at Microsoft Planner vs Microsoft Project.
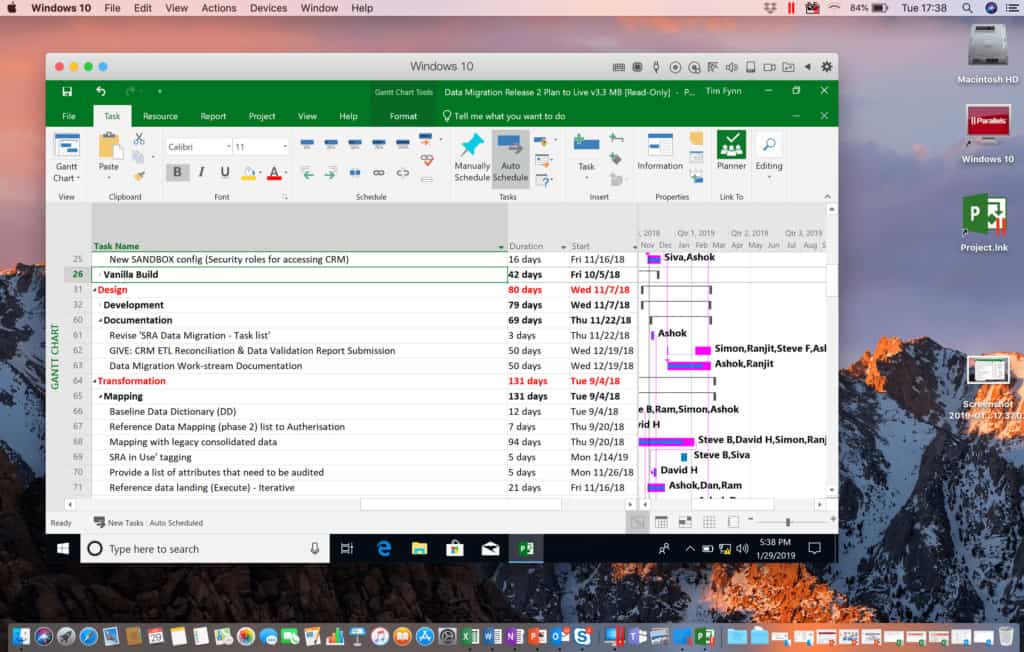
In this guide, we’ll show you the easiest ways to use Microsoft Project on a Mac including how to install the desktop version using Parallels Desktop.
Contents
- Quick Answer
- Can You Install Microsoft Project Directly on a Mac?
- Microsoft Planner vs Microsoft Project on Mac
- Using Microsoft Planner & Project for the Web on Mac
- When You Still Need Desktop Microsoft Project
- Best Way To Run Microsoft Project on a Mac
- How To Install Microsoft Project on a Mac
- Which Microsoft Project Plans Include The Desktop App?
- Do You Need a Windows License?
- Is Parallels Better Than Boot Camp?
- Alternatives To Microsoft Project For Mac
- Conclusion
- FAQ
Quick Answer
The easiest way to run the desktop version of Microsoft Project on a Mac is:
- Install Parallels Desktop which automatically installs Windows 11 alongside macOS on your Mac
- Sign into your Microsoft 365 account
- Download Microsoft Project Plan 3 or Plan 5 or install the one-time purchase version of Microsoft Project Standard/Professional 2024.
If you only need basic project management features, Microsoft Planner and Project for the web both work directly in a browser on macOS without Windows.
Can You Install Microsoft Project Directly on a Mac?
No. There is currently no native macOS version of Microsoft Project.
To use the desktop app on a Mac, you must install Windows first using virtualization software such as Parallels Desktop.
However, many users no longer need the desktop version because Microsoft now offers browser-based alternatives that work perfectly on a Mac.
Microsoft Planner vs Microsoft Project on Mac
Microsoft’s project management software has changed significantly in recent years and many users searching for “Microsoft Project for Mac” are actually looking for one of Microsoft’s newer cloud-based tools.
Here’s the difference:
| Product | Works on Mac? | Notes |
|---|---|---|
| Microsoft Planner | Yes | Browser-based task management |
| Project for the web | Yes | Lightweight online version of Project |
| Project Online | Yes | Enterprise web-based project management |
| Microsoft Project Desktop App | No | Requires Windows |
| Project Professional LTSC | No | Windows-only perpetual license |
For many small businesses and teams, Microsoft Planner or Project for the web are now enough and both run directly in Safari, Chrome or Edge on macOS.

Using Microsoft Planner & Project for the Web on Mac
Microsoft Planner and Project for the web both work natively on a Mac through a browser with no Windows installation required.
They integrate closely with:
- Microsoft Teams
- Outlook
- Microsoft To Do
- Microsoft 365
- Microsoft Copilot
This setup is ideal for:
- Small businesses
- Hybrid teams
- General task management
- Team collaboration
- Basic Gantt chart needs
However, they still lack some advanced features available in the desktop version of Microsoft Project such as:
- Advanced resource management
- Enterprise portfolio management
- Complex dependency handling
- Detailed scheduling tools
- Legacy MPP workflow compatibility
If you only need lightweight project planning, these web apps are often the easiest solution for Mac users.
When You Still Need Desktop Microsoft Project
You may still require the full Windows desktop version if you:
- Work with enterprise Microsoft Project environments
- Need advanced scheduling tools
- Use Project Server
- Exchange complex MPP files
- Require advanced reporting and resource management
- Work in construction, engineering or enterprise PMO environments
In that case, the best solution is to run Windows on your Mac using Parallels Desktop.
Best Way To Run Microsoft Project on a Mac
We strongly recommend using Parallels Desktop.
Parallels allows you to run Windows and macOS side-by-side without rebooting your Mac.
Unlike older methods such as Boot Camp, Parallels works on both Intel Macs and Apple Silicon Macs including M1-M5 models.
Performance is generally excellent and in many cases faster than older Intel-based Windows laptops.
Why We Recommend Parallels
Parallels is the best option because:
- Windows installs automatically
- No partitioning required
- Works on Apple Silicon Macs
- Seamless integration with macOS
- Easy drag-and-drop file sharing
- Optimized for Microsoft Office apps
- Excellent performance
You can switch instantly between macOS and Windows applications without restarting your Mac.
That’s not to say that other virtual machines aren’t available. There is also VMware Fusion which is free but in our experience, its nowhere near as smooth as Parallels, especially when it comes to running complex applications like Microsoft Project.
How To Install Microsoft Project on a Mac
Step 1: Install Parallels Desktop
Download and install Parallels Desktop on your Mac.
You can watch the installation tutorial above to see how quick and easy it is.
Once installed, Parallels can automatically download and install Windows 11 for you.
On Apple Silicon Macs, Parallels installs the ARM version of Windows 11 automatically. Microsoft Project works surprisingly well through Windows ARM compatibility.
The process usually takes less than 30 minutes.
We recommend having at least:
- 50GB of free storage
- 16GB RAM if possible
- An SSD-based Mac for best performance
Step 2: Sign Into Microsoft 365
Once Windows is installed:
- Open Microsoft Edge
- Sign into your Microsoft 365 account
- Go to your Microsoft account dashboard
This is where many users get confused because not all Microsoft Project subscriptions include the downloadable desktop app.
Which Microsoft Project Plans Include The Desktop App?
There are now two main ways to get the Windows desktop version of Microsoft Project on a Mac:
Subscription Plans
These include ongoing updates and Microsoft 365 integration.
| Plan | Desktop App Included? |
|---|---|
| Project Plan 1 | No |
| Project Plan 3 | Yes |
| Project Plan 5 | Yes |
Project Plan 3 and Plan 5 both include downloadable desktop versions of Microsoft Project for Windows.
One-Time Purchase Versions
Microsoft also still sells perpetual desktop editions with a one-time payment:
- Microsoft Project Standard 2024
- Microsoft Project Professional 2024
These versions:
- Include downloadable Windows desktop apps
- Do not require a recurring subscription
- Are licensed for one PC
- Continue working permanently once activated
However, unlike Project Plan 3 and Plan 5, perpetual versions do not receive continuous feature updates.
Project Professional 2024 also includes additional enterprise features such as:
- Project Server support
- Advanced resource management
- Timesheets
- Project Online synchronization
while Project Standard 2024 is aimed more at standalone project management use.
| Version | Subscription? | Desktop App? | Best For |
|---|---|---|---|
| Planner | No | Browser only | Basic task management |
| Project Plan 1 | Yes | No | Web-based PM |
| Project Plan 3 | Yes | Yes | Most professional users |
| Project Plan 5 | Yes | Yes | Enterprise PMOs |
| Project Standard 2024 | No | Yes | Individual PMs |
| Project Professional 2024 | No | Yes | Advanced enterprise use |
Step 3: Download Microsoft Project
Once signed into Microsoft 365 with an eligible subscription:
- Go to the Microsoft 365 Apps page
- Download Microsoft Project
- Install it inside Windows
After installation, Microsoft Project works just like it would on a Windows PC.
You can:
- Create Gantt charts
- Open MPP files
- Manage dependencies
- Use Project Server
- Sync with Microsoft 365 services
Do You Need a Windows License?
Windows 11 can be installed without activation. It won’t stop you using it if you don’t buy a license.
However, we recommend purchasing a Windows license for:
- Full personalization features
- Long-term reliability
- Compliance
- Removing activation warnings
Is Parallels Better Than Boot Camp?
Yes for most users.
Apple no longer supports Boot Camp on Apple Silicon Macs and even on Intel Macs, Parallels is generally easier and more flexible.
Advantages of Parallels include:
- No rebooting
- Better macOS integration
- Easier setup
- Apple Silicon support
- Faster workflow switching
Alternatives To Microsoft Project For Mac
If you don’t absolutely need Microsoft Project, there are now many excellent Mac-native alternatives available.
Many can even open and edit Microsoft Project MPP files.
Popular alternatives include:
- Merlin
- Smartsheet
- monday.com
- Wrike
- Teamwork
- OmniPlan
- GanttPRO
These are often easier to use and better optimized for macOS.
Conclusion
Most Mac users no longer need the full desktop version of Microsoft Project.
Microsoft Planner and Project for the web now handle many common project management tasks directly in a browser with no Windows installation required.
However, if you still require the full desktop version of Microsoft Project, running Windows through Parallels Desktop is by far the easiest and most reliable solution.
It works extremely well on modern Apple Silicon Macs and gives you full access to Microsoft Project without giving up macOS.
FAQ
Is there a Mac version of Microsoft Project?
No. Microsoft Project is still Windows-only.
Can Apple Silicon Macs run Microsoft Project?
Yes. Microsoft Project works on M1-M5 Macs using Windows 11 ARM in Parallels Desktop.
Does Project Plan 1 include the desktop app?
No. Project Plan 1 only includes web-based access.
Which Microsoft Project plan includes the downloadable app?
Project Plan 3 and Project Plan 5 include the desktop application as does the one time purchase version of Microsoft Project Standard/Professional 2024.
Can I open MPP files on a Mac?
Yes. You can either:
- Run Microsoft Project through Windows
- Use compatible third-party project management apps
- Use a Microsoft Project viewer for Mac
Is Microsoft Planner the same as Microsoft Project?
No. Microsoft Planner is a lighter task-management and collaboration tool while Microsoft Project is designed for advanced project planning and enterprise project management.