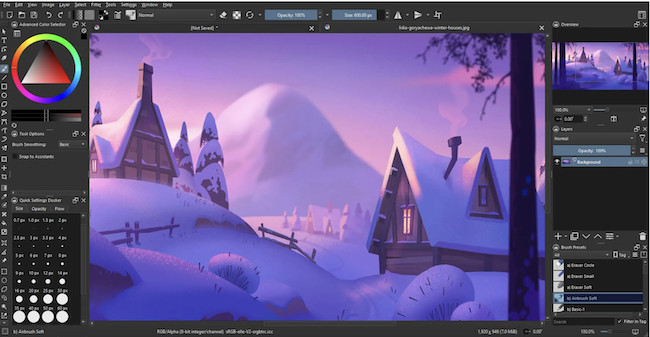
If you’re looking for a free graphic design tool or just simply want to doodle on your Mac, MacHow2 ranked Krita as one of the best graphic design software for Macs.
Krita has been around for over 25 years and while it’s often used as a free alternative to Adobe Photoshop and CorelDRAW, Krita is specifically geared towards digital painting, concept art, and comics.
Since there’s no version of the iPad app Procreate on macOS either, MacHow2 also ranked it one of the best alternatives to Procreate for Mac, thanks to its excellent support for comic art and animation.
Krita has also attracted users of Clip Studio after it switched to a subscription based pricing model (although there is still a one-time purchase version of CS still available).
Here we’ll take a closer look at what this impressive free digital art tool does in more detail.
Contents
- Installation and Compatibility
- User Interface and Customization
- Core Tools and Features
- 1. Brush Engines and Customization
- 2. Vector Tools
- 3. Layer System and Blend Modes
- 4. Animation Tools
- 5. Stabilizers and Assistants for Line Art
- 6. Color Management and Palettes
- 7. Resource Manager
- Krita vs Gimp, Photoshop, Clip Studio & Procreate
Installation and Compatibility
Krita is free to use but only if you download it from the official website.
The Mac App Store offers a paid version although the only benefit of this is that you get automatic updates.
The rest of the fee goes towards the development of Krita and costs associated with Mac App Store distribution.
You’ll also need macOS 10.14 or higher and it can be used with most major drawing tablets with a Mac.
Krita also works natively on both Apple Silicon and Intel Macs although we found unsurprisingly that performance is better on M-series chip Macs.
User Interface and Customization
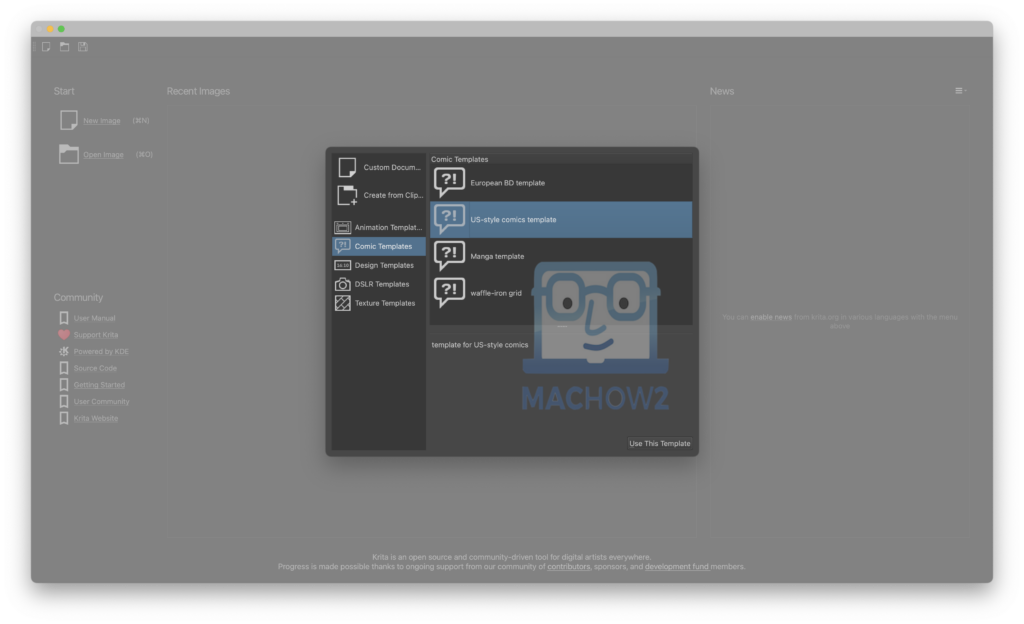
When you open Krita for the first time, the first thing you need to do is either upload an existing image or start a new template.
As already mentioned, Krita is aimed at animators and the templates it offers are customized primarily for:
- Animation Templates
- Comic Templates
- Design Templates
- DSLR Templates
- Texture Templates
Within these are subcategories for specific regions such as US Comic Templates, Manga Templates, European BD templates etc.
When the template opens, you’re presented with a standard graphic design layout with the main toolbar along the left-hand side and brushes, main canvas in the middle with color pallet and layer selectors on the right.
In fact, the layout is very similar to Adobe Photoshop.
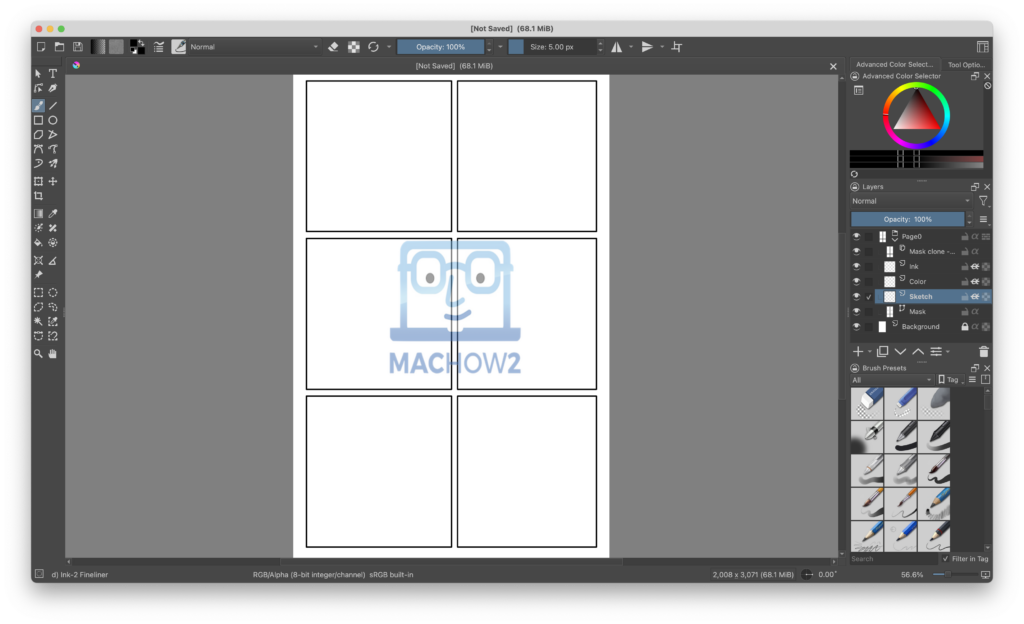
Although you can’t shift around the various palettes and tools, you can drag the side bars in and out for better visibility.
If you click on the “View” option in the Menu Bar, you can also select which tools are visible and which to hide for a cleaner canvas.
Generally, it’s very easy to tailor the workspace to fit your needs, whether that’s for illustration, comics, or general digital painting.
Note that all drawings are saved in Krita’s own format but you can also save in Photoshops PSD file format.
Core Tools and Features
Considering it doesn’t cost a cent, Krita provides an incredibly wide range of tools for digital artists.
Here’s a breakdown of some of the main features that stand out.
1. Brush Engines and Customization
One of Krita’s best features is its extensive brush engine.
There are over 100 pre-installed brushes, ranging from traditional media (oil paints, watercolors) to more specialized tools (pencil textures, airbrushes, inking brushes).
These brushes are powered by 9 unique brush engines, including:
- Pixel Brush: For general-purpose digital painting and sketching.
- Shape Engine: Draws predefined shapes like rectangles and ellipses.
- Color Smudge Engine: Simulates blending, smudging, and wet media effects.
- Texture Engine: Adds texture effects for brushes, useful for creating stylized looks.
- Dynamic Brush: Introduces lag and smoothing for more controlled strokes, especially useful when drawing with a stylus.
You can also configure keyboard shortcuts or hotkeys to switch between brushes if you find it easier.
If you’re a big user of keyboard shortcuts and have just switched from Photoshop, this is a good way to ease the transition.
In fact, there’s even a preset to use the Photoshop keyboard shortcut scheme if you’re really familiar with them.
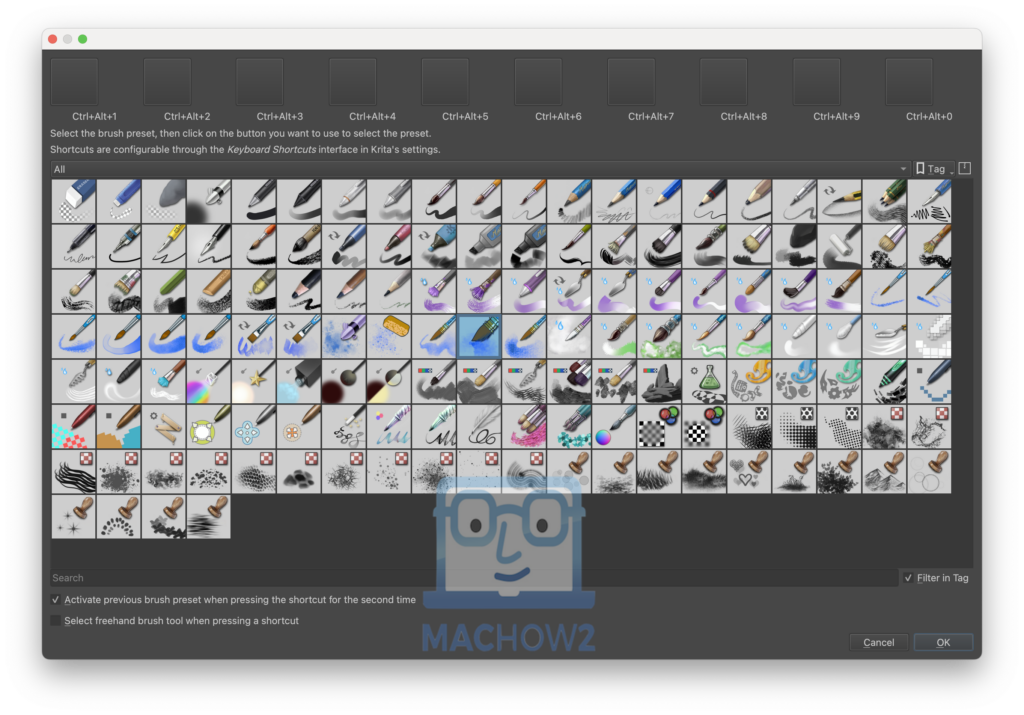
This doesn’t extend however to keyboard shortcuts for switching between the editing tools such as lasso, shape selector and text editor like you can in Photoshop.
I tried using Krita’s brushes with the Huion Kamvas and it’s amazing having such a wide range of brushes at your disposal.
The pressure sensitivity will depend on your tablet but generally I found that Krita responds remarkably well if you press harder for thicker lines and more lightly for finer touches.
However, this is a case of trial and error configuring your tablet pressure settings on your tablet with those in Krita.
Even more impressive for a free tool, Krita allows you to create your own custom brushes.
The flexibility on this is impressive allowing you to start from scratch or modify existing brushes down to the finest detail (e.g., spacing, rotation, scatter, opacity).
Not only this but you can import custom brushes you’ve made in Photoshop (although this is only possible if they are in .ABR format.)
Finally, there are lots of user generated brushes available from the Krita community.
2. Vector Tools
Although Krita is primarily known for its raster-based capabilities, it also has some limited support for vector design.
While it’s not as advanced as dedicated vector software like Adobe Illustrator, Affinity Designer or even Clip Studio, Krita offers basic tools for creating vector shapes, paths, and text.
For comic artists and illustrators who need basic vector functionality alongside raster tools, this is an added bonus.
I found these a bit tricky to find at first but a quick search in the Help section and Krita is very good at pointing you in the right direction.
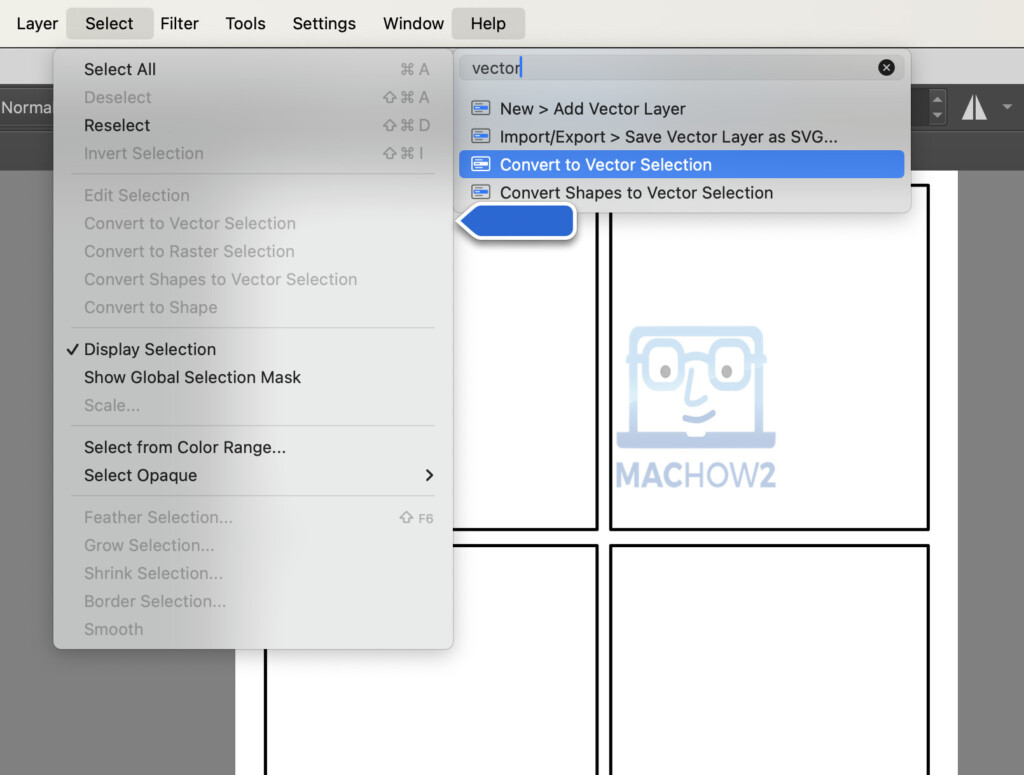
In fact the Help documentation in Krita is excellent with an extensive manual that can also be downloaded in EPUB format.t
I found that the vector tools perform pretty well although they are not as comprehensive as the painting tools.
You can easily switch between vector and raster layers though, useful if you need to work on both at the same time.
3. Layer System and Blend Modes
Krita’s layer management is well designed making it easy to organize complex projects.
You can create an unlimited number of layers, each with options for opacity, masks, and blending modes.
All of the layer tools are on the right of the interface and you can expand the options available by right-clicking on them.
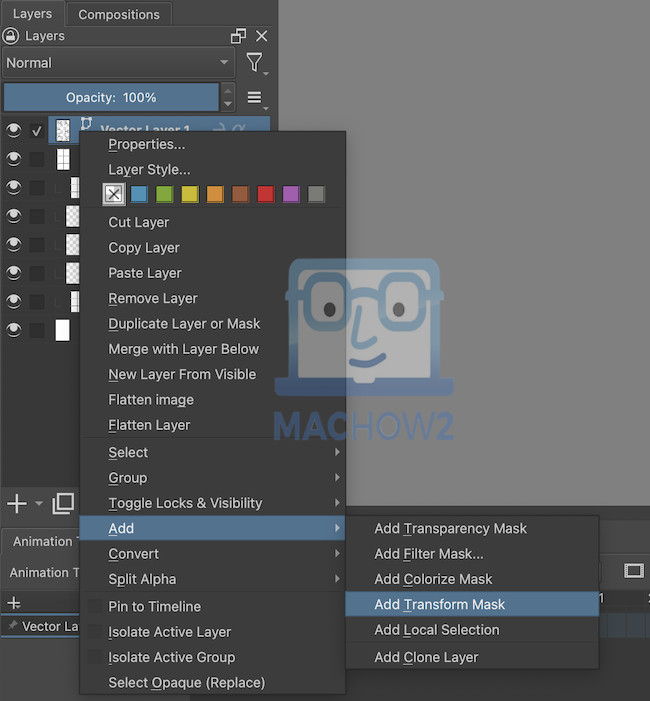
There’s a wide variety of layer types, including:
- Paint Layers: For standard digital painting.
- Vector Layers: For working with vector shapes and paths.
- Filter Layers: Non-destructive layers that apply effects like blur or color adjustment.
- Group Layers: To better organize complex projects.
Apart from this, Krita supports over 30 blending modes so you can experiment with different visual effects when working with multiple layers.
This gives you a lot of control over the precise composition of shadows, highlights and textures.
In fact, I’d say the blend modes in Krita are on a par with those in Photoshop although lack the advanced manipulation features of Adobe’s product.
4. Animation Tools
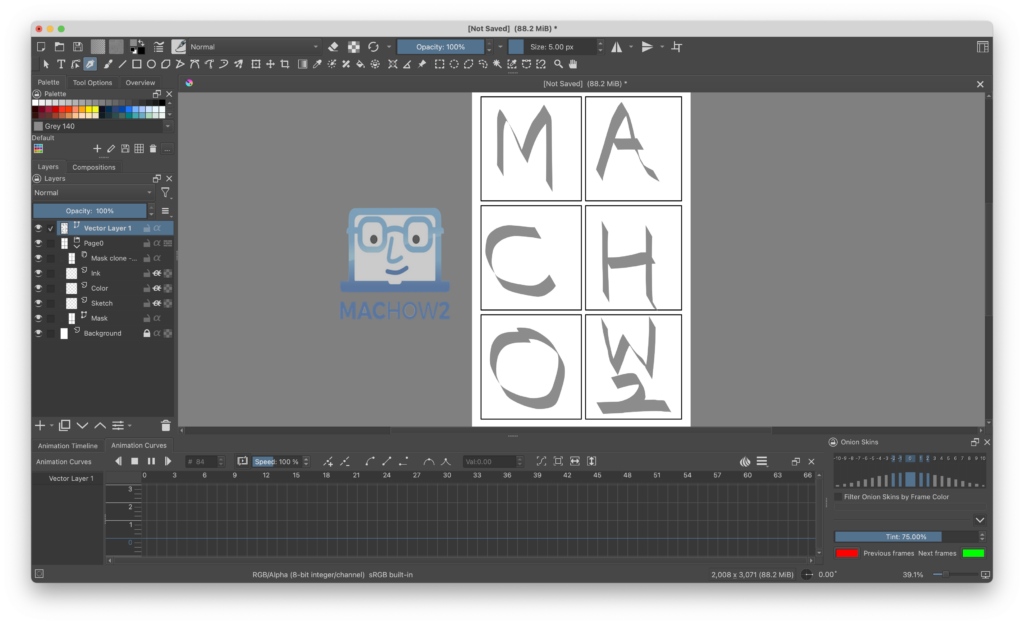
Apart from the impressive illustration tools, Krita also includes a surprisingly good animation suite, which is rare for any free graphic design software.
Note that this is only for 2D animation not 3D design.
Krita supports both 2D frame-by-frame animation and more straightforward GIF creation.
You can animate layer transformations, draw on individual frames, and even export animations in multiple formats, including most major video files formats.
Animation definitely isn’t my strong point and I found it hard to get to grips with these but anyone that wants to bring their comic strips to life can do.
5. Stabilizers and Assistants for Line Art
For line art and inking, Krita’s stabilizer tool is a nice touch, especially when working with a stylus.
Although many tablets and pens have features to help you have a steadier hand, Krita’s stabilizer tool smooths out squiggly lines, making it easier to produce clean strokes.
It also assists you get things straight with perspective grids, rulers and guides.
While Krita is clearly aimed at artists, these tools are useful for anyone wanting to create perspective drawings including those doing architectural or home design artwork.
6. Color Management and Palettes
As you’d expect in any decent graphic design software, Krita offers extensive color management options, including support for multiple color spaces (RGB, CMYK, LAB, and more) and ICC profiles.
This makes Krita an option for artists working in print, as you can accurately manage color profiles and ensure consistency across different devices.
I found the palette manager is generally user-friendly allowing me to create custom palettes or use predefined ones.
There are also color blending and gradient tools if you want to experiment with color harmonies and get smoother transitions between hues.
7. Resource Manager
Krita has a Resource Manager which allows you to import and export brushes, patterns, textures, and even workspaces.
Many of these are created by the very dedicated Krita community so you can download some really unique custom brushes, color palettes and textures.
Krita vs Gimp, Photoshop, Clip Studio & Procreate
Krita is often compared to apps including Gimp, Photoshop, Clip Studio Paint and Procreate.
They’re all popular tools for digital art and photo editing, but each has strengths suited to specific tasks and audiences whether it’s painting, photo editing, animation or design.
It also depends to a certain extent on whether you need cross platform support or just an app for macOS.
Here’s how they compare.
GIMP:
- Strengths: Free and open-source with photo editing and basic graphic design features. Supports plugins to expand functionality.
- Weaknesses: Outdated UI and not very intuitive to use. Less focused on digital painting.
- Best For: Users needing photo editing or design tools without a subscription.
Photoshop:
- Strengths: Industry-standard tool with advanced features for photo editing, digital painting, and design. Extensive third-party support and integration with Adobe Creative Cloud.
- Weaknesses: Expensive subscription model and is quite bloated for casual users or beginners.
- Best For: Professional graphic designers working in photo editing, design, or hybrid tasks.
Clip Studio Paint:
- Strengths: Specialized in illustration, comics, and manga creation. Offers vector tools, inking, and panel management. Also has an excellent brush engine.
- Weaknesses: Less versatile for photo editing or general design tasks. Requires a license or subscription.
- Best For: Illustrators, comic artists, and animators.
Procreate:
- Strengths: Intuitive and touch-optimized for iPads. Excellent brush engine, layer controls, and time-lapse recording. Affordable one-time purchase.
- Weaknesses: Exclusive to iPads and lacks the advanced features of desktop apps. Not available for Macs.
- Best For: iPad users focused on illustration and painting.
Summary Table:
| Feature | Krita | GIMP | Photoshop | Clip Studio Paint | Procreate |
|---|---|---|---|---|---|
| Cost | Free | Free | Subscription | License/Subscription | One-time fee |
| Best For | Painting/Comics | Photo Editing | Pros | Comics/Animation | iPad Art |
| Learning Curve | Moderate | Moderate | High | Moderate | Low |
| Advanced Features | Brushes/Animation | Plugins | Creative Cloud Integration & AI assistant | Inking/Manga Tools | iPad Tools |


