
Microsoft Visio is still a Windows-only application and there is no native Visio desktop app for macOS.
Although nowadays there are some excellent alternatives to Visio for Mac available, sometimes only the real thing will do.
The good news is you can run Visio reliably on a Mac in 2026 with a few workarounds – including Microsoft’s official web version and full desktop version of Visio via a virtual machine.
Here I’ll show you the best way I’ve found to run Visio on a Mac plus explain all the other options available (including for Apple Silicon Macs).
| Method | Apple Silicon | Intel Mac | Full Features | Difficulty |
|---|---|---|---|---|
| Visio for Web | ✅ | ✅ | ❌ | Easy |
| Virtual Machine + Windows | ✅ | ✅ | ✅ | Intermediate |
| Boot Camp | ❌ | ✅ | ✅ | Intermediate |
Option 1: Use Visio for the Web

Best for: casual users, collaboration, education, and light-to-moderate diagramming needs.
Microsoft officially supports Visio for the Web, which runs in any modern browser on macOS, including Safari, Chrome, and Edge.
However, it’s not a full replacement for Visio – more of a Visio viewer than anything as I found out in my Visio for the Web review.
Visio for the web does not have the same drawing tools as the full desktop version of Visio and is not suitable for professional needs.
For example, it lacks things such as shape data, you can’t edit hyperlinks in diagrams and there are annoying glitches like session timeouts if you leave the browser tab idle for more than a few minutes.
It also only works if you have saved your Visio files in SharePoint Online or One Drive for Business – you can’t open Visio files that are saved locally on your Mac’s hard drive or that are sent to you via email.
What you can do
- Create, edit, and share Visio diagrams
- Open and save .vsdx files
- Collaborate in real time via OneDrive or SharePoint
What you can’t do
- Use advanced desktop-only features (e.g. complex data linking, some automation)
- Work fully offline
Requirements
- Microsoft Visio Plan 1 or Plan 2 subscription and any editing capabilities
- Microsoft account
Pros:
- No installation required
- Works on Intel and Apple Silicon Macs
- Fully supported by Microsoft
Cons:
- Feature-limited compared to desktop Visio
- Ongoing subscription required
Option 2: Run Windows on Your Mac
Best for: engineers, architects, IT professionals, and enterprise users
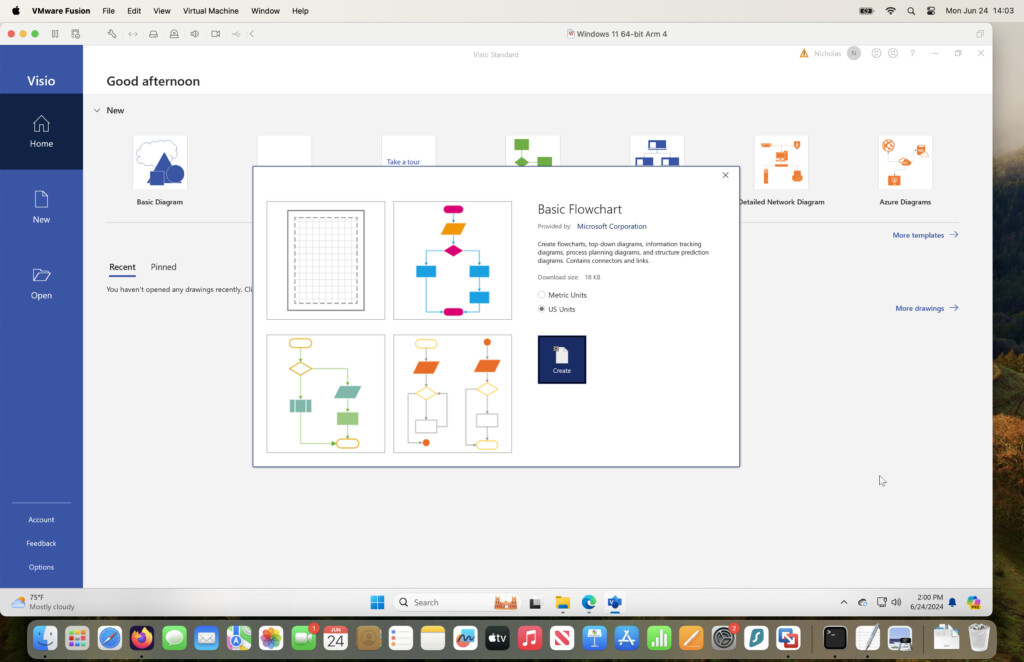
My preferred way to use Visio on a Mac is to install Windows using a virtual machine. This gives you complete access to the Windows desktop version of Visio and is by far the most reliable method I’ve tried.
It works really well too (as you can see above) and is really easy to setup. Even better, I used VMware Fusion which is by far the best free virtual machine I’ve used.
This works on both Apple Silicon and Intel Macs although Apple Silicon Macs only support running what’s known as Windows ARM
Although Visio isn’t natively compatible with Windows ARM, it does still work in it thanks to x86 emulation which “translates” Intel only software to work in Windows ARM.
The only downside is the full Windows desktop version of Visio requires either a Visio Plan 2 subscription or a one-off purchase of $579.99 for the Visio Professional desktop app.
This method also works on Intel Macs too as you can see below but this time using Parallels instead.
How it works
- Install a virtual machine: either VMware Fusion (Free) or Parallels Desktop
- Install Windows 11 inside the virtual machine
- Install Microsoft Visio (Plan 2 or standalone) in Windows
Apple Silicon Macs (M1, M2, M3, M4, M5)
- Windows 11 runs using ARM architecture
- Visio (x86) runs via Microsoft’s built-in emulation
- Performance is generally very good for diagramming tasks
Intel Macs
- Windows runs natively in a VM
- Full compatibility with all Visio features
Pros:
- Full Visio feature set
- Works with complex diagrams and legacy files
- Seamless macOS integration (copy/paste, shared folders)
Cons:
- Requires a Visio plan or purchase of the standalone version
- Requires VM software
- More setup involved
Option 3: Boot Camp (Intel Macs Only)
Boot Camp allows Intel Macs to boot directly into Windows and run Visio natively.
However, it’s not supported on Apple Silicon Macs and Intel Macs have been phased out by Apple so it’s really only an option if you’ve got an older Intel Mac.
You can find full instructions here on how to install Windows on a Mac with Boot Camp but this is the least recommended way of running any kind of Windows application on a Mac nowadays.
Unsupported or Obsolete Methods (Avoid These)
Although they worked in the past, I would no longer recommended any of the following methods as they no longer work:
- RemoteApp / Azure Remote Desktop-only Visio setups
- Wine or CrossOver (unreliable for Visio)
- Trying to run older versions of Visio (2016 / 2019 – support ended in 2025)
FAQ
Is there a native Visio app for Mac?
No. Microsoft does not offer a native Visio desktop app for macOS.
Can I open .vsdx files on a Mac?
Yes – using Visio for the Web, Windows virtualization, or compatible alternatives.
Which Visio plan do I need on a Mac?
- Plan 1: Web-only
- Plan 2: Web + Desktop (via Windows)
Is Visio supported on M‑series Macs?
Yes – via the web version or using Windows in a virtual machine.
Can You Open Visio Files On Mac?
There are Visio viewers for Mac that allow you to open and view Visio files on a Mac for free.
These will allow you to open VSD files without the need for Visio on a Mac.
However, they do not support full editing of Visio files and many of them do not preserve the formatting exactly how it is in Microsoft Visio.