
With more people working remotely, being able to access a Mac from another device – whether that’s a Windows PC, another Mac, or an iPhone – is more important than ever.
The easiest way to remotely access a Mac in 2026 is by using remote desktop software (see our guide to the best remote desktop software for Mac) like Chrome Remote Desktop or TeamViewer, especially if you’re connecting from Windows or outside your home network.
While macOS includes built-in tools like Screen Sharing, Remote Management and Remote Login, these are mainly designed for local network or Mac-to-Mac connections and require extra setup for remote access over the internet.
Below, we’ll show you the best ways to remotely access a Mac, starting with the simplest and most effective methods.
| Method | Works on Windows | Works Over Internet | Ease of Setup | Best For |
|---|---|---|---|---|
| Remote Desktop Software | ✅ | ✅ | Easy | Access from anywhere |
| Screen Sharing (macOS) | ❌ | Limited | Easy | Mac-to-Mac (local) |
| Remote Management (VNC) | Limited | Limited | Medium | Admin / advanced users |
| Remote Login (SSH) | ✅ | ✅ | Advanced | Command line access |
| iCloud | ✅ | ✅ | Easy | File access only |
Contents
Best Way: Remote Desktop Software (From Anywhere)
If you want to access your Mac from anywhere in the world, or from a Windows PC, iPhone or iPad, remote desktop software is by far the easiest and most reliable option.
These tools:
- Work across Mac, Windows, iOS and Android
- Don’t require complex setup like port forwarding
- Automatically handle connections over the internet
Popular options include:
- Chrome Remote Desktop (free remote desktop app and very easy to use)
- TeamViewer (great for remote support, or try one of these TeamViewer alternatives)
- AnyDesk (fast and lightweight, also a popular helpdesk software)
- Windows App tool (formerly Microsoft Remote Desktop)
👉 For a full breakdown, see our guide to the best remote desktop software for Mac.
How to Access a Mac from a Windows PC
If you’re trying to connect to a Mac from Windows, using remote desktop software is by far the simplest solution.
macOS does not offer a native Windows-compatible remote desktop tool, so apps like:
- Chrome Remote Desktop
- TeamViewer
- AnyDesk
are the easiest way to:
- Control your Mac remotely
- Access files and apps
- Avoid complicated network setup
While it is technically possible to connect using VNC, it usually requires manual configuration and is much harder to set up.
How to Access a Mac Over the Internet
macOS built-in tools like Screen Sharing and Remote Management are mainly designed for local networks (same WiFi or LAN).
To access your Mac remotely over the internet, you have two options:
Option 1 (Recommended)
Use remote desktop software – no setup required.
Option 2 (Advanced)
- Configure port forwarding on your router
- Or use a VPN to connect to your home network
For most users, remote desktop apps are far easier and more secure.
Built-in macOS Remote Access Tools (Mac-to-Mac)
macOS includes several built-in tools for remote access, but these are best suited for:
- Mac-to-Mac connections
- Local networks
- More technical users
Here’s a guide on how to use each one.
Remote Management (Mac-to-Mac or VNC)
Remote Management allows you to control another Mac using Apple’s built-in tools or a VNC client.
To enable it:
- Go to Apple Menu > System Settings > General > Sharing
- Turn on Remote Management
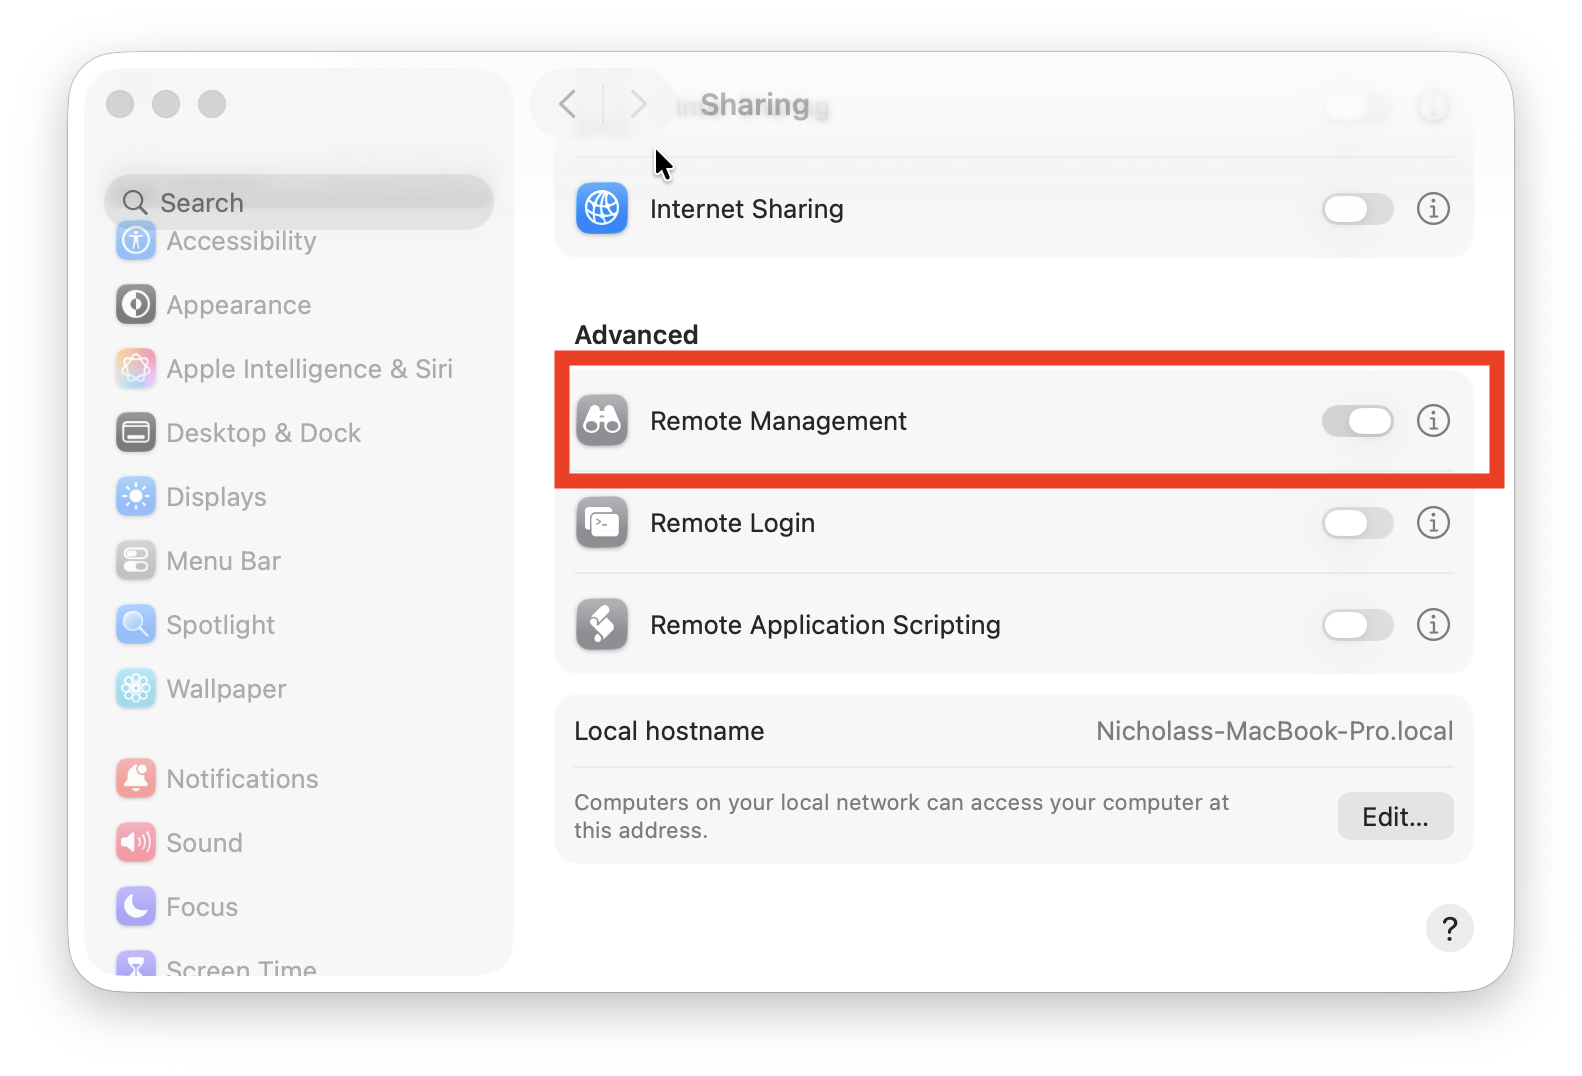
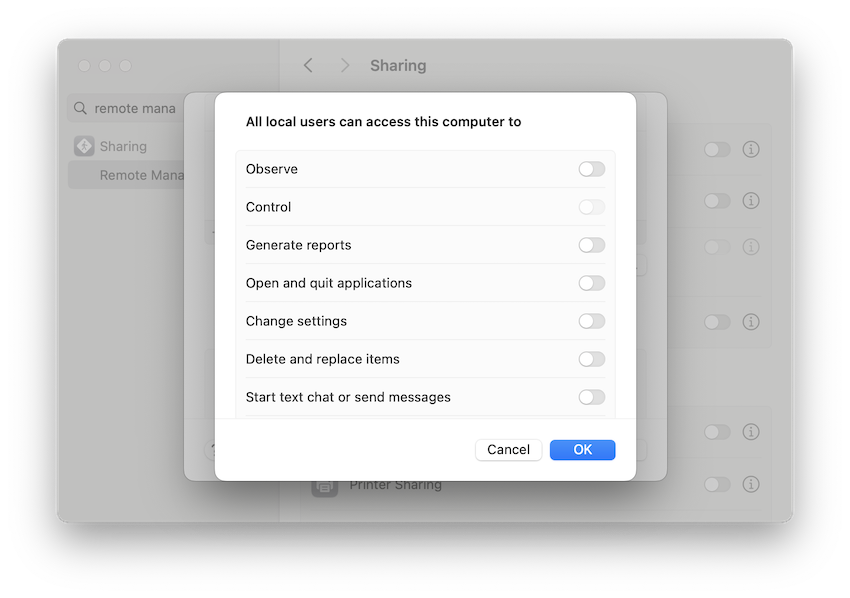
- Once toggled on, scroll down and click on “Options…” and define all the remote access options you would like to allow.
- On older Intel Macs using Monterey or earlier it will look slightly different. Go to the Apple Menu in the top left of your desktop and select System Preferences > Sharing and select Remote Management and you’ll be presented with the available options.
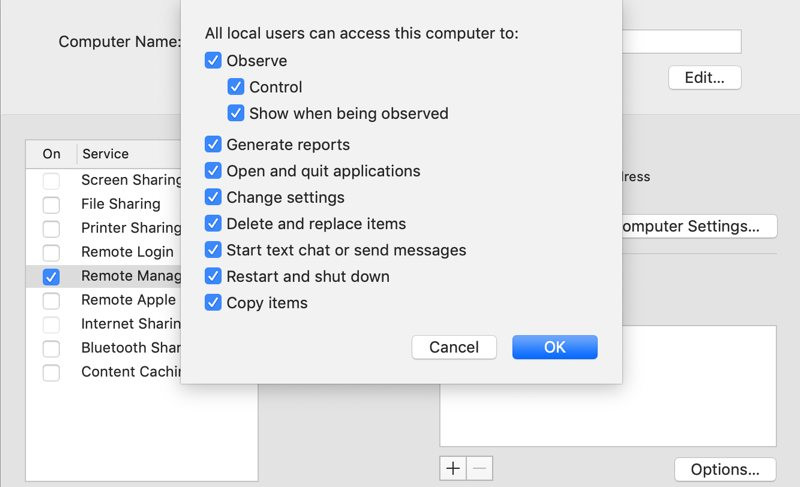
Finally, you also need to choose which users can access the Mac in the Allow access for section.
- All Users – Any account on your Mac or any Mac on the same network can request access (they still need a valid username/password).
- Only these users… – Click Add (+) and select specific macOS user accounts or network directory users who are allowed to connect.
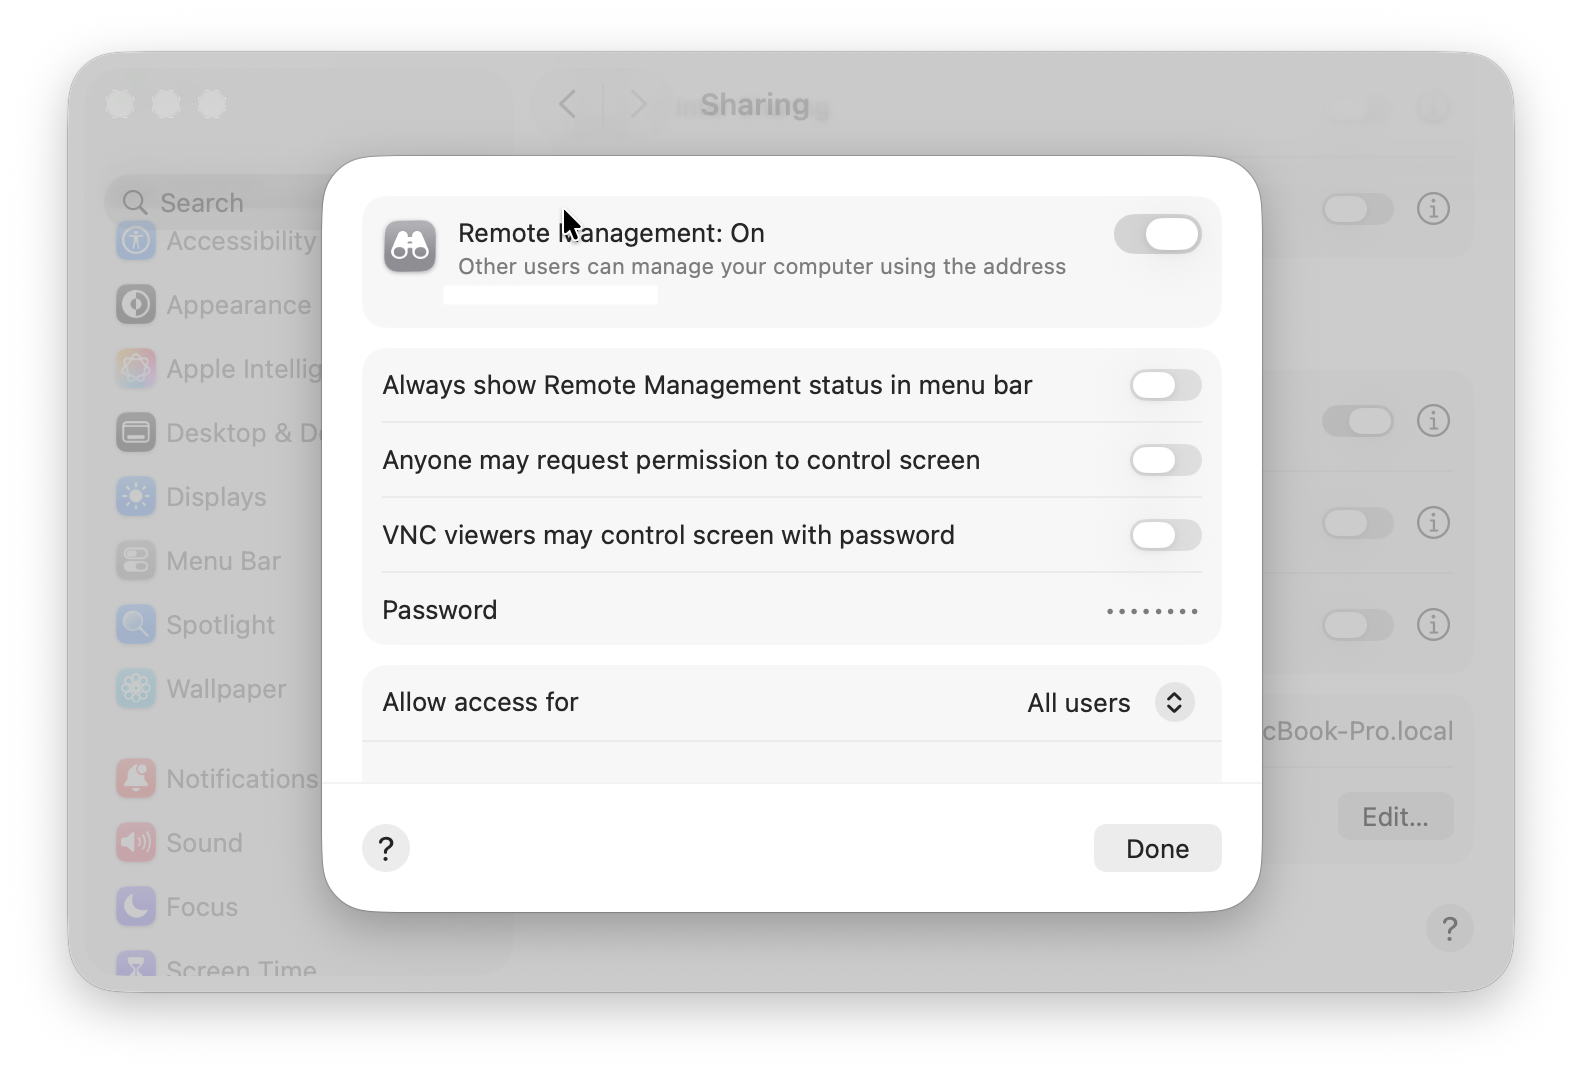
Under the Remote Management: On setting you’ll see an IP address: make a note of this as you’ll need it to connect from another Mac.
To connect:
To connect to the Mac from another Mac follow these instructions:
- On another Mac:
Finder > Go > Connect to Server (⌘K)
Enter:vnc://your-mac.localorvnc://IP-address(entering the IP address you took a note of earlier) - Click Connect

This will launch macOS Screen Sharing and display the remote desktop.
Important limitations:
- Not designed for internet access
- Requires VPN or port forwarding
- Limited compared to modern remote desktop tools
Note: The Remote Management tools in macOS are quite limited for system admins. For advanced administration (running scripts, copying files in bulk, monitoring multiple Macs), you can purchase Apple’s Remote Desktop app from the Mac App Store although it costs $79.99. It provides extra tools but still relies on the same Remote Management service in macOS.
Troubleshooting Remote Management in macOS
If you can’t connect or keep having dropped connection issues, check the following:
- Firewall: Ensure macOS firewall (System Settings > Privacy & Security > Firewall) allows Screen Sharing/Remote Management.
- VPN: If connecting over a VPN, confirm the VPN passes VNC traffic (port 5900).
- Different Networks: Remote Management is not designed for direct internet access – use a VPN or a remote-desktop service like Chrome Remote Desktop for off-site connections.
Screen Sharing (Simple Mac-to-Mac Access)
Screen Sharing is the easiest built-in way to control another Mac visually.
It allows you to:
- View and control another Mac’s screen
- Access apps, files and folders
However:
- It only works between Macs
- It’s best on the same network
- Performance can be slow over distance
For anything beyond simple use, remote desktop apps are usually better.
For step-by-step instructions, see our guide on how to screen share on a Mac.
Note: Although the Screen Sharing tool is very easy to use, it can also be very laggy or slow at times and you’ll get better results by using a remote desktop app. Alternatively, we recommend trying the excellent Screens for Mac app if you want better performance when screen sharing in macOS.
Remote Login (SSH)
Remote Login lets you access a Mac via command line using SSH.
The Remote Login feature in macOS lets you securely connect to a Mac using SSH (Secure Shell) or SFTP (Secure File Transfer Protocol).
Unlike Remote Management or Screen Sharing, Remote Login provides command-line and file-transfer access only – there’s no graphical desktop.
This is best for:
- Developers
- System administrators
- File transfers via SFTP
If you feel confident enough to use it, here’s how it works.
To enable it:
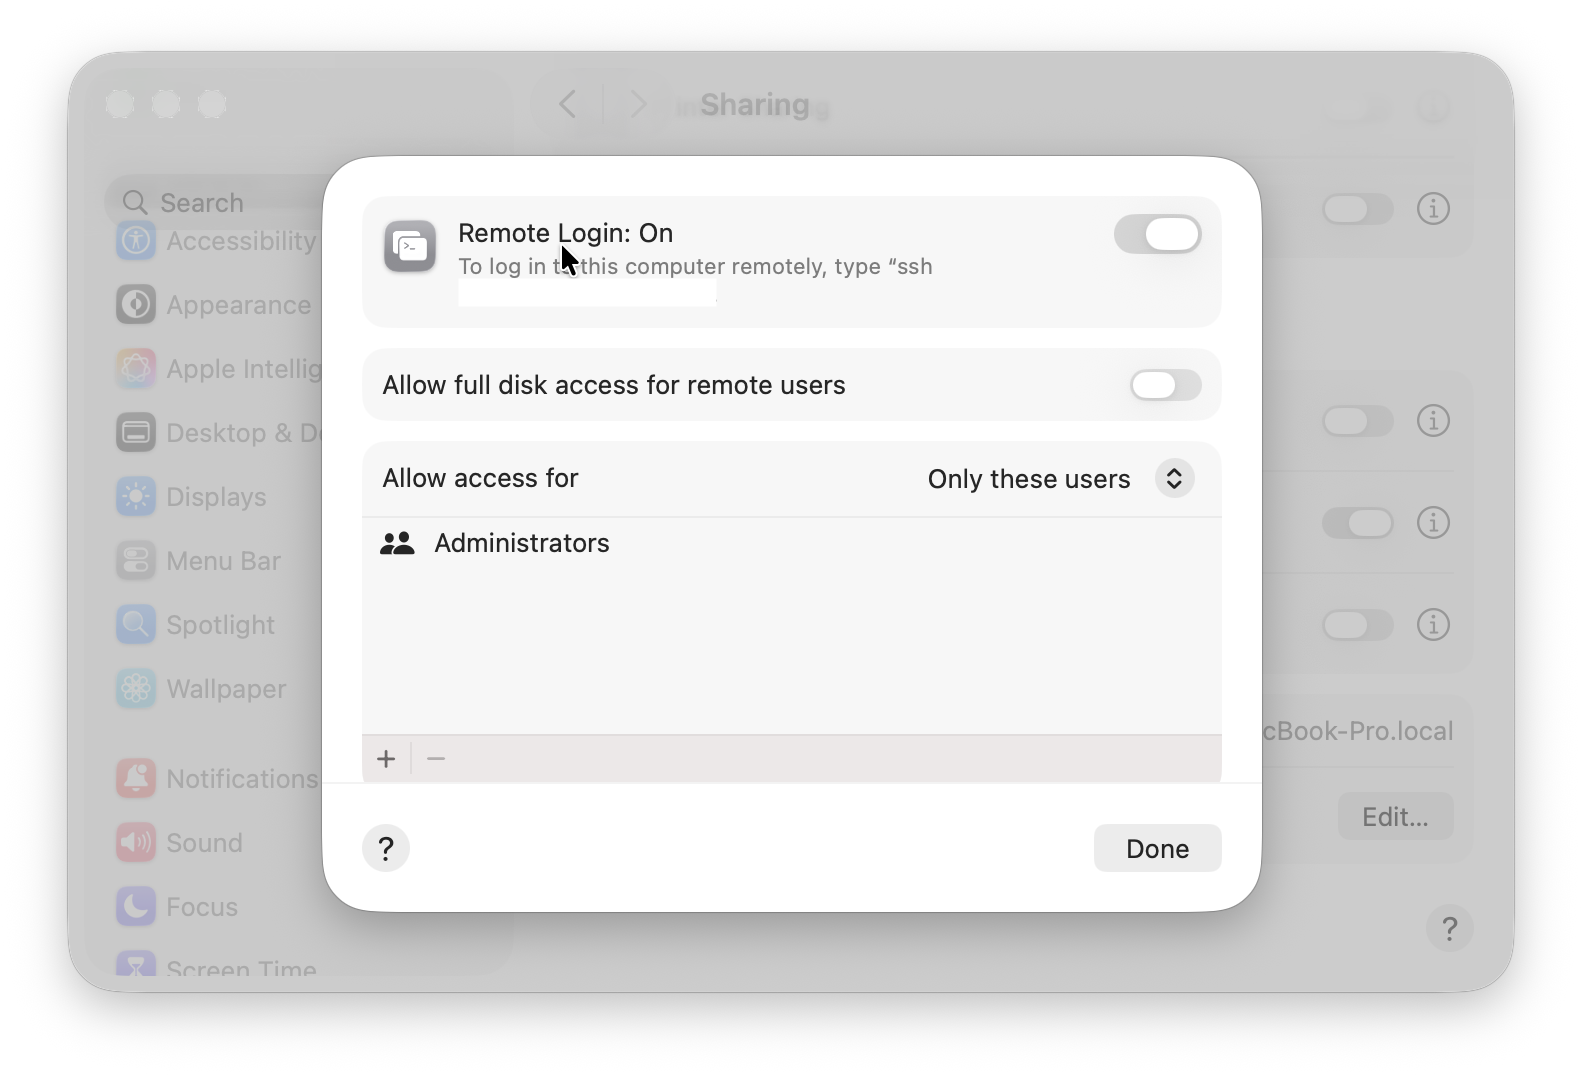
- Go to System Settings > General > Sharing
- Turn on Remote Login and make a note of the ssh IP address that appears such as:
ssh yourusername@192.168.x.x
yourusername – the macOS account you enabled.
192.168.x.x – your Mac’s local IP address (or hostname). - Choose which users can access the Mac:
To connect:
Open Terminal on your Mac and type:
ssh username@ipaddress (using the ssh remote login IP address you noted down earlier)
- Confirm the Mac’s fingerprint by entering the password for the remote Mac’s user account.
- You’ll then have a command-line session on the remote Mac.
Key points:
- No graphical interface
- Secure and lightweight
- Requires technical knowledge
Access Files Remotely Using iCloud
If you only need access to files – not full control of your Mac – iCloud is often the simplest solution.
With iCloud, you can:
- Access documents from any device
- Use a browser on Windows
- Sync files automatically
You can’t share screens using iCloud but it’s perfect for just accessing files, emails and pretty much anything stored on your Mac that’s been synced with iCloud.
Note that you need to be signed into iCloud on your Mac to do this and have an iCloud subscription with your Mac synced to it.
Here’s how to remotely access files on a Mac or Windows PC using iCloud.
To enable:
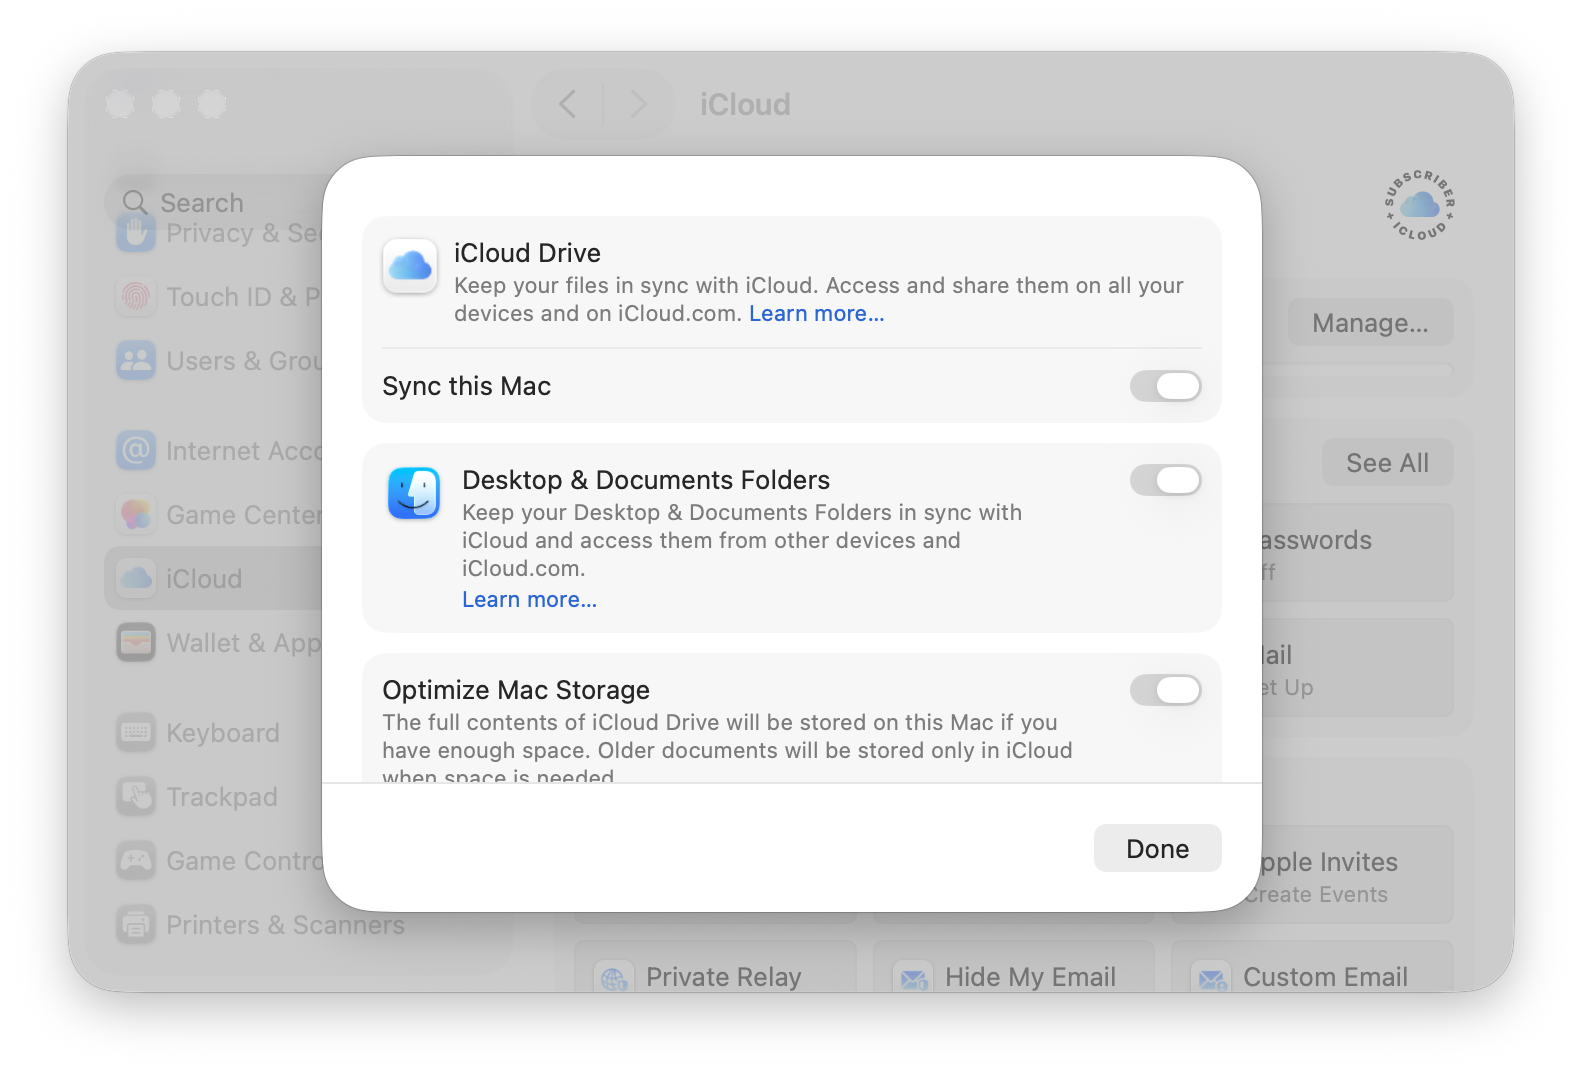
- Go to System Settings > iCloud
- Turn on iCloud Drive
- Enable Desktop & Documents Folders
You can then access your files from:
- Another Mac
- iPhone or iPad
- Windows PC via iCloud.com
FAQ
What is the best way to remotely access a Mac?
It depends on what you need to do.
- For access from anywhere, remote desktop software is the best option.
- For Mac-to-Mac access on the same network, Remote Management or Screen Sharing in macOS works well.
- For file access only, iCloud is usually the simplest solution.
Do I need remote desktop software?
If you’re only accessing a Mac on the same network, macOS built-in tools like Screen Sharing are usually enough.
However, if you want to:
- Access your Mac from outside your home
- Connect from a Windows PC
- Avoid complex setup
Then remote desktop software is the better option.
Can I remotely access a Mac from anywhere in the world?
Yes, but not with macOS’s built-in tools alone.
Remote Management and Screen Sharing are designed for local networks. To access a Mac over the internet, you’ll need:
- Remote desktop software, or
- A VPN connecting both devices to the same network
Can I remotely access a Mac from a Windows PC?
Yes. The easiest way is to use remote desktop software that supports both macOS and Windows.
Apple’s built-in Screen Sharing and Remote Management tools do not work natively with Windows.
Can I remotely access a Mac from an iPhone or iPad?
You can control a Mac from an iPhone or iPad simply by using the Touch Control feature in macOS and iOS. However, this is very limited in what it can do and for more control over accessing files, folders and doing other things on your Mac, you’ll need to use a remote desktop or VNC app.
For more, check out our guide on how to control and access a Mac with an iPhone.
Is Remote Management the same as Screen Sharing?
They use the same underlying technology (VNC), but they’re not identical:
- Screen Sharing is the basic macOS interface for controlling another Mac.
- Remote Management unlocks additional administrative features when used with Apple Remote Desktop.
For most users, the difference isn’t noticeable unless you manage multiple Macs.
Is it safe to access a Mac remotely?
It can be, provided you follow basic security practices:
- Use strong passwords or SSH keys
- Limit access to specific users
- Avoid exposing Remote Management or SSH directly to the internet
- Use a VPN or reputable remote desktop service for off-site access
Can I remotely access a Mac that’s asleep?
Yes, but only if:
- Wake for network access is enabled in System Settings
- The Mac is connected to power (especially laptops)
- The network supports wake-on-demand
This works more reliably on local networks than over the internet.
Do I need to leave my Mac turned on to access it remotely?
Yes. A Mac must be powered on (or able to wake from sleep) to accept remote connections.
You cannot remotely start a Mac that is completely shut down.
What’s the difference between Remote Login and Remote Management?
- Remote Login (SSH/SFTP) provides command-line and file access only.
- Remote Management provides full screen control and system interaction.
Remote Login is best for developers and administrators, while Remote Management is better for general remote control.
Can I transfer files when remotely accessing a Mac?
Yes, depending on the method:
- Remote desktop software usually includes file transfer
- Remote Login supports SFTP
- Screen Sharing allows basic file access
- iCloud syncs files automatically without remote control
Why is macOS Screen Sharing sometimes slow or laggy?
Screen Sharing prioritizes simplicity over performance and isn’t optimized for long-distance or low-bandwidth connections.
For smoother performance, especially over the internet, a dedicated remote desktop app will give much better results.