
If you’ve bought an external display for your Mac and found that the resolution and scaling is poor or the picture blurry, here are some tips on how to fix it.
There are various issues that can affect Macs with external monitors but one of the most common is terrible image quality when connected to them.
Many find that text and icons can appear tiny, blurry or fuzzy when connected to external monitors that support 4K and 5K resolutions.
Other problems include flickering, color issues, blurry fonts, garbled images and lag.
This is a particular problem on cheaper QHD monitors with resolutions of less than 4K especially 1440p which cannot reproduce the retina quality display of the MacBook Pro and MacBook Air.
Table of Contents
Why External Monitors Look Blurry With Macs
On many non Apple displays with 1080p, 1440p, 4K and 5K resolutions, Macs do not scale them well.
The result is text and web page elements that look either too small or blurry magnified images on your external display.
The reason for this is basically because external displays can’t support the Retina high pixel density mode (HiDPI) of a Mac which is 218 pixels per inch (ppi).
Apple’s own Apple Pro Display XDR (which supports a stunning 6K and 1600 nits of brightness) and the Apple Studio Display can support HiDPI but they don’t come cheap at $5,000 and $1,599 respectively.
The only non-Apple monitor that can support 218 ppi is the 27 inch LG UltraFine which is by far the best alternative to Apple’s displays.
On those external displays that don’t support 218 ppi, even those with stunning 5K 5120 x 2160 resolution, the image may still appear blurry or difficult to read particularly on ultra-wide displays such as the 5K LG UltraFine monitor.
Apple Silicon & Intel Mac Issues
There are also other reasons for these problems which are complex but are basically because Apple Silicon chips are based on ARM architecture compared to the older Intel Macs which are based on what’s called x86.
ARM based Macs use different graphics drivers to Intel Macs which don’t play well with anything other than Apple products such as Apple’s own displays, iPads and iPhones.
Intel x86 processors can still enable HiDPI on non 4K and 5K displays and allow you to configure the resolution.
Apple Silicon Macs can only do this on external displays that support at least 4K but if you sent the display to its native 1440 resolution with one, everything looks really small.
To fix these problems, you need to either change the display resolution settings in macOS or use third party software to do so depending on what the problem is.
Here then are some ways to improve the way your Mac and external monitor work together.
1. BetterDisplay (Free)
The most effective tool we’ve found to fix any of these problems is to use a free app called BetterDisplay (formerly known as Better Dummy).
BetterDisplay works by “unlocking” your screens making them fully scalable natively with an HiDPI resolution slider to freely scale the desktop size.
This means that for monitors that support less than 4K, it can even “trick” the monitor into using HiDPI. This basically fools your Mac into thinking you’ve connected a 5K display to it.
BetterDisplay works on the latest version of macOS including Sonoma.
For all monitors, it allows you to configure the resolution you want the display to use.
Other advantages of using BetterDisplay are:
- Converts your displays to fully scalable screens
- Allows brightness control
- XDR/HDR upscaling (which means you can set extra brightness beyond 100% on compatible displays)
- Full dimming to black
- Create and manage virtual displays
- Create Picture in Picture windows of displays
- Manage display settings easily from the menu bar
To unlock scaling and HiDPI resolutions in the app, just follow these instructions.
- Download and install BetterDisplay by dragging it to your Applications folder.
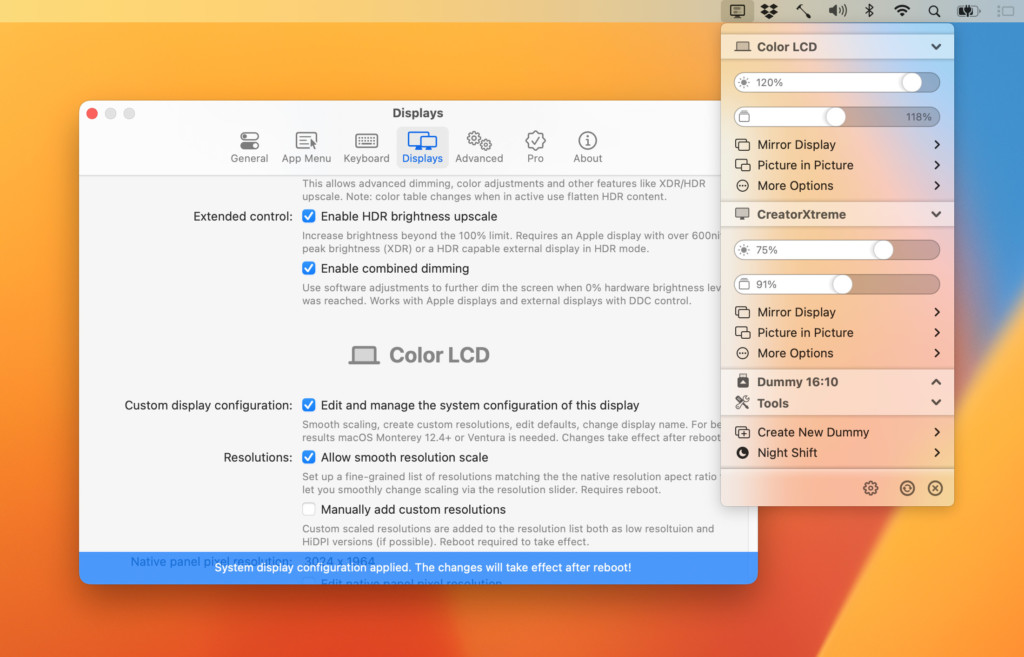
- Click on BetterDisplay in the Menu Bar and select Settings from the gear icon at the bottom of the Menu.
- Go to the Displays section and check the box Edit and manage the system configuration of this display and Allow smooth resolution scale on the display you want to make smoothly scalable. If you’ve got multiple monitors, you’ll have to do this for each one.
- Click on the Apply System Display Configuration button at the bottom of the screen. You’ll need to enter your Mac admin password and then reboot for the changes to be applied.
- When your Mac restarts, you can then use the resolution sliders in the BetterDisplay app menu to scale the desktop until you find the resolution that looks best.
Note that base level M1 Macs can only be configured up to 6K although Macs such as the Mac Studio with Pro, Max or Ultra chips can go beyond this.
This would only be a problem for users with ultra-wide screens trying to go beyond a horizontal resolution of 3072px HiDPI.
For most users, this should fix any blurry, pixelated or low resolution image issues when connected to an external display.
If it doesn’t, then you can also try using BetterDisplay’s Dummy mirroring method.
This creates a mirrored dummy of your original display which you can then use to unlock the resolution scaling in your external monitor.
Note that dummy displays have a maximum refresh rate limitation of 60Hz and there is no HDCP or HDR support.
To create a mirror dummy display with it, follow these instructions.
- In your Mac’s Menu Bar, click on the BetterDisplay icon and then select Display Settings Create New Dummy.
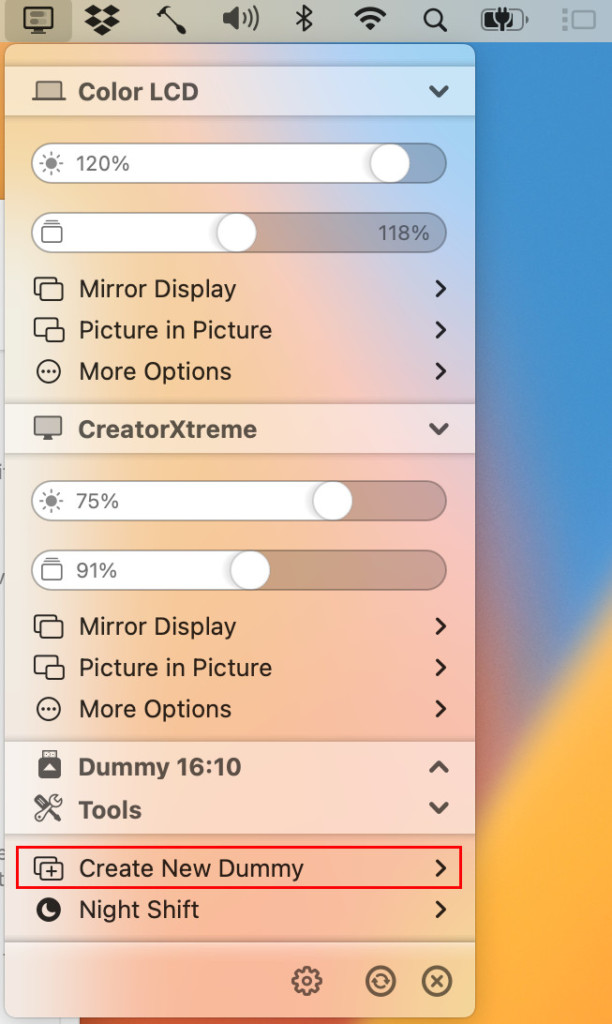
- Select the Aspect Ratio of the monitor you are using from the list that appears which for most users will be 16:9. BetterDisplay will then create a new virtual high resolution monitor. If you have more than one monitor, you have to repeat this process for each monitor.
- Go to the Apple logo in the top left of your screen and select System Preferences > Displays > Display Settings and you’ll see a list of your dummy monitor and real monitor. Select your real external monitor from the list.
- Click Use As and select Mirror Dummy For 16:9. You may notice your monitor flashes while it applies this change.
- Hold down the Option Key and click on Scaled under Resolutions and then try experimenting with the resolutions that appear such as 1952 x 1098, 1936 x 1089 or 1920 x 1080 to see which works best for you.
You should then see the dummy display mirrored to your display where you can then use the slider to change the resolution.
Note that you may find that BetterDisplay sometimes doesn’t work when you wake a Mac from sleeping. And unless you set it to launch it on startup, you’ll have to reconfigure it every time you use it.
Check our guide on how to use BetterDisplay with a Mac for more.
2. SwitchRes X
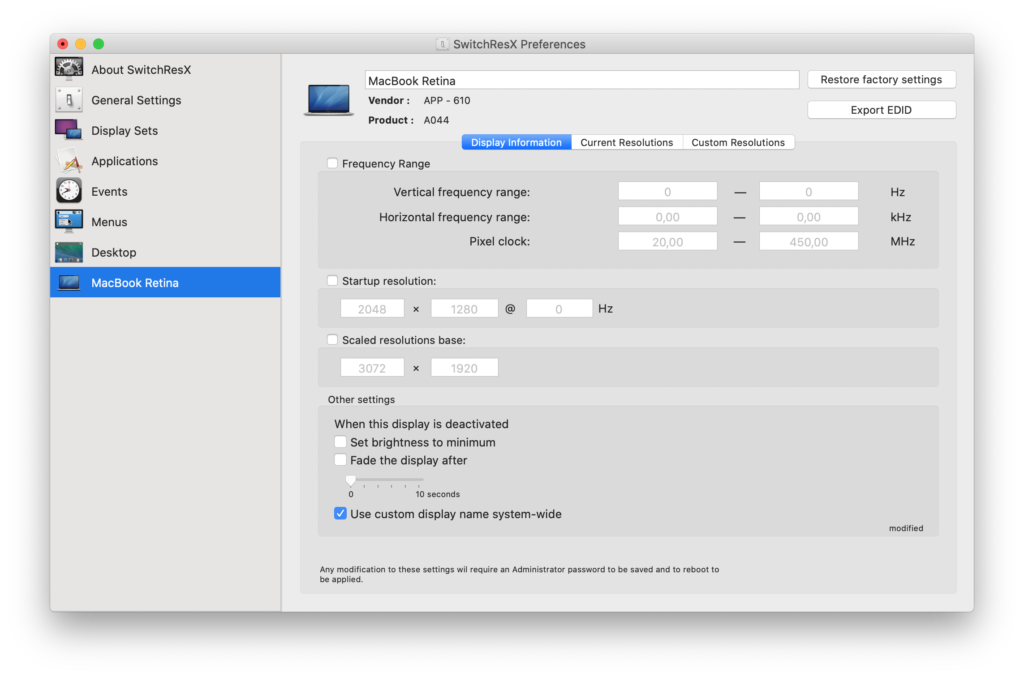
SwitchRes X gives you more control over the resolution your Mac uses with an external monitor.
SwitchRes X isn’t as effective as BetterDisplay but it has recently been updated to support Apple Silicon Macs.
At the moment, the app allows you to do the following:
- Set display rotation & display underscan
- Set the brightness of internal displays
- Set your display in gray levels
- Define custom scaled resolutions for external displays, though this is limited to resolutions smaller than native. You cannot create complete custom resolutions, only scaling is supported by Apple.
- Get information about the current timing that defines a resolution
- Export the EDID if the display does support it
SwitchRes X is worth installing if you haven’t been able to find a solution with BetterDisplay but be aware that it’s currently more effective with Intel Macs than Apple Silicon Macs.
3. RDM
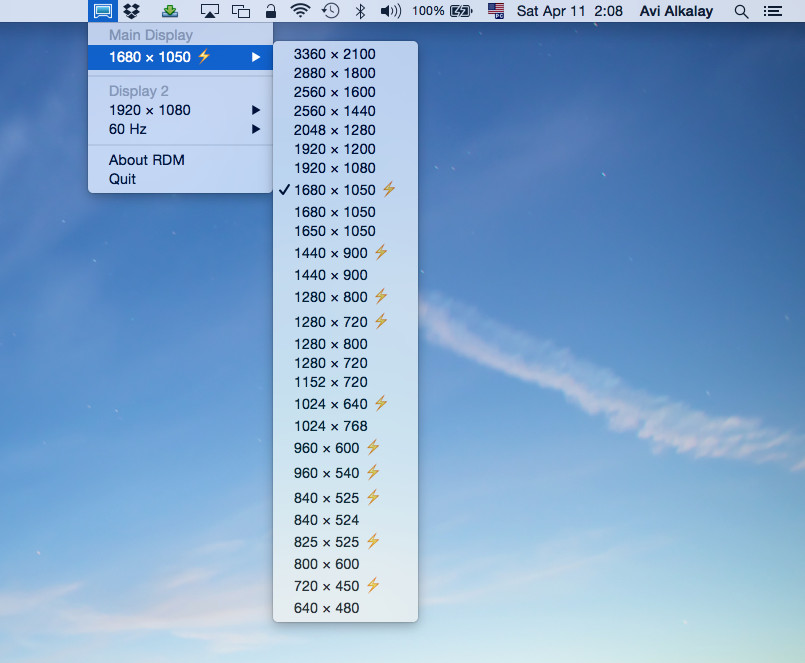
RDM is a similar solution to SwitchResX but is even simpler to use.
The app sits in your Menu Bar and allows you to instantly change the resolution of your Mac’s external display including on both Intel and Apple Silicon Macs.
RDM is particularly popular with MacBook Pro users as it lets you use the MacBook Pro Retina’s highest and unsupported resolutions on external displays.
For example, a Retina MacBook Pro 13″ can be set to 3360×2100 maximum resolution which is more than Apple’s maximum supported resolution of 1680×1050.
Those resolutions that are highlighted with a lightening strike mean that the resolution is HiDPI level or twice as dense in pixels.
If you want to use RDM daily, then you’ll need select the option “Open At Login” so that it works as soon as you boot your Mac.
4. Display Menu
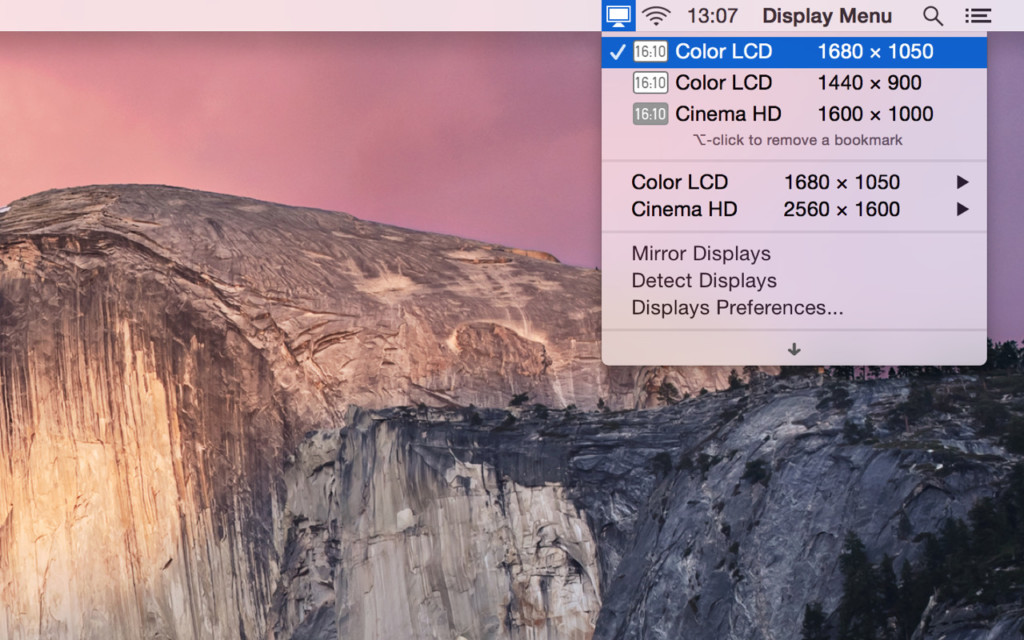
Display Menu is a handy tool which sits in your Menu Bar and allows you to change your external display settings with a single click.
Display Menu allows you to change the screen resolution, toggle mirroring and adjust the refresh rates including on 4K screens.
It also supports additional features like Retina resolutions, AppleScript and bookmarking of resolution settings if you pay to upgrade to Display Menu Pro for $1.99.
5. macOS Display Settings
Many of the apps we’ve looked at provide an easy way to change the resolution of the display or give you more control over it.
However, you can also change the resolution of the external display by simply changing the Display Settings in macOS.
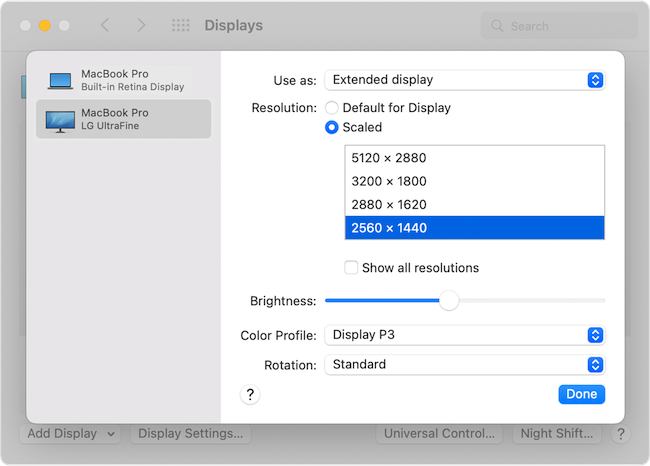
Go to the Apple logo in the top left of your screen and click on System Preferences > Displays to access the Display Resolution settings.
Usually, if Resolution is set to “Default for Display” the monitor will use the best resolution for use with your Mac.
However, if the text and images look blurry, too small or too large, you need to scale the resolution to a custom setting.
To change the resolution of your external display, select the Scaled button under Resolution and hold down the Option key to see all of the different resolutions available.

6. Reset External Display Settings
If none of the above works for you and all else fails, you should try resetting the external display settings of the monitor connected to your Mac.
When you reset the display setting, the display should return to the best default resolution setting and refresh rate setting for your Mac.
You can do this either by an Automatic Reset or Safe Mode Reset of your external display.
You can find full instructions how to reset external display settings on a Mac here.