If you’ve ever tried to create a bootable USB drive on a Mac, you’ve probably heard of Rufus – the popular Windows tool that makes it quick and easy to write ISO images to USB drives. Unfortunately, Rufus isn’t available for macOS, and it doesn’t run natively on Apple Silicon or Intel Macs.
The good news is that there are several excellent Rufus alternatives for Mac that do the same job – and in some cases, even more. Whether you want to install macOS, Windows, or Linux from a USB drive, or simply clone an operating system for recovery, these tools make it easy.
In this guide, we’ve tested and reviewed the best Rufus alternatives for Mac in 2025, including both free and professional options.
You’ll learn which one works best for your version of macOS, how they compare, and what to consider when choosing the right tool for your needs.
Table of Contents
- Can I Use Rufus On Mac?
- 1. balenaEtcher
- 2. UNetbootin
- 3. DiskMaker X
- 4. Ventoy
- 5. Raspberry Pi Imager
- 6. Install Disk Creator
- 7. WinDiskWriter
- 8. dd Command (Terminal)
- 9. Deepin Boot Maker
- 10. MiniTool Partition Wizard (via Parallels or Crossover)
- Why Create a Bootable USB Drive?
- How To Format a USB Drive on a Mac
- How To Choose An Alternative to Rufus for Mac
- FAQ
Can I Use Rufus On Mac?
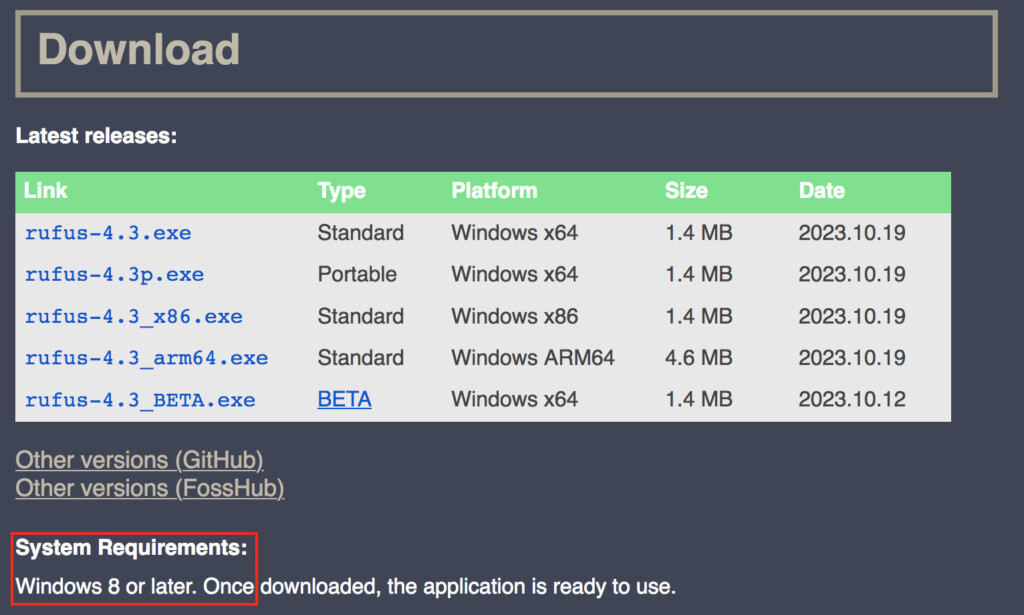
You cannot use Rufus on a Mac. Rufus only works on 32 bit 64 bit versions of Windows 8 and above only as you can see from the Rufus download page below.
The only way to use Rufus on a Mac is to install Windows on your Mac ideally using a virtual machine and then you can install Rufus in Windows, but we strongly recommend using one of the following tools instead.
| App | Best For |
|---|---|
| balenaEtcher | Users who want a simple, reliable, and modern tool for flashing ISO files to USB drives on macOS. |
| UNetbootin | Users who need a lightweight, cross-platform utility for creating bootable Linux USB drives. |
| DiskMaker X | macOS users who want an easy, native way to create bootable macOS installer drives. |
| Ventoy | Advanced users who want to boot multiple ISO files from a single USB drive. |
| Raspberry Pi Imager | Those creating bootable images for Raspberry Pi or other ARM-based systems. |
| Install Disk Creator | Mac users who want the simplest way to build a bootable macOS installer without using Terminal. |
| WinDiskWriter | Users who need precise Rufus-style control for Windows ISOs via virtualization software like Parallels. |
| dd Command | Power users comfortable with the Terminal who want a fast, native macOS method to create bootable USB drives. |
| Deepin Boot Maker | Mac users seeking an open-source, cross-platform bootable USB creator with a clean, minimal interface. |
| MiniTool Partition Wizard | Users managing partitions or creating bootable Windows USBs through virtualization tools like Parallels. |
1. balenaEtcher
Best For: Users who want a simple, reliable, and modern tool for flashing ISO files to USB drives on macOS.
balenaEtcher (also known simply as “Etcher”) works on all platforms including Mac and is very easy to use. Simply select an ISO image, USB stick and click on Flash. That’s all there is to it.
Etcher is very fast at flashing images and also includes Image Validation which verifies the system image and removable drive before flashing.
This prevents wasted time writing images on corrupt USB drives and isn’t something you usually find is boot utilities.
Etcher works on all versions of macOS 10.10 (Yosemite) or later including Tahoe.
For more, check out our full instructions how to create a bootable USB drive on a Mac with Etcher.
Pros:
- Free to use
- Image validation feature
- Very fast
- Also works with SD cards
- Works on the latest versions of macOS
Cons:
- Can’t choose between GBT and MBR partition styles
2. UNetbootin
Best For: Users who want a lightweight, cross-platform tool for creating bootable Linux USB drives.
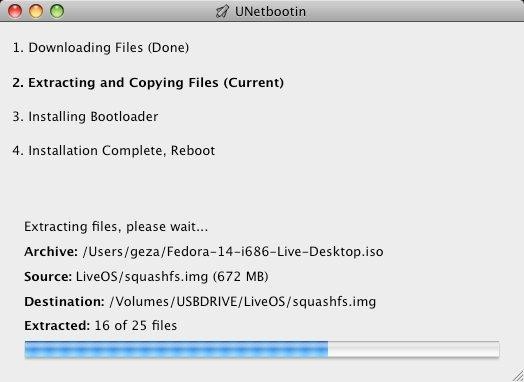
UNetbootin (Universal Netboot Installer) is a long-standing open-source utility that lets you create bootable live USB drives for a wide range of Linux distributions directly from macOS.
It doesn’t require burning a CD or DVD and supports downloading many Linux ISOs within the app.
Pros:
- Free and open source
- Cross-platform (macOS, Linux, Windows)
- Supports direct ISO downloads for popular Linux distros
Cons:
- Designed mainly for Linux distros
- No UEFI mode
- No SD card support
- Outdated interface
- Can occasionally fail with newer macOS versions
3. DiskMaker X
Best For: macOS users who want an easy, native way to create bootable macOS installer drives.
DiskMaker X (formerly Lion DiskMaker) is designed specifically for macOS and is one of the most popular USB boot tools on Mac.
Simply launch DiskMaker X and it will automatically find the installation file using Spotlight. It will also detect any USB drives plugged into your Mac and automatically flash the system image.
Unfortunately, due to changes in macOS Big Sur, DiskMaker X does not work on macOS Big Sur or later and the developer has no plans to upgrade it in the future.
However, for anyone looking for a Rufus alternative that works on all versions of macOS including Mojave and Catalina, DiskMaker X is all you need.
Pros:
- Designed specifically for macOS
- Automatically detects drives
Cons:
- Not compatible with Big Sur, Monterey, Ventura or Sonoma
These are by far your 3 best ways to create a bootable USB drive on a Mac.
4. Ventoy
Best For: Advanced users who need to boot multiple ISO files from a single USB drive.
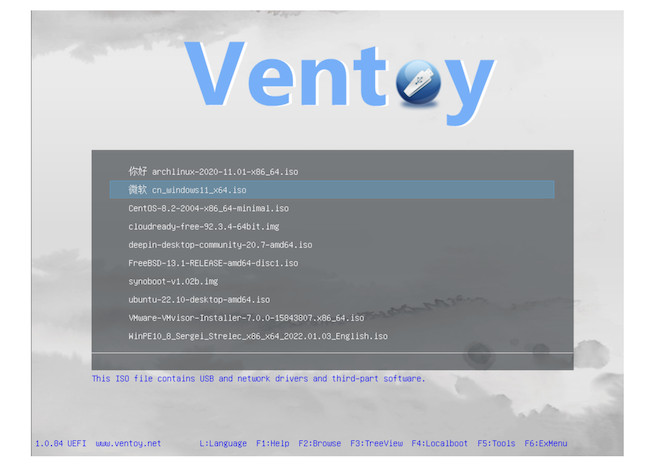
Ventoy is an innovative open-source project that changes how bootable drives work. Instead of flashing one image at a time, you can copy multiple ISO files to your USB drive, and Ventoy automatically lets you boot from any of them. It supports macOS, Linux, and Windows ISO images, making it a flexible alternative to Rufus.
Pros:
- Supports multiple ISOs on one drive
- Open source and frequently updated
- Compatible with macOS and Windows images
- Preserves USB data between writes
Cons:
- Slight learning curve for setup on macOS
- Some ISOs may require manual tweaks
5. Raspberry Pi Imager
Best For: Quickly creating bootable images for Raspberry Pi OS or other ARM-based systems.
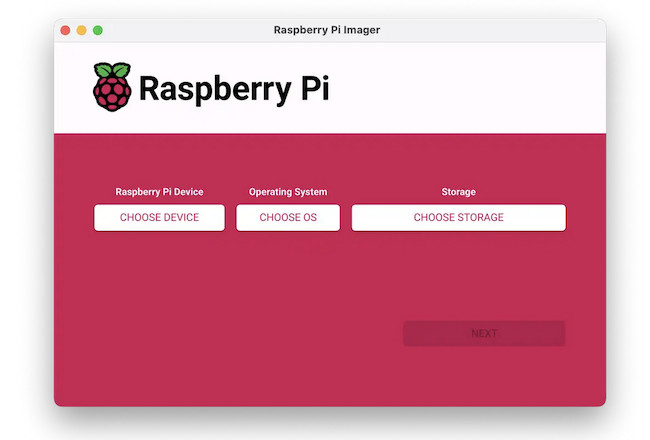
Developed by the Raspberry Pi Foundation, Raspberry Pi Imager is designed to make writing operating systems to SD cards and USB drives simple. Although it’s targeted at Raspberry Pi users, it’s also a handy Rufus alternative for writing any IMG or ISO file to removable media on a Mac.
Pros:
- Official, well-maintained tool
- Simple, clean interface
- Supports writing custom ISO/IMG files
- Works natively on macOS, Windows, and Linux
Cons:
- Limited to basic flashing features
- Primarily aimed at Raspberry Pi users
6. Install Disk Creator

Best For: macOS users who need to create a bootable macOS installer quickly.
Install Disk Creator is a small macOS app designed specifically for building bootable macOS installer drives. You simply select the macOS installer app from your Applications folder and the target USB drive. It’s perfect for those reinstalling or upgrading macOS without relying on Terminal commands.
Pros:
- Extremely easy to use
- Works reliably for macOS installers
- Free and lightweight
Cons:
- Only supports macOS installers (not Windows or Linux ISOs)
- Limited customization options
7. WinDiskWriter
Best For: Writing Windows images to USB drives using virtualization or CrossOver.
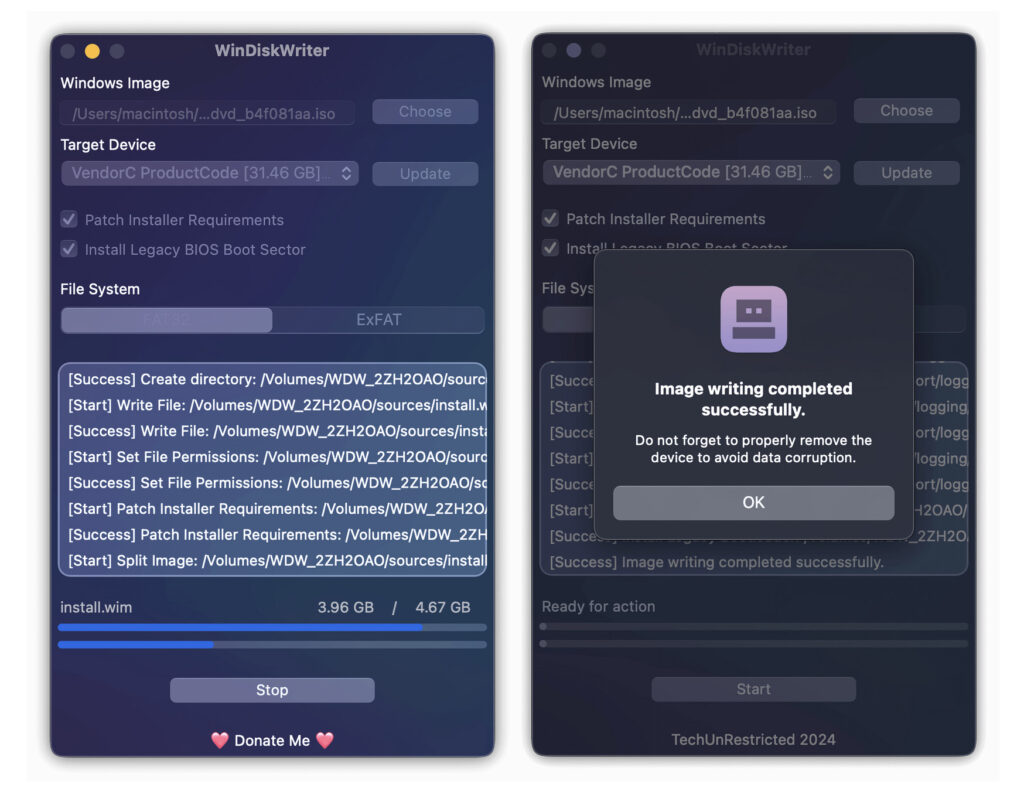
WinDiskWriter is a utility designed for Windows, but Mac users can run it through virtualization software such as Parallels or CrossOver. It’s useful if you need the same precise control as Rufus provides when preparing Windows installation media.
Pros:
- Replicates Rufus-like control for Windows ISOs
- Works through virtualization on macOS
- Reliable for BIOS and UEFI setups
Cons:
- Requires Parallels, CrossOver, or similar
- Not a native Mac app
8. dd Command (Terminal)
Best For: Advanced users comfortable with the command line who want full control.
The built-in dd command in macOS Terminal is a powerful native alternative for creating bootable USB drives. It’s the same Unix-level tool used under the hood by many GUI apps. While it requires precision and care, it’s fast and completely free.
Pros:
- Native to macOS (no downloads needed)
- Fast and reliable
- Works with any ISO or IMG file
Cons:
- No graphical interface
- Mistakes can overwrite your drive
- Requires Terminal proficiency
9. Deepin Boot Maker
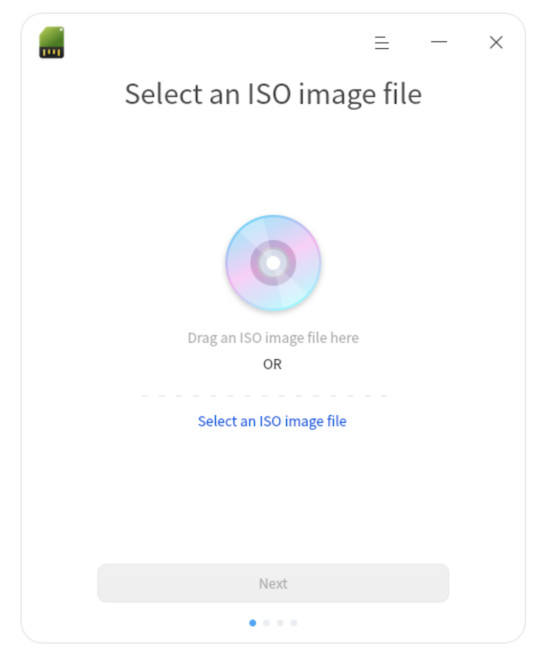
Best For: Mac users seeking a simple, clean interface tool that supports bootable USB creation for multiple OSes (including macOS) with cross-platform support.
Deepin Boot Maker is an open-source utility developed by the Deepin Technology Community that enables users to quickly create bootable USB drives from ISO images. Although it originates from the Deepin Linux ecosystem, it also provides downloads for macOS, making it a good alternative to Rufus on Mac.
Pros:
- Straightforward, user-friendly interface
- Cross-platform support (macOS version available) and open-source
- Lightweight: minimal extras, focused purely on boot-drive creation.
Cons:
- Not specifically macOS-centric: may lack APFS-specific handling
- Interface and documentation is less polished than other tools
- Fewer “extras” such as built-in ISO downloads, multiple ISO support
10. MiniTool Partition Wizard (via Parallels or Crossover)

Best For: Users managing partitions or creating bootable Windows USBs through virtualization.
MiniTool Partition Wizard is a powerful Windows partition manager that can also create bootable USB drives. While not natively available for macOS, it works seamlessly through Parallels or Crossover, making it a solid alternative for those who regularly handle multi-boot setups or system recovery drives.
Pros:
- Full partition management plus bootable USB creation
- Intuitive interface
- Works with Windows and Linux ISOs
Cons:
- Requires virtualization
- Paid version needed for advanced features
Why Create a Bootable USB Drive?
If you want to install Windows on your Mac or reinstall an older version of macOS, creating a bootable USB drive allows you to do so even if you don’t have the original installation disk.
Or if you have a Windows ISO file on your Mac and you want to create a Windows installer to install Windows for free on a Mac, you can mount it on a USB stick to install it on a Mac or any Windows PC.
To use any of these tools, you’ll of course need an external hard drive ideally an external SSD drive or thunderbolt drive.
You will also need to format the disk for a Mac before starting (see instructions below).
How To Format a USB Drive on a Mac
You’ll need to format your USB drive to use as a boot disk by using Disk Utility in macOS.
Disk Utility is a free tool in macOS which allows you to perform a number of diagnostic tests on your hard drive including creating a USB boot disk.
Just go to Applications > Utilities > Disk Utility to launch it and choose Erase and then select OS X Extended (Journaled) to format it (if you’re going to create a macOS boot disk).
You can find full instructions on how to format an external hard drive on a Mac here.
How To Choose An Alternative to Rufus for Mac
When choosing what to use instead of Rufus on your Mac, the right tool depends on what kind of bootable USB you want to create and how technical you are. Here are the main factors to consider:
1. What You Plan To Use It For
Start by deciding what you need the tool for:
- macOS installation: Use a native Mac tool like DiskMaker X or Install Disk Creator.
- Windows or Linux ISOs: Choose Etcher, UNetbootin, or Ventoy, which support a wide range of operating systems.
- Multiple operating systems: Go with Ventoy, which can boot from several ISOs on the same USB drive.
- Raspberry Pi or ARM-based OS: Raspberry Pi Imager is ideal for this.
2. Ease of Use
If you prefer a visual interface, apps like Etcher, DiskMaker X, and Deepin Boot Maker make the process point-and-click simple.
Power users comfortable with Terminal might prefer the dd command for full control.
3. macOS Compatibility
Ensure the app works with your version of macOS – especially if you’re using an Apple Silicon Mac running macOS Tahoe. Some older utilities still rely on Intel-only frameworks or require Rosetta 2.
4. Features and Flexibility
Look for features such as:
- Multi-ISO support (Ventoy)
- Built-in OS downloads (UNetbootin)
- Custom partition options (MiniTool Partition Wizard via Parallels)
- Support for UEFI and BIOS boot modes
5. Safety and Reliability
Always download from the developer’s official website and verify file integrity when possible. Some third-party mirrors may host outdated or modified installers.
FAQ
Can I run Rufus on a Mac?
No. Rufus is only available for Windows. However, you can run Rufus on a Mac using virtualization software such as Parallels Desktop, CrossOver, or Wine, or you can use a native macOS alternative instead.
What is the best Rufus alternative for Mac?
For most users, Etcher is the best Rufus alternative for macOS. It’s free, open source, and extremely easy to use. Power users might prefer Ventoy for its multi-ISO support or dd for command-line control.
Do Rufus alternatives work on Apple Silicon Macs?
Yes, most actively maintained tools like Etcher, Raspberry Pi Imager, and Install Disk Creator now work on Apple Silicon Macs. Always check the latest version or download a universal binary where available.
Which tool should I use to create a macOS installer USB?
Use DiskMaker X or Install Disk Creator. Both are designed specifically for macOS and let you create a bootable macOS installer without using Terminal commands.
Can I create a Windows bootable USB on a Mac?
Yes. Tools like Etcher, Ventoy, and WinDiskWriter (via virtualization) can create Windows bootable USBs on a Mac. Alternatively, Apple’s Boot Camp Assistant can create Windows installation drives on Intel Macs.
Is the Terminal dd command safe to use?
Yes, but with caution. The dd command is very powerful and doesn’t prompt before overwriting drives. Double-check your target disk before running the command to avoid data loss.
Are these Rufus alternatives free?
Most are completely free or open source. Some advanced utilities like MiniTool Partition Wizard may require a paid license for premium features such as partition recovery.
Do these tools work with macOS Tahoe or newer versions?
Yes – most modern Rufus replacements are compatible with the latest versions of macOS including Sonoma, Sequoia and Tahoe. Always use the latest app version for full compatibility.


