

Apple Freeform is a free whiteboard software in macOS that allows you to create diagrams and sketches on a Mac fuss-free.
In 2026, it’s a much better option than using Apple Pages to create flowcharts as Freeform is designed specifically for creating diagrams whereas Pages is mainly a word processing software.
Although there are also far better dedicated flowchart software for Macs available, the great thing about Freeform is that its free in macOS and easy to use.
Contents
1. Open Freeform
- Launch the Freeform app from your Applications folder or via Spotlight (
Cmd + Spaceand type “Freeform”). - Click New Board to create a blank canvas.
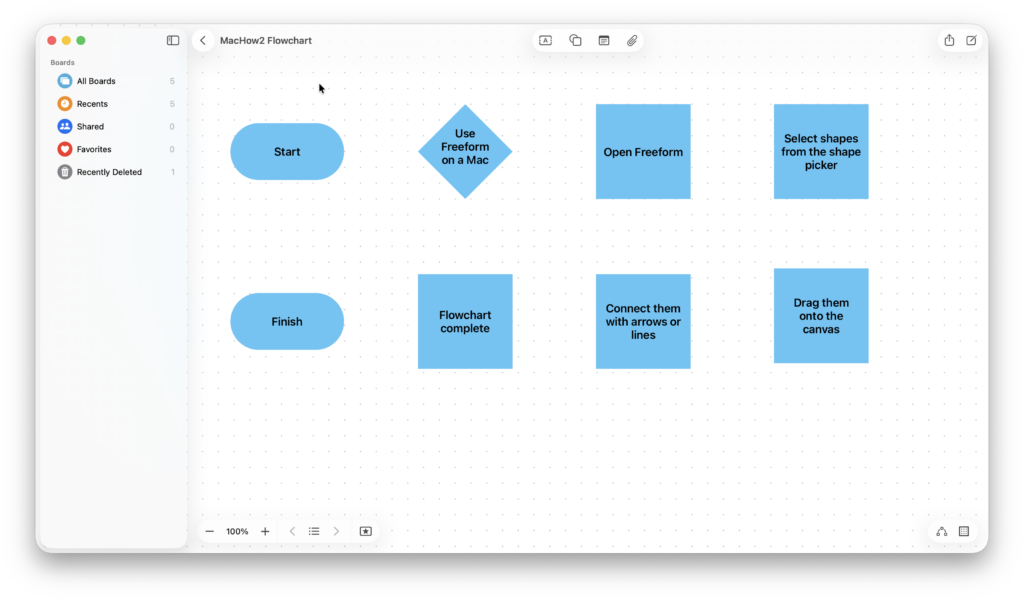
2. Add Shapes for Your Flowchart

Flowcharts use standard shapes like rectangles, diamonds, and ovals. In Freeform:
- Click the Shape Tool in the toolbar (a small rectangle or circle icon at the top of the interface).
- Choose the shape you want:
- Rectangle – typically used for process steps.
- Diamond – represents a decision point.
- Oval – usually the start or end point.
- Click or drag on the canvas to place the shape.
You can resize shapes by dragging the handles on their corners.

3. Add Text to Shapes
- Select the shape.
- Double-click inside the shape to type your text.
- Format text using the Text toolbar (font, size, alignment).
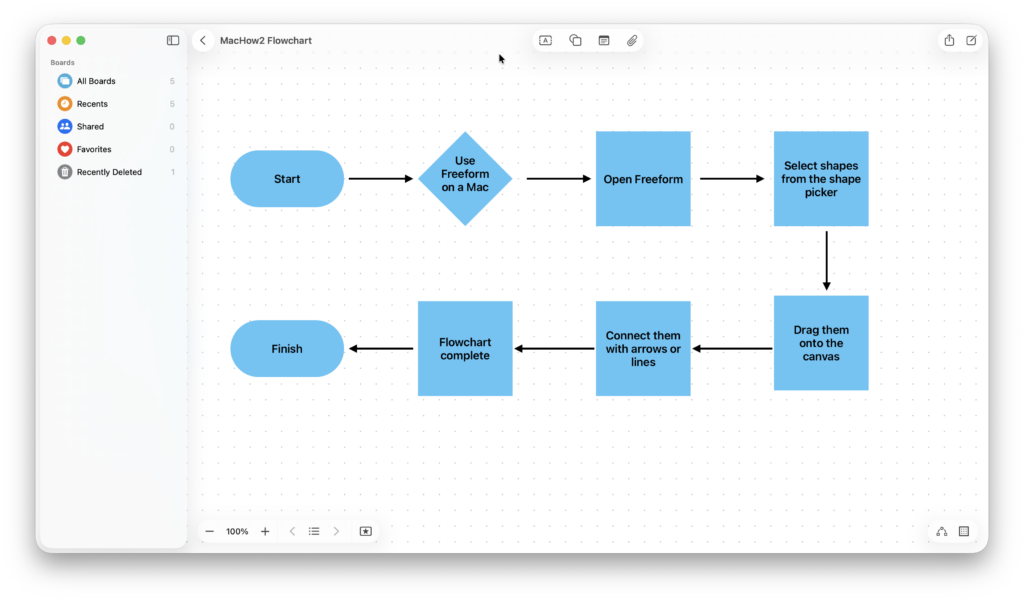
4. Connect Shapes with Arrows
Flowcharts need arrows to show the flow:
- Click the Line or Connector Tool which is in the same place as the shapes toolbar. You will need to make sure that “Basic”.
- Drag from the edge of one shape to the edge of another. Hold Shift while dragging to keep lines straight.
- Freeform will create an arrow linking the two shapes.
- Adjust the line style or add arrowheads via the Format panel if desired.
5. Arrange Your Flowchart
- Click and drag shapes to rearrange them.
- Use Align and Distribute options in the toolbar for neat spacing.
- Zoom in/out using
Cmd + +orCmd + -to see the whole flowchart.
6. Style Your Flowchart

Make it visually appealing:
- Colors: Change shape fill or border colors via the Format panel.
- Line styles: Make arrows dotted, thick, or colored to show importance.
- Grouping: Select multiple shapes and lines, then right-click and select Group to move them together.
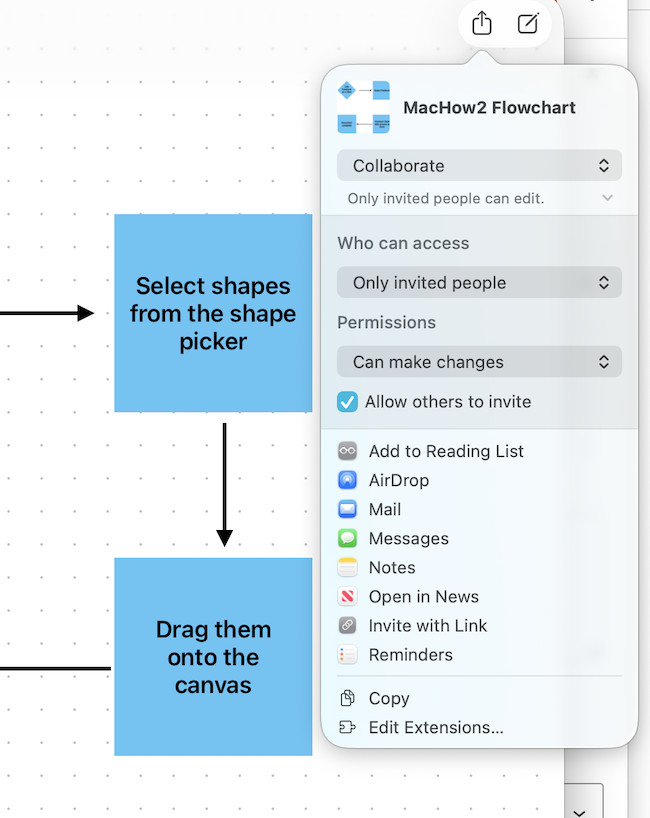
- Click File > Save to save your Freeform board.
- Export as PDF or image via File > Export > PDF/PNG to share with others. You can also click on the share symbol in the top right of the interface to share or invite others to collaborate on the flowchart. You can set editing permissions and limit sharing to other Freeform users on macOS and iOS.
Useful Keyboard Shortcuts
- Undo/Redo:
Cmd + Z/Cmd + Shift + Z. - Duplicate shapes: Select a shape →
Option + Drag. - Keyboard shortcuts: Use arrow keys to nudge shapes for precise placement.
That’s it! You now have a clean, professional flowchart in Apple Freeform on your Mac – and it didn’t cost a cent.
Sticky Notes & Adding Files
Freeform isn’t very advanced beyond this but you can add sticky notes to flowcharts by clicking on the sticky note tool at the top of the board.

You can also click on the paperclip at the top of the Freeform interface to add media to your diagrams including photos and videos, links and other files.
If you’re using Freeform on iPhone, you can also take photos, scan documents and add sketches instantly into your diagrams.

For diagramming tools that support more advanced collaboration, templates and offer far more features, check out our guide to the best flowchart software for Mac.