Using your iPad as a drawing tablet with your Mac is useful if you want to extend the screen estate of your drawing canvas.
It also allows you to use an Apple Pencil to touch up and edit images using graphic design software.
It even enables you to use iPad only drawing apps such as Procreate on a Mac.
Although there are better drawing tablets for drawing and sketching on a Mac, there is an increasingly strong argument for choosing an iPad vs drawing tablets, not least their impeccable Mac compatibility.
To use your iPad as a drawing tablet you firstly need to do the following:
- Make sure you’ve connected an Apple Pencil to your iPad. Although many apps will allow you to draw with your finger, it’s obviously not suitable for sketching or drawing properly. The iPad does not come with an Apple Pencil so you have to purchase one separately. There are currently three Apple Pencil’s available – the first, second and generation models, the Apple Pencil with USB-C and the Pencil Pro.
- Download a drawing app on your iPad. The best drawing app for iPads is Procreate but you can use any of these excellent alternatives to Procreate some of which are free and have both an iPad and macOS app.
If you have these, then to connect your iPad to a Mac, you have three options to choose from.
| Method | Pros | Cons |
|---|---|---|
| AirPlay | Wireless, easy setup | Potential lag, less suitable for detailed artwork |
| Sidecar | Wireless, seamless, uses macOS and iPadOS features | Limited to certain devices, requires being on the same Apple ID on both devices |
| HDMI with Thunderbolt Adapter | No lag, high-quality display | Requires additional cables/adapters |
Table of Contents
1. AirPlay
AirPlay is the easiest method as it transmits your iPad screen wirelessly to your Mac in seconds.
- Pros: Wireless, easy to set up.
- Cons: Some lag may occur, not ideal for intricate drawing.
Here’s how to connect your iPad to a Mac using AirPlay
- Make sure your Mac and iPad are compatible with AirPlay. Both devices should be on the same Wi-Fi network.
- On your iPad, access the Control Center and select the Screen Mirroring icon.
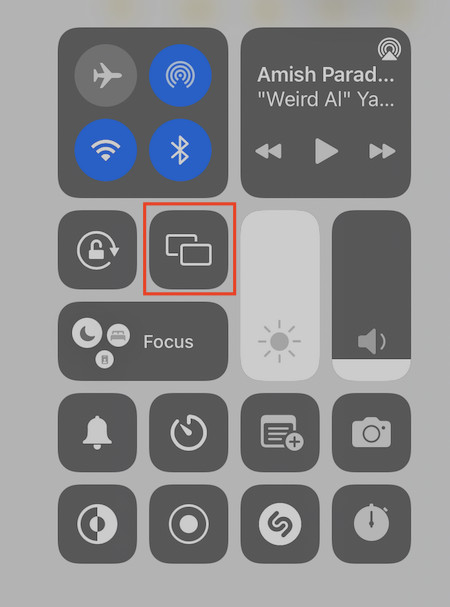
- A prompt will appear on your Mac asking for permission to connect. Accept the connection.
- Once connected, you’ll see your iPad screen mirrored to your Mac. Open your desired drawing app (e.g. Procreate or Clip Studio Paint) to see it on your Mac.
- You can then use your iPad to draw on, and see the exactly what you’re doing on your MacBook’s screen.
2. Sidecar in macOS
Sidecar is a feature in macOS Catalina or higher and iOS 13 or above that allows you to use your iPad as a second display for your Mac.
Unlike AirPlay which only allows you to mirror a screen, Sidecar also allows you you to drag applications between the two devices.
- Pros: Wireless, seamless integration, no extra hardware.
- Cons: Limited to newer Macs and iPads; requires being on the same Apple ID
To connect an iPad to a Mac using Sidecar, follow these instructions.
- Make sure both your Mac (macOS Catalina or later) and iPad (iPadOS 13 or later) are compatible and on the same Apple ID.
- On your Mac, go to the Control Center (top-right corner) and click Display.
- Select your iPad from the list under Connect To.
- Your iPad will now act as a secondary display. Open your drawing app on the iPad, and it will appear on your Mac.
- You can also click on on the green “Enter Full Screen” button on the application on your Mac and select “Move to iPad Pro”.
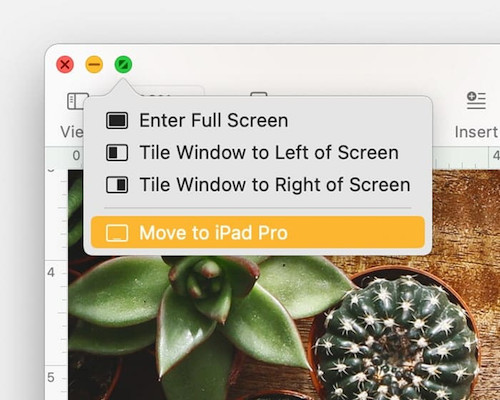
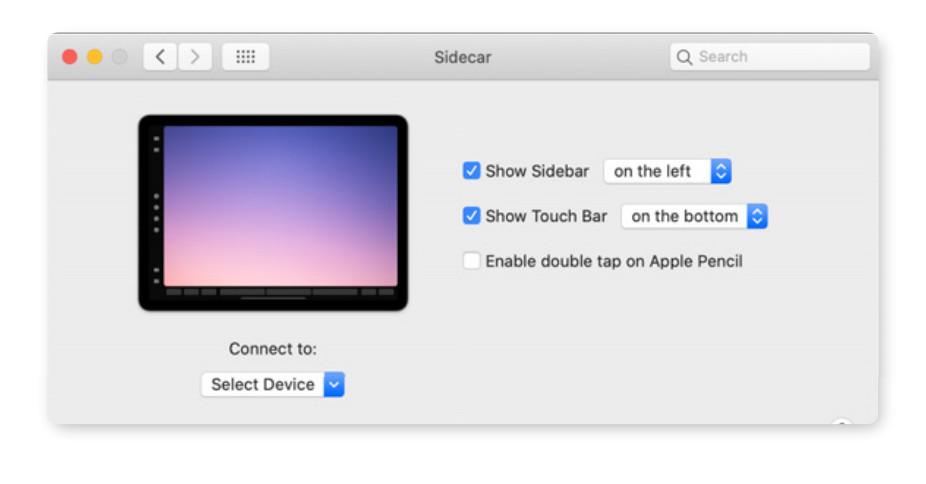
You can also configure how you want to use Sidecar in the preferences.
You can also use the Apple Pencil as a mouse to navigate and click around applications on your Mac as long as you check the box “Enable double tap” in the Sidecar preferences.
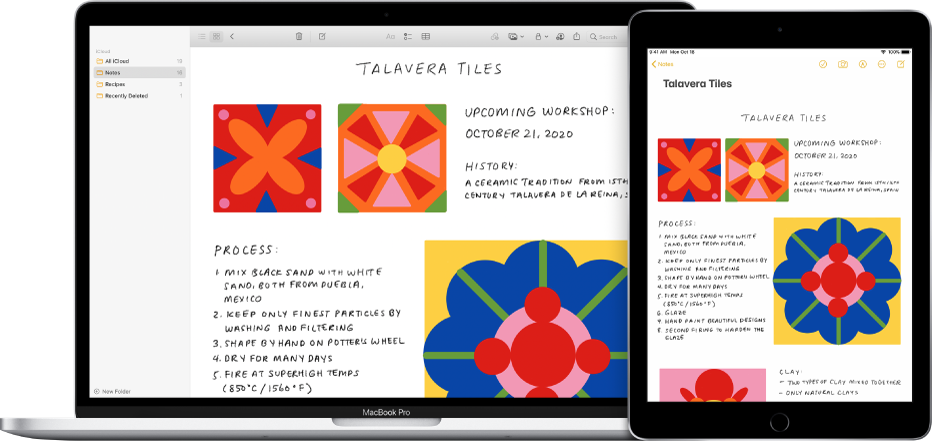
You can see a good example of Adobe Photoshop for iPad being used on a Mac with Side car below.
3. HDMI Cable with Thunderbolt Adapter
This requires purchasing both an HDMI cable and a Thunderbolt adapter to connect your iPad and Mac.
- Pros: No lag, high-quality display including on larger screens.
- Cons: Requires a wired connection and external adapters.
Here’s how to use a drawing app on an iPad with your Mac using a wired connection.
- Make sure you have both a Thunderbolt-to-HDMI adapter and an HDMI cable.
- Plug the Thunderbolt adapter into your Mac.
- Connect the HDMI cable to the adapter and the other end to your iPad.
- On your Mac, go to System Preferences > Displays.
- Select your iPad to mirror or extend the display.
- Open the drawing app on your iPad. Your iPad screen will appear on your Mac’s display.
Inserting An iPad Sketch Into A Mac Application
If you want to sketch within an application on your Mac, you can easily do so thanks to Continuity Sketch.
Continuity Sketch allows you to instantly insert sketches from an iPad into a document, email, note or folder in supported apps.
To use Continuity Sketch between your Mac and iPad follow these instructions:
- Make sure you are signed into the Mac and iPad with the same Apple ID. Continuity Sketch requires access to iCloud in order to work but both devices must be on the same Apple ID.
- In the document you want to insert a sketch on your Mac, go to File > Insert From iPhone or iPad on your Mac.
- On your iPad, you can then draw the sketch in the document or application you’ve chosen on your Mac.
- Tap Done when ready and the sketch will appear where you’ve positioned the cursor on your Mac thanks to Continuity Sketch.


