If you’re disappointed with the video quality of your webcam or iSight camera, did you know you can use your digital camera as a webcam?
Digital cameras provide much higher quality video than any webcam and it’s easy to connect a mirrorless, SLR, DSLR or GoPro camera to your Mac or PC.
You can even also use a camcorder as a webcam and the procedure to set it up is exactly the same as for a digital camera.
Using a digital cam or video camera as a webcam provides a much higher resolution video chat experience with software such as GoToMeeting, Zoom, Google Meet (formerly Google Hangouts), Microsoft Teams, Slack, Skype, Discord, or FaceTime.
It also allows you to do live streaming from your Mac if you want to setup your own broadcasting channel on YouTube.
In 2025, video quality has become more important than ever for virtual meetings, livestreaming, remote work, and content creation.
Built-in webcams on most Macs and PCs still fall short when it comes to sharpness, low-light performance, and depth of field.
That’s why many users are now turning their DSLR, mirrorless, or action cameras into high-end webcams for a more professional look.
You May Also Like:
- 10 Best Digital Cameras For Mac
- The Best Camcorders For Mac
- The Best Live Streaming Software For Mac
Table of Contents
- Which Digital Cameras Can Be Used a Webcam?
- What You’ll Need to Use a Camera as a Webcam
- 1. Use Your Camera Driver Software (Free & Easiest)
- 2. Use Other Digital Camera Webcam Software
- 3. Use an HDMI-to-USB Adapter (Best Quality)
- How to Use an iPhone or Android Phone as a Webcam
- Using iPhone as a Webcam with Continuity Camera (Mac only)
- Using iPhone or Android on Mac & Windows with Third-Party Apps
Which Digital Cameras Can Be Used a Webcam?
Most recent digital cameras from Canon, Sony, Nikon, Panasonic, Fujifilm, Olympus, and GoPro can now be used as webcams.
Thanks to improved firmware and manufacturer support, many models connect directly to a Mac or PC using just a USB cable or via HDMI with a capture card.
Some compact point-and-shoot cameras are already bundled with software that allow you to use them as webcams.
However, point-and-shoot cameras don’t usually provide much better image quality than a webcam.
Mirrorless or DSLR cameras offer much higher resolution images as they have a clean HDMI output so there’s no overlays on the screen.
What You’ll Need to Use a Camera as a Webcam
Before getting started, there’s a few things you’ll need in order to use your digital camera as a webcam.
Tripod
Apart from a camera that supports webcam use, you’ll also need a tripod.
You can of course try balancing the camera on something but we don’t advise it for many reasons not least, you could break your camera if it falls.
Digital camera tripods are inexpensive nowadays and make it much easier to adjust the camera to give you the perfect angle for video conferencing.
USB Charging Cable or Dummy Battery
The other thing you’ll need is a way to make sure your digital camera doesn’t run out of power during video calls.
For most users, this simply means connecting your camera to your computer via the USB or Thunderbolt cable that came with your camera which will automatically charge the battery.
However, in some cases you’ll need a “dummy battery” which sits inside the battery compartment but can be used to plug into the mains and power your camera.
Exactly which dummy charger you’ll need depends on the make of camera you have such as this one for Canons.
Microphone
Depending on your computer, you may also want to consider a microphone for the best video chatting experience.
If you have a Mac, you probably don’t need one as the internal microphone in most Macs is pretty good.
However, if you’re using a PC, the internal mics are often very poor and an external microphone is a modest investment that significantly enhances sound quality for the people at the end of your video conversations.
Lens
This is also optional but will give you more flattering results. If your camera came by default with lenses, they will probably be fine but we recommend using an 18-24mm zoom lens.
You’ll get the most flattering results if your camera supports manual focus (which most modern DSLRs do).
If you need to purchase lenses, the type you’ll need depends on the brand of camera you’re using.
Camcorders or point-and shoot camera don’t need a lens and are good to go.
External Lights
This again is optional but if you’re working in a confined space with bad natural light, spending just a few dollars on an external light source will make a huge difference to the quality of your video.
With these things in mind, here then are 3 ways to turn your digital camera into a webcam.
1. Use Your Camera Driver Software (Free & Easiest)
If you’re lucky, your camera drivers or firmware might already support webcam mode.
The best way to check this quickly is to google the name of your camera and then add “webcam” to see if it is supported.
Some manufacturers like Canon have just released updated drivers to use Canon EOS and Powershot cameras as a webcam.
However, at the time of writing it doesn’t support all video conferencing software such as Facetime and it only works with the web versions of apps like Skype and Zoom.
You can find Canon drivers here and Nikon drivers here.
Fujifilm has also released the Fujifilm X webcam software which turns all mirrorless Fujifilm X models into a webcam on Mac and PC.
If you’re not sure whether the drivers are installed for your camera, you need to check the manufacturer website.
2. Use Other Digital Camera Webcam Software
Unfortunately, there aren’t many applications that specialize in turning your digital camera into a webcam but if you’re camera’s default drivers don’t, it’s the next best thing.
Almost all software that allows you to connect your digital camera as a webcam nowadays are live streaming apps and we recommend checking out our guide to the best live streaming software for some options.
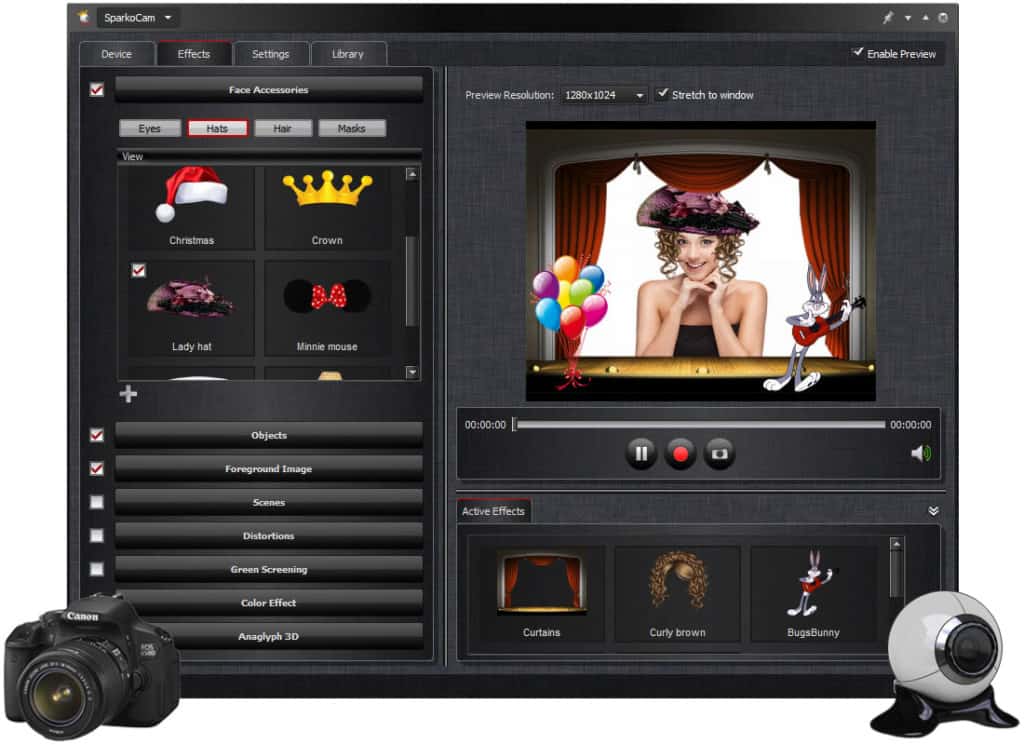
Windows users can use Sparkocam but it only works with Canon and Nikon cameras and it’s not available for Mac. It doesn’t come cheap either at $70 for both Canon and Nikon camera support.

One of the best software to connect a digital camera as a webcam to Macs is Ecamm Live which is an all-in-one livestreaming solution for macOS and works with all major brands of digital cameras.

Although there’s a free trial, it does cost $12 per month after that though.
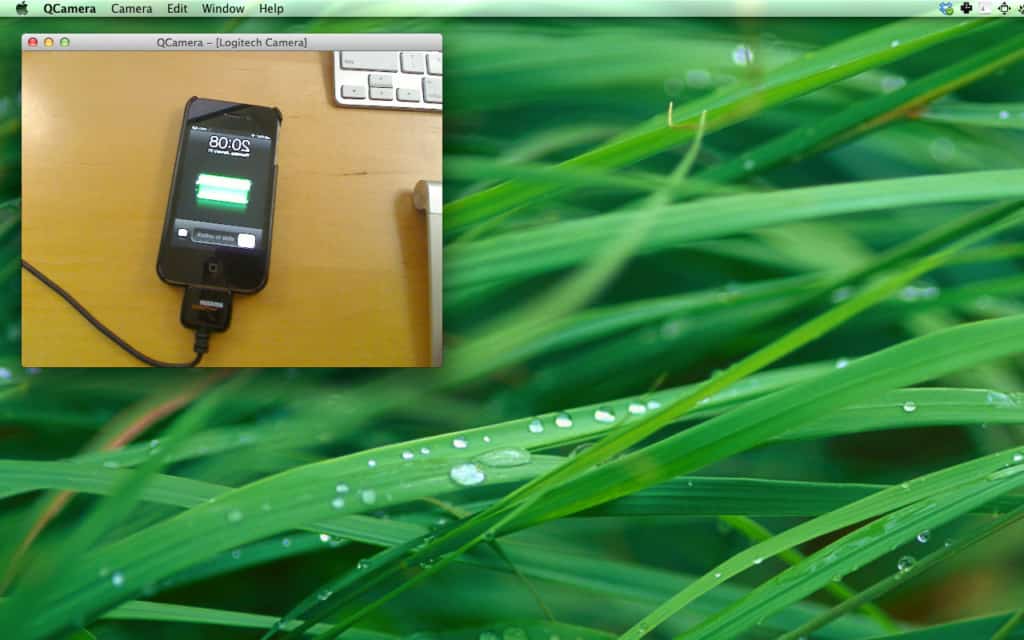
Mac users can also use the far simpler Quick Camera which turns any USB connected device into a webcam although it’s very basic and aimed more at phone camera than DSLRs.

3. Use an HDMI-to-USB Adapter (Best Quality)
If you want the highest quality images, this is the best way to connect a digital camera to your Mac or PC but it does require a few other bits of hardware.
HDMI capture involves taking raw, uncompressed video from your camera and converts it into a webcam feed.
This provides the highest possible quality images that go way beyond what a webcam can do.
It also means you’ll be able to use your Mac or PC for high quality video streaming and broadcasting if you want to setup a YouTube or Twitch channel as you can stream in 4K at 30fps.
However, crucially you’ll need to make sure that your camera has an HDMI or mini-HDMI out port.

If you’re not sure about this, google the model number of your camera with “HDMI out”.
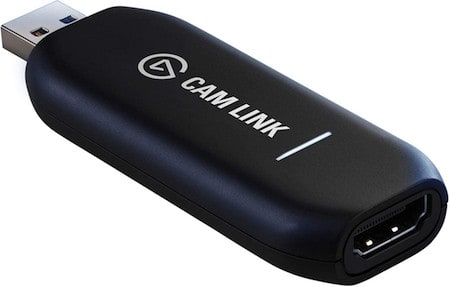
You also need a video capture card (also known as a “dongle”) to capture the video on your Mac or PC.
This connects your Mac or PC to the camera and allows you to use it as a high quality webcam with any application.
There are various video capture cards on the market, the most popular being the Elgato Cam Link 4K although you must check whether your camera is supported first.

There are also much cheaper video capture cards such as those by DIGITNOW and MavisLink but these cheaper brands often don’t update drivers quickly for new versions of macOS or Windows and support can be poor.
Finally, you’ll also need a micro HDMI to HDMI cable as you’ll find that most capture cards don’t come with one included.
Mac users will need an Apple Lightening to Digital AV Adapter.
Once connected, you’re done. Any application such as Google Meet, Zoom or Microsoft Teams will automatically recognize the camera as a webcam which will appear as a source option.
If you want to go one step further and start adding effects or tweaking video, you’ll need video streaming software to do among which there are a few free options too.
How to Use an iPhone or Android Phone as a Webcam
If you don’t own a DSLR or mirrorless camera, your smartphone can still deliver excellent video quality—often better than your Mac’s built-in webcam.
Both iPhones and Android phones can be used as webcams with the help of macOS features or third-party apps, making this an easy and affordable upgrade for Zoom calls, livestreaming, and recording content.
Using iPhone as a Webcam with Continuity Camera (Mac only)
macOS Ventura and later include Continuity Camera, which lets you use your iPhone wirelessly as a webcam—no cables or apps required.
Here’s how to use it:
-
Make sure your iPhone and Mac are signed into the same Apple ID with Bluetooth and Wi-Fi turned on.
-
Position your iPhone near your Mac using a stand or mount (ideally with the rear camera facing you).
-
Open Zoom, FaceTime, QuickTime, or another camera app. Your Mac will automatically detect your iPhone as a webcam.
-
In your video app’s settings, choose your iPhone from the list of available cameras.
You’ll also get access to features like Portrait Mode, Studio Light, and Desk View directly in supported apps.
Using iPhone or Android on Mac & Windows with Third-Party Apps
If you’re using an older macOS version or want more control, third-party apps can turn your iPhone or Android device into a webcam on both Mac and PC.
🔧 Recommended Apps:
-
Reincubate Camo (iPhone & Android)
Offers professional-grade controls including zoom, lens switching, color correction, and resolution up to 4K.-
Connect via USB or Wi-Fi
-
Free version available; Pro unlocks full features
-
-
DroidCam (Android & iPhone)
Lightweight and easy to set up, ideal for quick video calls or meetings.-
Supports 720p and 1080p depending on your device
-
Available for both macOS and Windows
-
How to get started:
-
Download the desktop app (Camo Studio or DroidCam) to your Mac or PC.
-
Install the mobile app on your phone.
-
Connect your phone using USB or Wi-Fi, and follow the in-app instructions.
-
Select the app (e.g. Camo or DroidCam) as your webcam source in Zoom, Google Meet, OBS, or other software.
Why Use a Smartphone as a Webcam?
-
Delivers higher resolution and better low-light performance than most built-in webcams
-
Avoids the need to buy a separate camera
-
Ideal for hybrid workers, students, streamers, and content creators
-
Works on both Mac and PC, depending on the method you choose
If you’ve got any questions or problems connecting your digital camera, iPhone or Android to a Mac or PC to use as a webcam, let us know in the comments below.


