
If you want to remotely access, control or share the screen of another Mac, macOS has a built-in Screen Sharing feature that makes it incredibly easy.
This is especially useful for:
- Accessing another Mac remotely
- Helping friends or family troubleshoot problems
- Controlling a headless Mac mini
- Managing multiple Macs from one desk
- Sharing your screen between an Intel Mac and an Apple Silicon Mac
Important Note: The easiest way to use macOS Screen Sharing is when both Macs are on the same local network at home or in the office. While it is technically possible to use Screen Sharing remotely over the internet, it usually requires additional network configuration or a VPN connection. For most users, using dedicated remote desktop software is a much simpler solution for accessing a Mac in another location.
In our video tutorial below, we show how it works accessing and controlling an Intel Mac from an Apple Silicon Mac but the method works whether you are accessing Intel to Intel or Apple Silicon to Apple Silicon.
The only difference is that Apple Silicon Macs running macOS Sonoma or later also support a newer High Performance screen sharing mode with better quality and lower latency.
Contents
Step 1: Enable Screen Sharing On The Mac You Want To Access
On the Mac you want to control remotely:
- Click the Apple logo in the top-left corner
- Go to System Settings
- Select General
- Click Sharing
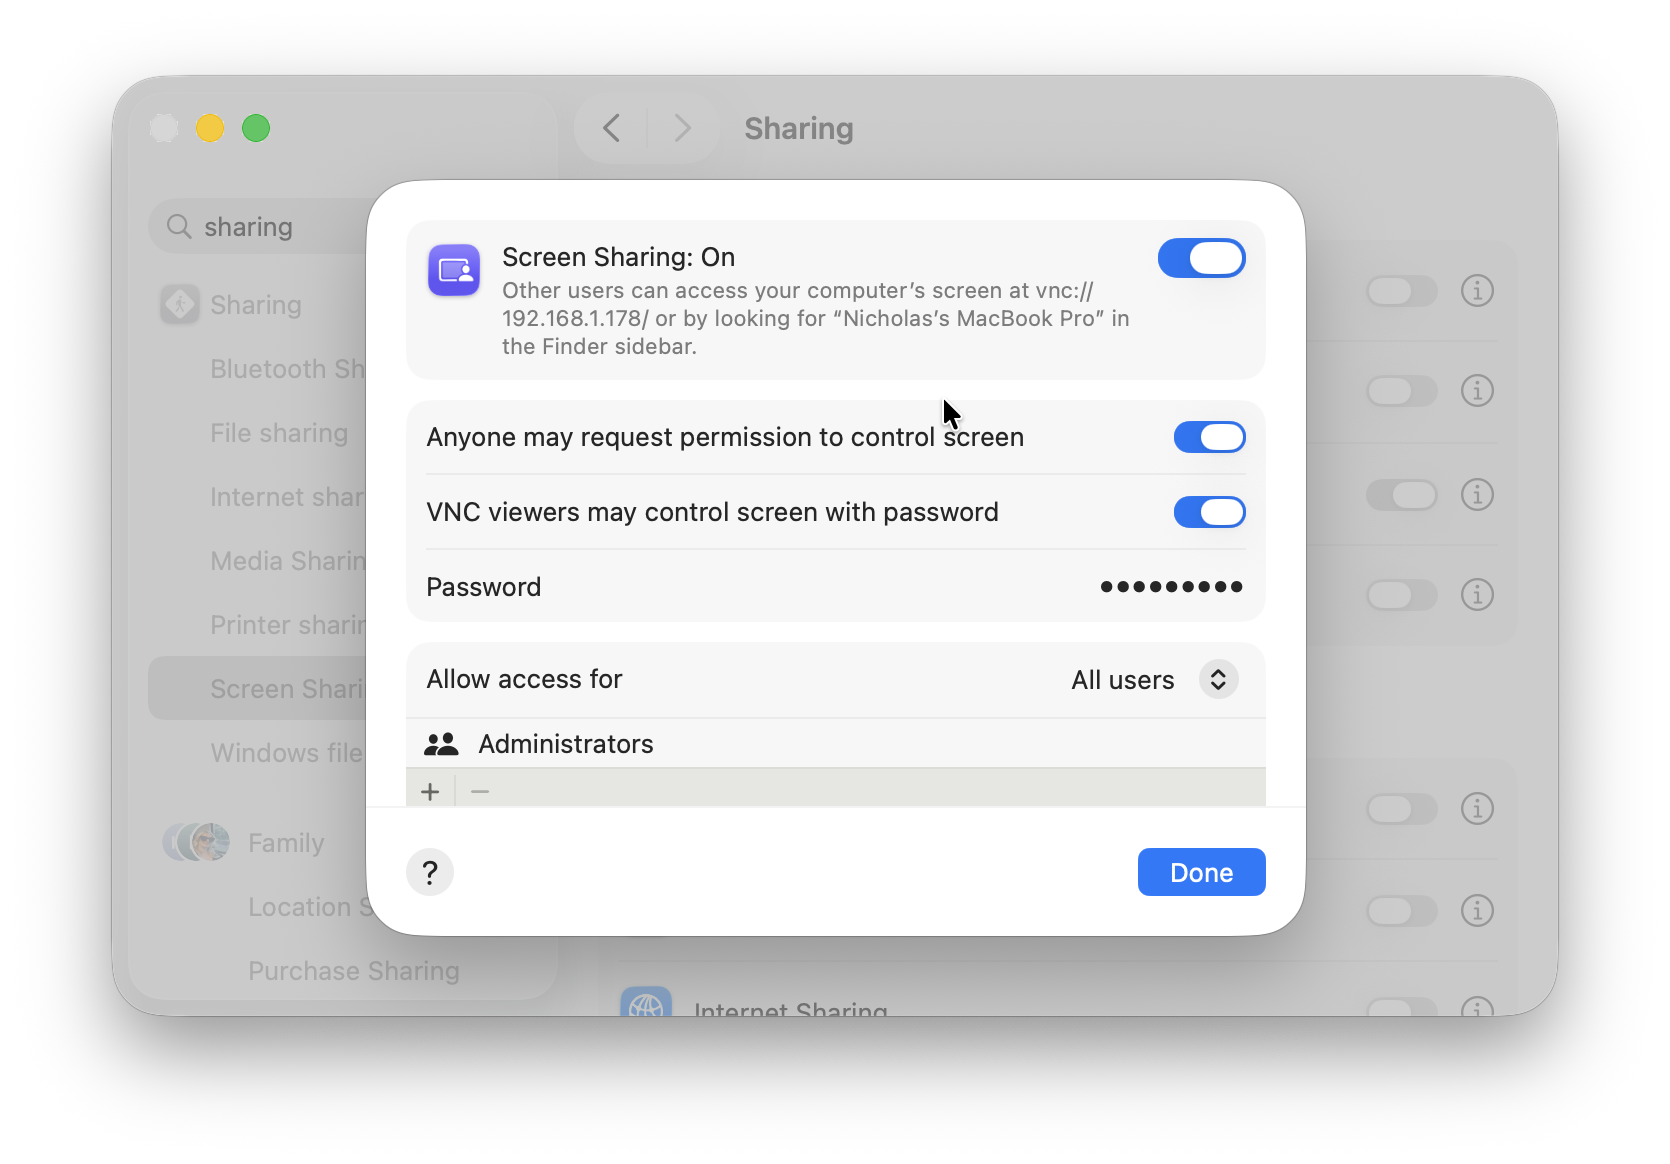
- Turn on Screen Sharing
- Turn on “Anyone may request permission to control screen” (optional but recommended for easy local access).
- Turn on “VNC viewers may control screen with password”
- Create a password
- Change Allow access for to All users. You restrict this to specific users if you prefer but whichever option you use, you can be assured that no one can access or control the target Mac without user accepting any requests to access it. However, users with authorized account credentials or the VNC password may be able to connect directly depending on your sharing settings.
- Click “Done”
Your Mac is now ready to accept requests to access it.
Note that once you’re finished screen sharing and you no longer need remote access, it’s good practice to disable Screen Sharing afterwards, especially on shared or portable Macs.
Step 2: Connect From Another Mac
On the Mac you want to use to control the other Mac, the easiest thing to do is:
- Search for “Screen Sharing” in Spotlight
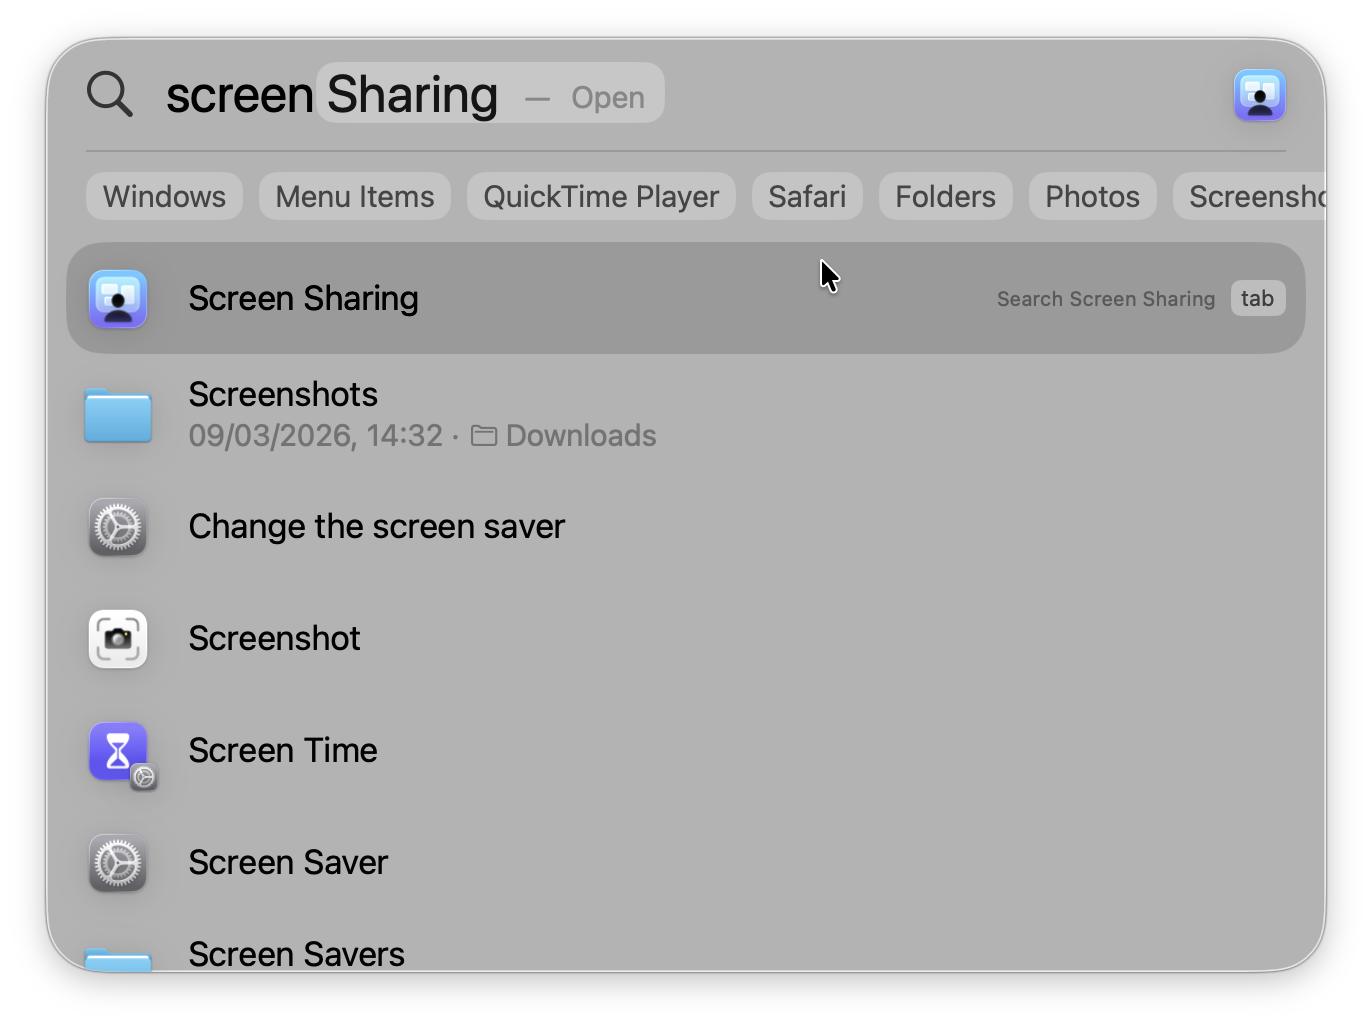
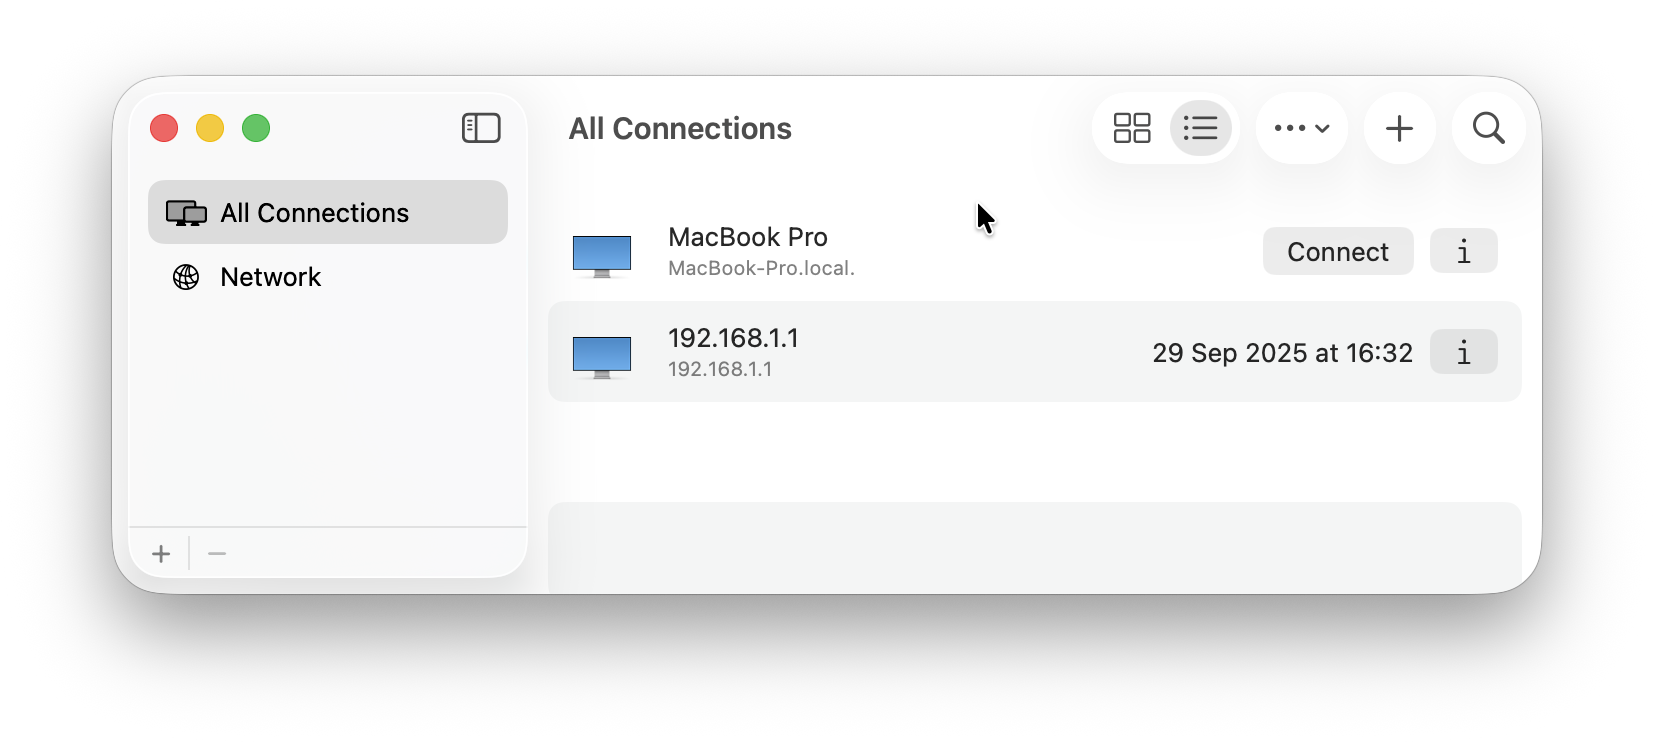
- The Mac you want to connect to should appear in the Connections list. Click on “Connect”. If it doesn’t appear, you can manually click the “+” symbol and enter the hostname or local IP address of the Mac.
When prompted on the method, select “By Requesting Permission” and click “Sign-in”.
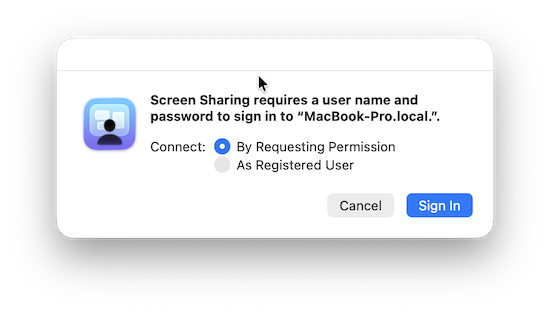
A message will then appear on the target Mac saying: “A guest user connecting from address 192.168.1.xxx is requesting permission to share your screen”. The user must click “Share Screen” to accept this.
And that’s it! After a few seconds the target Mac’s screen will appear in your desktop.
There is actually very little lag accessing and controlling a Mac locally this way, even when I connected to an Intel Mac. If you connect to an Apple Silicon Mac, the image quality and responsiveness is even better.
If you want to do this from a device other than a Mac, check out our guide on how to access and control a Mac from any device.
If you want to access and control a Mac that’s in another country, location or network check out our guide to the remote desktop software for Macs.
What If The Mac Doesn’t Appear?
If the target Mac does not appear in Screen Sharing:
- Make sure both Macs are connected to the same network
- Ensure Screen Sharing is enabled
- Disable VPNs temporarily
- Try restarting both Macs
- Make sure the target Mac is awake and not sleeping