
If you’ve recently connected an external monitor to your Mac and noticed blurry text, tiny icons, or fuzzy images, you’re not alone.
Even high-resolution monitors, including 4K monitors and 5K displays, can sometimes appear less sharp on macOS. Fortunately, there are multiple ways to fix these issues and get crisp, Retina-like clarity on your external screen.
Contents
- Common Issues With External Monitors on Macs
- Why External Displays Look Blurry With a Mac
- How to Fix Mac External Display Resolution Issues
- 1. BetterDisplay (Free)
- 2. SwitchRes X
- 3. RDM
- 4. Display Menu
- 5. macOS Display Settings
- 6. External Resolution Not Listed
- 7. Check Your Cable and Port
- 8. Use Accessibility Zoom or Display Scaling
- 9. Update macOS and Monitor Firmware
- 10. Reset External Display Settings
- FAQ
Common Issues With External Monitors on Macs
Mac users often encounter the following problems when connecting external displays:
- Text and icons appearing too small, blurry, or fuzzy
- Web pages and apps looking pixelated
- Flickering, color issues, or inconsistent brightness
- Lag when moving windows or dragging items
- Problems especially pronounced on ultra-wide or QHD monitors (e.g., 1440p)
- The resolution of the external display appears not to be listed
Even modern monitors with high resolutions can appear blurry because most external screens cannot replicate the Retina HiDPI experience of MacBook displays, which have extremely high pixel densities (typically 218 PPI or higher).
Why External Displays Look Blurry With a Mac
Macs are designed to use HiDPI scaling for sharp text and images. HiDPI doubles pixels so that everything looks crisp, but most external monitors – except Apple’s own displays – don’t support this natively.
- Apple Displays: The Apple Studio Display and Apple Pro Display XDR support true HiDPI scaling at 5K and 6K resolutions, respectively.
- Non-Apple Displays: Only a few serious alternatives to the Studio Display, like the BenQ PD370U and 27-inch LG UltraFine, match Apple’s pixel density. Other monitors, including some 4K and 5K panels, will often appear blurry, especially at non-native resolutions or on ultra-wide screens.
The technical reason for this is that Apple Silicon Macs (M1-M5 chips) use ARM-based graphics drivers, which handle non-Apple monitors differently than Intel Macs. Intel Macs (x86 architecture) are more flexible in enabling HiDPI modes on lower-resolution monitors, while Apple Silicon Macs often require 4K+ displays to avoid tiny, unreadable scaling.
How to Fix Mac External Display Resolution Issues
There are several ways to improve your Mac’s external display clarity, ranging from simple macOS tweaks to third-party apps.
1. BetterDisplay (Free)
The most effective tool we’ve found to fix any of these problems is to use a free app called BetterDisplay (formerly known as Better Dummy).
BetterDisplay works by “unlocking” your screens making them fully scalable natively with an HiDPI resolution slider to freely scale the desktop size.
This means that for monitors that support less than 4K, it can even “trick” the monitor into using HiDPI. This basically fools your Mac into thinking you’ve connected a 5K display to it.
BetterDisplay works on the latest version of macOS including Tahoe.
For all monitors, it allows you to configure the resolution you want the display to use.
Other advantages of using BetterDisplay are:
- Converts your displays to fully scalable screens
- Allows brightness control
- XDR/HDR upscaling (which means you can set extra brightness beyond 100% on compatible displays)
- Full dimming to black
- Create and manage virtual displays
- Create Picture in Picture windows of displays
- Manage display settings easily from the menu bar
To unlock scaling and HiDPI resolutions in the app, just follow these instructions.
- Download and install BetterDisplay by dragging it to your Applications folder.
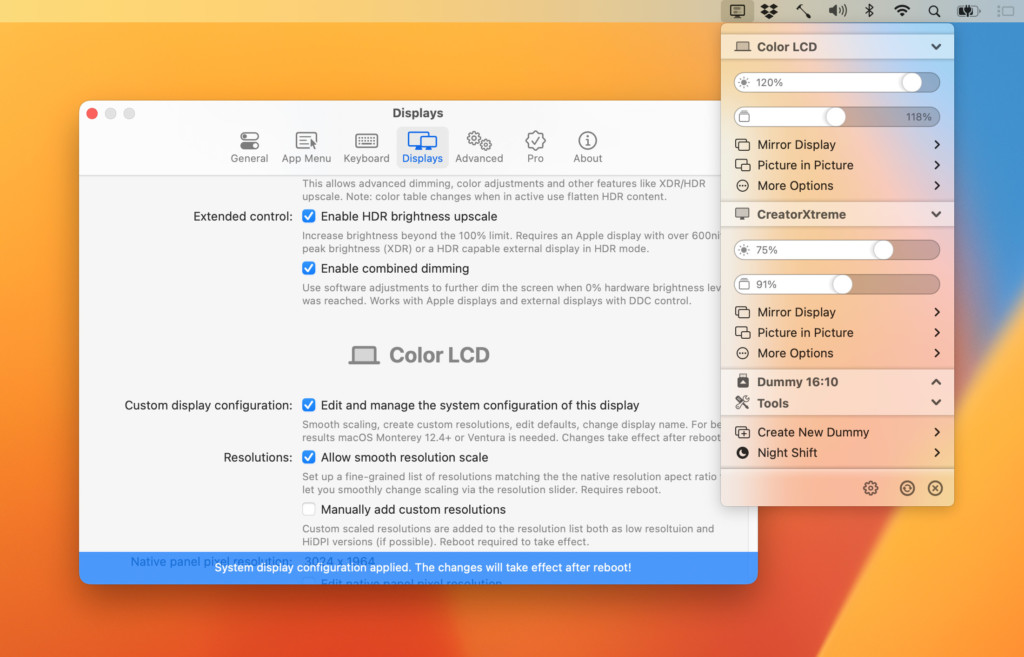
- Click on BetterDisplay in the Menu Bar and select Settings from the gear icon at the bottom of the Menu.
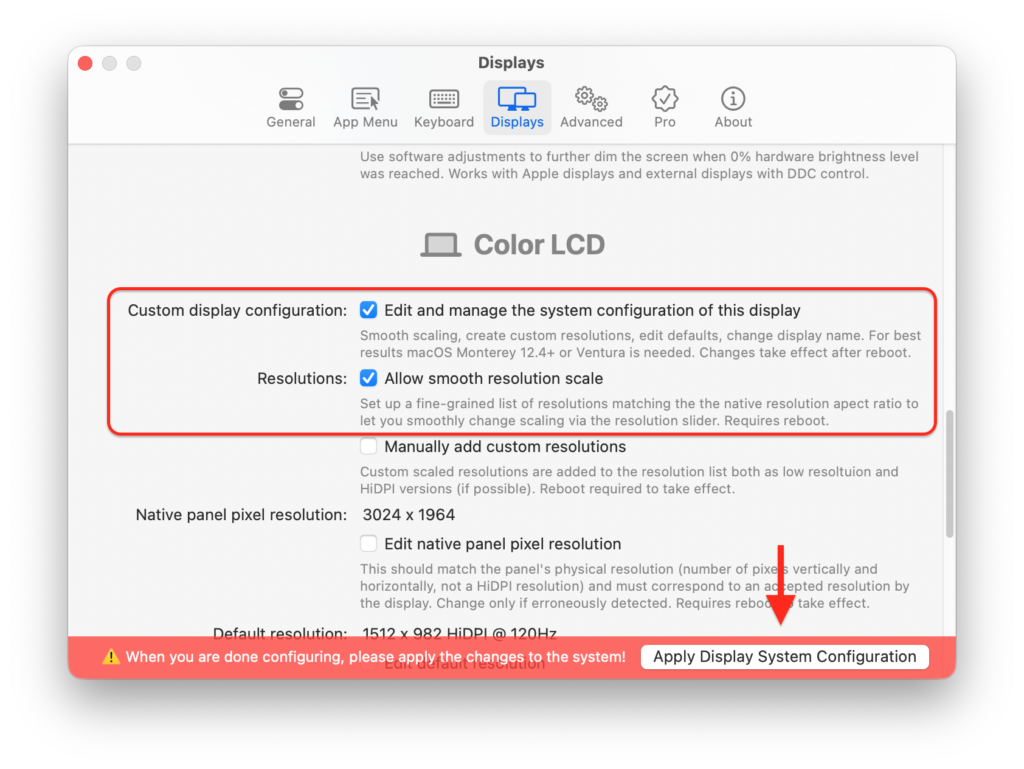
- Go to the Displays section and check the box Edit and manage the system configuration of this display and Allow smooth resolution scale on the display you want to make smoothly scalable. If you’ve got multiple monitors, you’ll have to do this for each one.
- Click on the Apply System Display Configuration button at the bottom of the screen. You’ll need to enter your Mac admin password and then reboot for the changes to be applied.
- When your Mac restarts, you can then use the resolution sliders in the BetterDisplay app menu to scale the desktop until you find the resolution that looks best.
Note that base level M1 Macs can only be configured up to 6K although Macs such as the Mac Studio with Pro, Max or Ultra chips can go beyond this.
This would only be a problem for users with ultra-wide screens trying to go beyond a horizontal resolution of 3072px HiDPI.
For most users, this should fix any blurry, pixelated or low resolution image issues when connected to an external display.
If it doesn’t, then you can also try using BetterDisplay’s Dummy mirroring method.
This creates a mirrored dummy of your original display which you can then use to unlock the resolution scaling in your external monitor.
Note that dummy displays have a maximum refresh rate limitation of 60Hz and there is no HDCP or HDR support.
To create a mirror dummy display with it, follow these instructions.
- In your Mac’s Menu Bar, click on the BetterDisplay icon and then select Display Settings Create New Dummy.
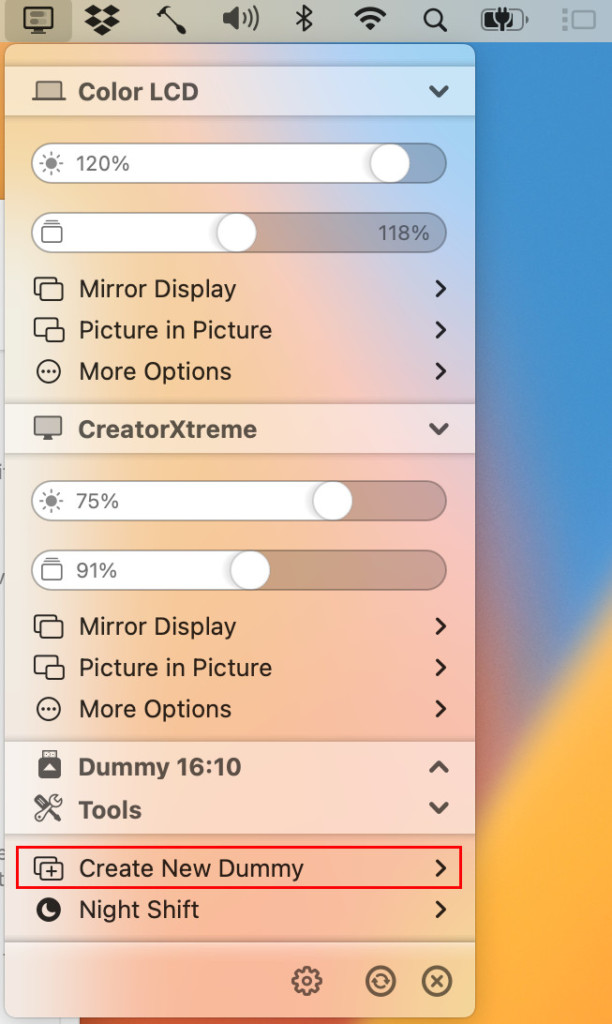
- Select the Aspect Ratio of the monitor you are using from the list that appears which for most users will be 16:9. BetterDisplay will then create a new virtual high resolution monitor. If you have more than one monitor, you have to repeat this process for each monitor.
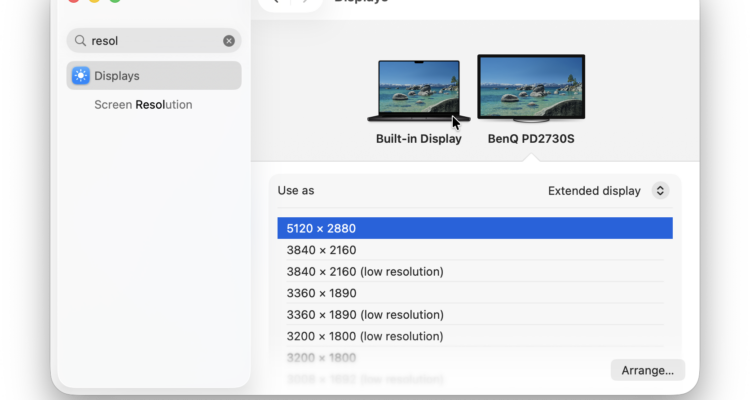
- Go to the Apple logo in the top left of your screen and select System Preferences > Displays > Display Settings and you’ll see a list of your dummy monitor and real monitor. Select your real external monitor from the list.
- Click Use As and select Mirror Dummy For 16:9. You may notice your monitor flashes while it applies this change.
- Hold down the Option Key and click on Scaled under Resolutions and then try experimenting with the resolutions that appear such as 1952 x 1098, 1936 x 1089 or 1920 x 1080 to see which works best for you.
You should then see the dummy display mirrored to your display where you can then use the slider to change the resolution.
Note that you may find that BetterDisplay sometimes doesn’t work when you wake a Mac from sleeping. And unless you set it to launch it on startup, you’ll have to reconfigure it every time you use it.
Check our guide on how to use BetterDisplay with a Mac for more.
2. SwitchRes X
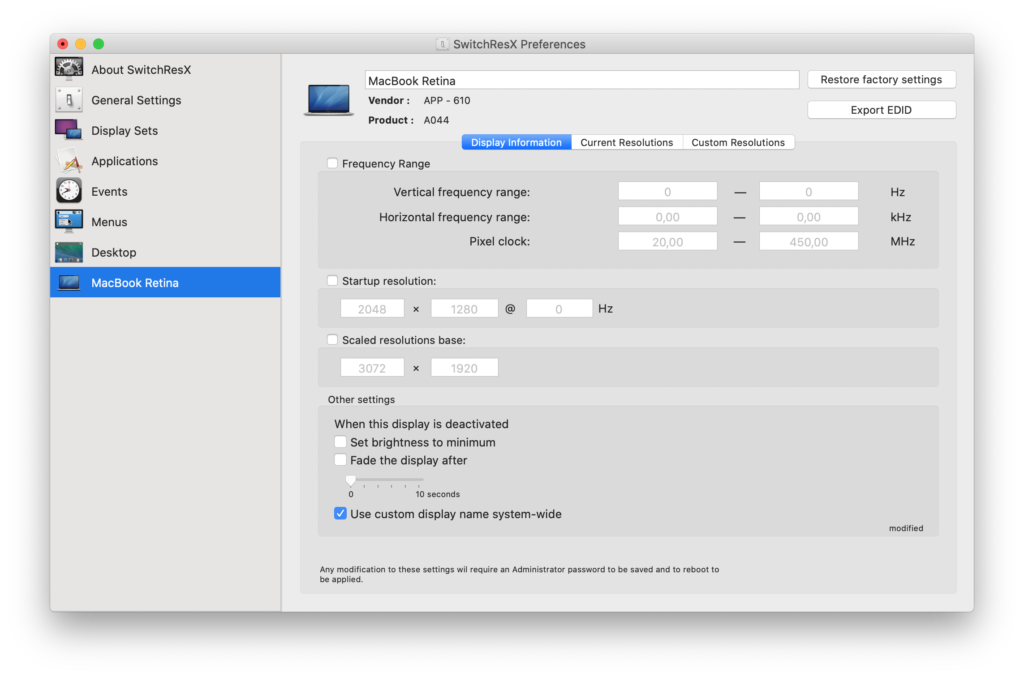
SwitchRes X gives you more control over the resolution your Mac uses with an external monitor.
SwitchRes X isn’t as effective as BetterDisplay but it has recently been updated to support Apple Silicon Macs.
At the moment, the app allows you to do the following:
- Set display rotation & display underscan
- Set the brightness of internal displays
- Set your display in gray levels
- Define custom scaled resolutions for external displays, though this is limited to resolutions smaller than native. You cannot create complete custom resolutions, only scaling is supported by Apple.
- Get information about the current timing that defines a resolution
- Export the EDID if the display does support it
SwitchRes X is worth installing if you haven’t been able to find a solution with BetterDisplay but be aware that it’s currently more effective with Intel Macs than Apple Silicon Macs.
3. RDM
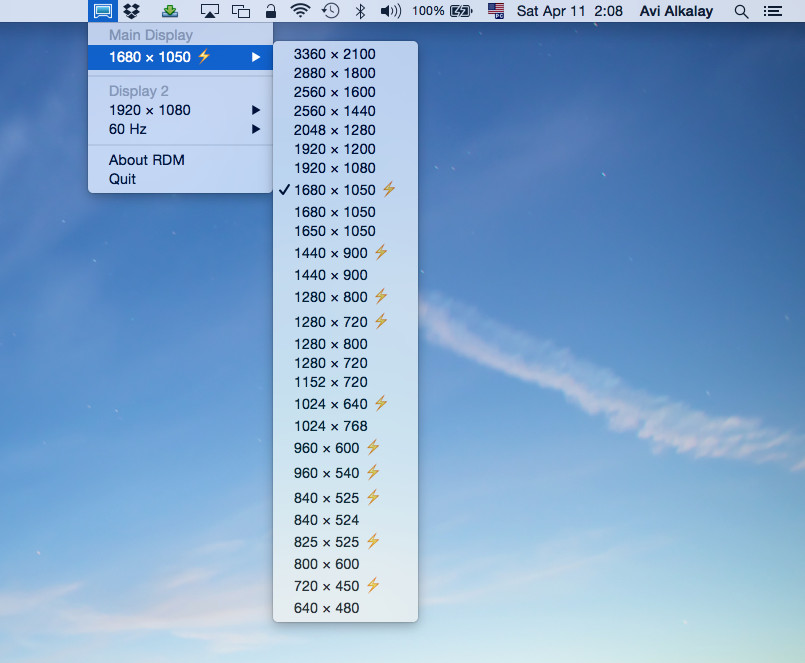
RDM is a similar solution to SwitchResX but is even simpler to use.
The app sits in your Menu Bar and allows you to instantly change the resolution of your Mac’s external display including on both Intel and Apple Silicon Macs.
RDM is particularly popular with MacBook Pro users as it lets you use the MacBook Pro Retina’s highest and unsupported resolutions on external displays.
For example, a Retina MacBook Pro 13″ can be set to 3360×2100 maximum resolution which is more than Apple’s maximum supported resolution of 1680×1050.
Those resolutions that are highlighted with a lightening strike mean that the resolution is HiDPI level or twice as dense in pixels.
If you want to use RDM daily, then you’ll need select the option “Open At Login” so that it works as soon as you boot your Mac.
4. Display Menu
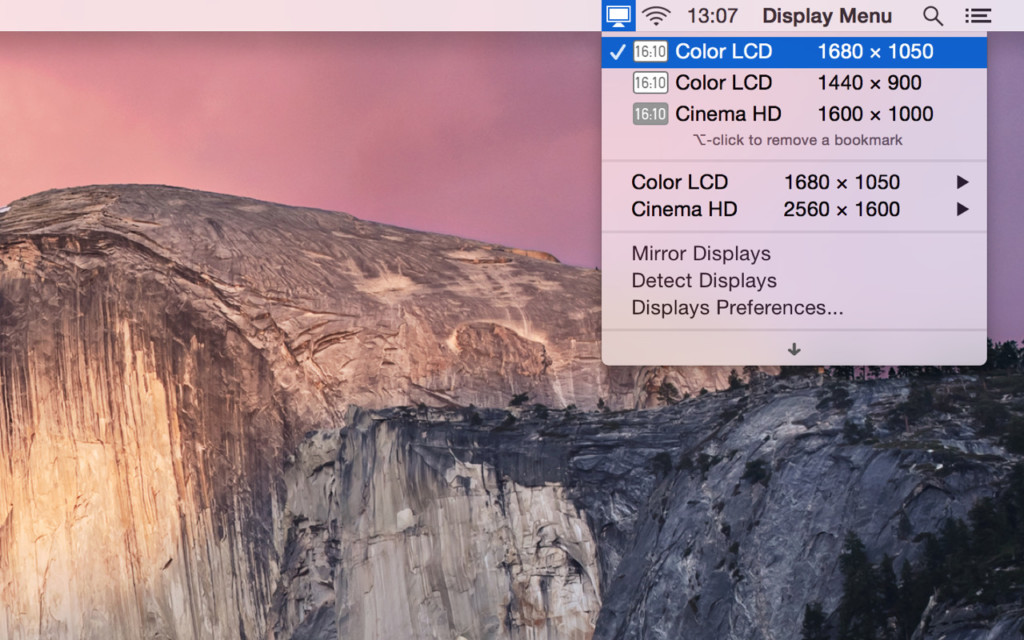
Display Menu is a handy tool which sits in your Menu Bar and allows you to change your external display settings with a single click.
Display Menu allows you to change the screen resolution, toggle mirroring and adjust the refresh rates including on 4K screens.
It also supports additional features like Retina resolutions, AppleScript and bookmarking of resolution settings if you pay to upgrade to Display Menu Pro for $1.99.
5. macOS Display Settings
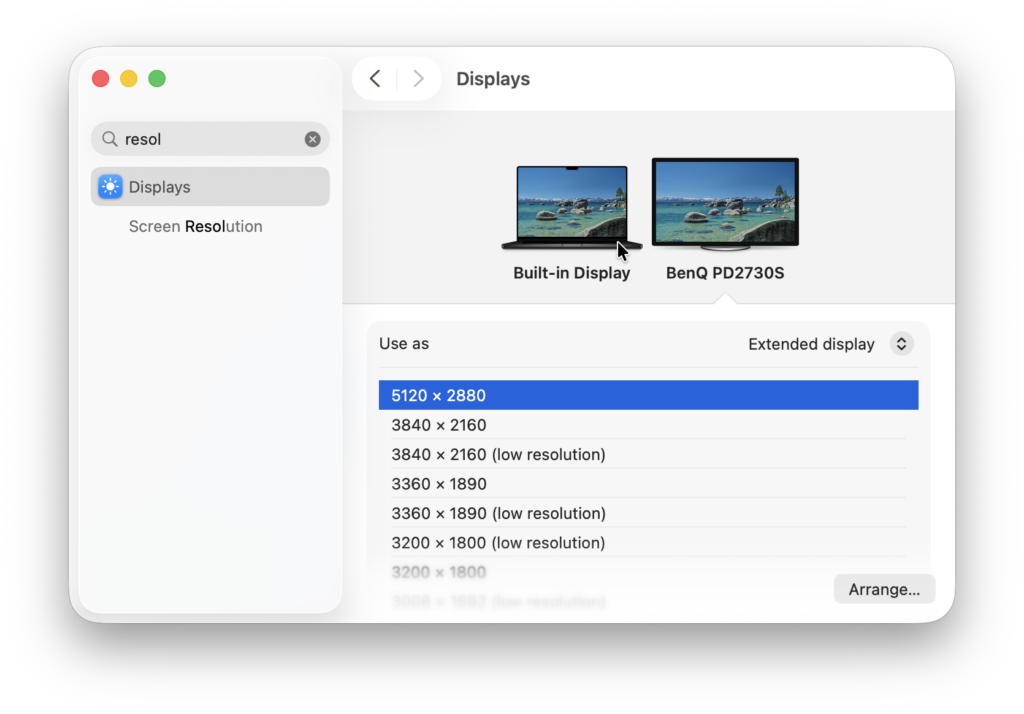
Many of the apps we’ve looked at provide an easy way to change the resolution of the display or give you more control over it.
However, you can also change the resolution of the external display by simply changing the Display Settings in macOS.
Go to the Apple logo in the top left of your screen and click on System Preferences > Displays to access the Display Resolution settings.
Usually, if Resolution is set to “Default for Display” the monitor will use the best resolution for use with your Mac.
However, if the text and images look blurry, too small or too large, you need to scale the resolution to a custom setting.
To change the resolution of your external display, select the Scaled button under Resolution and hold down the Option key to see all of the different resolutions available.
6. External Resolution Not Listed
If the correct resolution for your external monitor doesn’t appear in System Settings > Displays, this usually means macOS isn’t correctly reading the monitor’s capabilities (EDID), or the connection is limiting what resolutions are available.
Why This Happens
macOS relies on display metadata (EDID) to determine which resolutions are “safe” to show.
On Apple Silicon Macs in particular, macOS is more restrictive and may hide resolutions that work perfectly fine in practice.
Using the steps below usually restores the missing resolution without needing to replace the monitor.
Hold the Option key to reveal hidden resolutions
- Go to Apple Menu > System Settings > Displays
- Select your external monitor
- Hold down the Option (⌥) key and click Scaled under Resolution
This reveals additional resolutions that are hidden by default, including some HiDPI options.
Check the monitor’s native resolution
Make sure you know your monitor’s true native resolution (for example, 2560×1440, 3840×2160, or 5120×2880). If the native resolution isn’t listed at all, macOS may be misidentifying the display.
Try a different cable or port
- Switch from HDMI to DisplayPort or USB-C/Thunderbolt if available
- Avoid adapters where possible, especially HDMI dongles
- Some HDMI ports are limited to lower resolutions or refresh rates
A different connection often immediately unlocks missing resolutions.
Force missing resolutions with BetterDisplay or SwitchResX
If the resolution still doesn’t appear:
- Use BetterDisplay to unlock hidden HiDPI and native resolutions
- Or use SwitchResX to manually expose additional scaled resolutions
These tools can override macOS limitations and correctly apply the monitor’s full resolution range.
Restart with the monitor already connected
macOS sometimes only detects all supported resolutions during boot.
Shut down your Mac, connect the external display, then start the Mac again.
7. Check Your Cable and Port
Sometimes blurry images aren’t caused by macOS or the monitor – they’re caused by the connection.
- Use high-quality cables that support your monitor’s resolution and refresh rate. For 4K@60Hz, use DisplayPort 1.4, HDMI 2.0+, or USB-C/Thunderbolt 3+ cables.
- Avoid using cheap adapters or long HDMI cables, as they can degrade the signal.
- On Apple Silicon Macs, make sure the monitor is connected directly to a Thunderbolt or USB-C port, as older HDMI ports may be limited in resolution or refresh rate.
- Check your monitor’s on-screen menu to ensure it’s set to the correct input type (e.g., DisplayPort instead of HDMI if possible) for maximum quality.
8. Use Accessibility Zoom or Display Scaling
If you want text and icons to appear larger and sharper without changing the resolution, macOS has built-in accessibility tools:
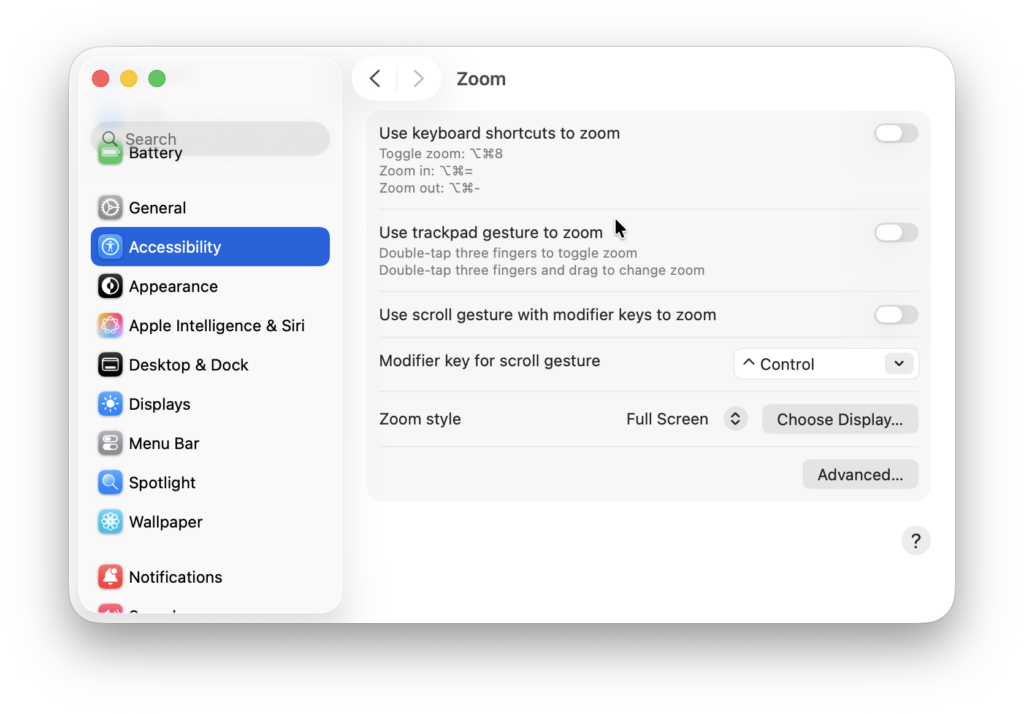
- Go to System Settings > Accessibility > Zoom.
- Enable Keyboard Shortcuts for Zoom or Scroll Gesture with Modifier Key to zoom in on text or parts of your screen.
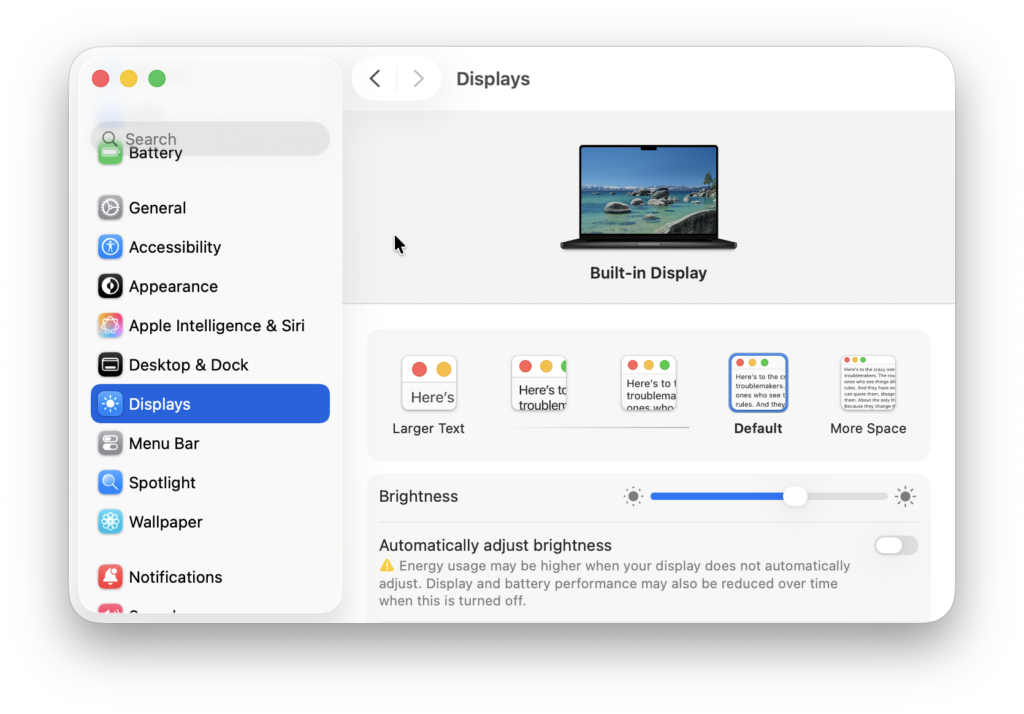
- In Displays > Display Settings, you can also enable Scaled resolutions and choose options labeled Larger Text or More Space. These can make apps and windows easier to read on high-resolution monitors.
This method doesn’t technically increase pixel density, but it can make your Mac much more readable on mid-range or 1440p monitors.
9. Update macOS and Monitor Firmware
Sometimes blurry or low-resolution issues are caused by software bugs:
- Keep your Mac updated to the latest version of macOS (currently Tahoe). Apple frequently improves external display handling and HiDPI support.
- Check if your monitor has firmware updates. Many monitors, especially high-end 4K and 5K displays, release firmware updates that improve compatibility with Macs.
Updating both macOS and your monitor firmware often fixes flickering, blurry scaling, and refresh rate issues.
10. Reset External Display Settings
If none of the above works for you and all else fails, you should try resetting the external display settings of the monitor connected to your Mac.
When you reset the display setting, the display should return to the best default resolution setting and refresh rate setting for your Mac.
You can do this either by an Automatic Reset or Safe Mode Reset of your external display.
You can find full instructions how to reset external display settings on a Mac here.
FAQ
Why does my external monitor look blurry on my Mac?
External monitors often look blurry on Macs because they don’t support HiDPI (Retina) scaling. Macs are designed for very high pixel density displays (around 218 PPI), which most third-party monitors don’t match. As a result, text and UI elements can appear fuzzy or poorly scaled, especially on 1080p and 1440p monitors.
Why does my Mac only show 1080p on a 1440p or 4K monitor?
This usually happens when macOS cannot properly detect the monitor’s capabilities or when the cable or adapter limits the signal. HDMI adapters, low-quality cables, or incorrect input settings on the monitor can cause macOS to fall back to 1080p.
Holding the Option key while clicking Scaled in Display Settings often reveals additional resolutions.
Why does text look worse on a 1440p monitor than on a 4K monitor with a Mac?
1440p monitors sit in an awkward middle ground for macOS scaling. They don’t have enough pixel density for clean HiDPI scaling, so macOS either shows very small UI elements or blurry scaled ones.
4K and 5K monitors work better because macOS can apply proper Retina-style scaling.
Are Apple Silicon Macs worse with external monitors than Intel Macs?
Not worse, but more restrictive. Apple Silicon Macs (M1-M5) are less flexible with non-standard resolutions and HiDPI modes than Intel Macs. Intel Macs allowed more custom scaling on lower-resolution displays, while Apple Silicon Macs strongly favor 4K+ monitors for optimal clarity.
What is the best resolution for an external monitor on a Mac?
The best resolutions for Macs are:
- 5K (5120×2880) at 27 inches
- 4K (3840×2160) at 27–32 inches
These resolutions allow macOS to use HiDPI scaling, producing sharp text and comfortable UI sizing.
Is BetterDisplay safe to use on macOS?
Yes. BetterDisplay is widely used, actively maintained, and safe to use. It does not modify system files permanently and can be disabled or removed at any time. It simply unlocks scaling options that macOS already supports but hides by default.
Why does my external monitor look fine on Windows but blurry on macOS?
Windows and macOS handle display scaling differently. Windows uses fractional scaling, while macOS relies on integer-based HiDPI scaling. A monitor that looks sharp on Windows may look blurry on macOS if it doesn’t meet Apple’s pixel density expectations.
Why can’t I select 60Hz or higher refresh rates on my external monitor?
This is usually caused by:
- HDMI limitations
- A cable that doesn’t support high bandwidth
- Using an adapter instead of a direct connection
Switching to DisplayPort or USB-C/Thunderbolt often unlocks higher refresh rates.
Can a cheap external monitor ever look good on a Mac?
Yes, but with limitations. 1080p and 1440p monitors can be usable if you:
- Use BetterDisplay to enable HiDPI scaling
- Sit further away from the screen
- Increase text size in macOS
However, they will never match the sharpness of a true 4K or 5K display.
What is the easiest fix for blurry external monitors on a Mac?
For most users, the fastest and most effective solution is:
- Use a high-quality cable (DisplayPort or USB-C)
- Enable HiDPI scaling with BetterDisplay
- Select a scaled resolution that balances sharpness and readability
This fixes the issue for the majority of Macs and external monitors.