If you have to print a lot of documents, images, PDFs and other files on a daily basis, you simply need a decent Mac compatible printer and your Mac does the rest.
Here we’ve created the ultimate guide to printing anything on a Mac from PDFs, Word documents, Pages, Preview, Google Docs, Photos, in color and double sided printing.
This guide to printing on a Mac works for the latest versions of macOS including Sonoma and the newest Apple Silicon Macs.
It’s also valid for all brands of printer including Epson, HP, Canon and Brother printers.
Contents
- How To Print on a Mac
- Printing a Document
- Adjusting the Printing Options
- Choosing the Printer
- Saving or Using a Preset
- Choosing the Number of Copies
- Setting the Print Range
- Printing in Color or Grayscale
- Enabling Double-Sided Printing
- Adjusting the Paper Size
- Changing the Orientation
- Adjusting the Scale
- Selecting the Media & Quality Options
- Picking a Layout
- Setting Paper Handling Options
- Printing with a Watermark
- Reviewing the Printer Information
How To Print on a Mac
Thanks to Apple AirPrint, you don’t have to mess around finding and installing drivers for most printers to make them work on a Mac.
AirPrint automatically connects to printers wirelessly and all you need to do is configure how to print the document exactly how you want it.
Note that AirPrint can’t control all the functions of a printer.
To use all the features on all-in-one-printers such as scanning and faxing, you will usually need to download and install the drivers and this is where the problems often begin for Mac users.
Printer manufacturers are often slow to update drivers for the latest versions of macOS but for a rundown of the best Mac compatible printers we recommend checking out our look at the best printers for Mac.
Here we show how to print on a Mac and configure your print outs.
You May Also Like:
Printing a Document
If you just want to print a document on a Mac within a few seconds without having to change lots of settings, follow these instructions:
- Open the document you want to print on your Mac.
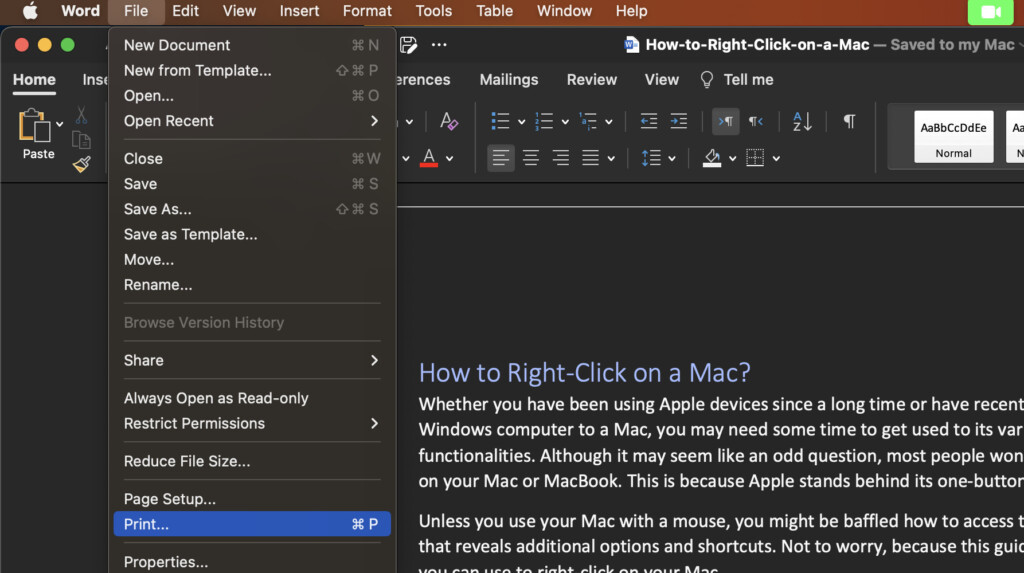
- Click on File > Print to access the Print dialogue, or press Command + P.
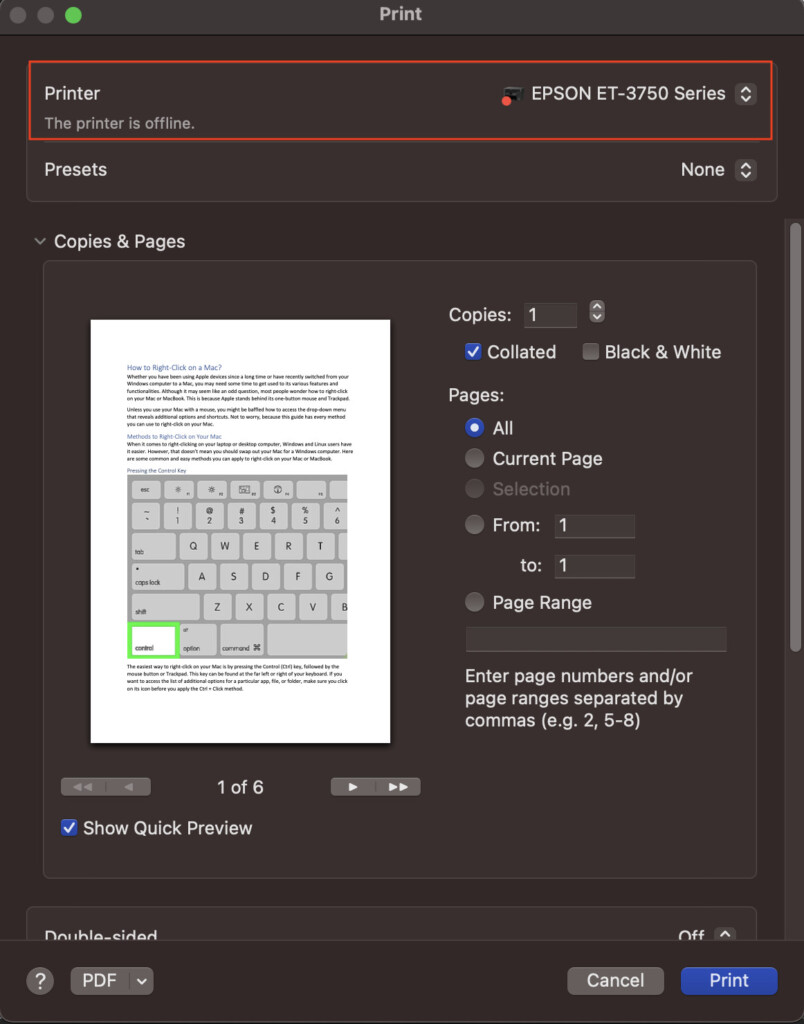
- The Print dialogue shows you the standard or default settings. Check the quick preview on the left of the dialogue, and click on the Print button.

Adjusting the Printing Options
Often you may need to adjust the printer settings and configurations to get the print outs exactly how you want them.
Here we look at how to adjust the printing options on a Mac in more detail.
Choosing the Printer
If you have multiple printers installed on your Mac, or have a different default printer than the one you are currently using, here is how you can select the correct one:
- Open the document you want to print.
- Click on File > Print to open the Print dialogue, or press Command + P.
- Look at the printer name in the Printer column. If it matches your current printer, you don’t have to change it. Otherwise, click on the drop-down arrow, and choose your printer from the list. If you don’t find your printer, you may have to install or configure it first.
Saving or Using a Preset
The next option in the Print dialogue is Presets, which enables you to use saved settings for certain types of documents.
If you haven’t saved any, you can use the default settings.
To save presets, do the following:
- Open the document you want to print.
- Click on File > Print to open the Print dialogue, or press Command + P.
- Review all the settings, changing them according to your requirements.
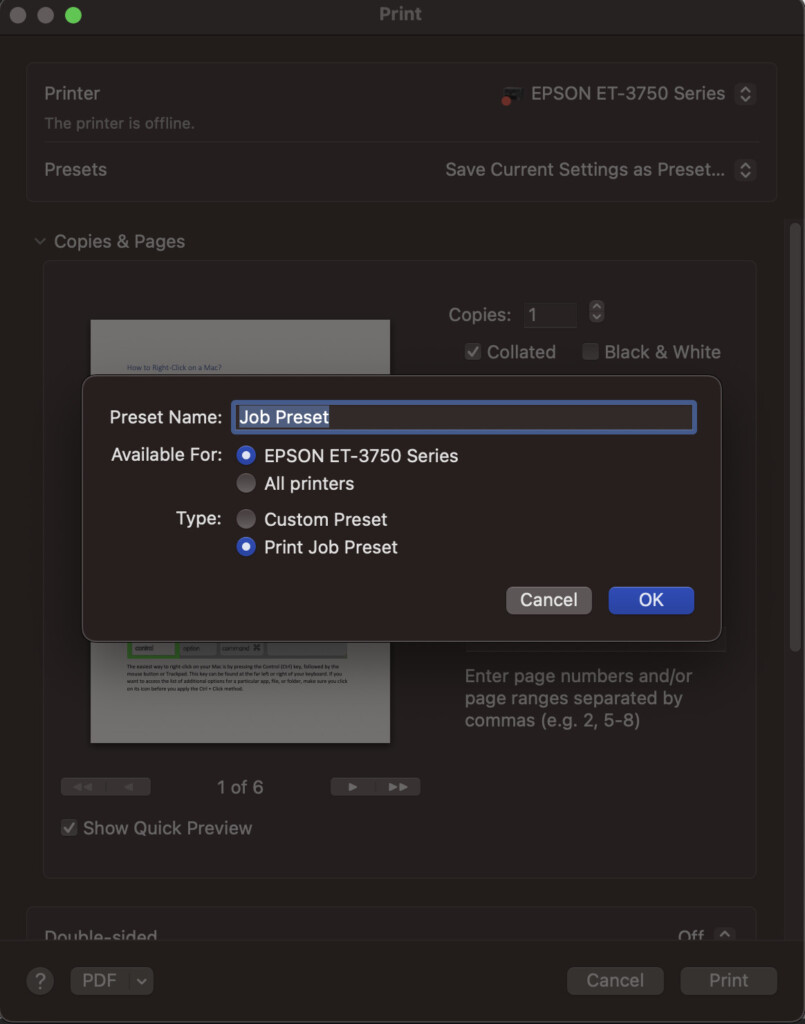
- Click on the drop-down menu in the Presets column, and click on Save Current Settings as Preset.
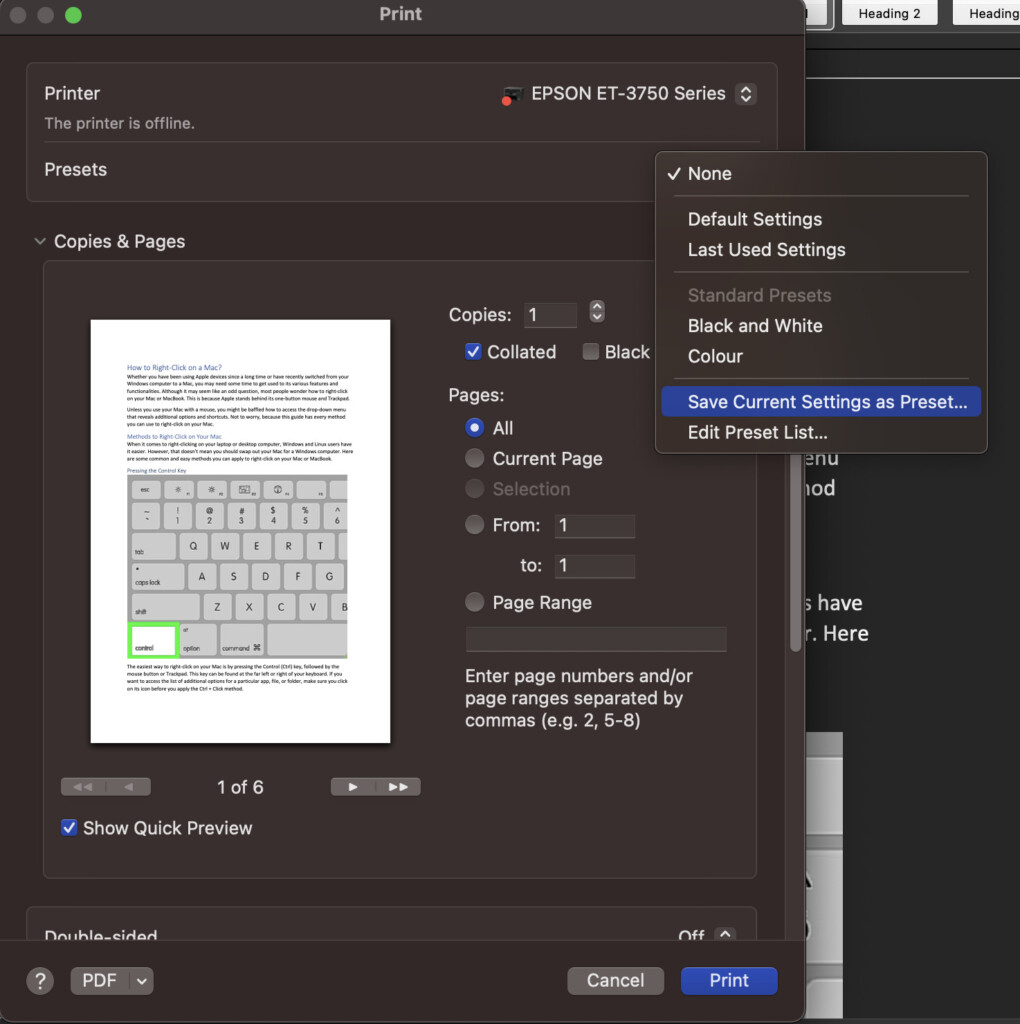
- Choose a name for your preset, and click on OK. It will be saved and displayed in the Presets drop-down menu for you to use.
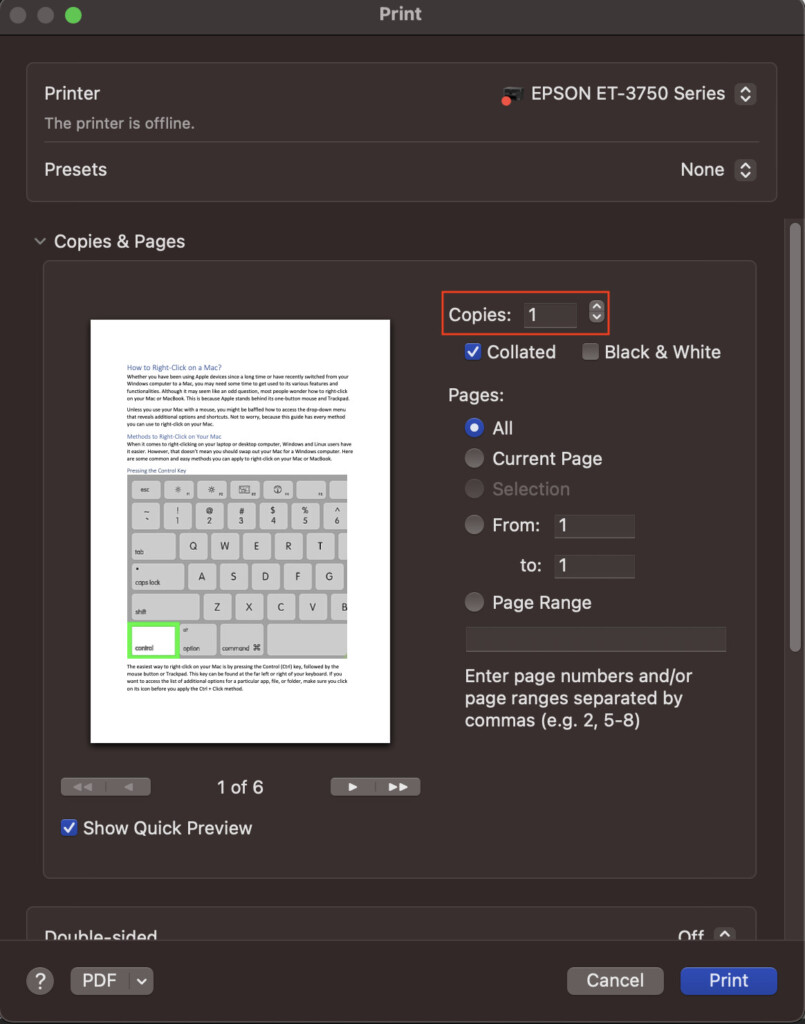
Choosing the Number of Copies
Sometimes you may need multiple copies of the same document, but you don’t have to print them one-by-one.
Here’s how to print multiple copies of a document:
- Open the document you want to print.
- Click on File > Print to open the Print dialogue, or press Command + P.
- In the Copies column, enter the number of copies you need in the text box, or press the up arrow to increase the number.
Setting the Print Range
The next thing to do is to specify which pages you want to print.
Here’s how to specify which pages you want to print.
- Choose All if you want to print all the pages in the document you have opened.
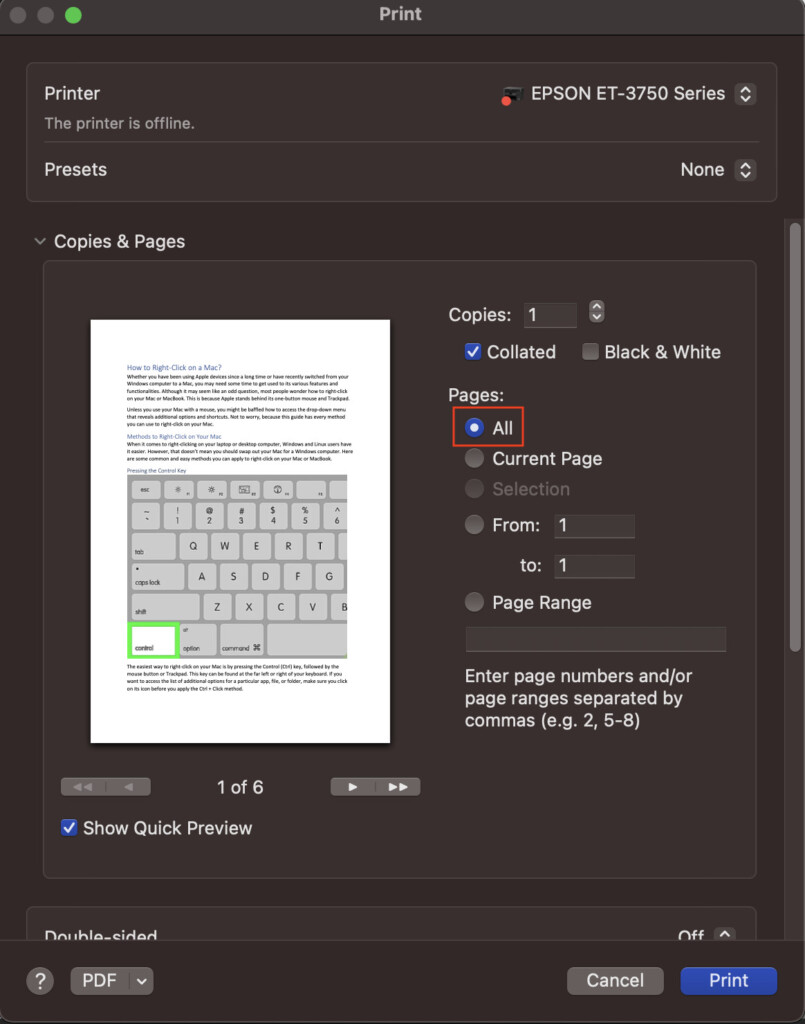
- If you want to print pages in a specific range, you can use the Range section and mention the range in the two text boxes, or enter the range in the Page Range field.
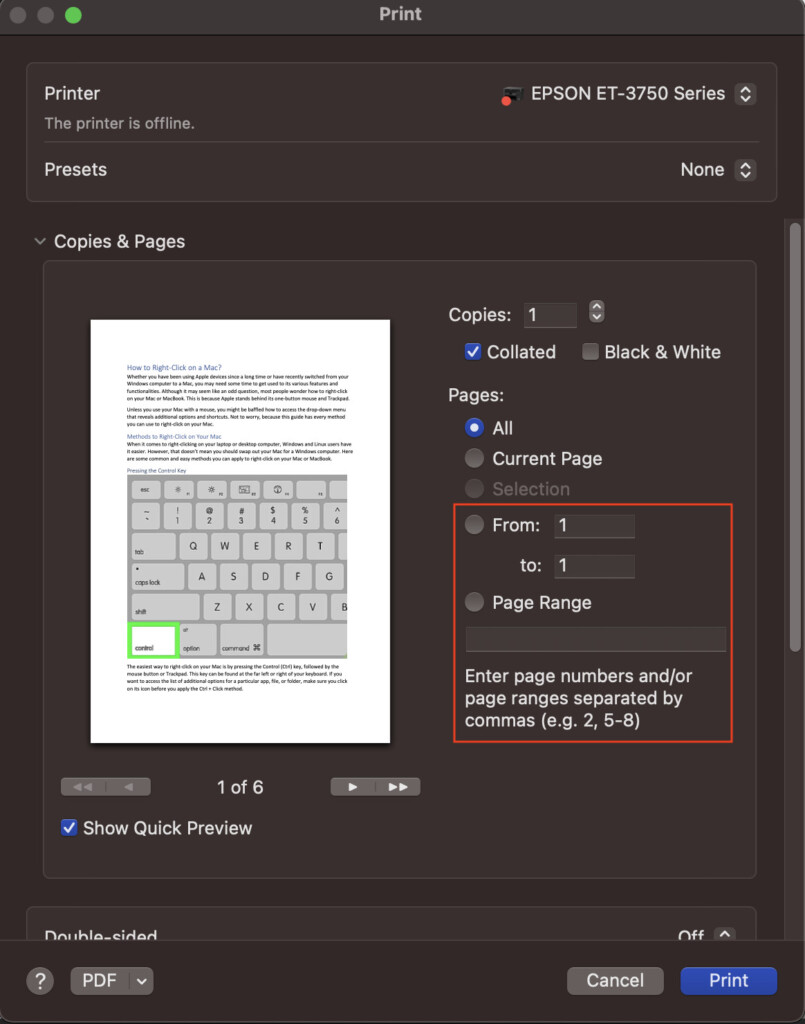
- If you want to manually select the pages to print, click on the Selection checkbox, and click on the pages in the sidebar.

Printing in Color or Grayscale
Here’s how you can choose whether to print your documents in color or grayscale, provided your printer has color printing capabilities:
- By default, the Black & White slider is turned off.
- If you want to print your documents in grayscale, click on the Black & White slider to deactivate it.

Enabling Double-Sided Printing
If your printer has the double-sided printing feature, here’s how you can enable it from the print dialog:
- By default, the double-sided printing is turned off. If you click on Print, your printer will output all pages from last to first.
- If you want to go with double-sided printing, click on the drop-down menu and select “On.”
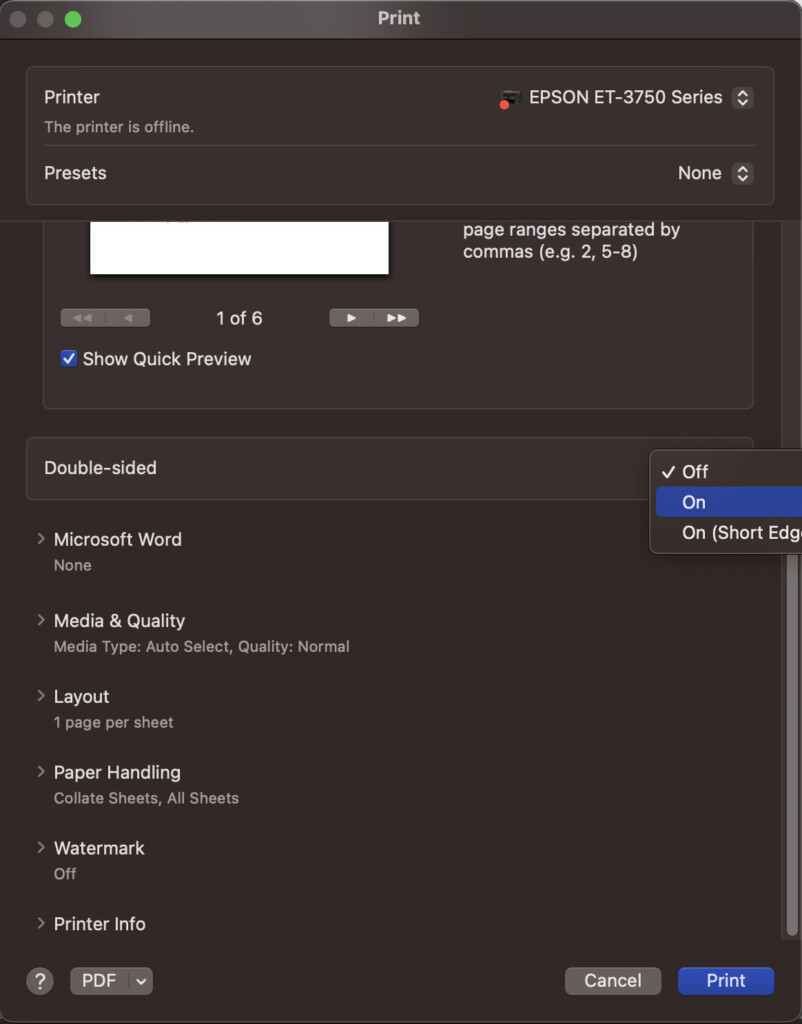
- If you click on Print, your printer will output odd-number pages first. You can flip the printed pages and feed them back into the paper tray to print the even-numbered ones.
- Click on “On (Short Edge)” to print the document ready for binding above each page.

Adjusting the Paper Size
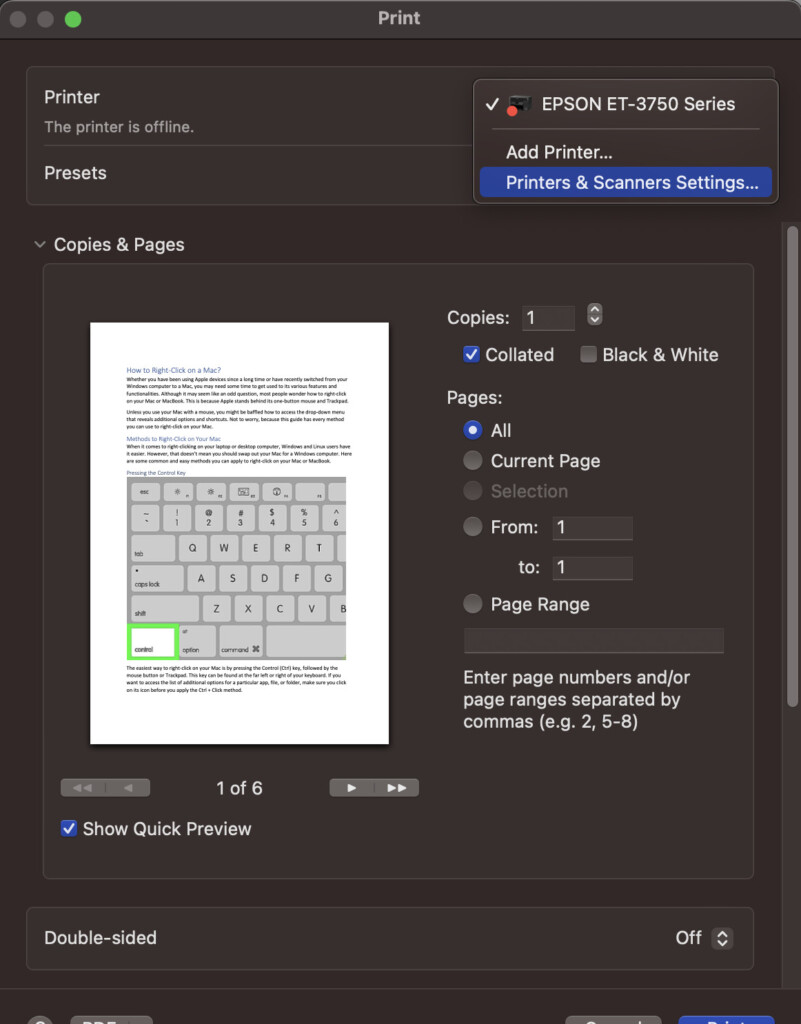
If you’re using different sizes of paper in your printer such as A3 and A4, here’s how to adjust the paper size when printing on a Mac.
- Click on the Printer drop-down menu and select Printers & Scanners Settings…
- In the Default Paper Size column, the default setting is US Letter which is suitable for most documents, but you can choose any that matches your paper size.
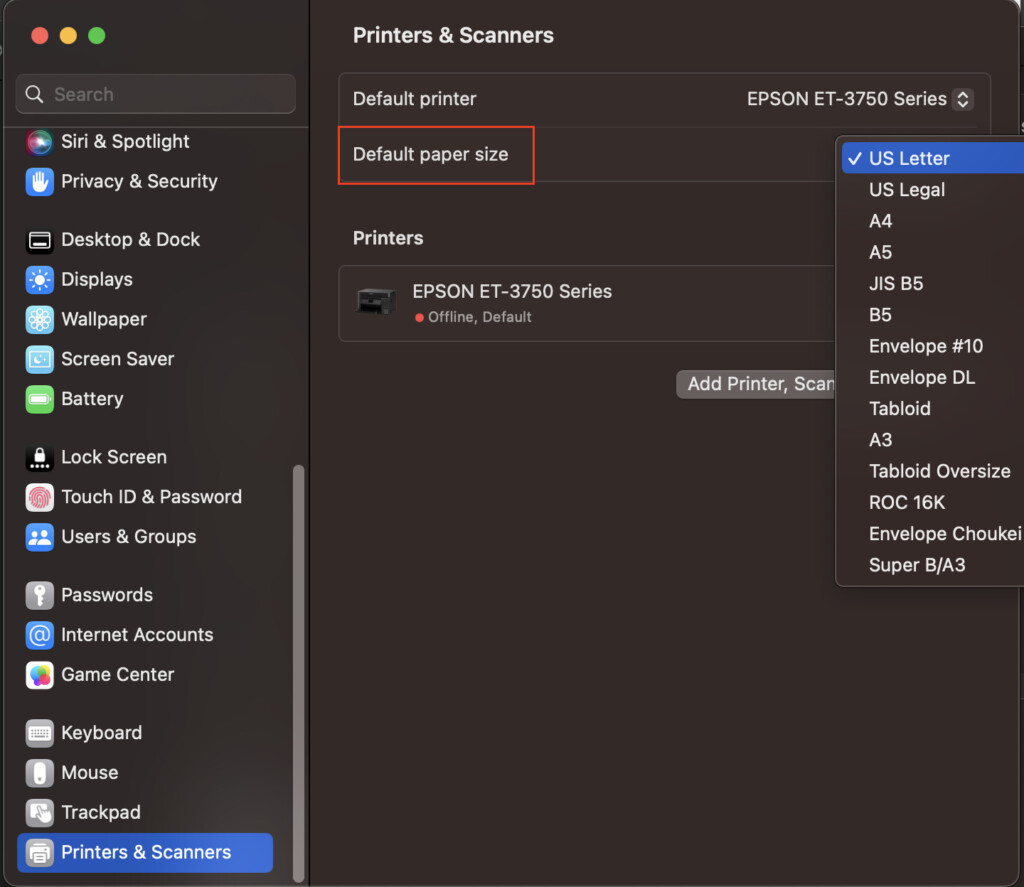
- Click on the drop-down menu to choose a different paper size. You can choose from different options, including Letter, Legal, Executive, A4, A5, etc.
Changing the Orientation
Most documents are printed in the Portrait orientation, but you can change it to Landscape by doing the following:
- Go on File and click on Page Setup.
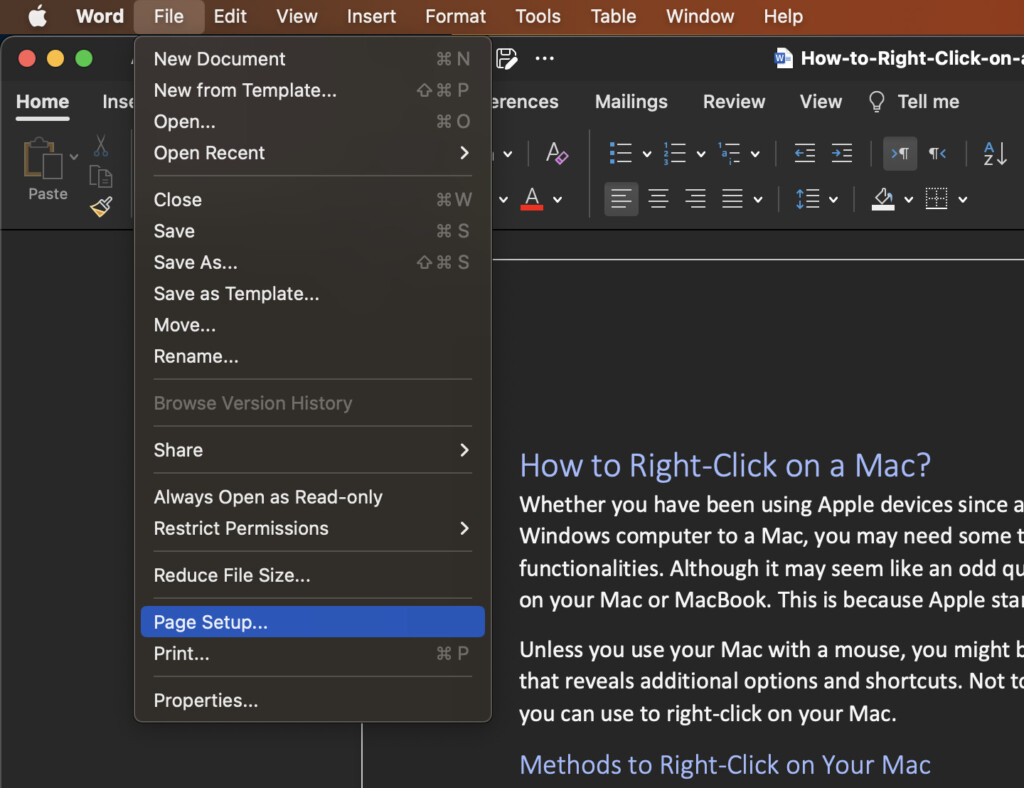
- By default, the orientation is set to Portrait in the Orientation column.
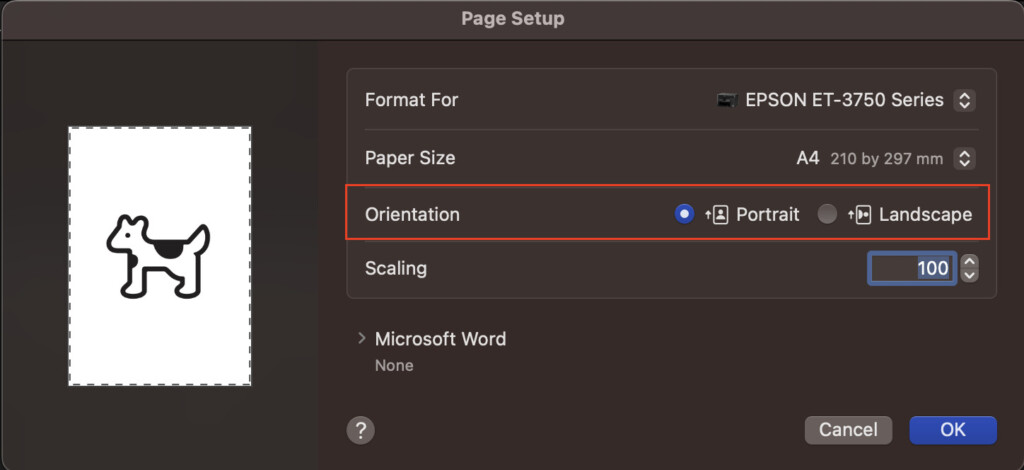
- If you want to print a document in the Landscape orientation, click the Landscape checkbox. You can check the Preview pane to see what your document looks like.
Adjusting the Scale
Some documents appear smaller or larger when printed, which is why you need to adjust the scaling to make it appear properly.
- Click on File > Print to open the Print dialogue, or press Command + P.
- Scroll down until you reach the Paper Handling section. Click to expand it.
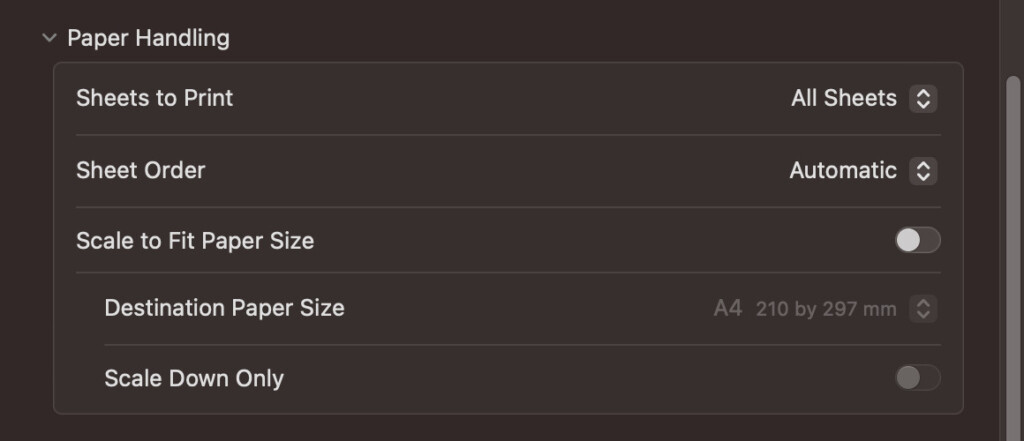
- Toggle the button in the Scale to Fit Paper Size row.
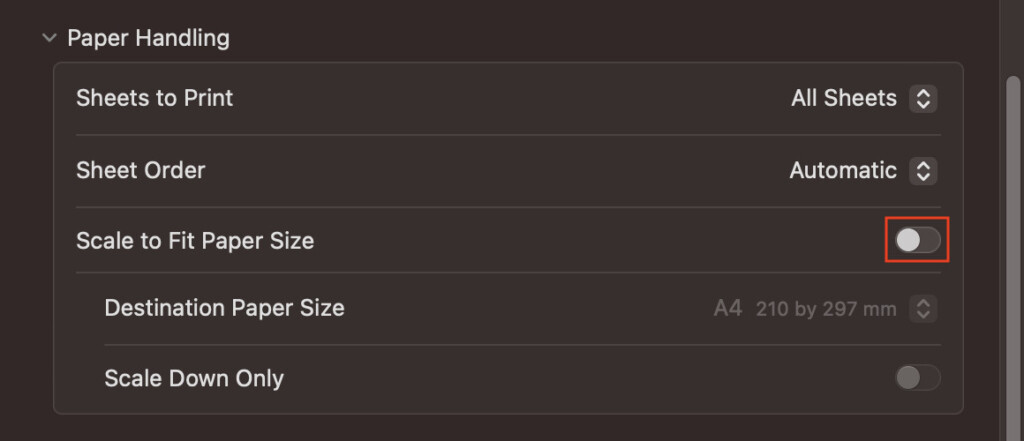
- Click on the drop-down menu in the Destination Paper Size row and choose the paper size you have in the printer.
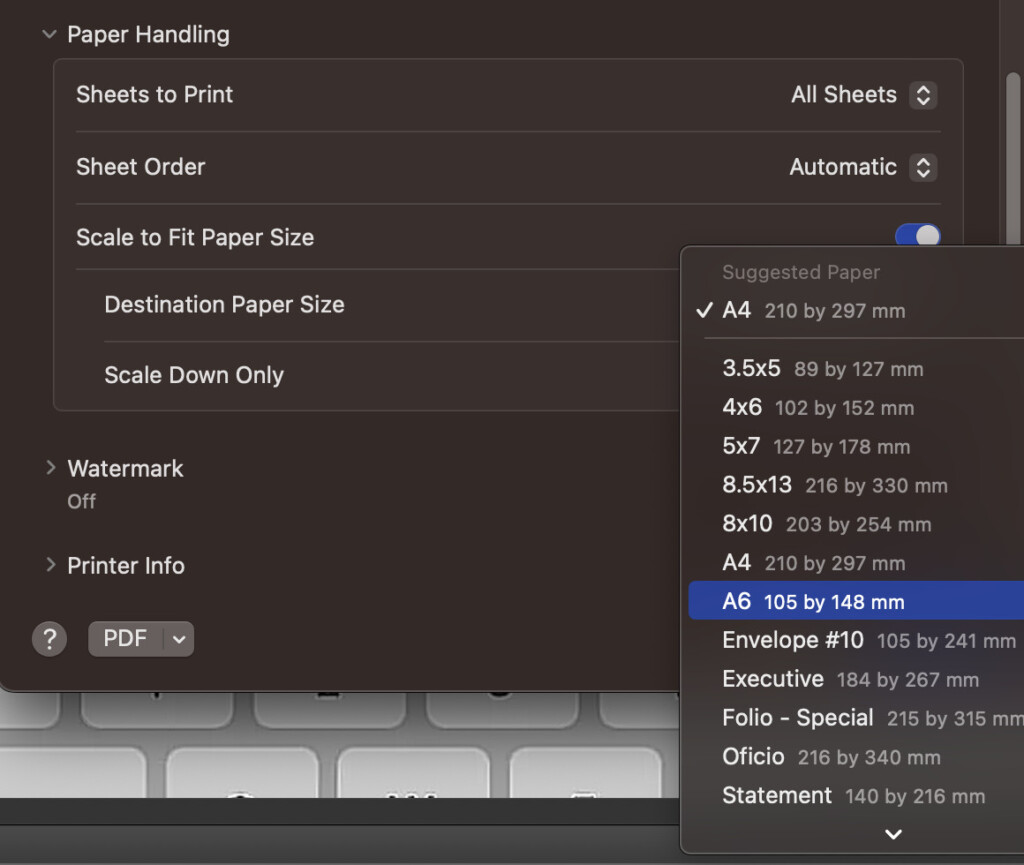
- This will ensure all content that appears in your word processor fits within the page you have in the printer.
Selecting the Media & Quality Options
The Media & Quality tab allows you to choose additional settings for your printer on your Mac.
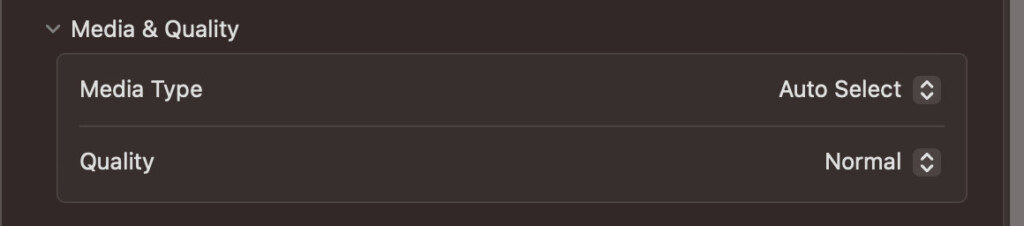
- If your printer has multiple paper trays, you can choose which paper tray to take paper from.
- You can also choose the type of paper you wish to use for printing.
- Additionally, you can select the printout quality between Normal and Best.
Picking a Layout
Your Mac also allows you to choose the layout for your printouts.
- Click on the Layout tab to unfold the options.
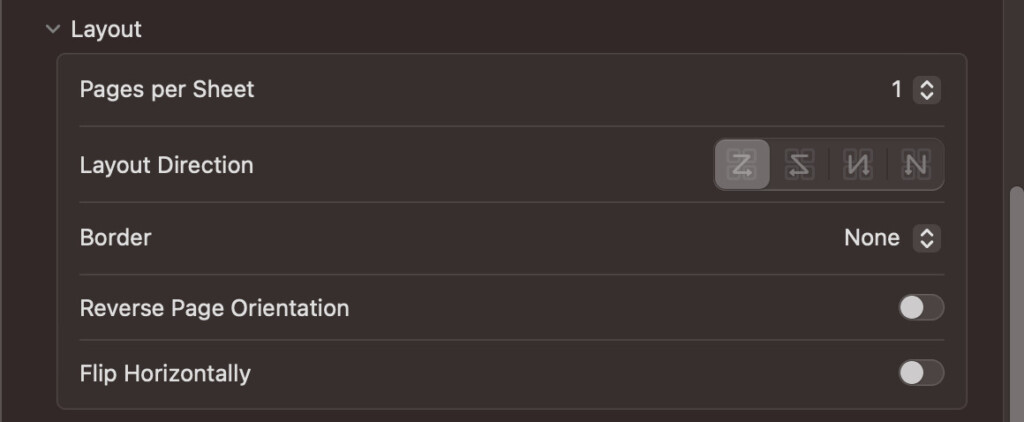
- You can set your printer to print multiple pages on a single sheet of paper, print the document with double-line borders, print the document in reverse page orientation, or choose from several other options, depending on your requirements.
Setting Paper Handling Options
The Paper Handling section allows you to print your document in a certain order or sequence.
Here’s how you can set this on your Mac:
- Click on the Paper Handling tab.
- You can set your printer to print odd or even-numbered pages in the Sheets to Print drop-down menu, print your document in normal or reverse by choosing in the Sheet Order drop-down, or use the Scale to Fit Paper Size option to fit all contents of your document on specific paper sizes.
Printing with a Watermark
You can print your documents with a watermark on them by doing the following:
- Click on the Watermark tab, and click the Apply Watermark button.
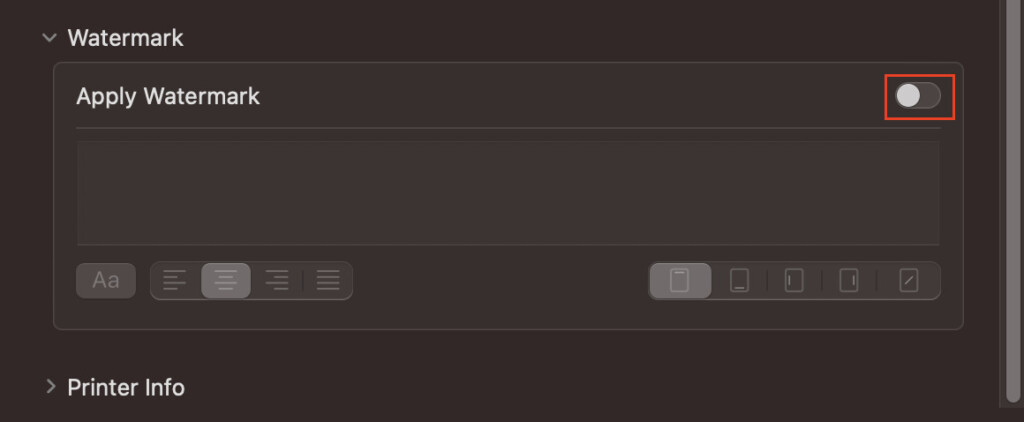
- Type the text you need for the watermark in the text box. You can check how it looks in the print preview.

- Once you click on Print, the document will have the watermark printed on them.
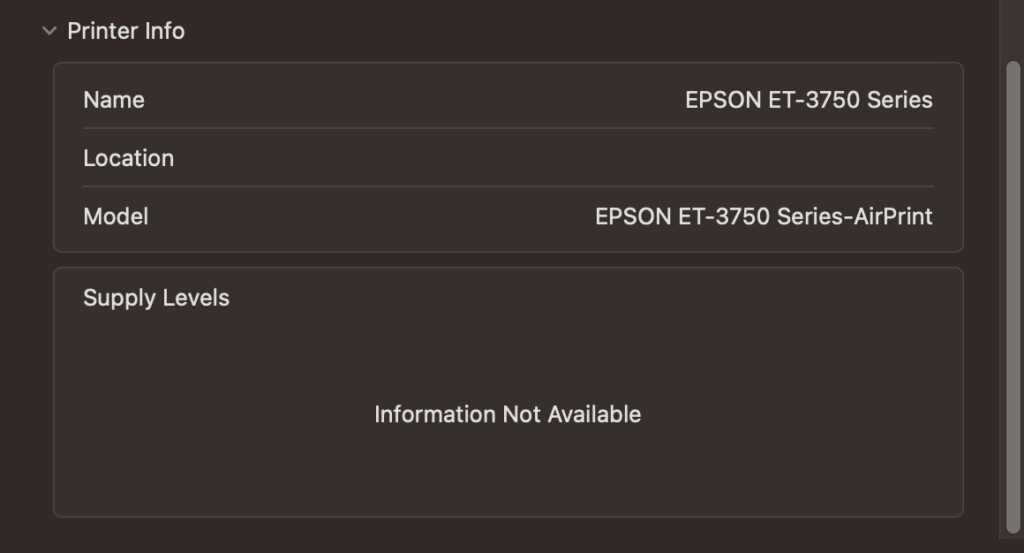
Reviewing the Printer Information
Normally you don’t need to check the printer information, except for checking the printer’s ink levels.
Some printers bought with a print cartridge subscription will send you new cartridges automatically when it detects the ink is running low.
If you want to check your Printer information, simply click on the Printer Info tab to access this information which gives you the exact model of printer you are using and ink levels.
Note that the image below is an example from an Epson printer and the display on other models such as HP, Brother and Canon may vary.