
For most of my life, Macs have been the only computers I’ve used.
I have used PCs many years ago but after switching to Mac, I swore I’d never go back – I’d certainly never have imagined I would build a PC completely from scratch.
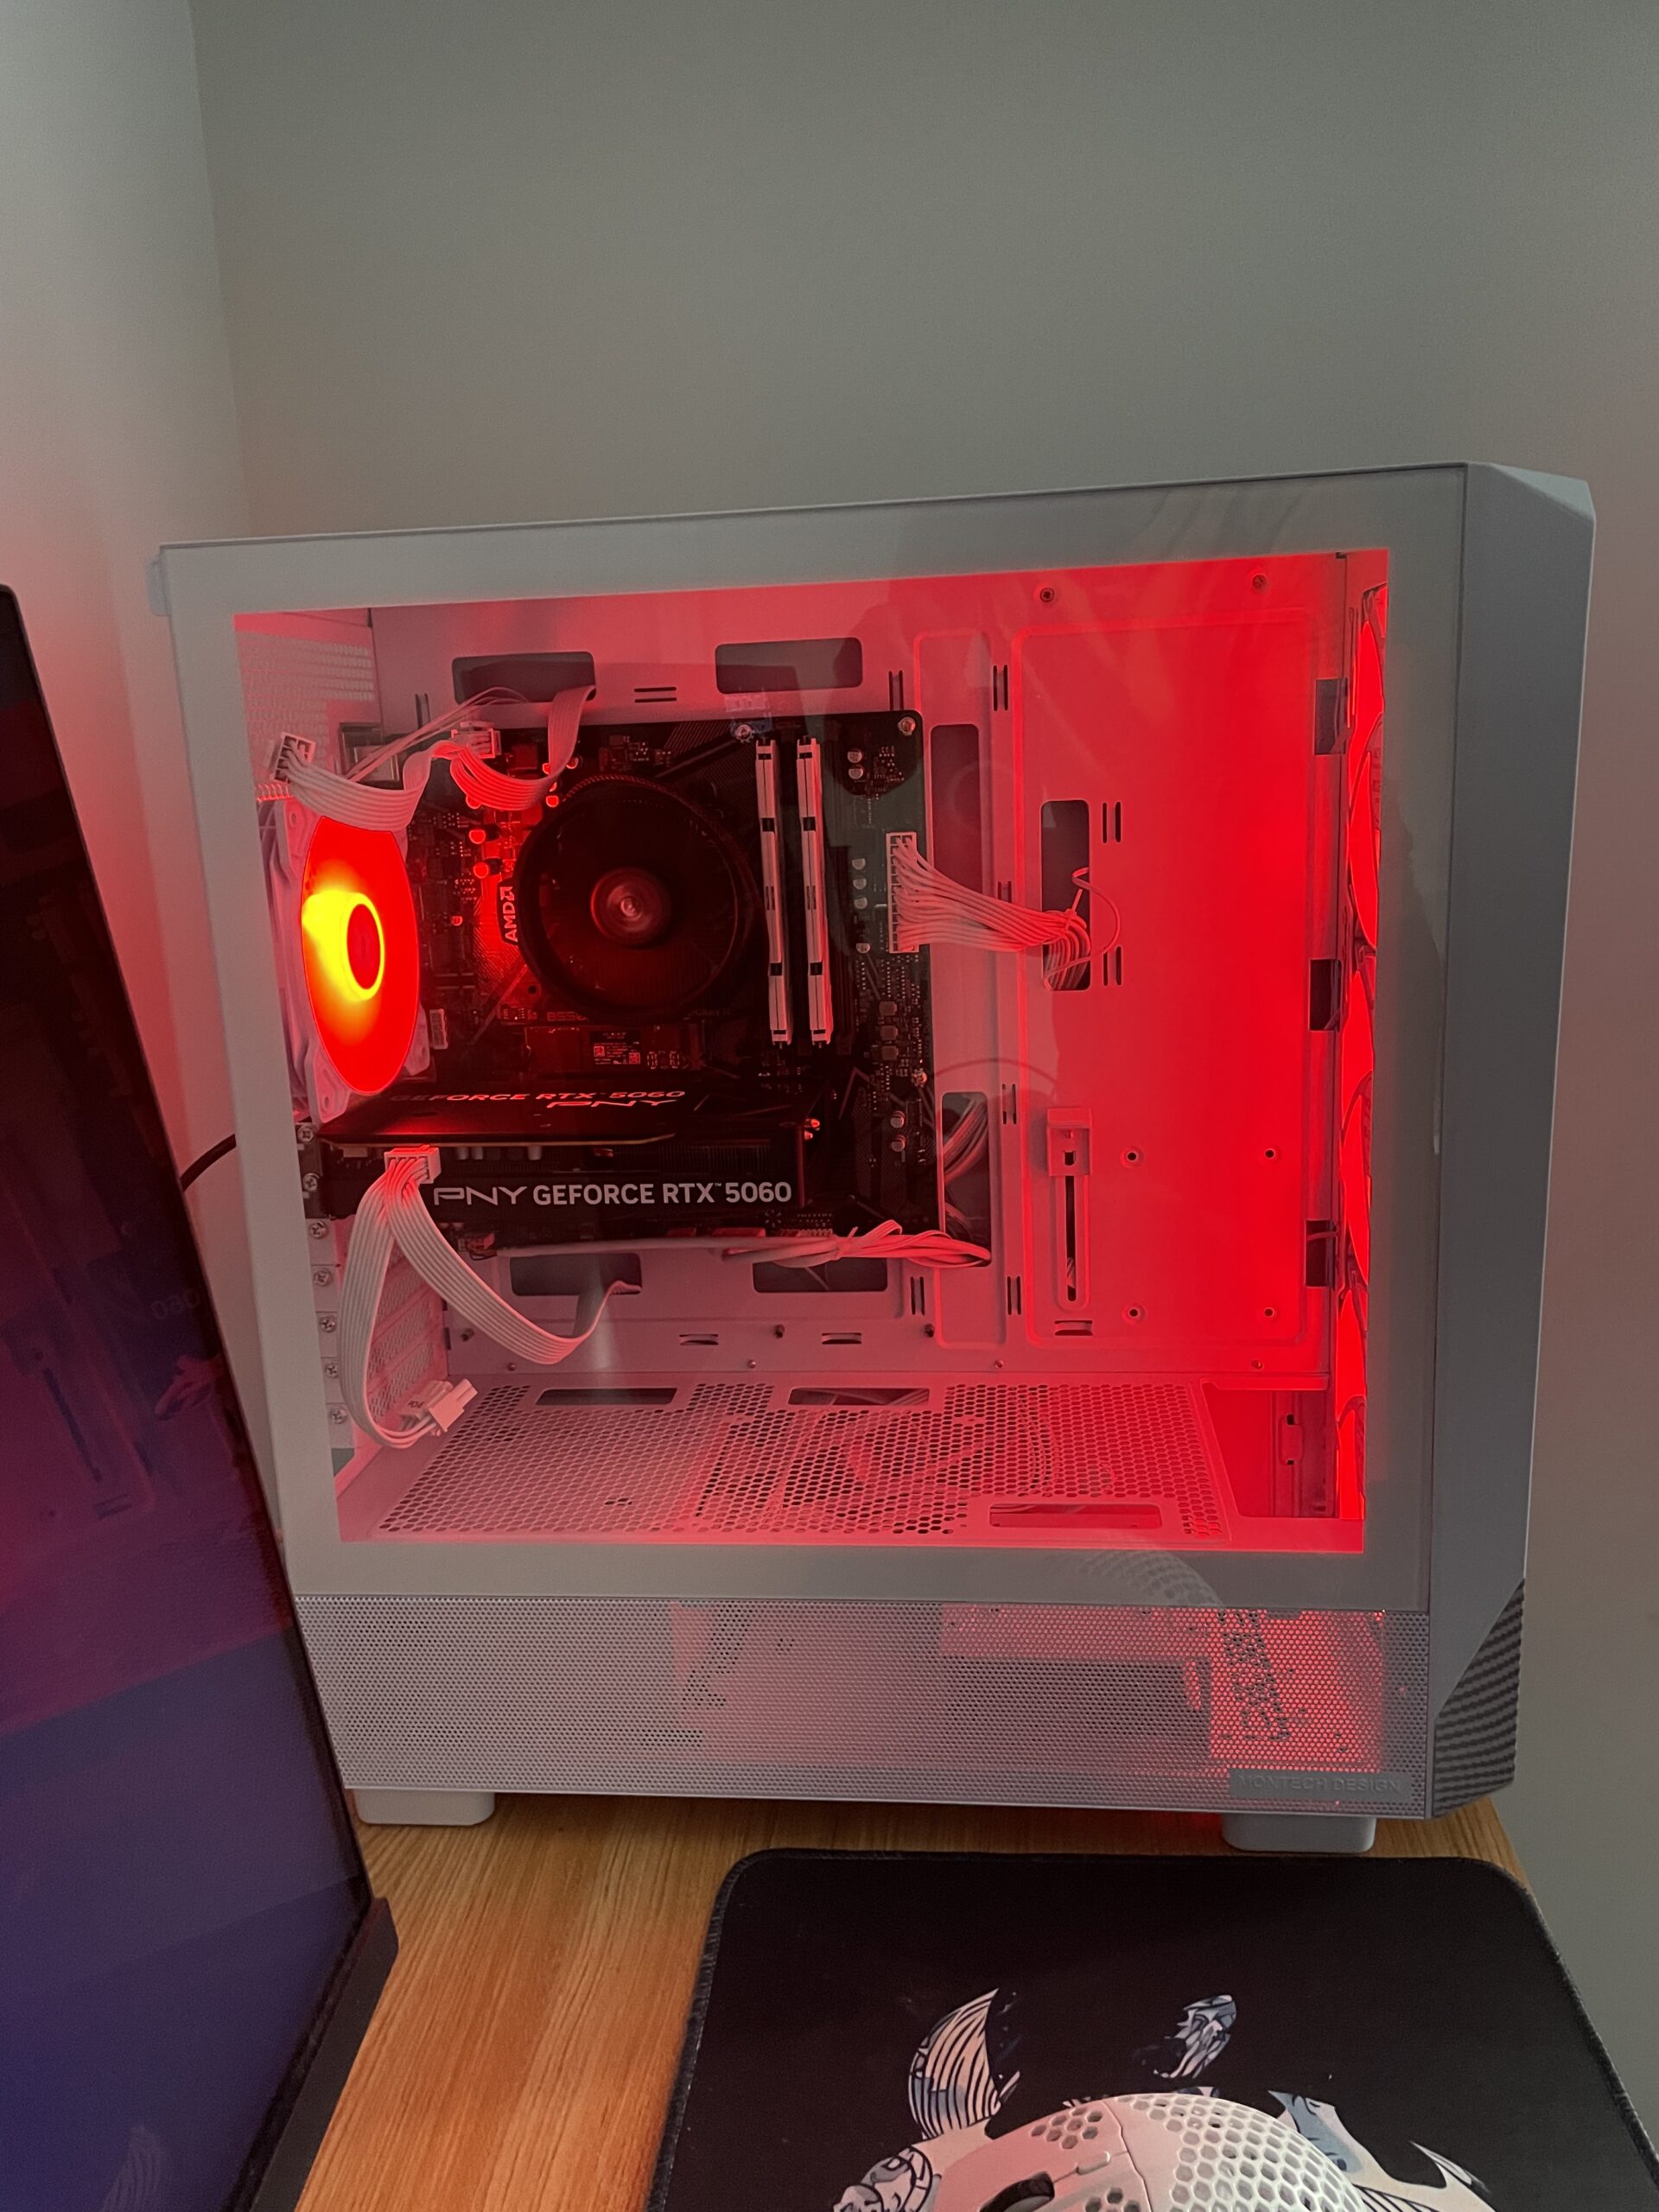
But as Apple has gradually locked-down Macs to the point where they are impossible to upgrade, I became curious about the seemingly endless world of customization possibilities with PCs (plus I thought they look cool when they’re all lit up and you can see the components whirring around inside them).
I was still pretty terrified of trying to build my own PC but after watching several YouTube videos, I decided to go back to the dark side and give it a go.
As I’ll explain, in the end it was surprisingly easy – although it wasn’t without some serious hiccups along the way.
Here’s exactly what I bought, how I assembled it, the mistakes I made, and whether I’d do it again.
Why Bother Building a PC As a Mac Owner?
There are various things that PCs do better than Macs:
- Gaming (although game streaming services for Macs have made this less of an issue than it used to be)
- Nvidia GPU support
- Upgradeable hardware
- Better value for gaming performance
- More local AI tools and models
- A machine I could repair and improve over time
And of course, having an actual PC means you don’t need to use a virtual machine if you need to access Windows sometimes.
The Components I Chose
I didn’t want to spend a fortune but wanted a relatively future proof setup that wouldn’t need upgrading for at least the next 5 years and would be powerful enough to play most high end games.
I bought all of the components on Amazon. I know I could have done it cheaper by going second hand but I was terrified one of the used components simply wouldn’t work and being a complete newbie to this, I’d be at a loss to work out what exactly was causing the problem.
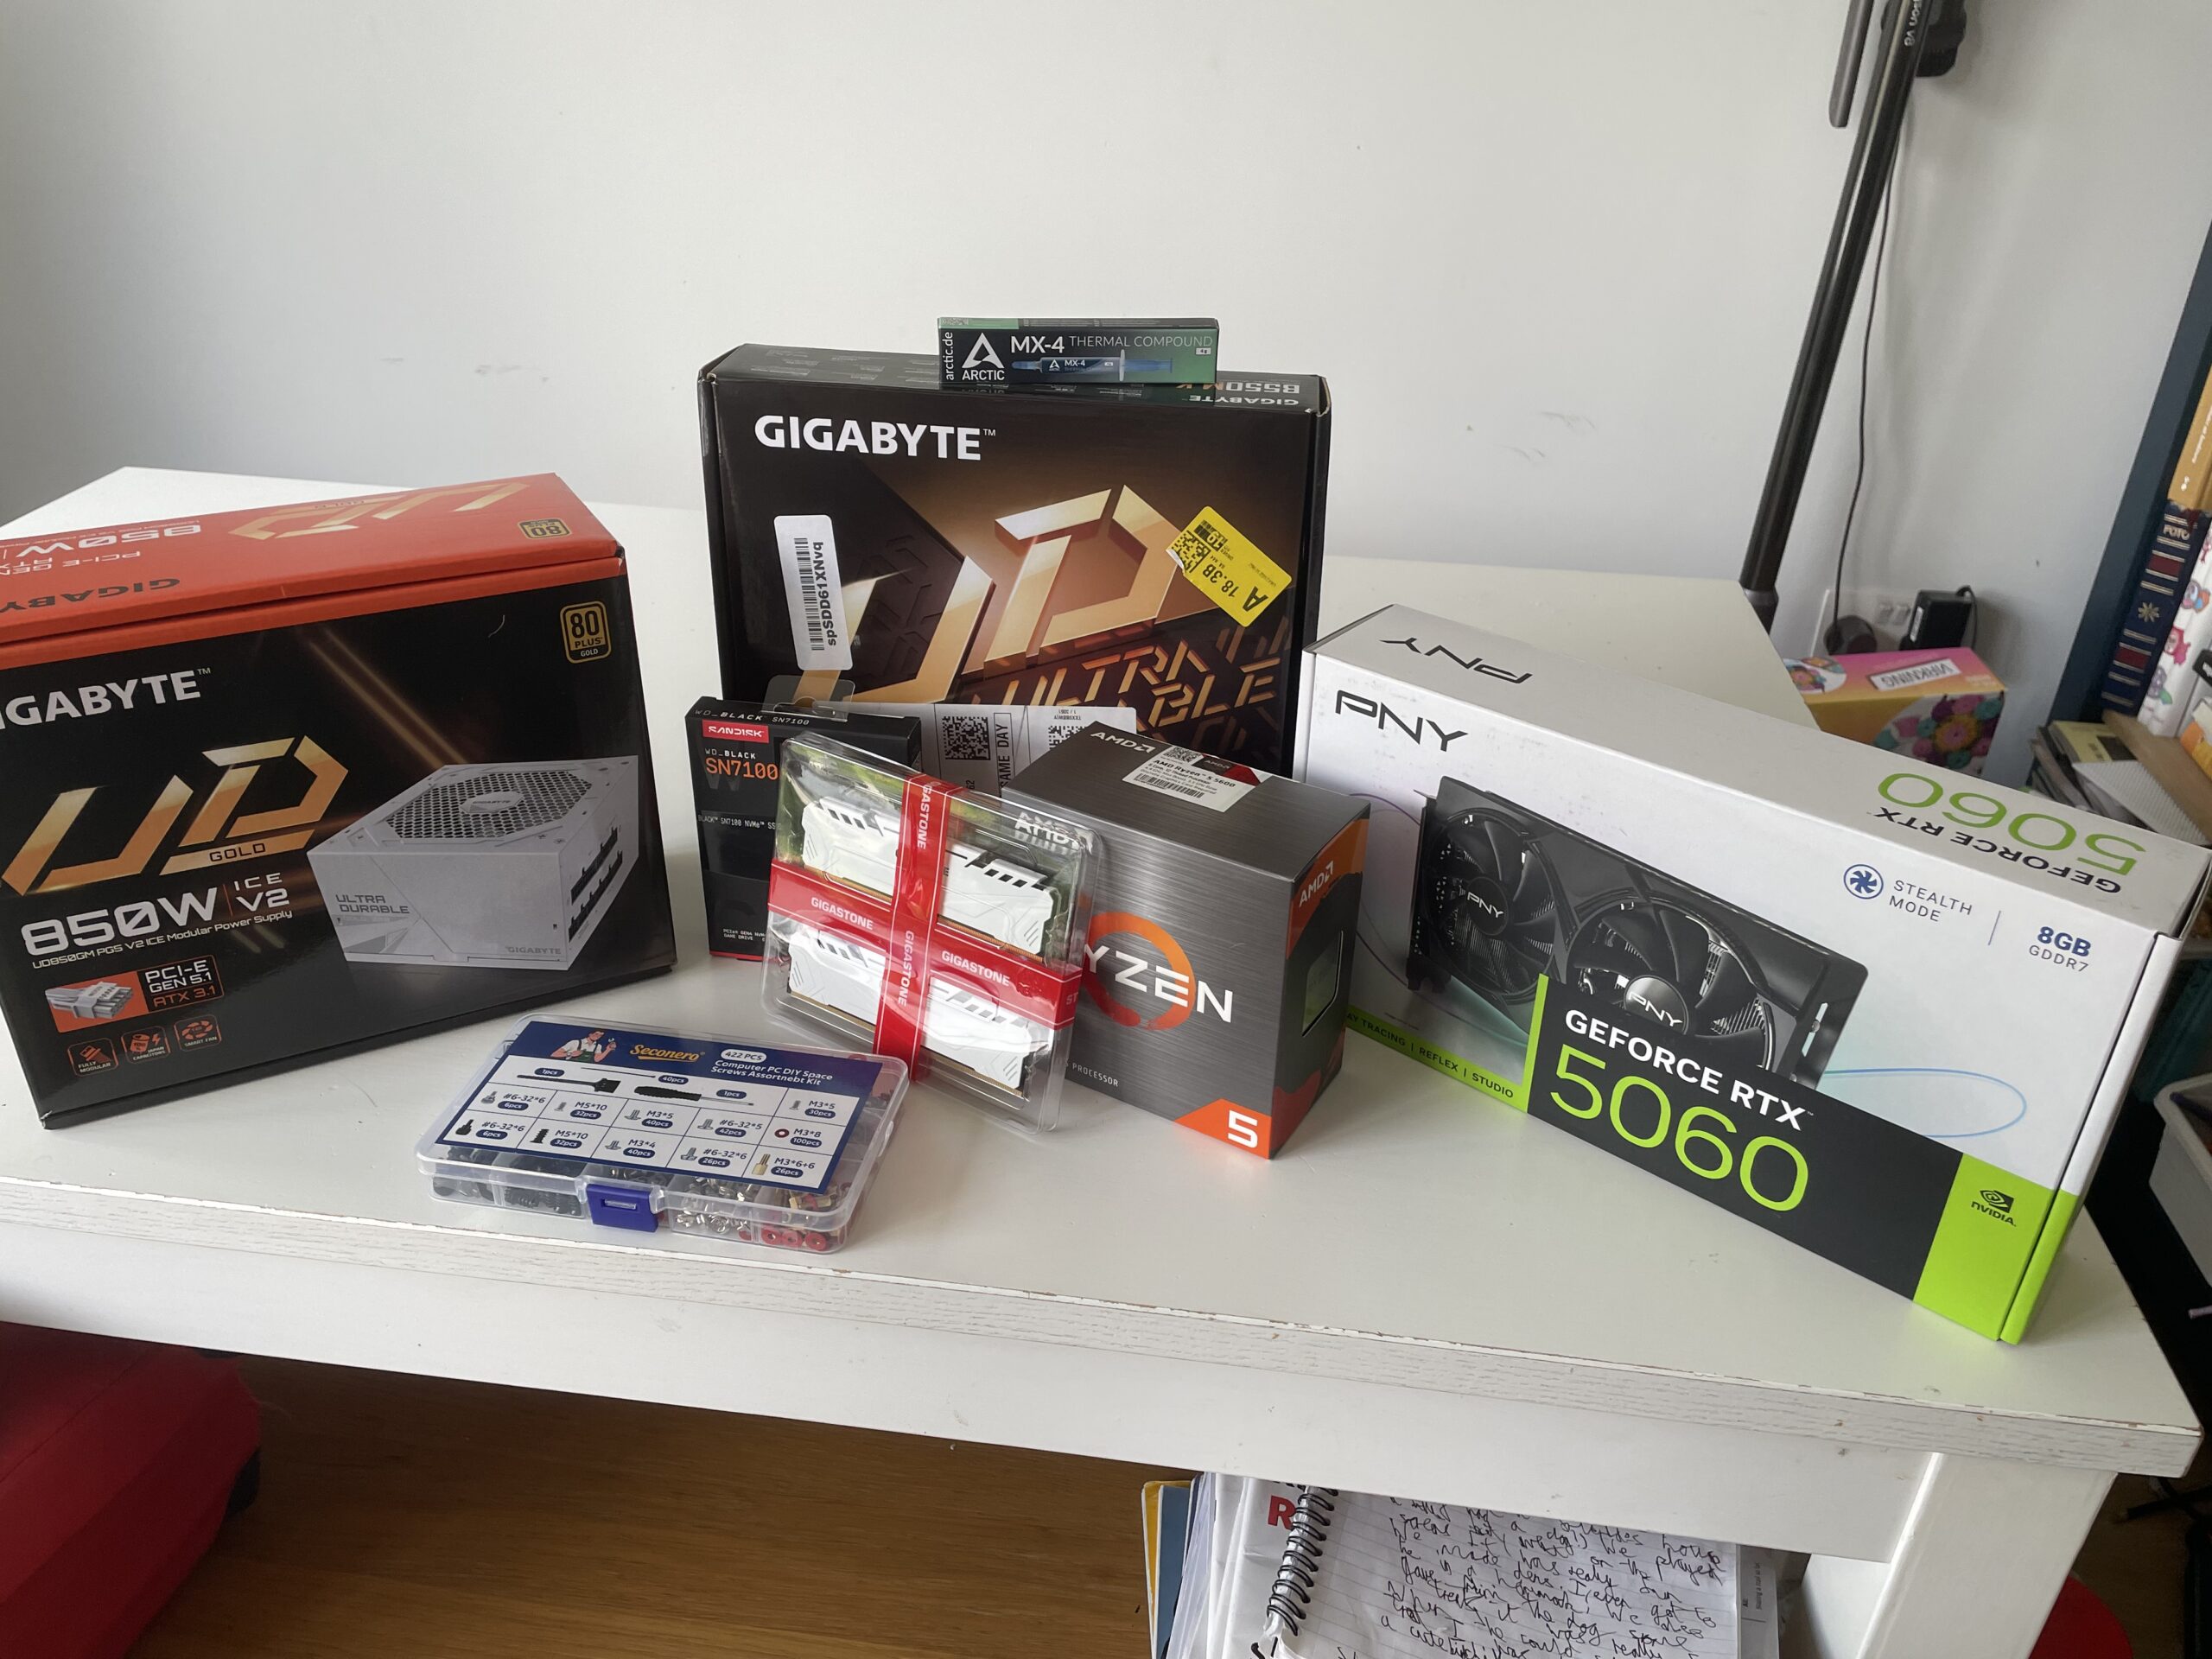
The exact build components I went for were:
- Montech X5 ATX Mid-Tower Gaming PC Chassis – $64.90 / £56.04
- AMD Ryzen 5 5600 CPU – $147.65 / £118.84
- 32GB DDR4 Gigastone Game PRO RAM – $218.99 / £184.24
- PNY GEFORCE Nvidia RTX 5060 8GB Graphics Card – $339.99 / £279.95
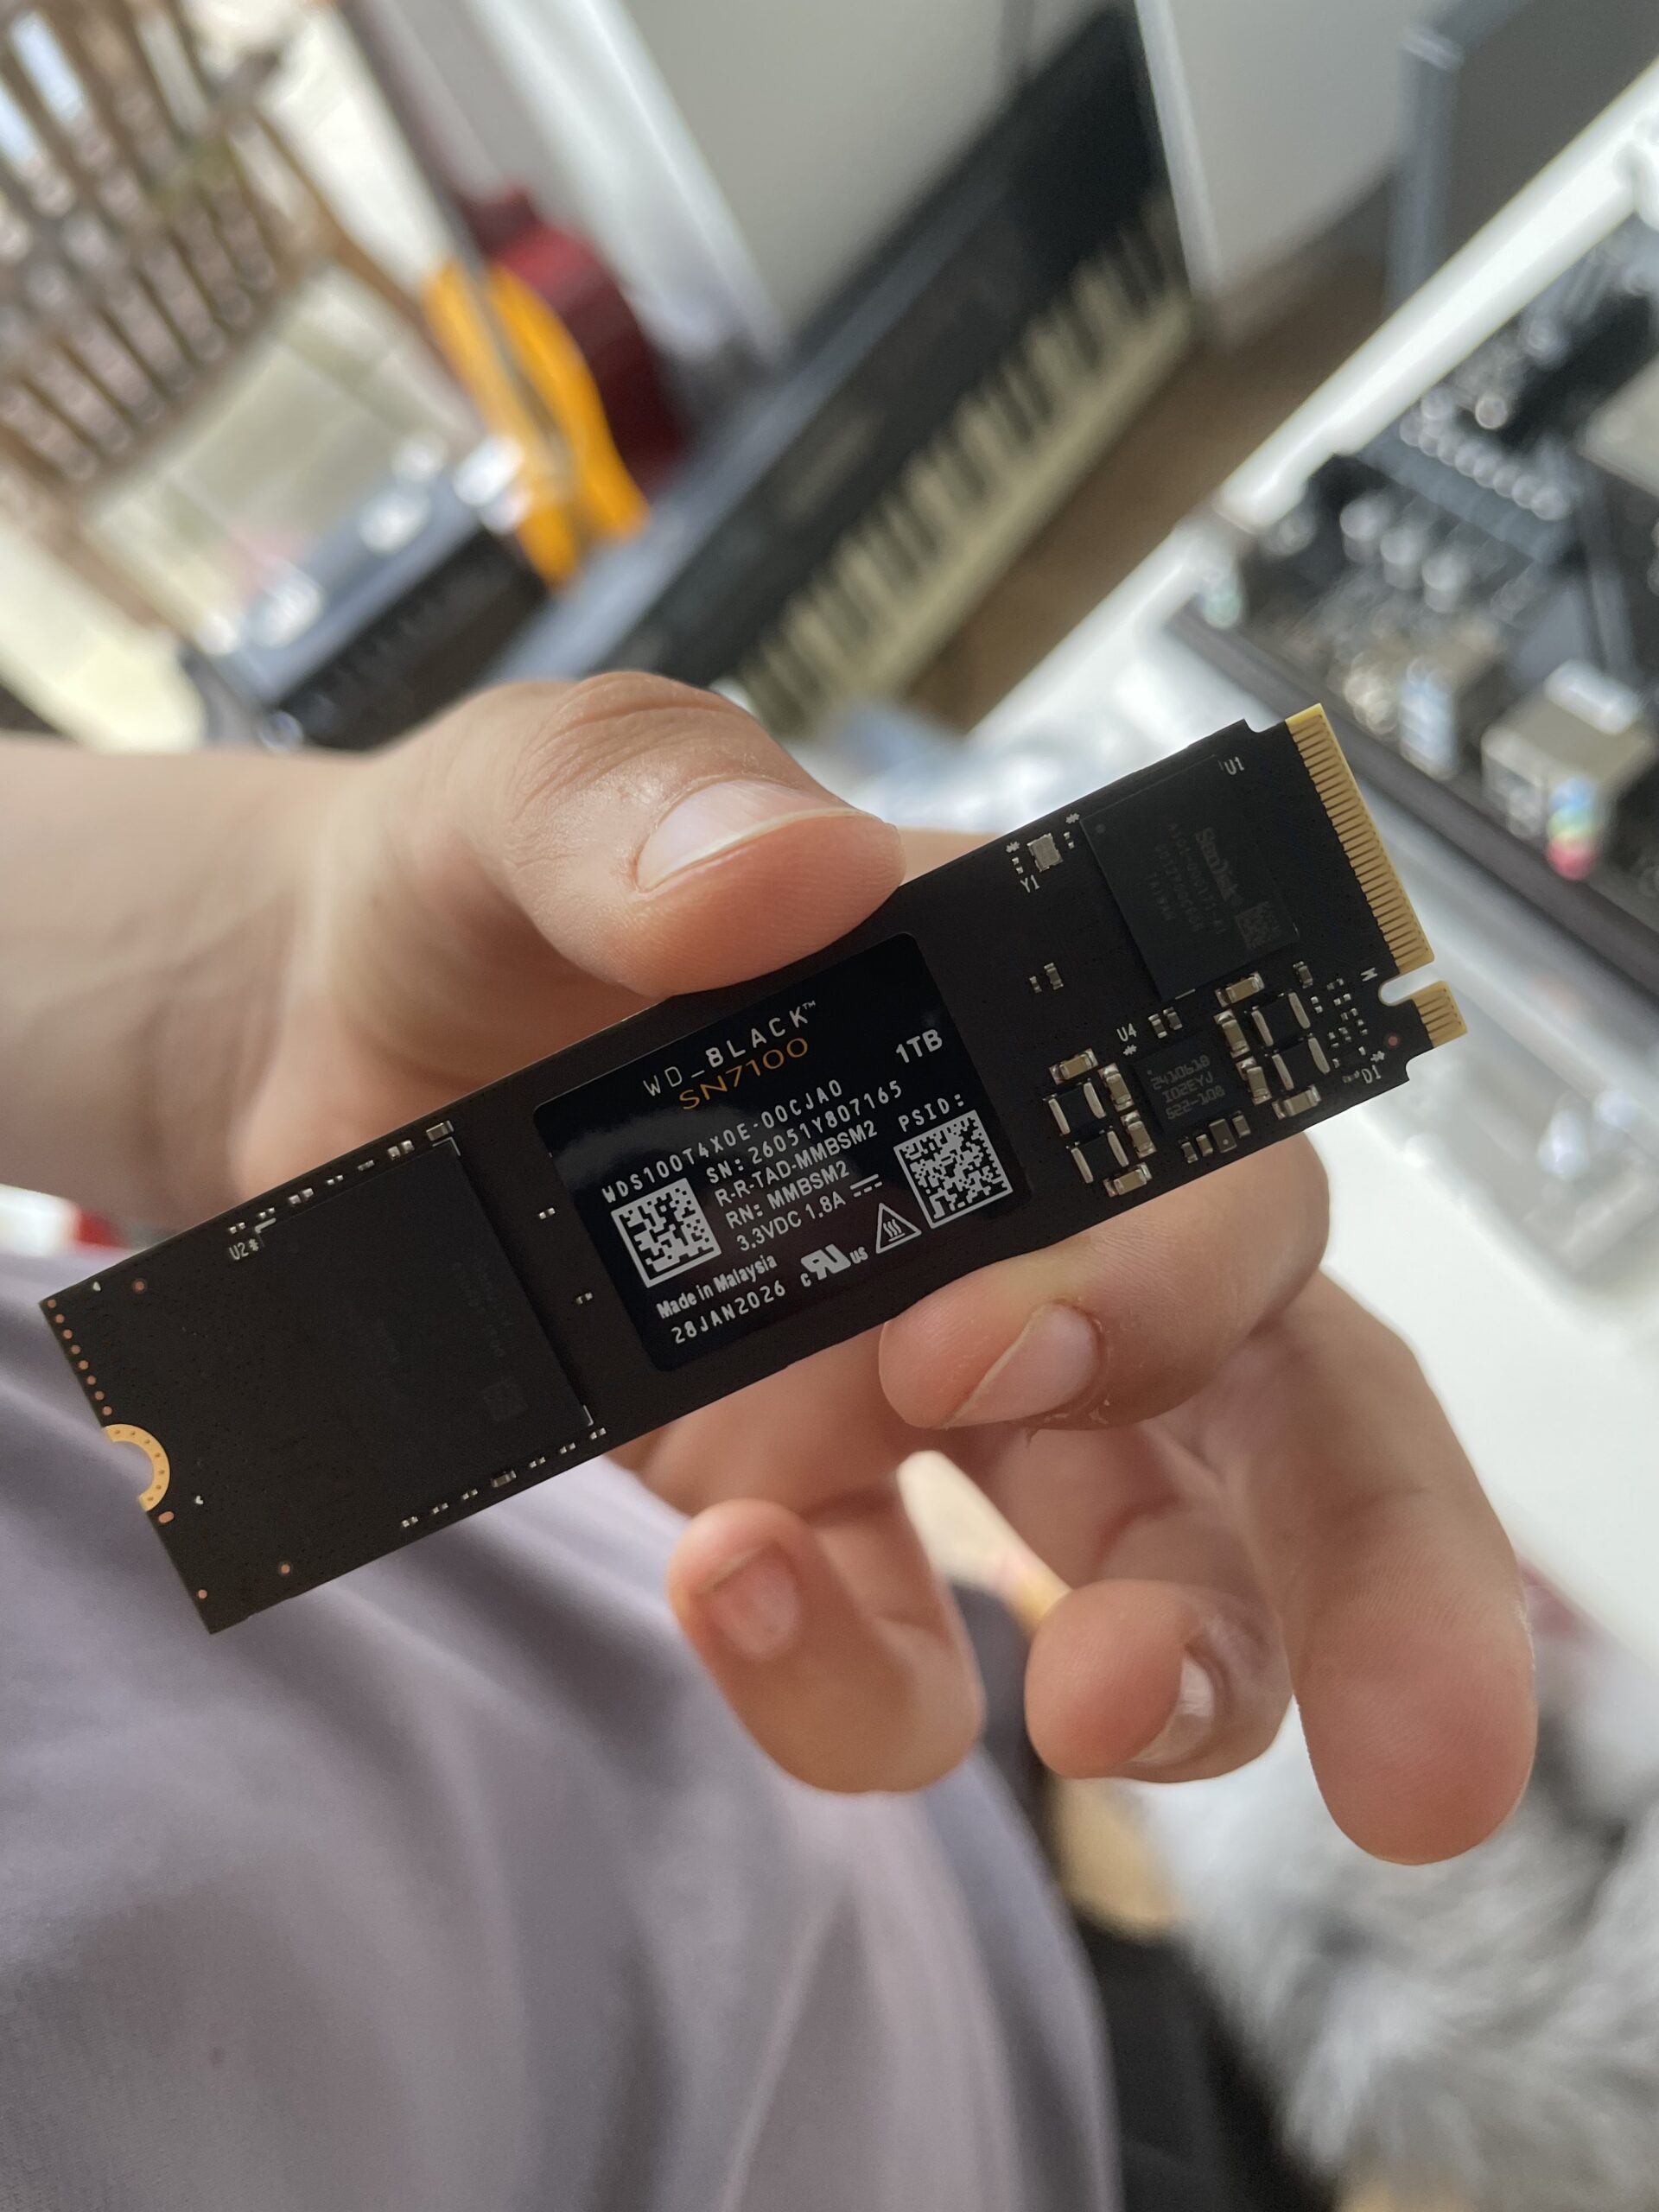
- 1TB WD Black SN7100 NVMe SSD – $194.00 / £144.95
- Gigabyte UD850GM PG5 ICE 850w Power Supply Unit – $89.99 / £84.99
- Gigabyte B550M K Motherboard – $89.99 / £68.99
- Sandisk Cruzer Blade 64GB Pendrive – $16.95 / £11.99
| Component | Model |
|---|---|
| CPU | AMD Ryzen 5 5600 |
| Graphics Card (GPU) | PNY GeForce RTX 5060 8GB |
| RAM | 32GB Gigastone Game PRO DDR4 |
| Storage | 1TB WD Black SN7100 NVMe SSD |
| Motherboard | Gigabyte B550M K |
| Power Supply (PSU) | Gigabyte UD850GM PG5 ICE 850W |
| PC Case | Montech X5 ATX Mid-Tower |
| Operating System | Windows 11 |
| Total Build Cost | $1,162.46 / £949.99 |
I realize that I could probably have bought a ready-made gaming PC with similar specs for around this price but the point was to see if I build-one from scratch – and learn a lot about how PCs are built and work along the way.
I also bought some thermal paste and screws – which in the end I didn’t need as the CPU cooler already has thermal paste on the rear of it and everything else that required screws, came with them.
One thing that immediately stood out compared to buying a Mac was the amount of choice involved. When buying a MacBook direct from Apple, your main options are usually restricted to:
- screen size
- storage
- RAM
- color of the Mac if it’s a MacBook or iMac
With PCs, there’s an overwhelming amount of choice and factors to consider such as:
- chassis type
- motherboard chipset
- PSU wattage
- airflow and fan cooling
- RAM speed
- fan configuration
- GPU clearance
- BIOS compatibility
However, what I came to discover is that modern PC components are generally far more compatible than I expected. Most modern motherboards work with most modern PC chassis, RAM, SSD drives and graphics cards etc. The main question is how powerful you want to go and how much you want to spend.
However, I double checked my setup with AI to confirm that they would all work together – and I recommend you do the same if you’ve never done this before.
What I Feared The Most
My biggest fear from the start was that after spending all this money and building it, the PC wouldn’t turn on and I wouldn’t have a clue which component or connection was causing the problem.
Watching PC builders on YouTube gives the impression that assembling a computer is a piece of cake and everything works first time.
My experience is that putting the components together on the motherboard is the relatively easy part. Connecting all the cables from the PC chassis to it was a bit more tricky.
Getting the damn thing to start was the hardest of all although, in the end this was mainly down to some careless wiring as you’ll see!
How I Built The PC: Step-by-Step
The first thing you need to do is layout your motherboard on a table. You don’t need to screw it onto the PC tower at this stage – it will only make your life harder.
I would not advise doing this on a carpet as all the tiny screws will inevitably get lost when you drop them.

The first nice surprise was that most of the components easily clip onto the motherboard.
You do need to secure the CPU fan cooler with four screws but apart from that, the RAM, SSD storage and the CPU itself clip into place.
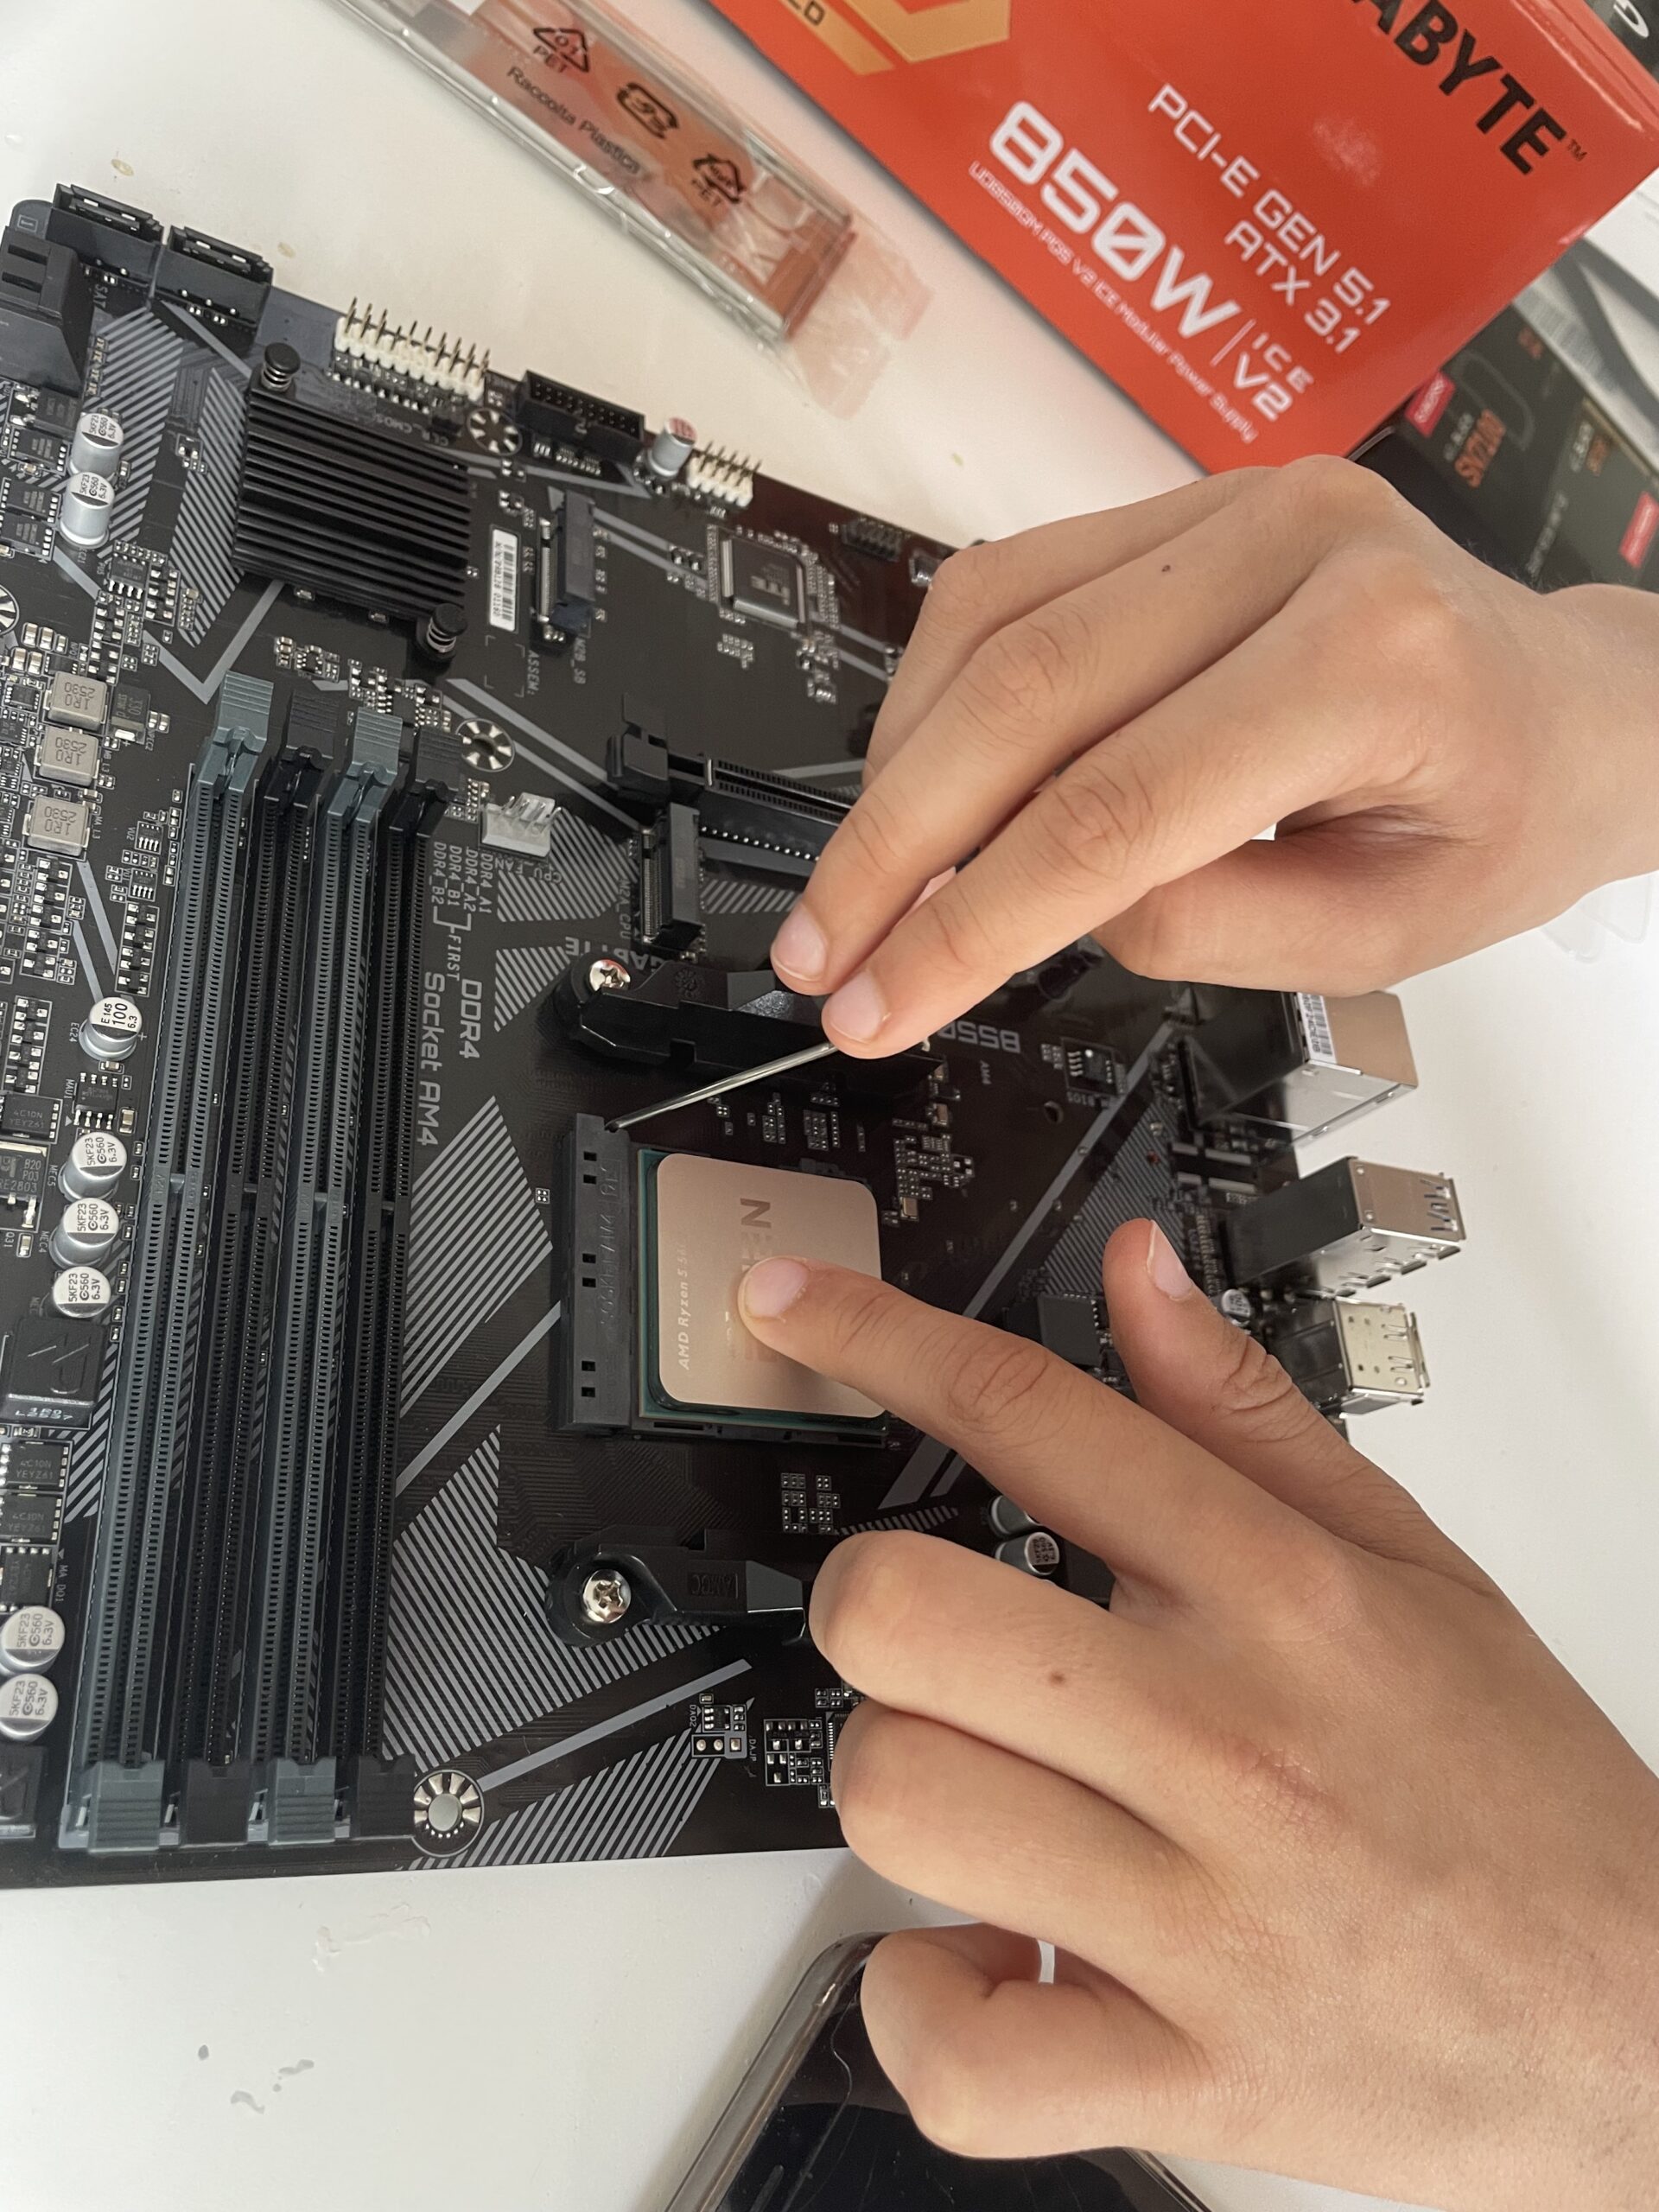
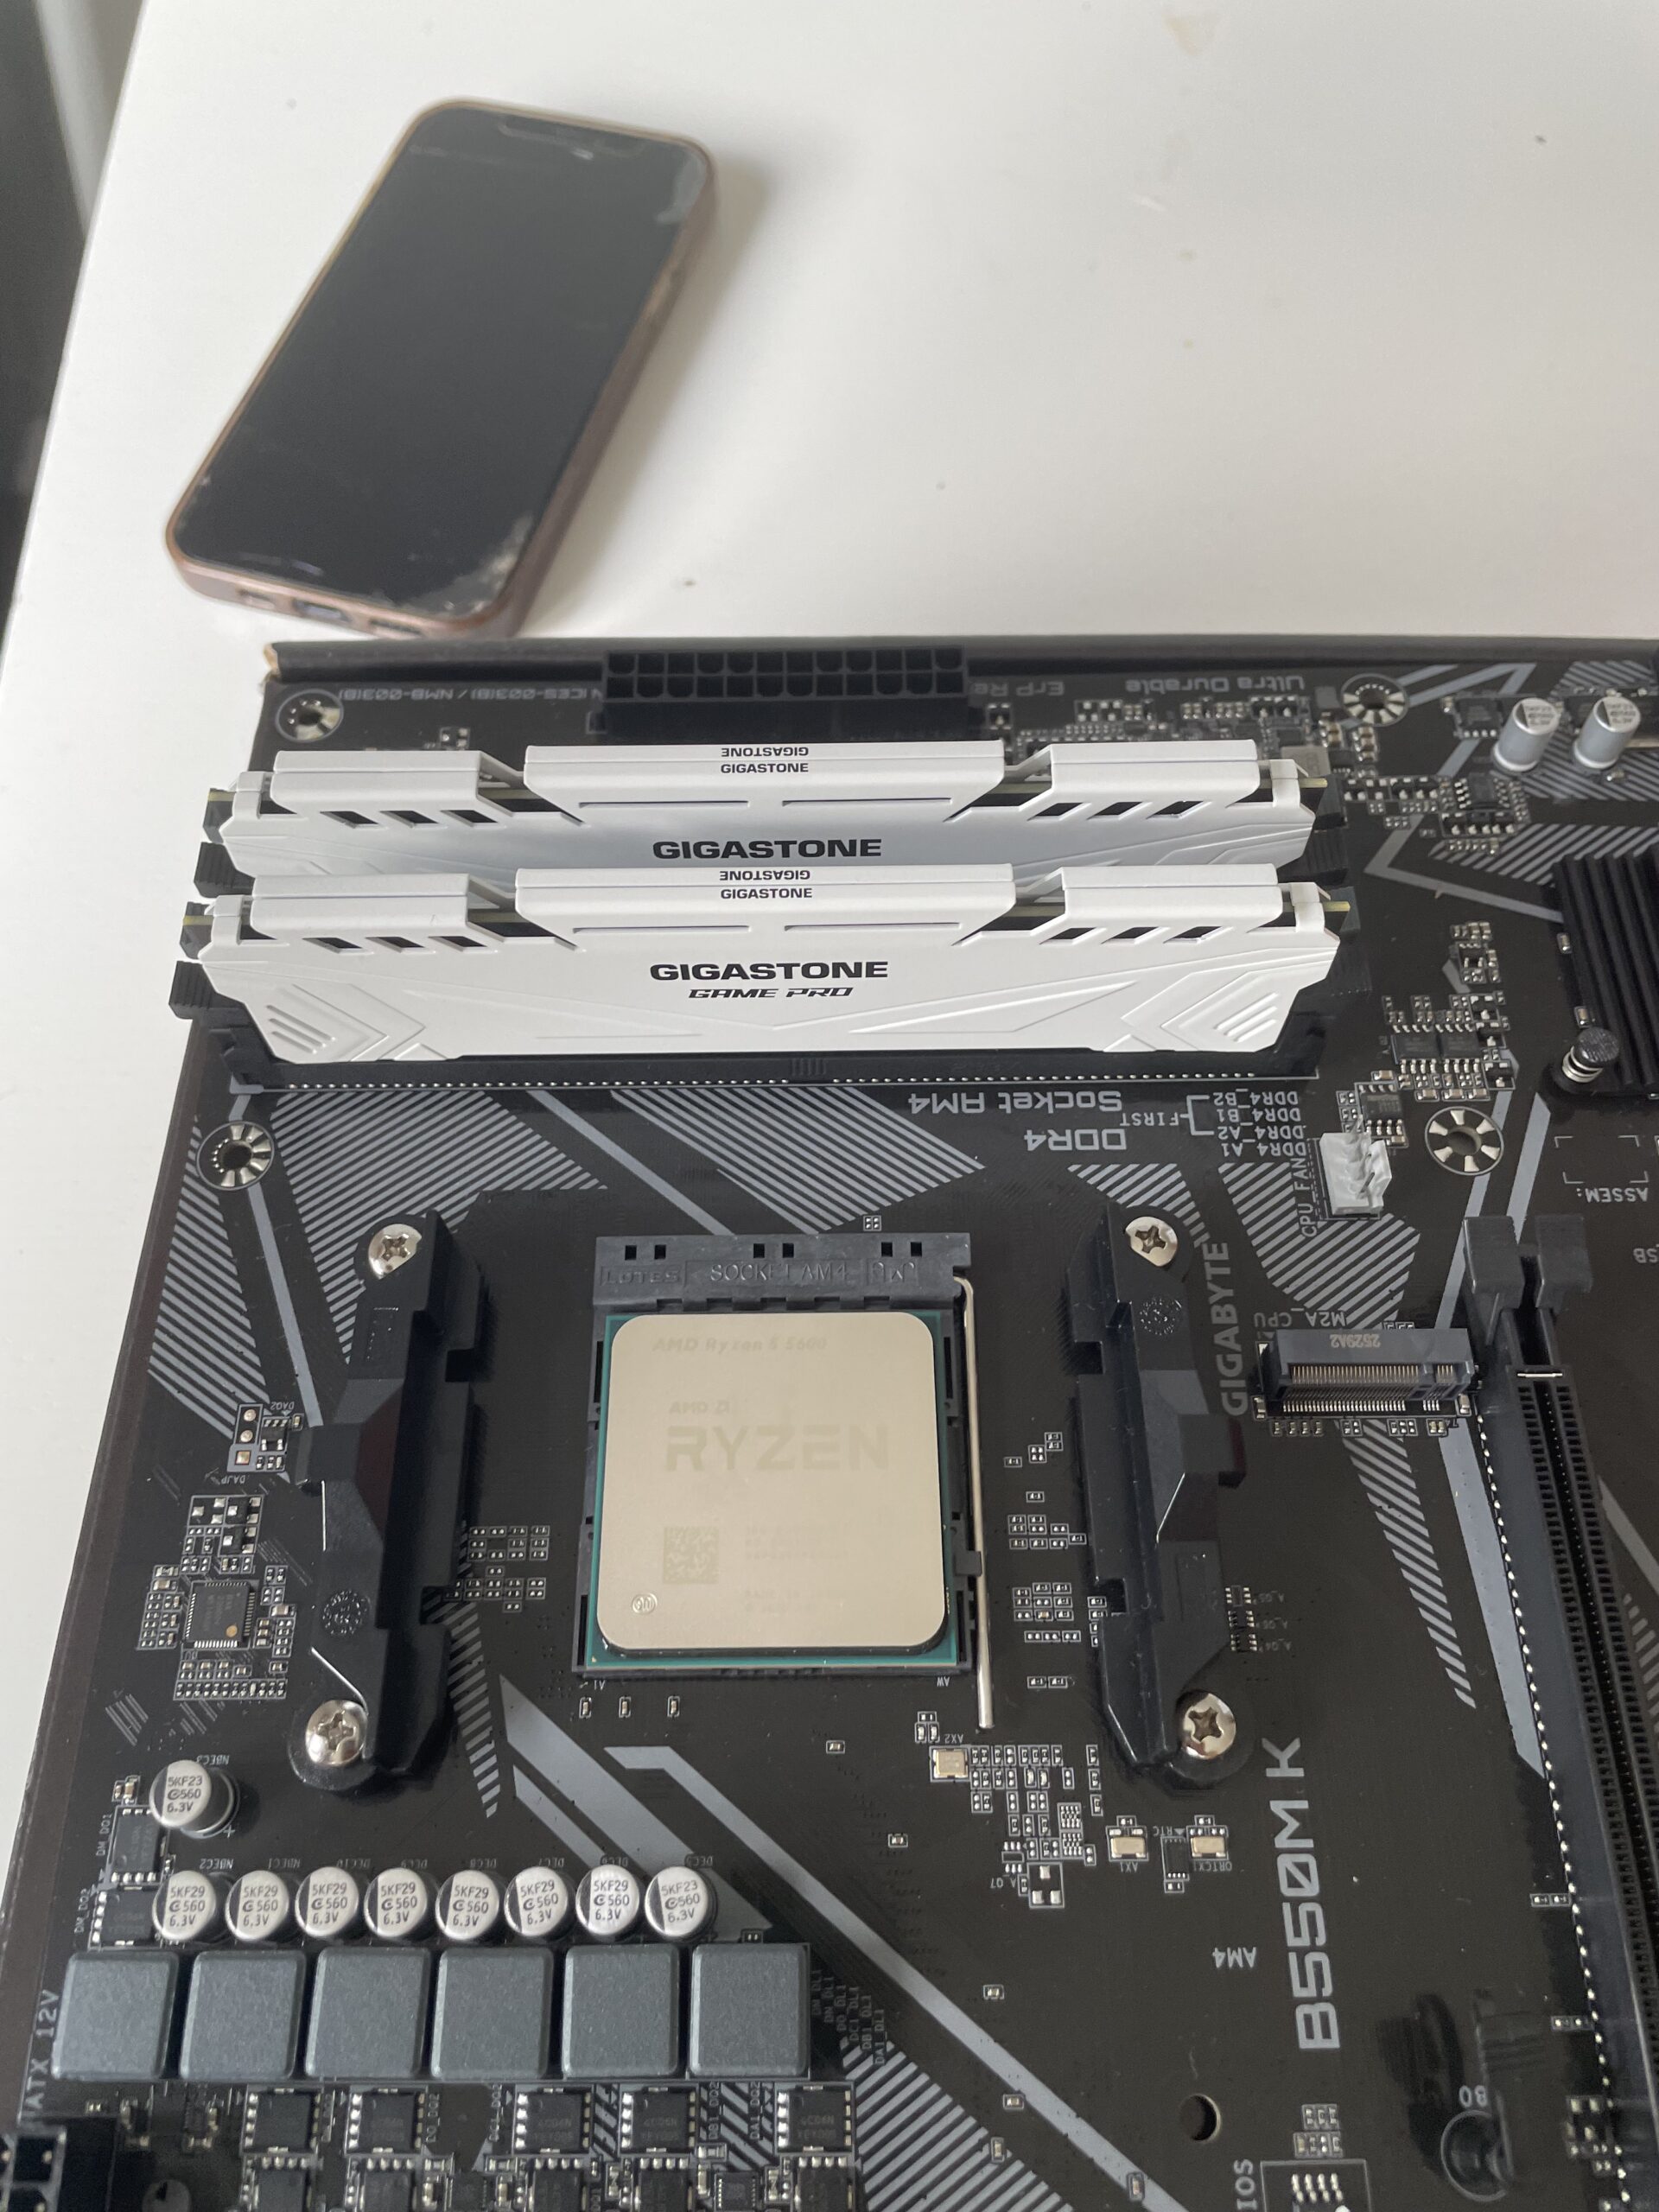
Installing The CPU
The first thing I did was insert the CPU. The CPU is small – it can fit in the palm of your hand – and must be handled with care.
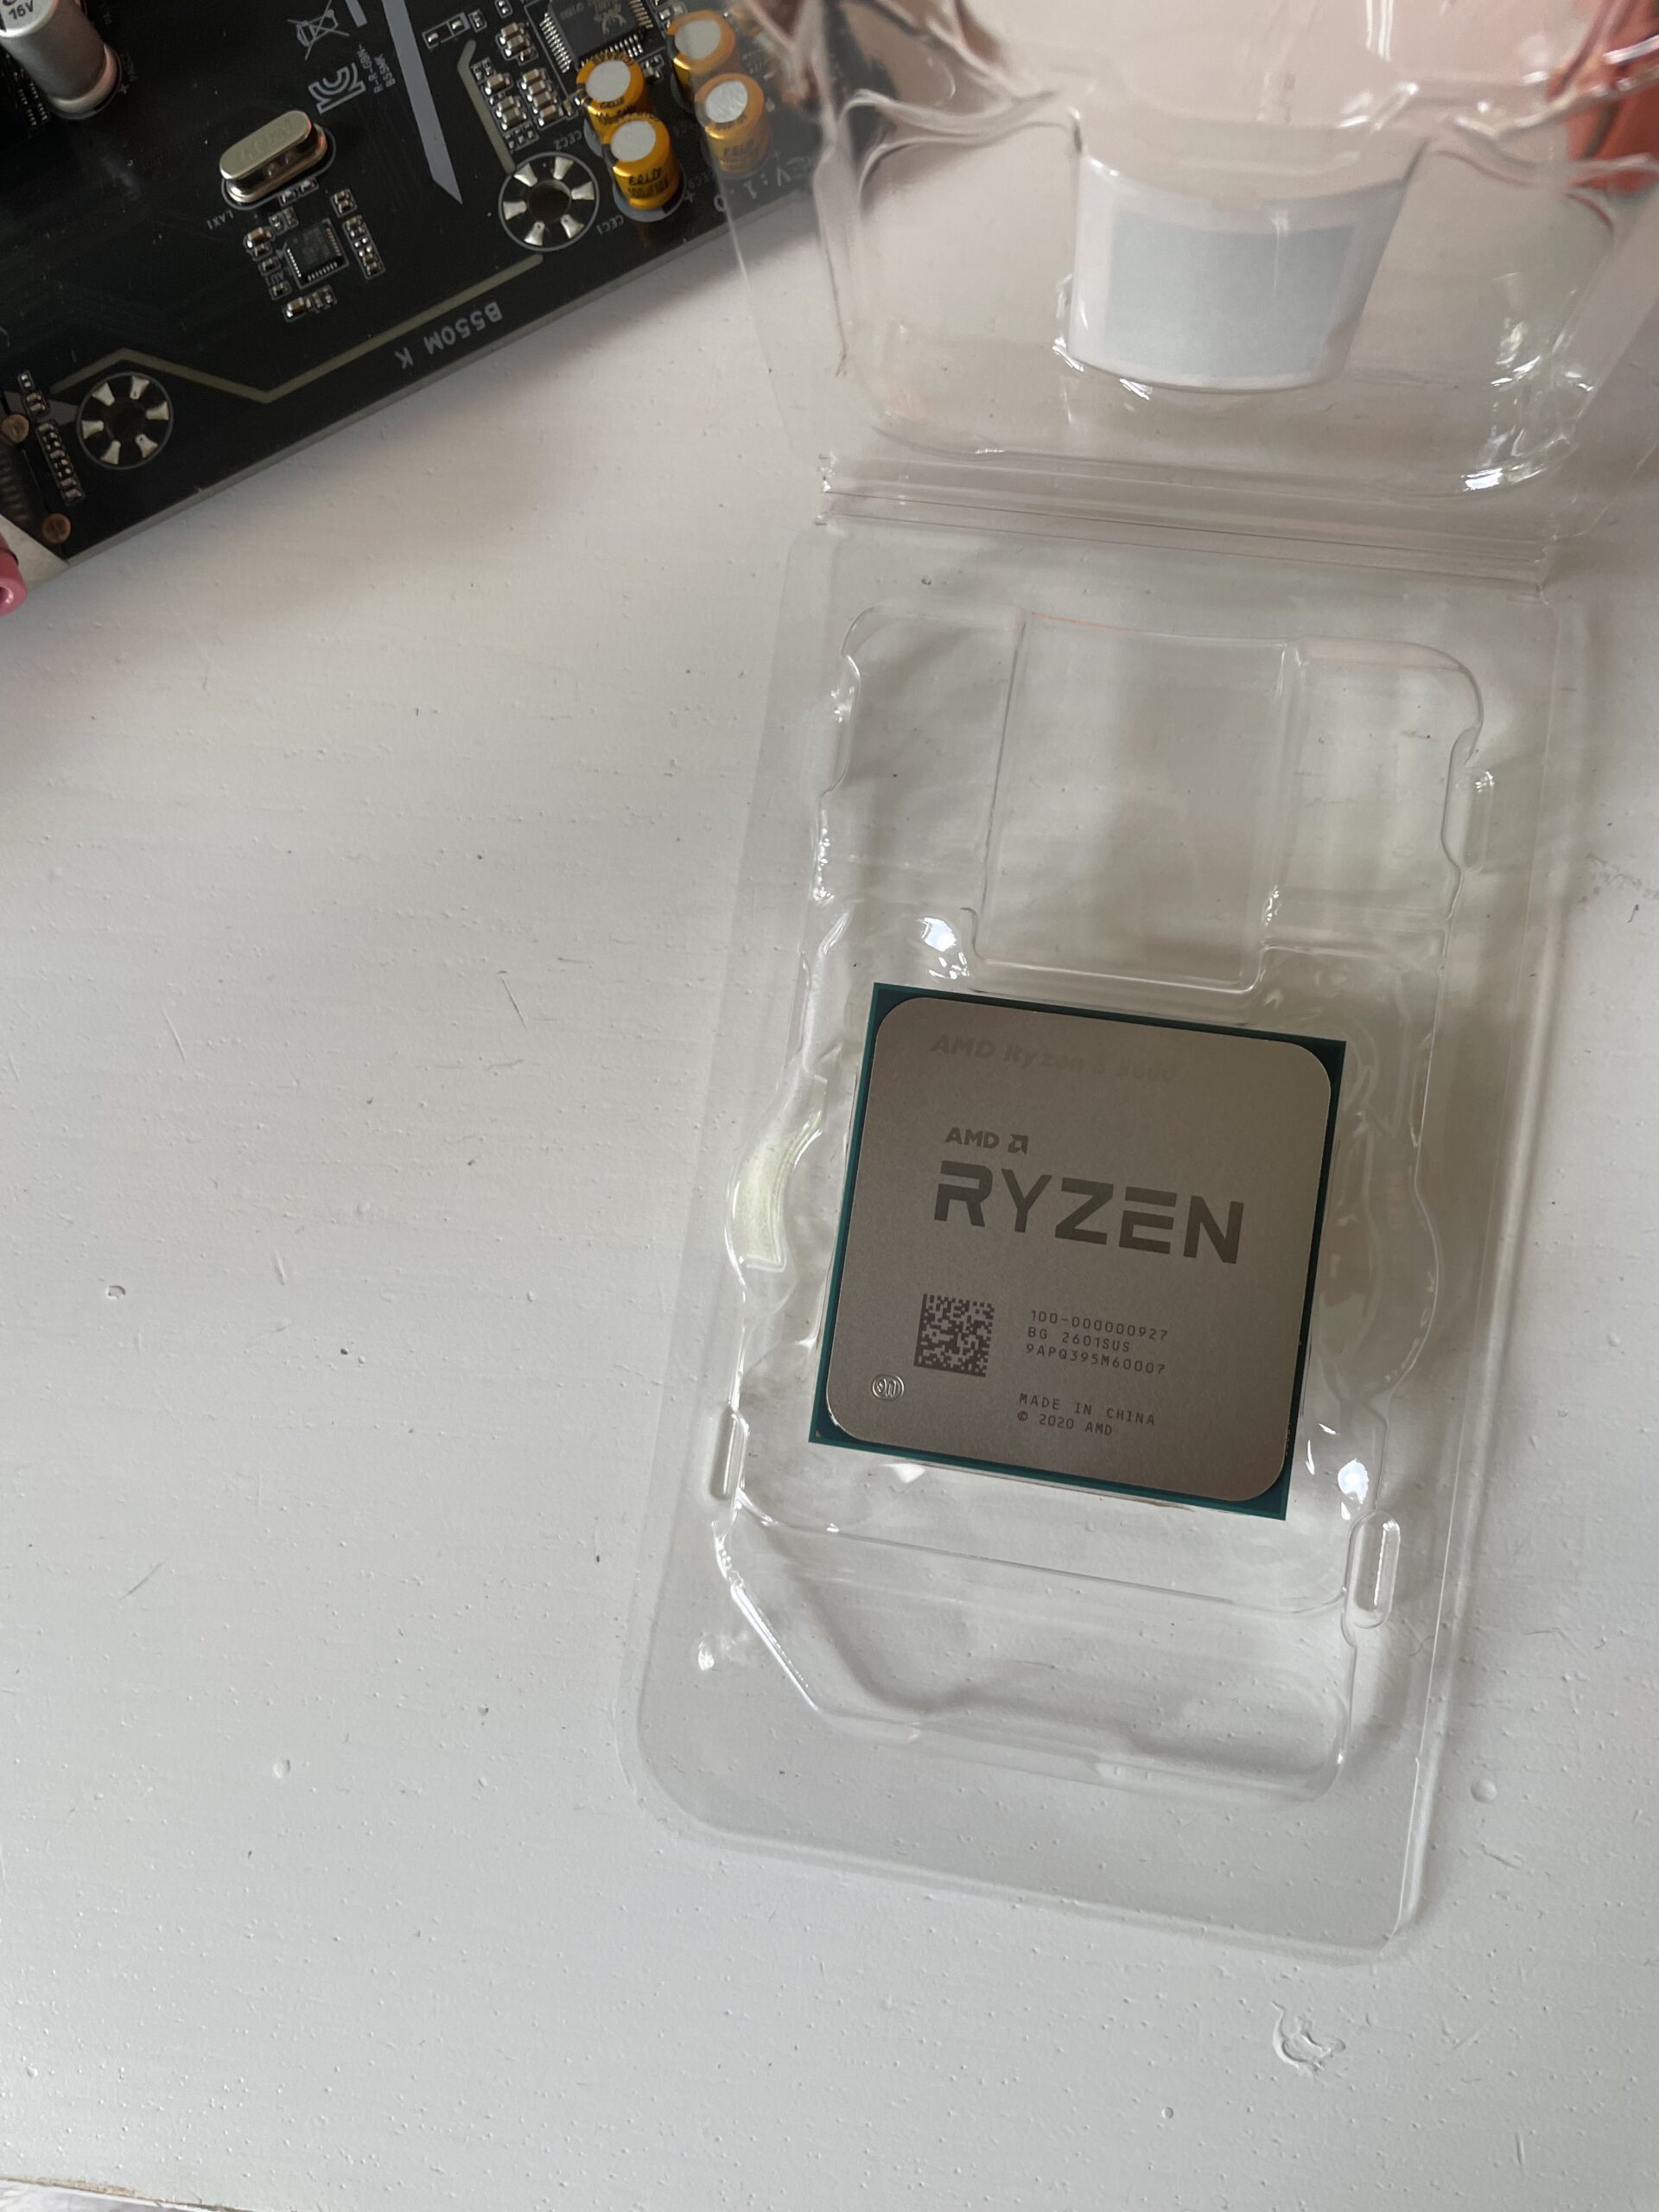
Fitting it is simple however. You just have to pull back a lever which opens the CPU slot, place the CPU in it and then close the lever to lock it down.
Installing The RAM
The next thing I did was clip in the RAM. I bought two 16GB RAM sticks to give a total of 32GB of RAM.
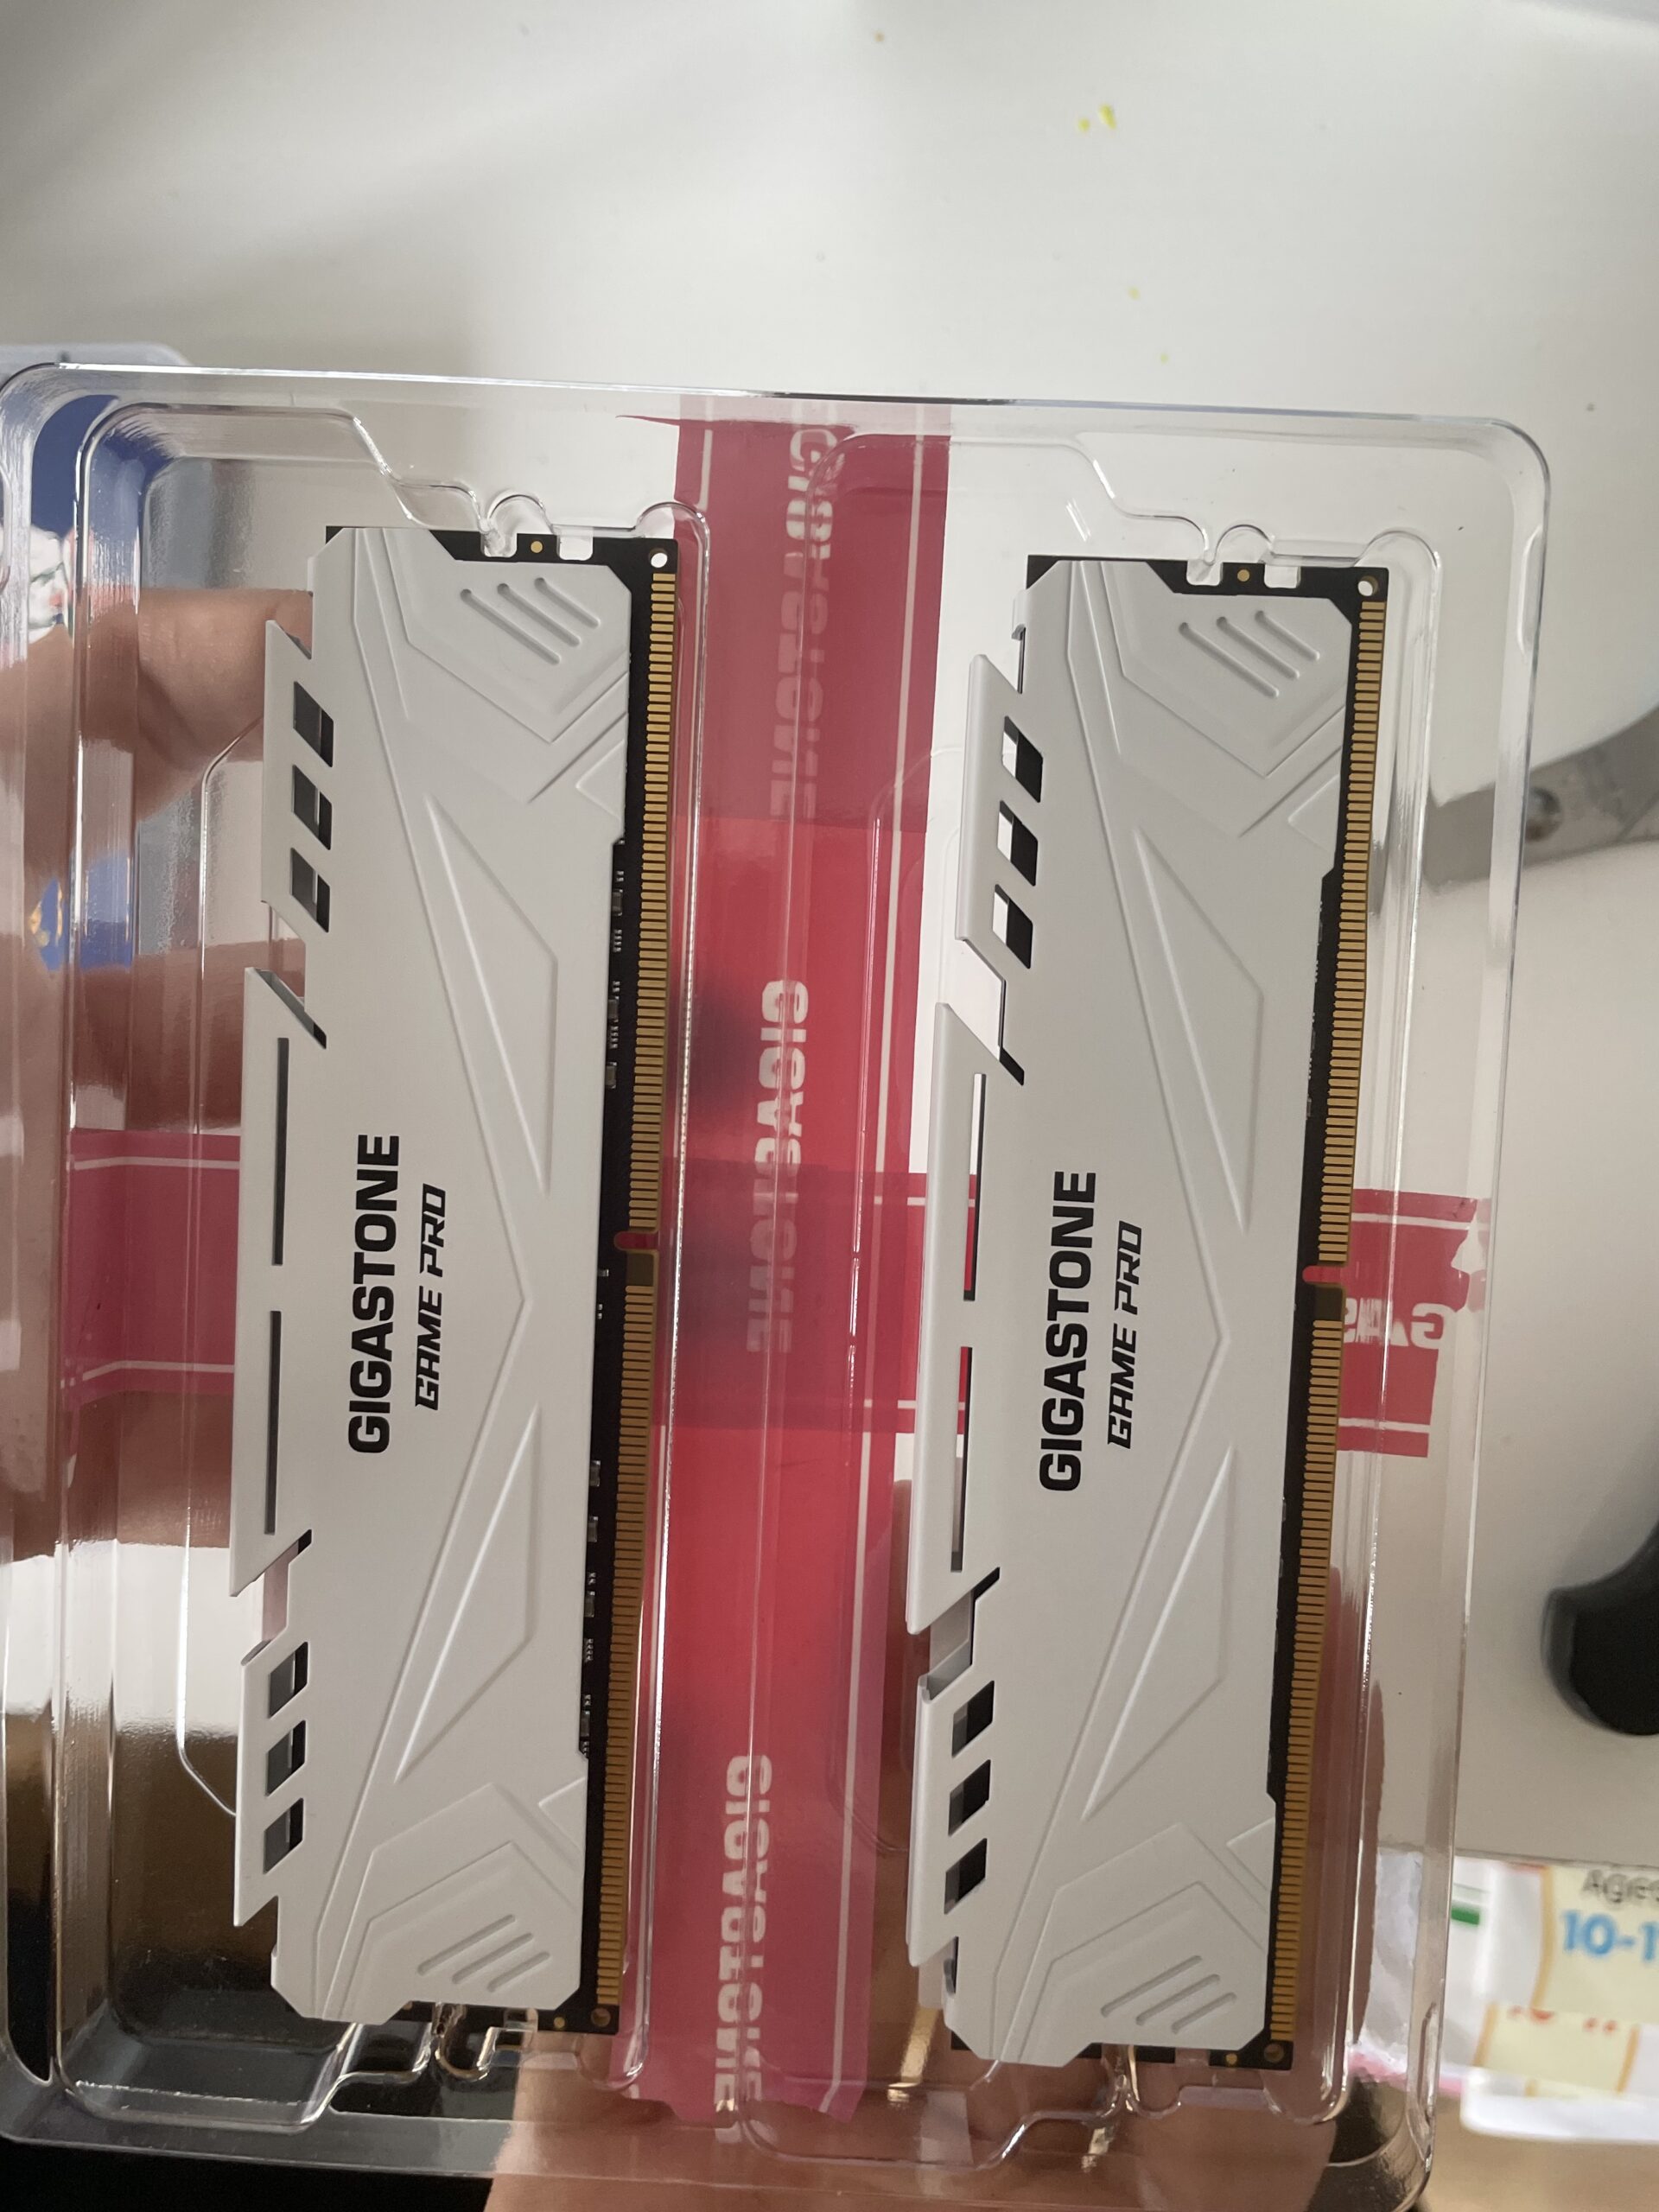
This is also very easy and simply requires you to open the two supporting clips on either side of the black or grey slots (on my motherboard there were four RAM slots) and push them in until they click. I later found out that you actually get better performance from them by clicking them into the grey slots rather than the black ones (at least for this brand) although they will still work in any slot.
The CPU and RAM were by far the easiest things to fit on the motherboard. I was worried about applying too much pressure and breaking things throughout the build but most things “slot” into place and it’s quite obvious once they’re secure.
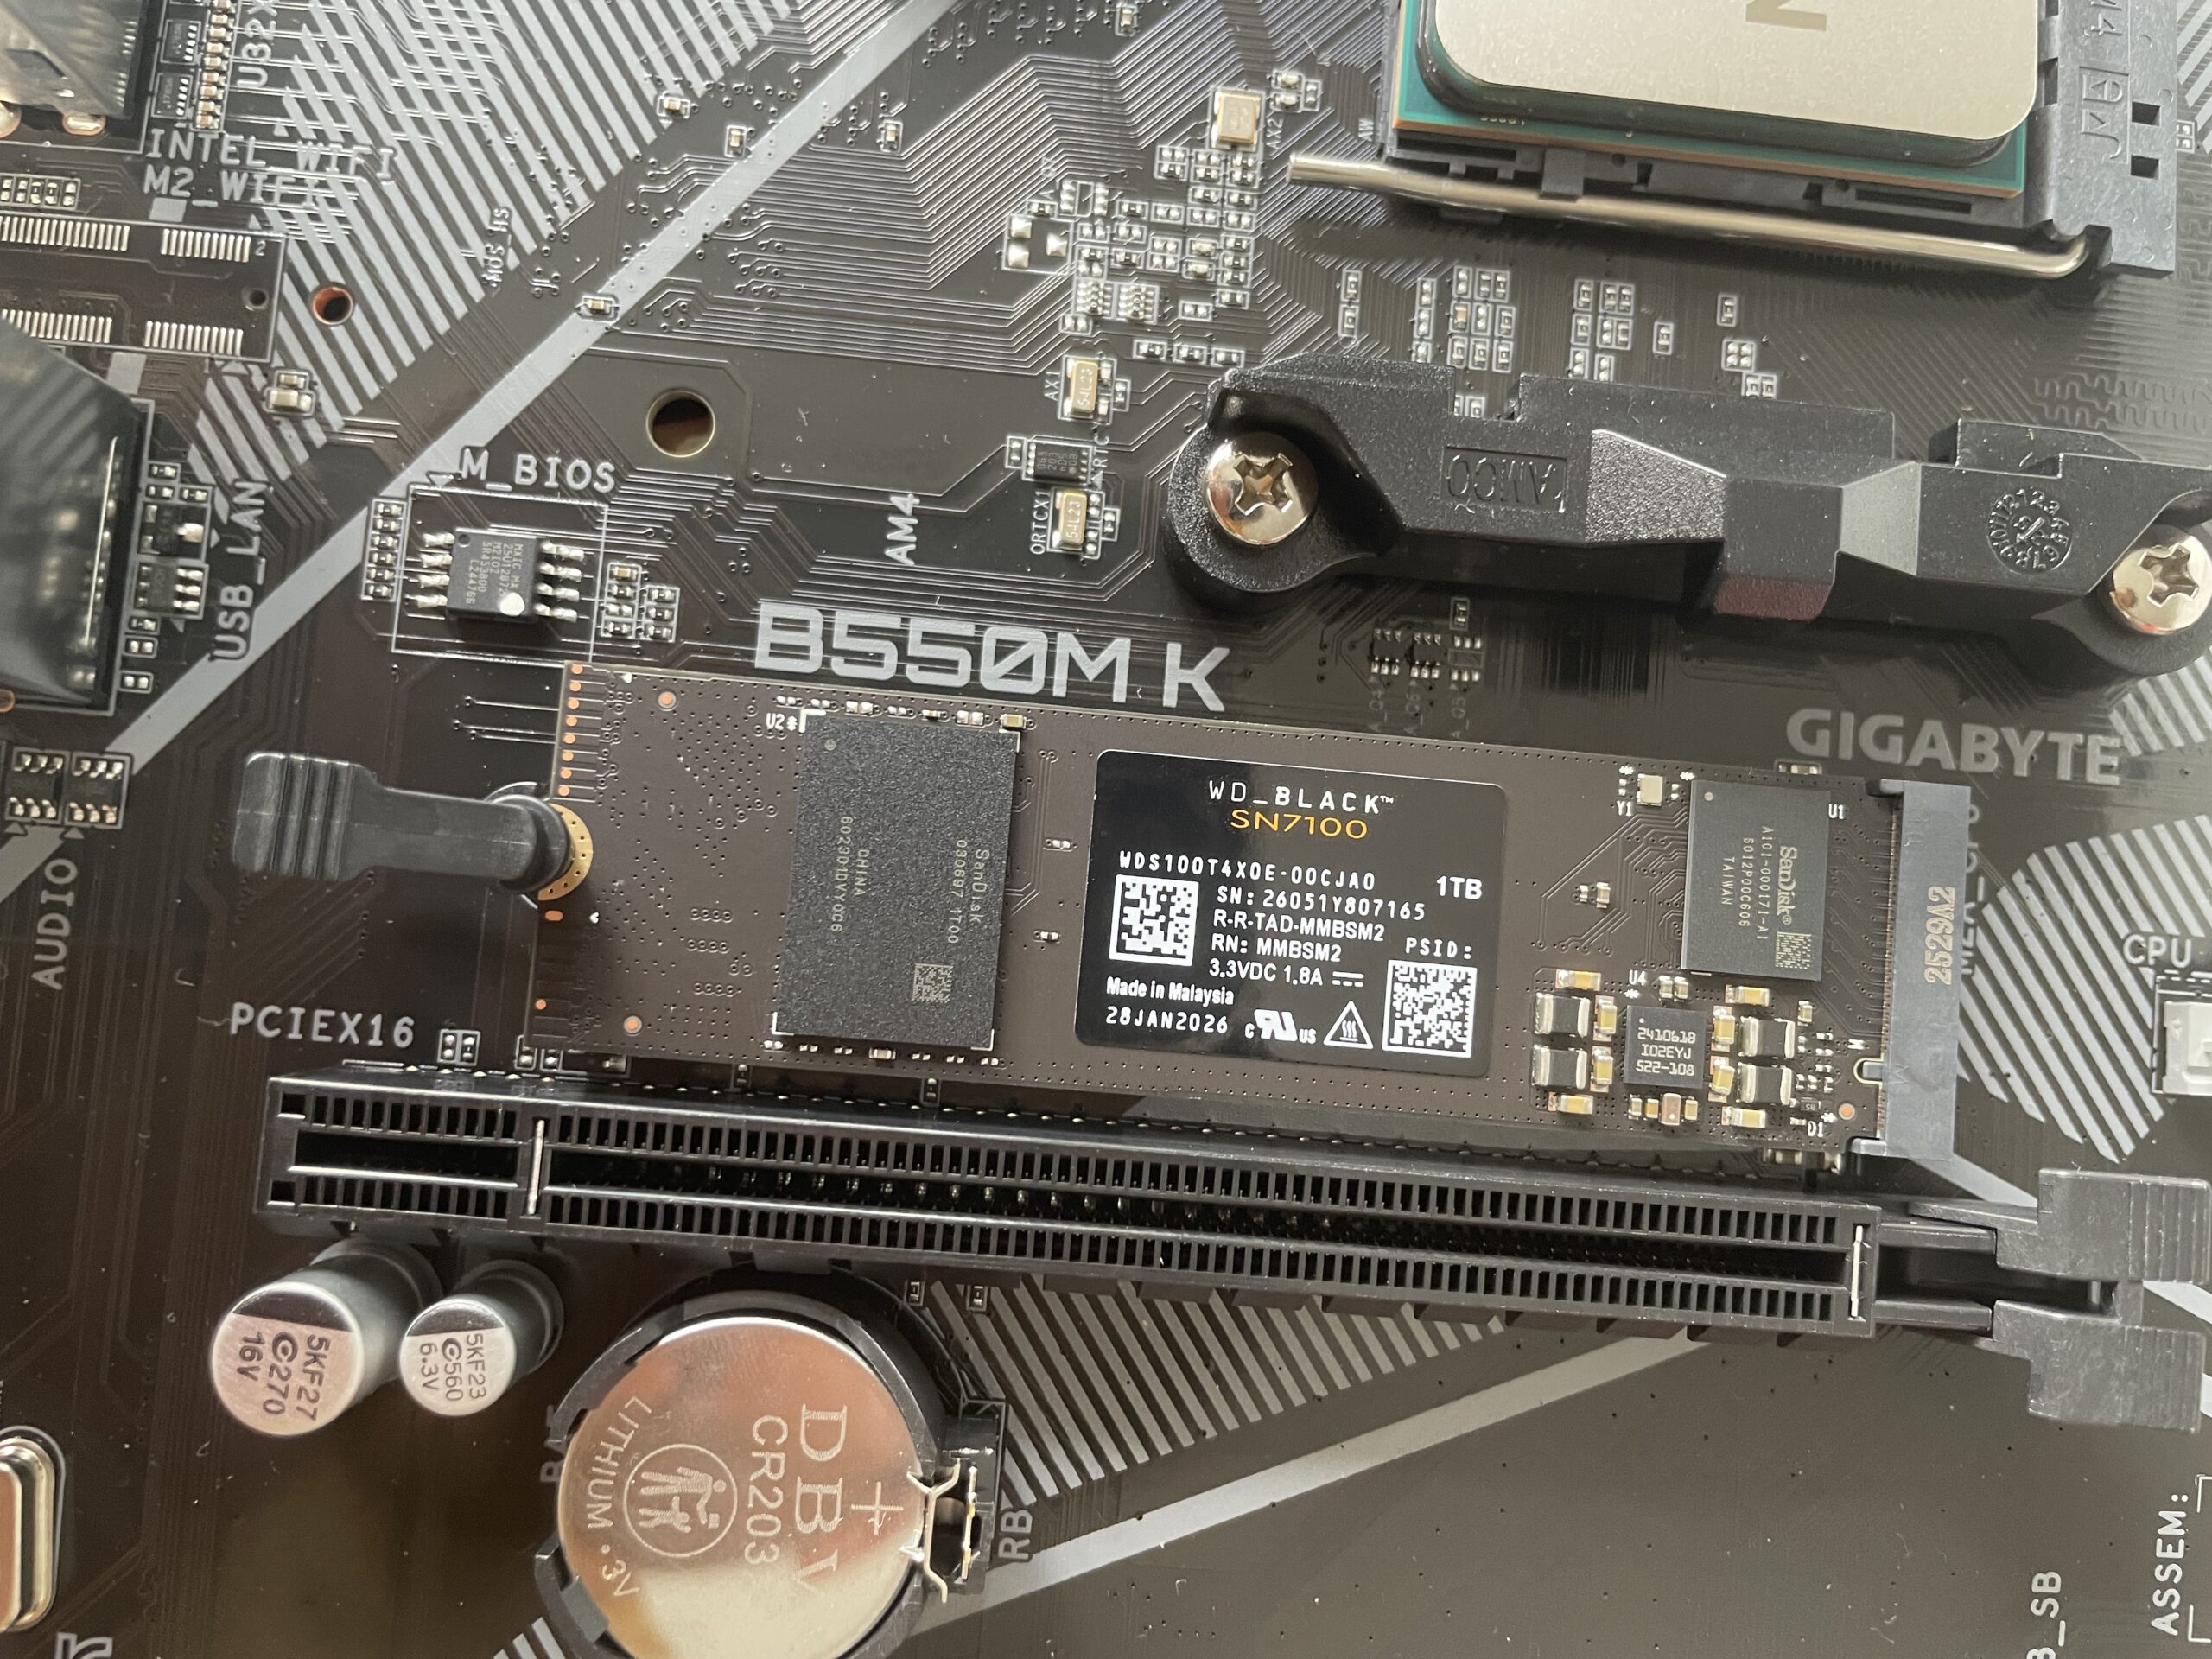
Installing The SSD
I then installed the 1TB WD SSD drive.
This also clips easily into place via a grey clip on the right. On my motherboard, there is a simple plastic plug on the other side which clips on top and secures the SSD drive in place.
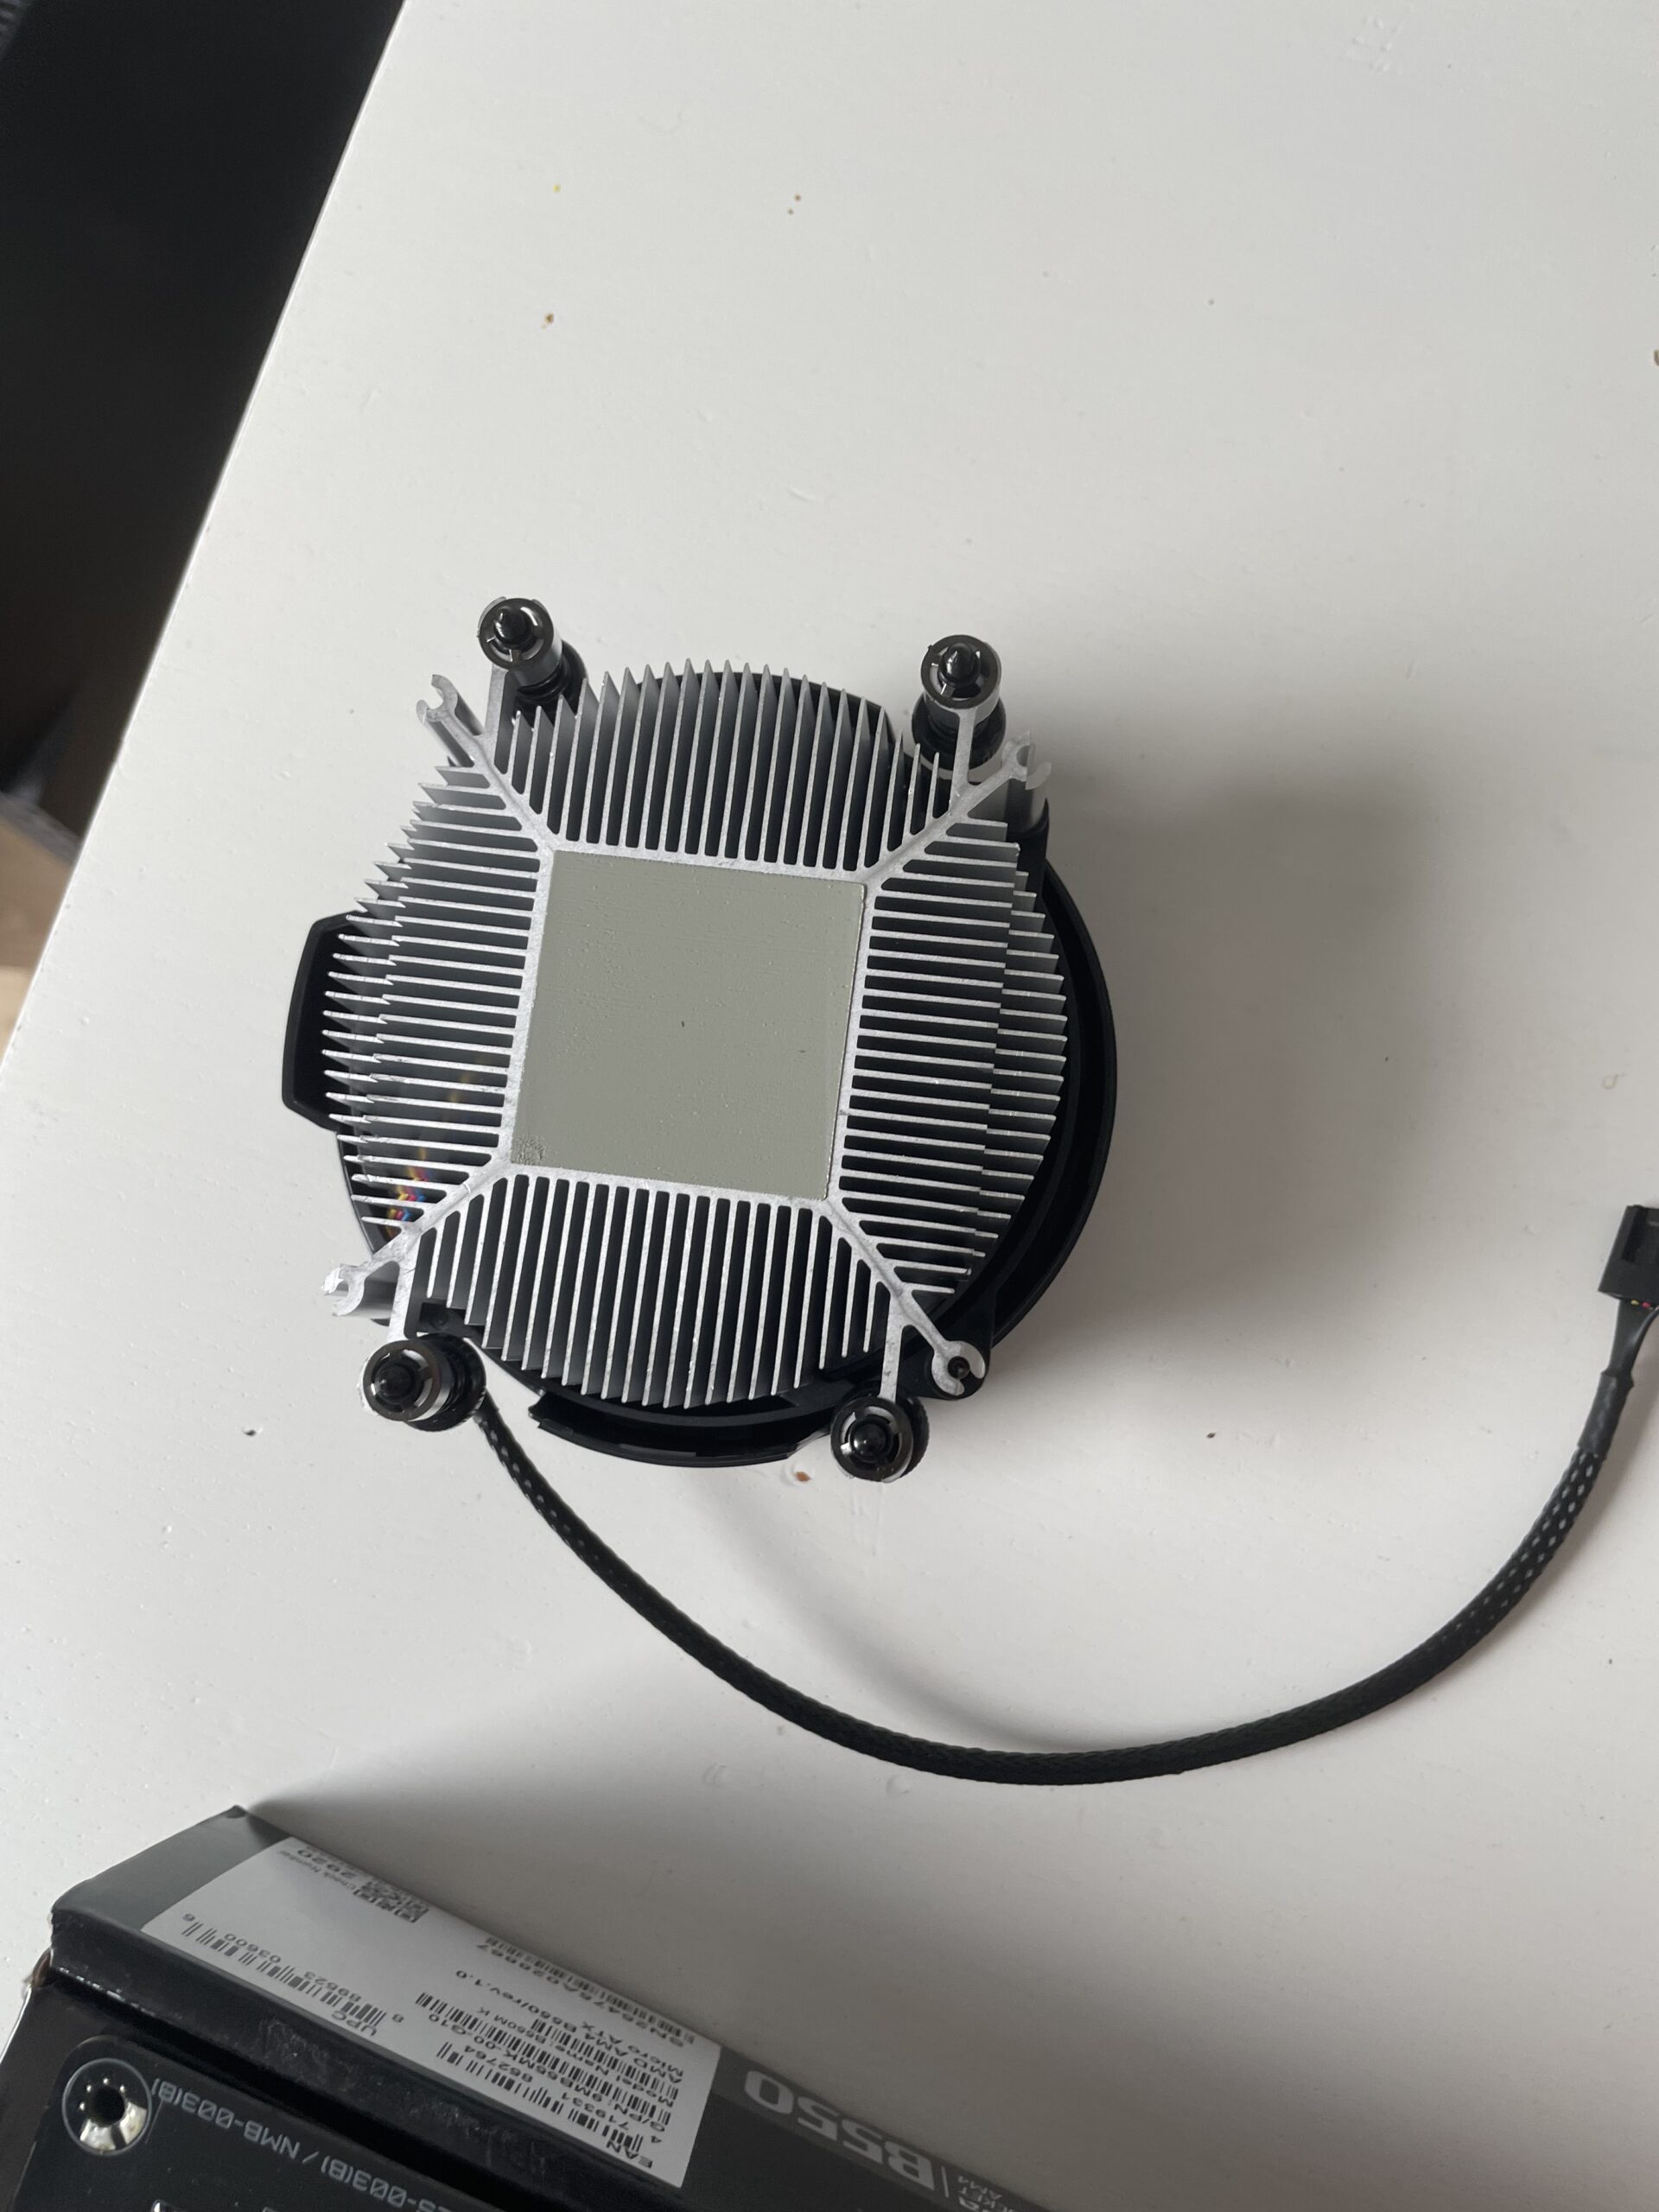
Installing The CPU Cooler
The next thing I installed was the CPU cooler which comes in the same box as the CPU. This is a fan that goes over the CPU to keep it cool. Although the computer chassis has plenty of fans on it, you need to add a dedicated fan that sits above the CPU because it gets so hot.
Be aware that most CPU coolers have a thin layer of thermal paste on the bottom of them. This is designed to absorb the heat from the CPU and it’s important not to touch it. I did order thermal paste as I wasn’t aware there was any included with the CPU cooler but you really shouldn’t need it. The black wire you can see is the power cable for the cooler which plugs into the motherboard.
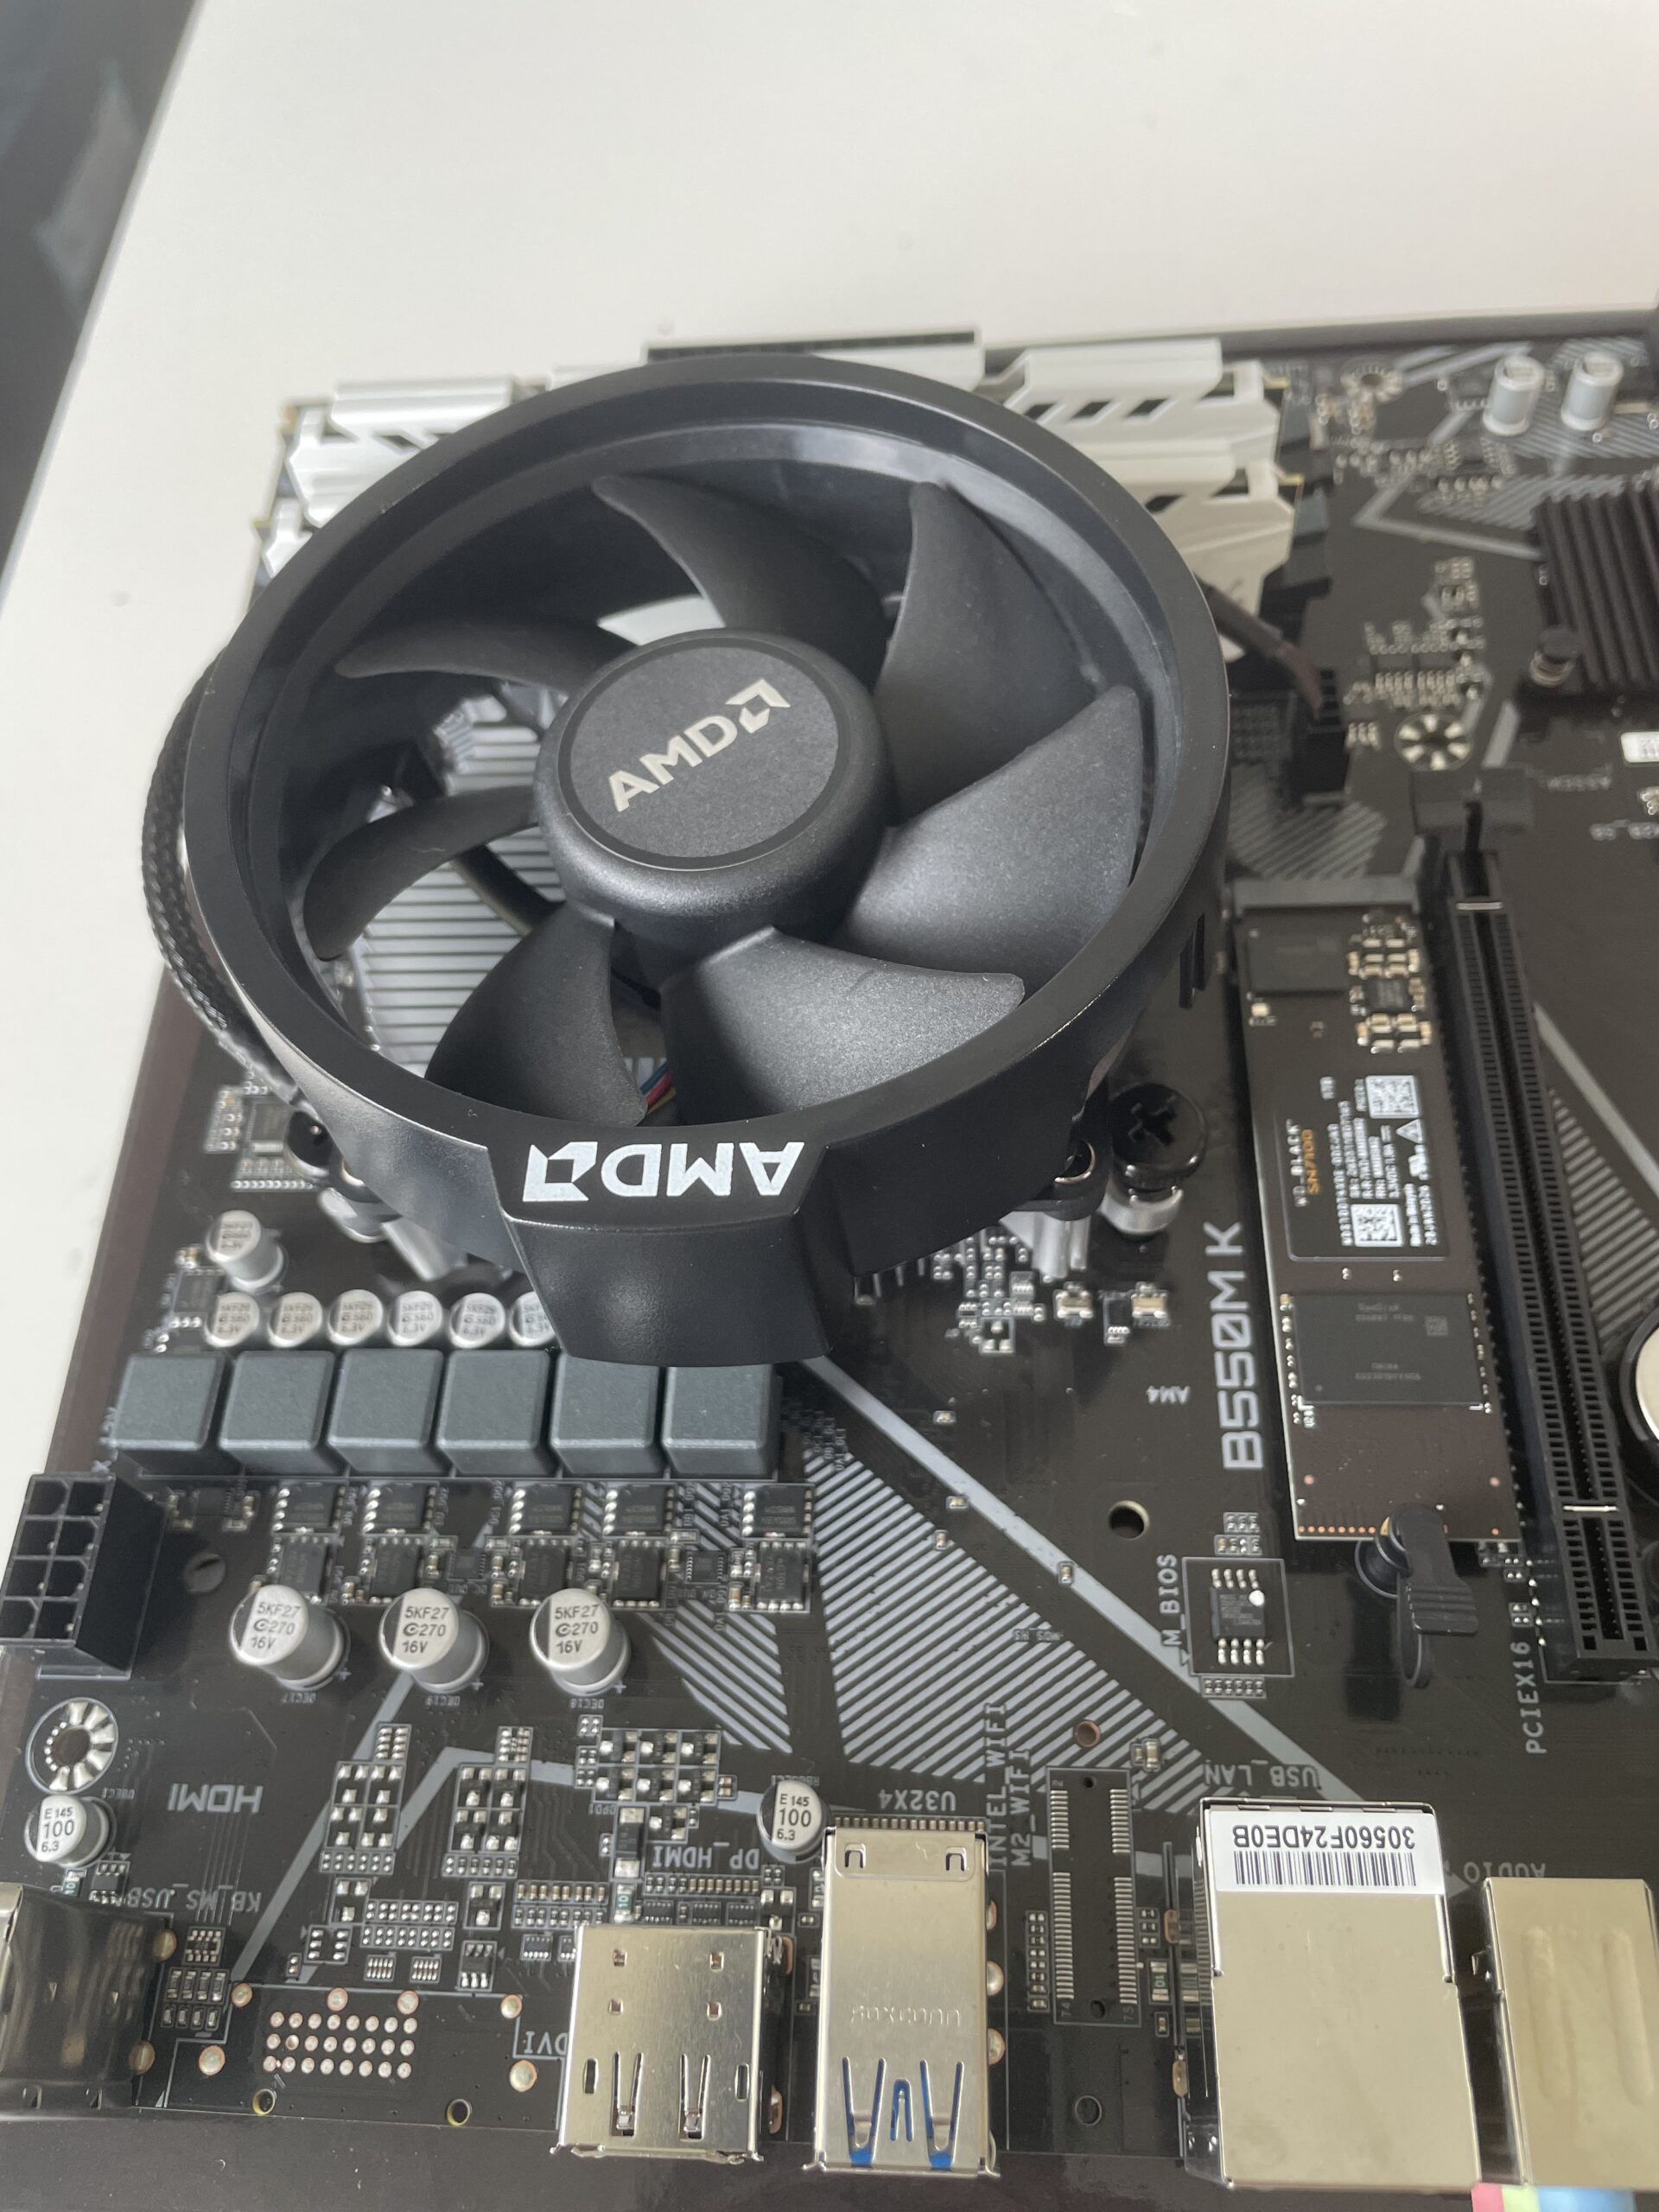
To install this, you need to remove the 4 screws on the motherboard that surround the CPU which hold two holding plastic brackets. I wasn’t sure if you were supposed to but I removed the plastic brackets too as the cooler would not sit on top of them.
The cooler has its own spring-loaded screws in each corner that you screw down on top of the CPU. It doesn’t really matter which way round you screw it on but I placed in a position so that the power wire would wrap neatly around the side of it and attach to the motherboard.
The motherboard was really taking shape now and it was almost time to get it screwed onto the PC chassis.
Attaching The Port Shield
However, before I did this, I attached the port shield which slides inside the PC chassis. These are to protect where all the ports are on the side of the motherboard.
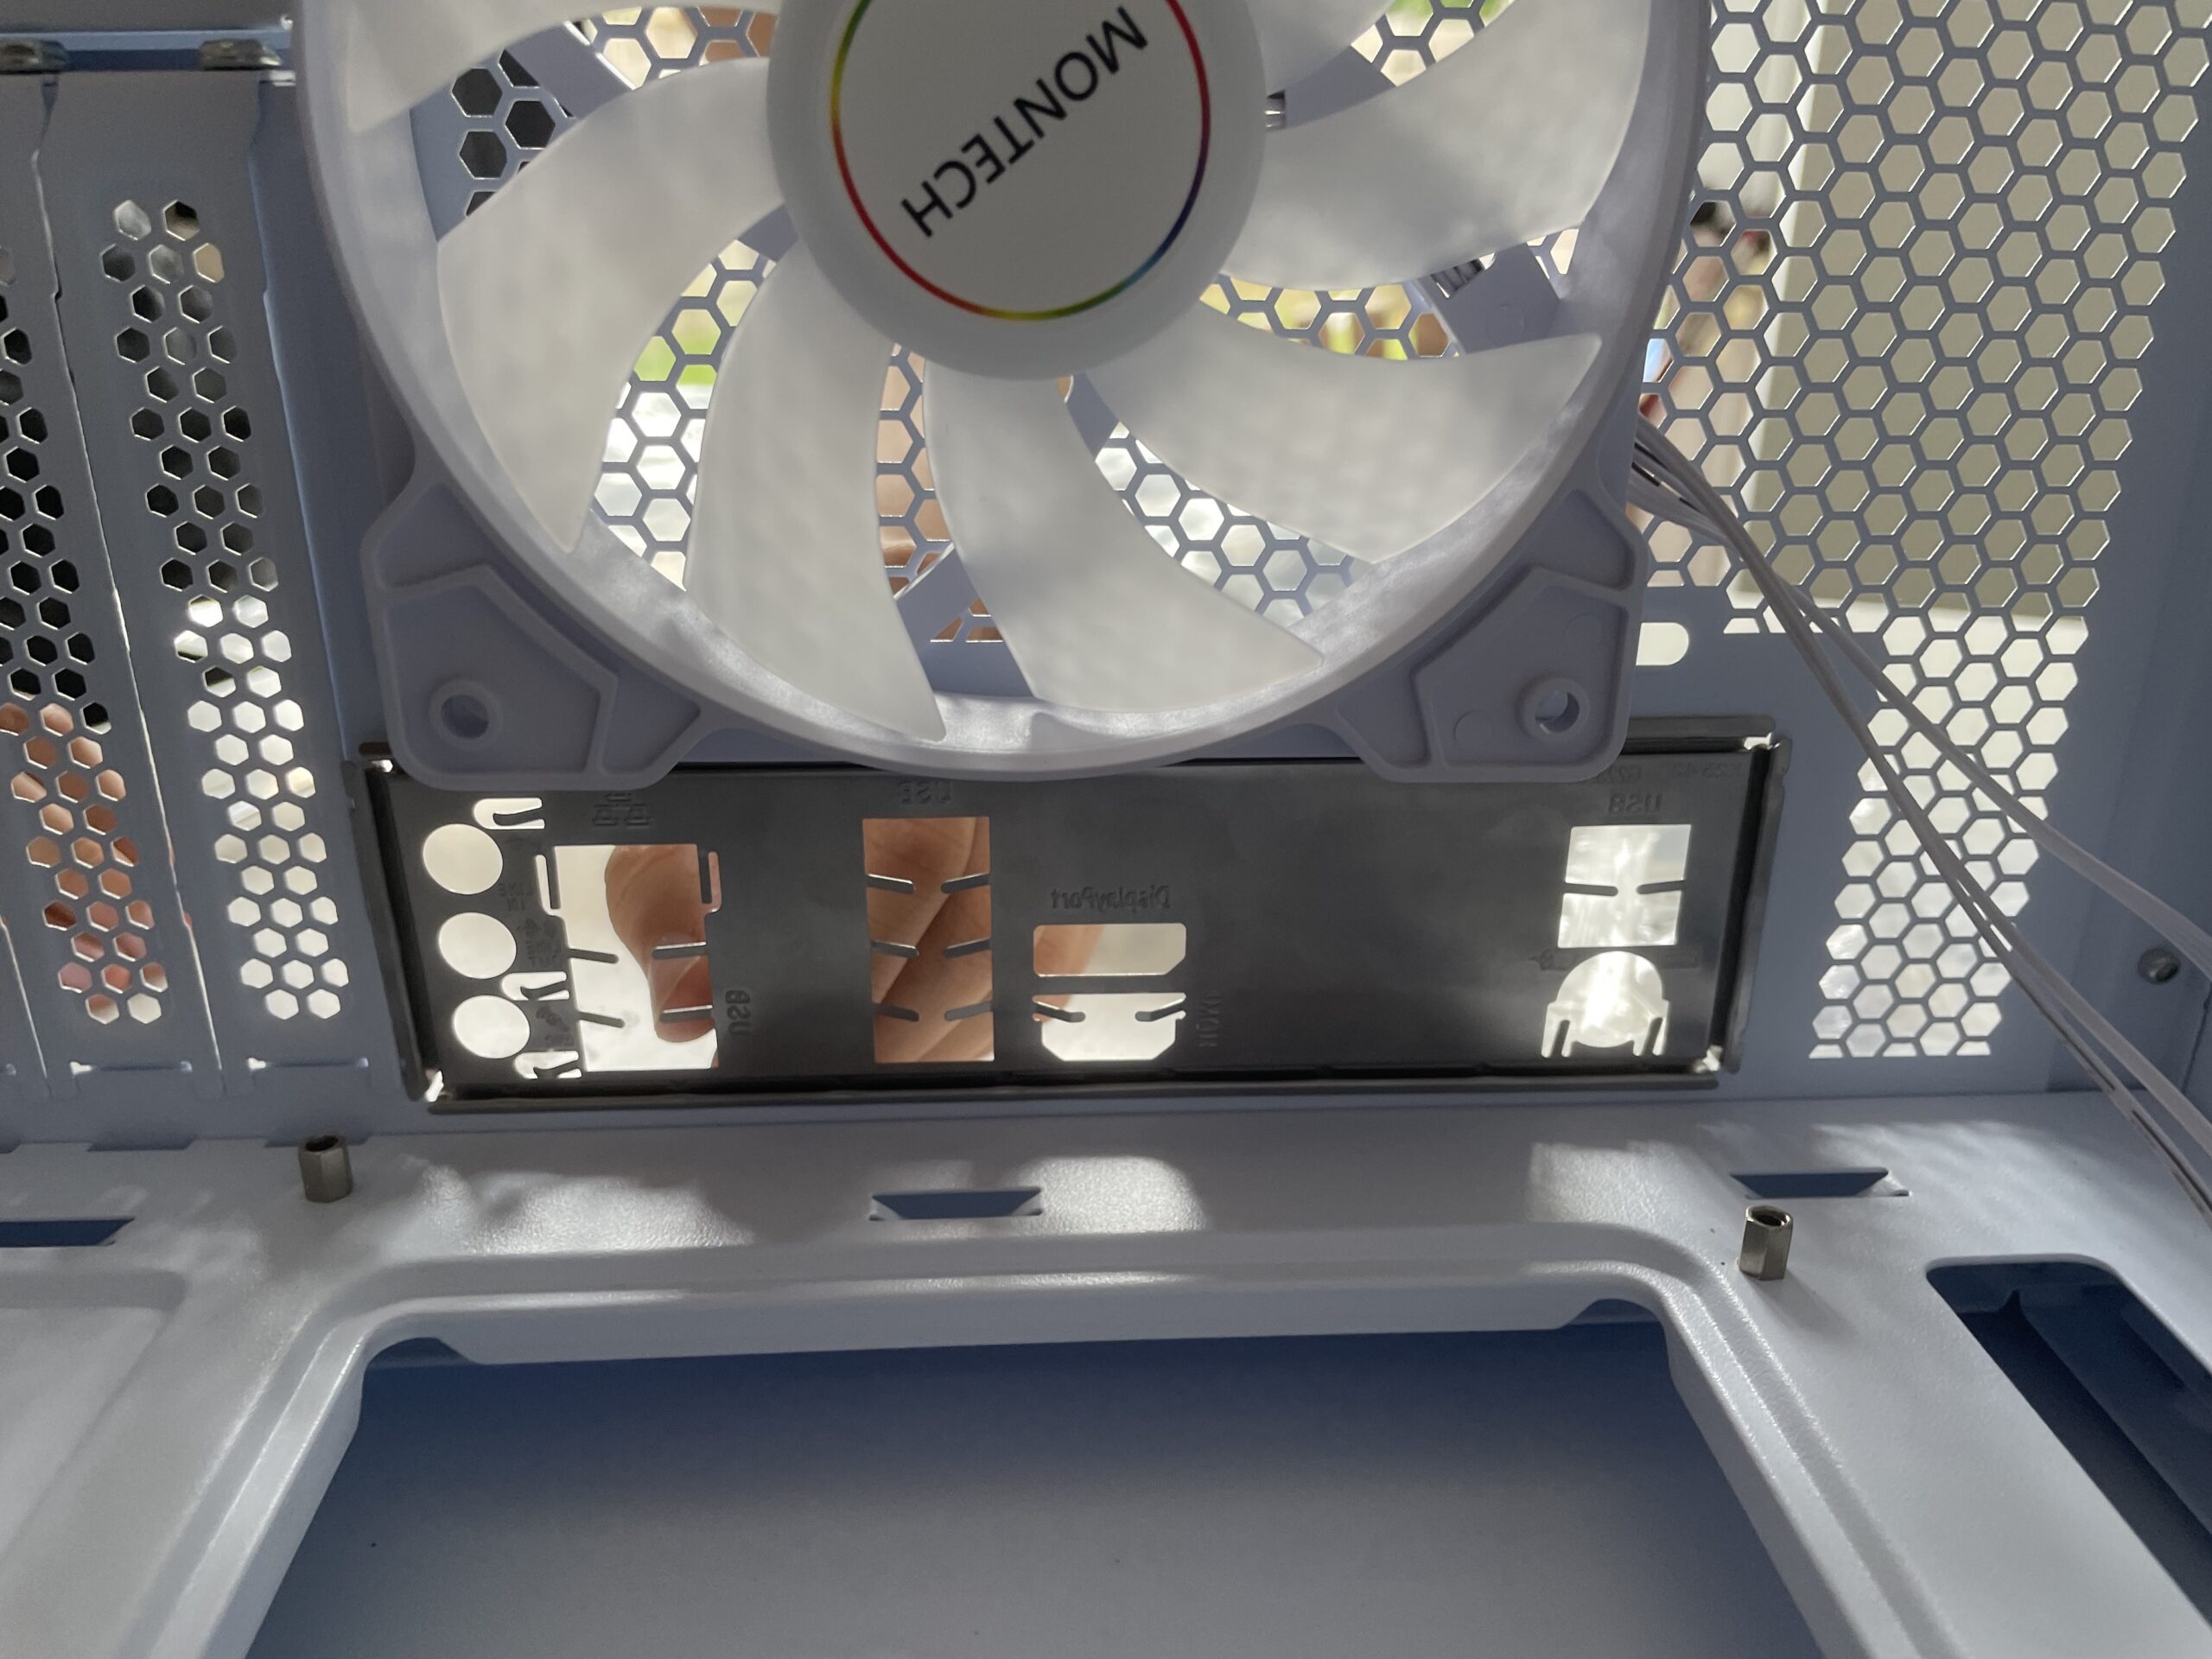
You may have to remove some of the guards off first which are attached with screws to the chassis. This took a bit of maneuvering and wiggling but eventually I managed to get it in place.

Attaching The Motherboard To The PC
It was now time to screw the motherboard onto the chassis. This is fairly easy and only required around 8 tiny screws (which should come with the motherboard).
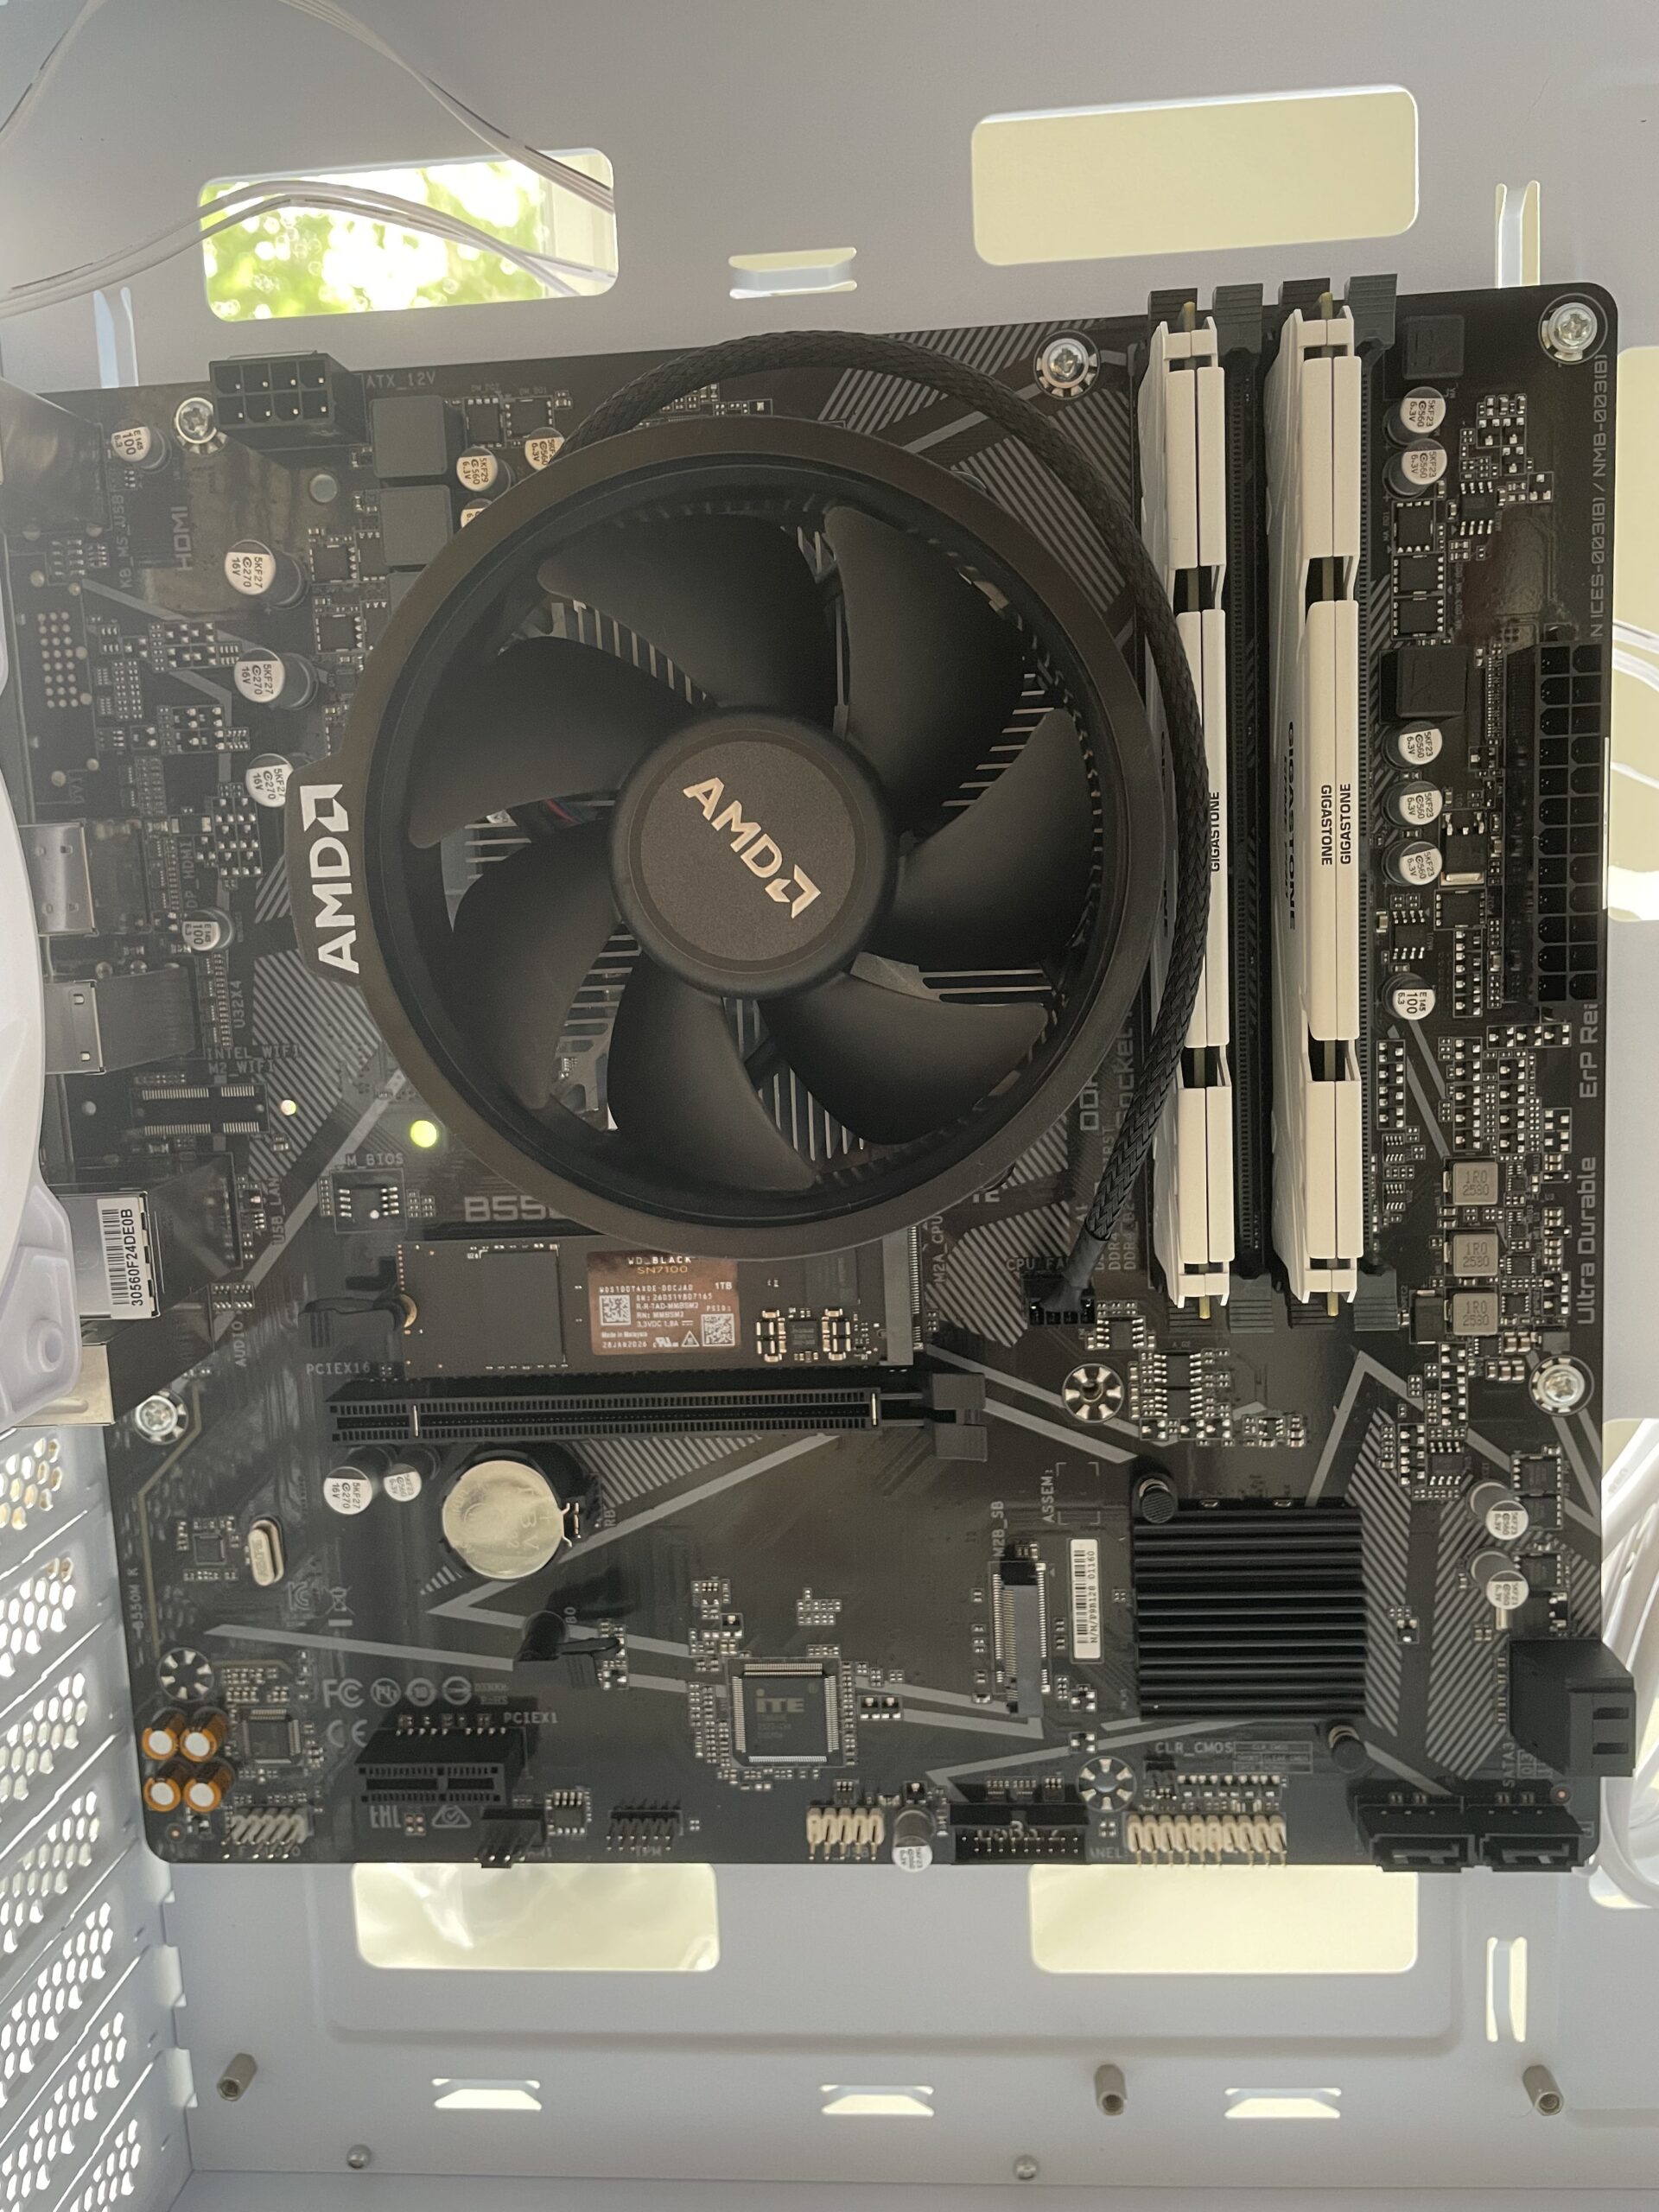
Installing The Graphics Card
Once this was done, I unpacked the graphics card. This has two huge fans on it and slots directly under the CPU cooler. It’s best to do this once the motherboard is fitted onto the PC as it’s just easy to secure the motherboard on the PC tower without it on.

This slots into place and only required one screw to secure it to the chassis. As you put it in, you will see the HDMI ports appear on the back side of the chassis, just below the connection ports. You may see a few protectors in place which you can screw off the PC tower and discard.

Connecting The PC Tower Cables
So far everything had gone surprisingly smoothly and I was feeling pretty good about how easy the build had been so far.
However, connecting all the cables from the PC chassis to the motherboard was far more challenging.
The cables are on one side of the chassis and you have to guide them through the gaps to connect to the motherboard on the other side.
A lot of it is just a case of fitting the right shaped connectors to the right shaped pins – you can literally guess a lot of it.
If you read the small print on the motherboard, it also often says what each port or pin is for although the text is often so small, it’s impossible to read!
But my chassis came with a lot of fans and these fans had all sorts of connectors that didn’t fit the motherboard.
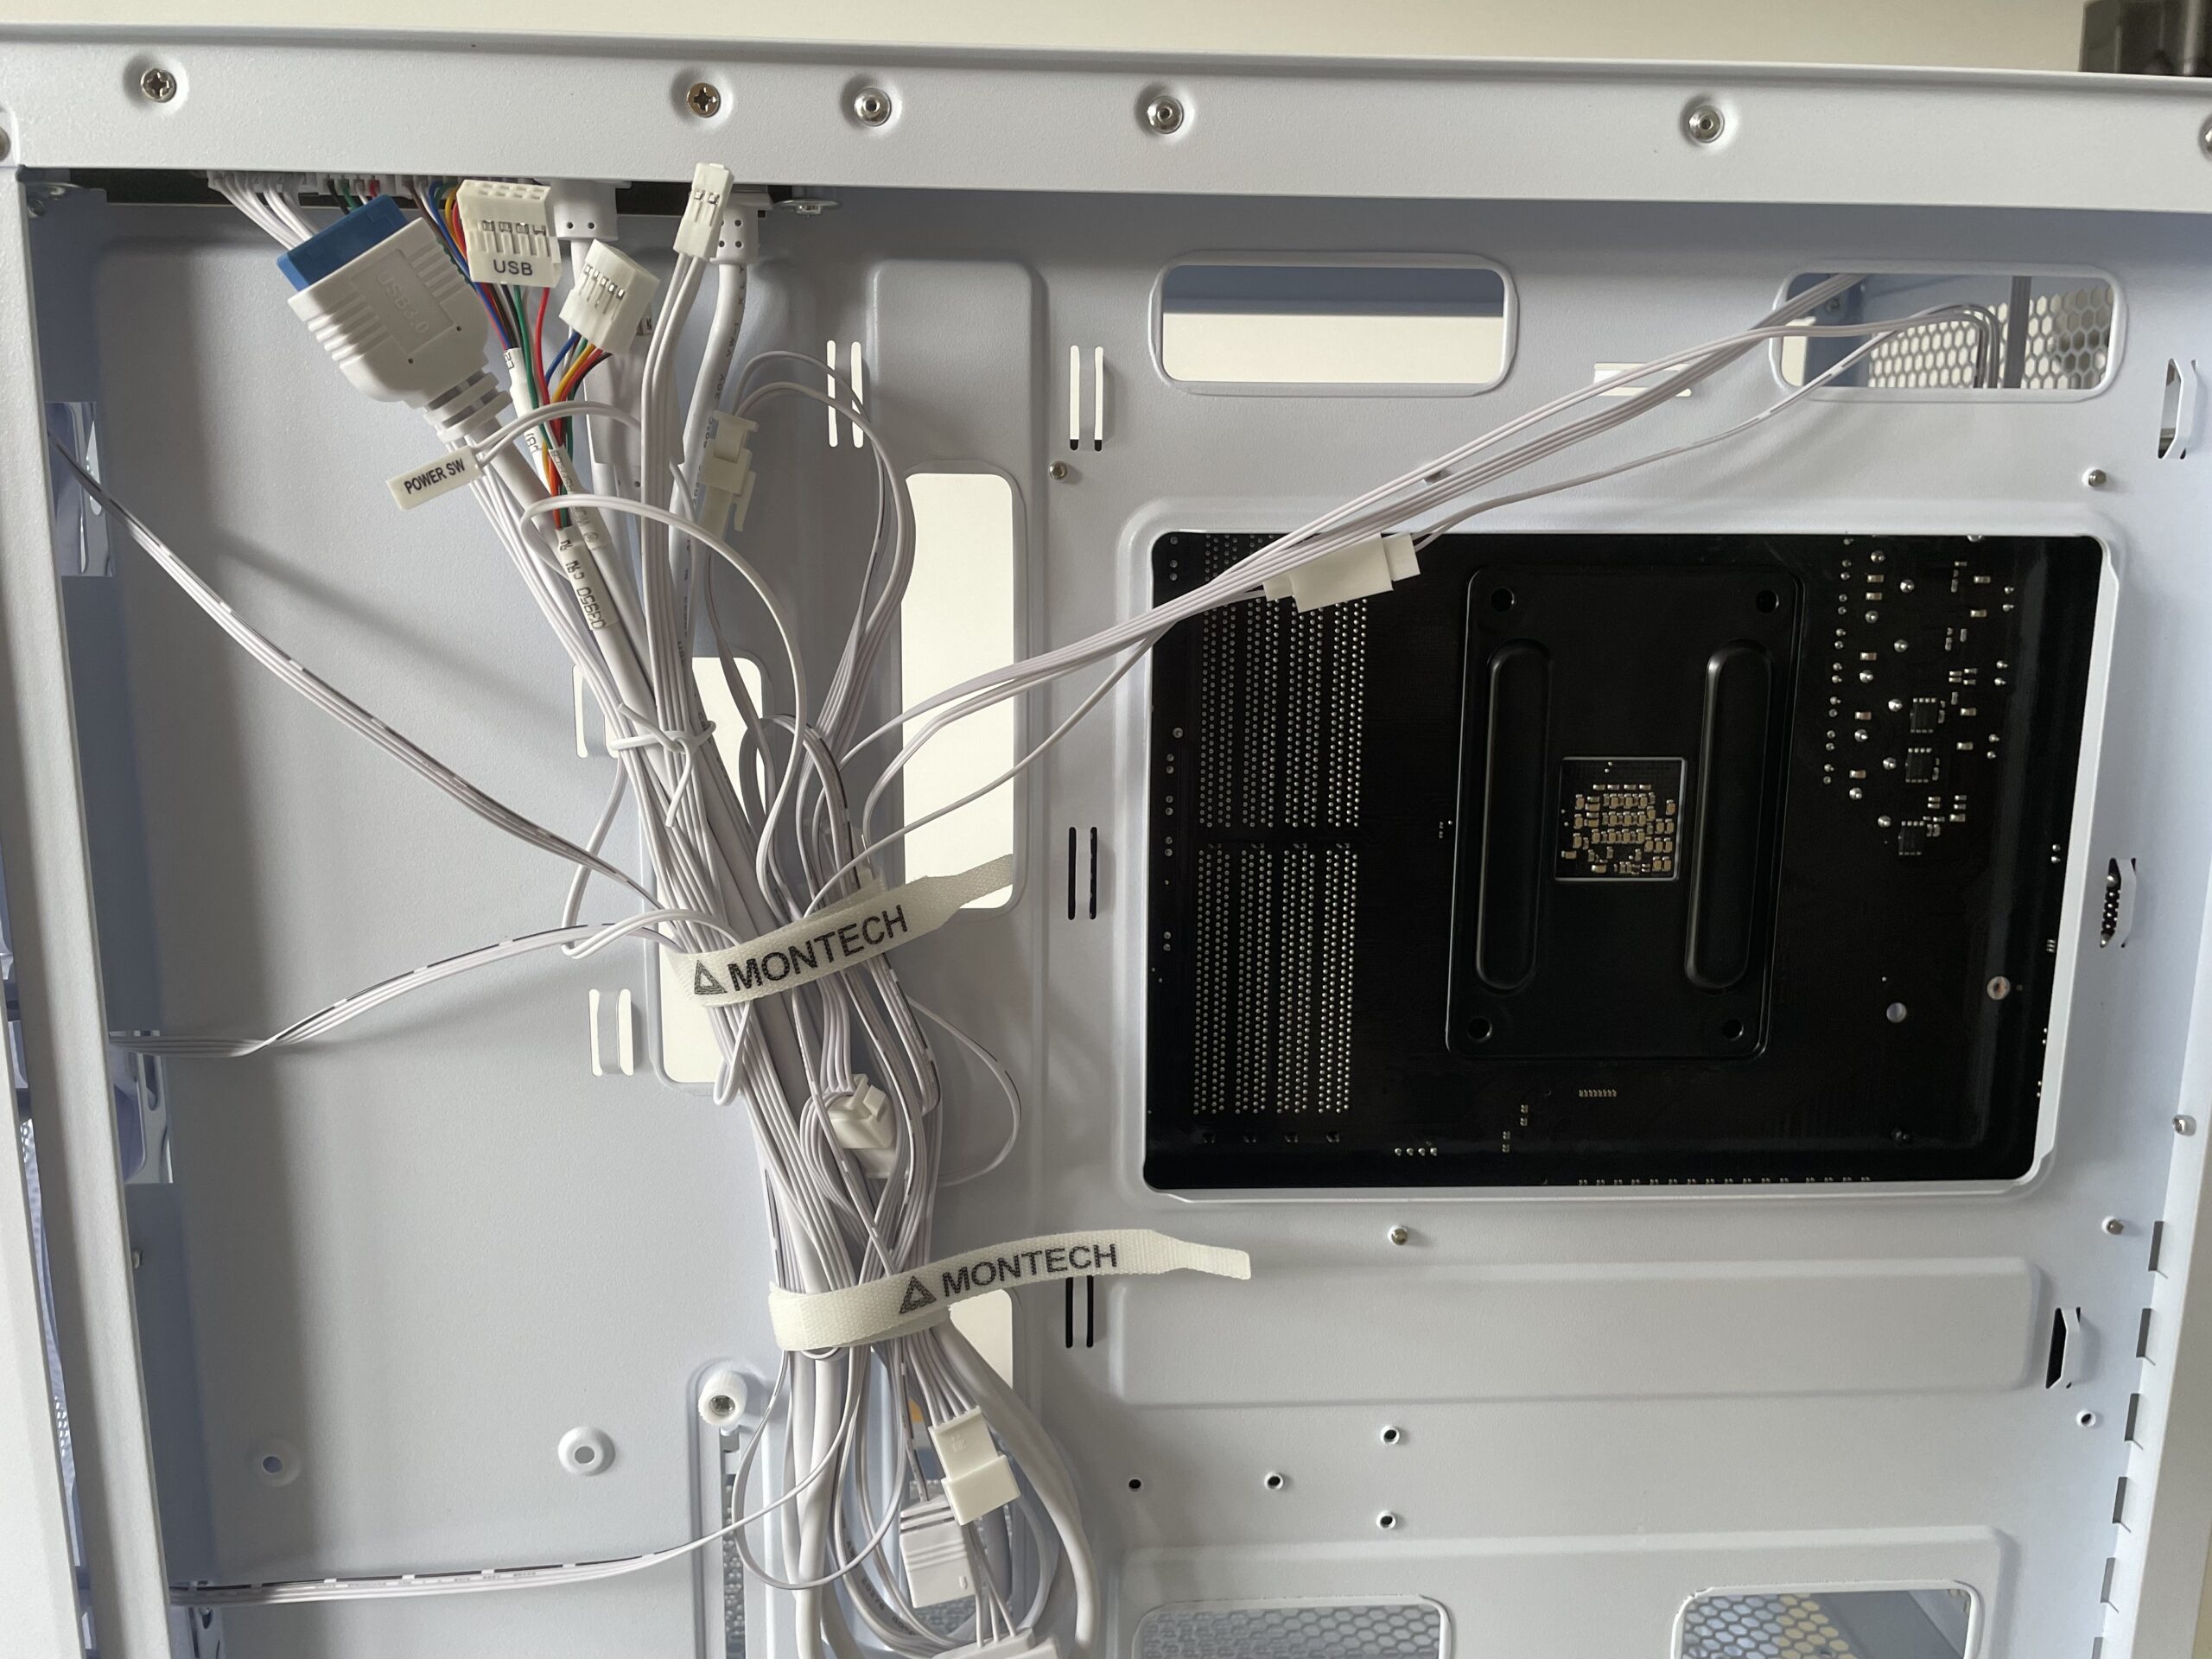
As you can see, some of the cables are labelled so its pretty obvious what they are for and then its just a case of finding the right sized slot or pins on the motherboard to connect them to.

Some of the cables are labelled to help you know what they’re for. Source: MacHow2
One of the trickiest cables to connect were to the F-PANEL pins which are are the bottom of the motherboard. Finding the right pins for these – which control the LED lights inside the chassis and power button – was a case of trial and error.

Fitting The Power Supply – More Cables
After managing to attach every cable I could (and finding there were several that didn’t fit) I crossed my fingers and moved onto the final stage – the power supply.
I bought an 850w power supply which is more than powerful enough to power my setup and comes with yes, more cables.
The key thing is to make sure that the CPU has two cables connected to it from the power supply – one the large 24 pin cable on the right of the board and a smaller 8 pin power supply near the top left.

The motherboard requires two power cables connected to it – the big 24 pin socket on the right and the smaller 8 pin socket at the top. The PCI-E labelled cable can be connected to the front of the graphics card.
It’s important that the cable you use is labelled “CPU” not “PCI-E” like the rest of the cables.
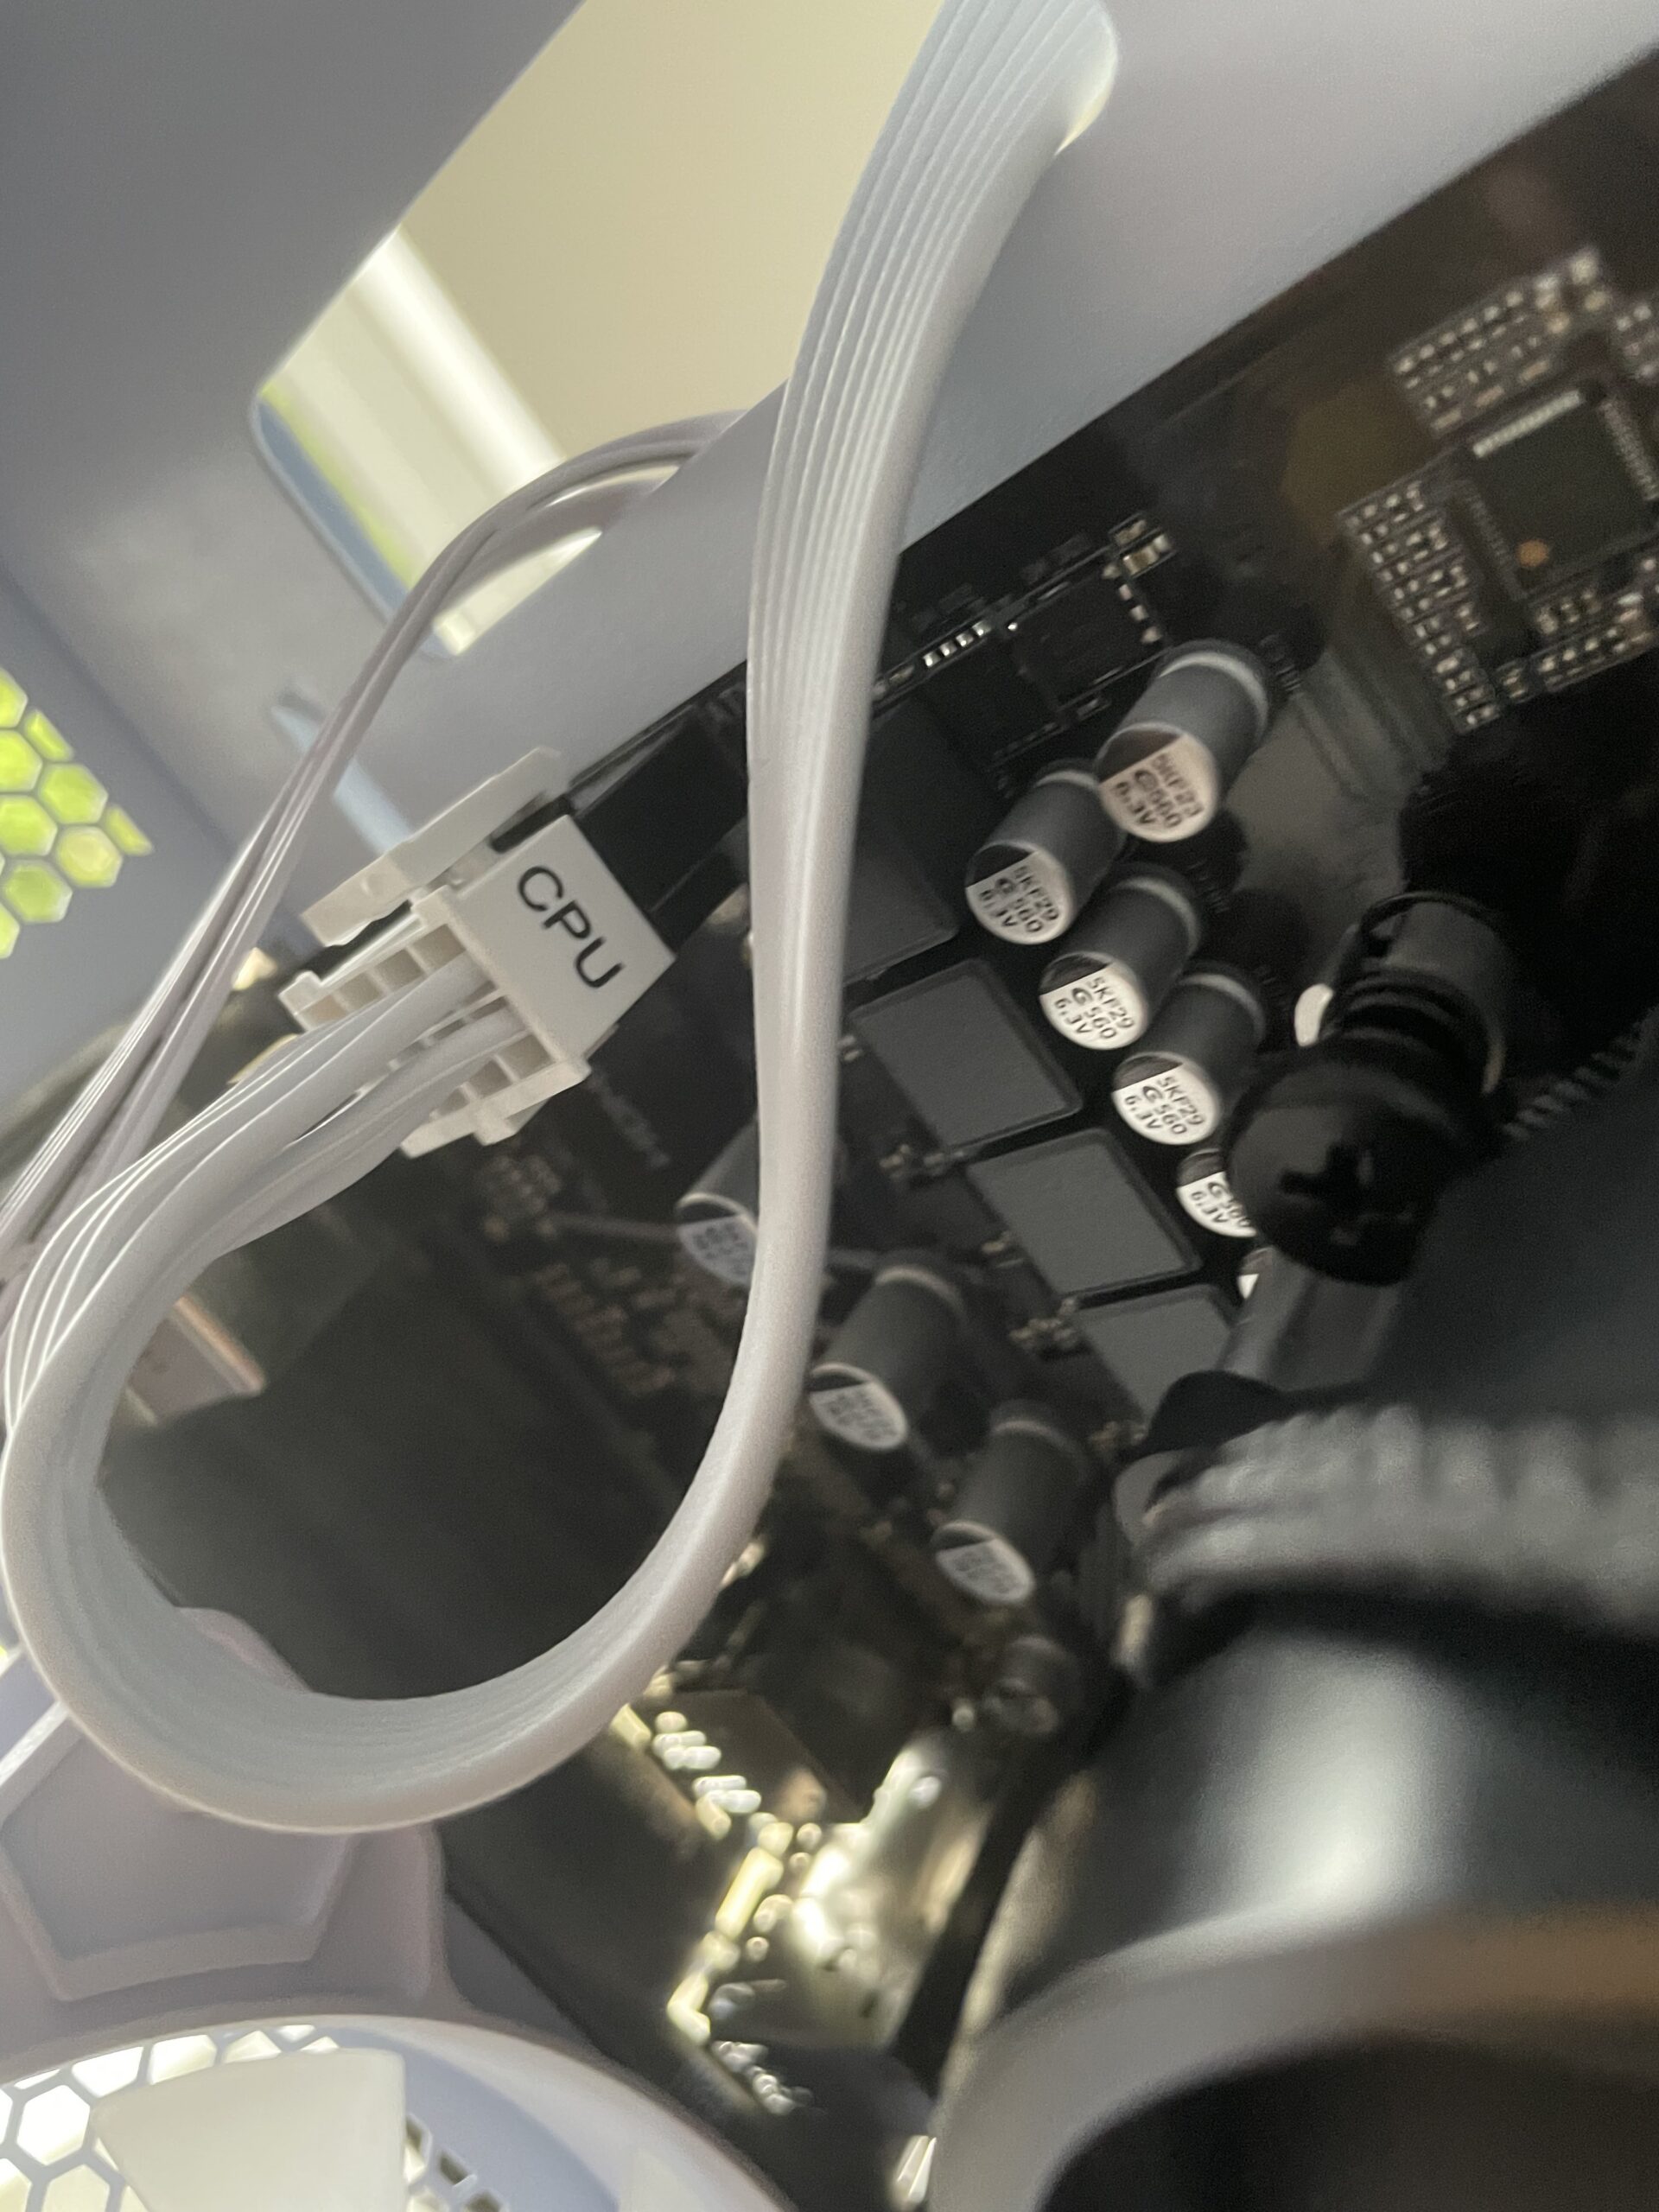
Make sure the power supply cable is labelled “CPU” for the two fat wires you need to connect to the motherboard. Source: MacHow2
The other important cable to connect is one of the “PCI-E” cables to the graphics card. This is a 16 pin connector that slots onto the front of the graphics card.
The only other cables I connected to the power supply were the fan connectors on the PC chassis.
Installing The Power Supply
The final step was to screw the power supply into the bottom of the tower. The power supply neatly slid into the bottom and I added a few screws on the front.

And that completed the build!
Taking things deliberately slowly and steady, the whole thing took me around 2 to 3 hours to put together I would say although the next troubleshooting bit took me at least another 2 or 3 hours to resolve….
The Moment Of Truth: I Thought I’d Broken Everything
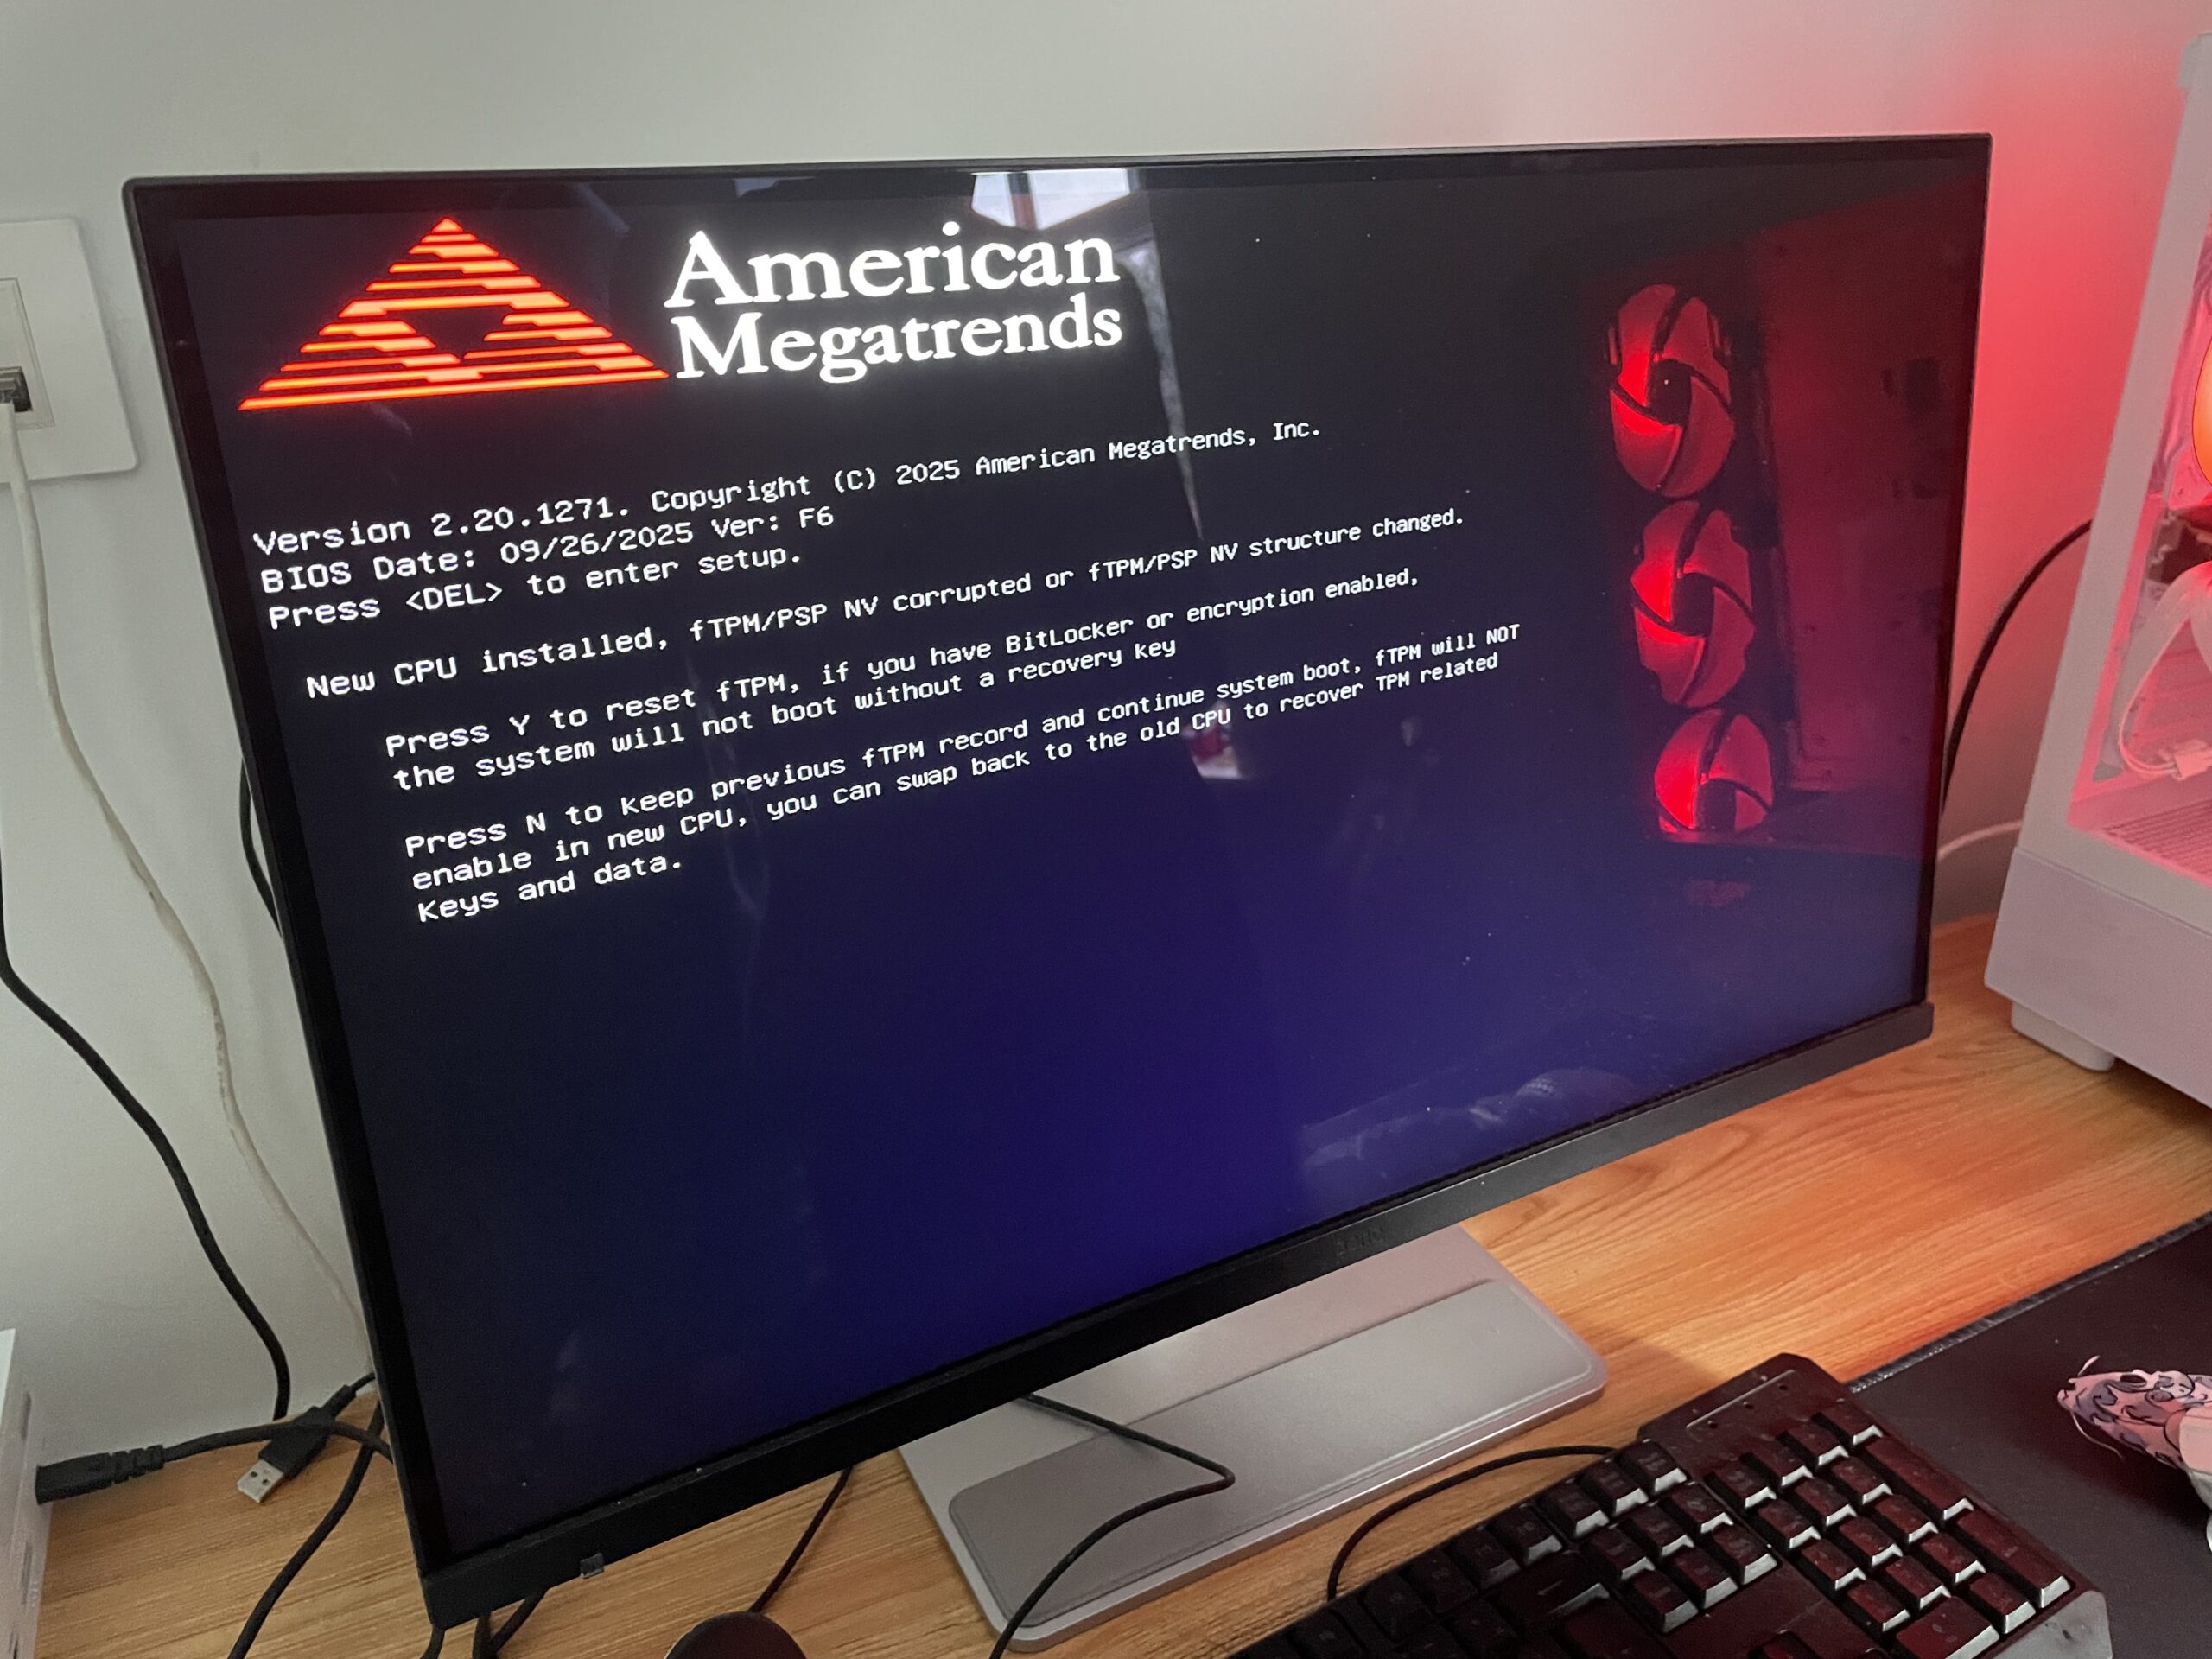
Before I put the panels back on the side of the PC tower to complete the build, the moment of truth arrived to plug it in and see whether this thing worked.
Leaving the tower open while you turn it on allows you to troubleshoot easily without having to take it apart again.
My biggest fear was confirmed when I plugged it in, it in the PC briefly powered on and then immediately shut down.
The fans spun for a second and the LED lights flashed and then – nothing.
Many things went through my mind:
- Did I fry the motherboard?
- Is the CPU dead?
- Did I bend pins?
- Is the power supply faulty?
There were tons of YouTube videos that addressed this problem but none of them worked for me. They all said basically the same thing which is to check that all the cables are connected properly and that the components are slotted in properly (especially the RAM apparently).
I unseated and re-seated the RAM to make sure it was secure. I even tried with just one stick of RAM – still no joy.
I spent the next two hours tearing my hair out, triple checking every connection and wondering what the hell had gone wrong.
Eureka!
My last throw of the dice was to disconnect one of the fan cables leading from the PC tower to the motherboard.
At the bottom of the motherboard is a “SYS FAN1” connection which had a small 4 pin cable connected to it from the Montech X5 PC chassis.

This was connected to a small 4 pin fan cable from the PC chassis:

I disconnected this cable just to see what would happen and lo and behold – the PC lit up, fans started whirring and it sprang into life!

It was easily the most satisfying moment of the entire build.
I presume what was happening is that this fan connection was shorting the motherboard for some reason which would explain why the fans came on momentarily and then died instantly.
I could finally put the side panels back on the PC tower and connect it to my monitor ready to go.
Installing Windows
So from here, it should have been simply a case of creating a boot disk by downloading a Windows ISO on my Mac and then mounting it on a USB drive.
However, as I explain in the next part of this tutorial in how to create a Windows boot disk on a Mac, this turned out to be almost as complicated and stressful than troubleshooting the PC!
Would I Build Another PC?
Absolutely.
In fact, once you get past the fear of the first build, the entire process is very straightforward. In fact, I’ve put together IKEA furniture more complicated than modern PCs.
I can also definitely see why PC users think that Apple users are gullible for paying so much for products which basically can’t be upgraded after purchase anymore.
The thought that one day, when the Graphics Card or RAM isn’t enough anymore (or is faulty), I can simply slide the window panel off the PC tower and insert upgraded components felt liberating.
Final Thoughts
Building my first PC gave me a new appreciation for both platforms.
I still prefer Macs for day-to-day productivity and creative work. I also prefer macOS – it’s just a better operating system to use than Windows and I don’t see that ever changing.
But for gaming, upgradeability and experimentation, PCs offer a level of freedom Apple doesn’t anymore.
And perhaps the biggest surprise of all?
Building a PC wasn’t nearly as impossible as I’d imagined as a long-time Mac user.
Frustrating at times, yes. But also incredibly satisfying.