
If your external monitor is not detected by your Mac, it’s usually caused by a simple connection issue, display setting, or macOS bug.
This guide walks you through the fastest fixes first, followed by more advanced solutions to get your external display working again.
You May Also Like:
- Best 5K Monitors For Mac
- Best Apple Studio Display Alternatives
- Best 4K Monitors For Mac
- How To Use an iMac as an External Monitor
Contents
- External Monitor Not Detected on Mac? Try These First
- Why Is My External Monitor Not Detected on Mac?
- 1. Check Your Cable and Ports
- 2. Check Your Monitor Input Source
- 3. Force macOS to Detect the Display
- 4. Check If Your Mac Supports Multiple Monitors
- 5. Disconnect Hubs and Adapters
- 6. Allow USB-C Accessories (macOS Ventura and Later)
- 7. Try a Different Connection Type (HDMI vs USB-C)
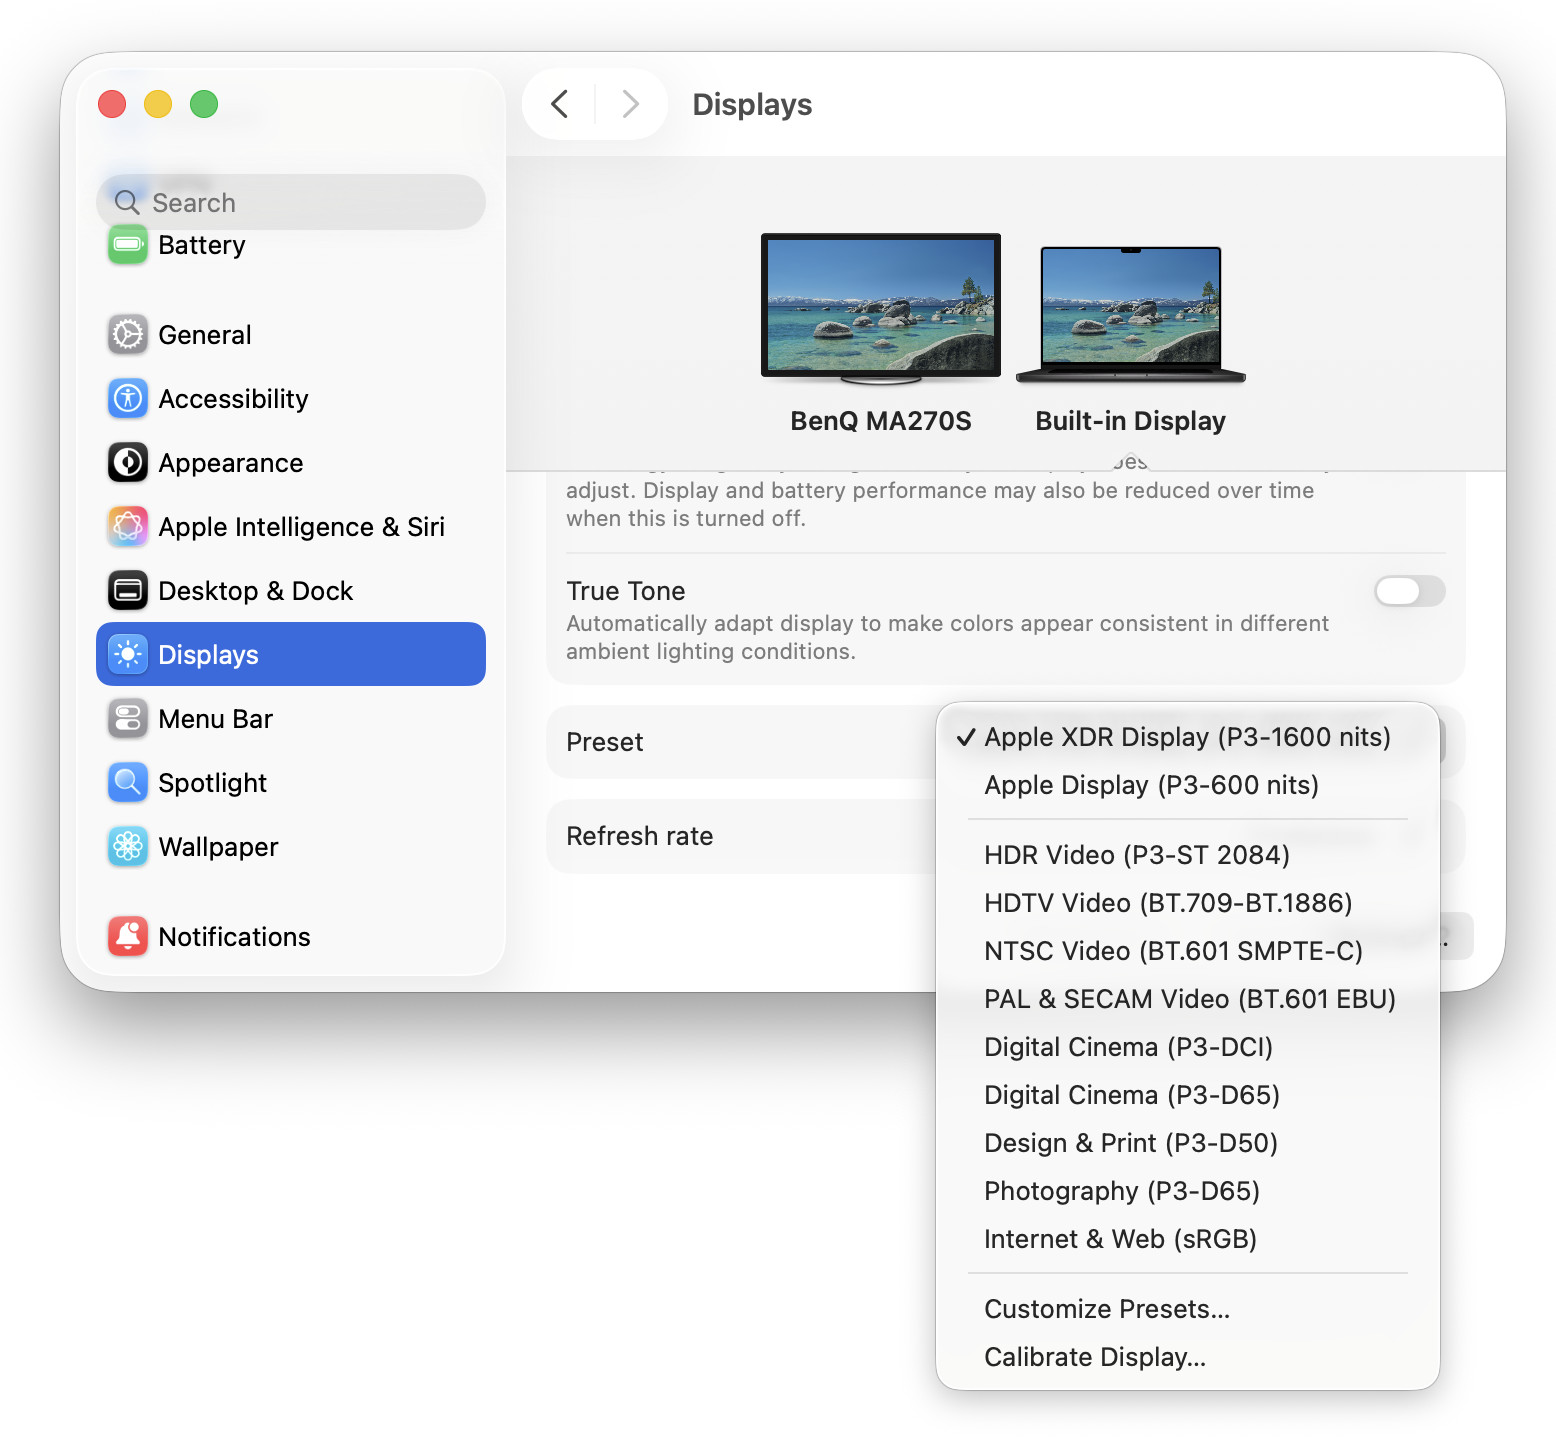
- 8. Adjust Display Settings
- 9. Disable True Tone and Night Shift
- 10. Update macOS
- 11. Boot Your Mac in Safe Mode
- 12. Restart the WindowServer Process
- 13. Use DisplayLink (For Docking Stations)
- 14. Reset macOS Display Configuration Files (Advanced Fix)
- 15. If Nothing Still Works
- Second Monitor Not Detected on Mac?
- FAQ
- Summary
External Monitor Not Detected on Mac? Try These First
Before diving into deeper fixes, try these quick solutions:
- Unplug and reconnect your monitor
- Restart your Mac
- Go to System Settings > Displays and check if it appears
- Try a different cable or port
- Disconnect any hubs or adapters temporarily
If your monitor still isn’t detected, follow the steps below.
Why Is My External Monitor Not Detected on Mac?
The most common causes are:
- Faulty or incompatible USB-C / HDMI cable
- macOS not detecting the display automatically
- Unsupported multi-monitor setup (especially on some M-series Apple Silicon Macs)
- Problems with USB-C hubs or adapters
- macOS bugs after updates
- Incorrect display or refresh rate settings
1. Check Your Cable and Ports
Start with the basics:
- Try a different USB-C, Thunderbolt, or HDMI cable
- Plug directly into your Mac (avoid hubs initially)
- Test another port on your Mac
- Try the monitor with another device (such as an external SSD drive to rule it out)
Cheap or damaged cables are one of the most common causes.
Important Note: Make Sure Your USB-C Cable Supports Video
Not all USB-C cables are capable of transmitting video signals.
Some cables only support:
- Charging
- Data transfer (low speed)
But do not support external displays
To avoid issues:
- Use a Thunderbolt 3 or Thunderbolt 4 cable for best results
- Or ensure your USB-C cable explicitly supports video output (DisplayPort Alt Mode)
- Avoid very cheap or unbranded USB-C cables when connecting monitors
A non-video USB-C cable is one of the most common reasons for a “monitor not detected” issue on Mac.
2. Check Your Monitor Input Source
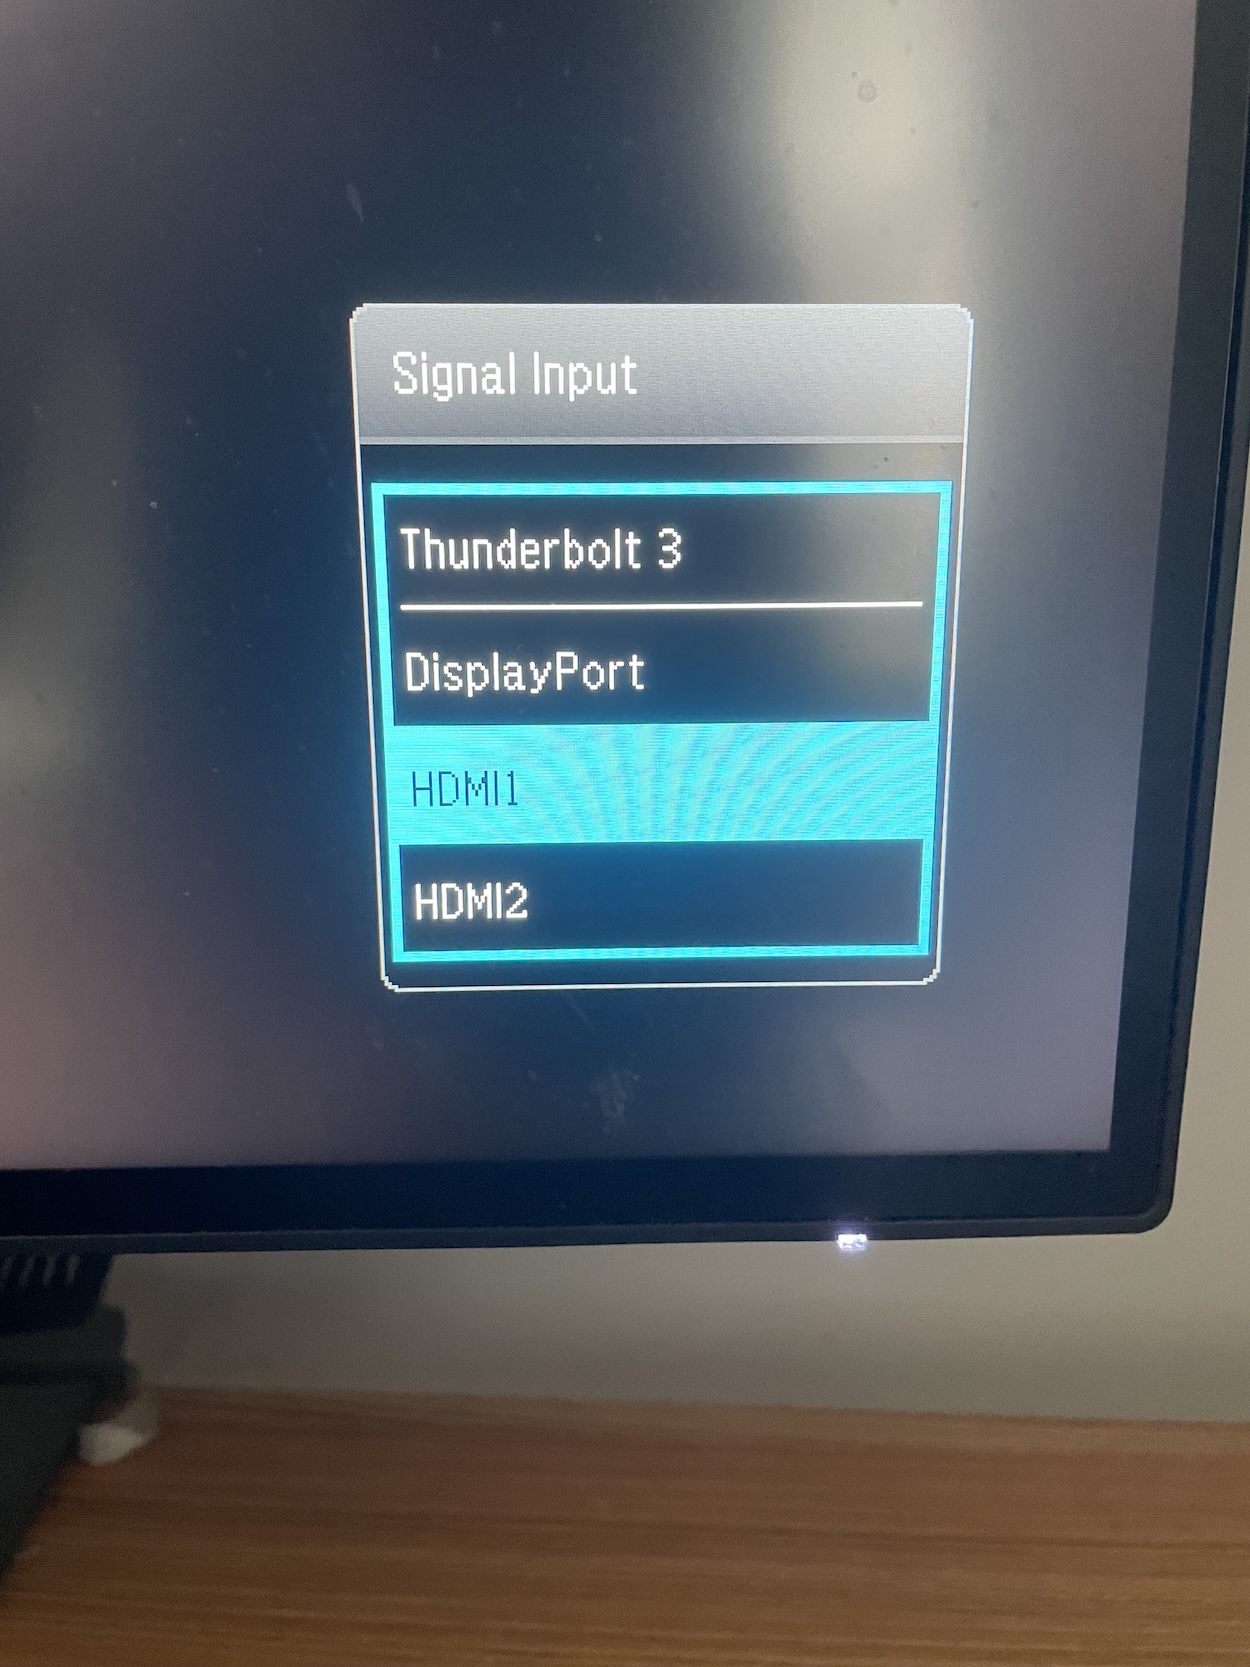
Sometimes the issue is not your Mac, but the monitor itself.
Many external displays do not automatically switch to the correct input.
Use the monitor’s built-in buttons or KVM switch to activate the on-screen menu to check:
- HDMI 1 / HDMI 2
- DisplayPort
- USB-C input (if supported)
Make sure the monitor is set to the same input type your Mac is connected to.
If the wrong input is selected, macOS will not detect the display at all.
3. Force macOS to Detect the Display
Sometimes macOS doesn’t automatically detect external monitors.
To force detection:
- Go to System Settings > Displays
- Hold the Option key on your Mac keyboard
- Click on “Detect Displays” (if it appears)
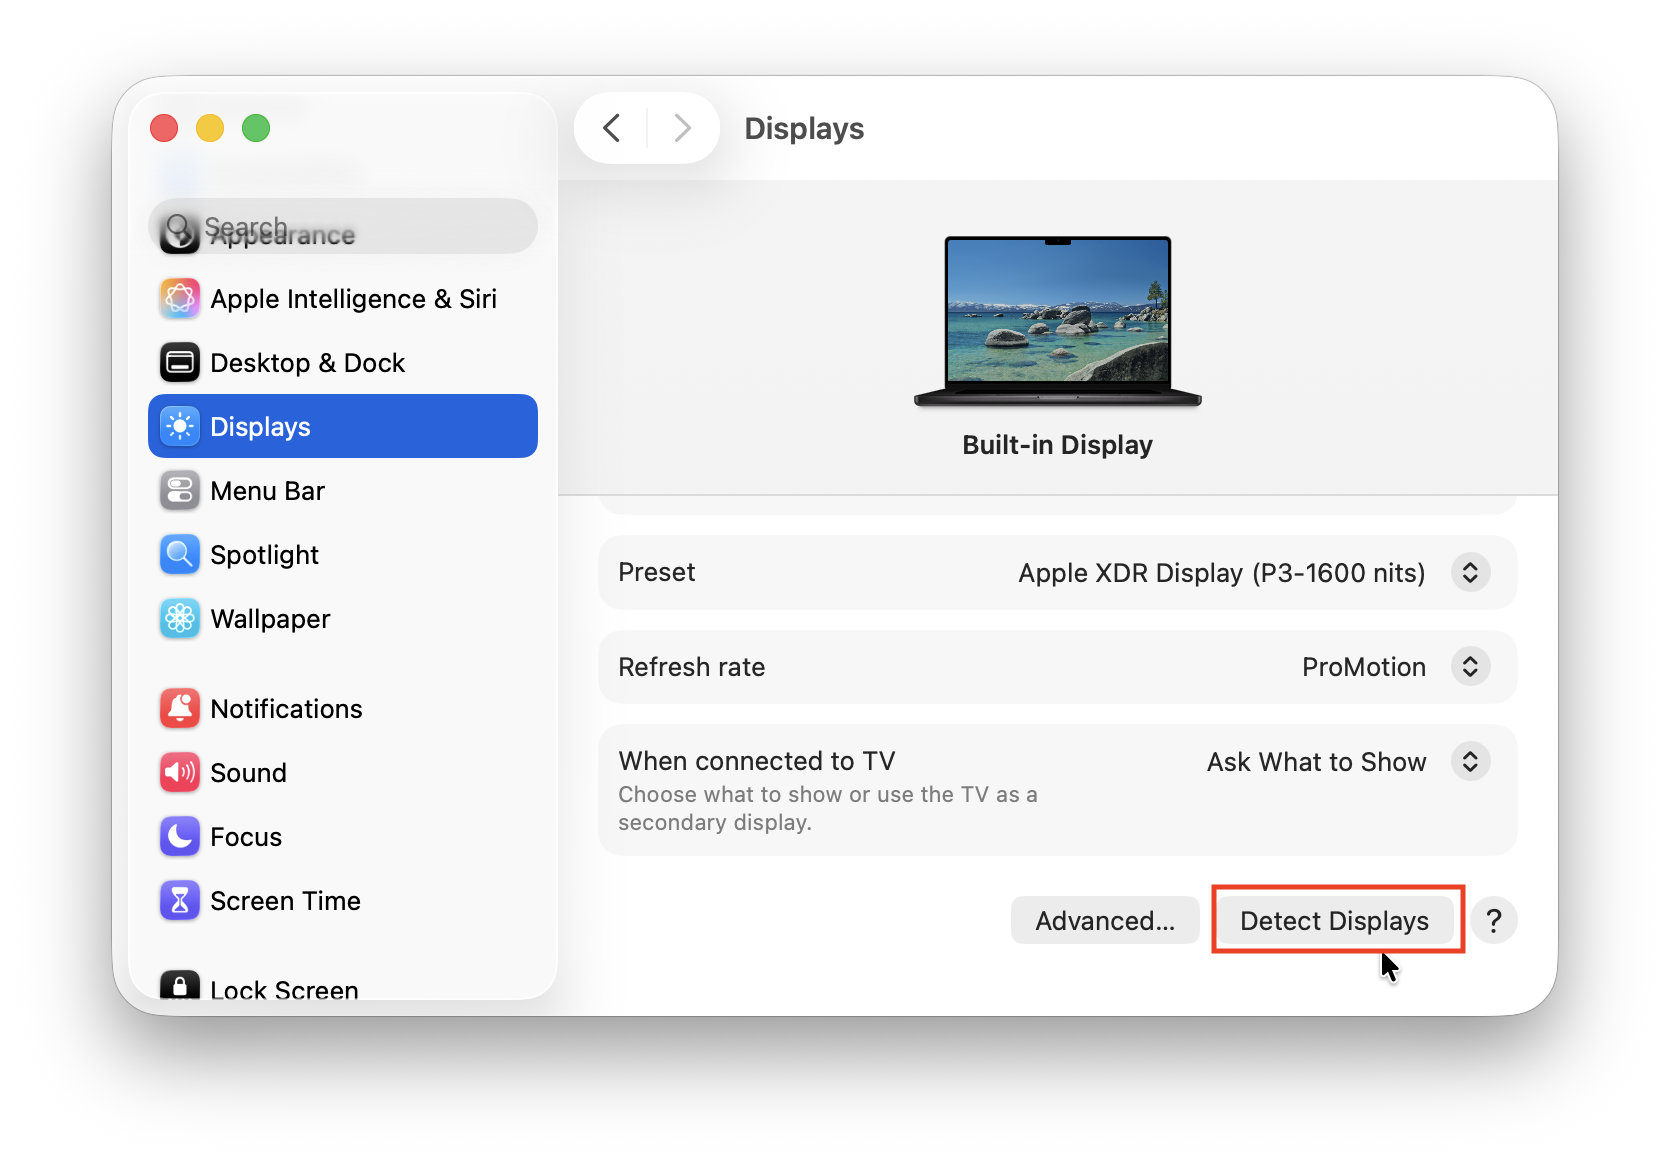
If the monitor shows up, you can adjust resolution and layout from here.
4. Check If Your Mac Supports Multiple Monitors
This is a big one that many Mac users don’t realize – especially on Apple Silicon Macs.
- Base model M1, M2, and M3 Macs only support ONE external display
- If you’re trying to connect two monitors, one may not be detected
Alternatively, you can use a DisplayLink-compatible dock workaround to enable multiple monitors. There are various docks available for this but for Macs we recommend one such as the Plugable Triple Display Docking Station or the Plugable 14-in-1 Dock.
You can find more help here on how to connect multiple monitors to Macs that are affected by this limitation.
5. Disconnect Hubs and Adapters
USB-C hubs and Thunderbolt docks often cause detection issues.
If you’re using one, try the following:
- Disconnect the hub
- Plug the monitor directly into your Mac
- Reconnect the hub afterward
If it works, your hub may:
- Not support video properly
- Need a firmware update
- Require installing or updating DisplayLink drivers
6. Allow USB-C Accessories (macOS Ventura and Later)
macOS can block new USB-C devices by default.
To fix this:
- Go to System Settings > Privacy & Security
- Scroll down to Security > Accessories
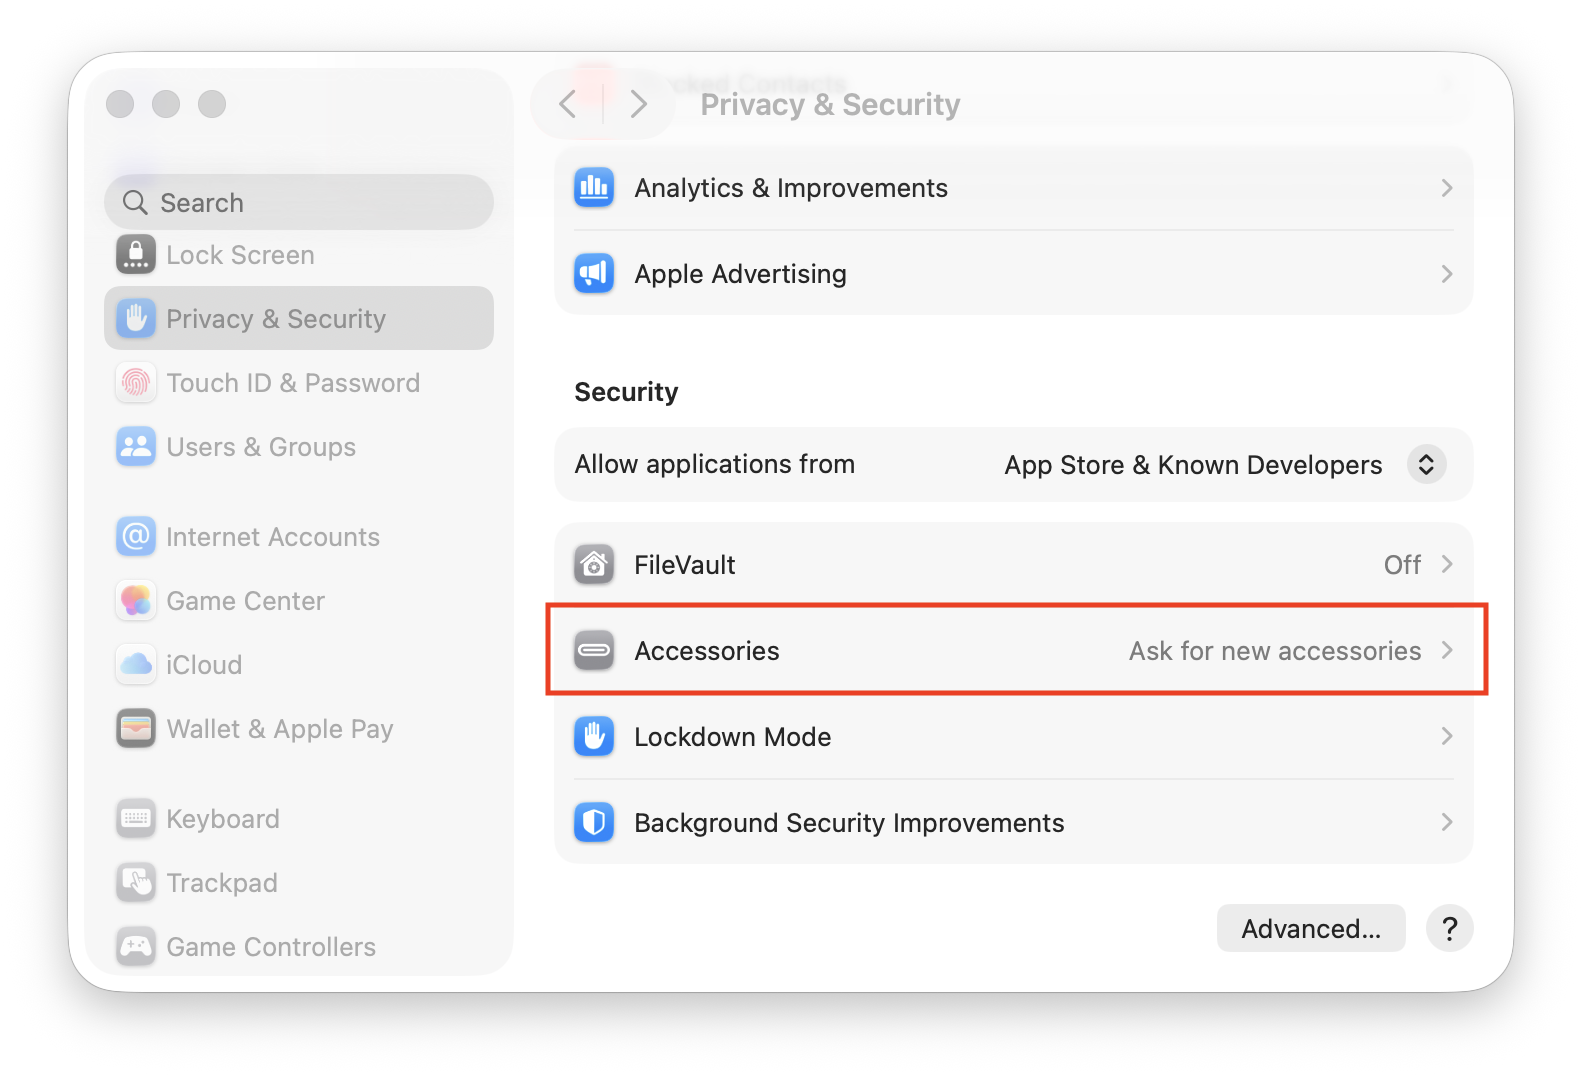
- Scroll to “Allow accessories to connect”
- Set it to “Always allow”. You will be required to enter your Mac’s admin password to do this for security reasons.

Then reconnect your monitor.
7. Try a Different Connection Type (HDMI vs USB-C)
If USB-C or Thunderbolt isn’t working and your monitor has an HDMI port:
- Try an HDMI cable instead
- Use a USB-C to HDMI adapter if needed
Sometimes the issue is specific to one connection type.
8. Adjust Display Settings
If the monitor is detected but not working properly:
- Go to System Settings > Displays
- Change from Default to Scaled
- Adjust resolution manually
- Try setting refresh rate to 60Hz
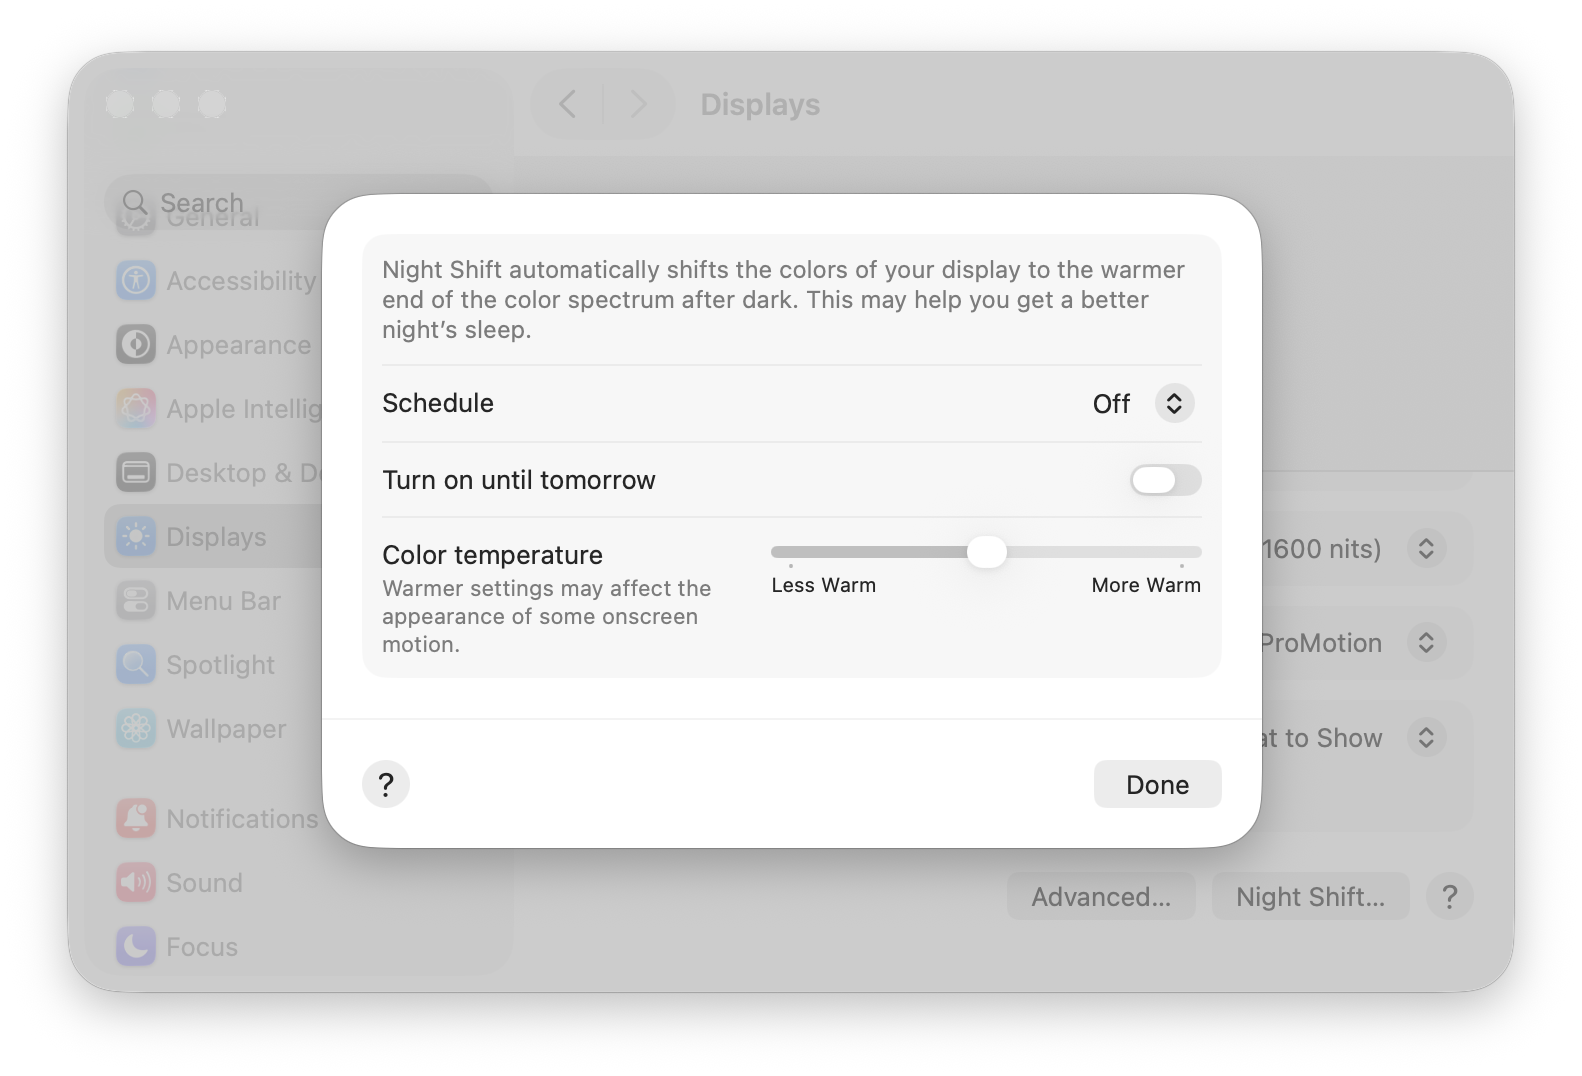
9. Disable True Tone and Night Shift
These features can interfere with some external displays.
To disable:
- Go to System Settings > Displays
- Turn off True Tone
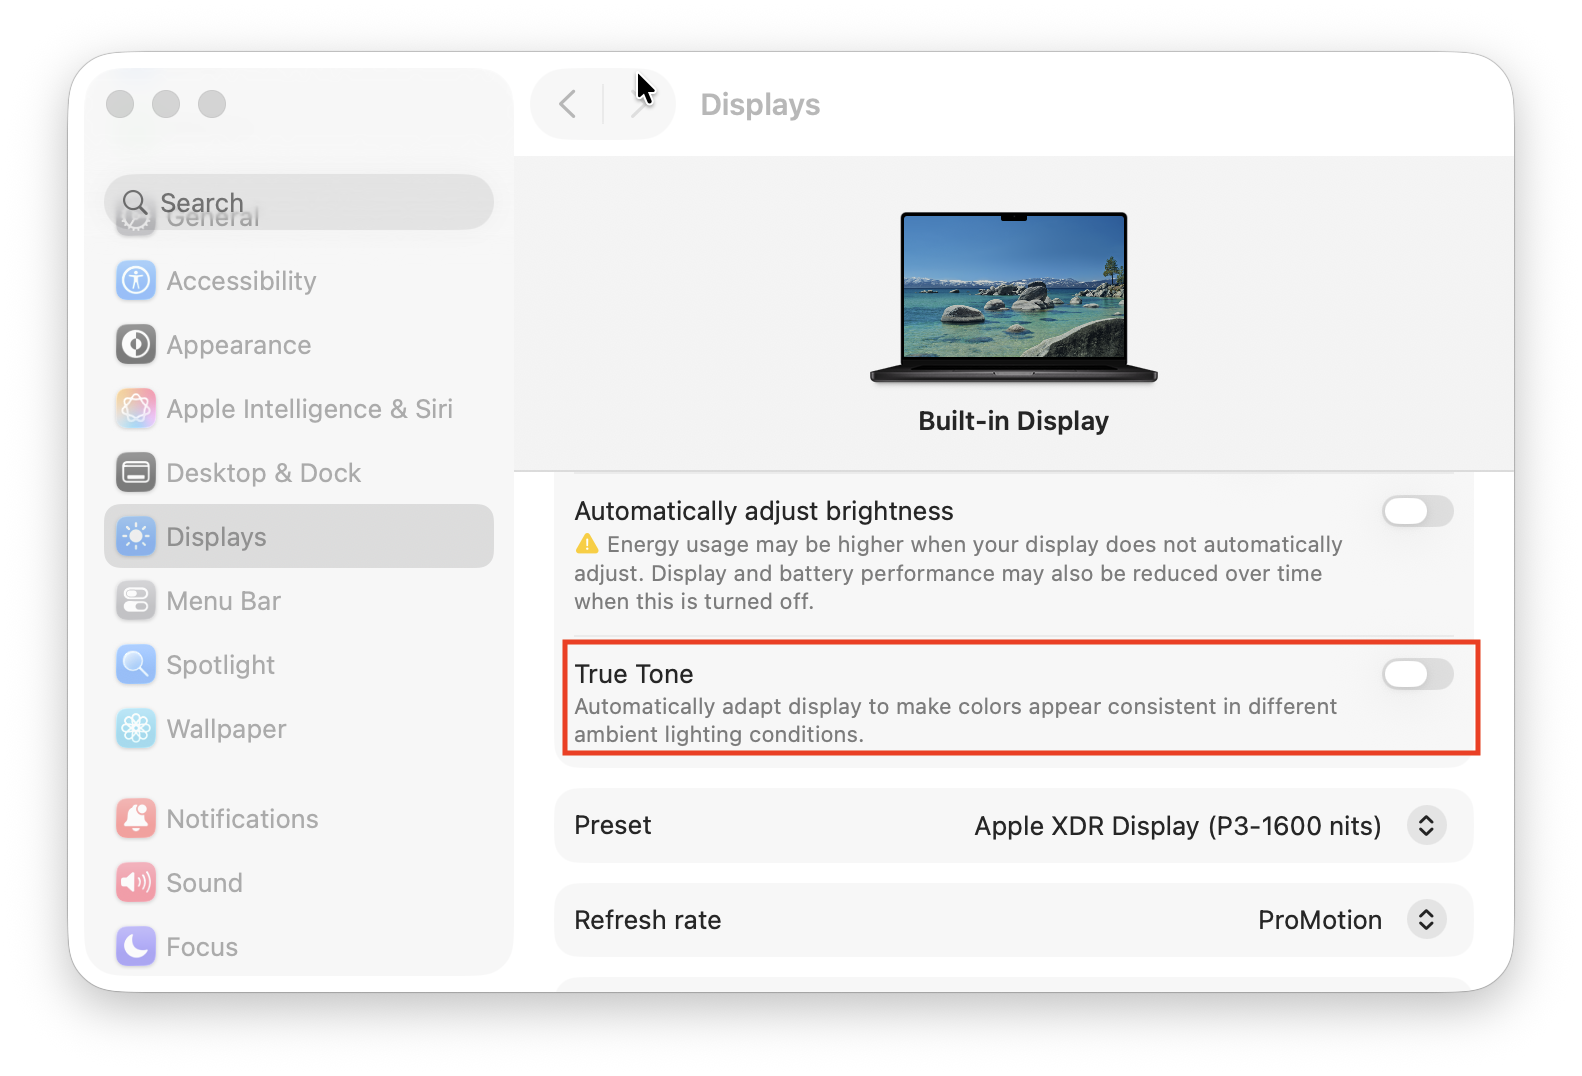
- Turn off Night Shift
10. Update macOS
Apple frequently fixes display issues in updates.
To update:
- Go to System Settings > General > Software Update
- Click on Update Now to install the latest version
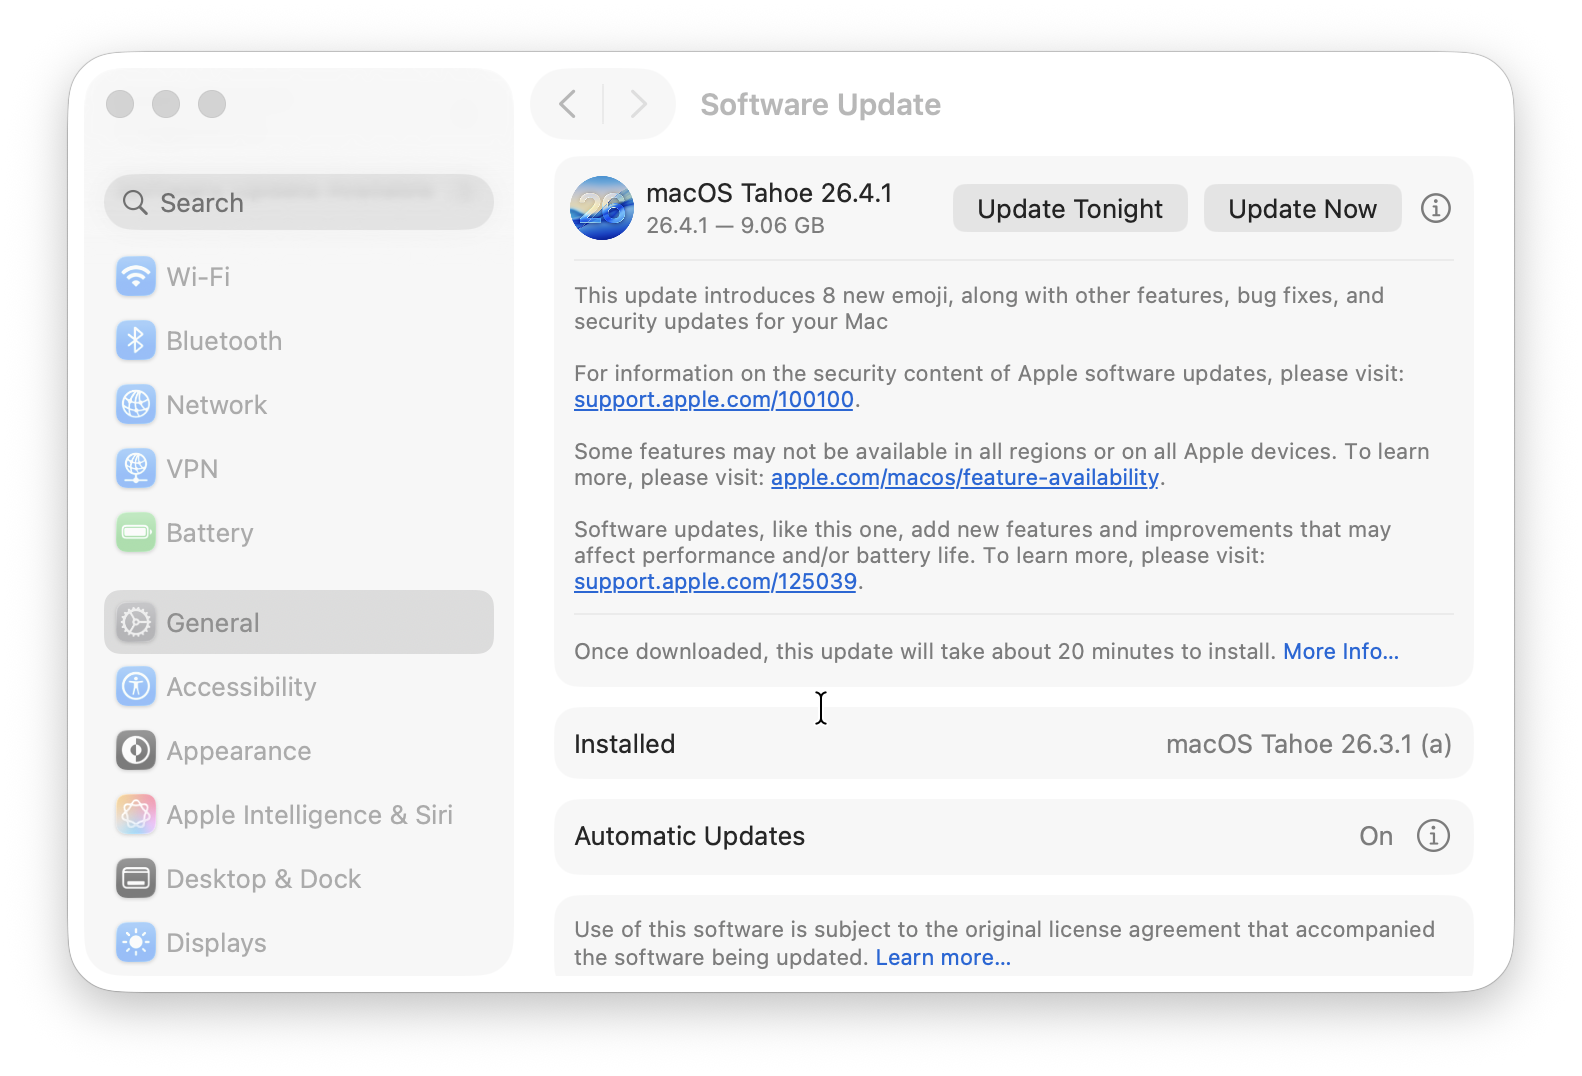
For more help, check our guide on how to update a Mac.
You can find out which is the latest version of macOS here.
11. Boot Your Mac in Safe Mode
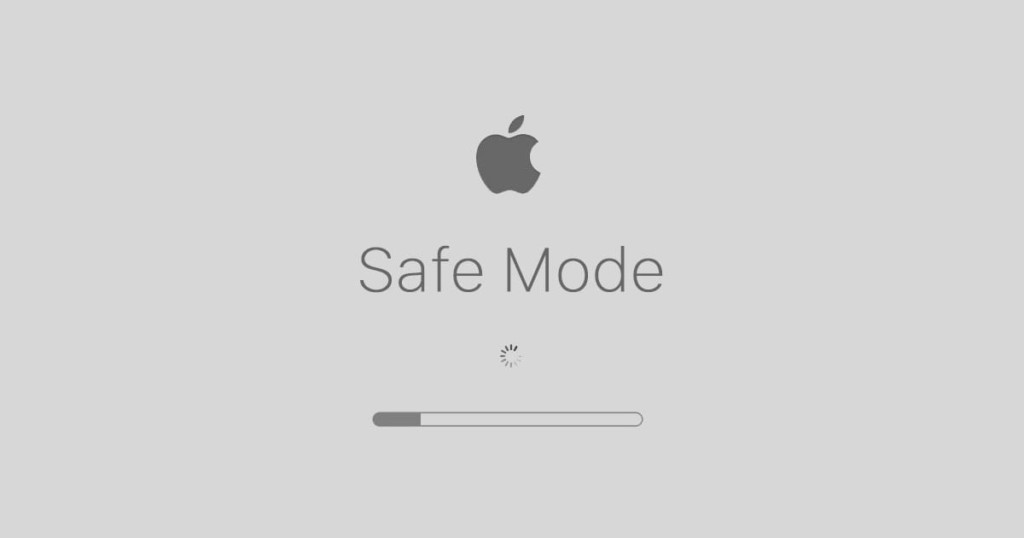
Safe Mode helps identify software conflicts.
Apple Silicon Macs:
- Shut down your Mac
- Hold the power button until startup options appear
- Select your disk
- Hold Shift and click Continue in Safe Mode
If the monitor works in Safe Mode, a background app may be causing the issue.
12. Restart the WindowServer Process
This can fix detection glitches.
- Open Activity Monitor (the equivalent of Task Manager in Windows)
- Search for WindowServer
- Select it and click Quit

Your Mac will refresh the display system automatically.
13. Use DisplayLink (For Docking Stations)
If you’re using a dock or want multiple monitors:
- Install DisplayLink Manager
- Connect via a DisplayLink-compatible hub
This can:
- Enable additional monitors
- Fix detection issues with docks
14. Reset macOS Display Configuration Files (Advanced Fix)
If your Mac still isn’t detecting an external monitor after trying all standard fixes, your display configuration files may be corrupted.
macOS stores monitor settings in a system file, and if this becomes broken, it can prevent external displays from being detected properly.
Try this advanced fix:
- Disconnect all external monitors
- Open Terminal
- Run the following command:
sudo rm /Library/Preferences/com.apple.windowserver.displays.plist
- Enter your password if prompted
- Restart your Mac
- Reconnect your monitor
If the issue persists, also try:
rm ~/Library/Preferences/ByHost/com.apple.windowserver*.plist
Then restart your Mac again.
Important Note:
This will reset your display layout and preferences, so you may need to:
- Reconfigure display arrangement
- Re-select resolution settings
15. If Nothing Still Works
If your external monitor is still not detected:
- Try a different monitor to rule out hardware issues
- Reset your monitor to factory settings
- Contact Apple Support or the monitor manufacturer
Second Monitor Not Detected on Mac?
If your first external monitor works but a second monitor is not detected, this is usually not a cable issue – it’s often a compatibility or hardware limitation rather than detection failure.
Apple Silicon Display Limitations
Most base Apple Silicon Macs have strict external display limits:
- M1 MacBook Air / M1 MacBook Pro (base chips) → 1 external display only
- M2 MacBook Air / M2 MacBook Pro (base chips) → 1 external display only
- M3 base models → also limited to 1 external display
This means the second monitor will not appear in macOS at all, even if everything is connected correctly.
How to Fix Second Monitor Detection Issues
If your Mac does support multiple displays (e.g. M1 Pro, M2 Pro, M3 Pro, Mac Studio), try the following:
- Disconnect both monitors and reconnect one at a time
- Restart your Mac with both monitors plugged in
- Check System Settings > Displays for both screens
- Try different combinations of ports (HDMI + USB-C)
- Avoid low-quality or passive USB-C hubs
Use DisplayLink for Unsupported Macs
If your Mac only supports one external display, you can still add more monitors using:
- A DisplayLink-compatible dock or adapter
- The DisplayLink Manager software
This allows macOS to “virtually” support additional displays through USB.
FAQ
Why is my Mac not detecting my external monitor?
This is usually caused by faulty cables, unsupported multi-monitor setups, USB-C restrictions, or macOS bugs.
How do I force my Mac to detect a display?
Go to System Settings > Displays, hold the Option key, and click Detect Displays.
Do M-series Macs support multiple monitors?
Base models only support one external display. You need a DisplayLink adapter for more.
Why is my monitor not detected via USB-C?
Possible causes include:
- USB-C accessory restrictions
- Incompatible hub
- Faulty cable
- macOS bugs
Summary
If your external monitor is not detected on a Mac, the issue is usually:
- A cable or connection problem
- A macOS setting or bug
- Or a hardware limitation (especially on Apple Silicon Macs)
Start with simple fixes, then work through the steps above – you’ll usually get it working quickly.