

The easiest way to migrate to Mac from a Windows PC is to use Apple’s free Migration Assistant. It copies supported personal data to your Mac while leaving the originals on your PC. You’ll install the Mac versions of your applications separately.
However, Migration Assistant isn’t always the best choice. If you already keep everything in OneDrive, signing in on the Mac may be simpler. If you want a fresh start with selected folders, an external SSD gives you more control.
This guide covers the entire move: choosing a transfer method, preparing your files, handling email and passwords, replacing Windows software, and checking that everything works before retiring your PC.
You may also find our guide on switching to Mac useful for more info on everything from the most useful Mac keyboard shortcuts to how to use the equivalent of File Explorer on a Mac.
Choose where to start:
- Use Migration Assistant for a guided step-by-step transfer.
- Copy files with an external drive for a more selective way of choosing what to migrate.
- Use OneDrive or another cloud service if your files are already online.
- Transfer over your home network without buying a drive.
- Check email, passwords and applications after moving your files.
- Fix migration problems if something goes wrong.
Which Is the Best Way to Migrate to Mac?
For most people setting up their first Mac, start with Migration Assistant. Choose a manual transfer when you want to bring across only the things you still use.
| Method | Best choice when… | What to allow for |
|---|---|---|
| Migration Assistant | You want a guided move of personal files and supported account information | You still need to install apps and check their data |
| External SSD or USB drive | You have large local folders or want a clean start | You choose and organise the files yourself |
| OneDrive, Google Drive or Dropbox | Your working files already live in that service | Uploads must finish first; offline access needs checking |
| Local network sharing | Both computers work and you want to copy selected folders directly | Windows sharing permissions require some setup |
You can combine methods. For example, use Migration Assistant for local documents and bookmarks, then sign in to OneDrive for cloud files.
If you only want to add documents to a Mac account you already use, an external drive, cloud service or network copy may be all you need.
The useful rule is to give each collection of data one main route. Avoid copying your entire photo collection by three different methods and trying to sort out the duplicates later.
Before You Start: Prepare Your PC and Mac
1. Make a separate backup
Keep a backup of irreplaceable files before beginning. A migration creates another working copy; it shouldn’t be your only protection against a mistaken selection or a failing PC drive.
Check more than Desktop and Documents. Look for:
- Pictures, videos, downloads and music.
- Folders on a second internal drive or an external disk.
- Outlook archives and locally stored email.
- Accounting records, creative projects and app-specific libraries.
- Files belonging to other Windows users.
Open a few files from the backup to confirm that you can actually read them.
If your PC drive is failing or repeatedly disconnecting, prioritise recovering important data before attempting a large migration.
2. Separate local files from cloud files
A filename in File Explorer doesn’t always mean the full file is stored on the PC.
OneDrive Files On-Demand can show online-only files. For folders you intend to copy manually or include as local data, right-click them and choose Always keep on this device, then wait for downloading to finish. Microsoft explains the status icons in its OneDrive Files On-Demand guide.
Alternatively, leave those files in OneDrive and access them through OneDrive on the Mac. In that case, confirm they appear on the OneDrive website before relying on them.
Apply the same check to other cloud services: distinguish files that are fully downloaded from shortcuts or placeholders.
3. Check how much storage you need
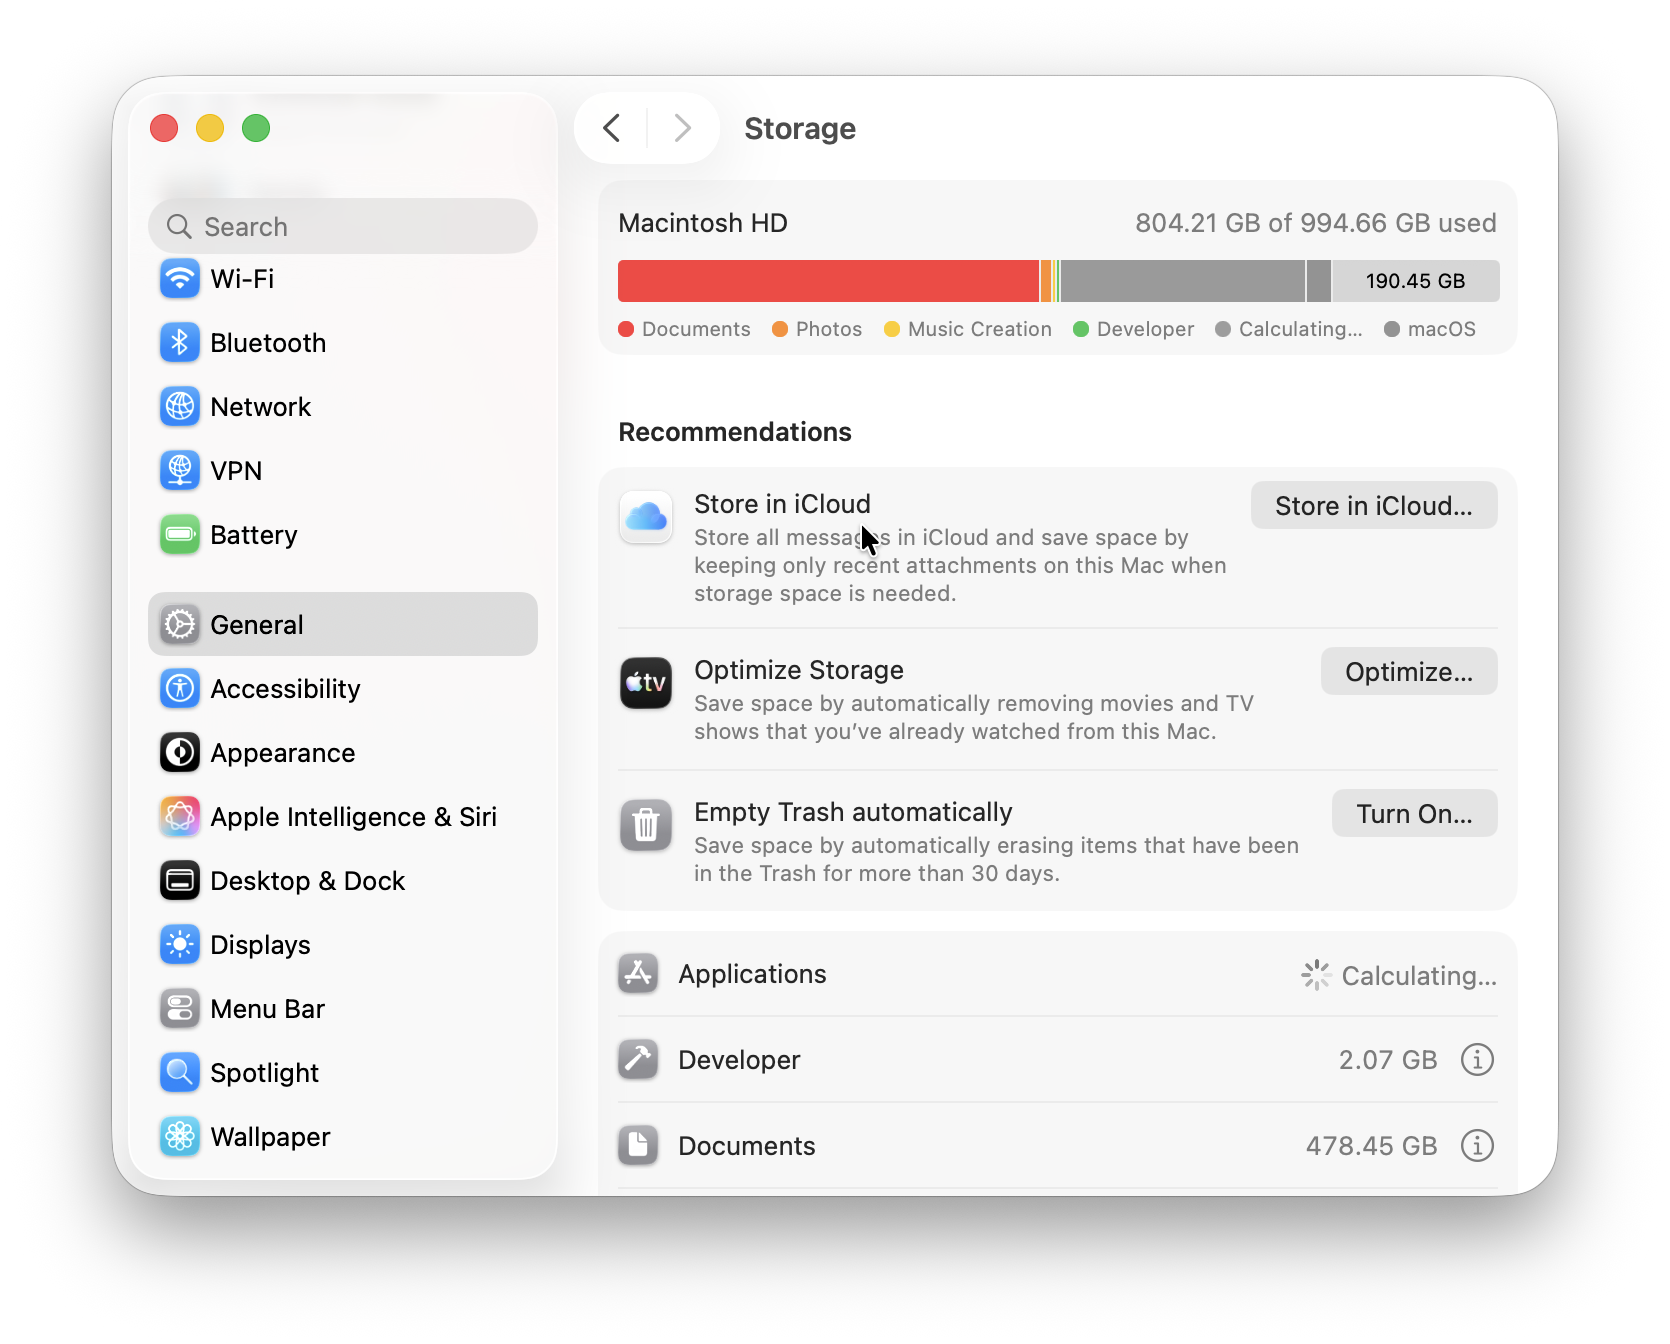
Compare the data you actually want to transfer with the Mac’s available storage.
On a Mac that is already set up, open Apple menu > System Settings > General > Storage. On Windows, select your main folders in File Explorer and open Properties to estimate their size.
Check additional drives separately. A modest Documents folder can hide a much larger collection of photos or video projects elsewhere.
Allow working space for applications, downloads and future updates. A 256GB Mac won’t comfortably hold 300GB of local files; keep an archive on external storage or use cloud storage selectively.
For more help, read our guide on how to check storage on a Mac.
4. Make a short application checklist
Write down your essential apps before moving anything.
| What you use | What to check |
|---|---|
| Office and other productivity software | Mac availability, licence entitlement and important document features |
| Accounting or business software | A supported Mac version, web version or data export |
| Photo, music and video applications | How to move the project database, catalogues, media and plug-ins |
| Windows-only utilities | Whether you still need Windows for them |
| Printers, scanners and specialist equipment | Support for your Mac model and macOS version |
A copied project file is only useful if you also have the software, linked media and any required licence to open it.
For software without a suitable Mac version, see our guide to the best ways to run Windows on a Mac.
There are some excellent virtual machines which can run Windows on your Mac, in some cases for free!
5. Check account access
Make sure you can sign in to your email, Microsoft account, browser and password manager without relying entirely on the old PC.
Keep access to your authentication phone or security key, and locate relevant recovery codes. Test a sign-in on another device where practical.
Save product keys and check whether any applications need deactivating before their licence can be used elsewhere.
For an employer-managed computer, use your organisation’s migration process. Work files, security settings and software licences may need IT involvement.
Method 1: Migrate from Windows to Mac with Migration Assistant
Migration Assistant is included with macOS. The extra software you download goes on the Windows PC.
Apple’s Mac transfer guide describes selecting personal data and supported settings. Think of this as moving your information into macOS, rather than recreating your Windows installation.
Step 1: Download the correct Windows Migration Assistant
Check the Mac’s version under Apple menu > About This Mac, then choose the Windows Migration installer that matches it.
| macOS on the destination Mac | Windows Migration Assistant |
|---|---|
| macOS Golden Gate 27, Tahoe 26, Sequoia 15, or Sonoma 14.4 and later | Version 3.2.0.0; requires Windows 10 or later |
| macOS Sonoma 14.3 or earlier, Ventura 13, or Monterey 12 | Version 2.4.5.0; Apple lists Windows 7 or later |
| macOS Big Sur 11 | Version 2.3.1.0; Apple lists Windows 7 or later |
| An earlier macOS version | Use the matching legacy download listed by Apple |
These are the installer options Apple lists at the time of writing. Check Apple’s migration page for subsequent changes.
Note that the important Sonoma detail is easy to miss: the 3.2.0.0 download page requires macOS 14.4 or later. Apple’s 2.4.5.0 page includes Sonoma 14.3 and earlier.
Download from Apple, open the installer on the PC and follow its setup instructions. Migration Assistant is free.
Step 2: Prepare the connection
Put both computers nearby with Wi-Fi and Bluetooth enabled. Plug laptops into power and keep them awake.
For a stable home-network setup, connect both to your normal private network. Avoid guest Wi-Fi, which may prevent devices from communicating.
Ethernet is worth considering for a large transfer if both computers have suitable ports or adapters (but most modern MacBooks no longer have an Ethernet port). Keep Wi-Fi and Bluetooth enabled for discovery when following the current assistant’s prompts.
Quit other applications and pause unnecessary jobs. If you use a VPN, disconnect it for the transfer. On a managed computer, ask IT about any connection restrictions.
Step 3: Start Migration Assistant on the Mac
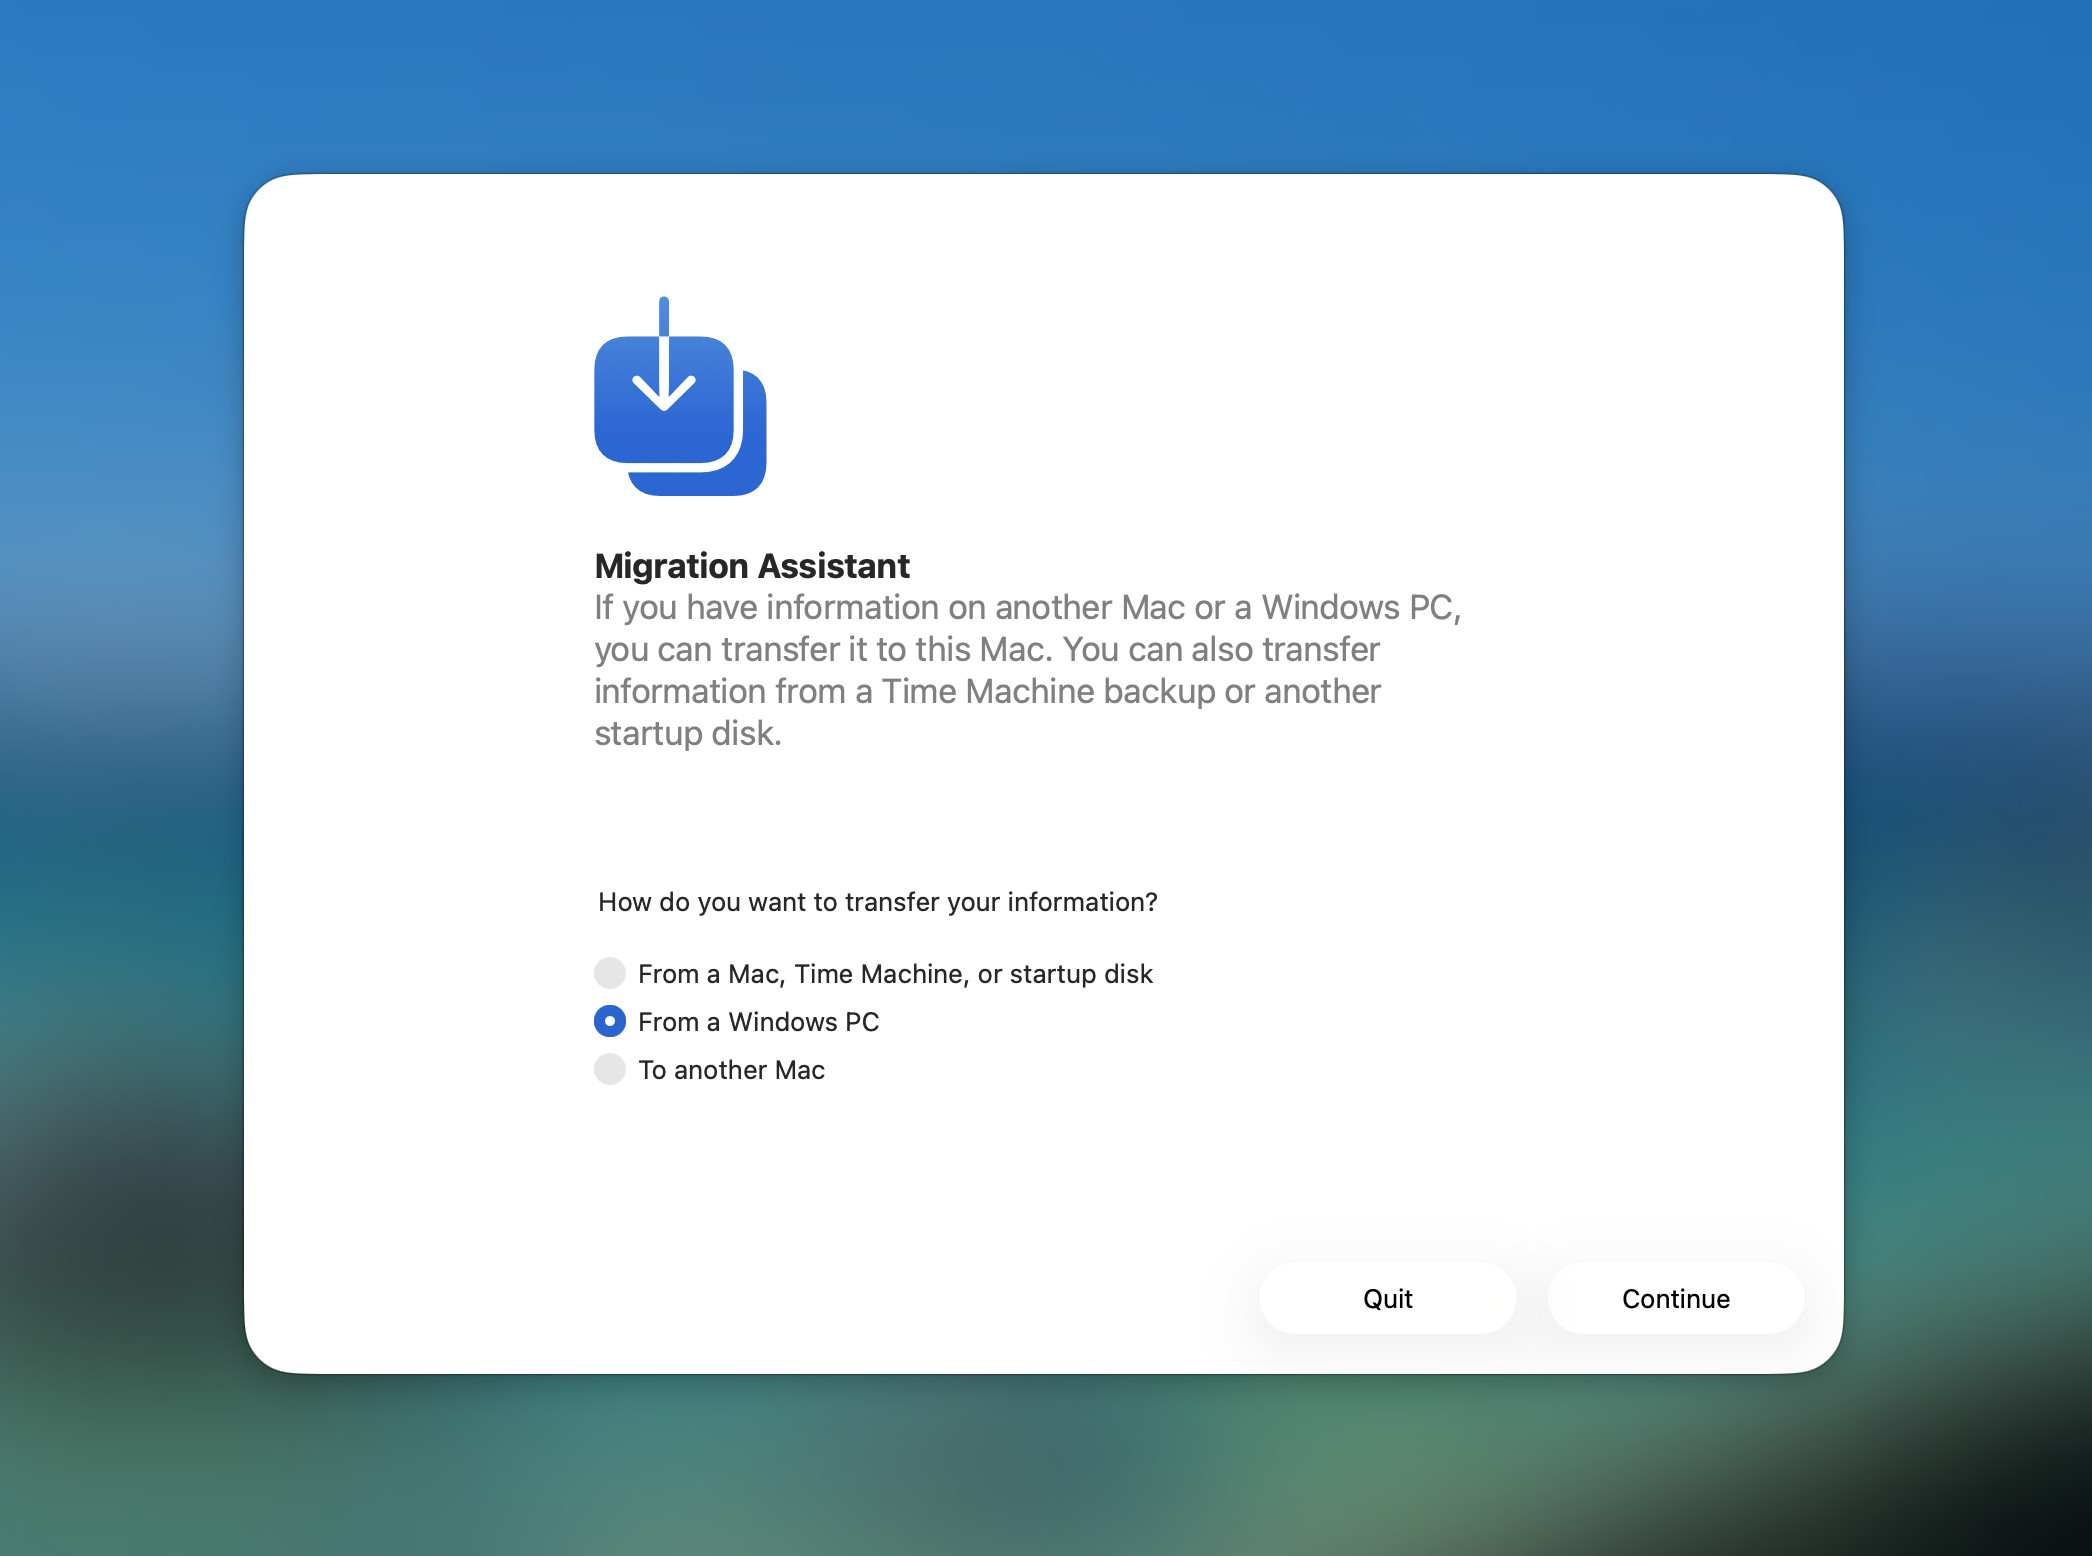
During initial Mac setup, choose From a Windows PC when asked about transferring information.
If you have already set up the Mac, open Applications > Utilities > Migration Assistant. You can also find it with Command + Space.
You can migrate after setup; you don’t need to erase the Mac. Read any account-name conflict carefully, particularly if the Mac already contains important work.
Step 4: Connect the PC
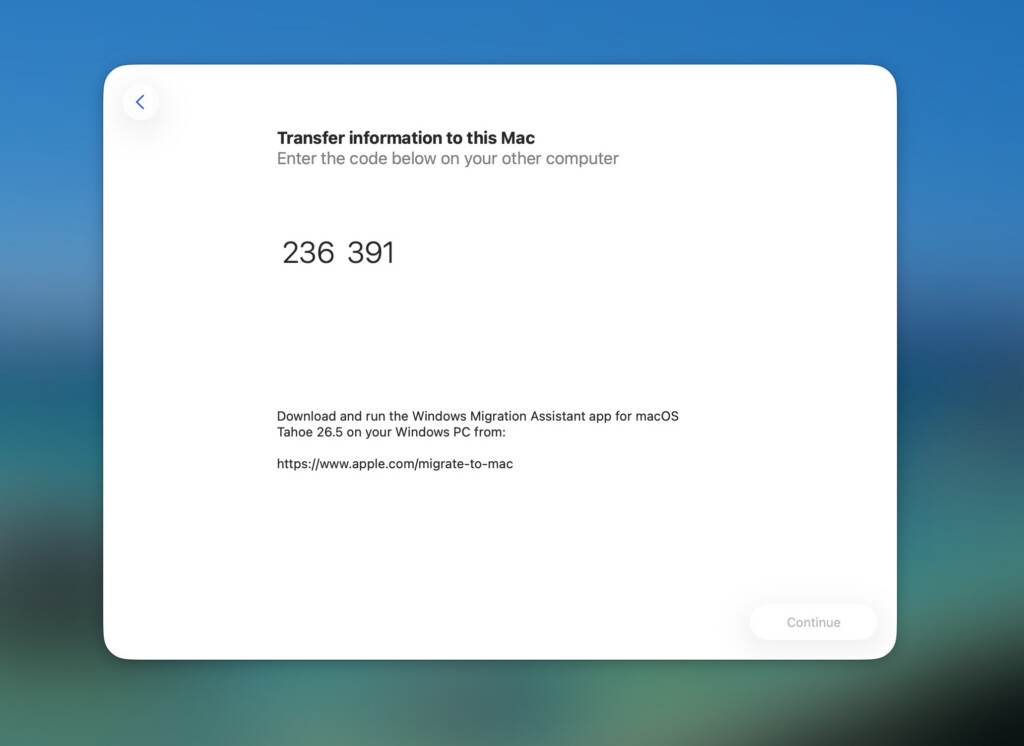
Open Windows Migration Assistant. In the current version, enter the code displayed by your Mac when requested, then continue through the pairing prompts, as described in Apple’s Mac setup guidance.
Use the instructions on your own screens if an older version presents the connection differently.
Step 5: Select your data
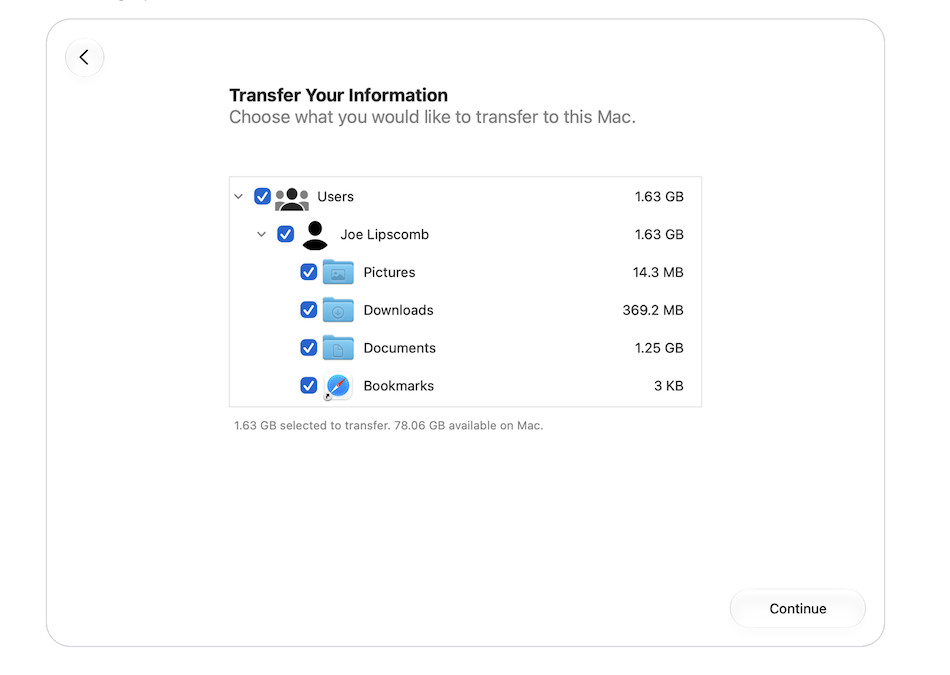
Wait for the Mac to finish calculating the available data, then expand the categories and choose what to bring across.
Review the selection rather than accepting everything automatically. This is a good opportunity to leave behind obsolete downloads or a large archive you plan to keep on an external drive.
The selection relates to the Windows user currently signed in. To migrate another person’s information, sign in to their Windows account and repeat the process.
Step 6: Finish and open the migrated account
Follow the password prompts and record any temporary password shown. When the transfer completes, sign in to the migrated Mac account using the credentials established during migration.
Then open important files and follow the verification checklist below.
Apple’s step-by-step instructions cover the pairing, password and completion screens.
What should you expect to move?
Use this as a checklist for inspecting the result, rather than assuming every app and account will be handled identically.
| Information | What to check on the Mac |
|---|---|
| Documents, Desktop, Downloads and other selected personal folders | Open the migrated user’s folders in Finder |
| Photos and videos | Locate the files, then decide whether to import them into Photos |
| Supported contacts and calendar information | Check Contacts and Calendar, including old entries |
| Supported mail information | Check account access and historical messages separately |
| Browser bookmarks | Check Safari and any browser you install yourself |
| Selected personal settings | Review your desktop, language and location preferences |
| Application-specific projects and databases | Open them in the correct Mac app or use its migration procedure |
| Windows programs and drivers | Install a supported Mac version or arrange continued Windows access |
Do not assume that saved passwords, every email archive or an application’s complete working environment will appear automatically. Those deserve separate checks.
Method 2: Transfer Files Using an External SSD or USB Drive
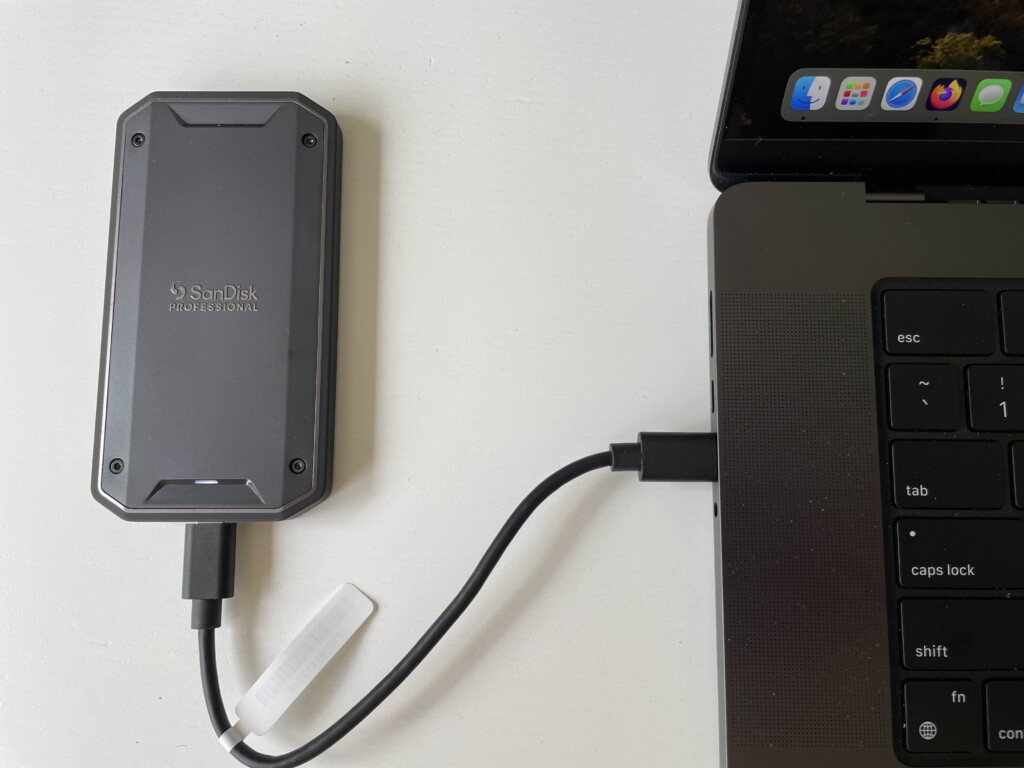
An external drive is a good option if you mainly need documents and media, want to organise the move yourself, or can’t get Migration Assistant working.
It also lets you move one collection at a time. Any external SSD drive with enough space will suffice, although for the fastest transfer speeds to your Mac, we recommend using a Thunderbolt drive.
Choose a suitable drive format
exFAT is a practical format for an ordinary transfer drive that needs to work with both Windows and macOS – read more in our guide on how to format a drive.
Formatting erases the drive. If it already contains files, back them up or use another drive.
If your existing PC drive uses NTFS, you may be able to copy its files onto the Mac without changing its format. macOS generally reads NTFS but doesn’t write to it using its built-in tools – for more check our guide to NTFS drives with Macs.
Don’t erase an NTFS drive merely because the Mac won’t let you save new files onto it.
Copy the files
- Connect the external drive to the PC.
- Create clearly named folders for the collections you want to move.
- Copy, rather than move, the files from Windows.
- Wait for copying to finish and safely eject the drive.
- Connect it to the Mac and open it in Finder.
- Copy the files into the appropriate Mac folders.
- Open representative files before removing either original copy.
For a straightforward transfer, match Documents to Documents, Pictures to Pictures, and so on. If you prefer to sort later, use a clearly labelled folder such as Imported from PC.
Avoid copying the entire Windows system drive as your migration strategy. Folders such as Windows and Program Files don’t turn into a working macOS software setup.
Keep app-specific collections together. For example, copy a video project’s source footage as well as the project file, and follow the developer’s instructions for transferring its library or database.
Method 3: Migrate Using OneDrive, Google Drive or Dropbox
Cloud storage is often the simplest route when your important files already live there.
You can continue using OneDrive on a Mac; switching computers doesn’t require switching every service to iCloud.
Move files with OneDrive
- On the PC, check which folders are actually inside OneDrive.
- Wait for uploads to finish and resolve any sync errors.
- Sign in to the OneDrive website and check important folders there.
- Install OneDrive on the Mac from the Mac App Store.
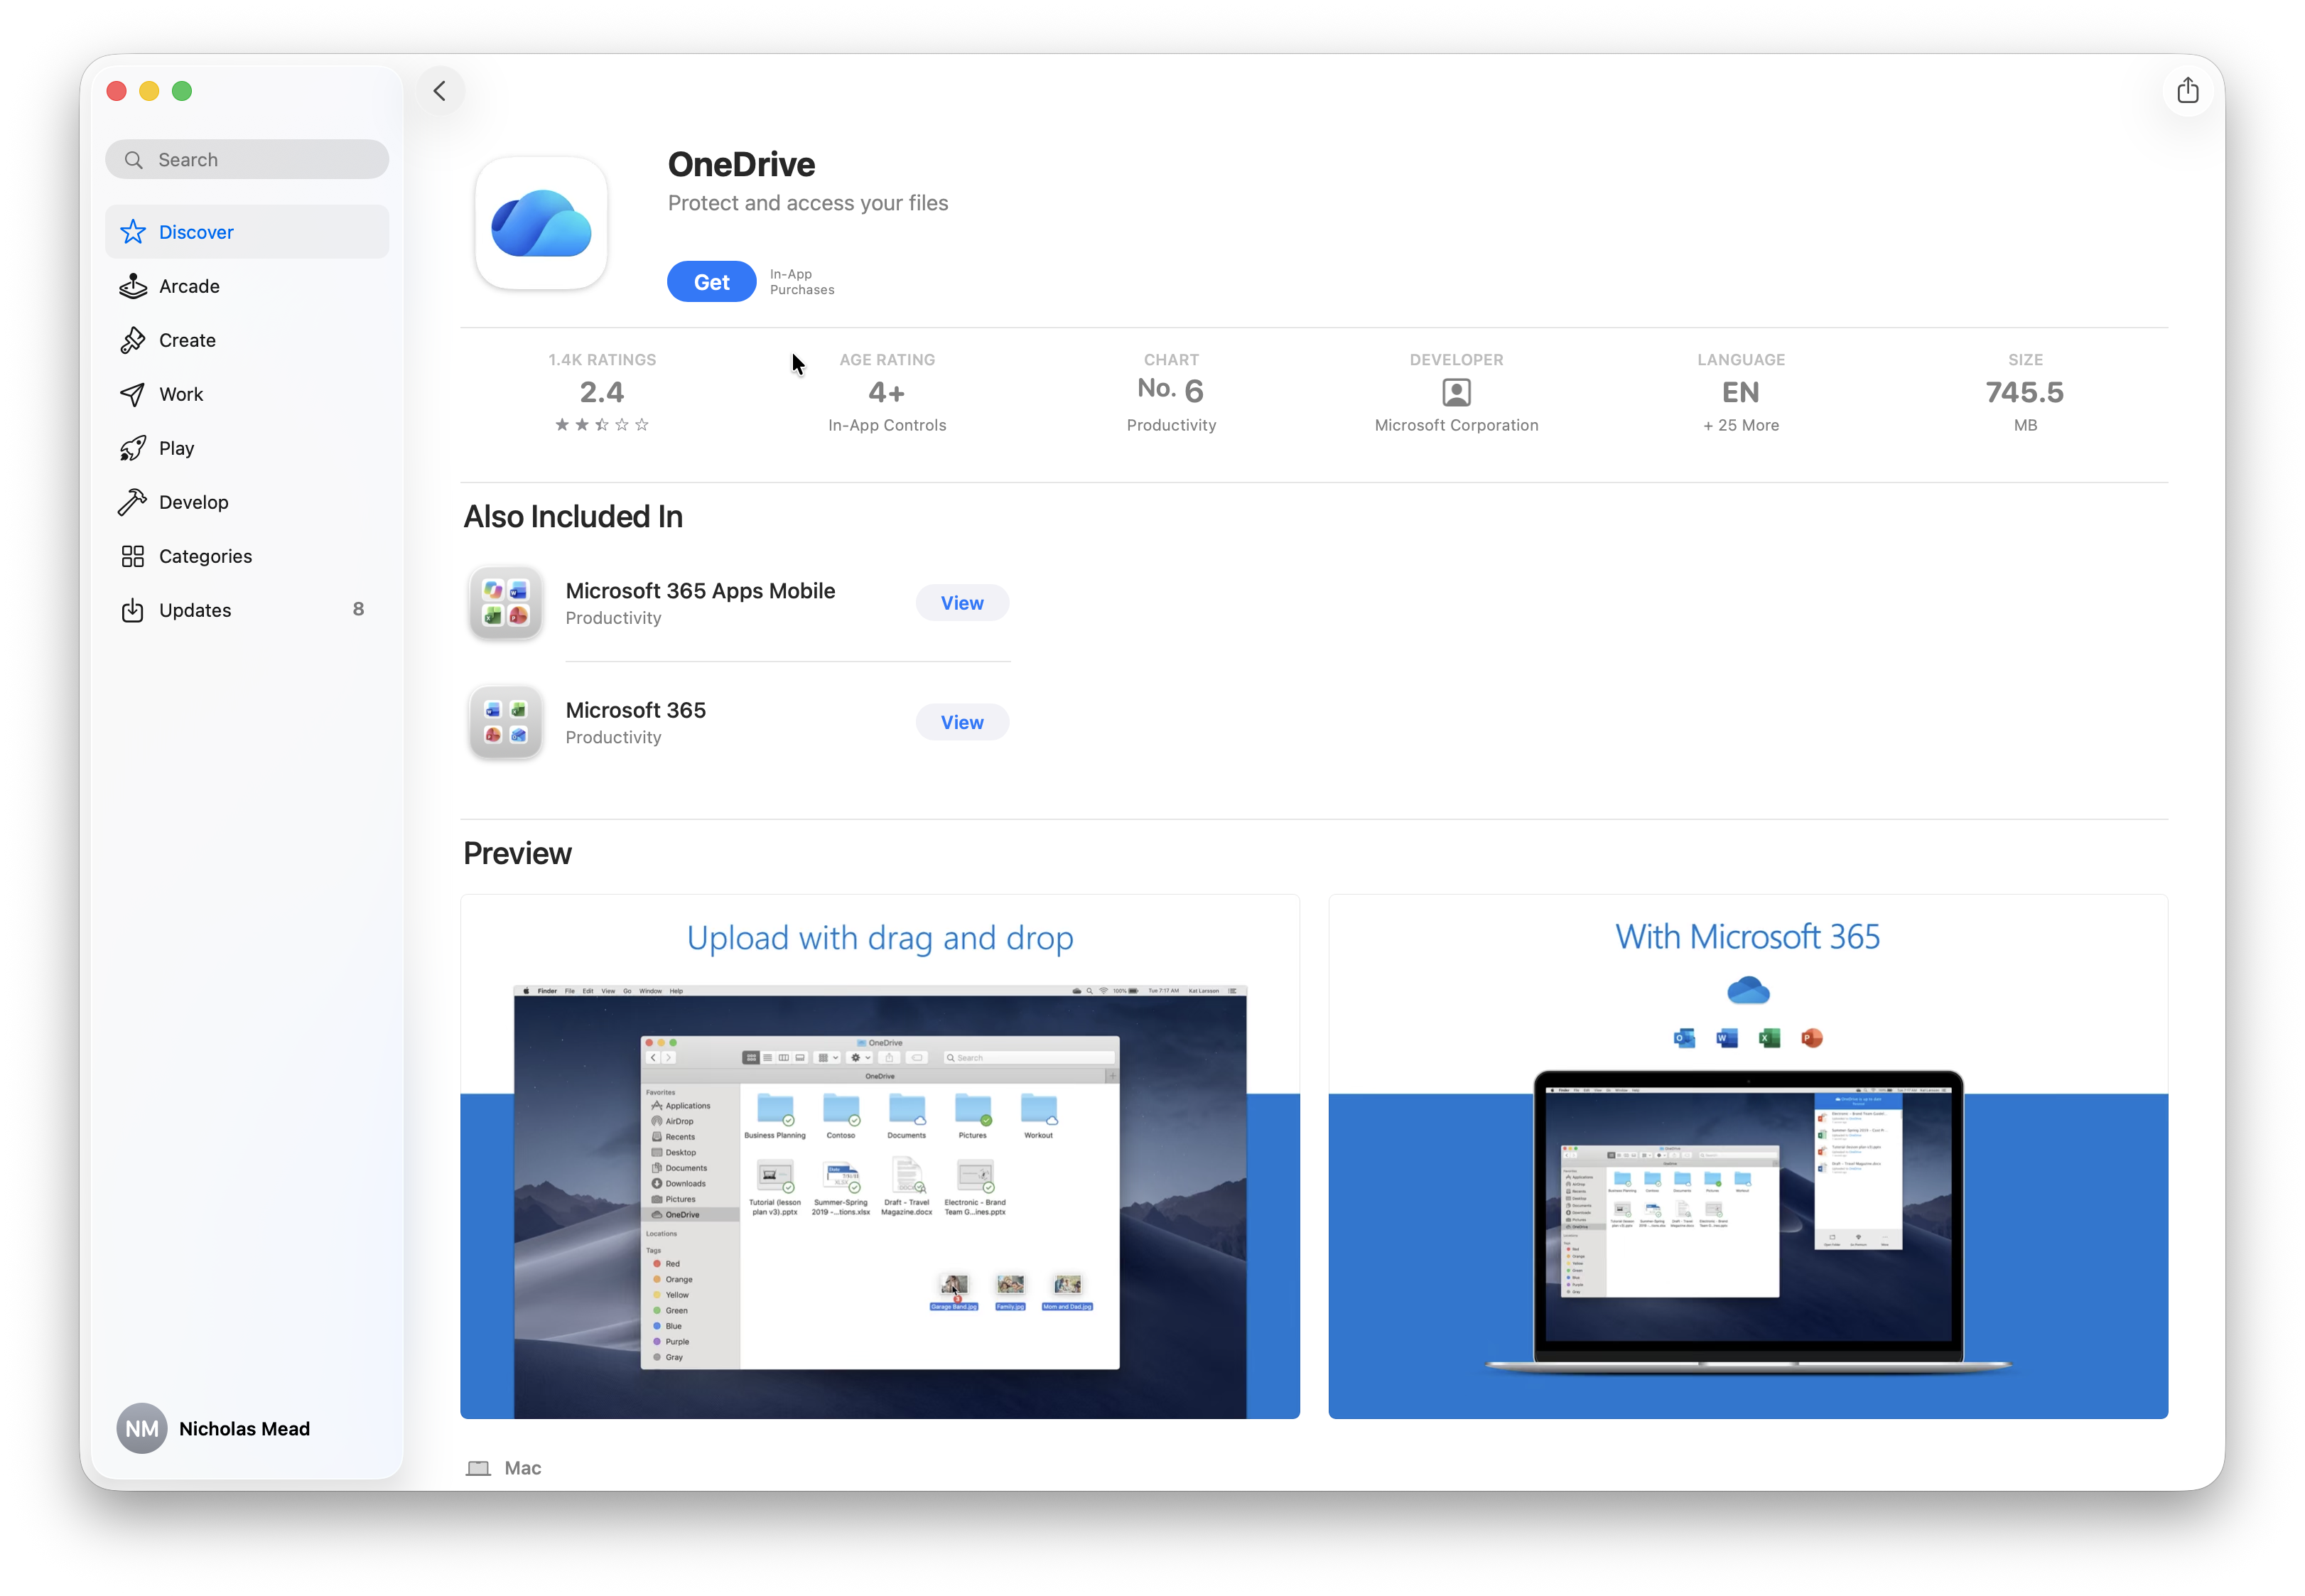
- Sign in with the same personal, work or school account.
- Choose the folders you need and let syncing finish.
Microsoft’s OneDrive setup instructions explain installing the Mac app and choosing its folders.
Don’t assume everything on your PC was included. Downloads, a second drive and application libraries can sit outside the synced locations.
Make essential files available offline
A cloud icon in Finder can mean the file needs downloading before you can open it.
For documents you need without internet access, use Always keep on this device and wait for downloading to finish. Microsoft explains the Mac status indicators in its Files On-Demand guide.
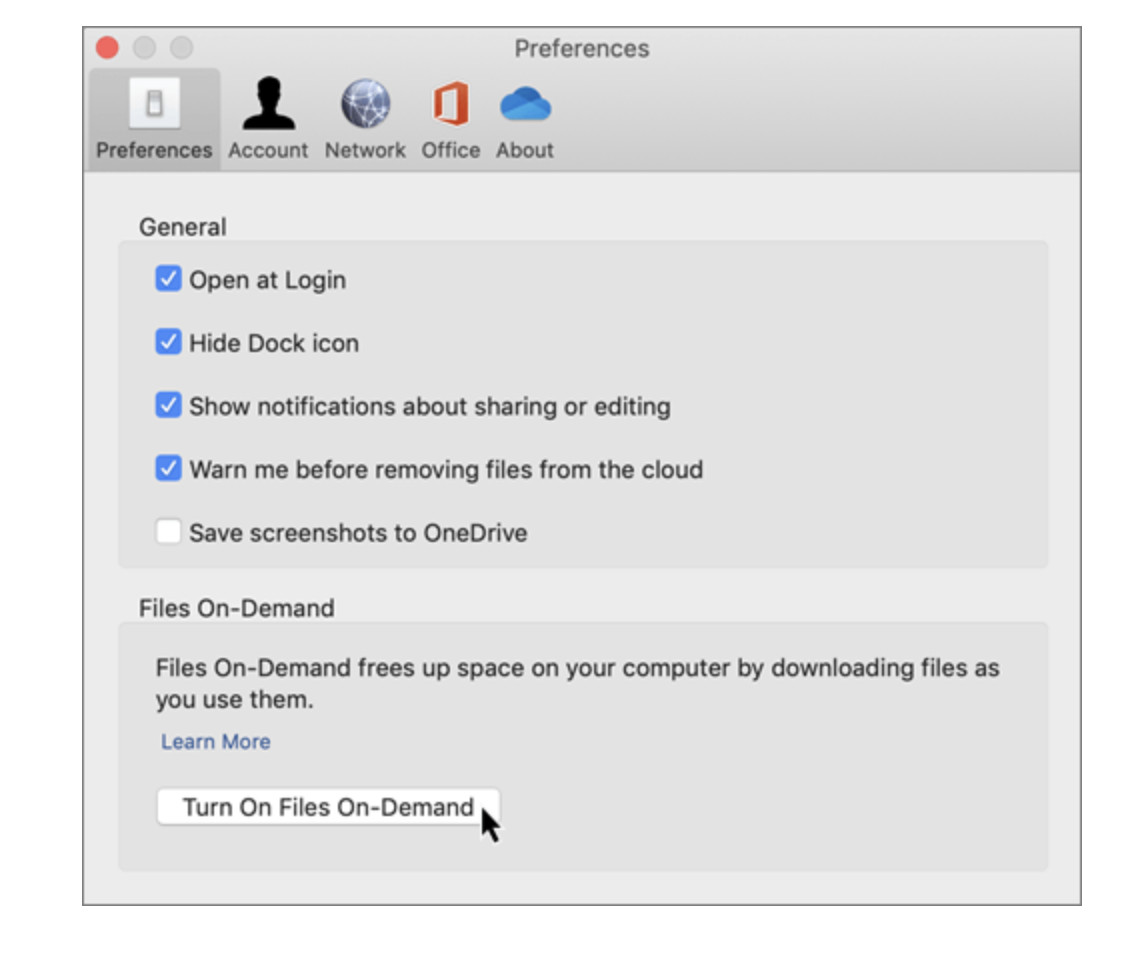
Test a few important files while disconnected from the internet.
Keep syncing separate from archiving
Changes and deletions in a synced folder can propagate to the cloud and other devices.
Once the Mac is working, don’t “tidy up” the PC by deleting its synced folders while the sync service is still connected. Follow the service’s procedure for disconnecting the old computer.
For large collections that aren’t already uploaded, consider your upload connection and storage allowance before committing to a cloud transfer. An external SSD may be more convenient.
The same planning applies to Google Drive and Dropbox: confirm upload completion, check the correct account, and verify offline copies.
Method 4: Copy Windows Files to Your Mac Over the Network
Network sharing lets you copy selected folders directly between computers on a trusted local network.
Unlike Migration Assistant, this is a manual file copy. It won’t set up your email, contacts or applications.
- Connect both computers to the same trusted home network.
- On Windows, share the required folder with a specific account.
- On the Mac, open Finder and choose Go > Connect to Server.
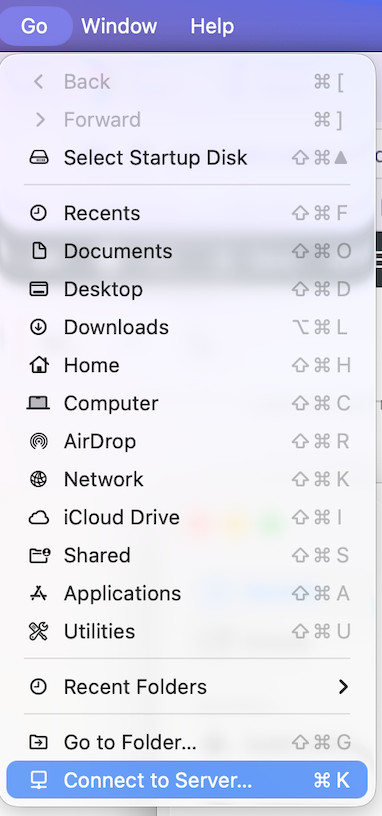
- Enter the PC’s address, for example smb://192.168.1.20.
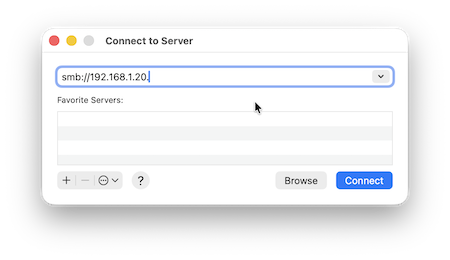
- Sign in with the Windows account authorised to access that folder.
- Open the share and copy files onto the Mac.
Use your own PC’s address in place of the example. Microsoft explains sharing folders in Windows, and Apple explains connecting to a Windows computer from a Mac.
If Windows is treating your trusted home network as public, review its network profile and sharing settings. Keep access limited to the folders and users needed for the transfer, then remove the share when finished.
Finish the Move: Email, Passwords, Photos and Applications
Getting your files onto the Mac is the first part. The next part is making sure your everyday work opens correctly.
Email: distinguish server mail from local archives
If your email is stored with a provider, adding the same account on the Mac should give you access to the messages that remain on its server.
For Apple Mail, use Mail > Add Account and follow the sign-in process. Apple lists supported account setup options in its Mail account guide.
Then check the oldest messages you need, not just the latest inbox. Send a test email, receive a reply, and check Sent folders and attachments.
Local archives need extra attention. Microsoft distinguishes Outlook’s PST archives from OST files, which are normally synchronised copies of server data, in its Outlook data-file guide.
Don’t treat an OST file as a portable email archive.
Moving Outlook PST archives
Keep a separate copy of important PST files and check the import options in the exact version of Outlook you plan to use on the Mac.
Microsoft’s familiar Tools > Import PST instructions are explicitly for legacy Outlook for Mac. They shouldn’t be presented as universal instructions for the current Mac app.
This matters in 2026: Microsoft documents legacy Outlook support changes, including the end of Exchange Online connectivity from October 2026.
A practical alternative, where your provider and organisation allow it, is to copy or import archived messages into an appropriate server mailbox using Windows Outlook, then let them sync to the Mac. Check mailbox quotas and verify the result before deleting anything.
For Apple Mail, mailbox import supports mbox files. Renaming a PST file to mbox won’t convert it.
For the MSG format, there are ways to open Outlook MSG files on a Mac.
Keep access to the PC until you can search and open the old messages you need.
Contacts and calendars
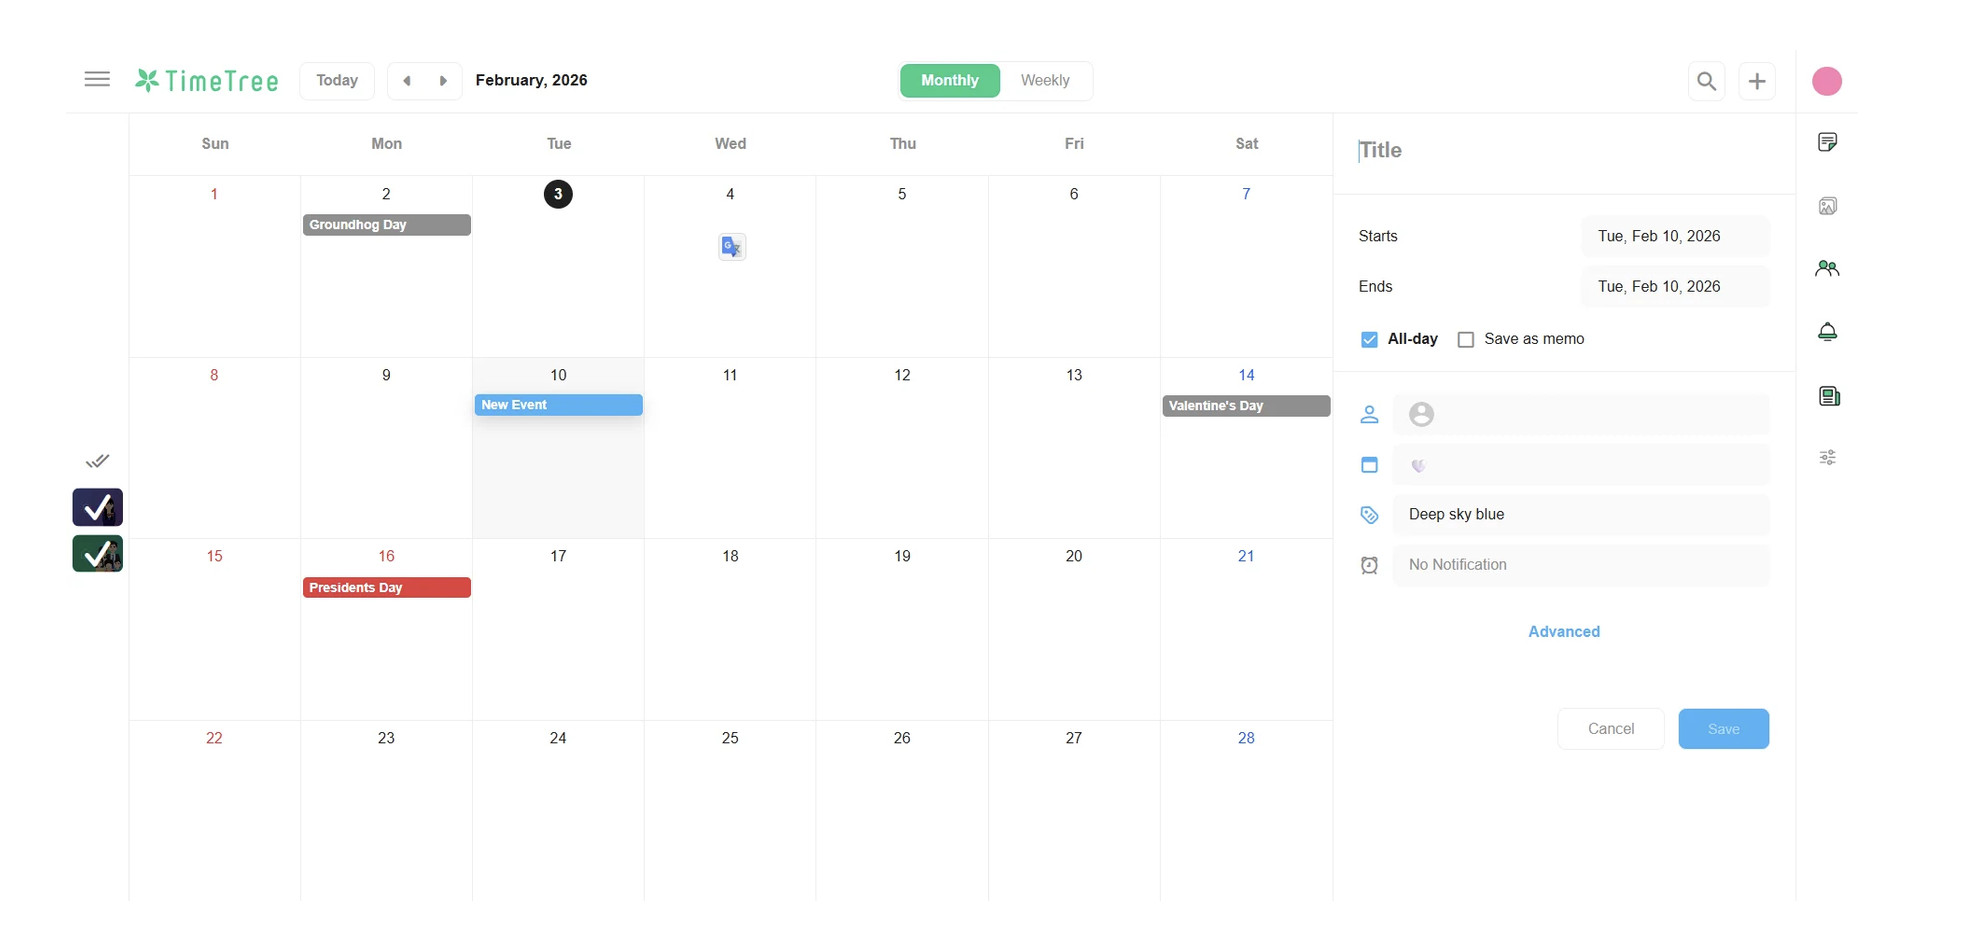
If contacts and calendars belong to an online account, first check that account’s data on the Mac.
Before importing a second copy manually, confirm that the missing entries really are absent. Importing the same address book through several routes can create an unnecessary clean-up job.
Check recurring appointments, shared calendars and contacts stored locally on the PC, as well as the main cloud account.
You can also consider syncing your calendar with one of these calendar apps for Mac.
Browser bookmarks and saved passwords
You can keep using your favorite browser on the Mac and there are plenty of excellent alternatives to Safari for Mac.
For Chrome, signing in with the same Google account can make saved bookmarks, passwords and other selected data available. Check what is being saved on the PC first; Google explains this in its Chrome sign-in guide.
For other browsers or a dedicated password manager, use the provider’s Mac app and migration or sync procedure.
If you want to switch to Safari, Apple documents importing browser data, including bookmarks exported as HTML. A bookmark file doesn’t include your saved passwords.
Treat password migration as its own job. Test important logins and check how your passkeys and two-factor authentication will work on the Mac. Retain access to the original device until those checks succeed.
If you export passwords to an unencrypted CSV, keep it out of shared folders and remove the temporary export after confirming the import.
Photos and videos
First decide whether you want to:
- Keep the files in ordinary folders.
- Import them into Apple Photos.
- Continue using an existing cloud photo service.
For Apple Photos, open Photos > File > Import, choose the files or folder, and review the selection. Apple’s Photos import guidance describes importing from Finder folders.
Copying files into the Pictures folder and importing them into the Photos library are separate actions.
Check a few older photos and videos, along with dates and any organisation you rely on. Albums, edits and face recognition from another application may need that application’s own transfer process.
For a large Photos import, allow space for the library as well as any originals you temporarily keep on the Mac.
Microsoft Office and other applications
Download Mac applications from their developers or the Mac App Store.
For Microsoft 365, sign in with the account associated with a plan that includes the desktop apps, then install the Mac software. Microsoft’s Office installation guide covers this process.
Check your particular licence before assuming a one-time Windows purchase includes a Mac installation.
Test important documents for layout, fonts, macros, add-ins and linked files. The fact that a document opens doesn’t prove every feature you use works identically.
Reinstalling an app and transferring its data are often separate jobs. Use the developer’s migration instructions for catalogues, databases, plug-ins, templates and settings.
What if you still need a Windows application?
There are three sensible starting points:
- Use a supported Mac or browser version.
- Run compatible Windows software in a virtual machine.
- Keep access to a Windows PC for software or hardware that needs it.
On an Apple Silicon Mac, a typical Windows virtual machine runs Windows 11 on ARM. It isn’t a direct replacement for every existing PC setup.
Microsoft makes it clear what are Windows-on-Mac options and limitations: drivers, games and specialist applications need particular care.
Start with our Windows on ARM compatibility guide before choosing a product, then compare the best virtual machines for Mac.
Do not assume you can simply copy your physical PC into a VM on an M-series Mac and continue unchanged.
Printers, scanners and accessories
Check the manufacturer’s support information for your exact model and macOS version.
Connect each essential accessory and complete a real task: print a document, scan a page, open an external drive or join a video call.
Basic operation and advanced features can have different software requirements. Test anything important while your PC is still available.
Learn the Mac Basics You’ll Need Immediately
You don’t need to learn every macOS feature before moving. These are enough to get started.
| What you used on Windows | Where to start on the Mac |
|---|---|
| File Explorer | Finder |
| Start menu search | Spotlight: Command + Space |
| Settings or Control Panel | System Settings |
| Ctrl + C / Ctrl + V | Command + C / Command + V |
| Alt + Tab | Command + Tab |
| Right-click | Two-finger click on a trackpad, or configure secondary click |
| Closing an application | Command + Q; closing its window may leave it running |
| Moving a file with cut and paste | Command + C, then Option + Command + V in Finder |
Our Finder guide explains your new file manager, keyboard shortcuts guide and our Windows-to-Mac commands guide provides more tips.
Windows-to-Mac Migration Problems and Fixes
Migration Assistant won’t install
Check the installer’s requirements against both operating systems.
In particular, the current 3.2.0.0 installer needs Windows 10 or later and macOS Sonoma 14.4 or later on the destination Mac. An older PC or Mac may need a different route.
Download a fresh copy from Apple. If Windows reports a previous installation conflict, resolve that installation before retrying. On a managed PC, ask IT whether installation is restricted.
The Mac and PC can’t find each other
Work through these checks:
- Turn on Wi-Fi and Bluetooth and bring the computers closer.
- Disconnect VPNs and avoid guest networks.
- Restart Migration Assistant on both computers.
- Check whether a firewall or security utility is blocking the app.
- Try an appropriate Ethernet connection if wireless pairing remains unreliable.
An older PC may need a Bluetooth Low Energy adapter for the current assistant.
Apple’s preparation guidance also discusses temporarily turning off security software. Restore any protection you pause as soon as the transfer is finished. For a work computer, use the administrator’s approved process.
The transfer seems stuck
A large scan or transfer can take time without the estimate changing smoothly.
Check power, sleep settings, the network connection and available Mac storage. Allow extra time for very large collections or folders containing many small files.
If the assistant reports an error or repeatedly fails, restart and try a smaller selection. Keep a note of the exact error and the folder or category involved.
For suspected PC disk problems, Apple’s troubleshooting procedure uses chkdsk. Back up important data before attempting repairs; a repeatedly failing disk needs attention before another long transfer.
A manual external-drive copy is a useful fallback when one category keeps preventing the whole migration.
Some files are missing
Check these locations before running the entire migration again:
- The migrated Mac user’s home folder.
- Other Windows user accounts.
- Secondary PC drives and external disks.
- OneDrive or another cloud account.
- Application-specific folders and local archives.
Also check whether the files were actually downloaded on the PC and included in your chosen transfer.
A file can exist on the Mac without appearing inside the app you expected. Photos and local mail archives are common cases where an additional import or setup step may be needed.
Files arrived, but won’t open
Find out which application created them and whether you have a compatible Mac app.
Copying a file preserves its data; it doesn’t automatically convert it into another format. Project files may also depend on linked media, fonts or plug-ins.
If necessary, return to the original Windows application and export a supported format while you still have access to it.
You are getting duplicate files
Stop before merging or deleting large folders.
Identify the source of each copy: Migration Assistant, a manual drive copy or cloud sync. Pick one collection to keep as your working set after checking its contents.
With synced files, review the service’s behaviour before deleting anything. A local deletion can affect the cloud copy too.
Before You Retire the PC: Check That the Move Is Complete
A successful transfer message is useful, but a practical test is stronger.
| Check | What a successful result looks like |
|---|---|
| Documents | Recent work and several older files open and can be edited |
| Photos and videos | Samples from different years open correctly |
| You can send, receive and search important historical messages | |
| Contacts and calendars | Important people, recurring events and shared calendars appear |
| Passwords | Essential accounts work with two-factor authentication |
| Applications | Your normal tasks work, with licences and project data available |
| Accessories | Printing, scanning and other required functions work |
| Cloud storage | Sync is complete and selected offline files open without internet |
| Other users | Each person’s required data has been checked |
| Backup | The migrated Mac data has a separate, usable backup |
Use the Mac for a normal working week, or long enough to cover your important recurring tasks, before deciding you no longer need the PC.
Then set up Time Machine under System Settings > General > Time Machine. Use a suitable backup disk and check for a completed backup.
Keep the PC backup until you are confident that everything important is accounted for.
If you sell, donate or recycle the PC, follow Microsoft’s reset instructions, including the appropriate data-cleaning options. Disconnect external backup drives first, and complete all verification before starting the reset.
FAQ
Can I migrate to Mac after I have already set it up?
Yes. Open Migration Assistant from Applications > Utilities. Back up existing Mac work first and read any account-name conflict options carefully.
Does Migration Assistant delete files from the Windows PC?
No. It copies supported information. Keep the PC originals until you have verified the Mac and made a separate backup.
Can I transfer everything, including my Windows applications?
You can transfer personal data, but Windows applications need a supported Mac replacement or another way to run them. App licences, drivers and specialist databases require separate checks.
Can I use a USB-C cable to connect the PC directly to the Mac?
A normal USB-C charging or data cable doesn’t turn two computers into an external drive for this process. Use Migration Assistant’s supported network connection, an external storage device, cloud storage or network sharing.
Do I need an Apple Account or paid iCloud storage?
An Apple Account and an iCloud storage subscription aren’t prerequisites for copying your PC files. You will need the relevant accounts for services you choose to use, such as iCloud or App Store purchases.
How long does migrating from Windows to Mac take?
Plan for several hours for a large move, and potentially overnight for a substantial library. The size and number of files, disk performance and connection all matter. Scanning, copying and cloud downloading can finish at different times.
Can I migrate from Windows 7 or Windows 8?
The current assistant requires Windows 10 or later. Apple lists older installers for certain older macOS versions, but match the requirements at both ends. For a new Mac, copying readable files through an external drive or cloud service may be the more practical route.
What if the PC no longer starts?
Migration Assistant needs a working Windows environment. Check your backups and cloud accounts first. A readable drive may offer another recovery route, but encrypted data requires the appropriate credentials or recovery key. Preserve a failing drive rather than repeatedly trying to migrate from it.
Will my PC backup restore directly onto a Mac?
A Windows system image doesn’t restore into a working macOS installation. Recover the personal files you need using a compatible backup or recovery tool, then copy them to the Mac. Keep the original backup until you have verified the recovered data.