

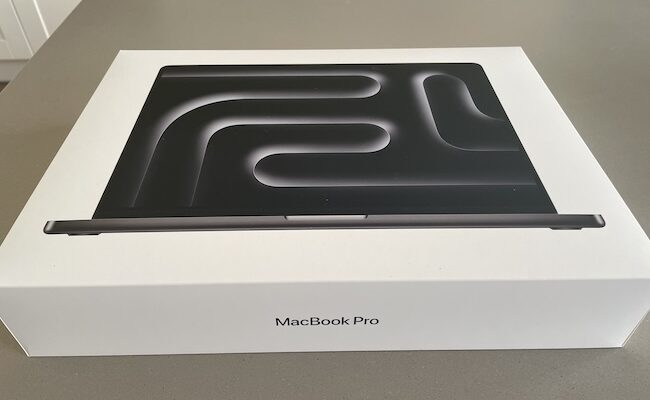
If you’ve just unboxed a shiny new Mac, then this may the first time you’ve used macOS.
But where should you begin?
If you’re completely new to Macs or you’re upgrading from an older Intel Mac, we’ve put together some essential steps to ensure your Mac is set up securely, optimized and personalized.
Here we’ll walk you through the most important things to do after unboxing your new Mac, ensuring you get the best out of it.
Quick Start (Do These First)
If you want the fastest setup possible, do this:
- Complete Setup Assistant
- Decide Whether to Migrate Data
- Update macOS
- Sign into iCloud
- Secure Your Mac
- Set up Time Machine
Here we’ll look at these and other steps in more detail.
1. Complete The Setup Assistant
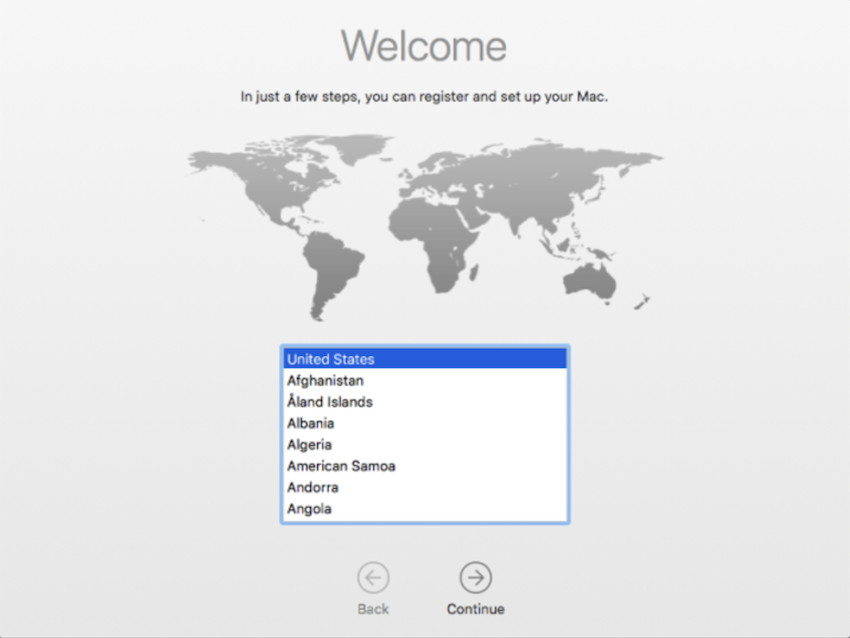
The Setup Assistant is the first thing you’ll encounter when turning on your new Mac.
This easy-to-follow process will guide you through configuring basic system settings.
- Select your language and region.
- Connect to Wi-Fi so you can download updates later and log in to your Apple ID.
- Sign in with your Apple ID. If you want cross device syncing, this step is crucial because it links your Mac to iCloud, allowing you to sync data such as contacts, photos, and apps across your Apple devices. It also enables you to enjoy features such as HandOff and Continuity to switch instantly between working in macOS and iOS, Private Relay for more secure browsing, Find My Mac and other nifty features. Like it or loathe it, iCloud integration is now an integral part of all Apple devices. If you don’t sign-into iCloud on your Mac, you’ll be constantly plagued by notifications saying “Some iCloud Data Isn’t Syncing” reminders like the one below (see more on iCloud syncing in step 3).
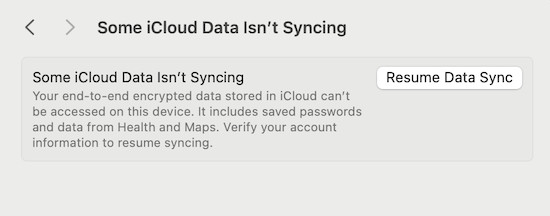
If you already have an iPhone or iPad then simply use the same iCloud log-in details. If you don’t, then you’ll need to sign-up for an Apple ID.
2. Decide Whether To Transfer Data or Start Fresh
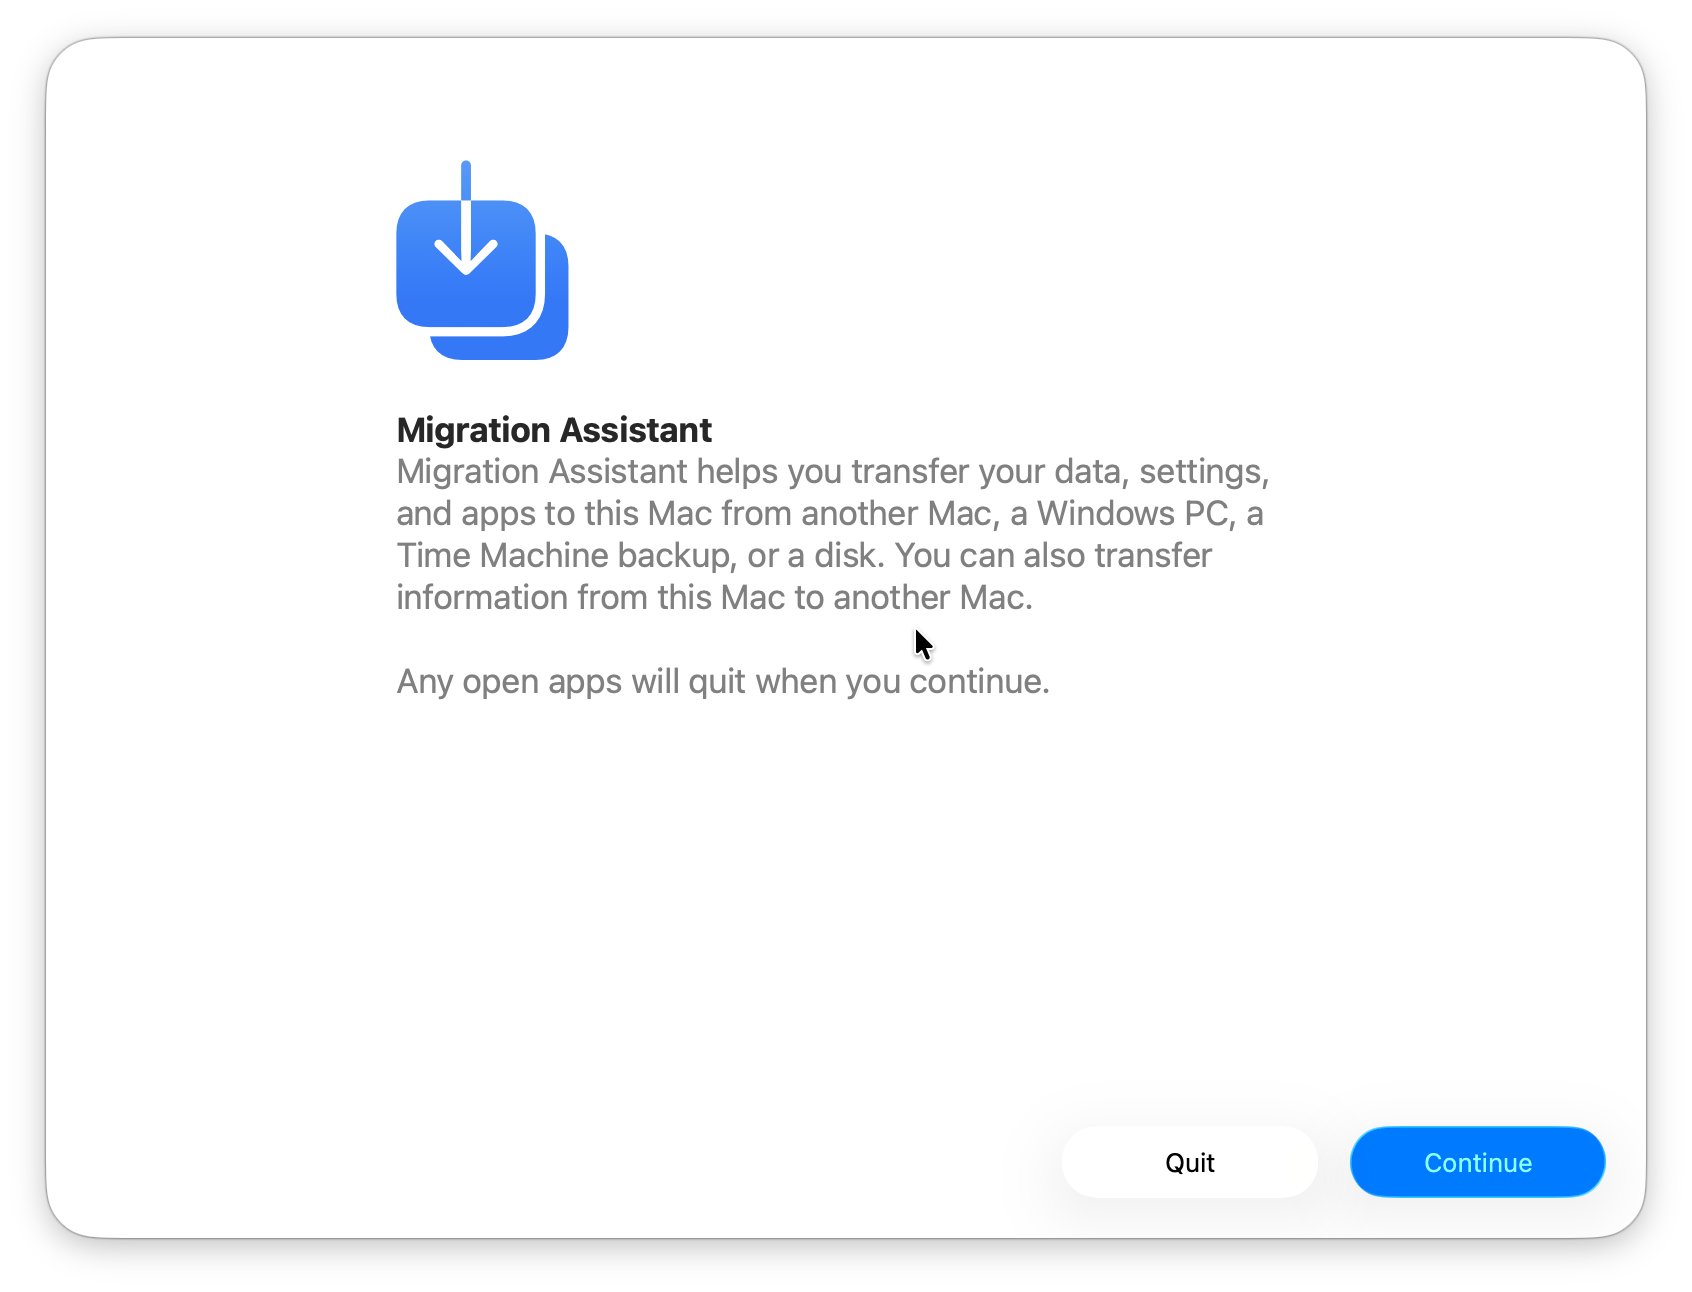
One of the biggest decisions you’ll make during setup is whether to copy everything from your old computer or start with a clean installation.
If you’re upgrading from another Mac, the Setup Assistant will ask if you’d like to transfer your data using Migration Assistant. This can copy your documents, photos, apps, settings and user accounts automatically.
We recommend migrating if:
- Your old Mac is running well with no major issues.
- You’re upgrading from a recent Apple Silicon Mac.
- You don’t want to spend time reinstalling apps and configuring settings again.
- You have lots of documents, photos and personal files you’d rather not move manually.
Consider starting fresh if:
- Your old Mac is several years old and feels slow.
- You’re moving from an Intel Mac to an Apple Silicon Mac.
- Your old Mac has accumulated lots of outdated software and login items.
- You want to improve performance and battery life by only installing the apps you actually use.
A clean installation often is the best thing to do on a new Mac. Instead of copying everything across, you can simply sign into iCloud to restore your contacts, calendars, passwords, photos and documents while reinstalling only the latest versions of your favourite apps.
The good news is that even if you choose Set Up as New, you can still run Migration Assistant later if you discover you’ve forgotten something important.
3. Update macOS To The Latest Version
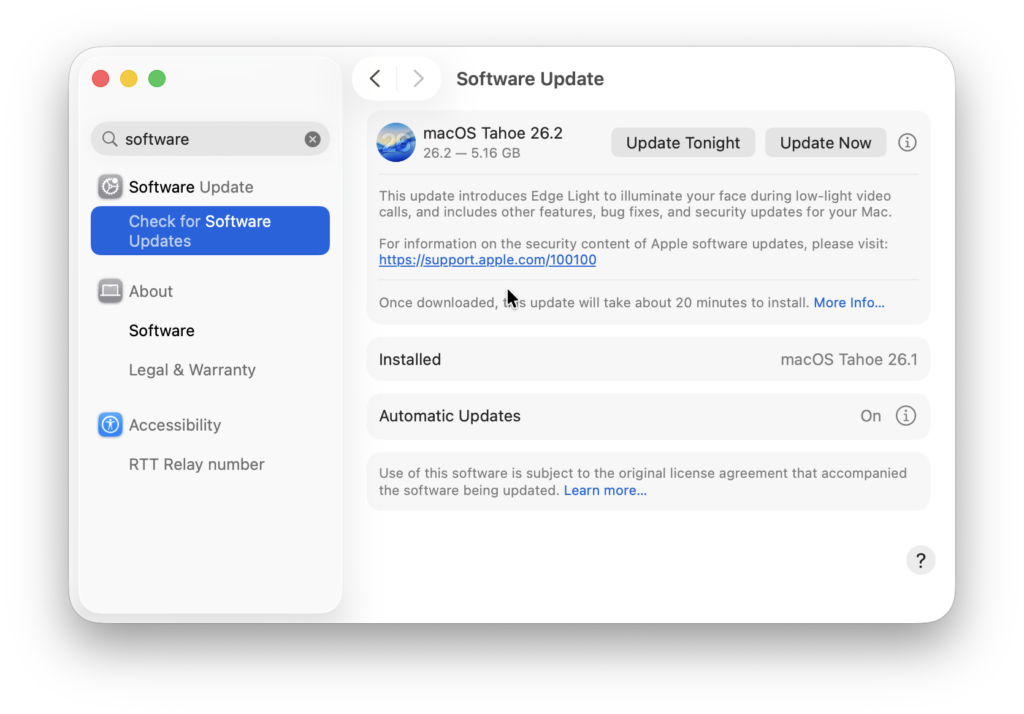
Once you’ve completed the initial setup, it’s a good idea to check if any updates are available for macOS.
Your Mac may ship with the latest version of macOS, but it’s common for one or more updates to be available when you first turn it on.
Apple regularly releases updates that include security patches, bug fixes, and new features that may not have been applied to your Mac since it has been sitting in a box for the past few months.
To update macOS:
- Click the Apple logo in the top-left corner of your screen.
- Go to System Settings > General > Software Update.
- If an update is available, click Update Now for an update or Upgrade Now if a new version of macOS is available.
Keeping macOS up to date ensures your Mac runs smoothly and securely with the latest improvements.
If you’re not sure which version of macOS is the latest, check out our guide to versions of macOS.
4. Configure Your Mac
Once you’ve done this, there are a few settings worth checking or activating before you start installing lots of apps.
Turn on Automatic Updates
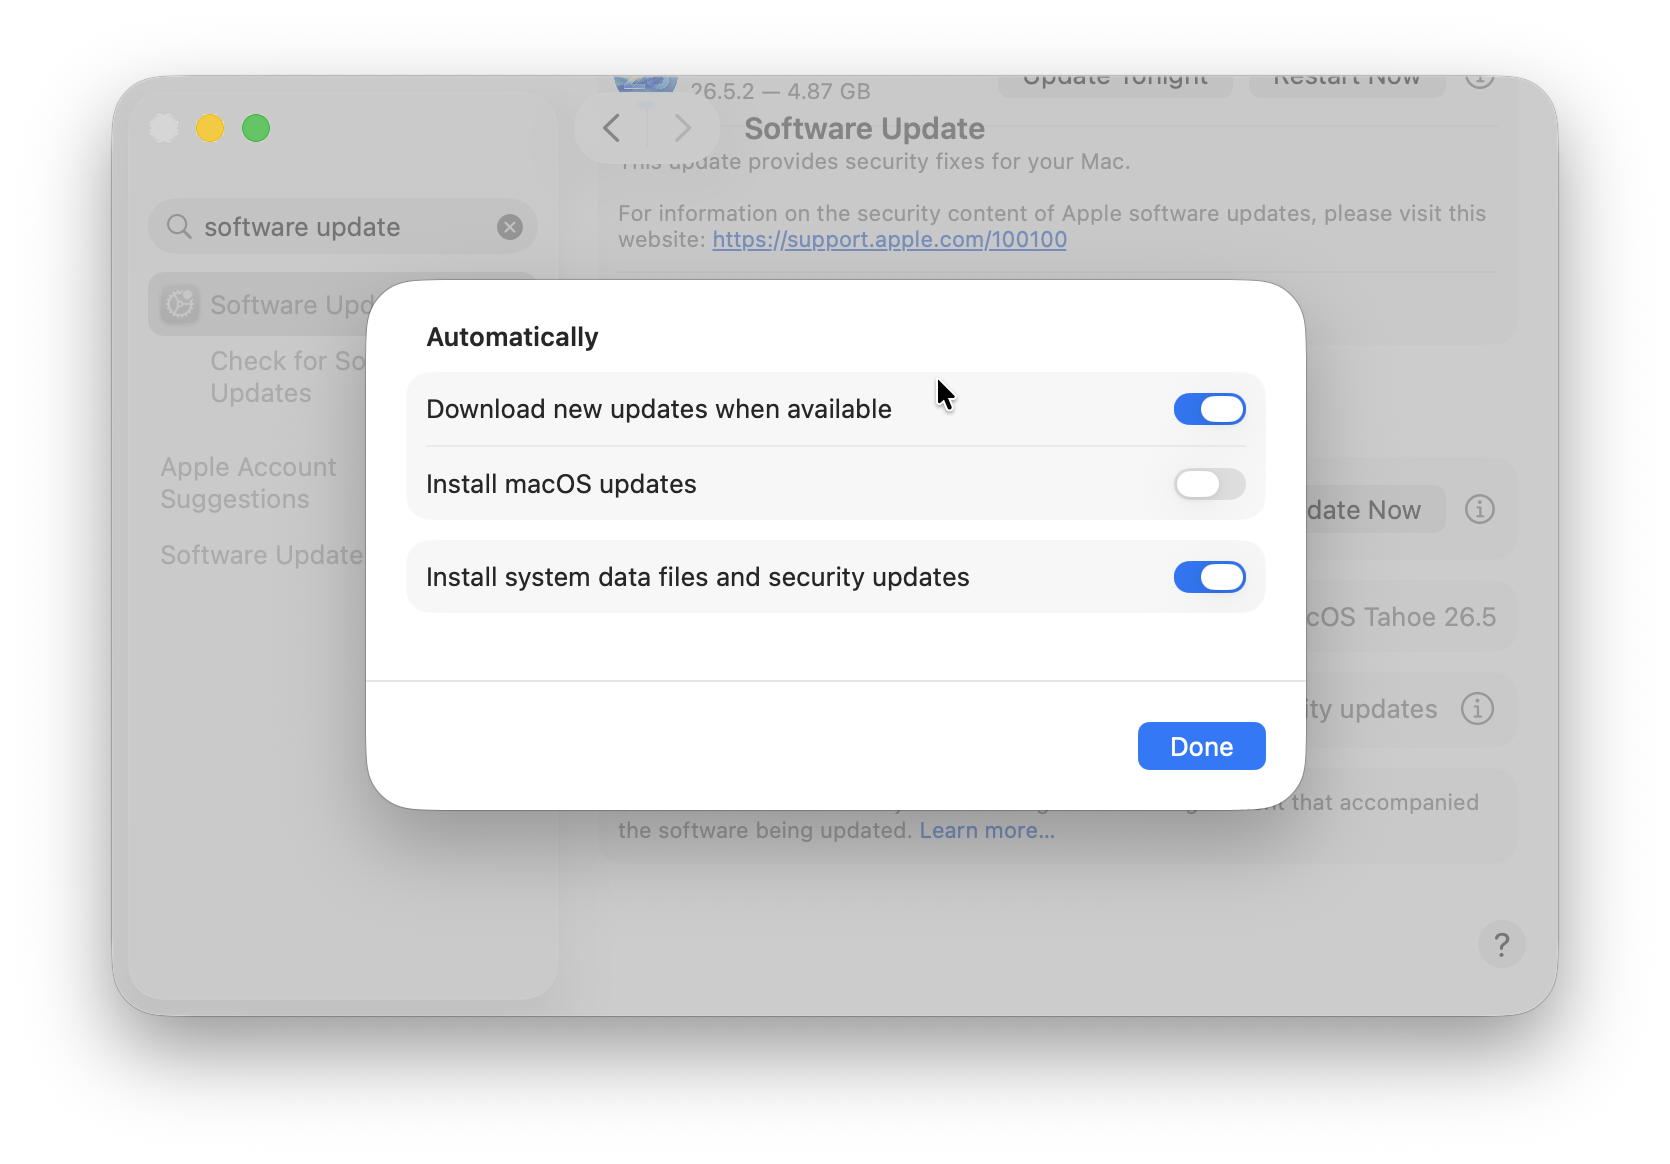
Go to System Settings > General > Software Update and enable automatic updates so your Mac always receives the latest security patches.
Enable Optimized Battery Charging
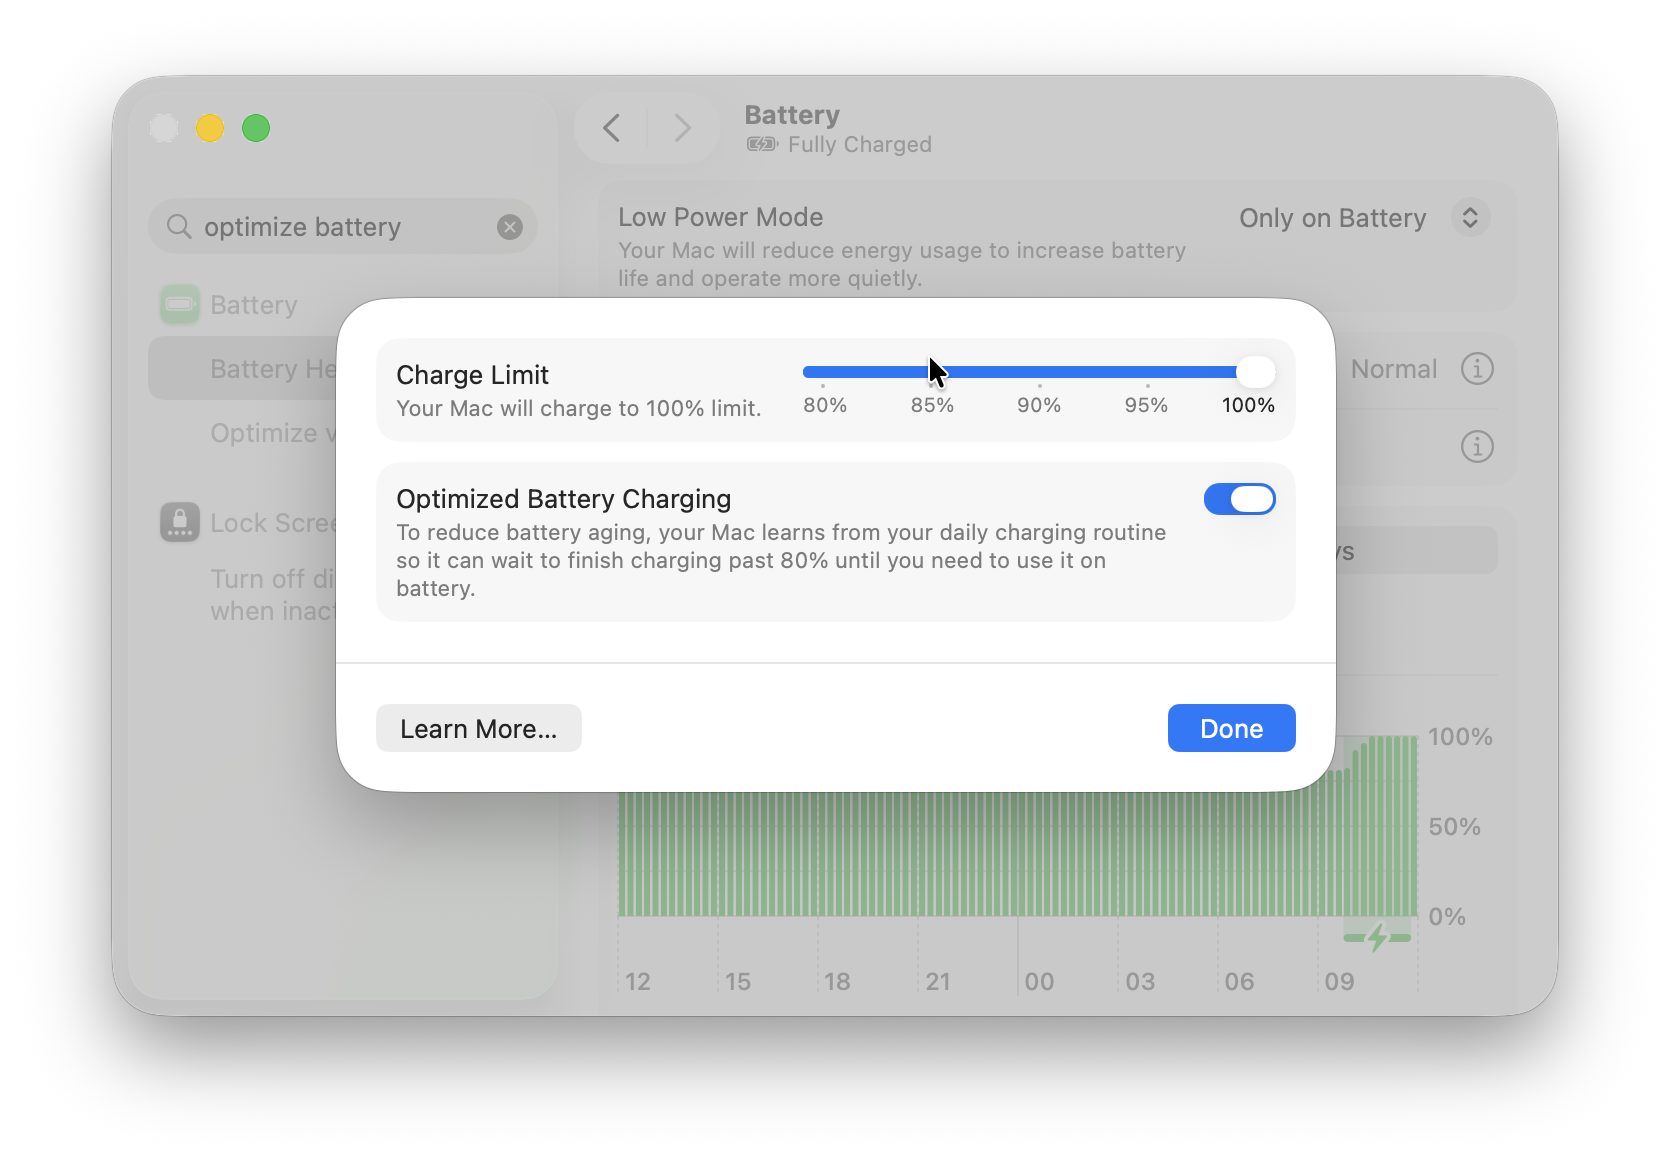
If you’re using a MacBook, open System Settings > Battery and make sure Optimized Battery Charging is enabled. This helps extend the lifespan of your battery by reducing the amount of time it’s spends fully charged.
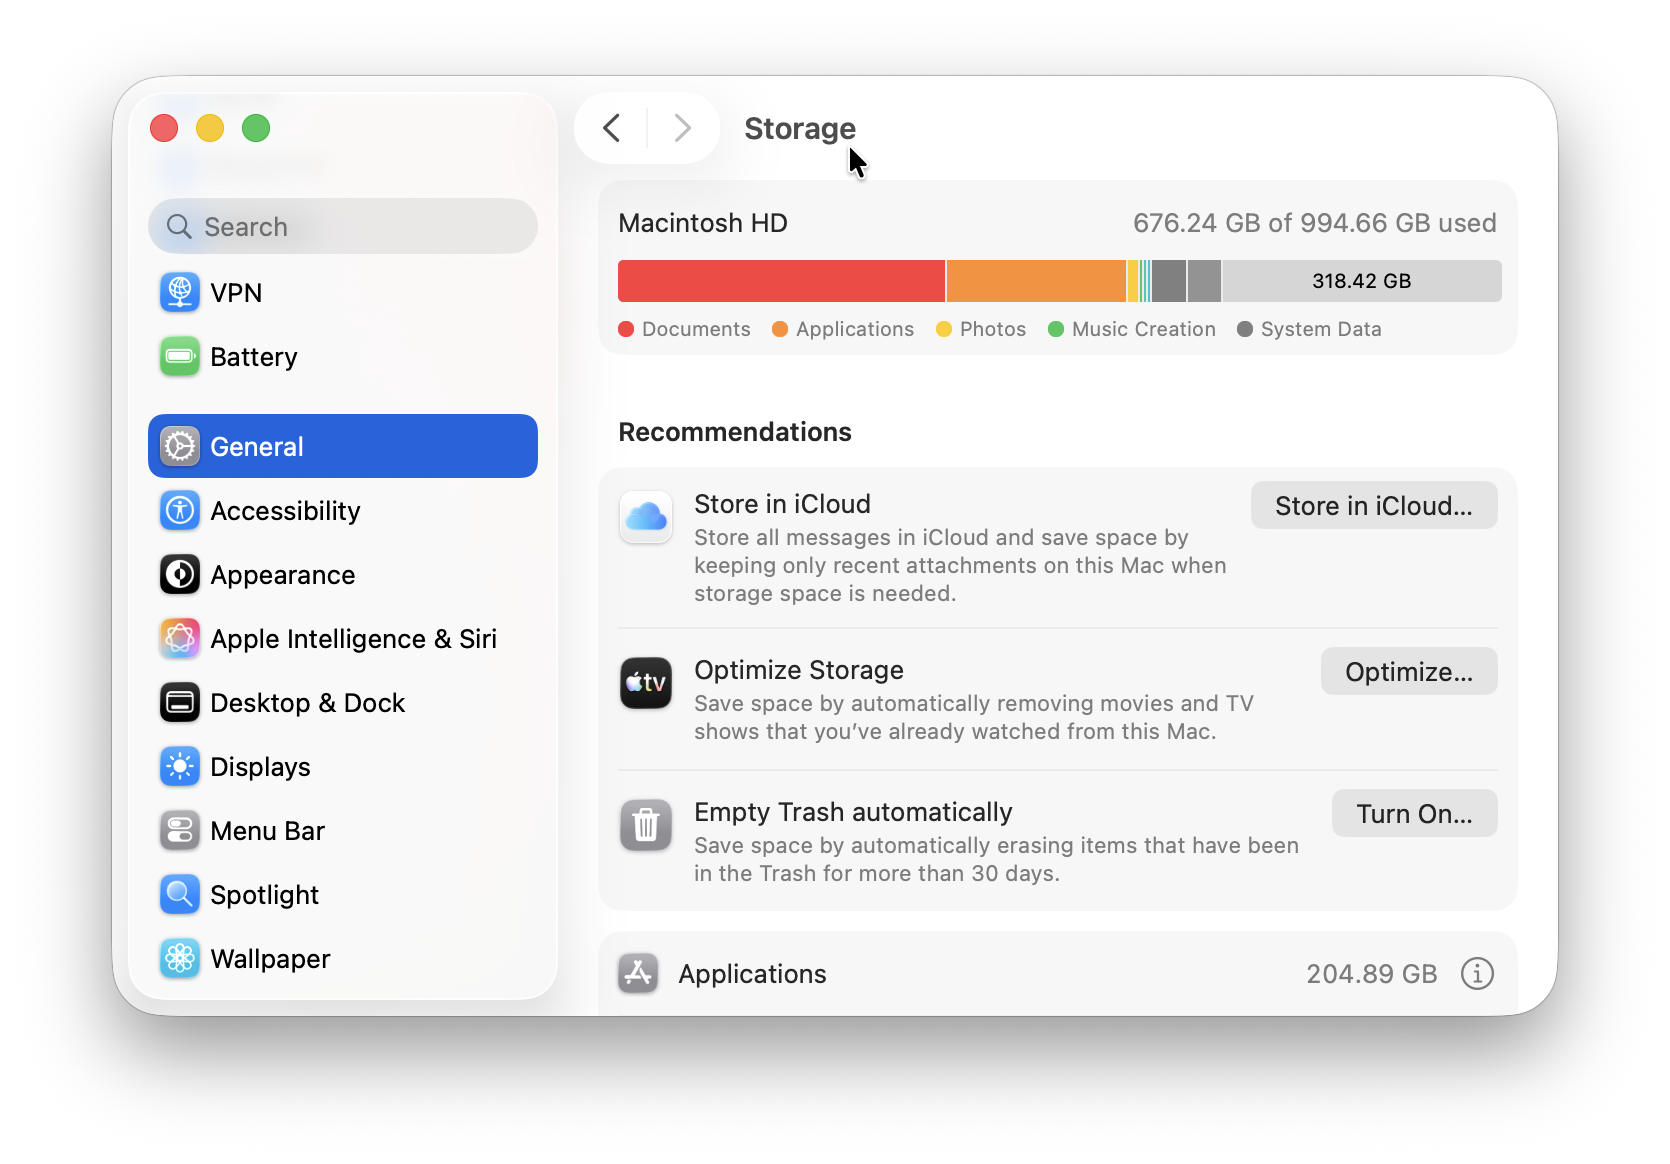
Check Storage
Open Apple menu > About This Mac > Storage to see how much space is available and ensure there aren’t any unexpected files taking up storage.
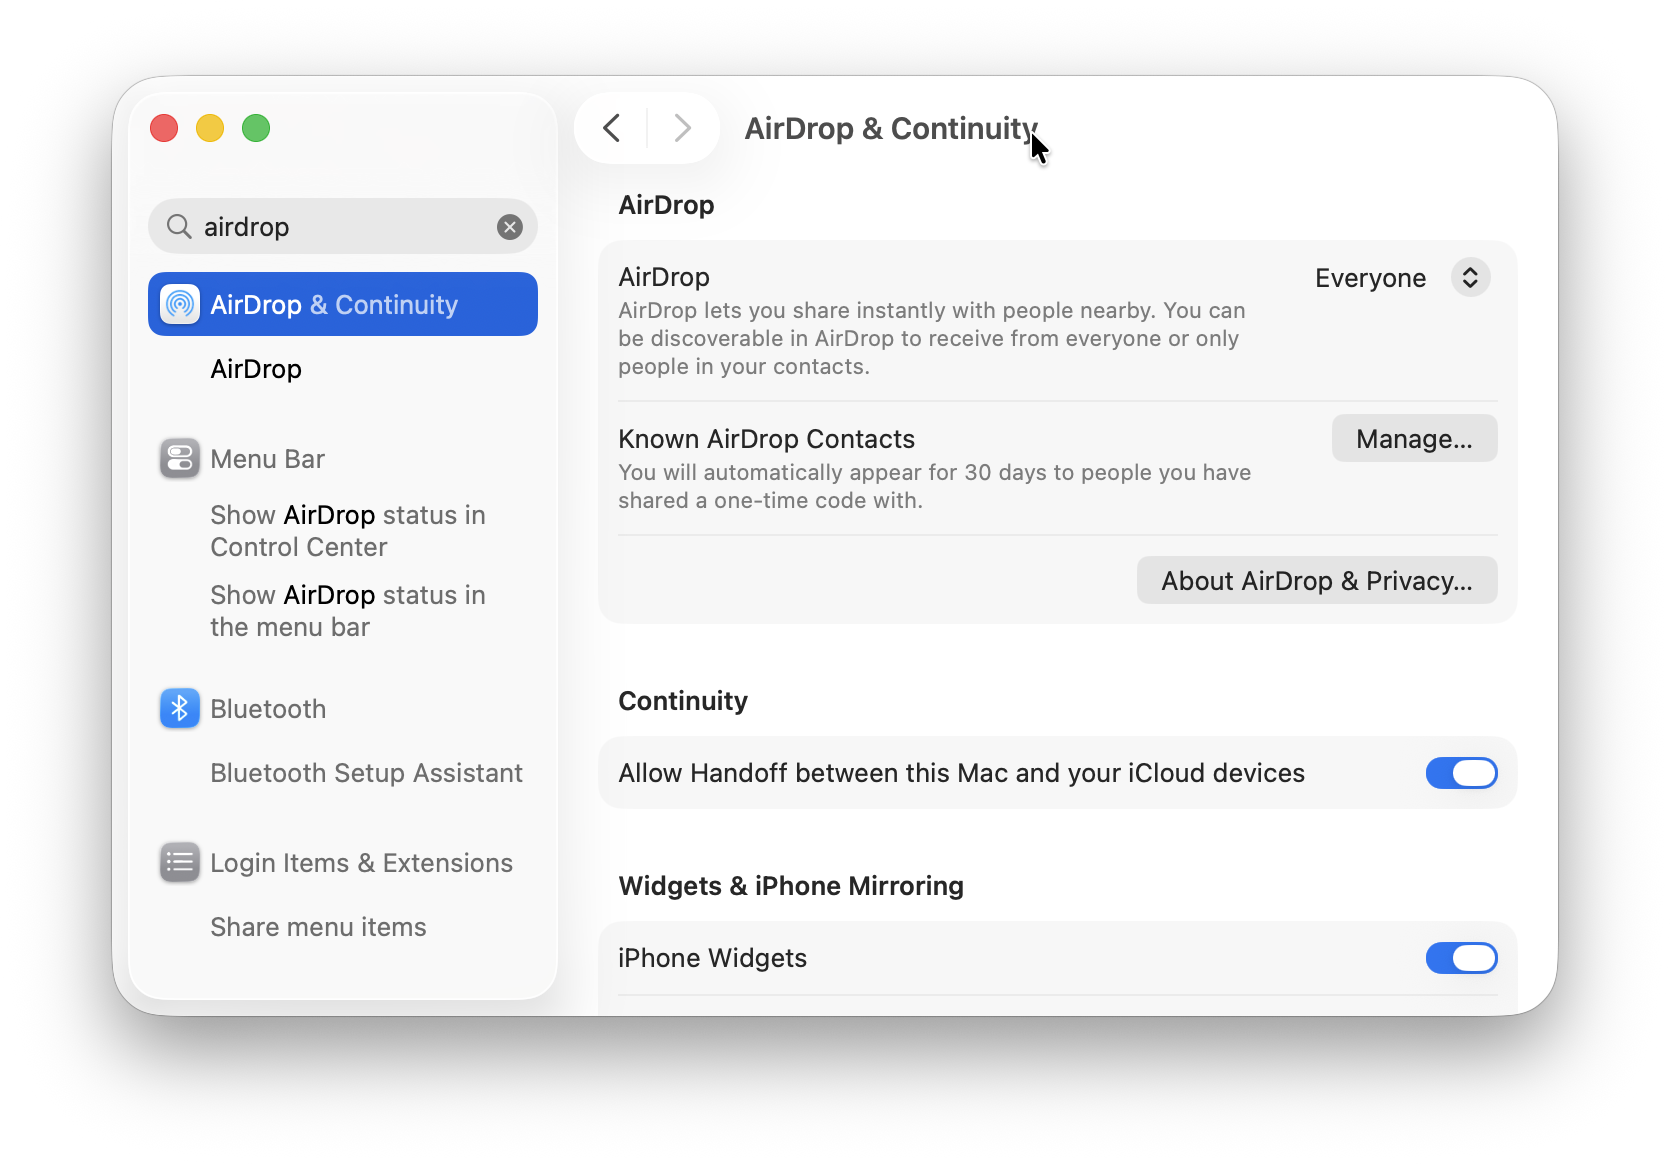
Enable AirDrop
AirDrop makes it incredibly easy to transfer files between Apple devices.
Go to System Settings > General > AirDrop & Continuity and choose who can discover your Mac.
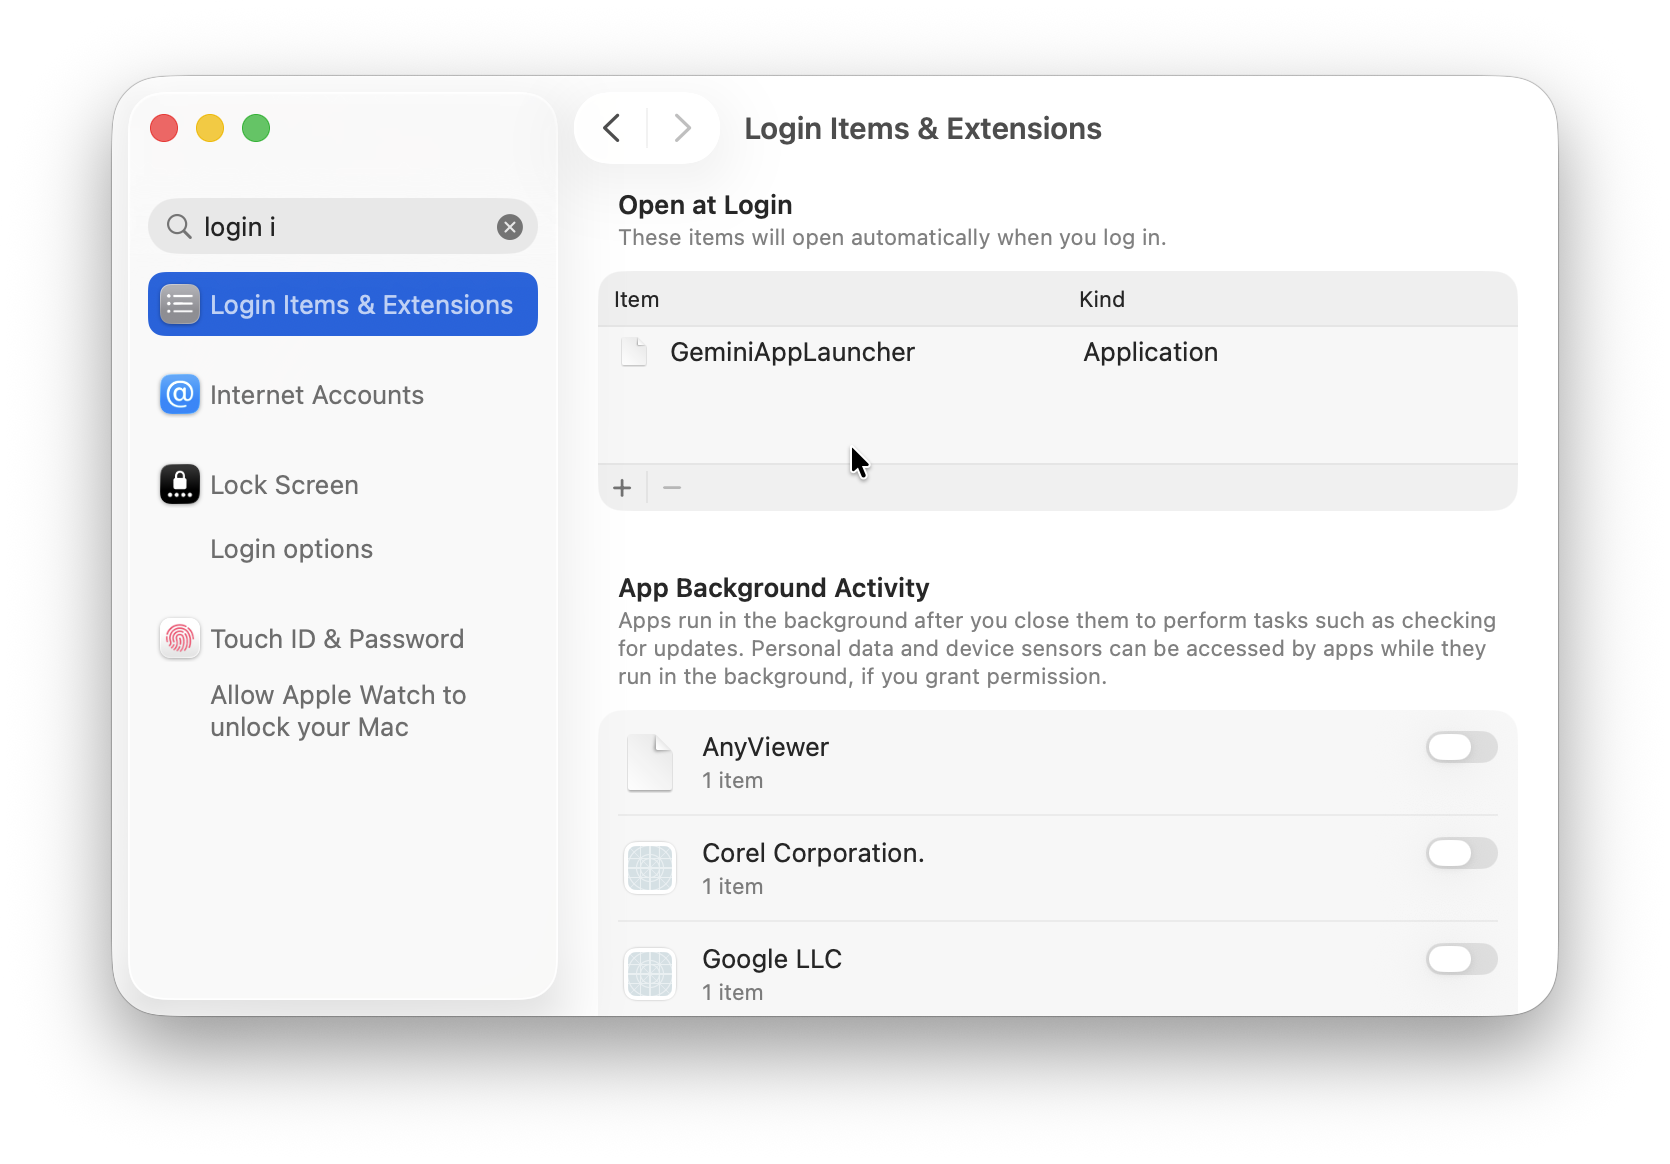
Configure Login Items
Many applications automatically launch when your Mac starts.
Go to System Settings > General > Login Items & Extensions and remove anything you don’t want loading automatically. Fewer startup apps usually means faster boot times.
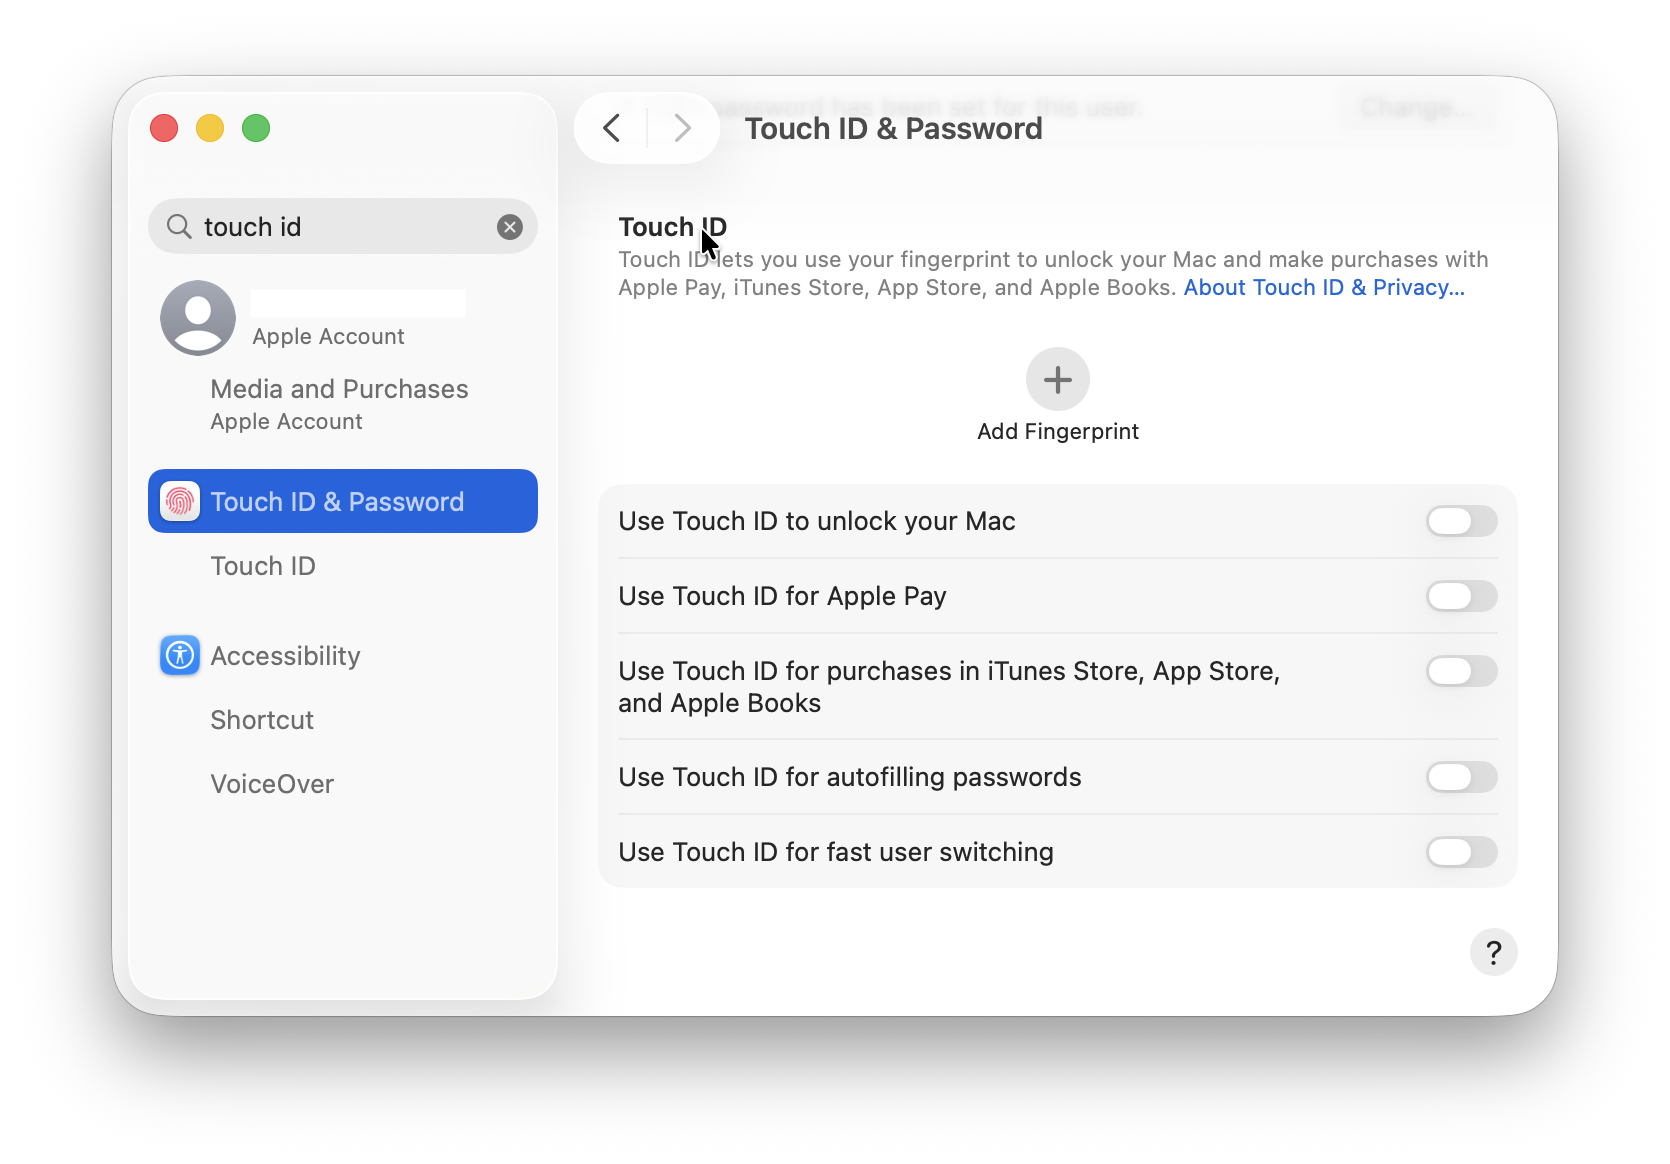
Test Touch ID
If your MacBook includes Touch ID, make sure you’ve added at least one fingerprint and test unlocking your Mac and approving purchases.
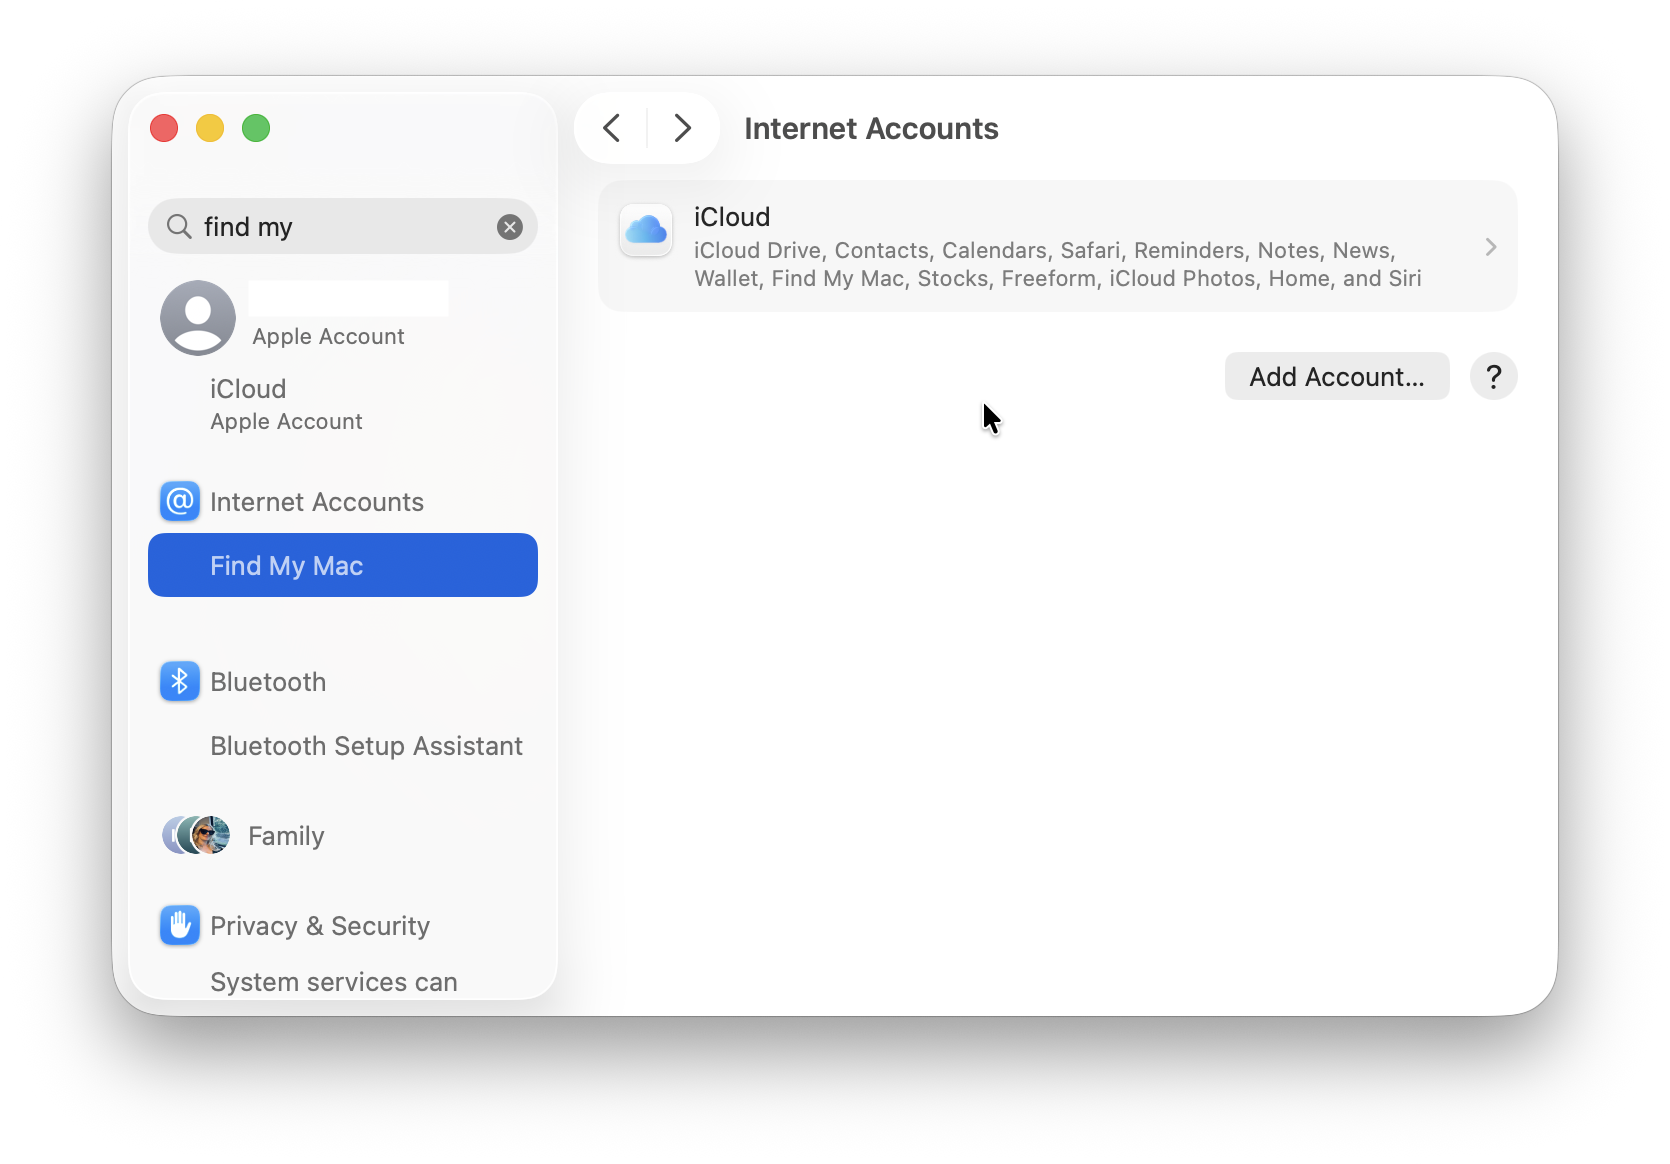
Check Find My
Finally, make sure your Mac appears in the Find My app on your iPhone or another Apple device. If your Mac is ever lost or stolen, you’ll be able to locate, lock or remotely erase it. As long as your Mac is logged into the same iCloud account, it should be available in Find My on other devices.
5. Set Up iCloud and Sync Your Data
Source: MacHow2
One of the most convenient things about owning an Apple device is the integration with iCloud.
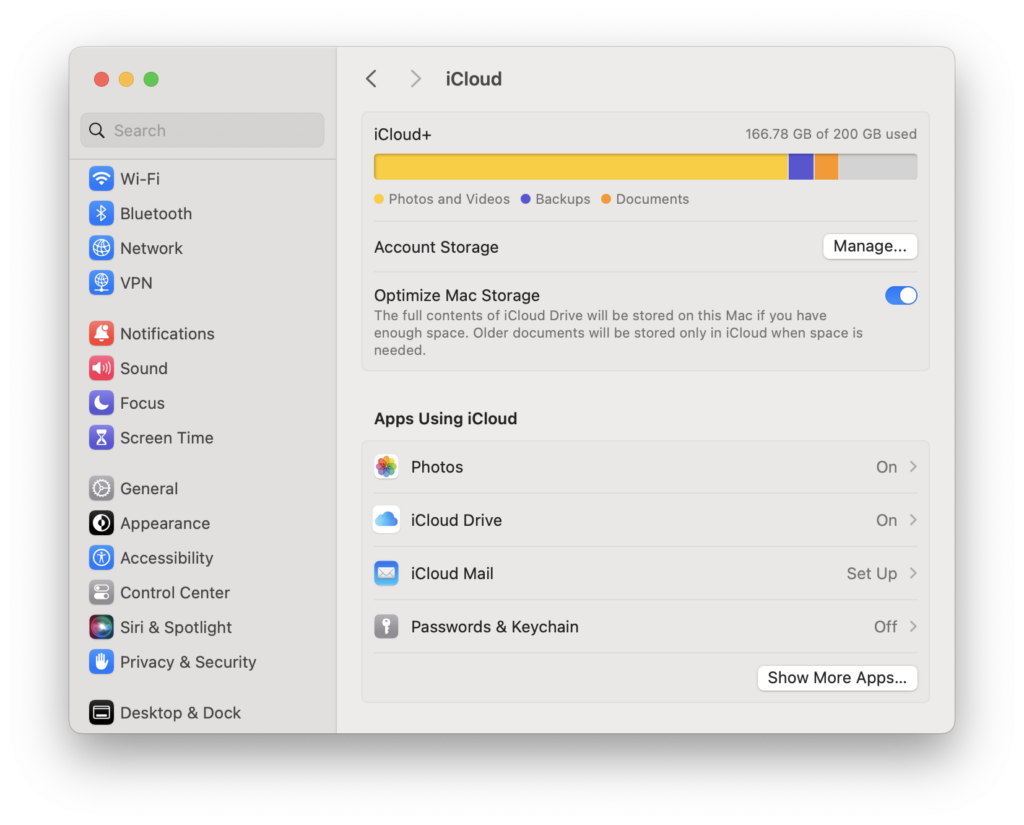
Once you’ve signed in with your Apple ID, you can set up iCloud to sync data across your devices, including your iPhone, iPad, and other Macs.
Here’s how to set it up:
- Open System Settings by clicking on the Apple logo in the top left of your Mac desktop.
- Click on your Apple ID at the top of the sidebar.
- Choose iCloud, then enable the services you want to sync, such as iCloud Drive, Photos, Contacts, and Messages.
With iCloud, you’ll have access to your important files and media no matter which device you’re using, all stored securely in the cloud.
Note that you only get 5GB of data for free with iCloud. If you backup anymore than this then you’ll need a subscription starting from $0.99 for 50GB of data.
6. Secure Your Mac
Source: MacHow2
Making sure that no one else can access your Mac is important, especially if you have confidential personal or business data on your Mac.
Here are a few key security settings you should enable right away on your Mac.
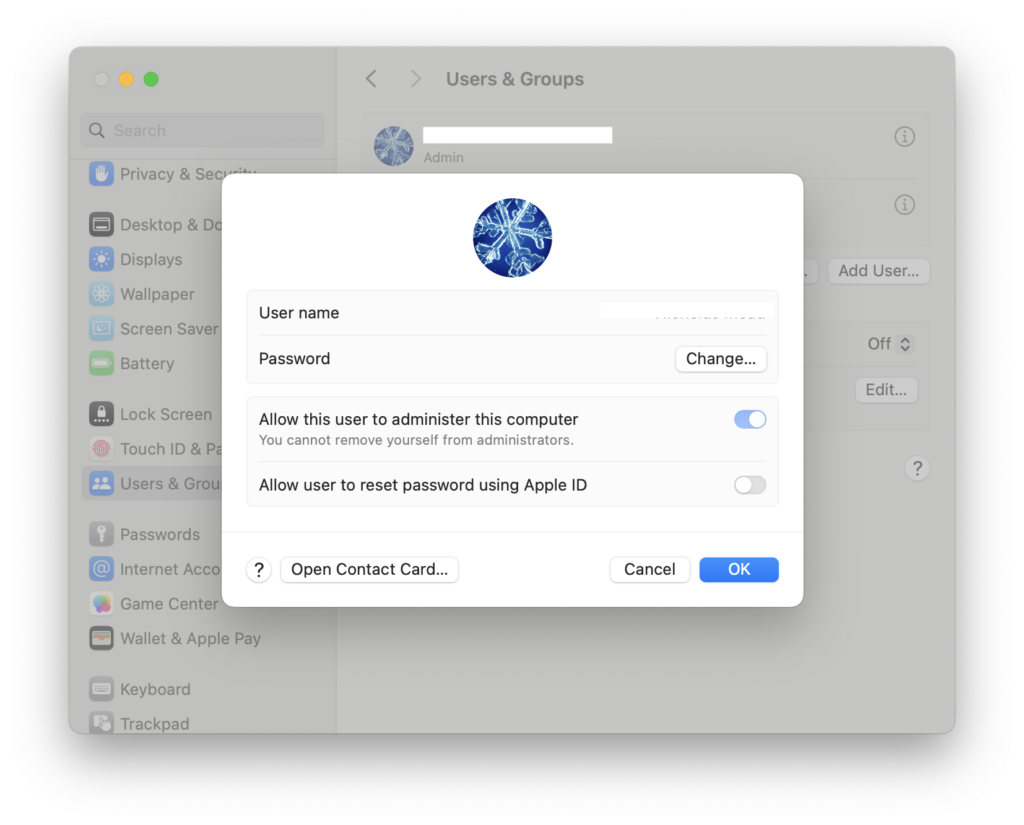
- Set a strong password: During setup, you’ll have already created an account password, but make sure it’s strong and unique. To change or update your password, go to System Settings > Users & Groups > Password.
- Enable FileVault: FileVault encrypts your MacBook’s storage, protecting your data from unauthorized access. To enable it, go to System Settings > Privacy & Security > FileVault.
- Enable Two-Factor Authentication (2FA): If you haven’t already, set up two-factor authentication for your Apple ID. This adds an extra layer of security by requiring a verification code (sent to your other devices) whenever you log in to your account.
7. Set Up Apple Intelligence
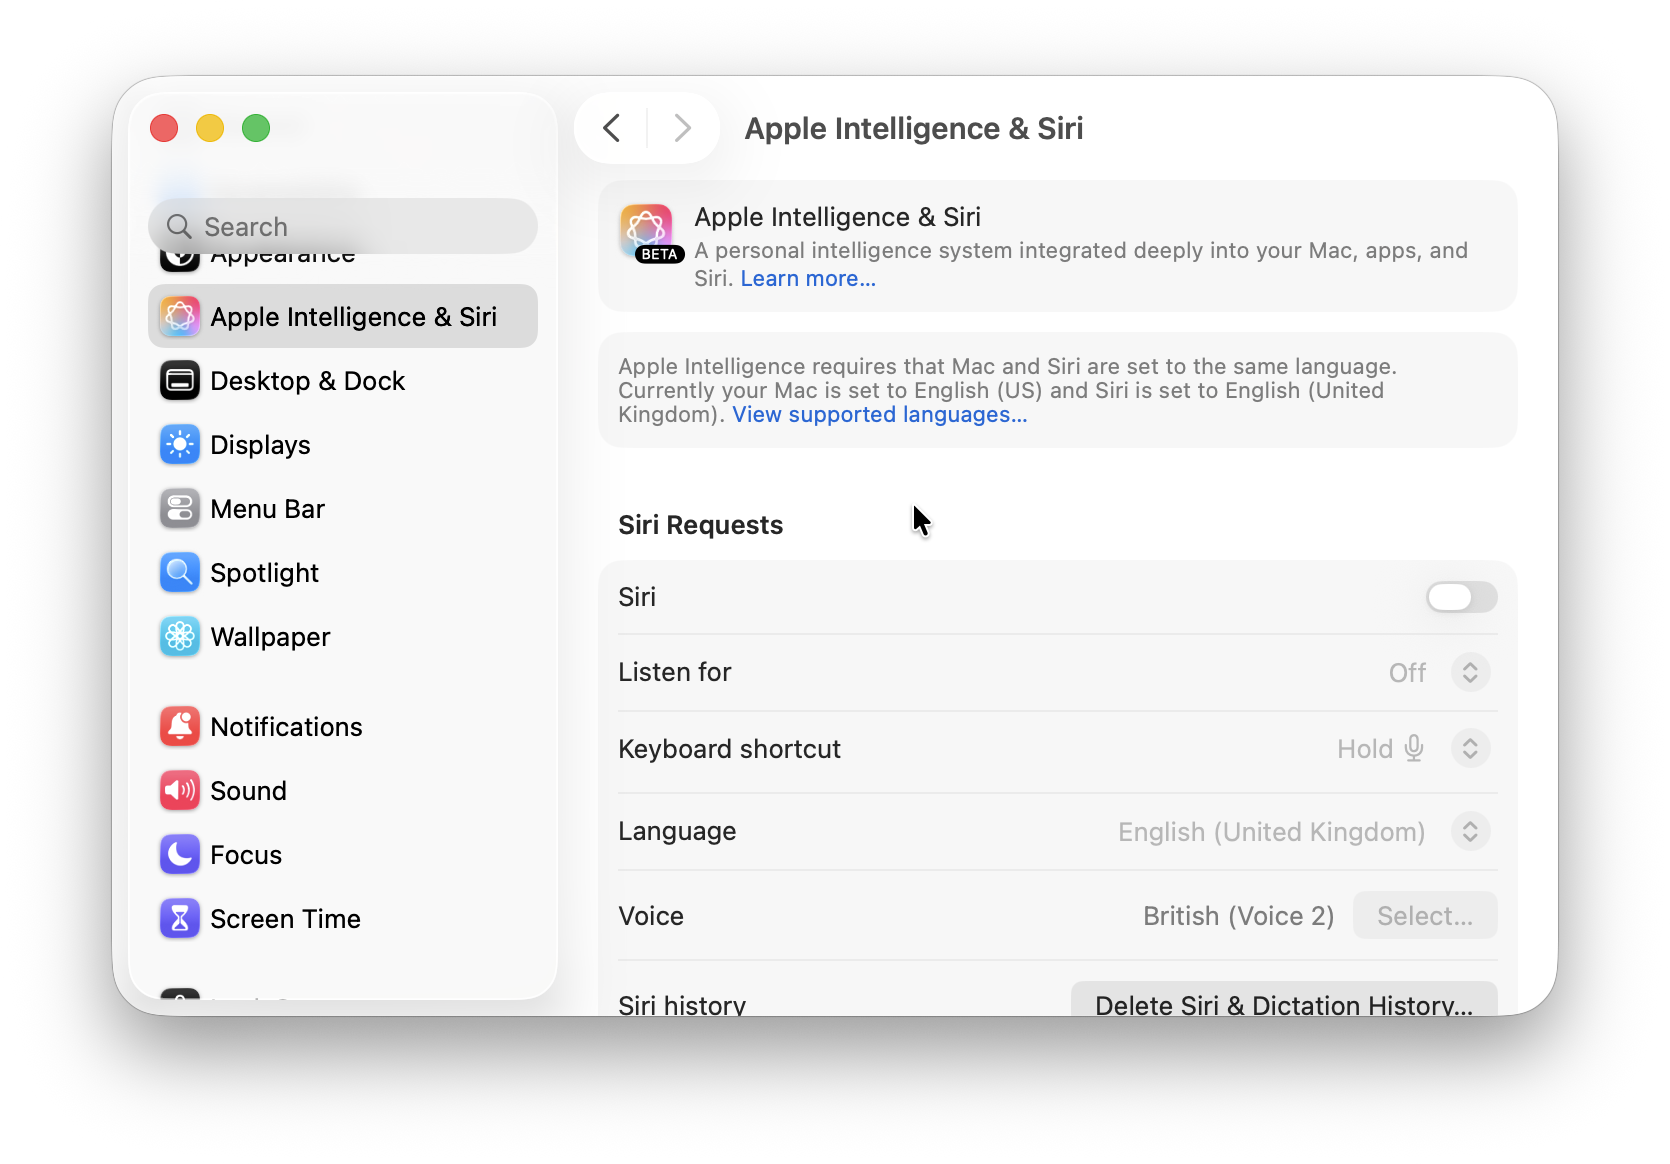
If your Mac supports Apple Intelligence, it’s worth enabling it during or shortly after setup so you can take advantage of Apple’s latest AI features.
Apple Intelligence is available on Apple Silicon Macs running the latest version of macOS and provides powerful writing, productivity and image-generation tools while keeping much of your data processed on-device.
Once enabled you’ll be able to use features including:
- Writing Tools for rewriting, proofreading and summarising text.
- A much smarter Siri that understands follow-up questions and can perform more complex tasks.
- Image Playground for creating AI-generated images.
- Genmoji for generating your own custom emojis.
- Smart Mail summaries and notification summaries.
- AI-assisted photo editing and Clean Up in Photos.
To check if it’s enabled:
- Open System Settings.
- Select Apple Intelligence & Siri.
- Follow any prompts to download the required AI models.
- Turn on Apple Intelligence if it isn’t already enabled.
Some features may download additional models the first time you use them, so don’t be surprised if setup takes a few minutes.
If your Mac doesn’t support Apple Intelligence, you’ll still have access to Siri and all the standard macOS features.
You can also use lots of other AI apps on your Mac and check out our guide to the best AI apps for Mac for more options.
8. Customize Your System Settings
Source: MacHow2
Now that your Mac is secure, it’s time to personalize it to suit your needs and preferences.
macOS offers a wide range of customization options, from appearance to notifications.
Here’s where to start:
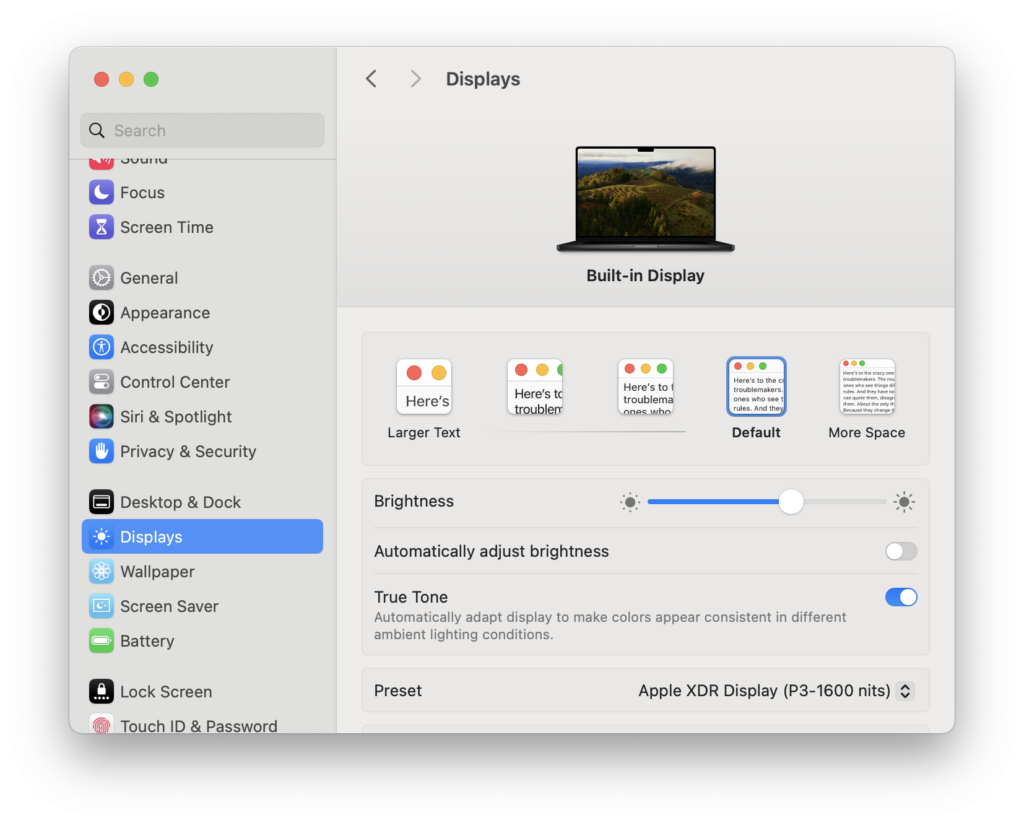
- Adjust the Display Settings: Head to System Settings > Displays to adjust resolution, brightness, and enable True Tone (which adjusts colors based on ambient light) or Night Shift (which reduces blue light exposure at night). Here you can also configure any external monitors you have connected.
- Set Up the Dock: The Dock is where you access your favorite apps and recently used files. You can customize it by dragging apps into or out of the Dock, and you can adjust its size and position in System Settings > Desktop & Dock.

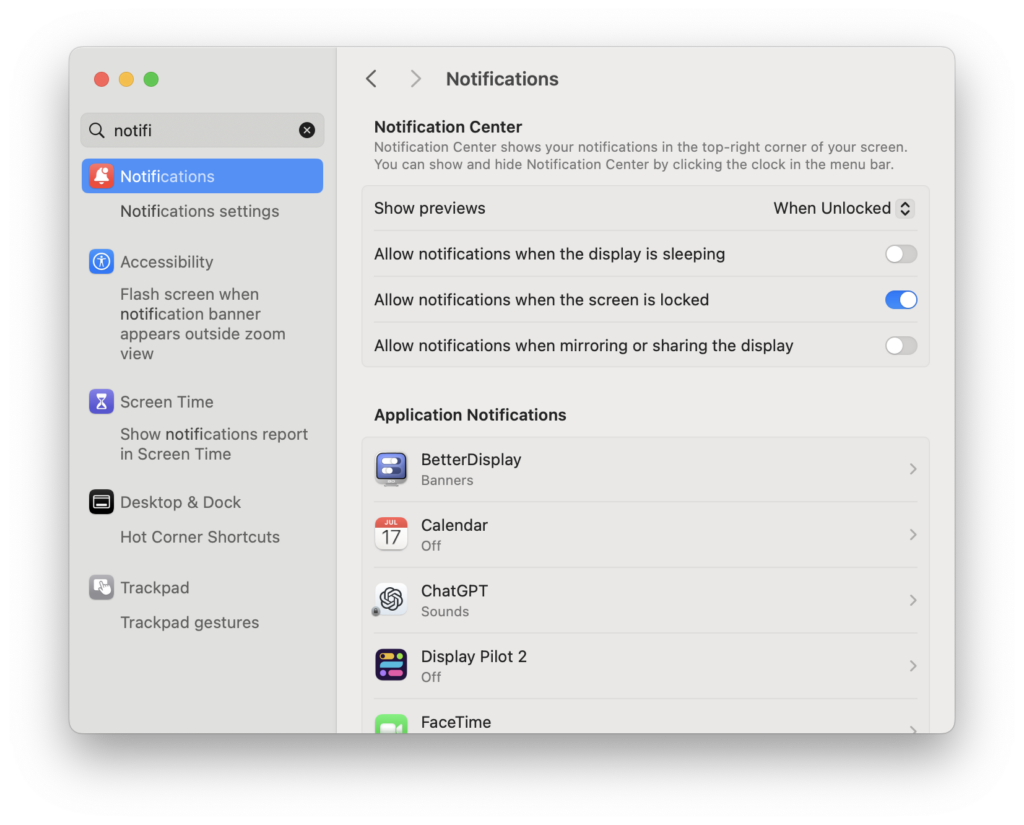
- Configure Notifications: In System Settings > Notifications, decide which apps can send you alerts. This helps prevent unnecessary distractions and keeps you focused on the tasks that matter most.
9. Install Essential Apps
Once your Mac is fully configured, it’s time to install the software you’ll use every day.
While the Mac App Store is the safest place to download applications, many excellent Mac apps can also be downloaded directly from developers.
Here are some of the categories we recommend.
Productivity
Whether you’re working, studying or managing personal projects, these apps are worth considering.
- Microsoft 365
- Apple Pages, Numbers and Keynote
- Google Workspace
- Notion
- Obsidian
If you don’t want to be locked into a Microsoft 365 subscription, check out our guide to the best alternative Office suites for Mac.
Web Browsers
Safari is excellent, but many users prefer an alternative browser.
Popular options include:
- Google Chrome
- Mozilla Firefox
- Brave
- Microsoft Edge
See our guide to the best browsers for Mac for more alternatives to Safari.
Password Managers
Using a password manager is one of the easiest ways to improve your online security.
Popular choices include:
- 1Password
- Bitwarden
- Proton Pass
These can generate strong passwords, securely store login details and even create passkeys for supported websites.
Cloud Storage
If you work across multiple devices, cloud storage makes accessing files much easier.
Popular services include:
- iCloud Drive
- Dropbox
- OneDrive
- Google Drive
Video & Media
For watching almost any video format, VLC Media Player remains one of the best free downloads available.
Utility Apps
Some small utilities can make using macOS much easier.
Our favourites include:
- DEVONthink Pro for document management
- FineReader PDF for OCR scanning of documents
- DaisyDisk for disk space management
- BetterDisplay for improving image quality on from 4K and 5K external monitors
Security & Privacy
Although macOS has excellent built-in security, many users also install additional privacy tools.
Useful options include:
If you regularly use public Wi-Fi, a VPN can encrypt your connection and improve your online privacy.
For more recommendations, see our guides to the best VPNs for Mac and the best Mac apps.
10. Set Up Time Machine Backups
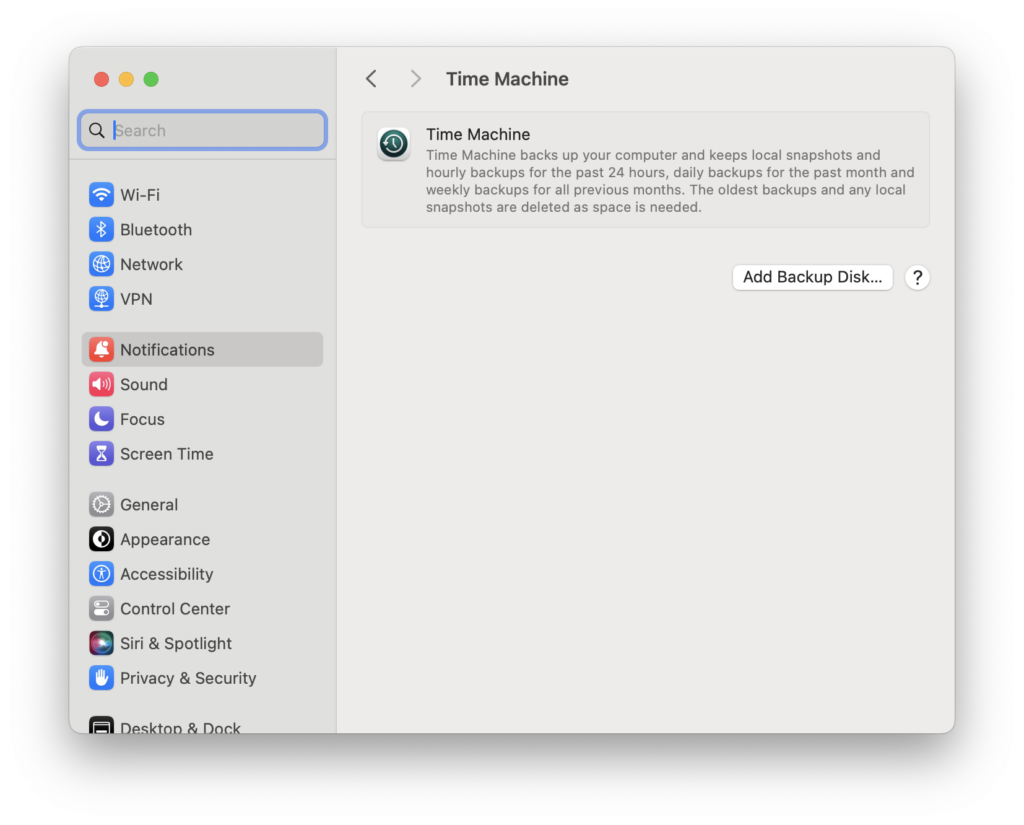
One of the most important things you can do after setting up your new Mac is to enable Time Machine backups.
We think Time Machine is one of the smartest features in macOS as it enables you to instantly roll-back to a previous state if anything should go wrong with your Mac.
Time Machine is macOS’s built-in backup system, which allows you to recover files, apps, and system settings if something goes wrong.
To set it up:
- Connect an external hard drive to your Mac. You can use any drive but we recommend using either an SSD external drive or a Thunderbolt external drive which are even quicker.
- Go to System Settings > General > Time Machine.
- Select your backup drive and click Use Disk.
Time Machine will automatically back up your Mac at regular intervals, so you can easily restore your data if needed.
11. Familiarize Yourself with macOS
macOS offers a range of features designed to improve your productivity.
Here are a few key ones to get familiar with:
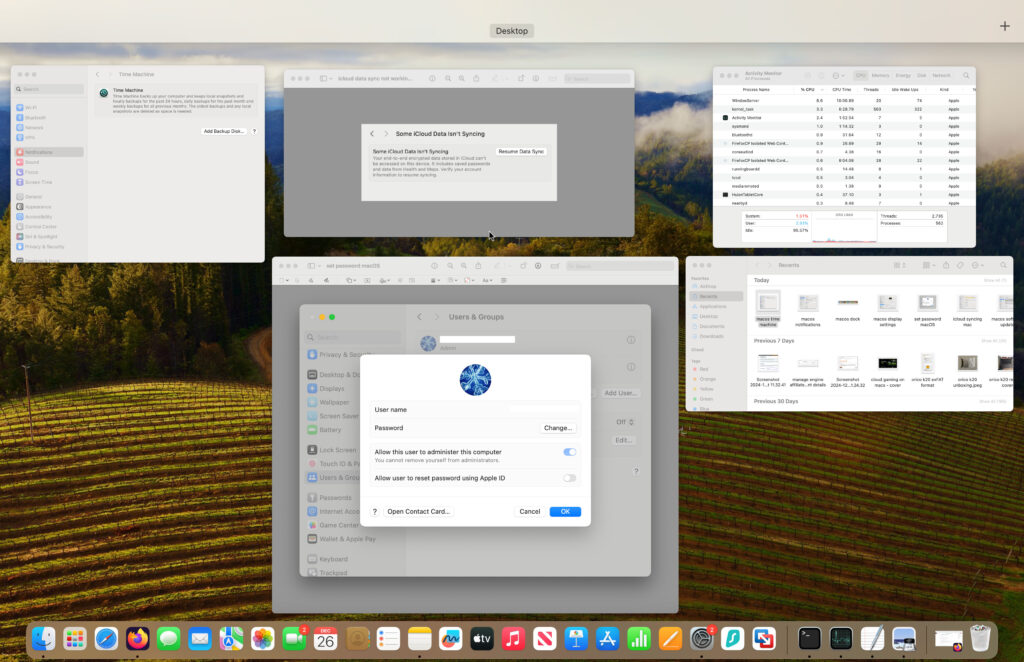
- Mission Control: Use Mission Control (F3 on the keyboard) to see all your open windows and easily switch between apps.
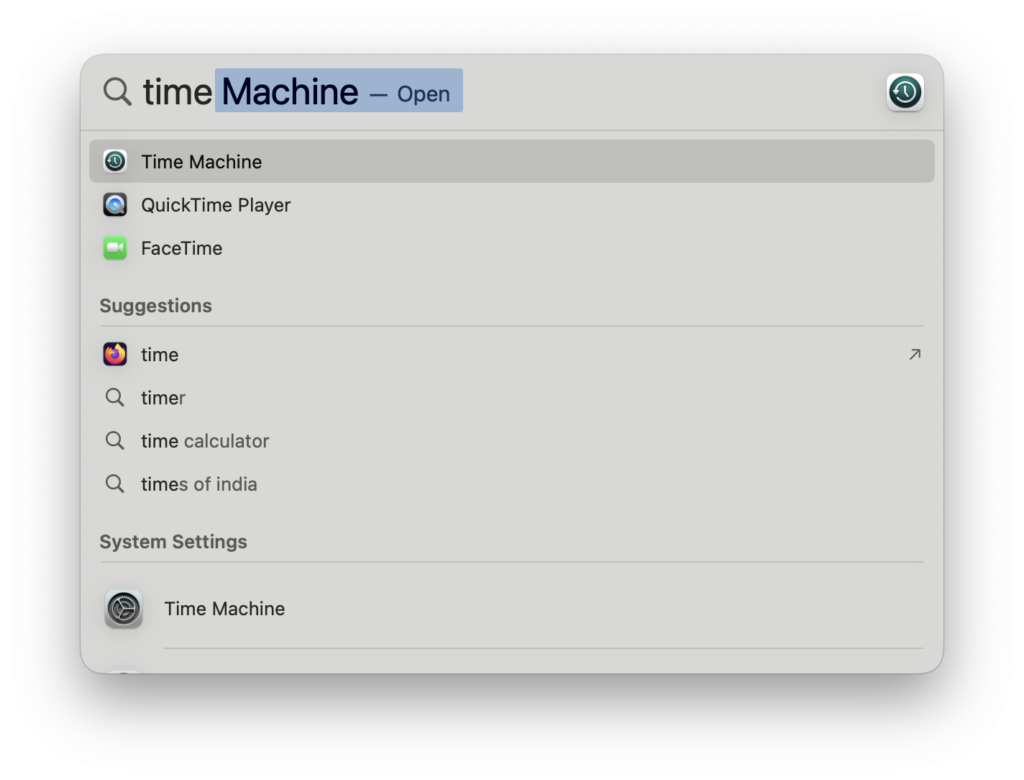
- Spotlight Search: Press Cmd + Spacebar to open Spotlight, a very useful search tool that can help you find files, launch apps, or even do quick calculations.
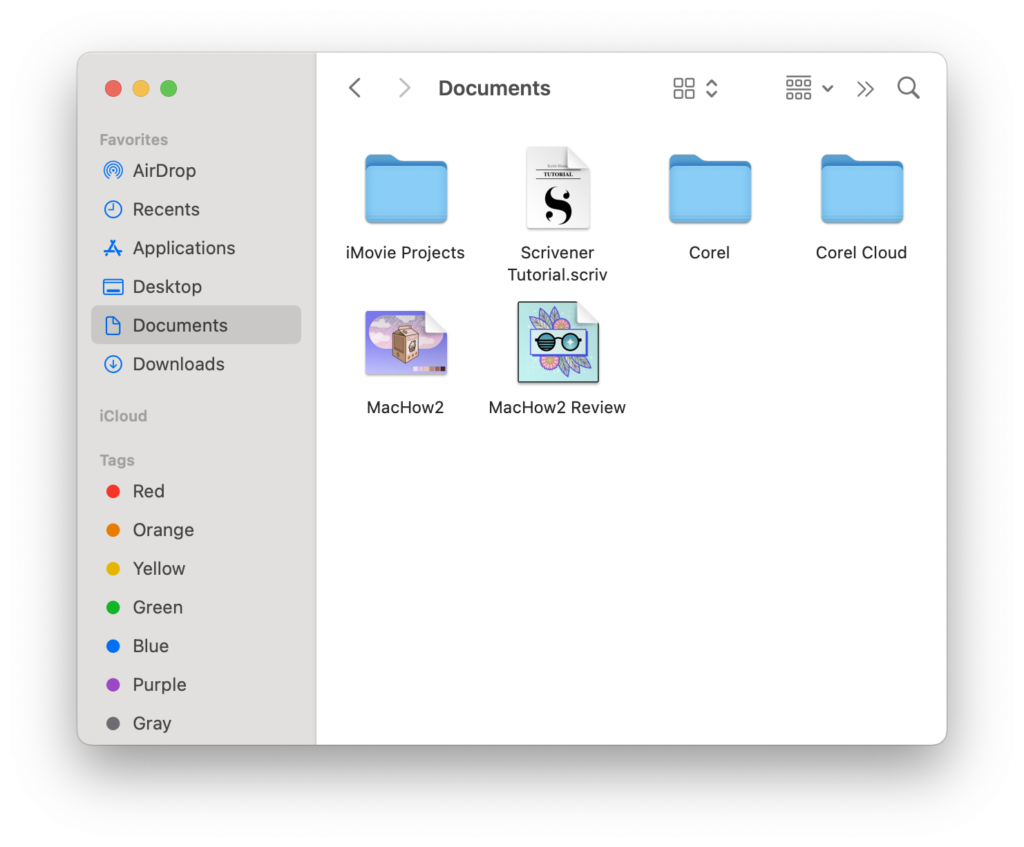
- Finder: The Finder app is your gateway to all the files and folders on your Mac. Learn how to navigate it efficiently by organizing files in folders, using tags, and creating shortcuts to frequently accessed documents. For help, check out our guide on how to use Finder on a Mac.
12. Install Windows On Your Mac (optional)
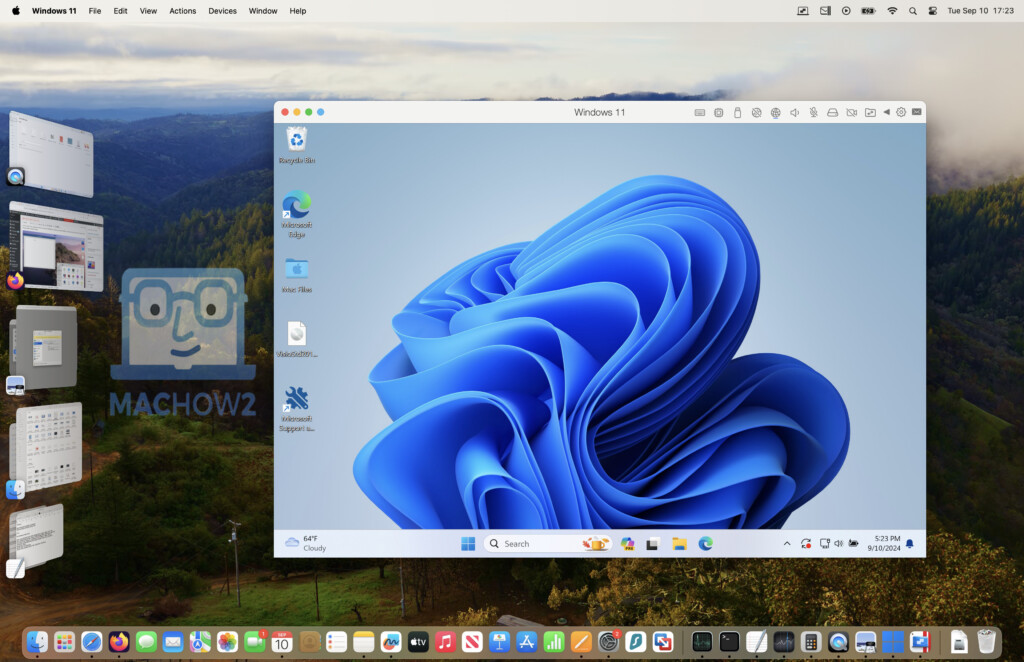
You don’t have to install Windows on your Mac but there are certain apps and games that simply won’t work on macOS.
In these cases, the best thing to do is use one of these methods to run Windows on your Mac.
Our preference is to use a virtual machine, specifically either Parallels (paid) or VMware Fusion (free).
However, it very much depends on what you plan to use Windows for and we recommend checking out our guide on the best ways to use Windows on a Mac for more.
You can watch the video below to see how quick and easy it is to install Windows on a Mac nowadays.
13. Use The Help Menu
One thing that Apple does really well is integrate Help assistants into its products.
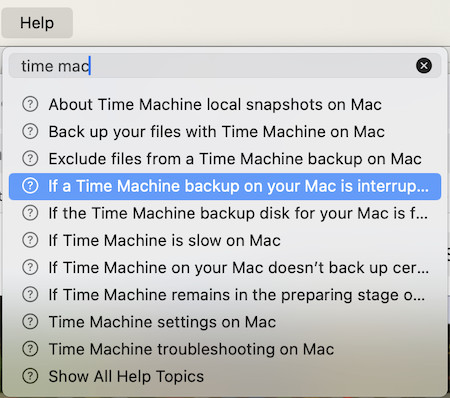
macOS has a really useful Help Menu at the top of your screen. To access it, simply make sure that Finder is selected on your Mac and then click on Help at the top the screen.
Search for the topic you need help with and there’s extensive help and assistance available online from Apple’s vast database of tutorials and troubleshooting articles.
14. Enjoy Your New Mac
Your Mac is now fully configured and ready to use!
As you spend more time with macOS you’ll discover lots of features that aren’t immediately obvious, from keyboard shortcuts and Stage Manager to Continuity Camera and Apple Intelligence.
Don’t worry about learning everything on day one – Apple’s operating system is designed to be approachable for beginners while offering plenty of advanced features as you become more comfortable.
FAQ
How do I transfer my data from my old Mac to the new one?
You can use Migration Assistant to transfer files, apps, and settings from your old Mac or PC. You’ll find this option during the initial setup or you can launch it later from the Utilities folder. However, if you’re migrating from an older Intel Mac to an Apple Silicon Mac, we recommend only migrating essential documents and files and reinstalling native apps for M-series Macs to avoid software conflicts.
How do I sync my new Mac with my iPhone and iPad?
Sign in with the same Apple ID on all devices and turn on iCloud to sync photos, files, contacts, and more. You can also use Handoff and Continuity to easily switch between your Apple devices.
How do I install apps on my Mac?
The easiest and safest way to install and update apps on a Mac is via the Mac App Store. These apps have all been certified by Apple as safe to install. However, you can still download apps from any website and install it on your Mac but you will have to grant macOS permission to install it during th setup process.
How do I customize my new Mac’s appearance?
You can personalize your Mac by going to System Settings > Wallpaper to choose or add a background image. You can also adjust the Dock size and positioning, and enable Dark Mode under Appearance in the settings.
How do I manage storage on my new Mac?
Go to Apple menu > About This Mac > Storage to see how space is being used. You can enable Optimized Storage, which offloads rarely used files to iCloud while keeping frequently used ones on your Mac to save space. If you need more storage space, then the easiest thing to do is purchase a Mac compatible external hard drive, preferably an SSD drive or a Thunderbolt drive.
Do I need antivirus software on my new Mac?
macOS has built-in security features like XProtect, SIP and Gatekeeper to help keep your Mac safe. Some users like to use additional antivirus software for extra protection, especially if downloading apps outside the Mac App Store. However, in general macOS is far less vulnerable to viruses and malware than Windows PCS and many users choose not to use anti-virus software on macOS.
How do I set up external displays or accessories with my new Mac?
You can connect external monitors, keyboards, and other accessories via USB-C or Thunderbolt ports. For displays, go to System Settings > Displays to adjust resolution, arrange screens, and choose whether to mirror or extend your desktop.
How do I setup email on my Mac?
You can setup Apple Mail as your default mail client simply by clicking on Apple Mail in the Dock and searching for it in Spotlight and following the instructions. However, many users prefer to use a web based email service such as Gmail or via their Microsoft account in a browser. Apple Mail does however integrate with most major web mail services so that you can receive and send mail from them on your Mac desktop.
How do I setup a printer on my Mac?
You can easily add a printer wirelessly on your Mac using Apple AirPrint. This doesn’t require any drivers and works via your WiFi network. For more on this, check our guide how to setup a printer on a Mac.
Should I install a VPN on my new Mac?
Installing a VPN (Virtual Private Network) can improve your online privacy and security by encrypting your internet connection. It’s especially useful when using public Wi-Fi. We have a full list of both best VPNs for Macs and also free VPNs for Macs if you want to learn more about the best ones.
Do I need an ad blocker for my Mac’s browser?
Installing an ad blocker for your mac is a good idea if you want to block intrusive ads, speed up your browsing, and improve privacy. Apple’s Safari browser has its own in-built ad-blocking tools but it doesn’t block everything.
Can a VPN and an ad blocker work together on my Mac?
Yes, they can be used together to improve both security and browsing experience. A VPN encrypts your connection, while an ad blocker removes unwanted ads and trackers. Just make sure both are configured properly, and you should see an overall improvement in the blocking of pesky ads while protecting your privacy.
How do I use Apple Intelligence on a Mac?
Apple Intelligence is Apple’s enhanced AI assistant that works in the latest versions of macOS on Apple Silicon Macs only. You can find out more about how to activate and use Apple Intelligence on a Mac here.
How long does it take to set up a new MacBook?
Most people can complete the initial setup in around 15–30 minutes. If you’re transferring data from another computer, the process may take several hours depending on how much data you have.
Should I update macOS before installing apps?
Yes. Installing the latest version of macOS first ensures your Mac has the latest security updates, bug fixes and compatibility improvements before you begin installing software.
Can I skip Migration Assistant and use it later?
Yes. If you choose to set up your Mac as new, you can still use Migration Assistant later to copy files, settings and user accounts from another Mac or Windows PC.
Do I need to install Rosetta 2?
Only if you use older Intel-only applications. Most modern Mac software now runs natively on Apple Silicon, but macOS will automatically prompt you to install Rosetta the first time you launch an Intel app.
Can I use my MacBook without an Apple ID?
Yes, but you’ll miss out on many of macOS’s best features including iCloud syncing, Find My, the App Store, Apple Intelligence, FaceTime, Messages and seamless integration with your other Apple devices.
Should I enable FileVault?
Yes. FileVault encrypts your Mac’s storage, helping protect your files if your Mac is ever lost or stolen. For most users there’s no noticeable impact on performance, and Apple enables it by default on many new Macs.
How much iCloud storage do I need?
Apple includes 5GB of free iCloud storage, but most users quickly outgrow this if they back up photos, files or multiple Apple devices. If you plan to use iCloud Photos or iCloud Drive regularly, upgrading to a larger storage plan is usually worthwhile.
Can I use my old Mac charger with my new MacBook?
In most cases, yes. Any compatible USB-C charger that provides sufficient power will charge your MacBook, although using Apple’s recommended wattage will give you the fastest charging speeds. Older low-wattage chargers may charge more slowly, especially on MacBook Pro models.