
If you want to draw a floor plan on a Mac, there are now plenty of tools that make it easy to create everything from simple room layouts to detailed home renovation plans.
Whether you’re redesigning a kitchen, planning an office layout, staging a property or building a new home, modern floor plan software for Mac allows you to create accurate layouts without needing professional CAD software or experience.
In this guide, we’ll show you how to draw a floor plan on a Mac step-by-step, the easiest tools to use and the best free options available.
If you’re looking for full software recommendations, check out our guide to the best floor plan software for Mac.
The Easiest Way To Draw a Floor Plan on a Mac
The easiest way to create a floor plan on a Mac is by using dedicated floor planning software.
Unlike general drawing apps, floor plan tools include:
- Drag-and-drop walls and rooms
- Accurate dimensions and scaling
- Furniture libraries
- Doors and window templates
- 2D and 3D viewing modes
This makes it much faster and more accurate than trying to draw a floor plan manually in apps like Preview, Pages or Photoshop.
Some of the most popular options for Mac users include:
They all offer free trials or limited free usage and you can compare all of the top options in our full guide to the floor planners for Mac.
Step-by-Step: How To Draw a Floor Plan on Mac
1. Choose a Floor Plan App
First, choose a floor plan application that works on macOS.
For beginners, tools like SmartDraw, Live Home 3D, Roomsketcher and Planner 5D are usually the easiest because they include templates, furniture libraries and simple drag-and-drop editing.
SmartDraw specializes in 2D design but Live Home 3D, Roomsketcher and Planner 5D support 3D design.
Professional users may prefer more advanced software such as:
If you’re unsure which to choose, our guide to Mac floor plan software compares the easiest and most powerful tools available.
2. Create a New Project
Once you’ve installed your software:
- Open the app
- Create a new floor plan project
- Choose either:
- a blank canvas
- or a pre-made template
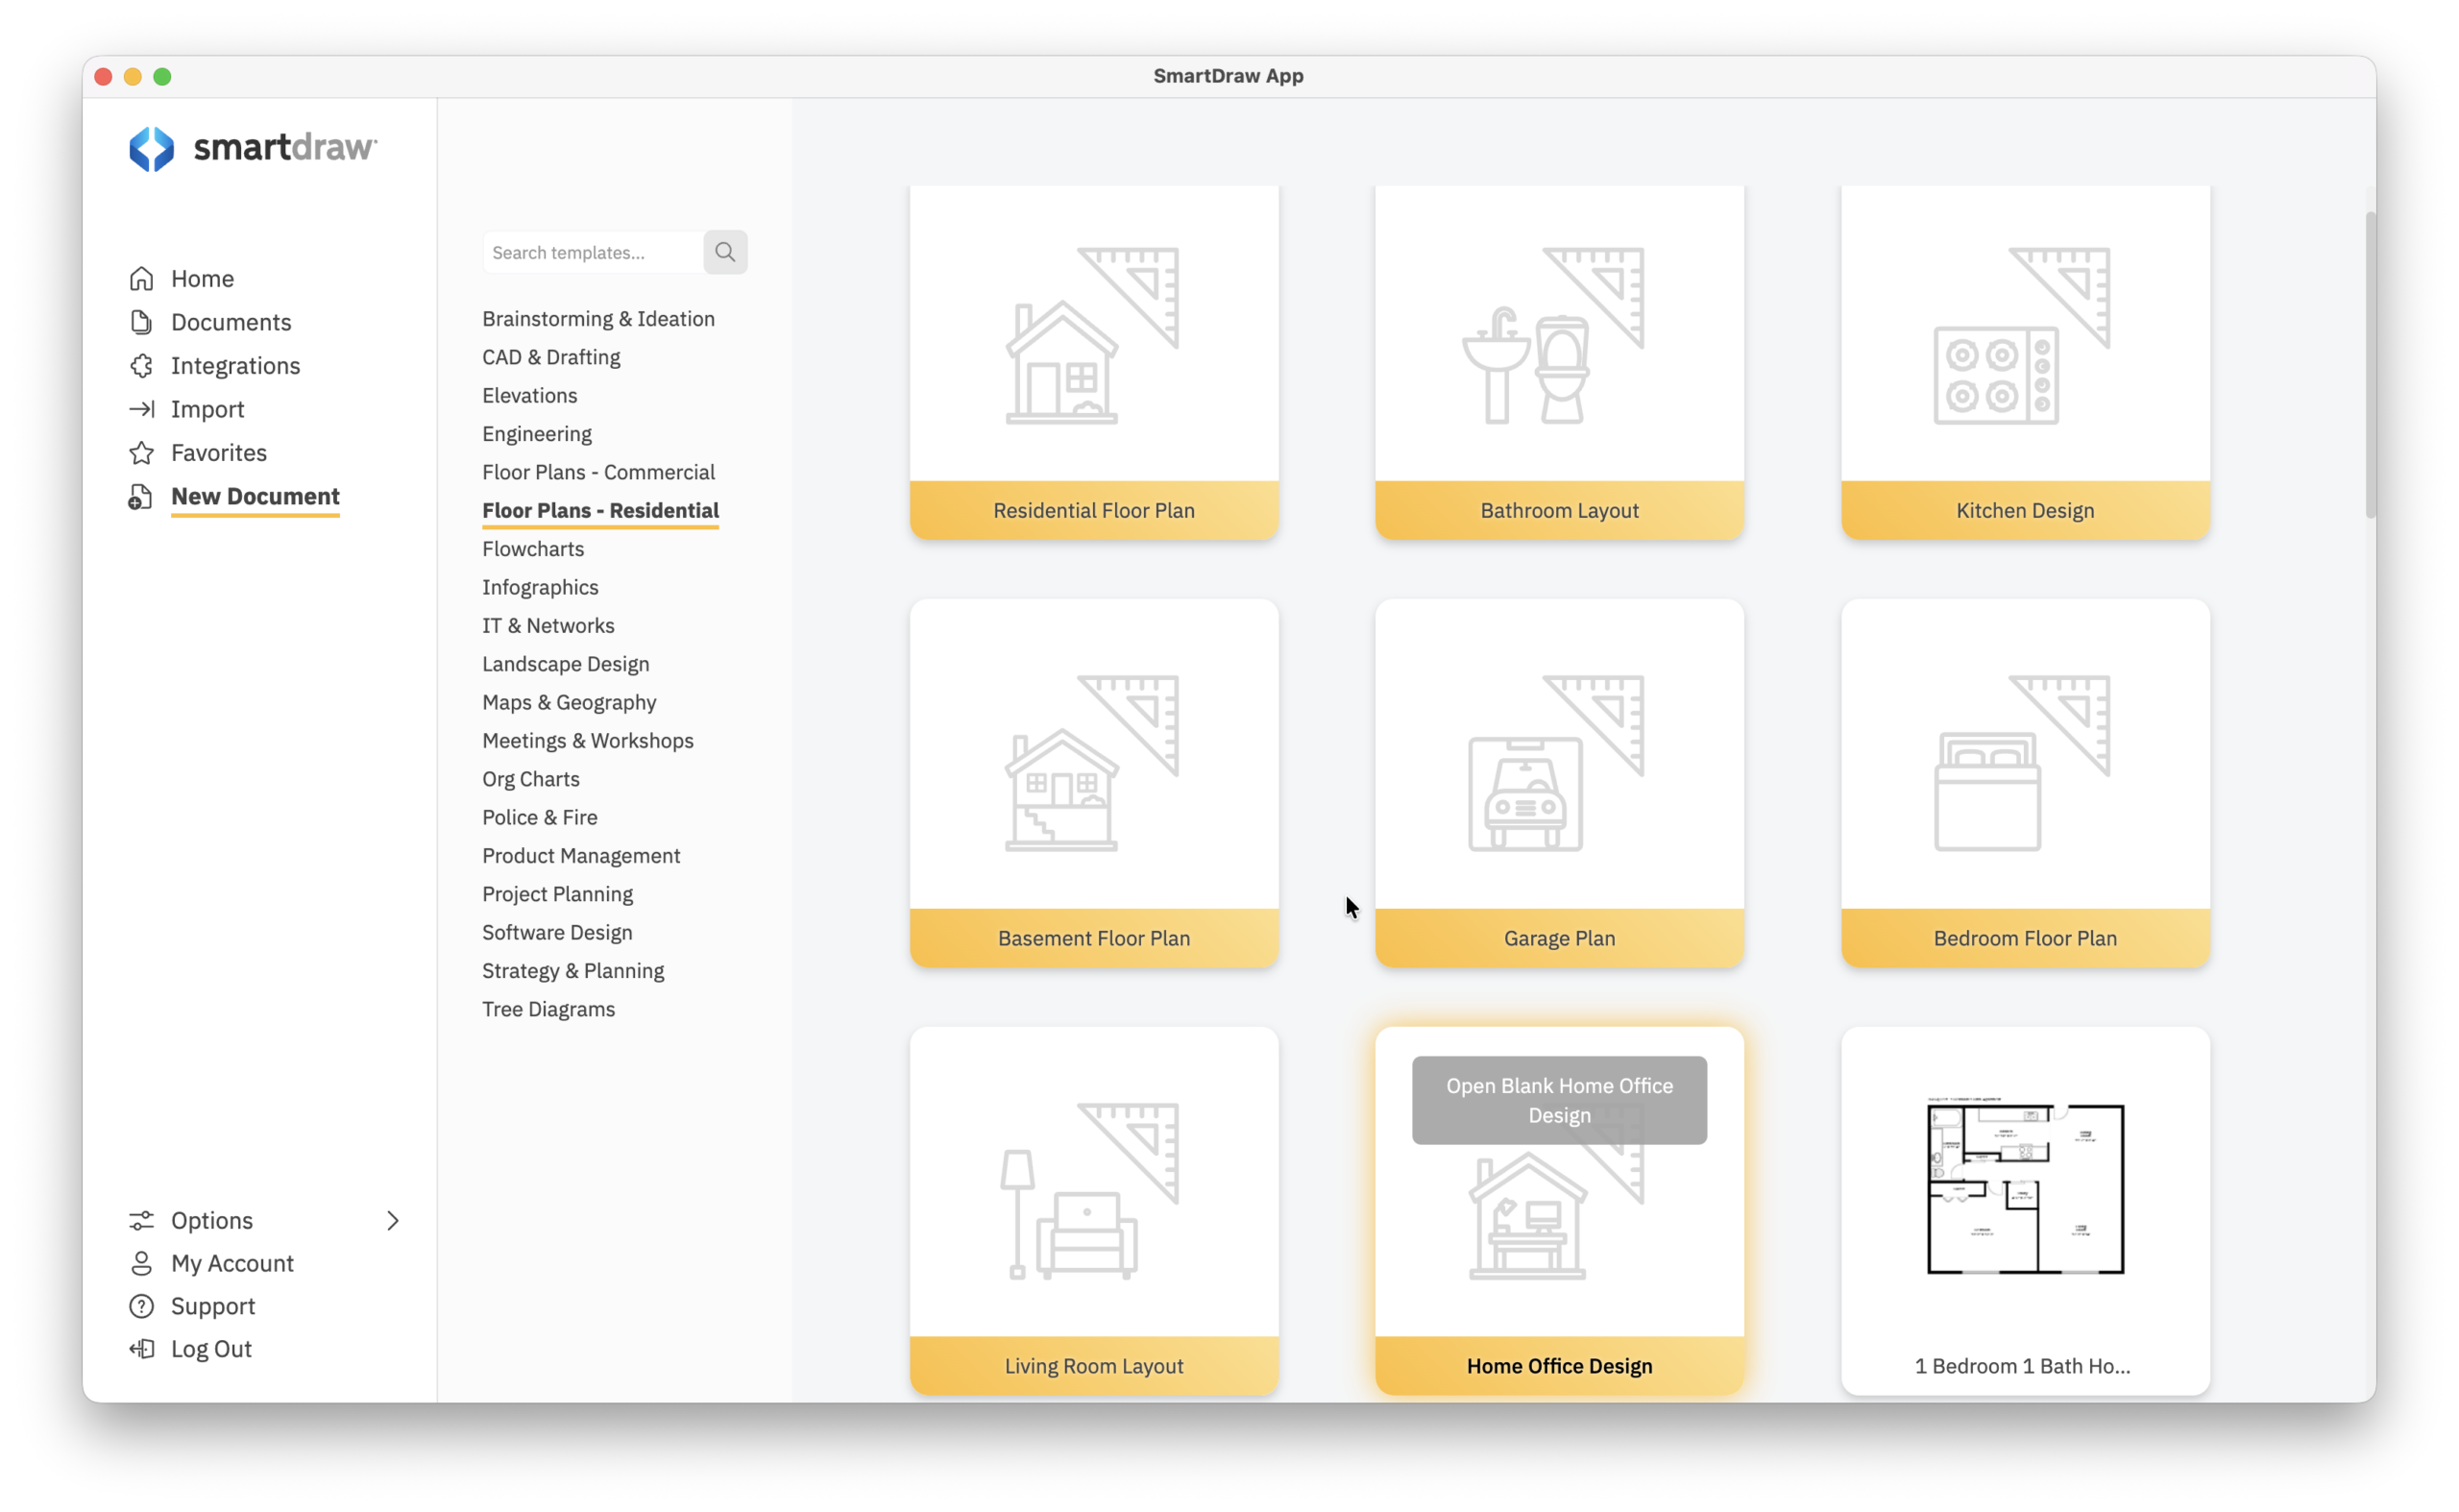
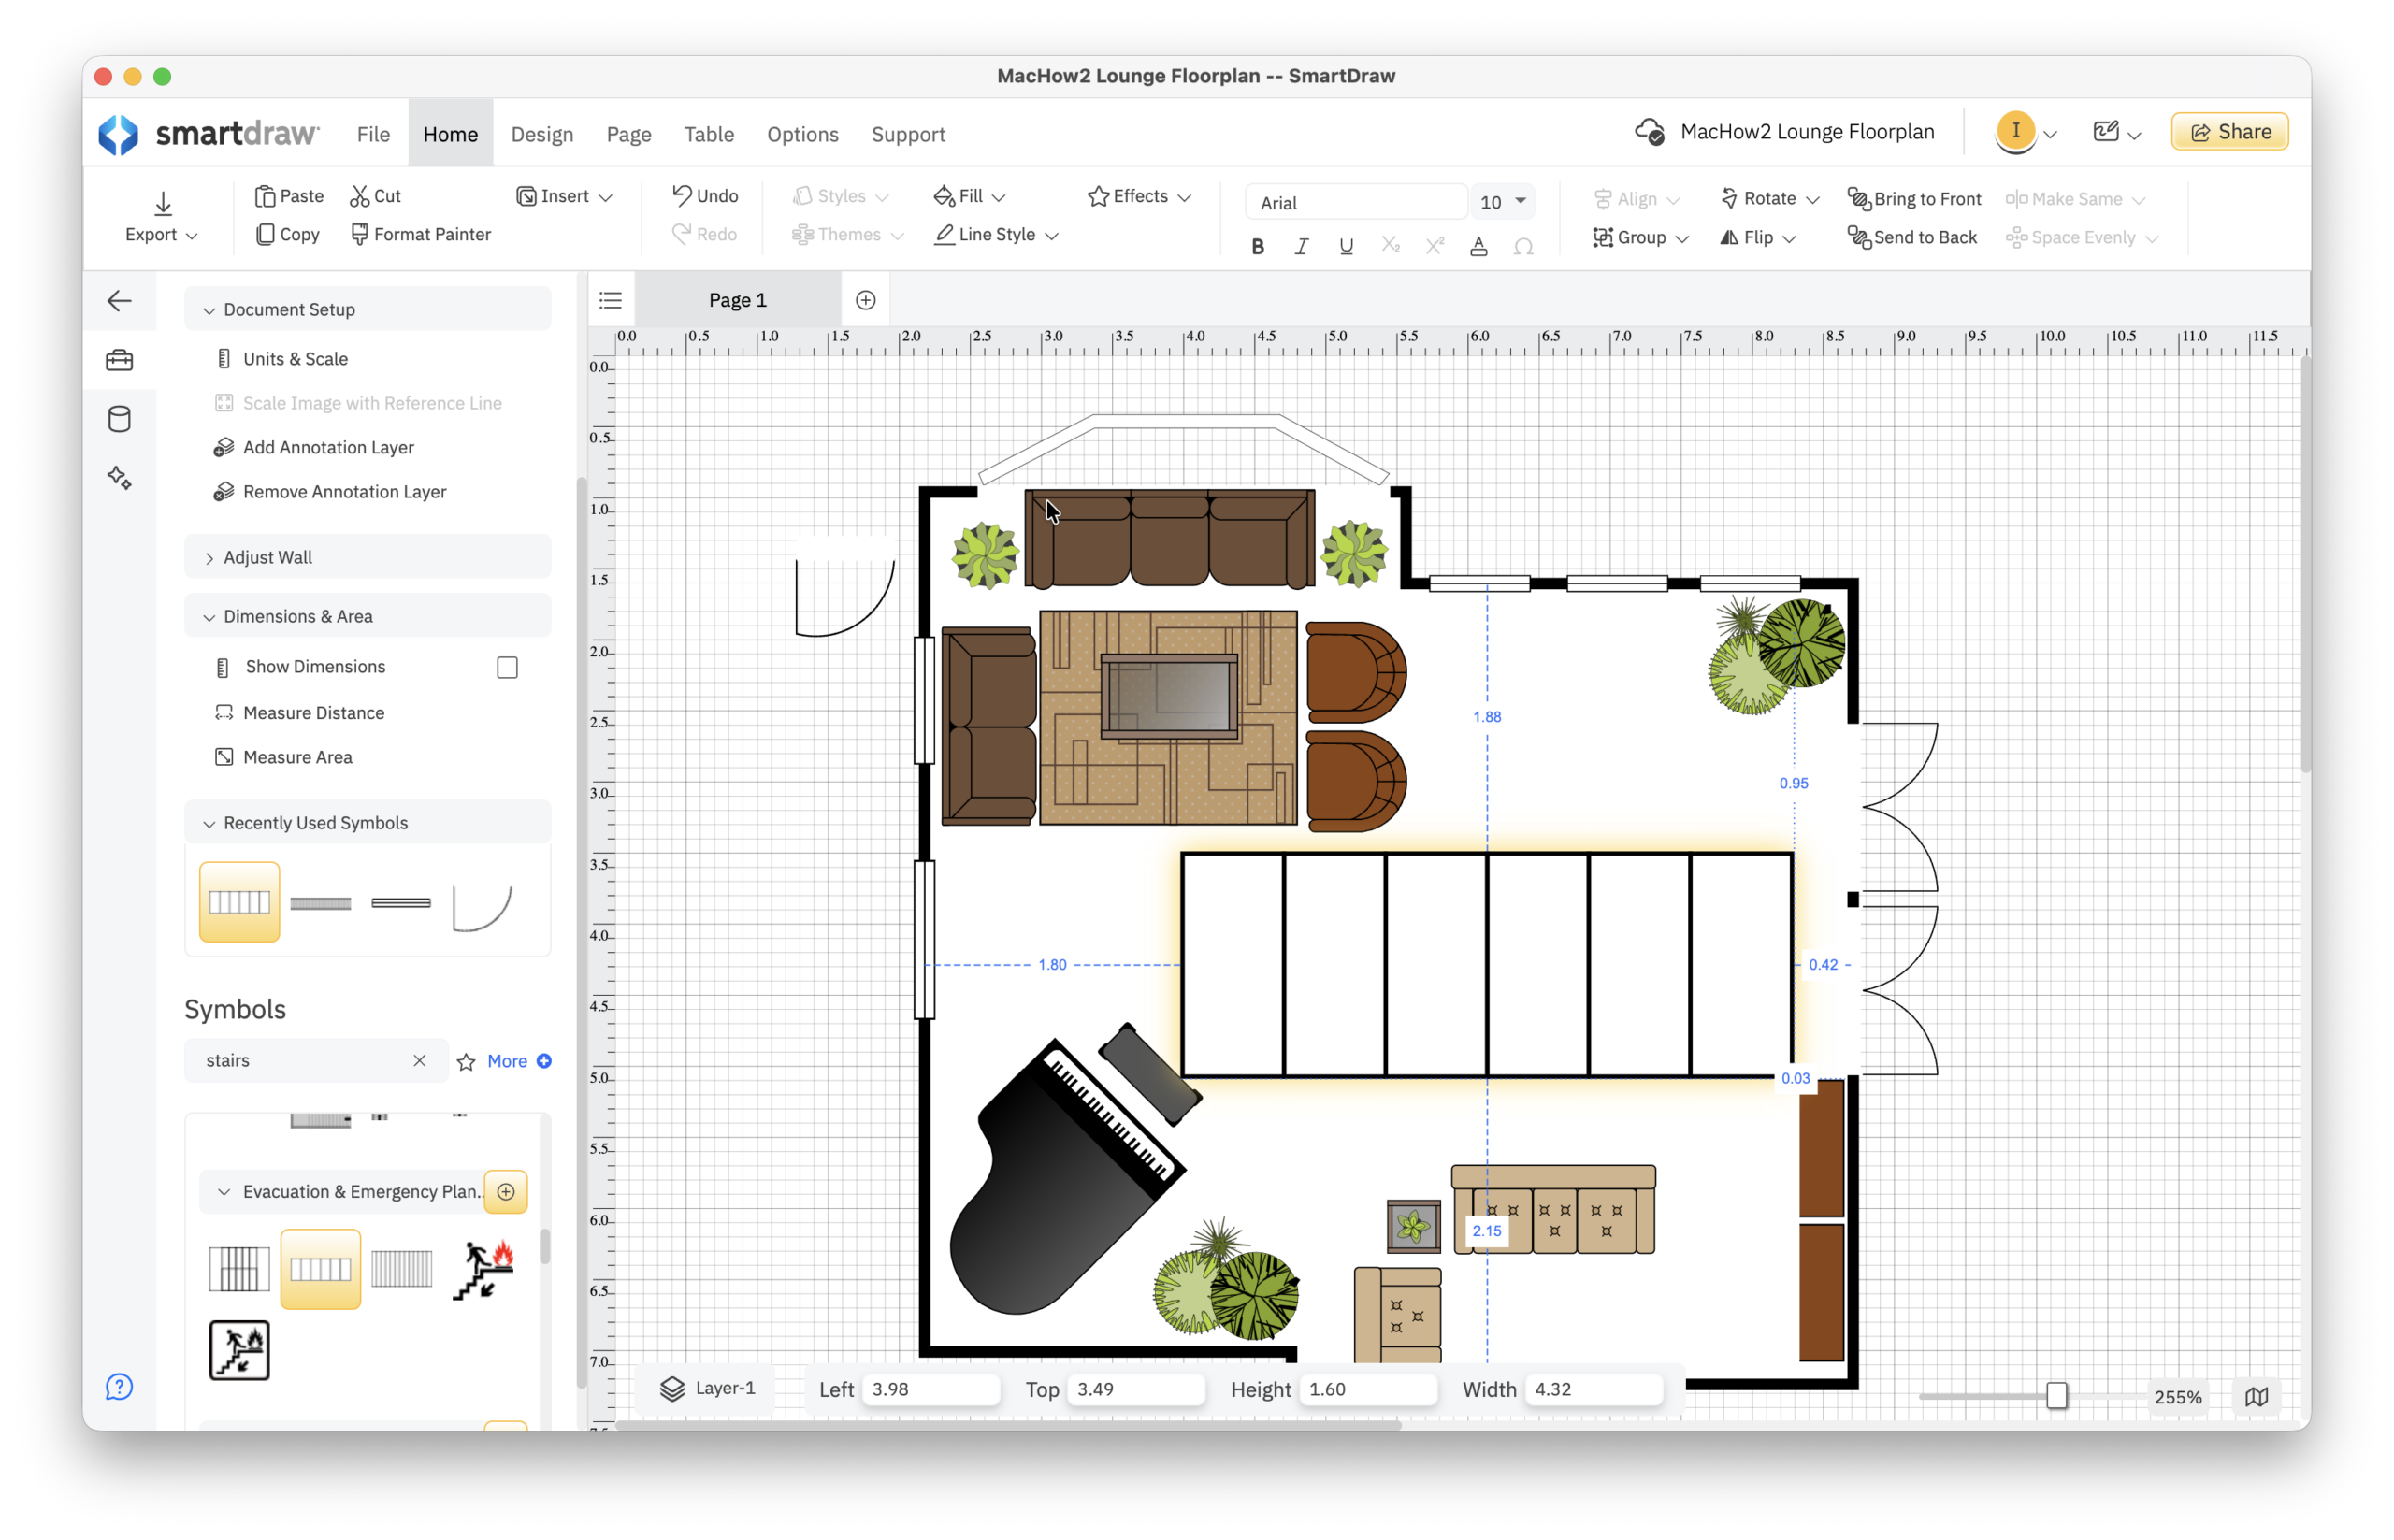
Using the free trial of SmartDraw as an example, you get a choice of Residential or Commercial Floor Plans templates.
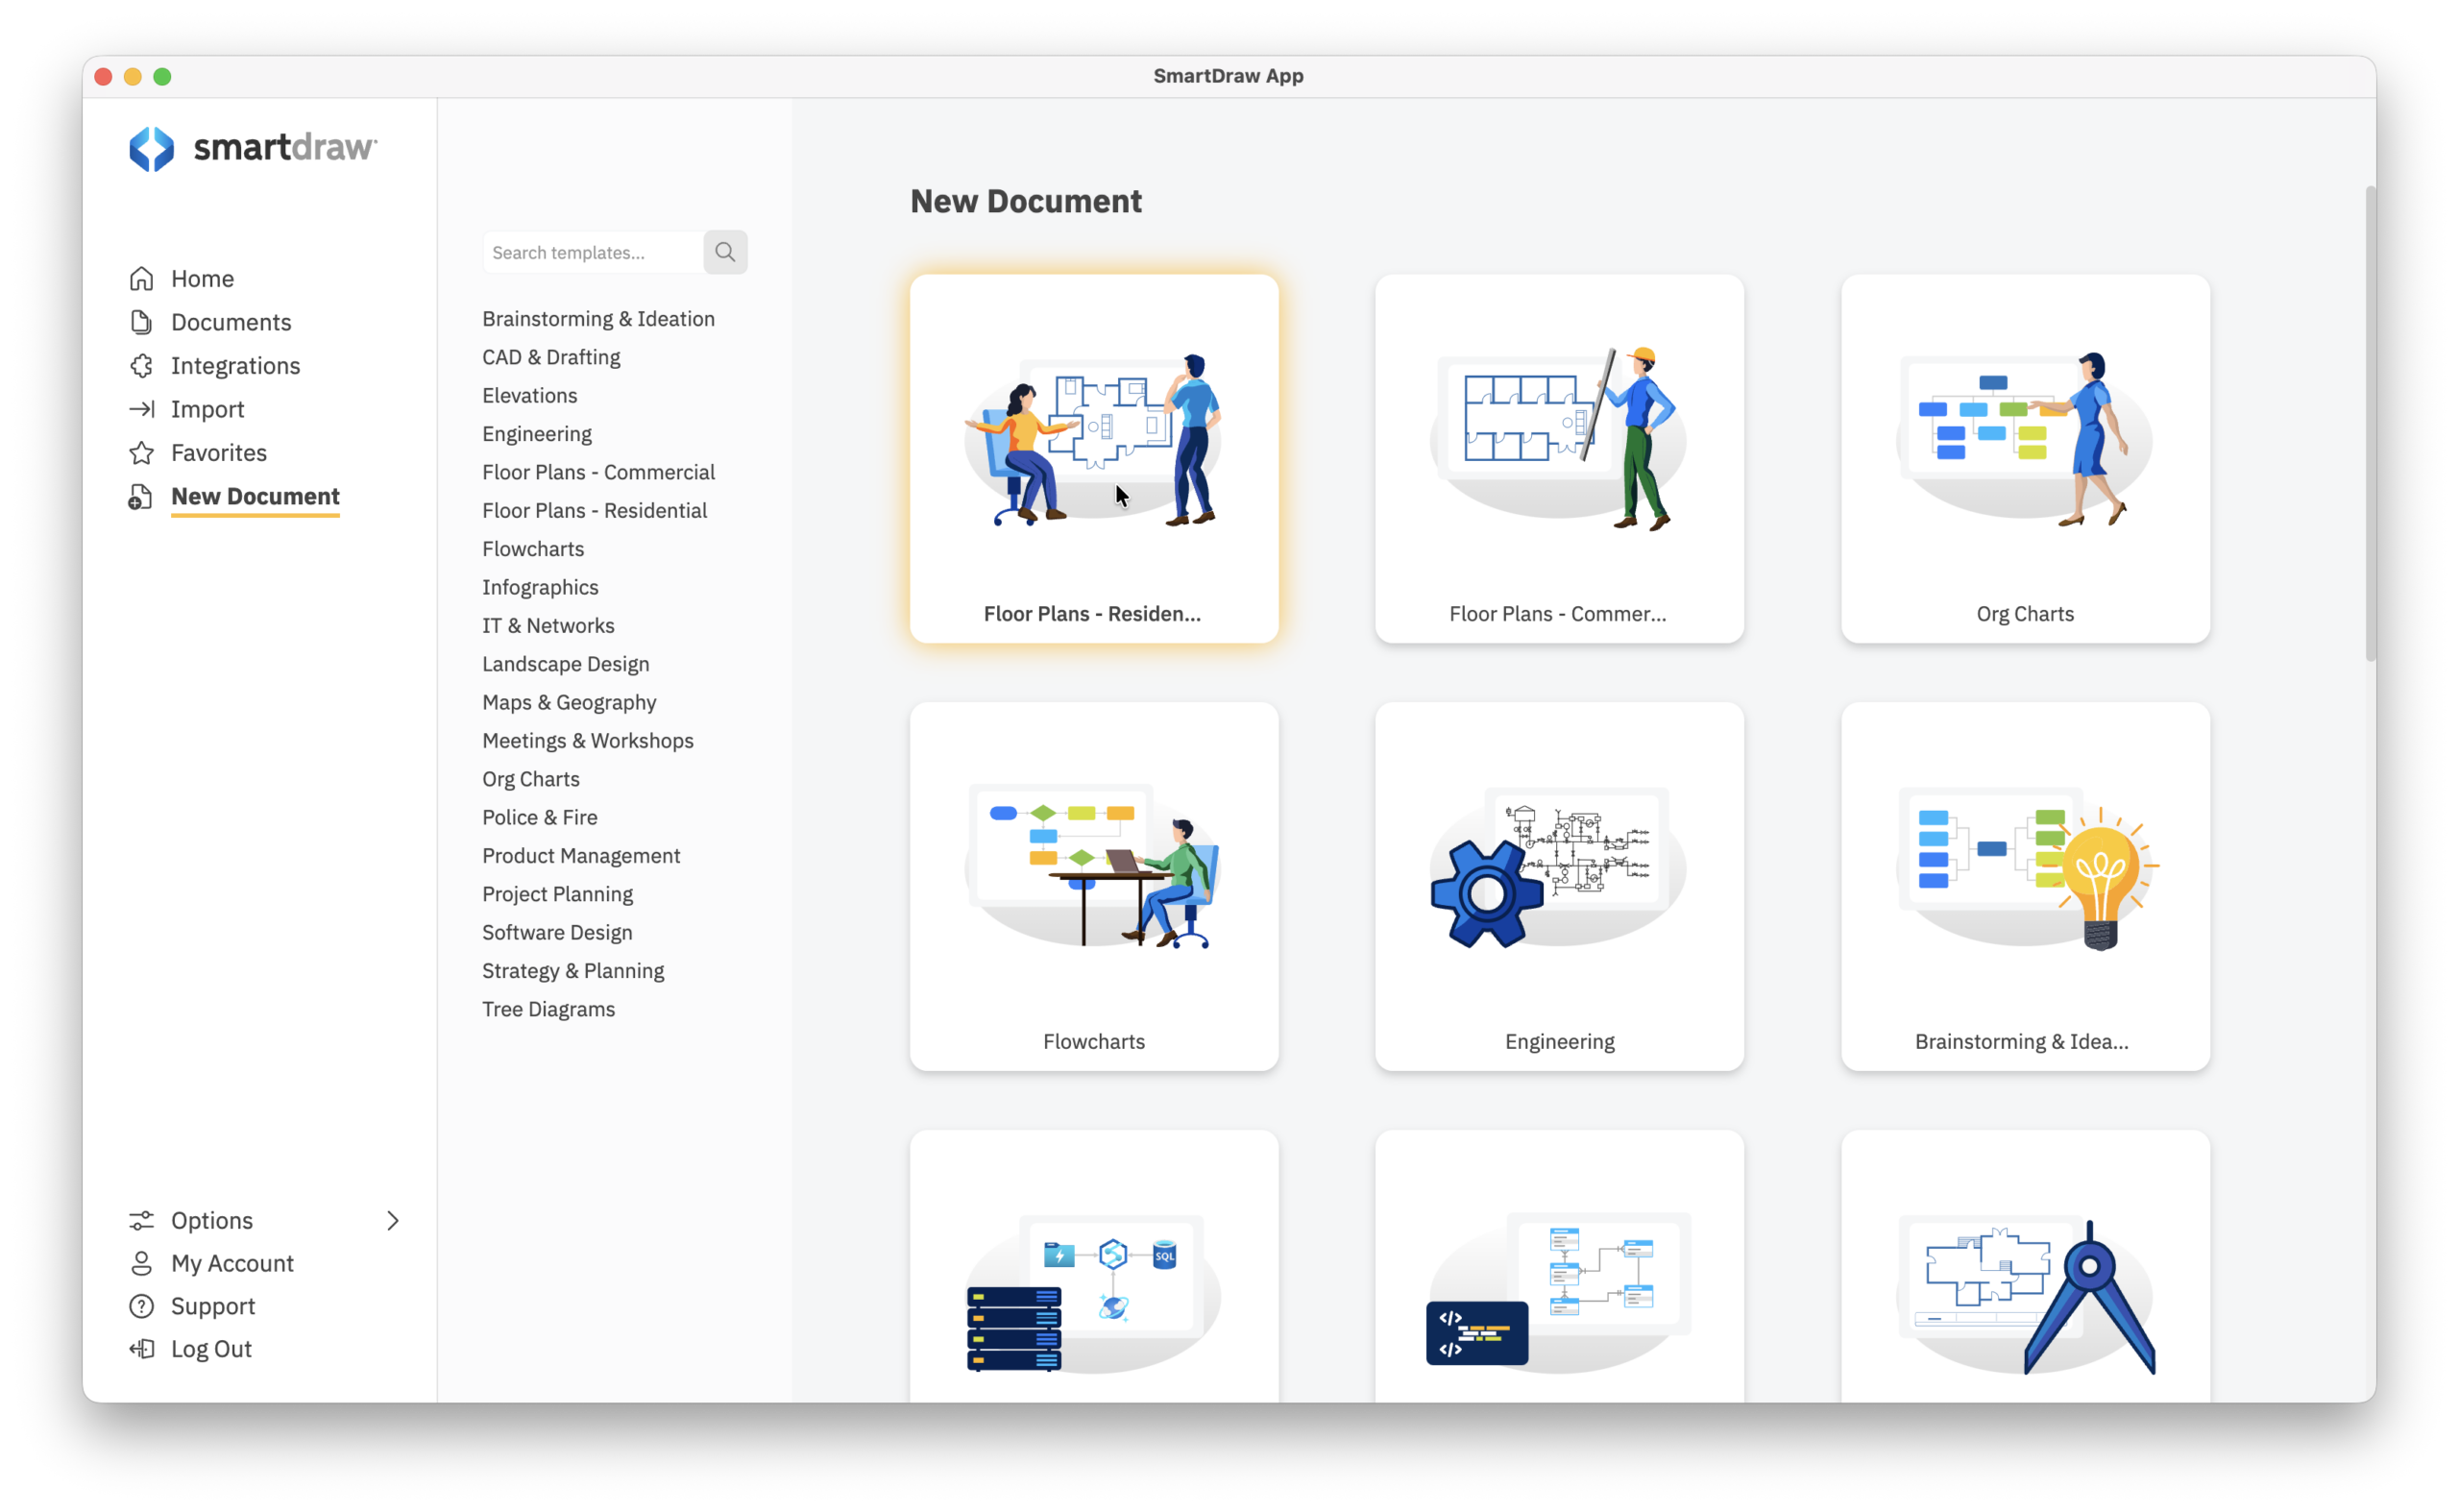
And then within that, a whole subsection of different types such as Bathroom Layout, Home Office Design, Basement Plan and many more.
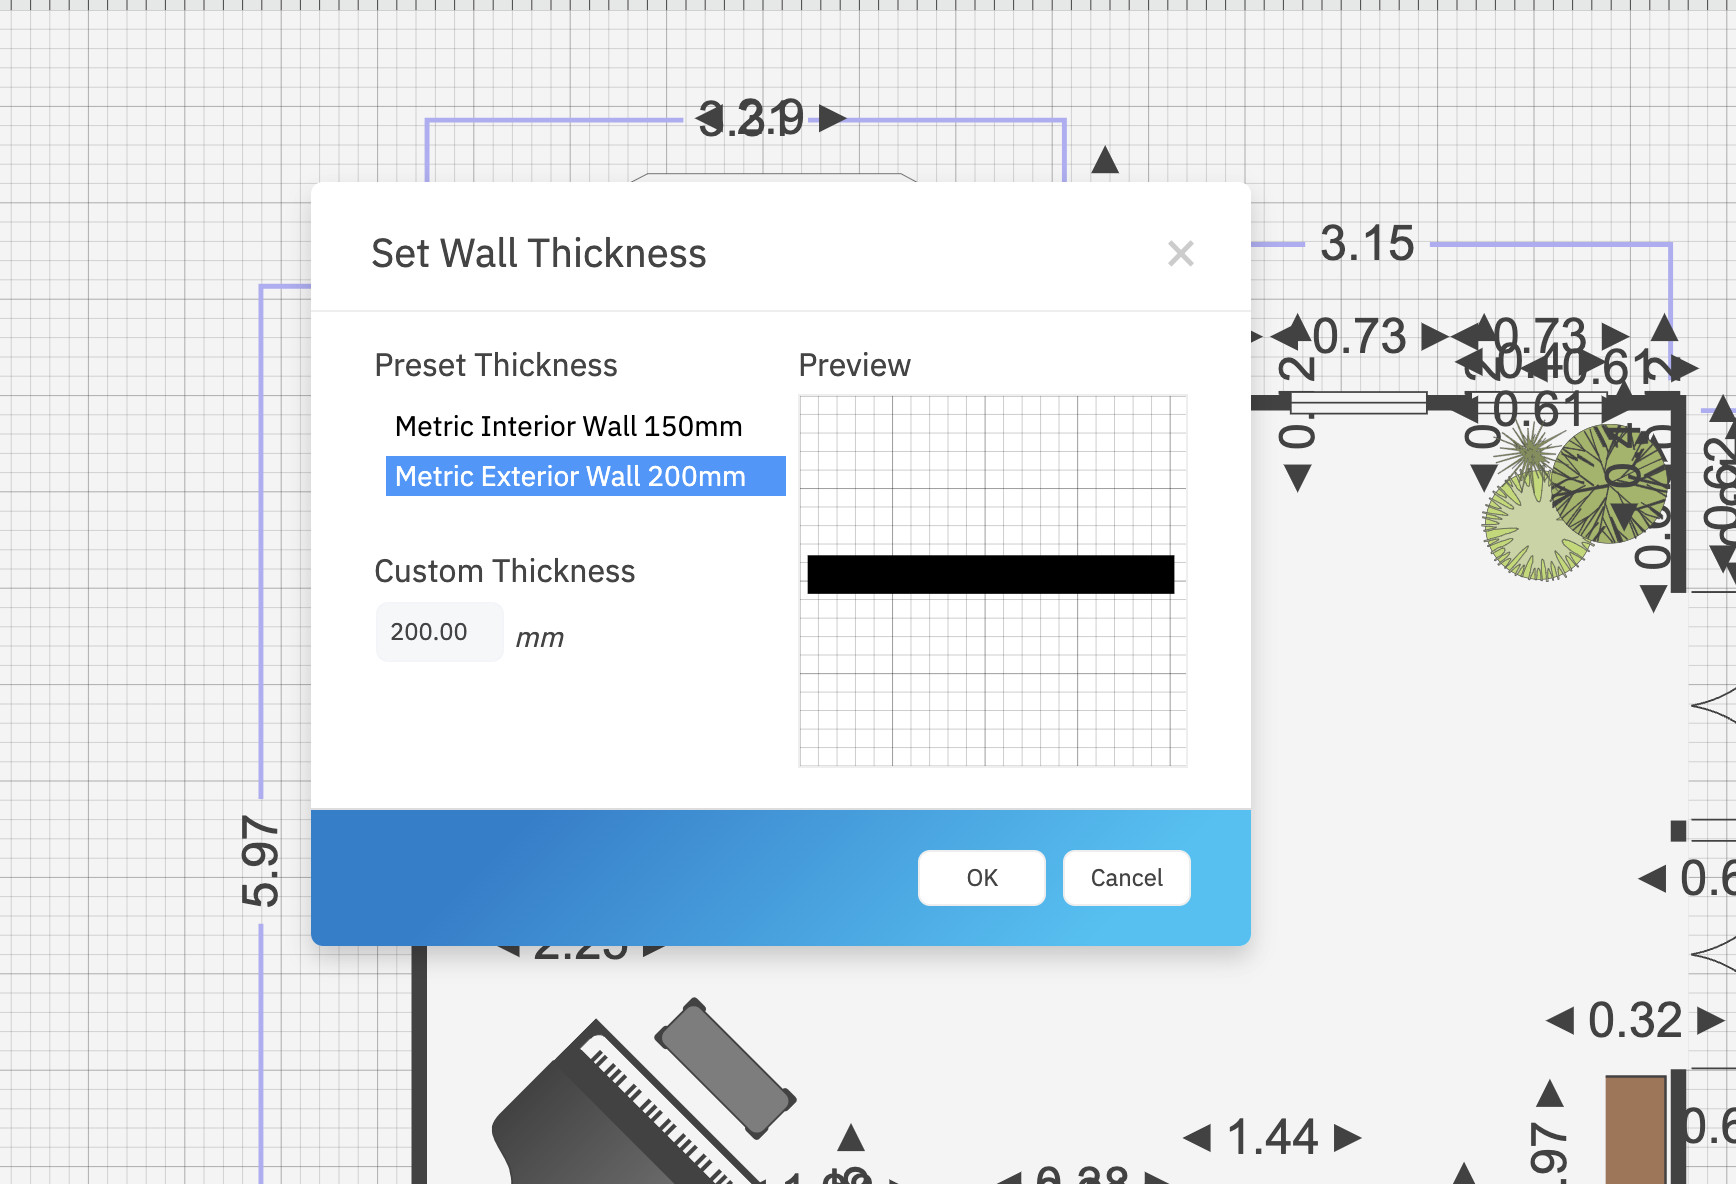
Most Mac floor planning apps also let you set:
- room size
- measurement units
- wall thickness
- ceiling height
Using accurate measurements early on makes the rest of the process much easier.
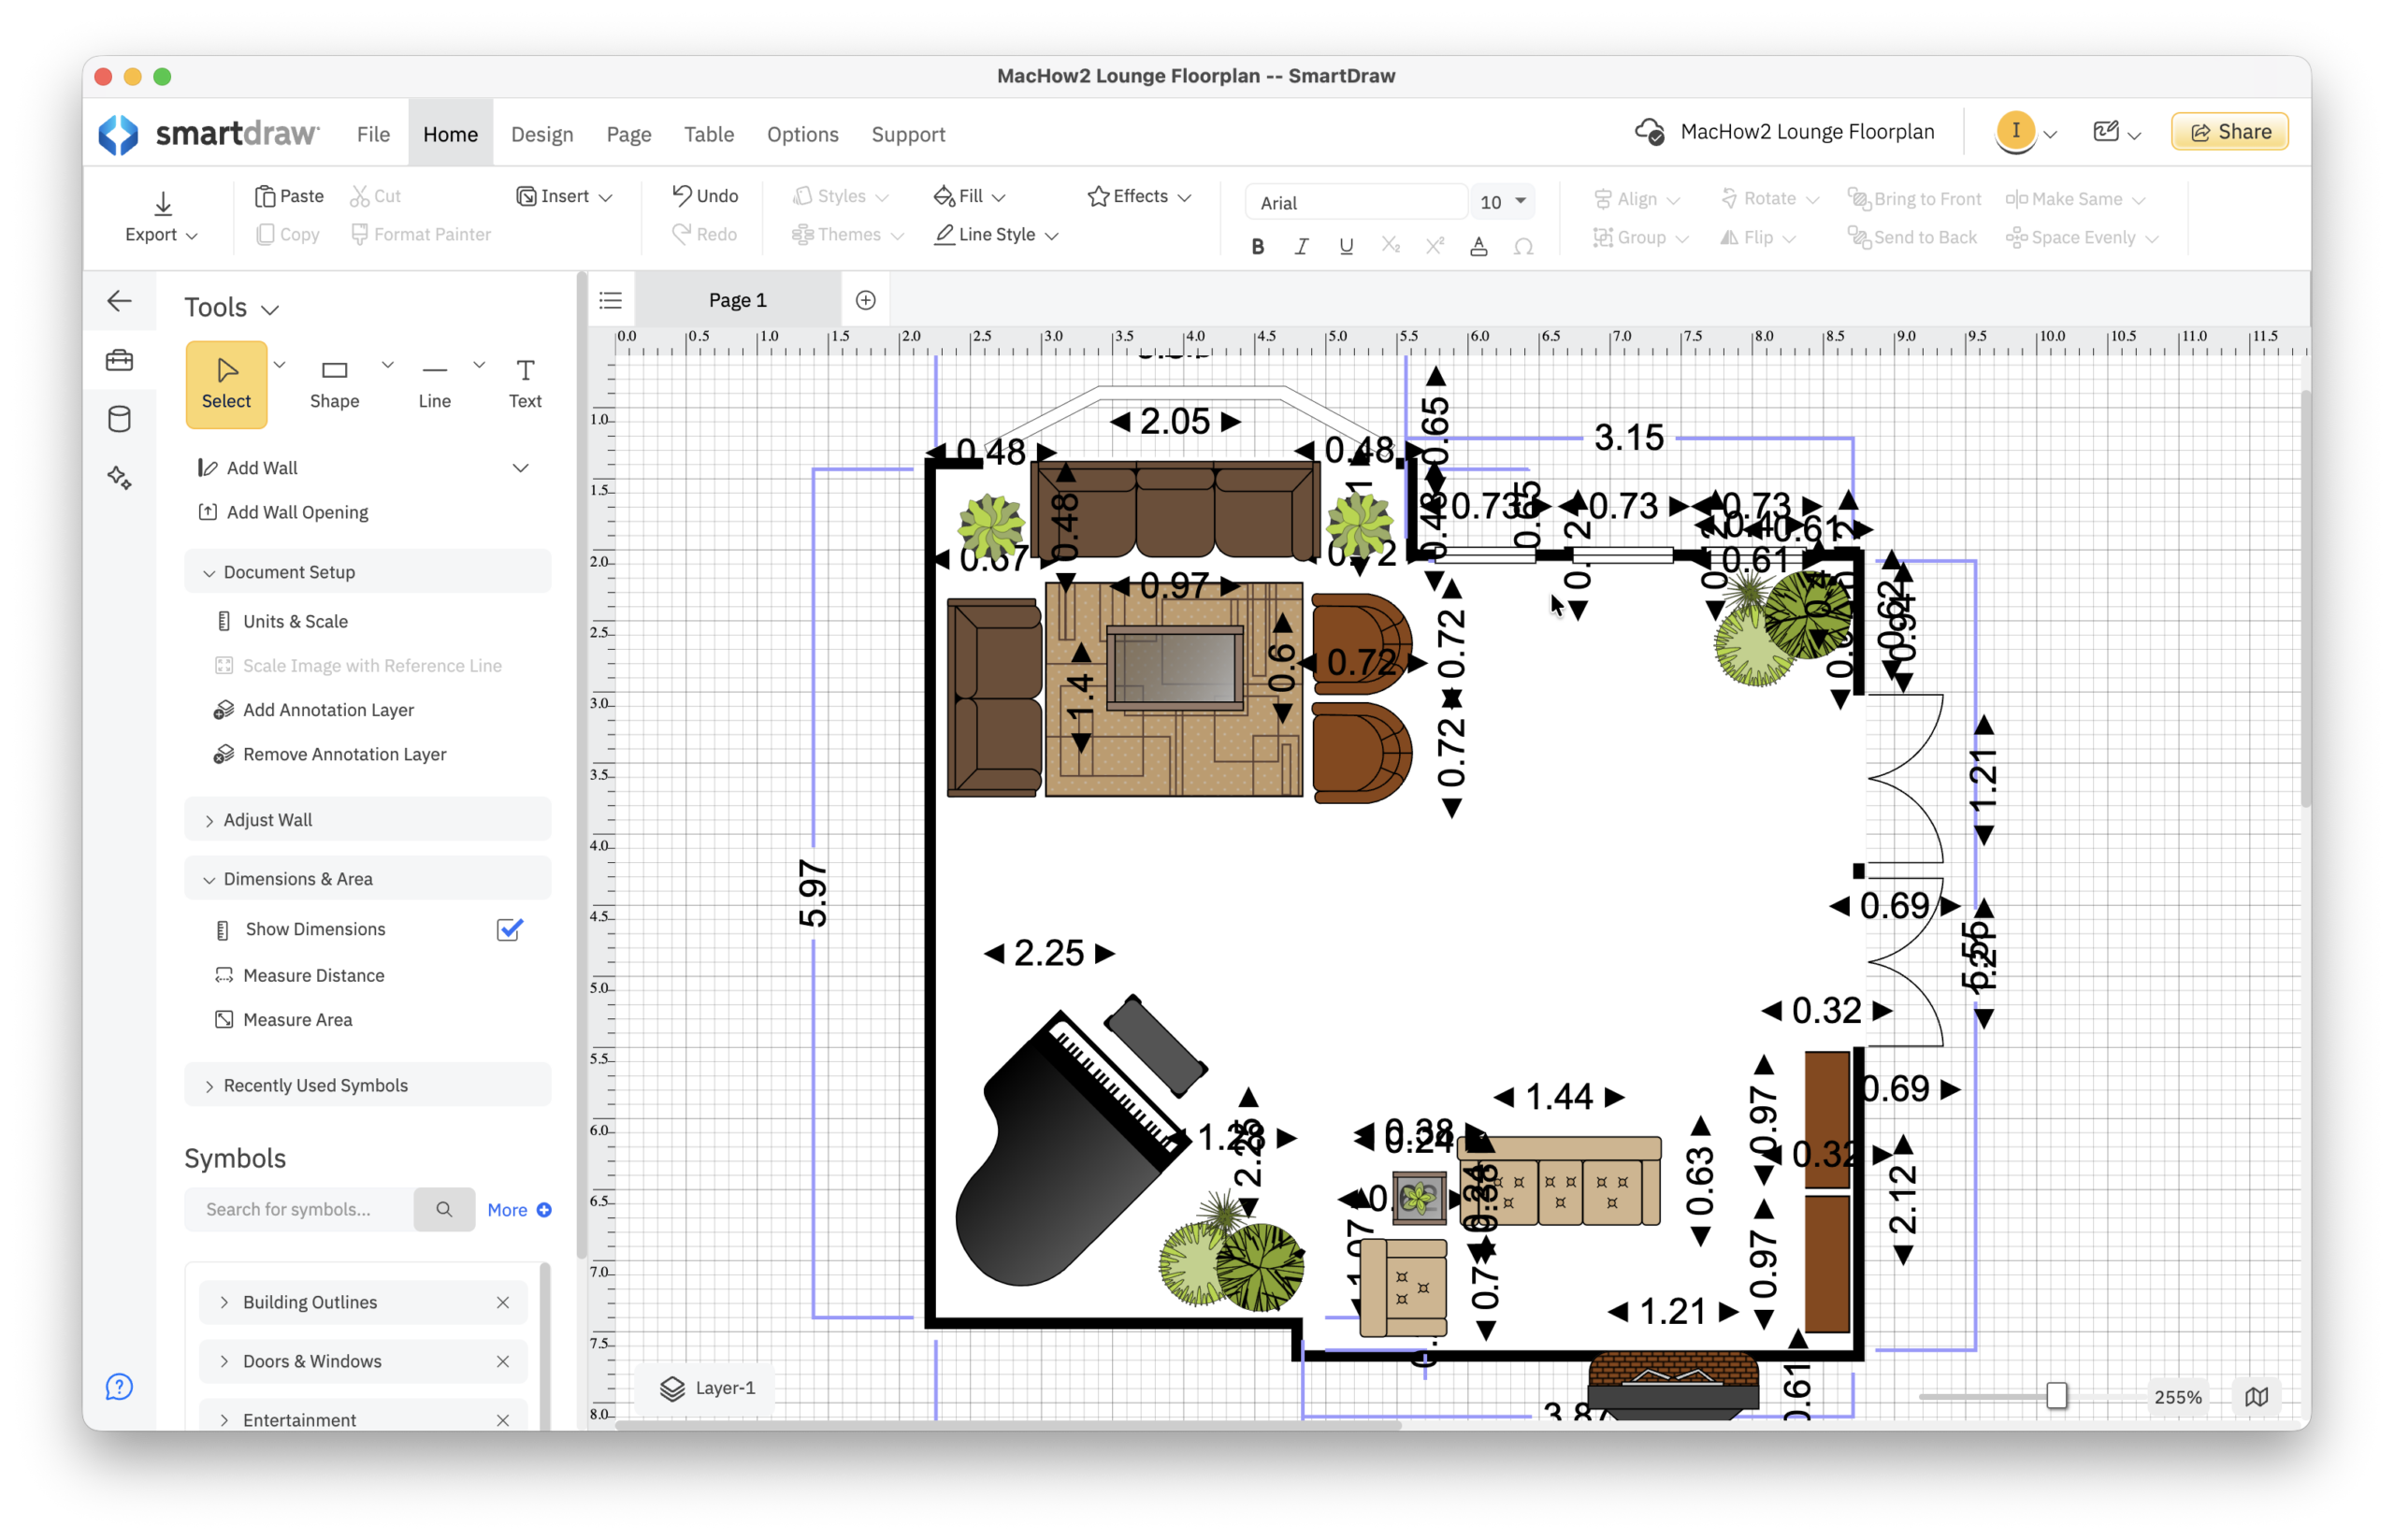
3. Draw Walls and Rooms
Next, use the wall or room drawing tool to create the basic structure of your floor plan.
Most floor planners let you:
- click and drag walls
- snap walls into place automatically
- enter exact dimensions manually
It’s best to start with exterior walls first and then add internal rooms and partitions
If you already have room measurements, entering them manually will help keep the plan accurate.
4. Add Doors and Windows
Once the layout is complete, you can add
- doors
- windows
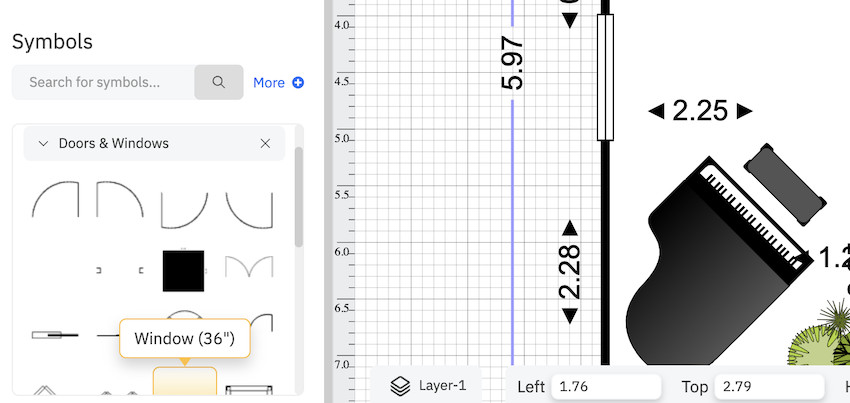
- staircases
- hallways
Most apps include pre-built objects you can drag directly into your design.
You can usually customize:
- dimensions
- opening direction
- frame style
- placement
This helps create a much more realistic layout.
5. Add Furniture and Fixtures
Now you can start furnishing the space.
Most floor planning apps include libraries for:
- sofas
- beds
- kitchen appliances
- desks
- lighting
- bathroom fixtures
Some floor planning software are better than others when it comes to the choice of furnishings available. For example, apps like RoomSketcher have huge, realistic 3D catalogs of a wide range of furnishings whereas 2D apps like SmartDraw have less choice.

A big selection of furniture and objects is especially useful if you’re:
- redesigning a room
- testing layouts
- planning renovations
- staging a property
Tools such as RoomSketcher and Live Home 3D also allow you to switch into a 3D view so you can visualize how the final room will look (note that SmartDraw is 2D only).

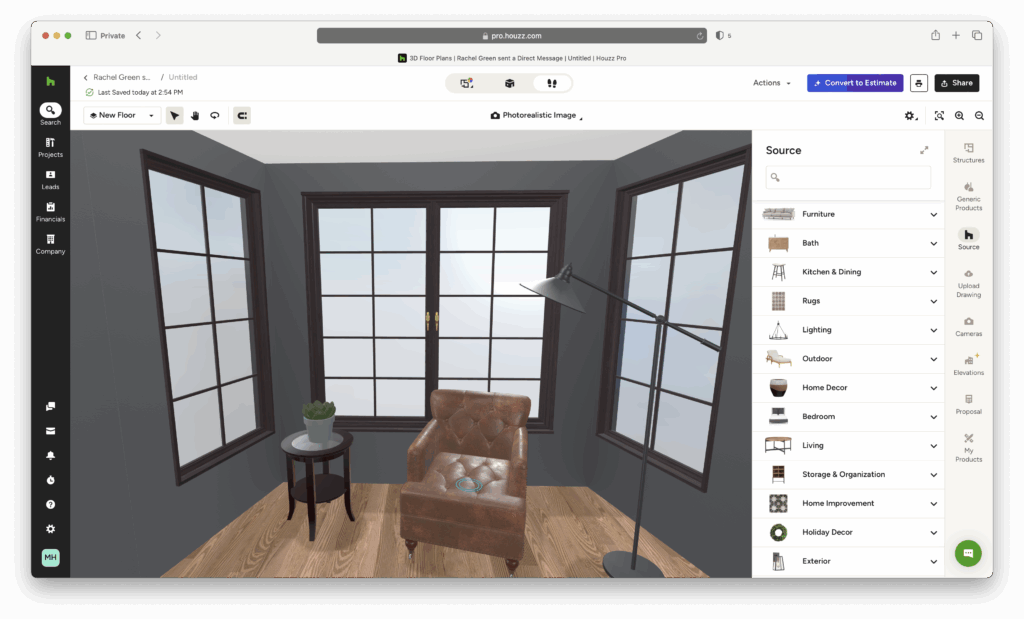
6. Export or Print Your Floor Plan
Once finished, you can usually:
- export your floor plan as a PDF or image
- share it online
- print it to scale

Some Mac floor plan apps also support:
- 3D walkthroughs (see the example from Houzz Pro below)
- cloud collaboration
- architectural blueprint exports
Can You Draw a Floor Plan on a Mac for Free?
Yes. There are several free floor plan tools available for Mac although they usually have some limitations.
Free versions often:
- restrict exports
- limit project size
- include watermarks
- reduce access to furniture libraries
- prevent you from saving your work
However, they’re still perfectly fine for:
- basic room layouts
- home projects
- learning how floor planning software works
Some popular floor planners with limited free usage include:
If you want more advanced tools or professional features, paid software is usually worth the upgrade.
You can compare both free and paid options in our guide to the best floor plan software for Mac.
Can You Draw a Floor Plan Without Floor Planning Software?
Technically yes, but it’s much harder.
Some people try using:
- Pages
- Keynote
- Graphic design software such as Adobe Illustrator and Photoshop
However, these apps are not designed for architectural layouts and usually lack:
- accurate scaling
- measurement tools
- room templates
- furniture libraries
For anything beyond a very basic sketch, dedicated floor plan software is much faster and more accurate.
Best Floor Plan Software for Mac (Quick Picks)
Here are some of the best tools for drawing floor plans on a Mac:
SmartDraw
Excellent a for business, office and technical floor plans.
Live Home 3D
One of the easiest Mac-native floor planning apps with both 2D and 3D design modes.
Planner 5D
Beginner-friendly and ideal for home renovation projects.
RoomSketcher
Excellent for creating professional-looking floor plans quickly.
SketchUp
More advanced but powerful for architectural and interior design work.
For a full comparison of features, pricing and ease of use, check out our complete guide to the best software for designing floorplans on Mac.
Summary
Drawing a floor plan on a Mac is now much easier than it used to be thanks to modern floor planning apps designed specifically for beginners and professionals alike.
For most users, the easiest approach is to use dedicated floor planning software that includes templates, drag-and-drop tools and built-in measurements.
Whether you’re redesigning a room, planning a renovation or creating a professional architectural layout, the right software can save a huge amount of time.