It is still possible to install Windows 11 on a Mac with Boot Camp in 2026, but only if you have an Intel-based Mac.
There are also two important limitations you need to be aware of:
Boot Camp does not work on Apple Silicon Macs with M-series chips.
Neither Apple nor Microsoft officially supports using Windows 11 with Boot Camp.
Apple’s official Boot Camp instructions only cover Windows 10. Windows 11 requires TPM 2.0, Secure Boot capability and a supported processor, and Boot Camp does not present a compatible TPM 2.0 device to Windows.
This means you must bypass Microsoft’s hardware checks to install Windows 11 on an Intel Mac.
Install Windows 11 directly through Boot Camp. This produces a clean installation but requires Registry Editor modifications during Windows Setup and does not work consistently on every Intel Mac.
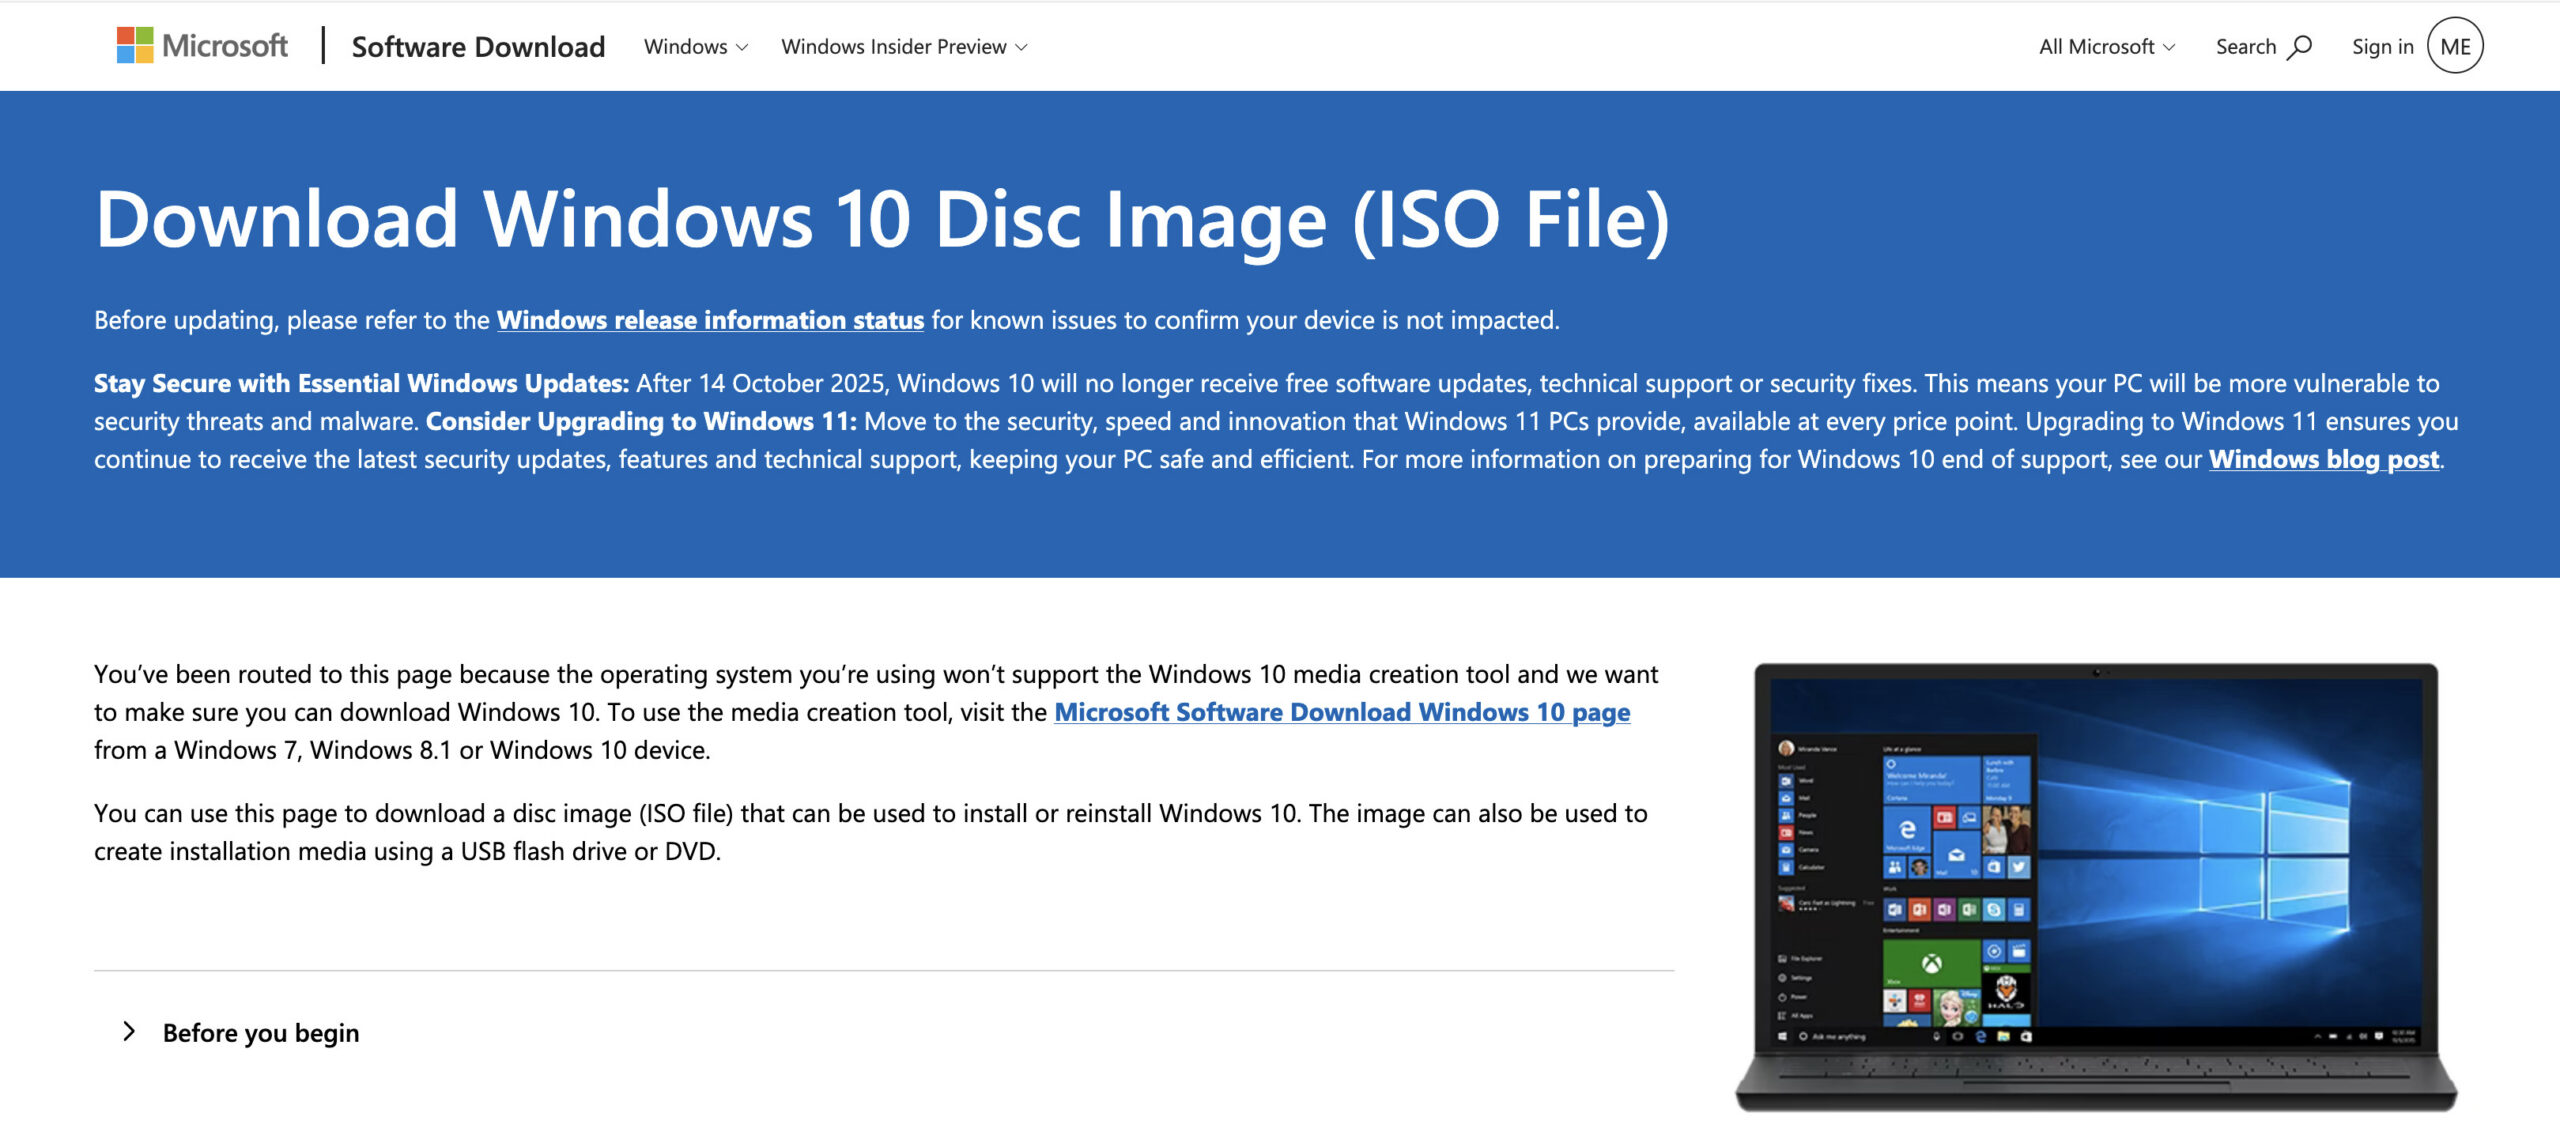
Both methods use an official Windows ISO downloaded directly from Microsoft. You should never download a pre-modified Windows ISO from an unknown website.
Important: Whichever method you use, the resulting Windows 11 installation is unsupported. Microsoft warns that computers which do not meet the requirements are not guaranteed to receive updates, including security updates.
No. Boot Camp officially supports Windows 10, not Windows 11.
This is still the case even on later Intel Macs that are powerful enough to run Windows 11 comfortably.
Microsoft’s minimum Windows 11 requirements include:
A compatible 64-bit processor
At least 4GB of RAM
At least 64GB of storage
UEFI firmware with Secure Boot capability
TPM 2.0
DirectX 12-compatible graphics
Some later Intel Macs have Apple’s T2 Security Chip and support Apple’s implementation of Secure Boot. However, the T2 chip is not exposed to Windows as a conventional TPM 2.0 device.
As a result, Intel Macs normally fail Microsoft’s Windows 11 compatibility check.
The workaround below bypasses this check, but it does not add TPM 2.0 to your Mac or turn the installation into an officially supported one.
Which Intel Macs Support Boot Camp?
Apple officially supports Windows 10 through Boot Camp on the following Intel Macs:
MacBook introduced from 2015 to 2017
MacBook Air introduced from 2012 to 2020, excluding the M1 model
MacBook Pro introduced from 2012 to 2020, excluding the M1 model
Mac mini introduced from 2012 to 2018
iMac introduced from 2012 to 2020
All iMac Pro models
Mac Pro introduced from 2013 to 2019
Boot Camp Assistant may be present on other Intel Macs, but these are the models included in Apple’s current support documentation.
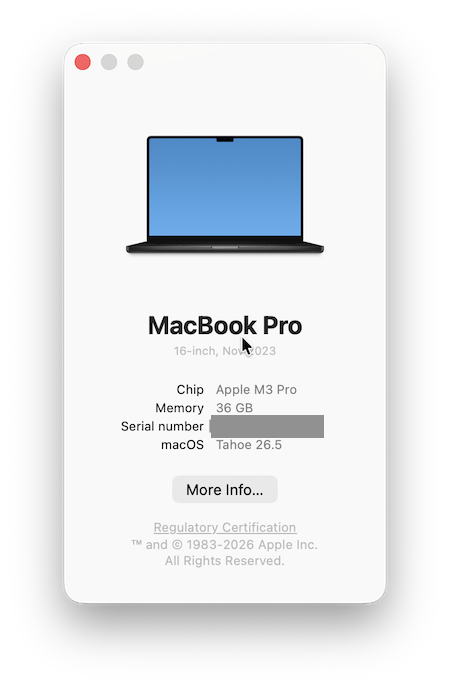
To check which Mac you have, click on the Apple logo in the top-left corner of your screen and select About This Mac.
If it says Chip: Apple M1, M2, M3, M4 or M5, you cannot use Boot Camp. If it lists an Intel processor, you may be able to use this method.
Source: MacHow2
What You Need
Before starting, you will need:
A supported Intel Mac
At least 64GB of free storage on the internal startup disk
Preferably 128GB or more for the Windows partition
A full 64-bit Windows 10 ISO
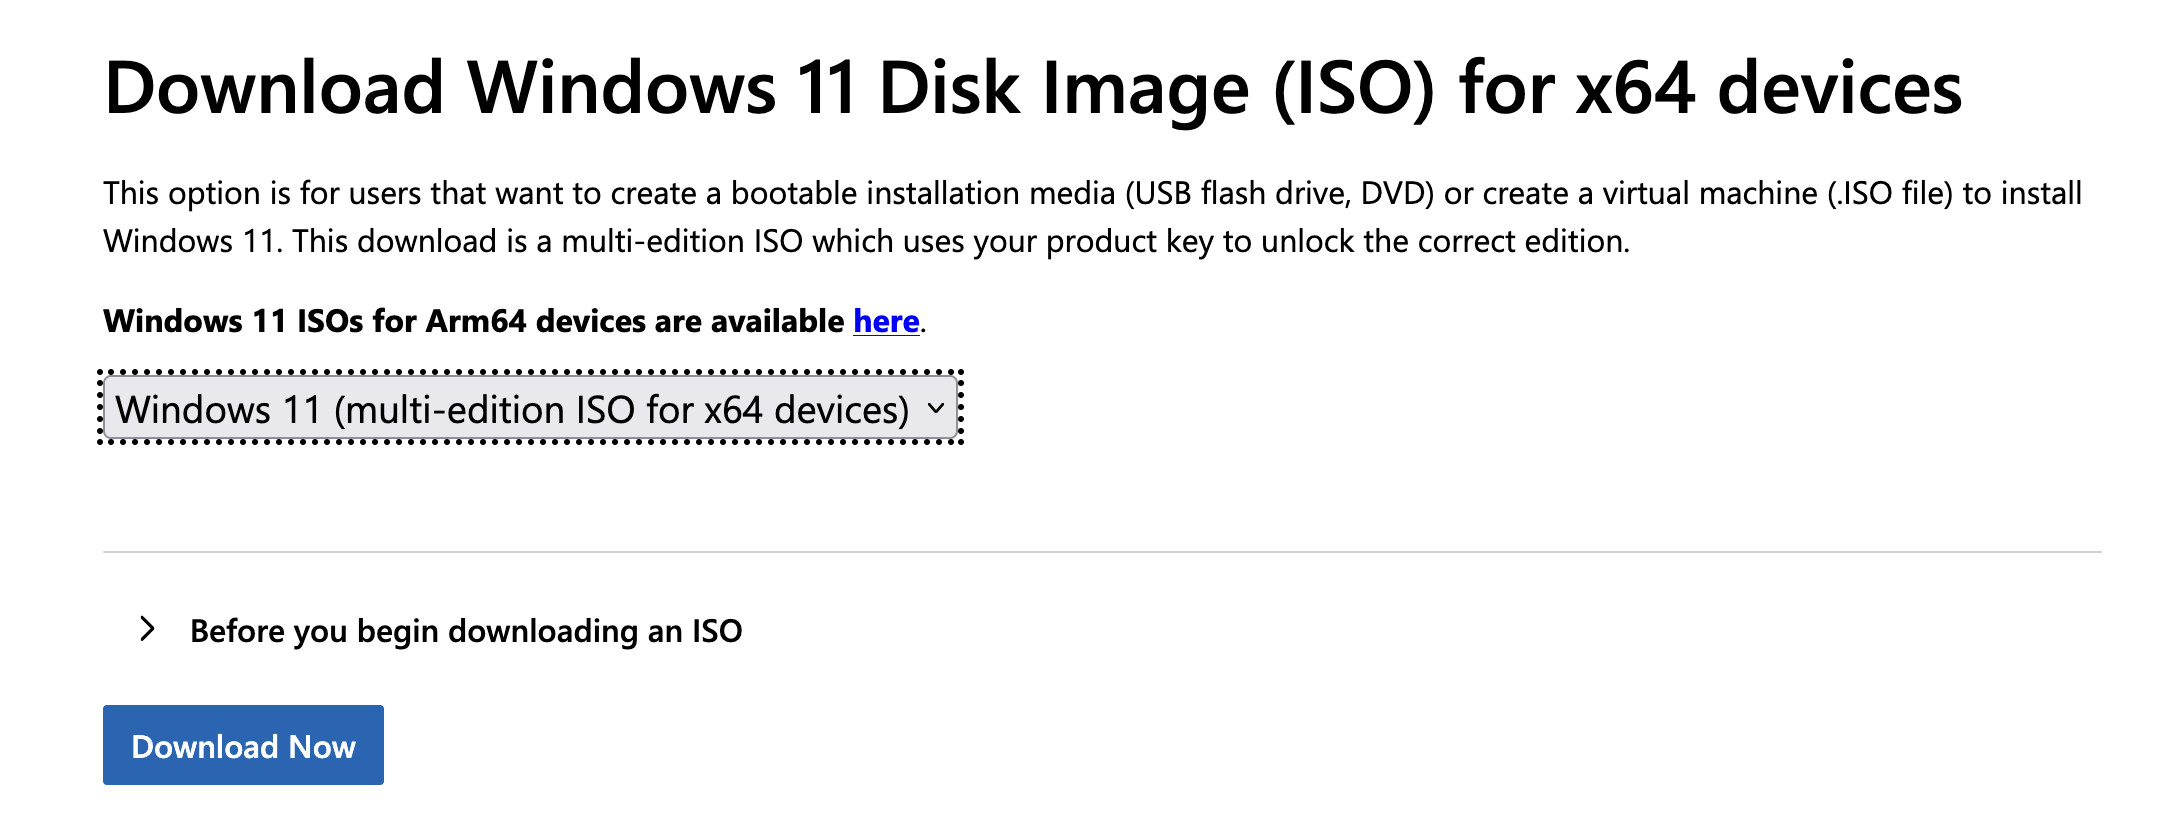
The current Windows 11 x64 ISO
A 16GB or larger USB flash drive
A valid Windows licence or digital licence
A full backup of your important files
A wired USB keyboard and mouse as a precaution
For the recommended upgrade method, you need both:
A full 64-bit Windows 10 ISO
The current Windows 11 x64 ISO
For the direct installation method, you only need the Windows 11 x64 ISO.
Although Microsoft’s minimum storage requirement is 64GB, we strongly recommend allocating at least 128GB to Windows.
Windows updates, applications and games can consume space quickly, and the Boot Camp partition cannot easily be resized afterwards. You may need to free up storage space on your Mac before continuing.
Boot Camp Assistant changes the partition structure of your internal drive. Although it is normally reliable, a failed partitioning or installation process could result in data loss.
If you already have Windows installed, separately back up your important Windows files. Do not rely on Time Machine to protect everything stored inside the Boot Camp partition.
Connect a MacBook to its power adapter before starting and leave it connected throughout the installation.
Download the Boot Camp Drivers
We recommend downloading the Windows support software before using either installation method.
Insert a blank 16GB or larger USB flash drive.
Open Disk Utility, select the physical USB drive and format it using:
Format: MS-DOS (FAT)
Scheme: Master Boot Record
Source: MacHow2
Formatting the USB drive will erase everything currently stored on it.
Next, open Boot Camp Assistant from:
Applications > Utilities > Boot Camp Assistant
From the menu bar, select:
Action > Download Windows Support Software
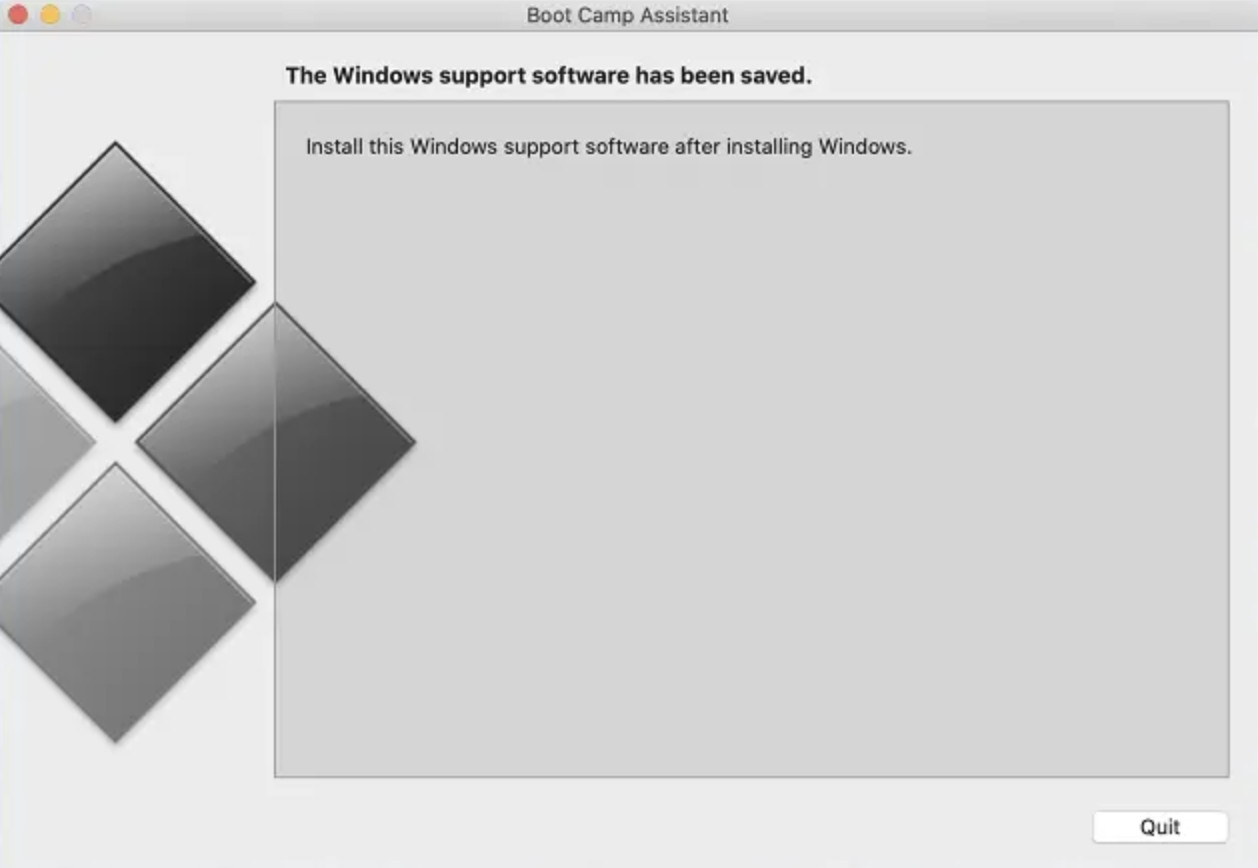
Save the support software to the USB drive.
Boot Camp should install these drivers automatically, but keeping a separate copy is useful if the keyboard, trackpad, Wi-Fi, Bluetooth or graphics drivers stop working.
Method 1: Install Windows 10 and Upgrade to Windows 11
This is our recommended method because it uses Boot Camp in the way Apple intended before upgrading the resulting Windows installation.
It takes longer, but it is usually more dependable than attempting a direct Windows 11 installation.
The process consists of two stages:
Install Windows 10 officially using Boot Camp Assistant.
Upgrade the Boot Camp installation to Windows 11 using the official Windows 11 ISO.
This takes longer than attempting a direct Windows 11 installation, but it allows Boot Camp Assistant to create the partition properly and install the correct Apple drivers first.
Apple menu > System Settings > General > Software Update
Connect a MacBook to its power adapter and disconnect any external drives you do not need.
If you have a Mac with Apple’s T2 Security Chip and previously changed its Secure Boot setting to No Security, Apple recommends changing it back to Full Security before using Boot Camp.
2. Install Windows 10 Using Boot Camp Assistant
Source: MacHow2
Download a full 64-bit Windows 10 Home or Pro ISO from Microsoft. The reason you’re downloading Windows 10 instead of Windows 11, is that Boot Camp does not support installing a Windows 11 ISO directly so you have to install Windows 10 first and then update to Windows 11 from there.
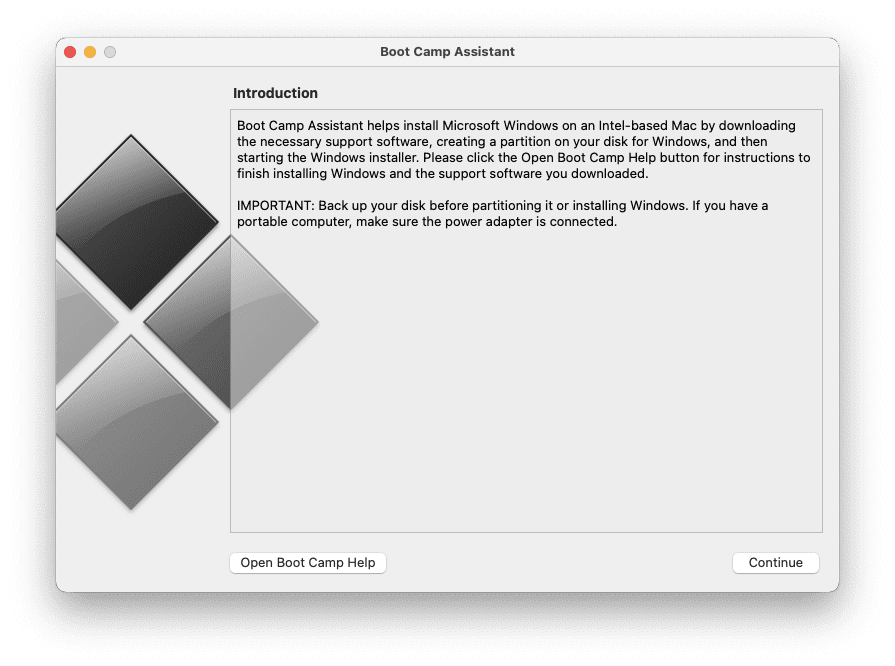
Open Boot Camp Assistant and follow the onscreen instructions.
Source: MacHow2
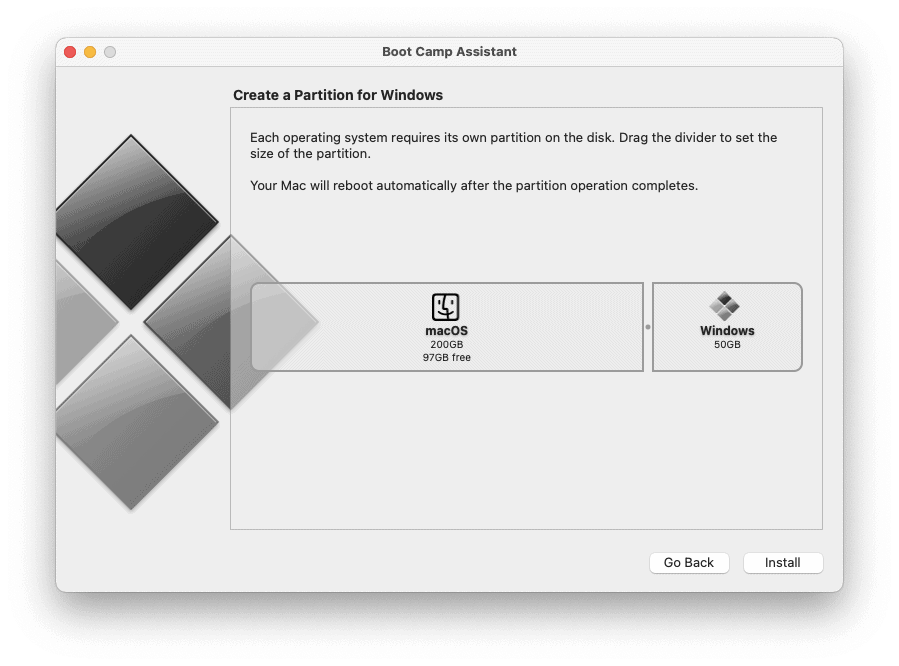
On newer Intel Macs, Boot Camp Assistant normally asks you to select the Windows 10 ISO and choose how much space to allocate to Windows.
Source: MacHow2
On some older Macs, you may also be asked to insert a USB drive so Boot Camp can create the Windows installer.
Allocate at least 64GB to Windows, although 128GB or more is strongly recommended.
Choose the partition size carefully. Boot Camp does not provide a simple way to enlarge it later.
Click Install and enter your Mac administrator password if requested.
Boot Camp Assistant will:
Create a partition named BOOTCAMP
Download the required Windows support software
Restart your Mac
Launch the Windows installer
If the Windows installer asks where Windows should be installed, select the partition named BOOTCAMP.
Do not select, delete or format any other partition.
If necessary, select the BOOTCAMP partition and click Format, followed by Next.
Windows 10 will then be installed and your Mac will restart several times.
3. Install and Update the Boot Camp Drivers
Source: MacHow2
When Windows 10 starts for the first time, the Boot Camp installer should open automatically.
Follow the instructions to install Apple’s Windows support software and restart the Mac when prompted.
Next, open Apple Software Update in Windows and install every available Boot Camp update.
You may have to check several times and restart Windows between updates before all available drivers are installed.
Also run Windows Update and install the available Windows 10 driver and system updates.
Windows 10 reached the end of its normal support period in October 2025, but at this stage it is only being used as a temporary bridge to Windows 11.
Before continuing, confirm that the following work correctly:
Keyboard
Trackpad or mouse
Wi-Fi
Bluetooth
Audio
Display brightness
Graphics
It is much easier to resolve Boot Camp driver problems before upgrading to Windows 11.
Do not download the ARM64 ISO. ARM versions of Windows are intended for Apple Silicon virtual machines and other ARM-based computers, not an Intel Boot Camp installation.
Save the ISO somewhere accessible, such as the Windows desktop or Downloads folder.
Make sure the Windows partition has at least 30–40GB of free space before attempting the upgrade.
5. Mount the Windows 11 ISO
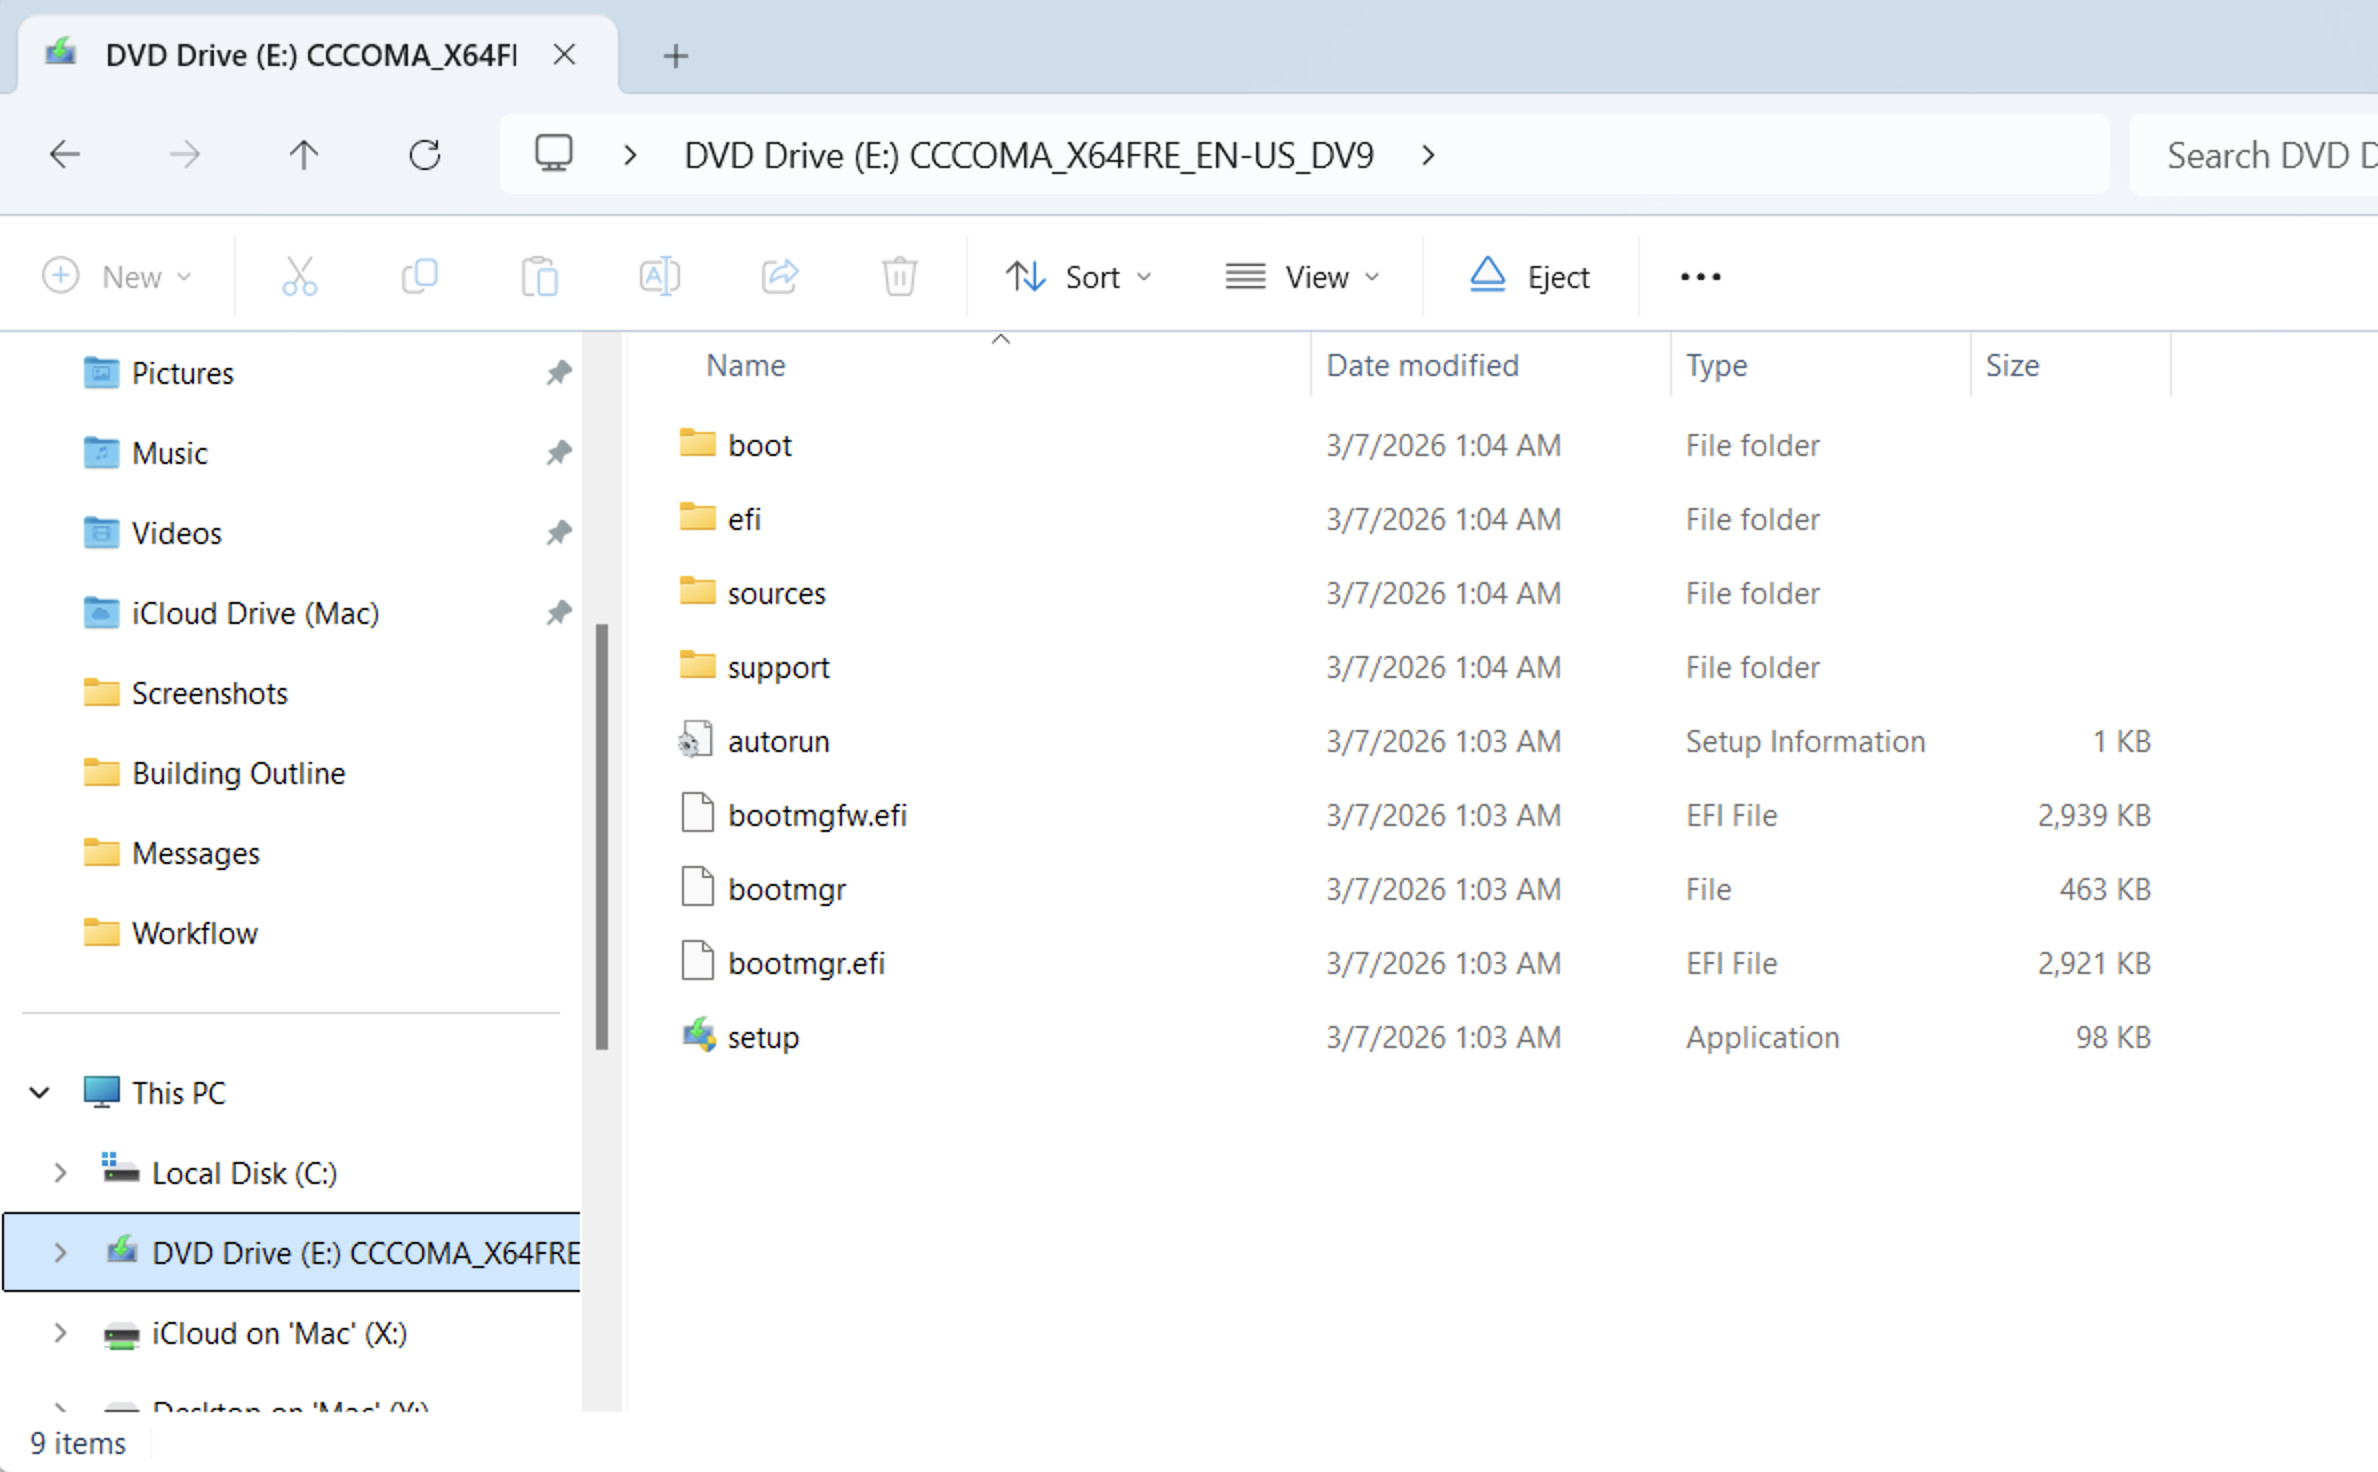
In File Explorer, double-click the Windows 11 ISO.
Windows will mount it as a virtual DVD drive. Open This PC and note the drive letter assigned to it, such as D: or E: – in this case its labelled as “DVD Drive (E:)”.
Source: MacHow2
The correct letter will vary depending on the drives connected to your Mac.
6. Start Windows 11 Setup With the Compatibility Bypass
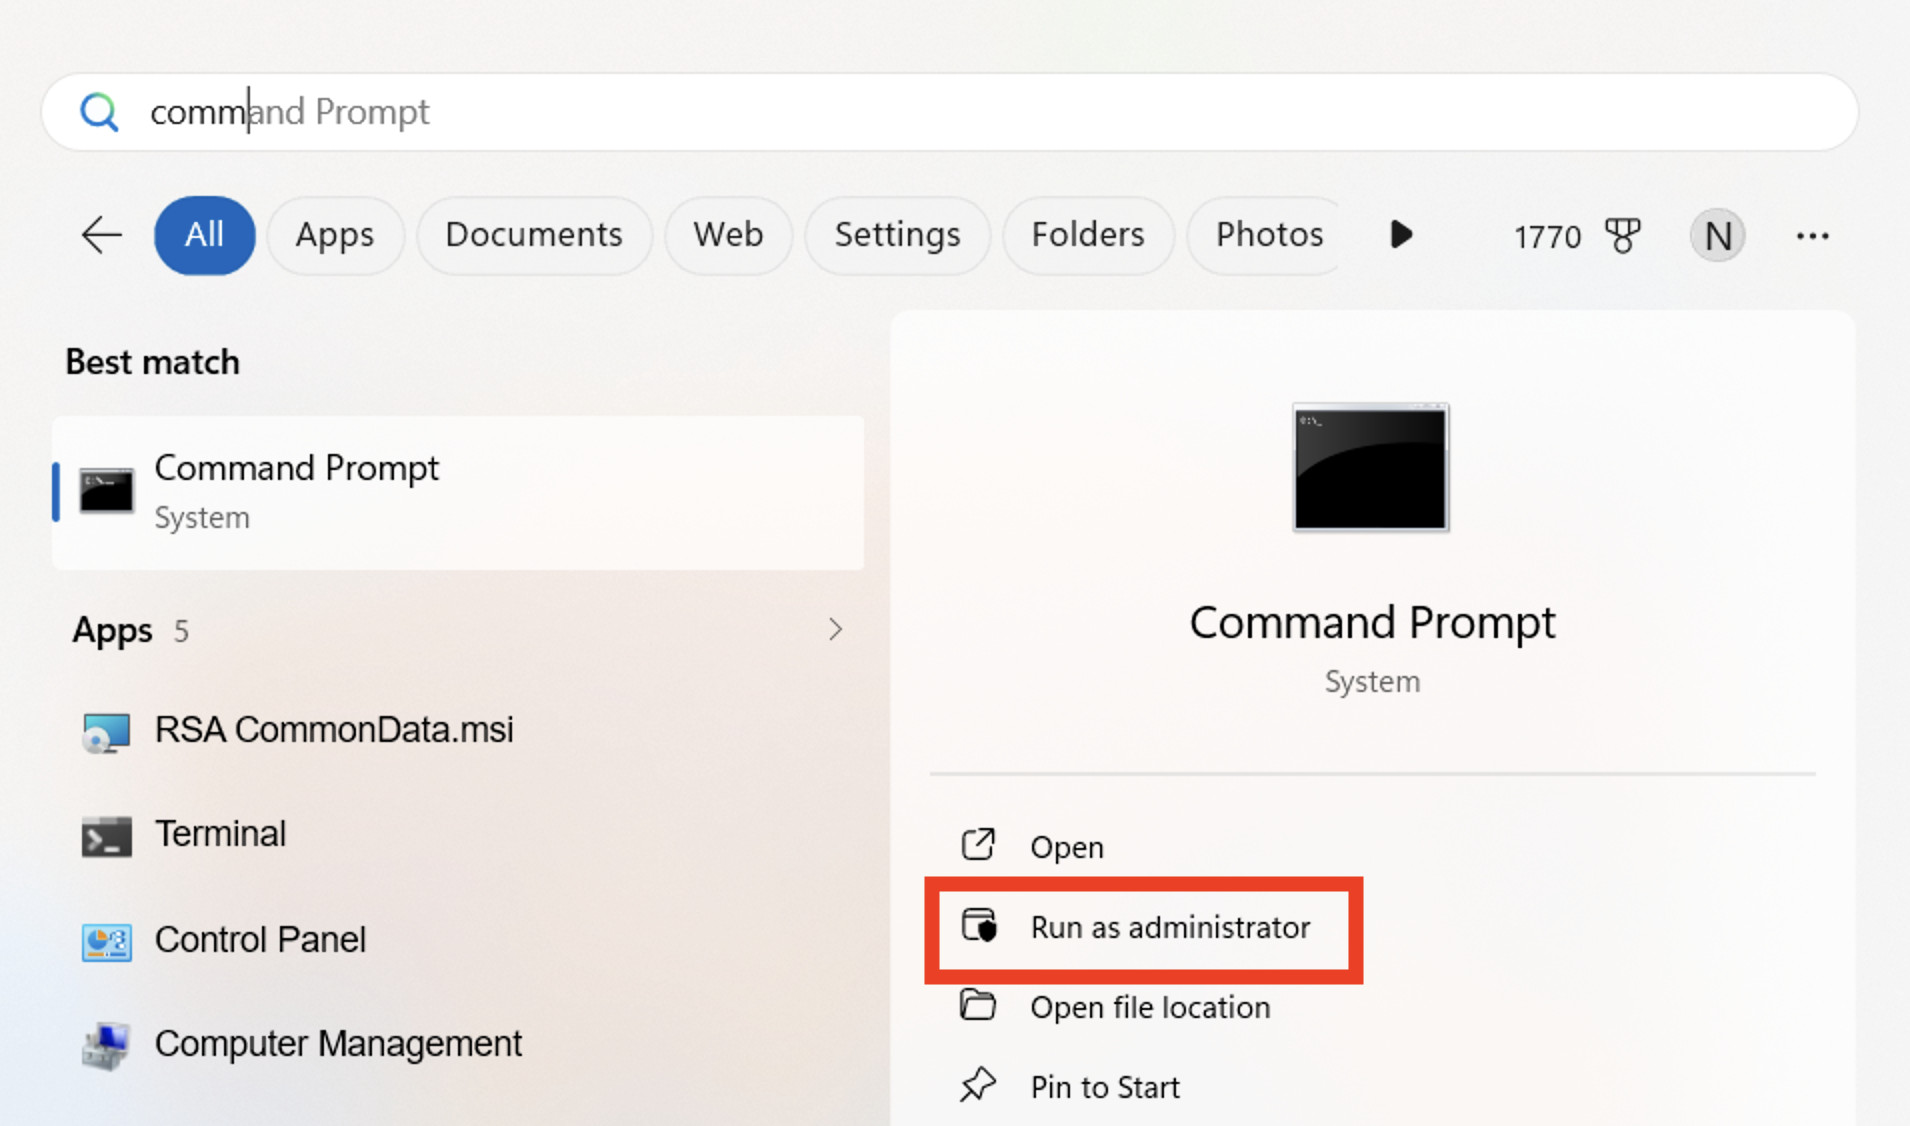
Search for Command Prompt from the Windows Start menu.
Select Run as administrator.
Source: MacHow2
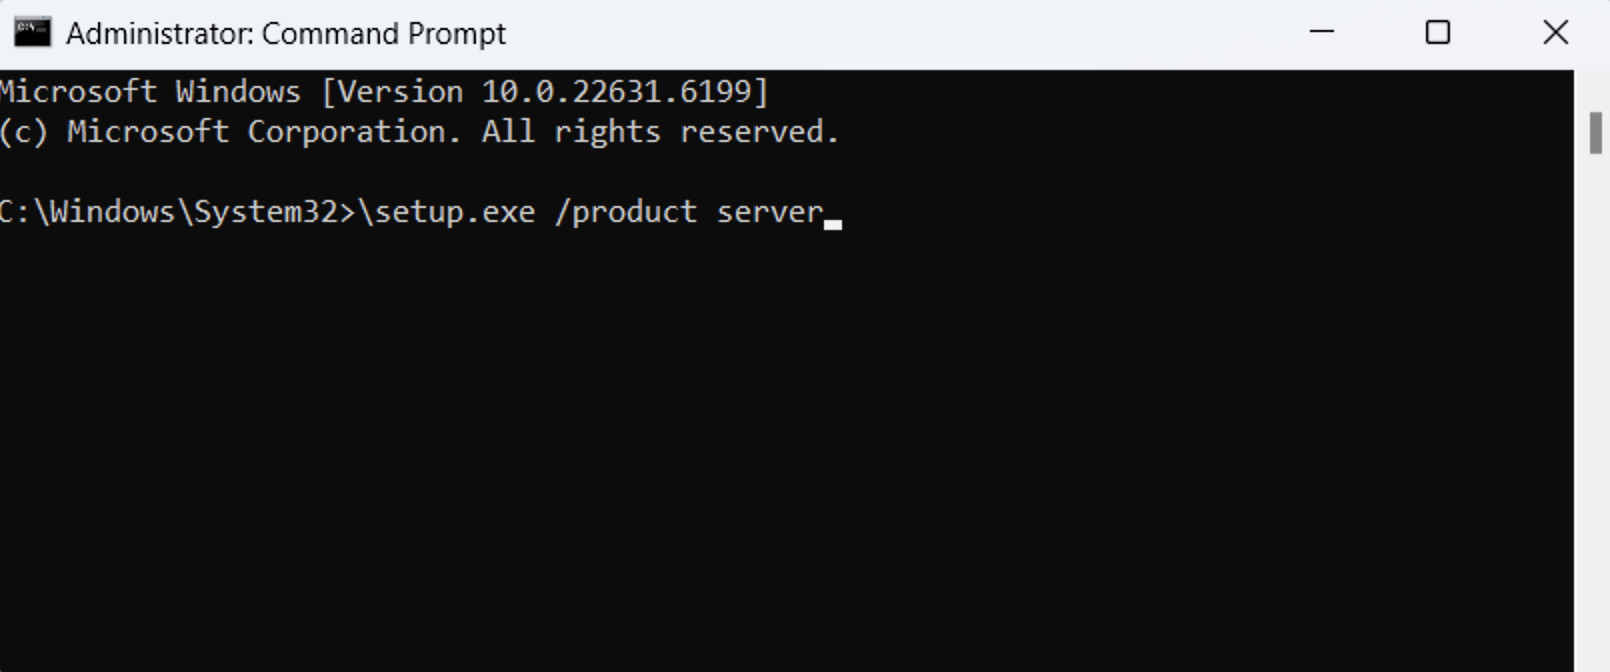
Enter the following command, replacing D: with the drive letter assigned to your mounted Windows 11 ISO:
D:\setup.exe /product server
For example, if the ISO appears as drive E, use:
E:\setup.exe /product server
Source: MacHow2
This launches a different Windows Setup path which currently bypasses the TPM, Secure Boot and supported-processor checks.
The window may say Windows Server Setup during parts of the installation. This is expected. Because you are using a Windows 11 client ISO, it will still install the corresponding Windows 11 Home or Pro edition rather than Windows Server.
This is an undocumented workaround and Microsoft could remove it from a future installer.
7. Choose What To Keep
When Windows Setup opens, click Change how Setup downloads updates and select:
Not right now
This prevents Setup from downloading a newer compatibility checker before the upgrade has started. You can install updates after Windows 11 is running.
Continue through the installer and select:
Keep personal files and apps
Check the final confirmation screen carefully before clicking Install.
If Keep personal files and apps is unavailable, cancel the installation. This can happen if:
The Windows 11 ISO uses a different language
The ISO does not match the installed Windows edition
You downloaded an ARM64 ISO instead of x64
Setup was not launched using the compatibility-bypass command
Do not continue unless the installer clearly shows what will be retained.
8. Complete the Windows 11 Installation
Source: MacHow2
Click Install and leave the Mac connected to power.
The installation will take some time and the Mac will restart several times. Do not interrupt it or hold down the Option key while the upgrade is being completed.
When it has finished, sign back into Windows.
Press Windows key + R, enter winver and press Enter to confirm the installed Windows 11 version.
9. Repair and update the Boot Camp Drivers
Some Intel MacBook models temporarily lose access to the built-in keyboard, trackpad, Wi-Fi or other hardware after a major Windows upgrade.
If this happens, connect a wired USB keyboard and mouse.
Insert the USB drive containing the Windows support software and open:
WindowsSupport > BootCamp > Setup.exe
Run the installer and select Repair if prompted.
Restart Windows and run Apple Software Update again until there are no remaining Apple or Boot Camp updates.
Finally, open:
Settings > Windows Update
Install the available Windows 11 security and driver updates.
Method 2: Install Windows 11 Directly With Boot Camp
It is also possible to perform a clean Windows 11 installation on some Intel Macs without installing Windows 10 first.
This method has been shown to work on Macs including a 2013 MacBook Pro using a current Windows 11 ISO.
However, it depends on your version of Boot Camp Assistant accepting the Windows 11 ISO and successfully creating the installer.
If Boot Camp rejects the ISO, use Method 1 instead.
Make sure you download the x64 version and not ARM64.
Save the ISO in your Mac’s Downloads folder or somewhere else that is easy to find.
2. Open Boot Camp Assistant
Source: MacHow2
Insert a blank 16GB or larger USB drive if your Mac requires one.
Open Boot Camp Assistant from:
Applications > Utilities > Boot Camp Assistant
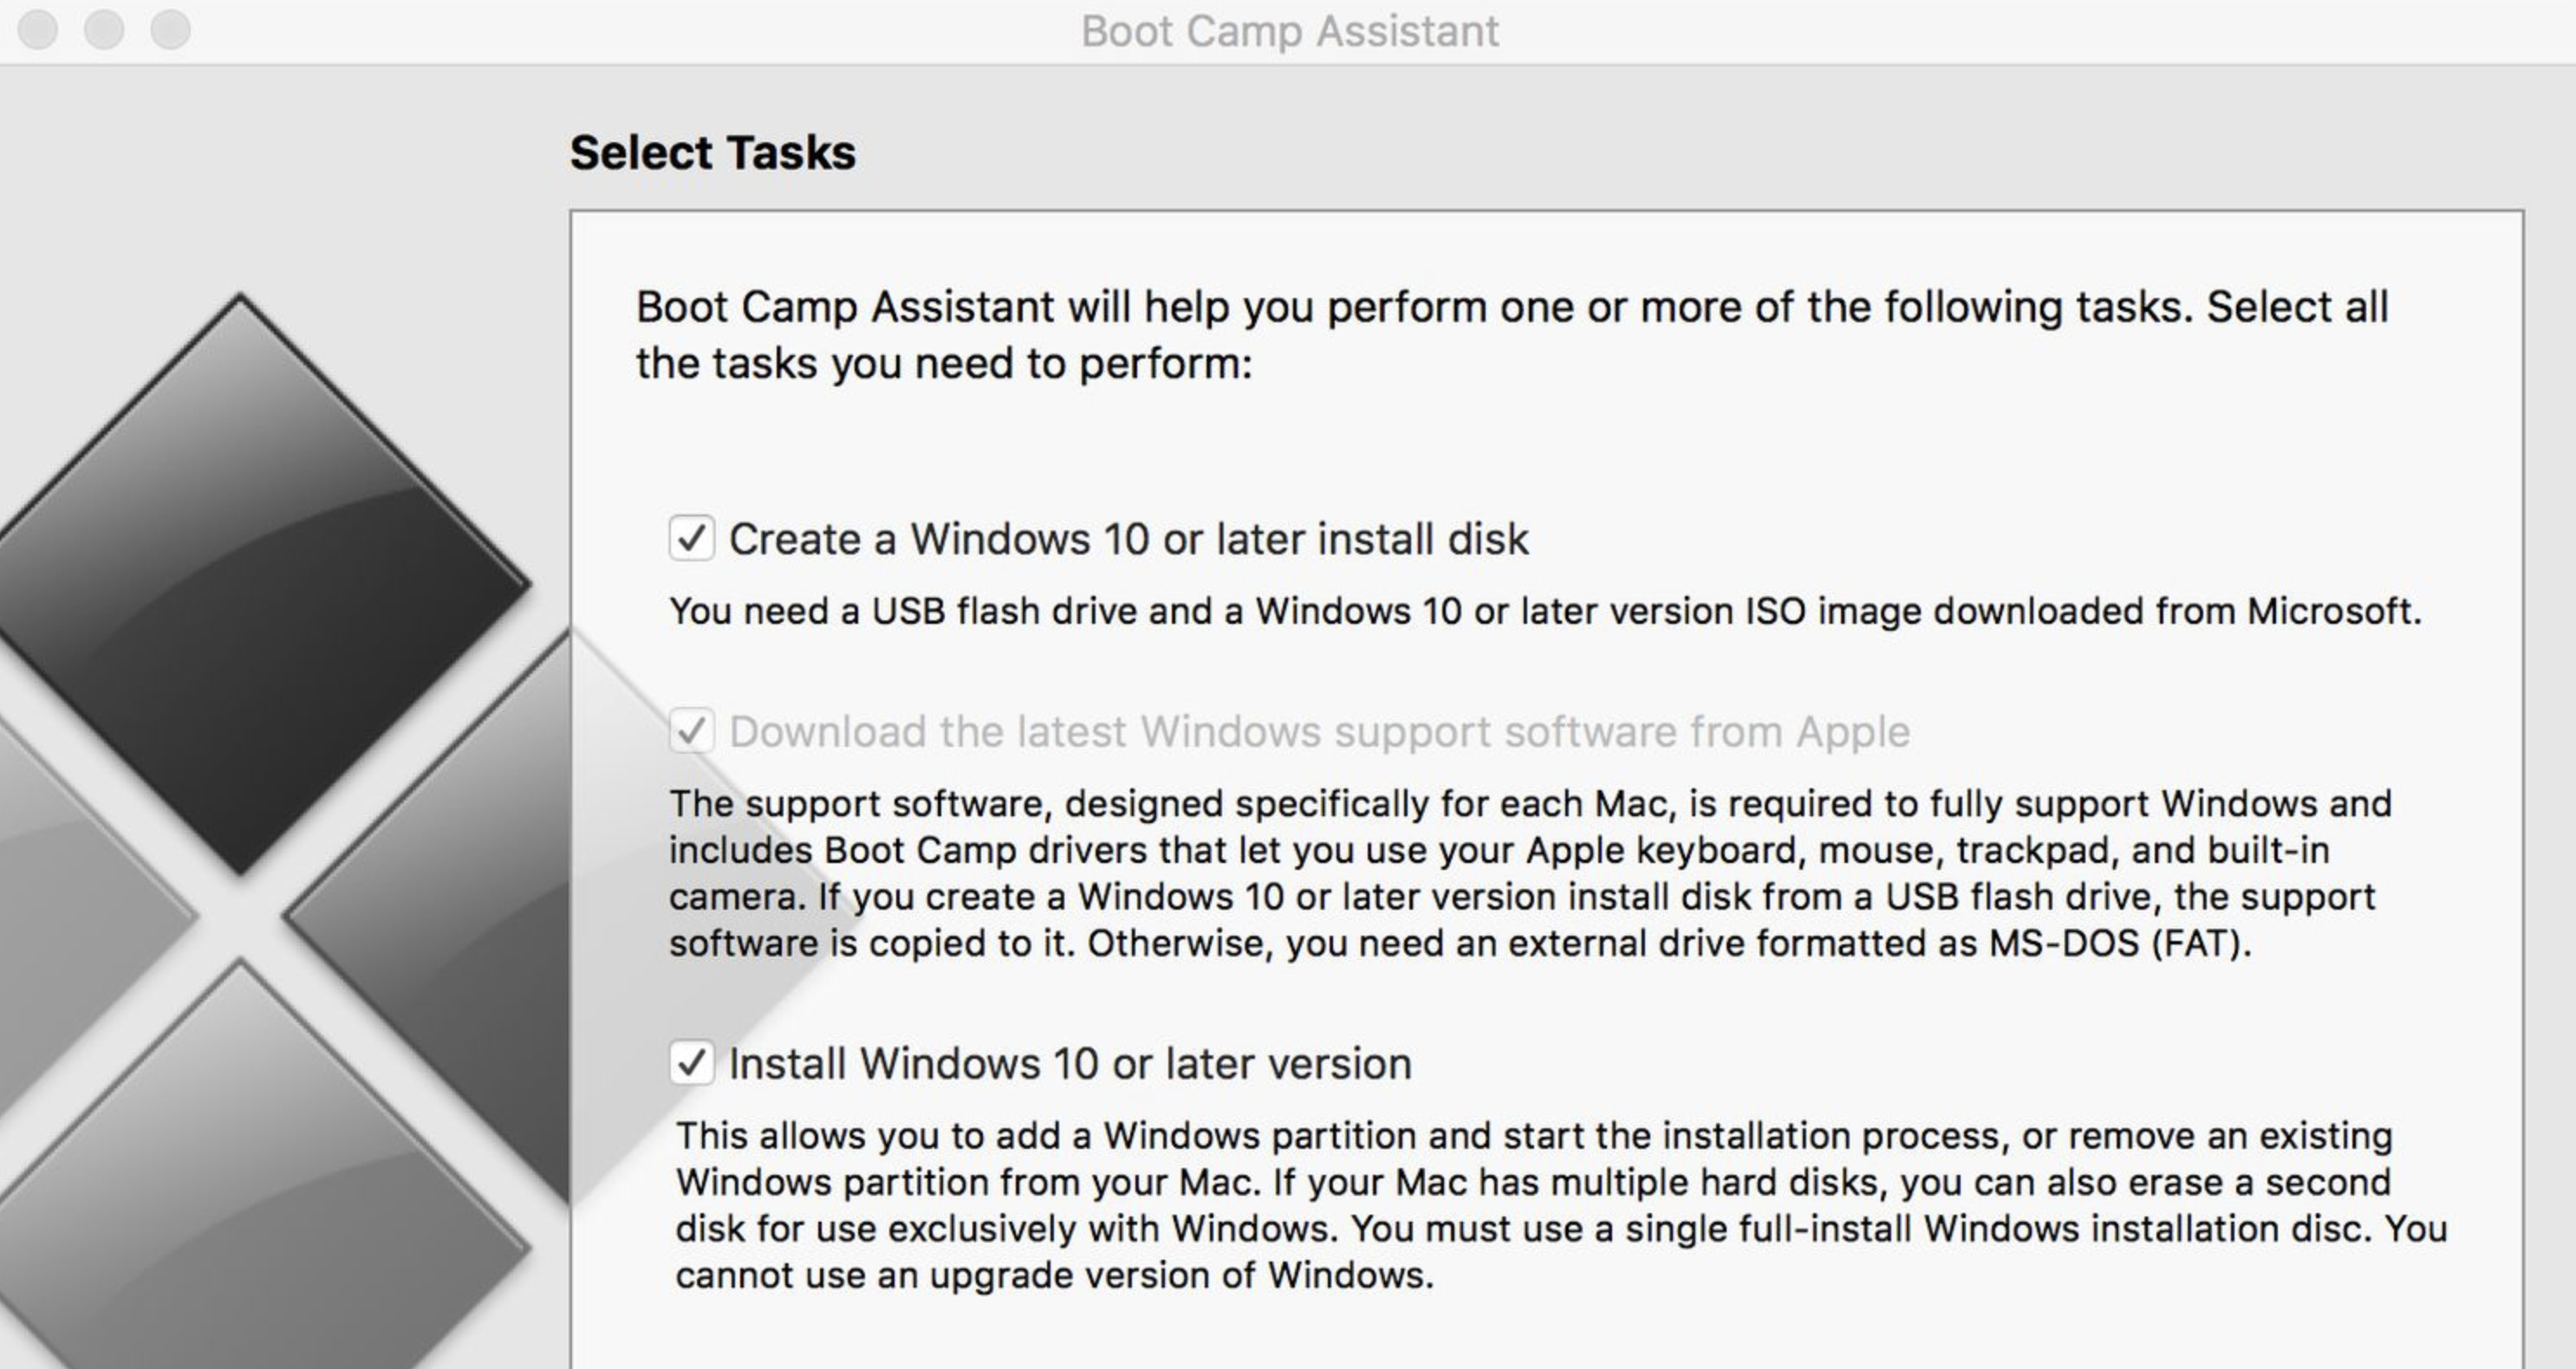
Depending on the age of your Mac, Boot Camp may display options including:
Create a Windows 10 or later install disk
Download the latest Windows support software from Apple
Install Windows 10 or later
The wording refers to Windows 10, but some versions of Boot Camp Assistant will accept the Windows 11 x64 ISO.
Leave the available options selected and click Continue.
Select the Windows 11 ISO and, if requested, select the USB drive that Boot Camp should use to create the installer.
Boot Camp will erase the USB drive, copy the Windows installer files and download the Apple support software.
3. Create the BOOTCAMP Partition
Source: MacHow2
Boot Camp Assistant will ask how much space you want to allocate to Windows.
We recommend at least 128GB if you have enough storage available although you may need much more if you intend to install lots of Windows software and especially games.
Click Install.
Boot Camp will partition the internal drive and restart your Mac.
If it does not start from the Windows installer automatically:
Restart the Mac.
Immediately hold down the Option (⌥) key.
Select the Windows installer.
4. Open Command Prompt During Setup
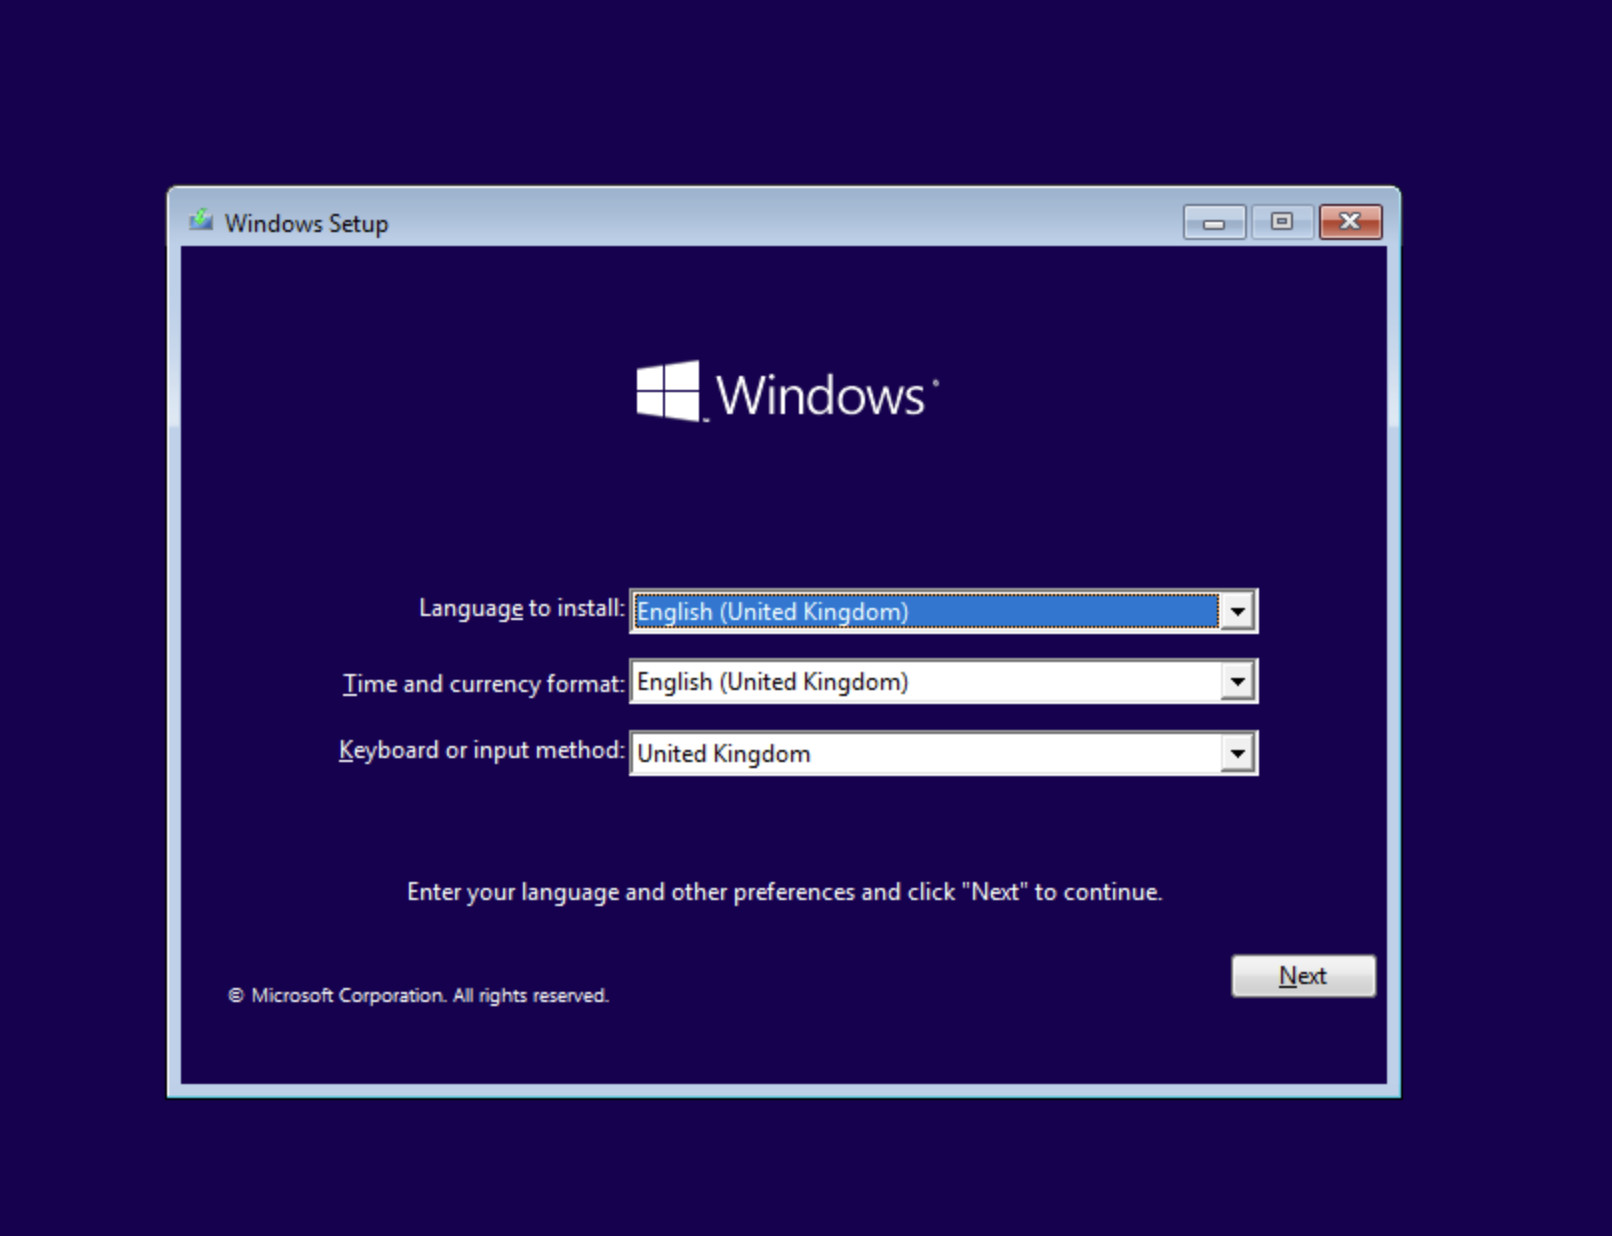
When the Windows Setup screen appears, press:
Shift + F10
On some MacBook keyboards, you may need to press:
Shift + Fn + F10
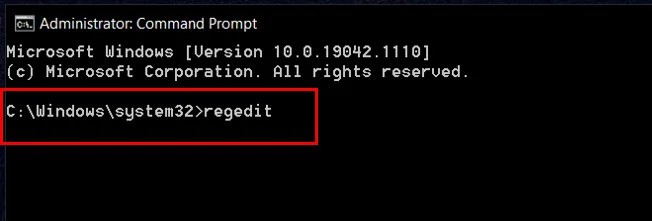
This opens Command Prompt.
Type:
regedit
Press Enter to open Registry Editor.
Source: MacHow2
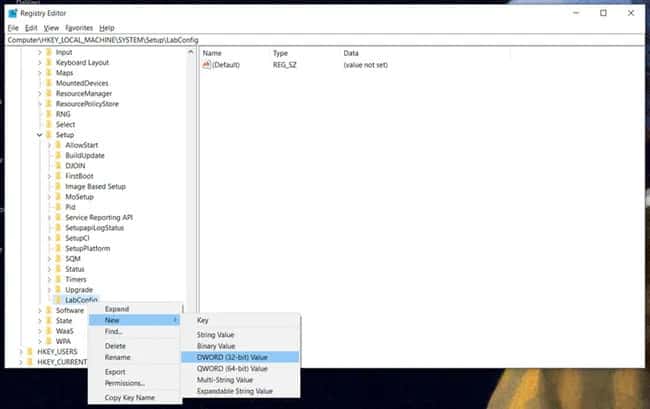
5. Create the LabConfig Registry Key
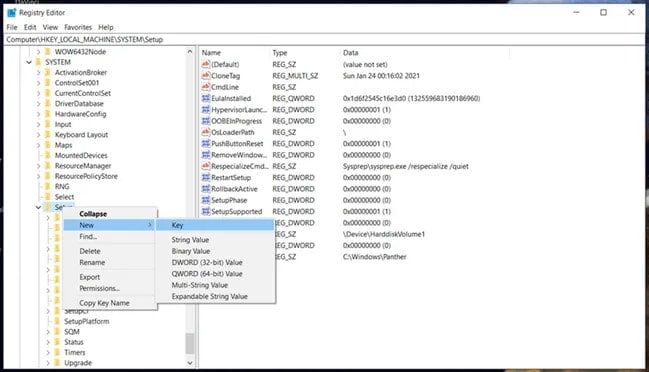
In Registry Editor, navigate to:
HKEY_LOCAL_MACHINE\SYSTEM\Setup
Right-click the Setup folder and select:
New > Key
Source: MacHow2
Name the new key:
LabConfig
Select the new LabConfig key.
Right-click in the empty area on the right and select:
New > DWORD (32-bit) Value
Name the first value:
BypassTPMCheck
Double-click it and change its value from 0 to:
1
Create a second DWORD value called:
BypassSecureBootCheck
Double-click it and set its value to:
1
You should now have:
BypassTPMCheck with a value of 1
BypassSecureBootCheck with a value of 1
There is normally no need to create BypassRAMCheck because supported Boot Camp Macs should already meet Windows 11’s 4GB minimum.
Close Registry Editor and Command Prompt.
6. Install Windows 11
Continue through Windows Setup.
If asked for a product key, enter it or select I don’t have a product key and activate Windows later.
Select the edition covered by your licence, such as Windows 11 Home or Windows 11 Pro.
When asked where to install Windows, select the partition named:
BOOTCAMP
Do not select, delete or format any other partition.
If Windows Setup cannot use the partition, select BOOTCAMP and click Format.
Confirm that BOOTCAMP remains selected and click Next.
Windows 11 will copy its files and restart the Mac several times.
7. Complete the Windows Setup
Source: MacHow2
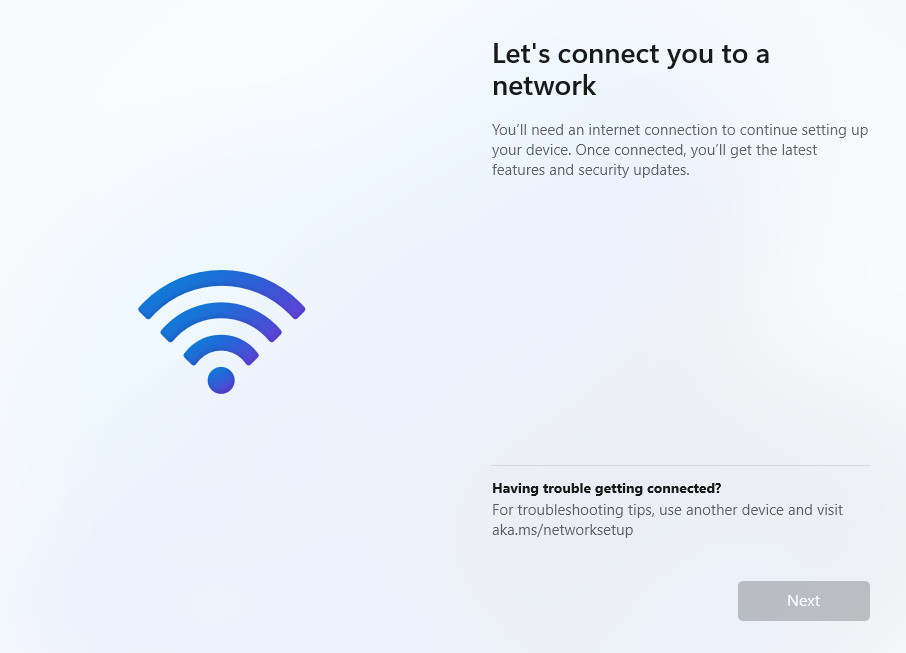
During the initial setup, Windows 11 may display the “Let’s connect you to a network” screen.
Your Mac’s Wi-Fi may not work yet because the Boot Camp drivers have not been installed.
First, try pressing Shift + F10 to open Command Prompt. On some MacBook keyboards, you may need to press Shift + Fn + F10 instead.
Enter the following command and press Return:
OOBE\BYPASSNRO
If the command works, Windows will restart and display an I don’t have internet option. Select this, followed by Continue with limited setup, to finish installing Windows without an internet connection.
However, Microsoft has removed the OOBE\BYPASSNRO command from newer Windows 11 installers, so you may receive an error stating that the command cannot be found.
If this happens, the easiest solution is to connect the Mac temporarily using Ethernet. Most modern MacBooks do not have an Ethernet port, so you will need a compatible USB, USB-C or Thunderbolt-to-Ethernet adapter that Windows can recognise without an additional driver.
Alternatively, if you downloaded the Boot Camp support software to a USB drive before starting, you can try installing its network drivers manually.
Press Shift + F10 again and enter the following command, replacing D: with the drive letter of the USB drive:
Once the drivers have installed, close Command Prompt and check whether Wi-Fi is now available. Connect to the internet and complete the remaining Windows setup steps.
8. Install the Boot Camp Drivers
When the Windows 11 desktop appears, the Boot Camp driver installer may start automatically.
Follow the instructions and restart Windows when prompted.
If the installer does not appear, insert the USB drive containing the Windows support software and open:
WindowsSupport > BootCamp > Setup.exe
Install the drivers and restart the Mac.
Open Apple Software Update and install all available Boot Camp updates.
Finally, run Windows Update repeatedly until no further Windows or driver updates are available.
What If Boot Camp Rejects the Windows 11 ISO?
Not every version of Boot Camp Assistant accepts a Windows 11 ISO.
You may receive an error stating that Boot Camp requires a 64-bit Windows 10 installation image or that it cannot create the installer.
In this situation, do not download a modified ISO from another website.
Use Method 1 instead:
Install Windows 10 through Boot Camp.
Allow Boot Camp to install all the Apple drivers.
Mount the official Windows 11 ISO in Windows.
Launch it using the product server command.
This is the more dependable route across different Intel Macs.
Other Windows 11 Boot Camp Methods
There are several other methods discussed online.
A widely shared Reddit Windows 11 Boot Camp guide installs Windows 10 first and then uses the open-source MediaCreationTool.bat script to perform the upgrade automatically.
This method can work, but we prefer using Microsoft’s official ISO and the product server command because it avoids running a third-party script with administrator privileges.
Other methods include:
Creating modified Windows 11 media with Rufus
Replacing install.wim in a Windows 10 installer with the Windows 11 version
Splitting large WIM files to work around FAT32 file-size limits
Creating an unattended installation file
Downloading pre-modified Windows ISOs
The Rufus and install.wim methods can work, but they are more complicated and usually require access to another Windows installation.
We strongly advise against downloading pre-modified Windows ISOs because you cannot easily verify what else has been changed or added.
Windows 11 Updates on an Unsupported Mac
A successful installation does not guarantee that every future update will install.
In our experience, unsupported Windows 11 installations often continue receiving monthly security and quality updates. However, Microsoft explicitly states that unsupported devices are not guaranteed to receive updates.
The more common problem is upgrading from one major Windows 11 release to another.
For example, Windows Update may install monthly 25H2 patches but refuse a future feature release because the Mac still fails the TPM and processor checks.
If that happens, you may need to download the latest x64 ISO and repeat the setup.exe /product server method.
There is no guarantee that this workaround will remain available indefinitely.
How To Switch Between Windows and macOS
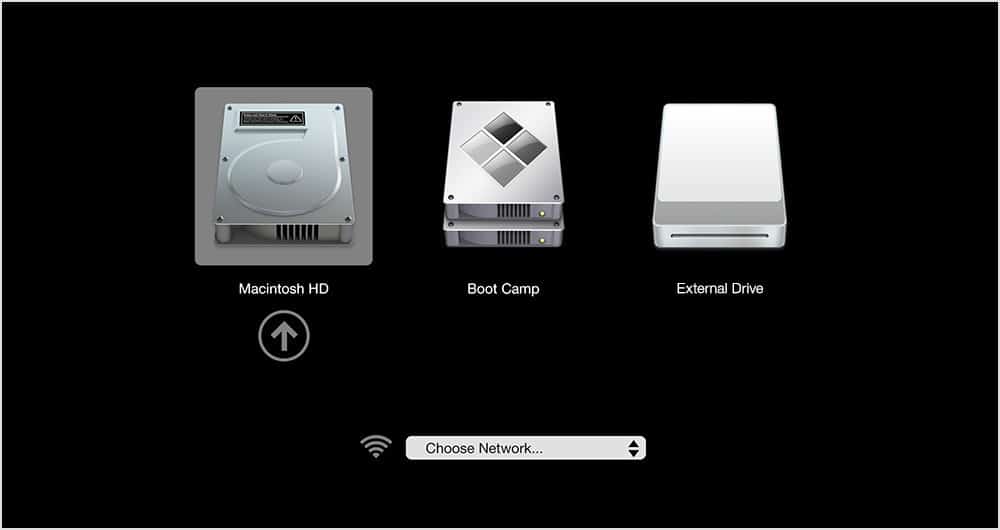
To choose an operating system when starting your Mac:
Shut down the Mac completely.
Press the power button.
Immediately hold down the Option (⌥) key.
Select either macOS or Windows.
Source: MacHow2
If you are using a Windows keyboard, the Option key is usually labelled Alt.
You can also select the default operating system using Startup Disk in macOS or the Boot Camp Control Panel in Windows.
Is Boot Camp Better Than a Virtual Machine?
Boot Camp can provide better raw graphics performance because Windows runs directly on the Intel Mac rather than inside macOS.
This can still make Boot Camp useful for:
Older Windows games
Graphics-intensive Windows software
Applications that do not work correctly in a virtual machine
Hardware that requires direct Windows access
However, Boot Camp also has significant disadvantages:
It only works on Intel Macs
Windows 11 is unsupported
You must restart to switch operating systems
The Windows partition has a fixed size
Apple’s Boot Camp drivers receive limited development
Major Windows updates may fail
Some newer games require TPM 2.0 and Secure Boot
Most remaining Intel Macs now have ageing graphics hardware
Bypassing the Windows installer’s checks does not provide the missing TPM or Secure Boot functionality. Software or anti-cheat systems that actively require those features may still refuse to run.
For most people, the convenience and reliability of a Windows virtual machine on a Mac outweigh Boot Camp’s potential performance advantage.
Troubleshooting Windows 11 With Boot Camp
“This PC Can’t Run Windows 11”
If you are performing the direct installation, check that both of these Registry values exist under the LabConfig key and are set to 1:
BypassTPMCheck
BypassSecureBootCheck
If you are upgrading Windows 10, make sure you launched Setup from an administrator Command Prompt using:
D:\setup.exe /product server
Replace D with the actual drive letter of the mounted Windows 11 ISO.
Shift + F10 Does Not Open Command Prompt
On some MacBook keyboards, the F-keys control hardware functions by default.
Try:
Shift + Fn + F10
A wired Windows keyboard can also make this part of the installation easier.
Windows Server Setup Appears
This is normal when using the product server parameter.
The installer may display Windows Server wording during Setup, but the Windows 11 client ISO determines which operating system is installed.
Check the final confirmation screen before proceeding.
“Keep Personal Files and Apps” Is Unavailable
Cancel the upgrade and check:
The ISO language matches the Windows installation
You downloaded the x64 ISO
The ISO contains the correct Windows edition
Setup was launched with the correct command
Do not proceed if the installer is going to remove files or applications you intended to keep.
Keyboard or Trackpad Does Not Work
Connect a wired USB keyboard and mouse.
Run Setup.exe from the WindowsSupport or BootCamp folder on the USB drive and select Repair if prompted.
Wi-Fi or Bluetooth Is Missing
This usually means the Apple hardware drivers have not been installed correctly.
Reinstall the Boot Camp support software and then run Apple Software Update in Windows.
Windows 11 Feature Updates Fail
Because the Mac is unsupported, major feature updates may not arrive through Windows Update.
Download the latest official Windows 11 x64 ISO and attempt an in-place upgrade using the same product server method.
Back up your Windows files before every major upgrade.
A Game Says TPM 2.0 or Secure Boot Is Required
The installation workarounds only bypass the Windows Setup checks. They do not add TPM 2.0 or Windows-compatible Secure Boot to the Mac.
Games and anti-cheat systems that check for these features independently may still refuse to run.
How To Remove Windows From Your Mac
Start the Mac in macOS and open Boot Camp Assistant.
Select the option to remove Windows or restore the disk to a single macOS partition.
Do not remove the BOOTCAMP partition manually using Disk Utility. Apple recommends using Boot Camp Assistant so that the disk structure is restored correctly.
Is Installing Windows 11 With Boot Camp Worth It?
Boot Camp is no longer the best way to run Windows for most Mac users.
It remains useful in one specific situation: you already own an Intel Mac and need Windows to run natively for the best possible graphics or hardware performance.
For experimenting, playing older games or extending the useful life of an Intel Mac, either of the methods in this guide can still be worthwhile.
We recommend installing Windows 10 first and upgrading it because this is the most dependable way to ensure the Boot Camp partition and Apple drivers are configured correctly.
The direct Registry Editor method is a useful alternative if Boot Camp Assistant accepts the Windows 11 ISO and you specifically want a clean installation.
Can You Install Windows 11 Directly With Boot Camp?
Yes, on some Intel Macs.
Boot Camp Assistant may accept the official Windows 11 x64 ISO and create a working installer. You must then bypass the TPM and Secure Boot checks using Registry Editor.
This is not consistent across every Intel Mac or Boot Camp version, which is why we recommend installing Windows 10 first and upgrading it.
Is Windows 11 With Boot Camp Officially Supported?
No. Apple only provides official Boot Camp instructions and drivers for Windows 10.
Microsoft also considers Windows 11 installations on computers that do not meet the requirements unsupported.
Does This Work on a Touch Bar MacBook Pro?
Yes. The Touch Bar does not prevent Windows 11 from being installed.
The important requirement is that the Mac has an Intel processor. Touch Bar functions may depend on the Boot Camp drivers working correctly.
Do I Need a USB Drive?
Not every Intel Mac requires a USB drive to install Windows. Many later models install directly from the ISO.
However, we recommend keeping the Windows support software on a 16GB or larger USB drive in case the keyboard, trackpad, Wi-Fi or other hardware stops working.
Is Windows 11 Free With Boot Camp?
Boot Camp Assistant is included with macOS and does not cost anything.
You can install Windows without immediately entering a product key, but you still need a valid Windows licence to activate it and use it in accordance with Microsoft’s terms.
Can I Install Windows 11 on an External Drive?
Boot Camp Assistant installs Windows on the Mac’s internal startup disk.
Windows 10 continues to work, but normal support ended on October 14, 2025.
Microsoft allows eligible Windows 10 22H2 computers to enrol in its Extended Security Updates programme. This is a temporary solution rather than a long-term alternative to moving to a supported operating system.
Will Windows 11 Receive Updates on a Boot Camp Mac?
It may receive monthly security and quality updates, but Microsoft does not guarantee updates for unsupported computers.
Major feature releases are more likely to be blocked and may require another manual ISO upgrade.