
For as long as I can remember, Parallels has been the software I’ve used the most to run Windows on a Mac.
Although nowadays it faces stiff competition from the free version of VMware Fusion, I still think that Parallels is the more polished product when it comes to comparing Parallels vs Vmware Fusion.
Parallels is also still the only solution officially authorized by Microsoft to run Windows 11 on a Mac, which isn’t an honor the company has granted to other emulators or virtual machines.
The latest version of Parallels 26 (which jumped from version 20 to fit in with Apple’s new numbering system for macOS) has also been fully optimized to make it faster and easier than ever to run Windows on the latest versions of macOS including macOS Tahoe.
In this review, I put it through its paces to see how it performs.
Contents
Parallels Pricing
First, the business side of things.
Note that for a limited period, the prices quoted below are up to 45% off.
Parallels offers 4 different subscription versions plus a one time purchase version.
- Standard ($99.99/£89.99 per year)
The Standard version is aimed at general and home users that want to run Windows only apps and games on their Mac. There’s also a one time purchase option of $219.99/£154.99 for the Standard Edition only but this is only valid for one year, doesn’t include free updates and may not work with future versions of macOS. I don’t recommend this option as you’ll have to pay almost the same again to upgrade it eventually so that it supports the latest version of macOS and get any new features that are added.
- Desktop Pro ($119.99/£104.99 per year)
The Pro version of Parallels is aimed at developers of apps and games that need debugging tools such as support for Microsoft Visual Studio and AI virtual machines.
- Desktop Business ($149.99/£119.99 per year)
The Business Version of Parallels is aimed at large enterprises that need to manage multiple licenses of Parallels in an office environment.
- Student & Educator Edition for $79.99 (£49.99 per year)
All plans include free updates to the product as long as you maintain a subscription.
If you buy any version direct from Parallels, there’s also a 30 day money back guarantee although this doesn’t apply if you buy it from another retailer.
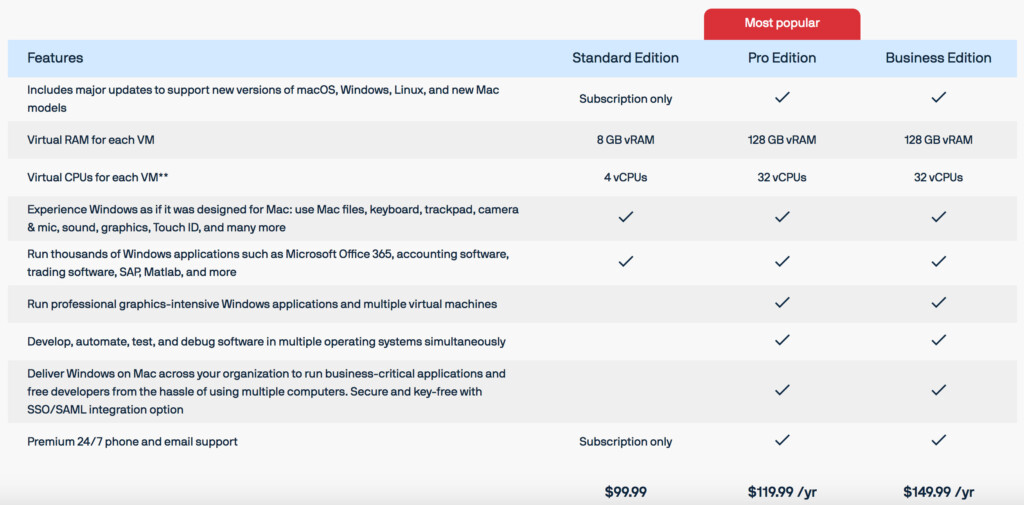
You can see how the Standard, Pro and Business Editions differ below.
As an incentive to go for the subscription model, Parallels are also offering Parallels Toolbox and for free with new subscription purchases of Parallels
Parallels Toolbox offers some useful utilities to smooth integration between Windows and macOS (such as file sharing, drag and dropping, printer sharing etc).
Note that you also used to get Parallels Access included but this product, which allowed you to access Macs and Windows PCs from iOS and Android devices, has been discontinued by Parallels.
Parallels also offers a 50% discount to students and teachers.
You can try a free 14 day trial of Parallels to test it for yourself first.
Parallels System Requirements
Hardware
- A Mac computer with an Intel Core 2 Duo, Core i3, Core i5, Core i7, Core i9, Intel Core M , Xeon processor or M1/M2/M3/M4 chip
- Minimum 4 GB of memory, 16 GB is recommended (although I ran it with 8 GB and wouldn’t want run it with less)
- 600 MB for Parallels Desktop application installation
- Additional disk space for the guest operating system (at least 16 GB is required for Windows 11)
- SSD drive is recommended for better performance
- Internet connection for product activation and select features
Software
Parallels recommends using at least one of the last 3 versions of macOS for optimal performance but it works on all of the following versions of macOS. Note that macOS High Sierra 10.13 is not supported anymore.
- macOS 26 Tahoe
- macOS Sequoia 15.0
- macOS Sonoma 14.0
- macOS Ventura 13.0
- macOS Monterey 12.0
- macOS Big Sur 11.0
- macOS Catalina 10.15
- macOS Mojave 10.14
- DirectX 11 requires at least macOS Mojave 10.14, but works best on macOS 10.15.3 Catalina or newer.
Setting Up Parallels
The setup process for Parallels has become progressively easier over the years and its by far the most painless way to install Windows on a Mac.
You can see how easy it is below and the entire process takes about 10 minutes although the video has been edited to remove some of the longer parts of the installation:
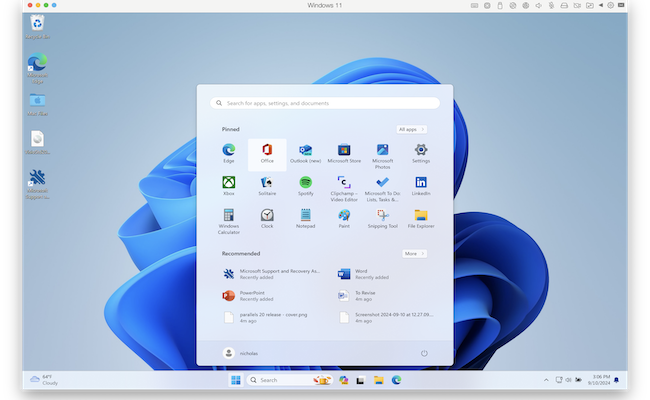
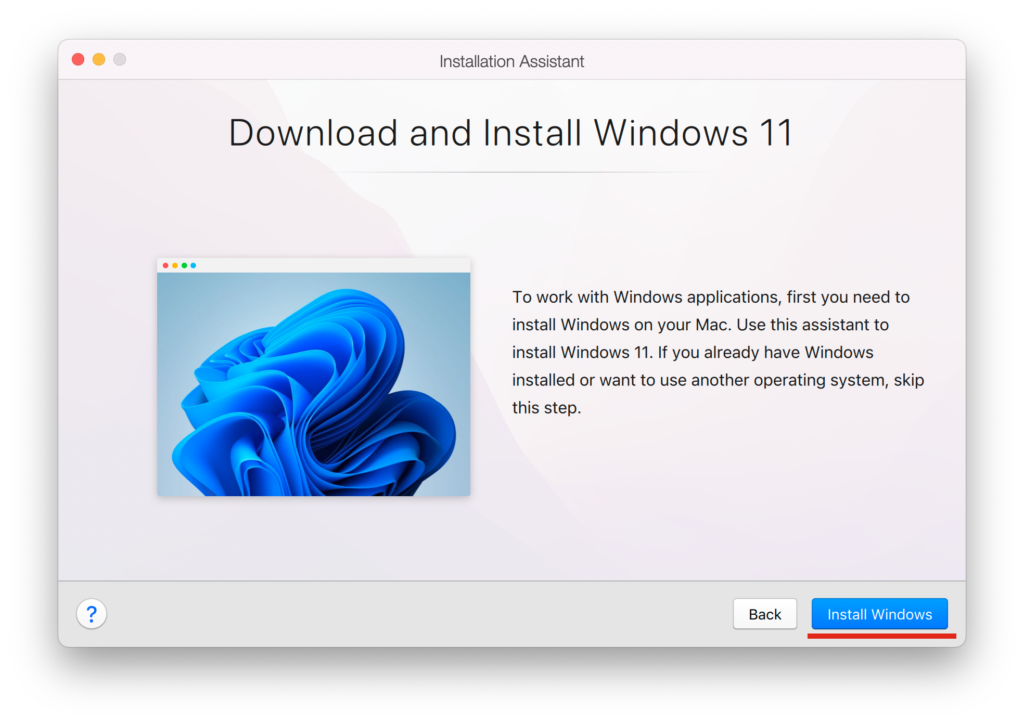
The setup Wizard makes it easy to install any kind of operating system on a Mac especially Windows 11 and Linux distros.
Parallels conveniently automatically downloads Windows 11 onto your Mac during the setup process.
You can use Windows for free without activating it as you only need to get an activation code from Microsoft if you want to customize it.
Alternatively if you’ve already installed Windows on an Intel Mac using Boot Camp, Parallels can cleverly import Windows from that installation.
During the setup process, Parallels also optimizes your Windows installation based on how you plan to use it.
You are prompted whether you want to use Windows mainly for Productivity or Gaming and the setup will be optimized based on what you choose.
Windows ARM: What You Need To Know
There are many pros and cons to installing Windows on a Mac but one of the biggest cons for modern Macs is the version of Windows they can run.
At the moment, virtual machines like Parallels can only run Windows ARM, not the x86 version of Windows that most people use and are familiar with.
Microsoft does not sell Windows ARM to individual users, but it still allows Mac users to run it in virtual machines such as Parallels.
Windows ARM is technically licensed only to PC manufacturers, but Microsoft supports running it on Apple Silicon Macs and does not require activation.
This means you can download and use Windows 11 ARM for free on an M1, M2, M3, M4 or M5 Mac, although there are limits such as the inability to change the wallpaper and customize it.
In recent updates, Parallels Desktop now includes experimental support for running x86 and x86-64 versions of Windows on Apple Silicon Macs using an emulation layer but we do not recommend using it as its really limited.
The virtual machine is restricted to one CPU core, a maximum of 8 GB of RAM, and lacks important capabilities such as USB passthrough, proper audio support, and advanced graphics acceleration.
Performance is also significantly slower than running Windows ARM, with long boot times and sluggish responsiveness.
For most users, Windows 11 ARM remains the only practical and fully supported way to run Windows in Parallels on an M-series Mac.
How Parallels Works
Once you’ve installed Windows, Parallels makes it incredibly seamless to switch between Windows and macOS.
You can use Windows and macOS side by side with no restart or reboot required (unlike with Boot Camp where you must choose to boot in either macOS or Windows when you start your machine).
Parallels is able to run even the most graphic intensive applications within Windows on your Mac including Adobe Photoshop, Visual Studio and powerful CAD software such as AutoCAD.
You can of course run Microsoft Office applications too including Windows only apps such as Microsoft Publisher and Microsoft Visio.
You can watch us running Publisher on a Mac with Parallels below:
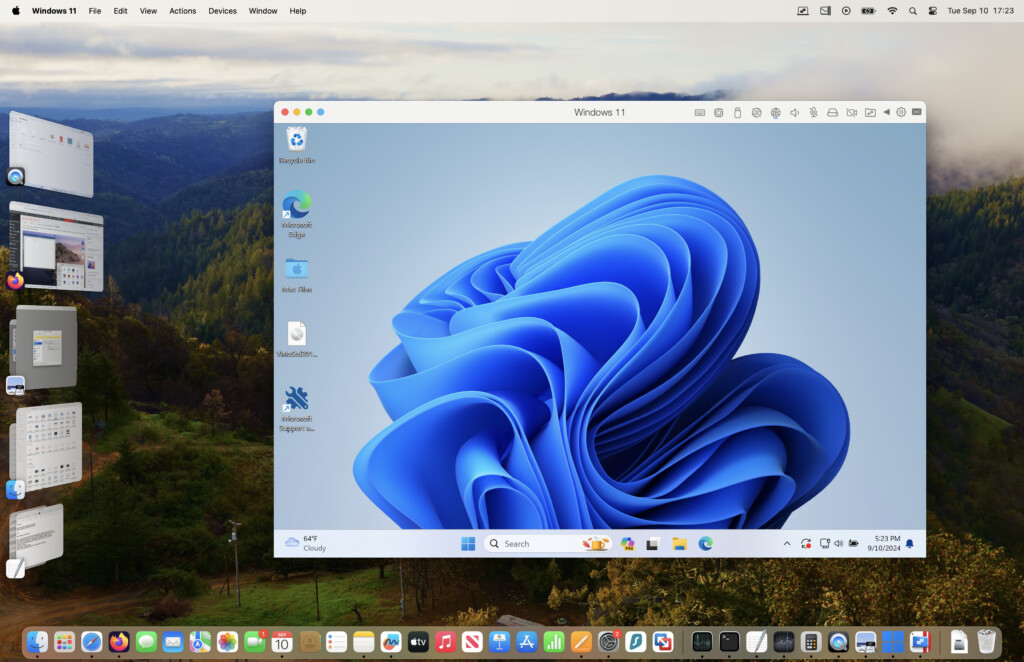
You can choose how Windows appears on your Mac too.
For example Coherence Mode allows you to simply launch applications from the Dock as if they were installed on your Mac.
However, I found this can get confusing as it blurs the line between macOS and Windows.
If you prefer more separation between your macOS and Windows installation like I do, you can run Windows in windowed mode which runs Windows and its apps inside a separate window.
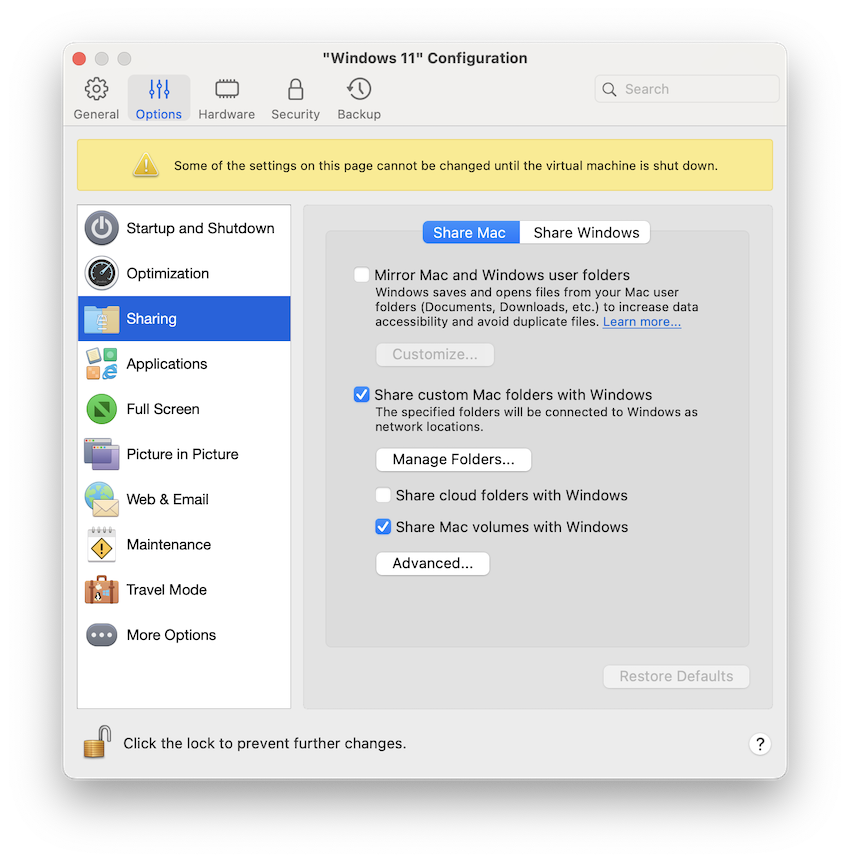
Even in this mode, you can still copy and paste files and documents between macOS and Windows as if they were one operating system.
You can customize exactly how Parallels does this in the Windows 11 Configuration settings.
Does Parallels Slow Down a Mac?
Parallels should not slow down Mac although it depends how much RAM you’ve allocated to it.
You need to allocate at least 4GB of RAM to Parallels for running Windows 11 although this is the bare minimum and you will notice some lag.
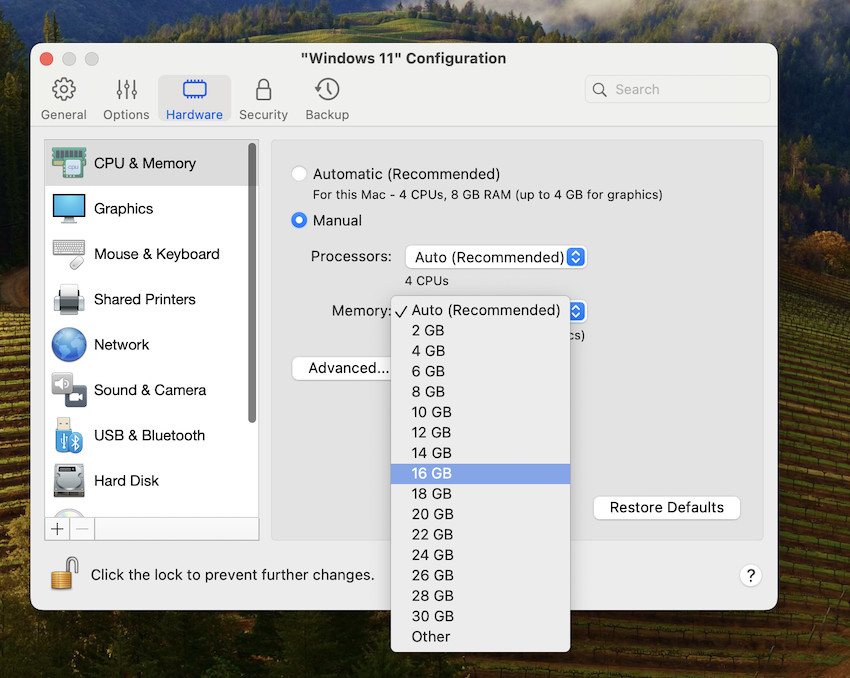
Parallels recommends 16GB of RAM for gaming although I allocated 8GB of RAM and had no problems.
You can also allocate more of your Mac’s memory to Parallels in the Hardware > Graphics settings although any changes you make require restarting the virtual machine.
Using Printers & External Drives with Parallels
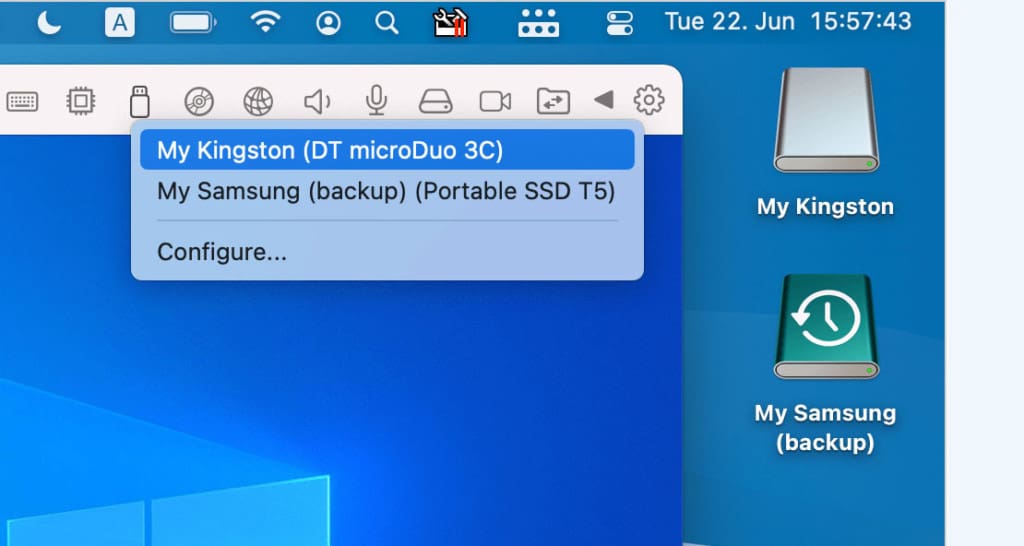
Parallels also detects devices connected to your Mac such as external drives, drawing pads and printers.
This includes support for USB-C devices such as SSD drives and Thunderbolt devices such as Thunderbolt external drives.
Gaming On Parallels
One of the most common reasons Mac users install Parallels is to play PC only games on a Mac.
For many games, I recommend Parallels as the best way to play Windows only games on a Mac and support for gaming has come a long on Parallels including on M-chip Macs.
However, there are a few things to be aware of before using Parallels for gaming.
- For best performance, you need a Mac that’s got at least 16GB of RAM. Games will still work in Parallels with 8GB of RAM but performance can be slow and laggy depending on how demanding the game is. You can check how much RAM your Mac has by going to the Apple logo in the top left corner, select About This Mac… and the amount of RAM will be listed under Memory.
- Parallels supports DirectX 11 but doesn’t support DirectX 12 if the game you want to play requires DirectX 12 (such as FIFA for example), you’re out of luck.
- Games that use anti-cheat software such as Vanguard, EasyAntiCheat and Denuvo won’t work in Parallels. As the name suggest anti-cheat software is a type of DRM protection to prevent people cheating in games and games that are protected by it will not work in Parallels. Examples include Hogwarts Legacy, Fortnite and Genshin Impact.
You can check which games work on Apple Silicon Macs in Parallels here.
For those games that do work, Parallels is remarkably effective considering the games are running in a virtual environment.
When you first setup Parallels, you can optimize it for gaming which configures the best settings for Parallels to run games on your Mac.
It also enters games into full screen mode for a better experience and toggles the mouse or trackpad for better compatibility with games.
You will notice though that some games are laggy or are virtually unplayable at times and I recommend the following tweaks to improve the performance of games in Parallels.
A few extra tweaks that you can use to improve the performance of games in Parallels are:
- Games usually launch in Parallels in their maximum resolution which is very demanding on your Mac’s graphics card when running a virtual machine. Try lowering the resolution to 1920 x 1200 Full HD or lower, this usually helps improve graphics performance.
- Parallels Desktop requires around 30% of your Mac’s RAM just for running Windows alone. If you use the Parallels the gaming profile that increases to almost half of your Mac’s resources. If the system requirements for the game you want to play require 3GB of graphics memory, you need to have at least 6GB of RAM assigned to Windows in Parallels. To increase the amount of RAM assigned to Windows, shut down Windows in Parallels and go to Configuration > Hardware > CPU & Memory. You can also try assigning at least 6 CPU cores to Windows for better gaming performance.
- Close any open Mac applications to devote as many resources as possible to Parallels.
- You can also connect an external graphic processing unit (eGPU) to your Mac which Parallels will recognize so that your Mac can run games better in Windows.
One other great thing about recent versions of Parallels is that it now recognizes Xbox and Playstation Dualshock controllers connected to your Mac via Bluetooth (note that this doesn’t work with Apple Silicon Macs yet).
Other Features In Parallels
There are far too many features in Parallels to go into details on every one but here are some of the other tools and features in Parallels worth highlighting.
- Windows 11 can recognize your macOS battery status in Parallels and activate on low power saving mode when your Mac runs low on battery. It also suspends your virtual machine automatically if not in use, even when plugged in to save energy.
- You can automatically reclaim cached disk space taken by Parallels when it puts the virtual machine to sleep.
- You can zoom in and rotate Windows apps with your Mac Trackpad and there’s Touch Bar support to control Windows applications.
- Parallels has a Do Not Disturb Mode when you’re using Windows to prevent distractions from notifications while you’re working.
- Lots of print options from Windows including different paper sizes from A0 to envelopes, double sided printing and support for remote printing on networks.
- Apple Pencil and Sidecar support in Windows using Parallels so that you can now use your drawing tablet connected to your Mac within Windows apps too.
- Support for faster refresh rates on ProMotion Displays in Apple Silicon Macs and external displays such as the Apple Studio Display and Apple Pro XDR.
- USB 3.0 support for live streaming to devices such as the Elgato HD60 and Startech USB 3.0 Video Capture.
- Shared printing from Windows is available meaning if your Mac is connected to an office network, you can print to any printer.
- Parallels can also reclaim disk space used on your Mac by Parallels when it puts a virtual machine to sleep.
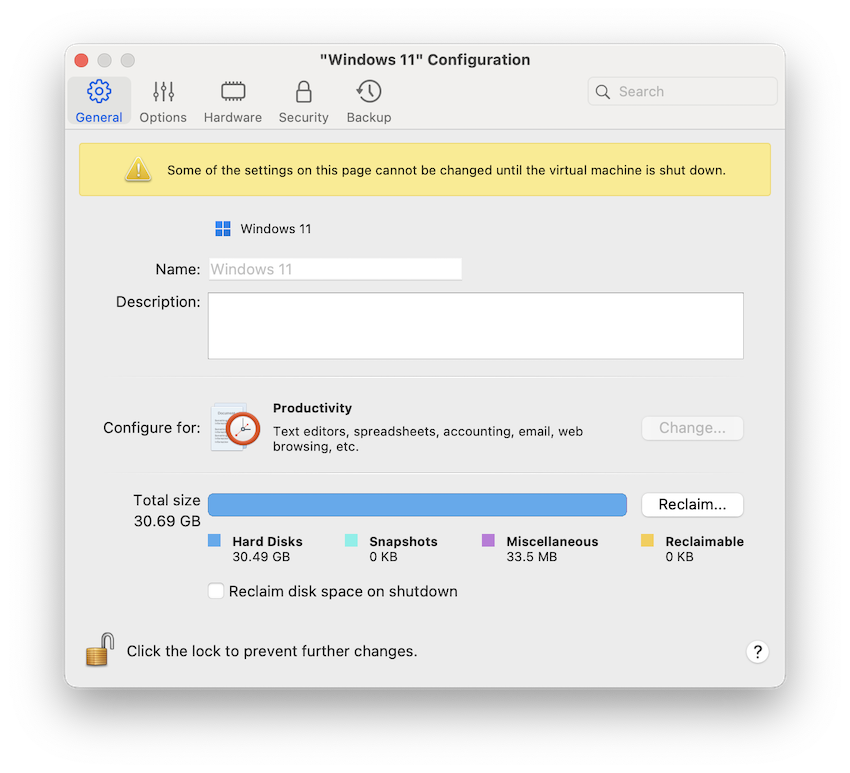
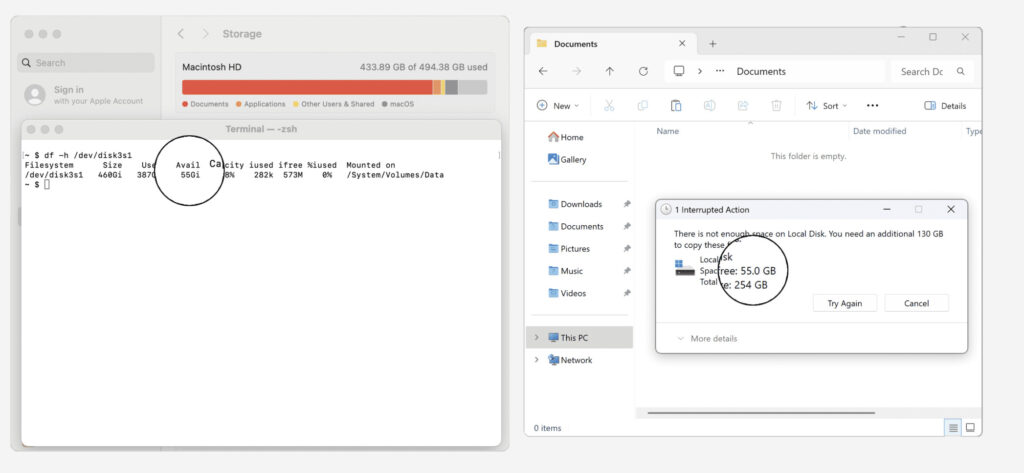
- Disk space control so you can clearly see how much space your Windows installations are consuming. This has been improved in Parallels 26 to give you a much better idea of how much storage space Parallels and your Windows VM are using.
- Parallels will evaluate how much RAM and other resources your Mac is using to run Windows and re-allocate where necessary.
- Shift+Option+Command+V support to paste unformatted text from macOS into Windows.
- Ability to use the Mac Option key to work at AltGr in Windows 10
- In the Pro and Business Editions of Parallels, you can also create an independent virtual machine from a linked clone
- The Pro and Business Edition support Visual Studio 19 on Apple Silicon Macs
- Business admins can also provision pre-configured Windows machines to Apple Silicon Macs.
- For Linux users, Parallels also allows you to enjoy multichannel sound support with sound jack detection. It also dynamically updates the resolution when you resize a Linux window now.
- Apple Intelligence integration with macOS Sequoia and Tahoe to help in writing documents.
- Windows Server 2025 support including on ARM chip Apple Silicon Macs.
- Support for Windows 11 version 25H2
Downsides
On a performance level, Parallels will still only allocate 8GB of virtual RAM (vRAM) in the Standard Edition and 128GB of Virtual RAM in the Business and Pro edition to each VM installation.
Although the 128GB in the Business and Pro versions is enough for most needs, the Home and Student edition limit of 8GB may become a problem if you’re running a lot of graphic intensive programs.
If you want to connect a PlayStation Dualshock or an Xbox controller to Parallels on Apple Silicon Macs, you’re also out of luck.
Although this works on Intel Macs, it still doesn’t work on M-series Macs in the latest version of Parallels.
Development of Parallels
The most recent update to Parallels was Parallels 26 which jumped from version 20 to align with Apple’s new numbering policy for macOS Tahoe.
Parallels 26 introduced a range of improvements including full support for Tahoe and Windows 11 version 25H2, better visibility of how much space Parallels and Windows are taking on your hard drive and better support for IT admins.
The last major update to Parallels before that was in Parallels 15 which was a big step-up from previous versions of Parallels because it finally supported DirectX 11 and Apple Metal API.
This allowed Mac users to play Windows only games such as FIFA, Age of Empires and Fallout in the virtual machine.
Parallels 16 and 16.5 brought significant speed improvements plus beta support for Apple Silicon Macs.
Parallels 17 was another evolution in the product as it had to be re-engineered for some fundamental changes in macOS 11 Big Sur, Monterey and beyond into Apple Silicon.
Parallels became the first virtualization software to officially support Apple Silicon Macs although other virtual machines have beta versions that support it.
It also became the only virtual solution to run Windows on a Mac that is officially endorsed by Microsoft.
Parallels 18 extended this support to take full advantage of the incredible M1 Ultra chip in the M1 Mac Studio making it possible to run Windows 11 on a Mac 96% faster than before according to Parallels.
Parallels 19 arrived with a cleaner user interface, even faster “two-click” installation of Windows 11 and closer integration with macOS including macOS Sonoma.
Other nice touches in Parallels 19 included Touch ID support, OpenGL support to run Windows CAD software on Mac, and improved support for the M2 chip Macs.
Version 20 was mainly aimed at developers that want to test and develop AI applications within a virtual environment although its also optimized for macOS Sequoia and is the fastest version of Parallels yet.
Parallels also introduced integration with Apple Intelligence in version 20.1 which is already part of macOS Sequoia and higher.
Apple AI allows users to summarize text in Parallels, generate ideas and assist with writing documents in Windows app.
It also added support for Windows Server 2025 including on Apple Silicon Macs for the first time.
FAQ
What Is Parallels?
Parallels is a virtual machine (also known as a virtual environment or hypervisor) that allows you to conveniently run all those Windows only applications and games that don’t run on Mac.
In fact, it can run over 200,000 Windows only apps on a Mac according to the company.
Is Parallels Bad For Your Mac?
Parallels runs in a virtual environment that doesn’t affect your Mac in the same way as macOS which is installed directly on your hard drive.
This means that Parallels can’t actually harm your Mac in any way. Everything in Parallels is done in a sealed “virtual” environment from macOS.
Although you could still get a virus or malware infection in the Windows installation, it is isolated to the virtual environment – it would not be able to spread to your Mac’s hard drive.
If a virus damaged Windows in Parallels, you could quite simply reinstall the copy of Windows and your Mac would be unscathed.
Parallels is therefore perfectly safe to use and will never be able to damage your Mac’s hard drive.
Can Parallels Run Windows 11 on a Mac?
Parallels was the first software to support running Windows 11 on a Mac and is also the only virtual solution officially authorized by Microsoft to run it.
However, Parallels 26 still only supports Direct X 11 at the moment meaning games and applications that require it may not work in it.
It’s also important to be aware that, although Parallels can run the standard version of Windows 11 on Intel Macs, it can only run Windows 11 for ARM on M-chip Macs.
This isn’t a limitation of Parallels as its because M-series chip don’t support the Intel version of Windows.
Parallels does include experimental support for running x86 and x86-64 versions of Windows but it’s very slow and we don’t recommend it.